
At this point after completing my template and look of my code, it may be simple but i translated what i shared in my last progress report. I am very proud of my code as it was quite challenging for me since i had some difficulties. i added an animation of a circle with 4 arches rotating to give an illusion that the record is spinning. I inserted a button that would make the record spin when pressed on and also pause the record when clicked on again. In the final sketch there will be a sprite sheet dancing character which will be dancing to a sample of music i created using the software “Logic”.
Initial sketch:
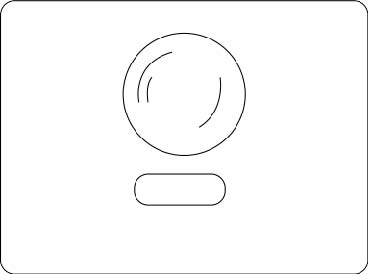
i sketched out my design on adobe illustrator to see how i would like my sketch to look like, and luckily it turned out exactly how i wanted it to be.
My final design:
My code:
// Declare a variable to store the button object
let btn;

// Variables to control rotation animation
let r = 0;
let angle = 0;

function setup() {
  createCanvas(500, 500); // Create a 500x500 pixel canvas
  background("#408080"); // Set the background color to a shade of blue-green
  btn = new Button(250, 400, 120, 50); // Create a button object at the specified position and dimensions
}

function draw() {
  record(250, 250); // Call the record function to draw a rotating shape
  btn.show(); // Call the show method of the button object to display it
}

// Function to draw a rotating shape
function record(x, y) {
  push();
  translate(x, y); // Translate the origin to the specified position

  // If r is set to 1, increment the angle for rotation
  if (r == 1) {
    angle += 0.1;
  }
  rotate(angle); // Rotate the subsequent shapes based on the angle

  fill(0); // Fill color for the central ellipse
  ellipse(0, 0, 200, 200); // Draw a central ellipse

  noFill();
  stroke(100); // Set stroke color
  strokeWeight(5); // Set stroke weight

  // Draw four arcs to create a pattern
  arc(0, 0, 150, 150, 0, PI/4);
  arc(0, 0, 120, 120, PI/4, PI/2);
  arc(0, 0, 100, 100, PI, 3 * PI/2);
  arc(0, 0, 150, 150, PI/2, PI);

  pop(); // Restore the previous drawing settings
}

// Function to respond to mouse clicks
function mouseClicked() {
  // Check if the mouse click is within the boundaries of the button
  if (mouseX > btn.x - btn.w / 2 && mouseX < btn.x + btn.w / 2 && mouseY > btn.y - btn.h / 2 && mouseY < btn.y + btn.h / 2) {
    // Toggle the value of r to start or stop the rotation animation
    if (r == 1) {
      r = 0;
    } else {
      r = 1;
    }
  }
}
Button code:
// Define a class called Button
class Button {
    // Constructor that initializes button position (x, y) and dimensions (w, h)
    constructor(x, y, w, h) {
        this.x = x; // X-coordinate of the button
        this.y = y; // Y-coordinate of the button
        this.w = w; // Width of the button
        this.h = h; // Height of the button
    }

    // Method to display the button
    show() {
        // Save the current drawing style
        push();

        // Set the rectangle drawing mode to center
        rectMode(CENTER);

        // Set the fill color to yellow
        fill(255, 255, 0);

        // Check if the mouse is within the button's boundaries
        if (mouseX > this.x - this.w / 2 && mouseX < this.x + this.w / 2 && mouseY > this.y - this.h / 2 && mouseY < this.y + this.h / 2) {
            // If the mouse is inside, change the fill color to a darker shade of yellow
            fill(200, 200, 0);
        }

        // Draw a rectangle with rounded corners at the specified position and dimensions
        rect(this.x, this.y, this.w, this.h, 10);

        // Restore the previous drawing style
        pop();
    }
}
Rotation of the arcs/ also a part of the code that made me proud:
I used the push and pop method we took in class to achieve this motion, also to achieve the arc “animation” i used the reference “arc()” on p5js website
arc() :
arc(50, 55, 50, 50, 0, HALF_PI);
noFill();
arc(50, 55, 60, 60, HALF_PI, PI);
arc(50, 55, 70, 70, PI, PI + QUARTER_PI);
arc(50, 55, 80, 80, PI + QUARTER_PI, TWO_PI);
describe(
  'A shattered outline of an ellipse with a quarter of a white circle at the bottom-right.'
);
// Function to draw a rotating shape
function record(x, y) {
  push();
  translate(x, y); // Translate the origin to the specified position

  // If r is set to 1, increment the angle for rotation
  if (r == 1) {
    angle += 0.1;
  }
  rotate(angle); // Rotate the subsequent shapes based on the angle

  fill(0); // Fill color for the central ellipse
  ellipse(0, 0, 200, 200); // Draw a central ellipse

  noFill();
  stroke(100); // Set stroke color
  strokeWeight(5); // Set stroke weight

  // Draw four arcs to create a pattern
  arc(0, 0, 150, 150, 0, PI/4);
  arc(0, 0, 120, 120, PI/4, PI/2);
  arc(0, 0, 100, 100, PI, 3 * PI/2);
  arc(0, 0, 150, 150, PI/2, PI);

  pop(); // Restore the previous drawing settings
}
I also used the function for the button to start and pause the record mouseClicked() :
From p5js website:
let cnv, d, g;
function setup() {
  cnv = createCanvas(100, 100);
  cnv.mouseClicked(changeGray); // attach listener for
  // activity on canvas only
  d = 10;
  g = 100;
}

function draw() {
  background(g);
  ellipse(width / 2, height / 2, d, d);
}

// this function fires after the mouse has been
// clicked anywhere
function mouseClicked() {
  d = d + 10;
}

// this function fires after the mouse has been
// clicked on canvas
function changeGray() {
  g = random(0, 255);
}
// Function to respond to mouse clicks
function mouseClicked() {
// Check if the mouse click is within the boundaries of the button
if (mouseX > btn.x - btn.w / 2 && mouseX < btn.x + btn.w / 2 && mouseY > btn.y - btn.h / 2 && mouseY < btn.y + btn.h / 2) {
// Toggle the value of r to start or stop the rotation animation
if (r == 1) {
r = 0;
} else {
r = 1;
}
Button function:
I created a class called button then set the x,y,w,h coordinates, in addition to the shape of the rectangle, and the color changes for when mouse is clicked
// Define a class called Button
class Button {
    // Constructor that initializes button position (x, y) and dimensions (w, h)
    constructor(x, y, w, h) {
        this.x = x; // X-coordinate of the button
        this.y = y; // Y-coordinate of the button
        this.w = w; // Width of the button
        this.h = h; // Height of the button
    }

    // Method to display the button
    show() {
        // Save the current drawing style
        push();

        // Set the rectangle drawing mode to center
        rectMode(CENTER);

        // Set the fill color to yellow
        fill(255, 255, 0);

        // Check if the mouse is within the button's boundaries
        if (mouseX > this.x - this.w / 2 && mouseX < this.x + this.w / 2 && mouseY > this.y - this.h / 2 && mouseY < this.y + this.h / 2) {
            // If the mouse is inside, change the fill color to a darker shade of yellow
            fill(200, 200, 0);
        }

        // Draw a rectangle with rounded corners at the specified position and dimensions
        rect(this.x, this.y, this.w, this.h, 10);

        // Restore the previous drawing style
        pop();
    }
}
Any difficulties? :
Fidgeting with the coordinates of the arc() function was tricky for me, its the first time for me to try and use it as it was not quite working for me, also figuring out the push and pop method was confusing at first. In future projects i would want to do something more complex and better my skills coding wise. I will be posting my final sketch soon.