Self-Portrait: Introduction to Shapes

– Concept:

In this assignment, since I am not someone used to making portraits and descriptions of real objects/people, I wanted to make a simple, cartoon-style approach to how I perceive myself.
With basic shapes, I intended to rely on the noStroke() function to give a feeling similar to the characters seen in the art style of the “South Park” series. In the portrait, I tried to highlight subtly characteristics of my face that most people recognize from me: A middle part hairstyle, glasses, slightly closed eyes, and a thick lower lip side.

– Highlights of my code:

In my code, I wanted to experiment with the moving animations we could produce with the draw() function. To do so, instead of making an element of my face move, I decided to add a cloud to try and move it around the portrait.

//Cloud
  fill(255);
  ellipse(x, 40, size, size);
  ellipse(x+10,50,size,size);
  ellipse(x+30,50,size,size);
  ellipse(x+30,30,size,size);
  ellipse(x+15,30,size,size);
  ellipse(x+40,40,size,size);
  
  //Movement of cloud
  x = x += 0.2 ;
  if(x >= width){
    x = 0;
  }

Here, I used various circles with a modifiable size to make a cloud that would move thanks to sharing a common x-axis that I would change dynamically. At the end, I also added a condition that returns the cloud to the start if it reaches the max width.

As a personal preference, I am also proud of how I managed to utilize the arc() function to generate the mouth. Having experimented (and failed) with ellipses before the use of this, I am happy that I found a way to improve the drawing of my mouth.

//Mouth
  //Half a circle painted red.
  fill(170,51,0);
  arc(250, 450, 75, 40, 0, 180);


– Sketch:

Reflection and ideas for future work or improvements:

In future projects, I would like to experiment and explore a more realistic art style, a style that could reward the use of more specific shapes and figures. In addition to that, having tried the movement of the cloud, I would like to generate more varied movement (other than just lateral movement) all around my drawings and possibly include interactive components. However, I am aware now of the time it takes to animate even easy movements like the cloud just going from side to side.

In addition to all this, I would plan my code in a different way next time. I would possibly create functions that can improve the legibility and reusability of the code (maybe creating the eyes, the glasses, and the hair, being such symmetric drawings, would have been easier with a proper structure of the code).

HW1: Self Portrait “GoofAya”

Concept:

Quirky, aesthetic and simple but efficient with a light cartoonish aspect was everything I was looking for concerning this very first assignment. I tried as much as possible to utilize the functions and shapes we studied in our first class, to generate a self portrait that has at least one of my actual features. So here is Goof-aya, my goofy portrait with her round glasses, pink cheeks and moon-shaped pupils. I really wanted to have an interactive element in my portrait, so if you click and grab the mouth, it will widen up as if it is saying: “WOW!” (my favorite expression!). I feel like it adds an expressive touch to the portrait which is exactly what I intended.

Code Highlight: 
//widen the mouth
function mouseDragged() {
  mouthSize = constrain(dist(mouseX, mouseY, xPos, yPos), 20, 70);
}

It was very exciting to see something actually moving in my portrait. Hence, I love the mouth widening part of this code. I figured out a part of it watching a Youtube tutorial (here).

Reflection and Ideas:

Overall, I am satisfied with the outcome of my portrait given the limited coding knowledge that I started with. However, I definitely think that there are many areas to improve. Starting off with some parts of the portrait itself missing (neck and ears). Also, I find the pink background a bit dull. My initial idea was to actually have an interactive background that changes images based on the user’s input, but couldn’t figure out that part. Hence, I am excited to learn more in this class in order to incorporate such elements in upcoming assignments. For now, this first homework was definitely a fun task!

References:

P5JS references page: https://p5js.org/reference/

Mouse Interaction with Objects: https://youtu.be/TaN5At5RWH8?si=nZXGcyDdp9Hd6eOY


Assignment 1: Self Portrait

Concept

In this sketch, I wanted to use only basic shapes such as circles, ellipses, and rectangles. I found it intriguing to see if I could capture the essence of a person’s face and features with these simple forms.

While the resulting portrait may not exactly resemble me, I made an effort to incorporate some of my distinctive characteristics, like the curly hair, into the design. The curly hair is represented using a series of circles, creating a unique and visually interesting hairline.

Code highlight:

// Check if the mouse is over the left eye
let d = dist(mouseX, mouseY, 170, 180);
if (d < 15) {
  leftEyeWink = true;
} else {
  leftEyeWink = false;
}

// Check if the mouse is over the right eye
let distance = dist(mouseX, mouseY, 230, 180);
if (distance < 15) {
  rightEyeWink = true;
} else {
  rightEyeWink = false;
}

My favorite part of the code is the section where I check if the mouse is over the eyes and make the portrait wink accordingly. It adds an interactive and dynamic element to the artwork, giving the portrait a sense of life and engagement.

In this code snippet, I calculate the distance between the mouse pointer and the position of each eye using the dist function. If the mouse is within a certain range (less than 15 pixels) of either eye, it triggers a “wink” effect by setting a boolean variable (leftEyeWink or rightEyeWink) to true.

Sketch

Reflection and Ideas

In reflecting on my project, I find myself generally satisfied with the final product. However, there are a couple of aspects that I believe could have been improved. One area where I feel I could have done better is in making the portrait resemble me more closely. While the artwork captures some of my distinct features, such as the curly hair, there is room for improvement in achieving a stronger likeness.

Additionally, I recognize that incorporating shadows and shading could have significantly enhanced the depth and realism of the portrait. By strategically adding shadows to various parts of the face and body, I could have created a more three-dimensional and lifelike appearance.

I am content with the final product though and working on this assignment was super fun!

Self-Portrait – My World

Concept

Through the journey of discovering myself in code, I had a lot of grappling in figuring out many things. When I thought of a self-portrait, I thought of creating a cartoonish self that reflects what I like to do. I was so nervous to start coding, as a result, I spent a lot of time watching random videos, and reading through the resources of the P5js library to get inspired and a better understanding of coding. I never properly learned how to code, but I tried before way back.  I am honestly happy with the result I have done because I learned a lot in the process. I was enjoying every step even when I was struggling because I knew with time, I would figure it out.

 Code that I am  proud of:

I am honestly proud of the whole project. Nevertheless, I was so proud of the background I did because it took a considerable amount of time.

function setup() {
  createCanvas(400, 400);

  //declare and initiali   variablnameeI i for the stars in the background - it is in the setup because I only want it toncece create ata e condition to check, if true, run code in curlbracketske,ts and increment the variable

  for (let i = 0; i < numStars; i++) {
    stars[create vectorector(random(width), random(height), random(1, 2)); // gdimensionntion to the background makes the stars feel far away
  }
}

let stars = []; //global variable (array)

let numStars = 400; //variable to control number of stars

function draw() {
  background(0, 0, 60);

  rectMode(CENTER);

  //stars
  fill(255);
  for (let i = 0; i < numStars; i++) {
    ellipse(stars[i].x, stars[i].y, stars[i].z, stars[i].z);
  }
  //inspred by https://editor.p5js.org/jesse_harding/sketches/0szF7gcAx

  //things I like
  textSize(30);
  text("🪐", 45, 80);
  text("🐶", 310, 80);
  text("✈️", 325, 180);
  text("🎹", 40, 180);
  text("☃️", 50, 290);
  text("🧘🏻", 325, 290);
  text("🎨", 190, 45);
  //inspired by https://www.youtube.com/watch?v=ZfFtXzzTwP8

<iframe src=”https://editor.p5js.org/shn202/full/H8OVFkhj9″></iframe>


width=”400″ height=”400″

Reflection and ideas for future work or improvements:

After watching a lot of basic videos on P5JS I started a simple sketch of how I want my Portrait to be. I tried to make it basic so I could use 2D functions from the library. I think organization is key to making every coder’s life easier. If I had planned in more detail, I think my code would have been simpler. During the process of creating my self-portrait, I encountered many challenges because I was challenging myself to do something a little extra.

There are a couple of things that I should have employed from the start. which could have made the process easier. One such approach delves into variables for all the colors I wanted to use. Rather than repeatedly going back and forth to copy and paste the color codes from one place to the other. I should have adopted a more efficient technique by creating variables for the colors I intended to use extensively. This would have entailed employing the following method:

var Skin = color(255, 229, 204); //beige

var hair +color(140, 60, 0);  //brawn

During my color selection phase, I came across a valuable website that gives RGB parameters of many colors. yhttps://www.rapidtables.com/web/color/RGB_Color.html

Further, I had a hard time debugging the code. I kept getting an error saying that there was a function that was duplicated. This took me almost a day to figure out, but it turned out to be a common error that people get when the sound in the accessibility feature in the P5js web is turned on. Once I turned it off the error was gone.

I think I was successful in making my sketch a reality using P5JS. I have learned many things along the way. Among these things was creating the logic behind the stars in the background. After a lot of research, I came across a YouTube video explaining how to do it, even though I followed the video, I had to change little things to make it work for my image.

Additionally, drawing the hair was another struggle because I had to figure out how I would rotate the bangs to make them look the way I imagined them to be. I had to do a considerable amount of experimentation and reading on the rotate function in P5js. Figuring out the Pixels parameter was so hard through the whole process and even though there was some logic behind it, visualizing the image and using my eyes to tweak some things was a little experimental.

I am aware that there are easier ways to do my code. However, I tried to adhere to simplicity and my basic knowledge of coding.


Resources:

https://vimeo.com/619224012

https://editor.p5js.org/jesse_harding/sketches/0szF7gcAx

https://www.youtube.com/watch?v=ZfFtXzzTwP8

https://www.rapidtables.com/web/color/RGB_Color.html

ASSIGNMENT 1 SELF PORTRAIT

Concept:

Since I am very new to coding, I wanted to challenge myself a bit and make a self portrait that was somewhat accurate. I tried to create my portrait with very basic shapes and silhouettes so I could somewhat replicate my face. That’s why there are so many circles, ellipses and squares. I felt that they were easier shapes to use when recreating my face. For my hair, I used one large black circle to create the illusion of long hair and a bunch of smaller circles that framed my face to create the illusion of texture, since I have curly hair. I gave myself red lipstick to match my red shirt and pink cheeks!

A highlight of some code that you’re particularly proud of:

square(30,80,9, mouseX);
    fill('#C5D42C')
  square(100,30,9, mouseX);
   square(150,80,15, mouseX);
  fill('rgb(134,0,0)')
  square(150,80,9, mouseX);
  square(270,70,9, mouseX);
     fill('#C5D42C')
    square(350,60,9, mouseX);
   fill('rgb(134,0,0)')
     square(295,30,9, mouseX);
     fill('rgb(134,0,0)')
    square(295,30,15, mouseX);
     fill('#C5D42C')
    square(295,30,9, mouseX);


I was very excited to add the red and green circles/squares. They are simple, but effective. I felt like they gave the same energy as stars, plus I made them a little interactive, so they have this sort of flickering affect to them.


Reflection/Improvements:

I definitely want to in the future use more shapes than I did in this assignment. Using more shapes and other techniques would allow my design to have more definition and complexity. Right now, it feels very simple, which I think is okay for a first sketch. I also would love to learn how to play around with more interactive features to make my design a bit more eye catching!

Colorful Hues: My Self-Portrait Adventure

Concept

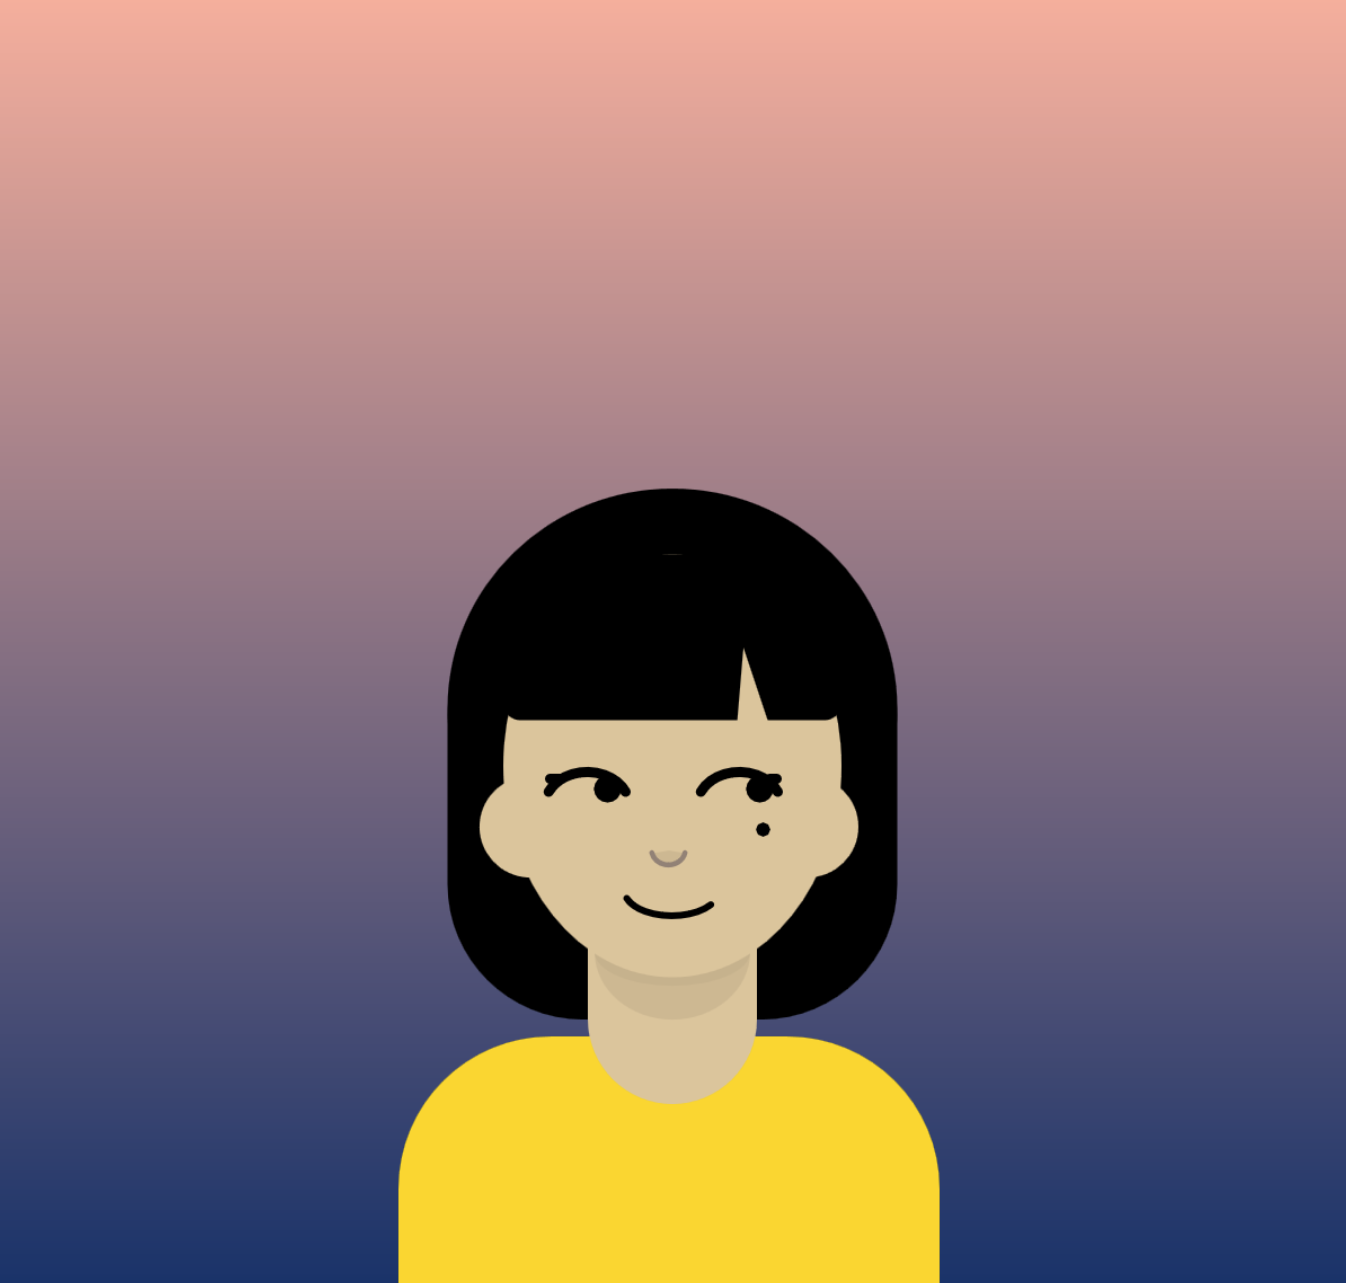
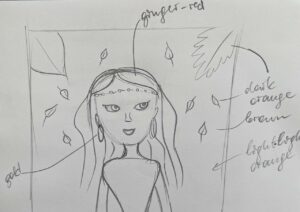
For this first assignment, I had a clear idea to create a cartoonish/fashion-styled sketch using coding. My goal was to create a visual card, which can be comprehensive and rememberable for the audience. With simple shapes and colors, I wanted to show something specific to me, for instance, ginger hair, interest in fashion sketching ( e.g. many curved lines used to draw body and hair), and two of my favorite colors used in the background. You can see the second color by clicking on the mouse 🙂

Approach and Code Highlights

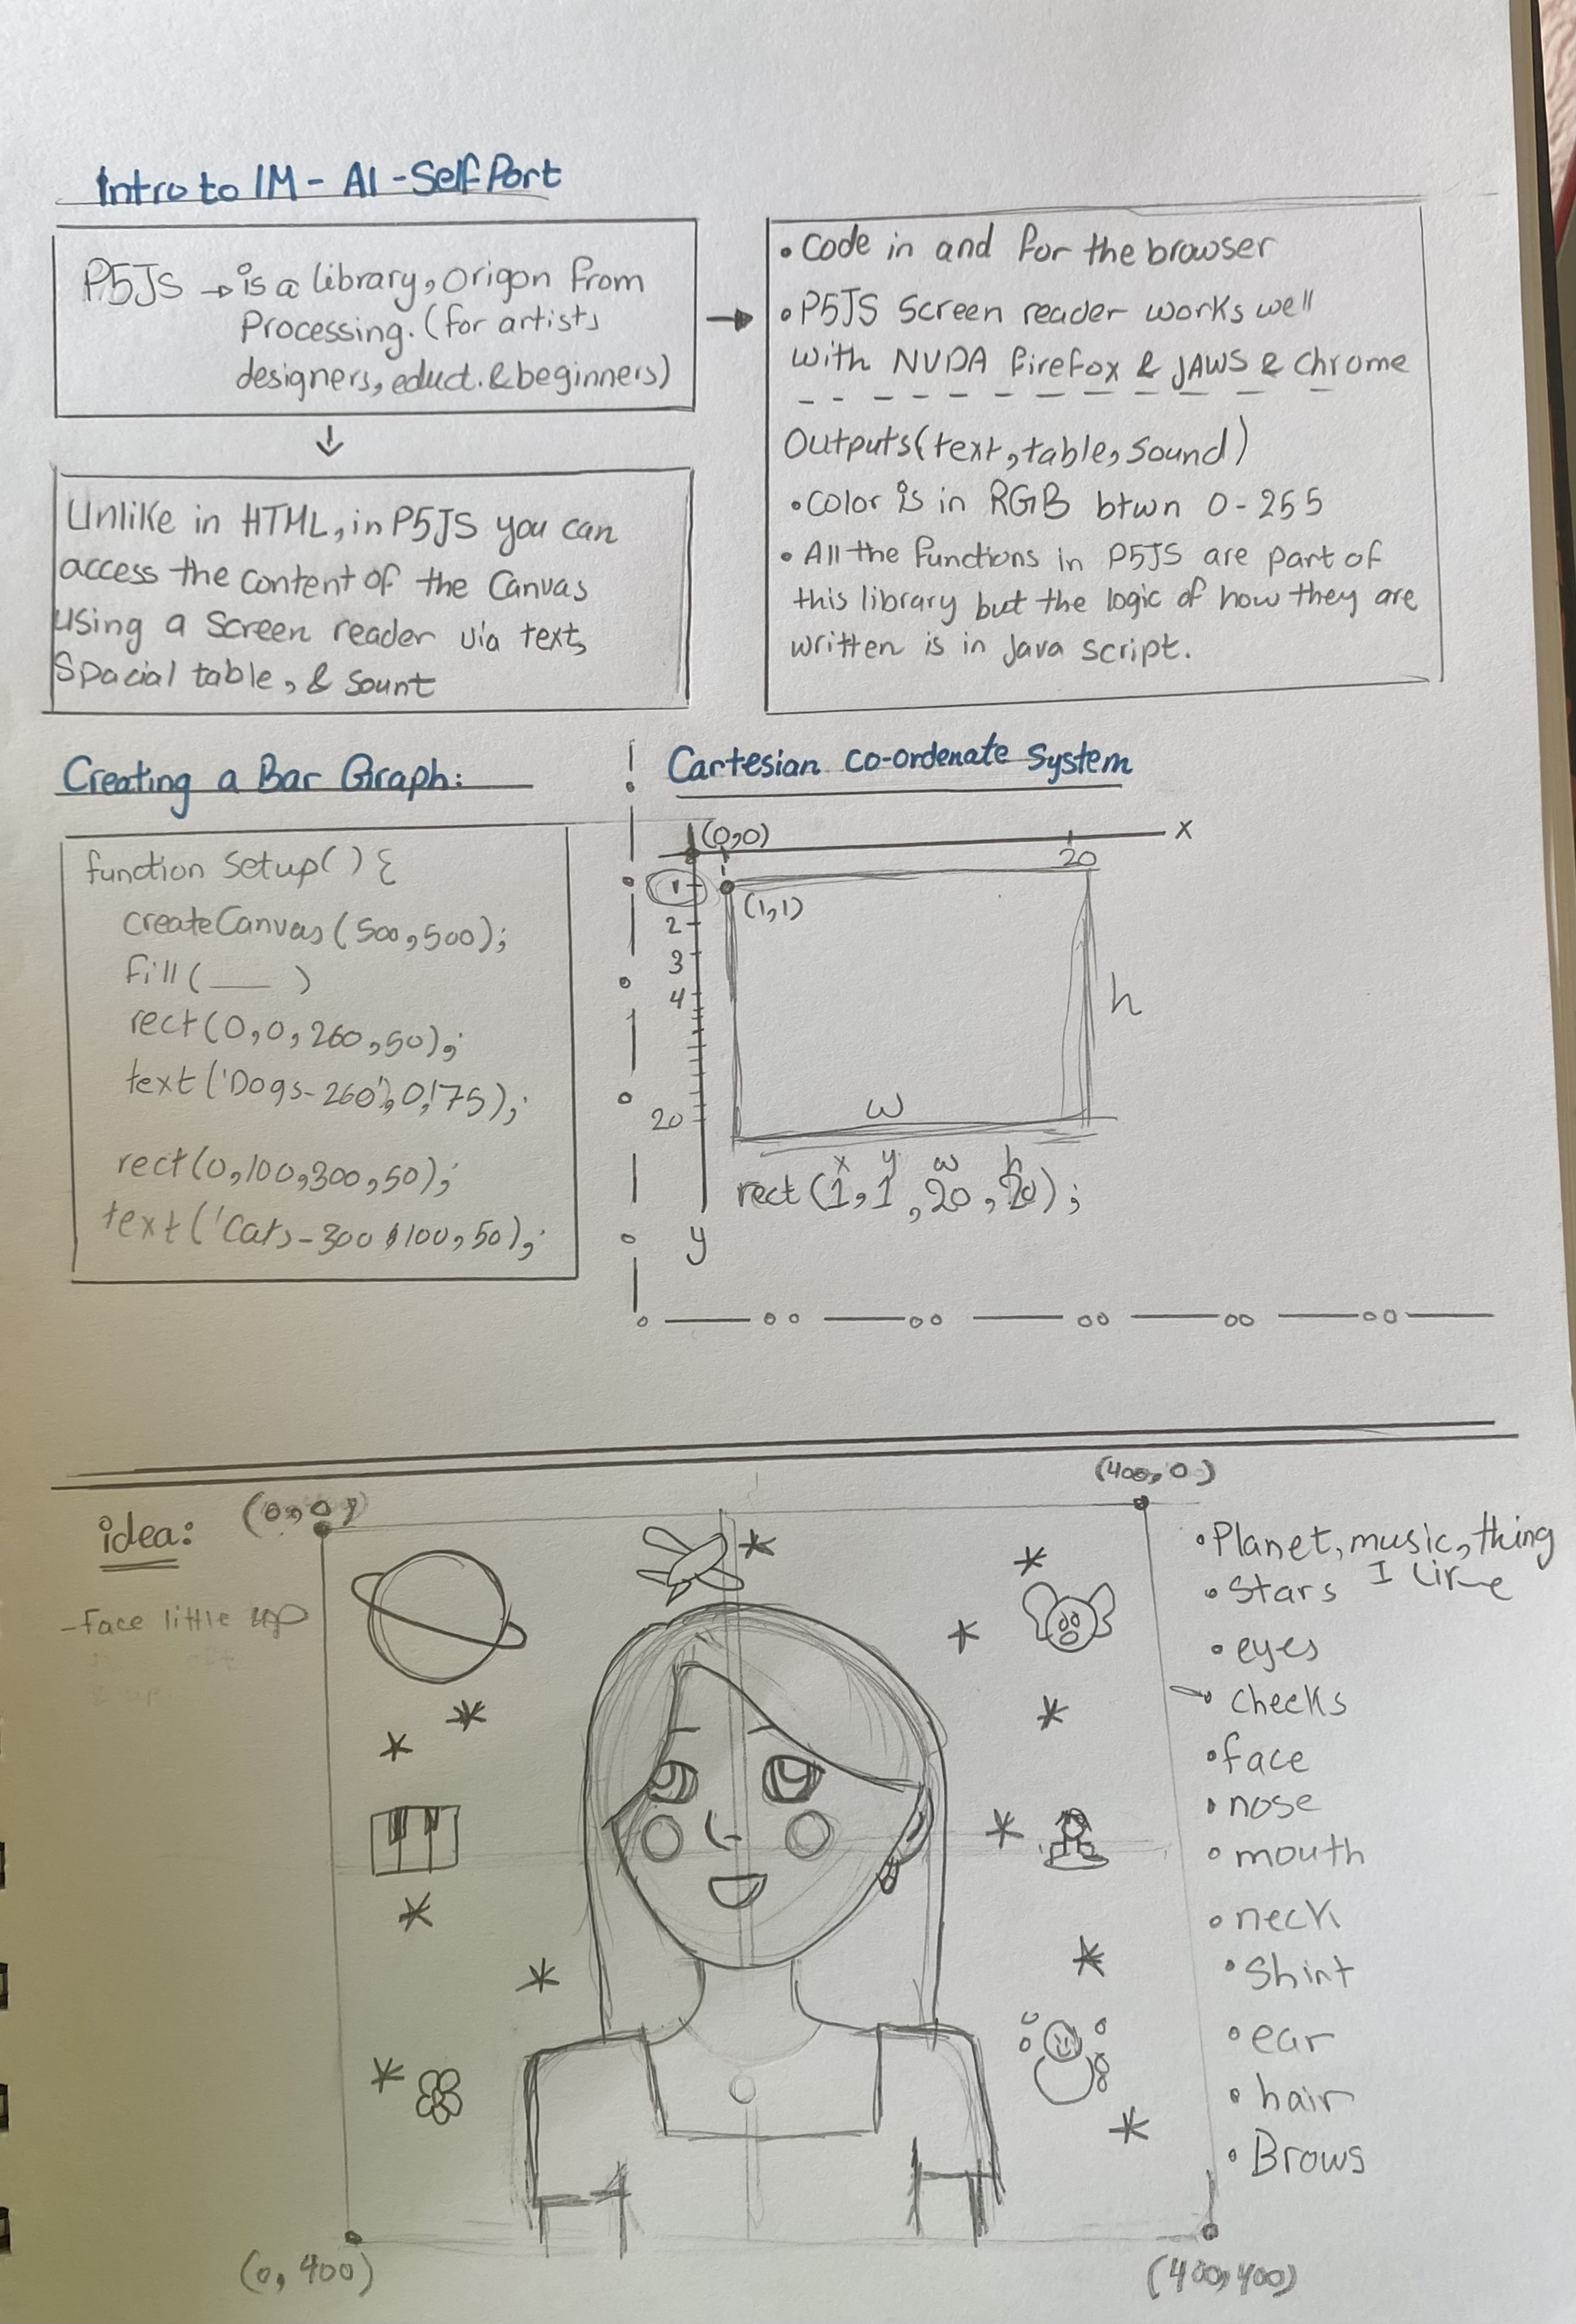
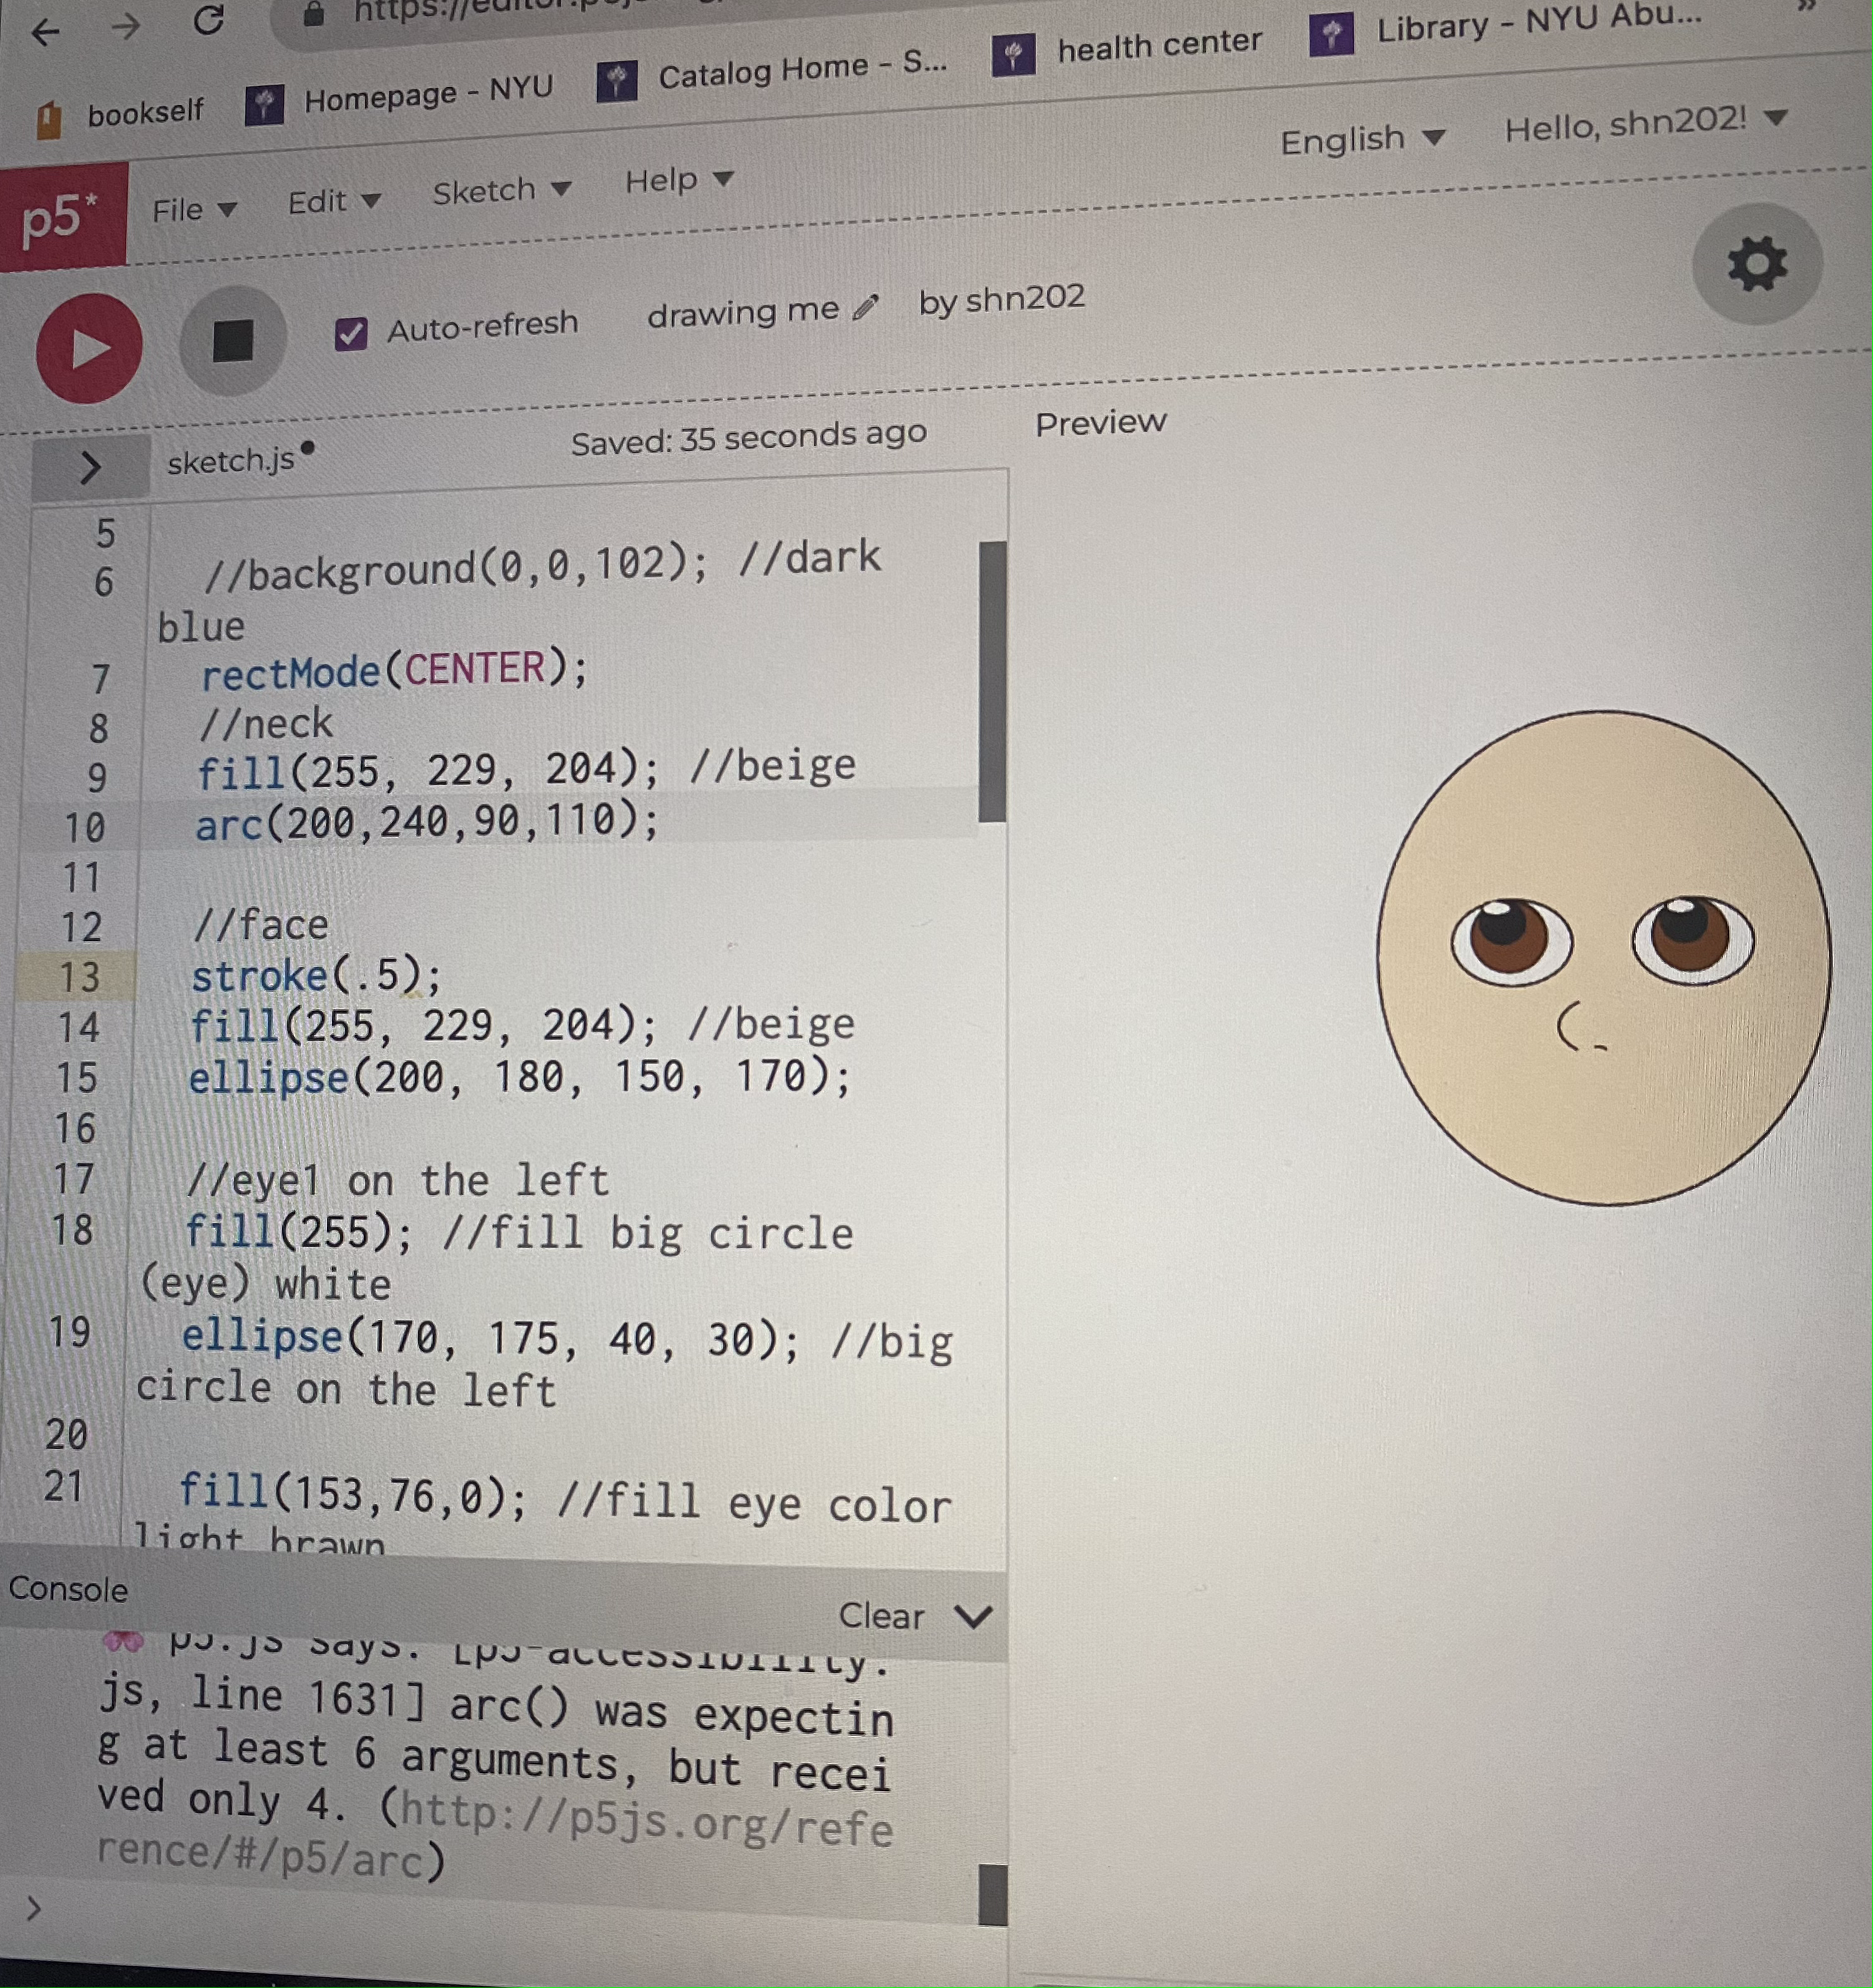
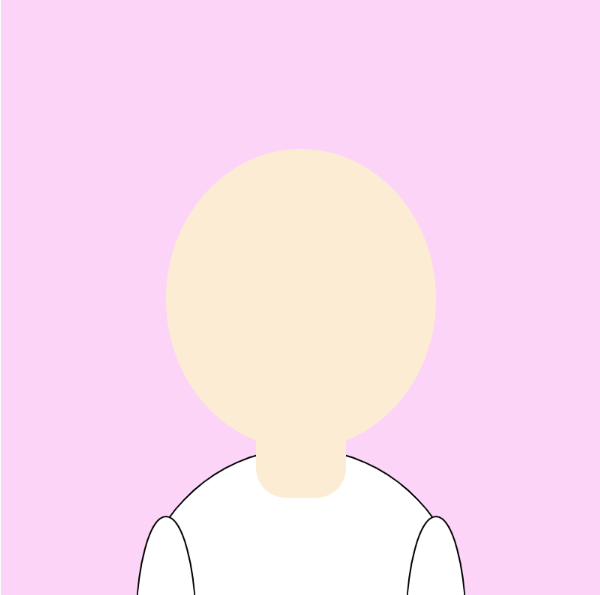
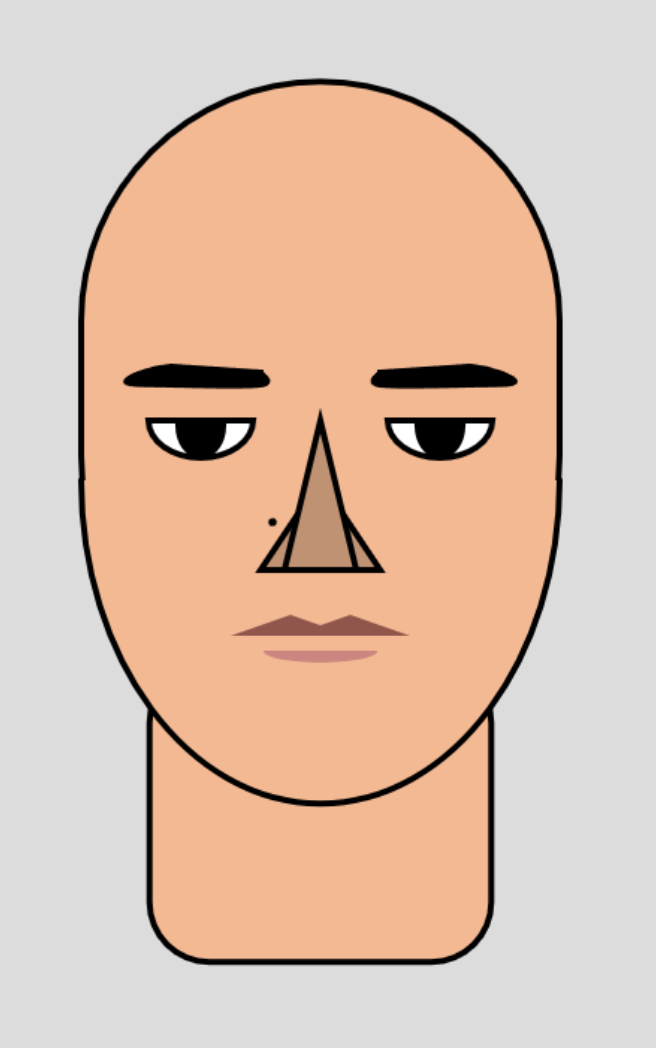
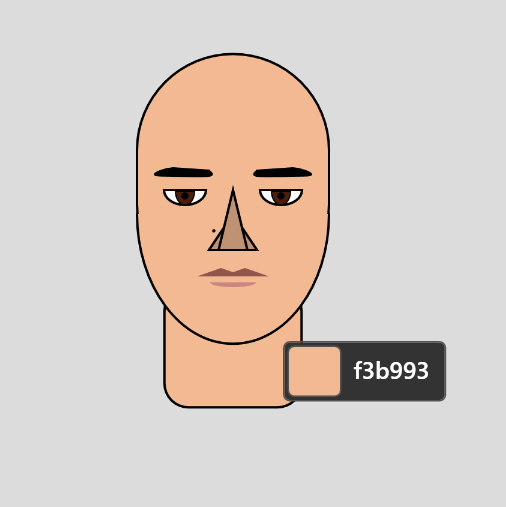
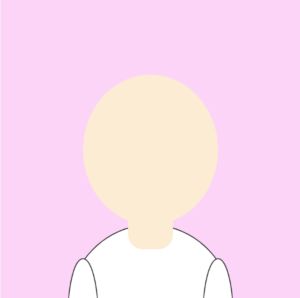
As I was initially drawing out some sketches, I thought that I’d use pretty basic, easy-to-do shapes. However, as I began coding, I immediately understood that I couldn’t do things I drew, as I was only aware of how to use ellipses, circles, and other functions of basic shapes we learned during our first class. At first, I decided not to worry about it and tried my best to do a portrait with those basic functions, however, it led me to a huge disappointment in both the work and myself. Below are my initial sketch vs. my first attempts to do a self-portrait:

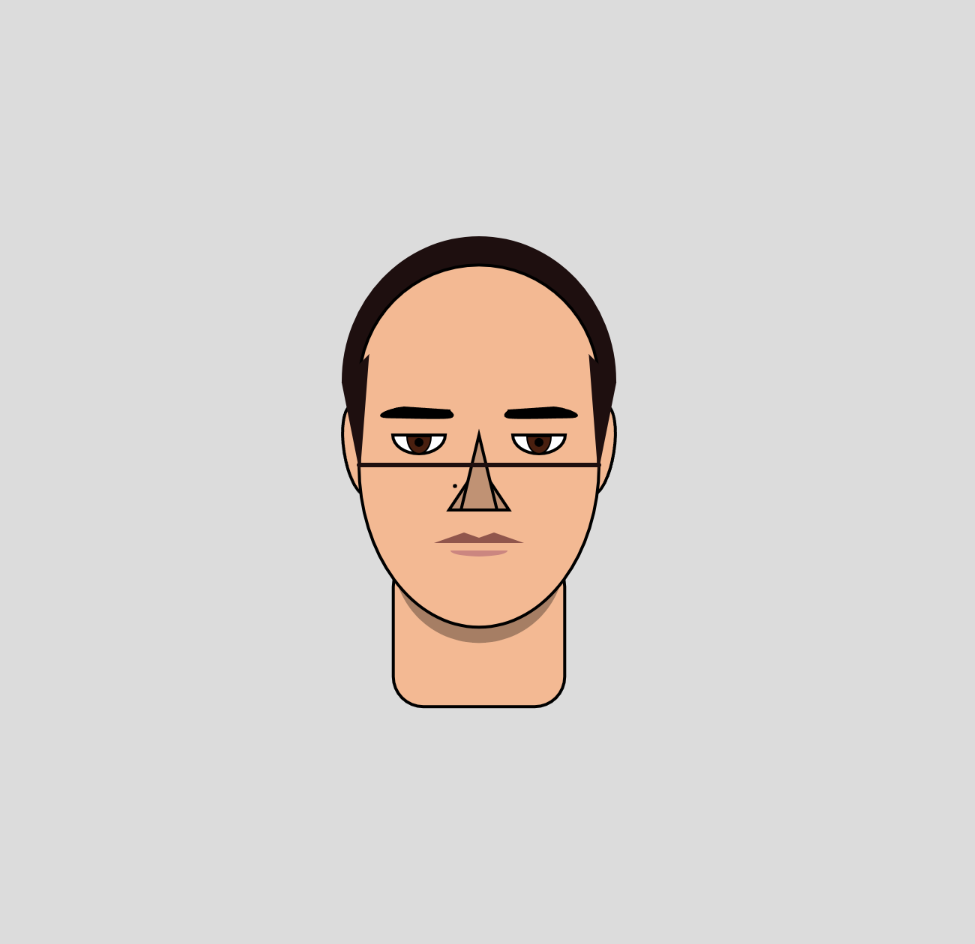
I decided to challenge myself and take a risk in doing something I’d never done before. After a couple of videos, readings, and attempts to understand how different functions work, I decided to try out the beginShape(), and bezierVertex() functions to create more complex shapes and curved lines. I spent a lot of time trying to understand which points to choose and how to make smoothly curved shapes. The most time-consuming was to create a shape of wavy hair, which I am very proud of! Below you can see one of my failed attempts and the code I used to create the final result:
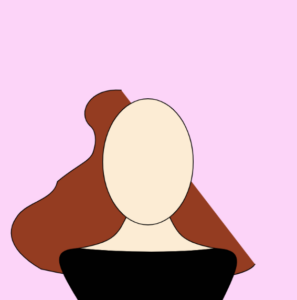
//hair

  fill(148, 60, 33);
  beginShape();
  vertex(166, 123);
  bezierVertex(125, 120, 110, 152, 126, 168);
  bezierVertex(133, 173, 136, 186, 130, 203);
  bezierVertex(124, 215, 110, 225, 89, 240);
  bezierVertex(48, 266, 29, 286, 19, 306);
  bezierVertex(12, 338, 26, 370, 85, 385);
  bezierVertex(328, 398, 365, 374, 360, 338);
  bezierVertex(348, 310, 280, 290, 287, 258);
  bezierVertex(294, 230, 323, 206, 316, 176);
  bezierVertex(304, 148, 274, 146, 254, 138);
  bezierVertex(242, 131, 240, 118, 238, 110);
  bezierVertex(236, 100, 229, 86, 198, 87);
  bezierVertex(186, 88, 173, 98, 166, 123);
  
  endShape();

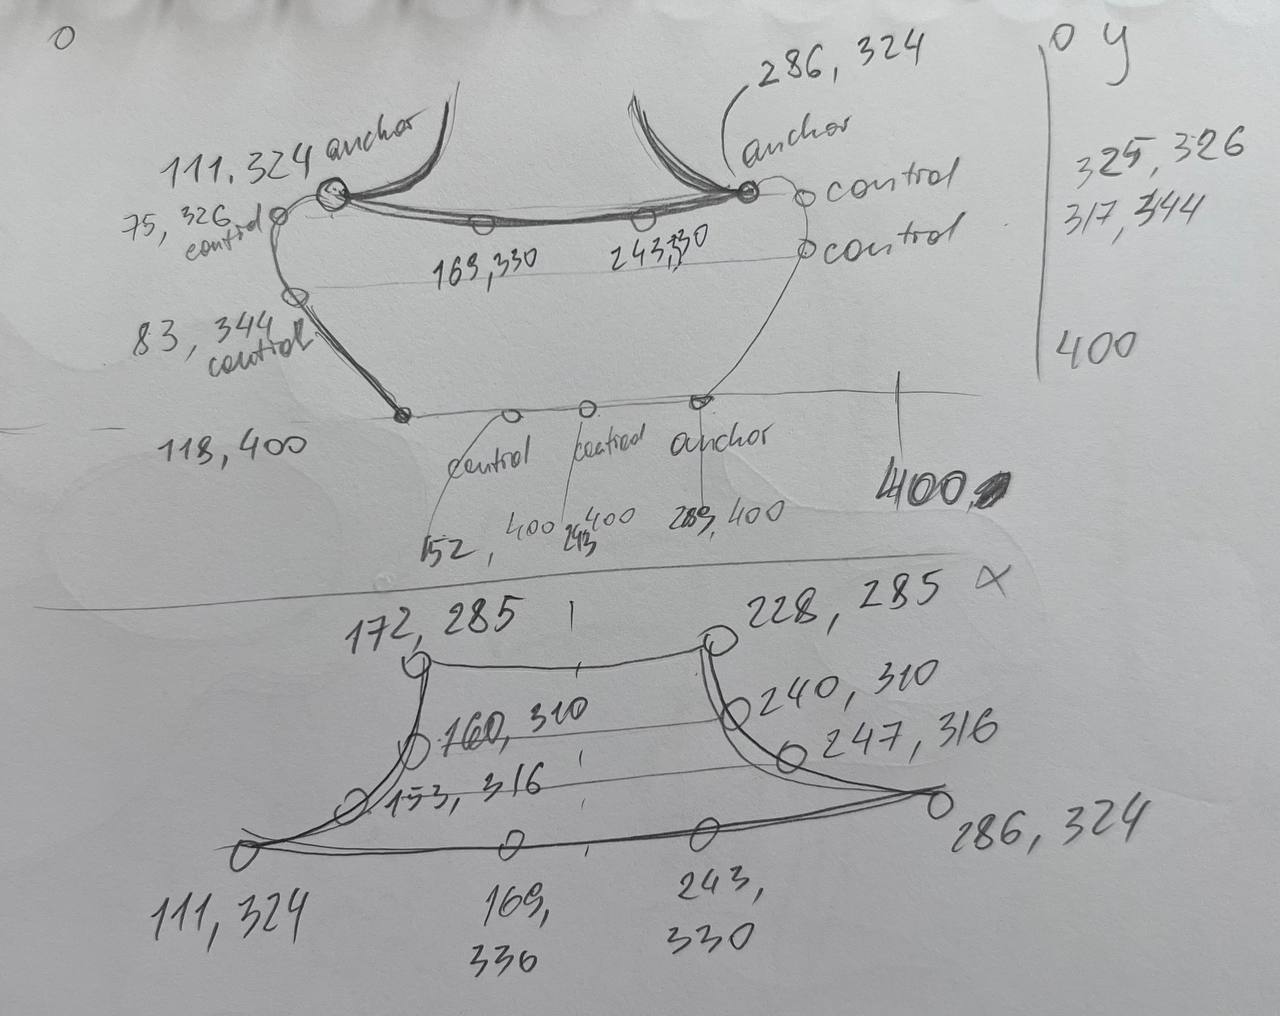
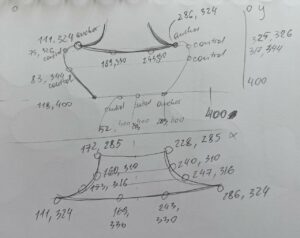
The biggest problem when using these functions was identifying what anchor and control points are and how they work to create a certain shape I want. For better understanding, in the beginning, I separately drew out every shape and recorded every point with its coordinates in my sketchbook. It is a method I used mostly in creating my portrait:

As I was looking through other students’ portraits, I was curious about how to incorporate interactive elements into my work. Initially, I was planning to have falling leaves behind my portrait in the background, as a way to show that my favorite season is Autumn + I was born during this season. After watching a couple of videos on how to create an array of falling points (you can find this resource at the end of the post) and multiple attempts at doing this, I couldn’t figure out a way to manipulate a bezierVertex function with animation, so I wasn’t able to achieve that. However, I’m planning to learn how to do it next time. Nevertheless, I wanted to include some interactive components, therefore I changed my concept a little bit to include another aspect of myself, which is two of my favorite colors: light pink and light blue. To execute this, I used the following part of the code, which I am particularly proud of:

function draw() {
  
  //change background color when mouse is pressed 
  
  background(246, 215, 230);
  if (mouseIsPressed) {
    background(215, 233, 246);
  }

Reflection and Future Thoughts

I am proud of my first attempt to code an artistic sketch using JavaScript language. I understand now how learning how to code can be helpful for the design of posters and animations, which I would like to make one day. As I think about what could I have done better the first idea is to use variables. After learning how to create variables during our second class, I understood how easy it would be to utilize the bezierVertex() functions that I used a lot in my code. Instead of hardcoding and constantly changing every single coordinate point in bezierVertex(), I would have saved time and energy by using the Weight and Height variables, adding or subtracting as much as I wanted. So, it’s a note for myself for future projects. Also, as I mentioned previously in this post, I would love to learn how to code animations like falling stars/snowflakes/leaves, etc. Unfortunately, this was out of my league for this first project, but as I learn new functions in P5JS, I definitely can learn how to do these cool things too!

Resources used for this project

  • The most important one: https://p5js.org/reference/#/p5/
  • Somewhere to choose the RGB colors: https://imagecolorpicker.com/color-code/d7e9f6
  • Snowfall: https://www.youtube.com/watch?v=cl-mHFCGzYk&t=258s
  • TheCodingTrain channel: https://www.youtube.com/@TheCodingTrain
  • Book by Rune Madsen called  Programming Design Systems: https://programmingdesignsystems.com/shape/custom-shapes/index.html#custom-shapes-pANLh0l


assignment 1: self portrait

I wanted to create something simple but with some interactivity, so I made a portrait of summer in Abu Dhabi. In the drawing I’m holding up a sign that says “click to make me go inside/outside”, and the user can click anywhere really, and the background toggles between an indoor and outdoor scene. The highlight here is my glasses: they fog up when I’m outside, which is a never ending nuisance, and they clear up again when I’m inside.

The full code is on the p5.js editor and can be seen here, but this is what the final result looks like:

I’m particularly proud of this line:

isInside ? "click to make me go outside" : "click to make me go inside",

I could’ve gone the if/else way, which I always do, but using the conditional operator today made me feel like I had achieved a feat in code optimization.

Certainly, a few small tweaks could make this drawing look much more polished. I wanted to draw some beads of sweat rolling down my face when I’m outdoors. But I would need to think a little more about randomization/motion, so for now I’ll leave this project as is.

Assignment 1 – Self Portrait

Concept
I’ve been learning German on Duolingo for the past few months, and I was inspired by simple yet expressive way in which the characters are drawn. I thought it would be possible to emulate that style with basic shapes in p5.js. I also really love sunsets, so I wanted to make the background a sunset gradient.

Highlight
A section of code I’m particularly proud of is the two arcs that form the shading for the neck. I placed this section of code before the section for the ellipse that makes the head, so I was able to fill them both in with a lower opacity, creating the shading effect defining the chin. When trying to get this shading to work, I realized that identifying the specific tasks you want the code to do (being less opaque, being able to define arcs in degrees) is integral to the process, because then you can look up commands online that complete those tasks and implement them into your code.

//shading
 fill(191, 172, 134, 130);
 noStroke();
 angleMode(DEGREES);
 arc(200, 285, 46, 40, 0, 180);
 arc(200, 285, 46, 20, 0, 180);

Embedded sketch

Reflection and ideas for future work or improvements
In the future I would organize my code better by making each part of the drawing, such as the face, a separate function, and then call that function to draw that part. This way, it will be easier to see everything at a glance and also troubleshoot. As you can see in the sketch above, there is a glitch creating an errant line on the right ear and a notch on the left ear – if I organized my code by section it would be easier to isolate bugs like this. I would also like to try animating parts of the drawing, like making the eyes move from side to side.

Resources used
https://vimeo.com/619224012
https://www.youtube.com/watch?v=EAY7S1tWbzc&t=9s
https://p5js.org/reference/

Self Portrait — With a Surprise!

Concept

I wanted to capture as much detail as possible in my self-portrait. Since we needed to use simple shapes to draw our portraits, I decided to work with a reference photo of myself and simplify my face into the most basic shapes possible. For an animated component, I added a blinking animation as well. I also wanted an interactive element, which is why I added some cats that pop out when you click on the mouse!


Code Highlights:

My favorite part was creating a cat class. It’s the highlight of the project since I can create a cat anywhere on the canvas and rotate it as well. You can even customize the base, iris, mouth, and nose colors for each cat. This flexibility made my code much cleaner and allowed me to have fun, creating different cats.

class Cat {
  constructor(x, y, angle, baseColor, eyeColor, mouthColor = color(255), noseColor = color(202, 137, 155)) {
    this.x = x;
    this.y = y;
    this.angle = angle;
    this.baseColor = baseColor;
    this.eyeColor = eyeColor;
    this.noseColor = noseColor;
    this.mouthColor = mouthColor;
  }

  show() {
    push();
    translate(scaledSize/this.x, scaledSize/this.y);
    rotate(this.angle);

    strokeWeight(2);

    //face
    push();
    fill(this.baseColor);
    triangle(
      -scaledSize / 25,
      -scaledSize / 120,
      -scaledSize / 21.81,
      -scaledSize / 17.14,
      -scaledSize / 100,
      -scaledSize / 26.66
    );
    triangle(
      scaledSize / 25,
      -scaledSize / 120,
      scaledSize / 21.81,
      -scaledSize / 17.14,
      scaledSize / 100,
      -scaledSize / 26.66
    );
    circle(0, 0, scaledSize / 12);

    pop();

    //eyes
    push();
    strokeWeight(2);
    fill(255);
    circle(-scaledSize / 60, -scaledSize / 120, scaledSize / 40);
    circle(scaledSize / 60, -scaledSize / 120, scaledSize / 40);
    pop();

    push();
    noStroke();
    fill(this.eyeColor);
    circle(-scaledSize / 60, -scaledSize / 120, scaledSize / 48);
    circle(scaledSize / 60, -scaledSize / 120, scaledSize / 48);
    pop();

    push();
    noStroke();
    fill(this.noseColor);
    triangle(
      0, scaledSize / 120,
      -scaledSize / 150, scaledSize / 300,
      scaledSize / 150, scaledSize / 300
    );
    pop();

    //mouth
    push();
    stroke(this.mouthColor);
    strokeWeight(1);
    line(0, scaledSize / 120, 0, scaledSize / 80);
    pop();

    push();
    stroke(this.mouthColor);
    strokeWeight(1);
    translate(-scaledSize / 1200, scaledSize / 80);

    rotate(PI / 3);
    line(0, 0, 0, scaledSize / 120);
    pop();

    push();
    stroke(this.mouthColor);
    strokeWeight(1);
    translate(scaledSize / 1200, scaledSize / 80);

    rotate(-PI / 3);
    line(0, 0, 0, scaledSize / 120);
    pop();

    pop();
  }
}

To add the blinking animation, I created open and closed states for the eyes.  I implemented the state changing using the following code:

 
//blink animation
if(eyeOpen)
  {
    if(frameCount%150== 0)
      eyeOpen = !eyeOpen;
  }
else{
  blinkFrames++;
  if(blinkFrames%11 == 0)
    {
      eyeOpen = !eyeOpen;
    }
  
}

The time between each blink is calculated using the frameCount variable. I want the eye to blink every 2.5 seconds, and since there are 60 frames per second, every time 150 frames are drawn 2.5 seconds elapse.

I also use a blinkFrames variable because I want to count the number of frames that pass while the eyes are closed. This way I can keep the blink time constant. Since I don’t want the time between blinks to be exactly the same, I use frameCount instead. The reason this inconsistency occurs is because frameCount still counts ahead while the eye state is set to be closed.


Approach and Reflection

After an houof experimenting, I came up with the following face shape using the rect, arc, triangle, createShape, and curveVertex functions:

One particular tool that I used extensively throughout this project was Microsoft Powertoys , which comes with a Color Picker tool. It helped me figure out the color scheme that I wanted to go with, e.g., when picking the color for the shadow under my face.


I struggled with creating the hair, as I wanted to create curls. After no luck with that, I changed the plan to feature me with short hair. Using triangles and arcs, I created my hairline:

The line in the picture above is a reference line I drew, as in the beginning I translated the canvas to the middle. However, it was hard to keep track of coordinated as printing the mouse coordinated did not work after translating the canvas using the translate function. Removing the translation was tedious after making so much progress, so I continued working like this. This is something I would choose not to do next time.

After finishing the hair, I quickly gave my portrait a body and then created the cat class. I worked in a separate file and added the class to the main project once I was satisfied.

I also wanted to implement a way to control the scale of the picture, so I added a factor to every coordinate and length that is controlled by the scaleFactor variable. The idea was to keep size of the portrait fixed relative to the canvas size, and to allow me to zoom in and out of the portrait. However, this implementation was not perfect, and I suspect the translation in the beginning to be causing some minor problems.

In retrospect, it would have been beneficial to plan out the project more thoroughly. I did not have a clear idea in the beginning of what I wanted, and added features as I went along. Still, I enjoyed the process and am happy with the end result!


Resources


Assignment 1: Rainy Self-Portrait

We are what we consume. If you love something enough, it can’t help but spill out of you. One of my favorite movies growing up was Hayao Miyazaki’s Totoro. If you’ve seen it, you’ll recognize this image of Satsuki standing in the rain:
I always wanted to be her in this scene. There’s nothing like waiting for a bus in the rain.

There is an interactive media wiz I follow on Instagram under the handle @hotemogf on Instagram. She posted a little code she made of an umbrella repelling rain. I decided to take a wack at it.

What I came up with was:

You can make the stick figure move by pressing down on your mouse.

I learned how to code the rain by watching a Youtube tutorial, linked here: https://www.youtube.com/watch?v=eFaVK3_mWkM.

Making the stick figure and umbrella was simple enough. But figuring out how to make the stick figure’s arm move and umbrella appear by pressing my mouse down was more difficult. It took asking for my friend’s help (thanks Naz) and constantly checking the reference page. The code I used to make this work is below:

if(mouseIsPressed) {
  stroke(0);
  strokeWeight(0);
  fill(0);
  rect(410,342,147,260);
  }
  
  stroke(255);
  strokeWeight(2);
  fill(0);
  circle(445,400,50);  
  line(445,428,445,523);
  //line(446,442,470,468);
  line(446,441,413,477);
  line(446,522,485,584);
  line(445,522,411,584);
  
  if(mouseIsPressed) {
  arc(490,353,150,120,PI,0,CLOSE);
  line(416,354,462,344);
  line(462,344,489,356);
  line(489,356,517,341);
  line(517,341,565,353);
  line(490,357,490,412);
  line(490,412,501,412);
  line(501,412,502,405);
  }
  
  if(mouseIsPressed){line(446,442,490,420);}
  else{line(446,442,478,477);}

I discovered that it would be too complicated to make the umbrella repel rain like @hotemogf did. But I created the illusion of it happening by coding a black box that appeared behind the stick figure when I pressed my mouse down.

I’m content with how my self-portrait came out. But I want to develop an idiosyncratic style that shines through in all of my interactive media projects. In short, I want what I create to be unequivocally, irrefutably ME. I discovered how difficult that would be given my technical limitations. But someone once told me true love knows no limits. In fact, technical limitations often serve art (think Kurt Cobain or Bob Dylan, or modern day musicians with purposefully harsh production styles). I’ll keep trying to carpe the diem. You learn.