reading reflection- Casey Reas’ Eyeo talk

Casey Reas’ Eyeo talk on chance operations was a captivating exploration of the creative potential found within the realm of randomness and chaos. Throughout his presentation, he skillfully conveyed the idea that by relinquishing some degree of control and allowing chance to play a role in the creative process, remarkable and unexpected outcomes can emerge.

One impressive aspect of Reas’ talk was his ability to draw connections between chance operations and art, highlighting how artists throughout history have employed randomness as a tool for inspiration and innovation. He showcased famous examples like John Cage’s experimental music compositions, where random elements determined the outcome of the piece, and Jackson Pollock’s drip paintings, which embraced the element of chance in the artistic process.

Reas also demonstrated the practical applications of chance operations in contemporary art and technology, particularly in his work with generative systems and computer algorithms. His discussion of software and coding as mediums for exploring chance operations opened up new possibilities for creativity and self-expression, showcasing the intersection of art and technology.

Another striking feature of Reas’ talk was his emphasis on the relationship between randomness and intention. He emphasized that while chance operations introduce an element of unpredictability, they are not entirely devoid of intention. Artists can carefully design the parameters and constraints within which randomness operates, guiding the creative process toward desired outcomes while still embracing the unexpected.

Week 3 Reading Reflection

For me, the concept of interactivity was always intuitive. I never tried to establish the definition of interactivity. The reading helped me delve deeper into what interactivity is and made me think about whether the actions we perform every day that imply interactions with objects can be called interactivity. Moreover, it helped me get a better sense of what interactive design is, which I’ll try to implement in my future projects.

The author made a good point about the three main features of interactivity: listening, thinking, and speaking. But the use of these terms in the text is quite vague. Even though the author considers an act of turning the light on in a refrigerator by human an interaction, I don’t think that this interpretation is right. I believe that the term interactivity should be split between digital interactivity and natural interactivity. I consider them to be two different terms because natural interactivity offers a wider range of reactions than digital interactivity. While interacting with people or other living creatures, we cannot always predict the way another actor will react. At the same time, while interacting with computers, particular actions have specific outcomes that are always the same for each action. Therefore, from my perspective, it would be wise to distinguish between natural and digital interactivity based on the concept of predictability.


Week 3 – Reading Reflection

The Art of Interactive Design

The chapter begins with an interesting argument on the term interactive. With the increased usage of the word in recent times, it becomes essential to understand what it means to be interactive. The writer has beautifully put forward his explanation of the term using the metaphor of a conversation. Breaking down interactivity into three major processes, the writer has compared it to the actions of listening, thinking, and reacting while having a conversation. The analogy of a conversation and the interactive process resonated with my understanding of the term.

He further stresses the importance of having two purposeful mediums to produce an interaction. He makes it very clear that if only one actor is present, it becomes more of a reaction than an interaction. The examples illustrated by the writer allowed me to grasp the difference between a reaction and an interaction.

While the writer agrees that some people would not approve of his classification of action as a mere reaction, he has elaborated on the subjectivity of the interactive process by introducing the concept of degree in interactivity. Hence, a passive interaction could be classified as an interaction at a low level.

To make his stance better understood, the writer goes on to discuss the different types of conversation you can have based on the person you are talking to and has used this explanation to classify activities such as reading and watching movies as non-interactive. Finally, he talks about graphic designing and the need to integrate interactivity into it.

The chapter was a thought-provoking read, and to a large extent, I agree with the writer on his definition of the interactive process.

ASSIGNMENT 3 “Rocket Man”

Concept:

For this assignment, my goal was to depict a bunch of mini rockets (triangles) blasting off. This idea was mainly because, I wanted to practice using OOP, functions, and arrays in a very simplified manner. If you press down on your mouse, the rockets should shoot up, each at different times!

CODE I’M PROUD OF:


// applies thrust to rockets if the mouse is pressed
  if (mouseIsPressed) {
    for (let i = 0; i < rocketArray.length; i++) {
      rocketArray[i].thrust(20);
      //increases the thrust value if the mouse is pressed

I know it’s simple, but it seemed like a really cool idea to me.

REFLECTION:

I ran into a multitude of issues while trying to finally complete this assignment. The main issue that I came across, was that I kept creating infinite loops that made P5 keep crashing. It was really frustrating because for a while, I couldn’t figure out what was happening, but in the end, everything was sorted.


week3.reading – theArtOfInteractiveDesign

When I first joined the Introduction to Interactive Media course, I did not know what to expect. My perception of interactive media at the time was highly connected to that of a visual artist. Coming from an artistic background and having taken many art courses throughout my life, I have come to accept interactivity to be highly based of the audiences reaction.

Nevertheless, I was pleasantly surprised when the course that I am in turned out to be something that I had dreamed of trying by myself, but never having the time. Chris Crawford puts it perfectly when he says, “interaction: a cyclic process in which two actors alteratley listen, think, speak.” My understanding of the interactivity had been highly subjective, and I found myself in the position of naming various items ‘iteractive,’ even if they were not ideally so. I liked Crawford’s example of the degrees of interactivity, specifically how he talked about the fridge possessing a low degree of interactivity. This led me to think back about some commercial or idea I saw/had, where a smart fridge would scan all the food inside if, and provide you with various information, e.g. constructed a grocery list for you, or proposed recepies that can be made with the ingredients available. I believe that type of fridge can pass for being interactive.

Ultimately, I believe that this chapter highly changed my views on interactivity, specifically what it means for something to be interactive. The three main steps, listen, think, speak, can most likely be applied universally, and thus I see huge potential in this field of study.

The Art of Interactive Design:

The discussion on the nature of interaction, breaking it down into input, processing, and output, provides a solid foundation for understanding the mechanics behind interactive experiences. This breakdown clarifies the essential components that designers must consider when crafting user interactions.

His emphasis on integrating storytelling and interactive design is intriguing. Storytelling has been a pivotal element in various forms of media, and exploring how it can be adapted for interactive experiences is fascinating indeed. The idea of narratives adapting to user choices and actions adds depth to the discussion, raising questions about the complexities and possibilities of interactive storytelling.

Assignment 3: Spiral Circles

Concept:

So I wanted to create a 3D spiral that shows depth that is kind of interactive. This artwork is created using circles to form an after-effect that looks like a 3D spiral from far away. When the mouse is Clicked the movement of the circles reverses from the opposite axis creating a unique design. with the use of Perlin noises, smooth radii, and colors are created to make the design appealing to the eye.

Highlight:

Using OOP I had to think of a way to create a spiral without actually creating the spirals as objects. So I decided to use circles to do this. Initially, I got some bugs due to random radii not being smooth so I decided to use Perlin noise which fixed that problem. I also had a similar problem with the colors, which made the art weird.

Additionally, getting the right colors at the right times was another challenge I encountered even with the use of the Perlin noise, arrangement of the code caused bugs.

Finally the most challenging part for me was the spiral movement which I made use of the translate and the rotate functions as well as increment of the radius by a counter. with this counter and angle I was able to reverse the effect and ended up getting the design I wanted.
Extra video that helped

this.aa=map(noise(this.a),0,1,0,this.j);//getting smooth x-axis for the circles
  this.bb=map(noise(this.b),0,1,0,this.j);//y-axis
  this.i=this.aa;
  translate(mouseX,mouseY);//making the orijin the the mousex and mouse y points
  rotate(this.angle);//movement of the circle
  fill(this.x,this.y,this.z);//giving the colours to the circles
  circle(this.aa,this.bb,random(0,50));//creating circles 
  this.angle+=this.r;//incrementing the angle for circular motion
  this.x+=0.02;
  this.y+=0.02;
  this.z+=0.02;
  this.j+=0.1;

Final Work:

Reflection and Ideas for Future works:

With this I plan to make a design where the art work actually moves and is not just as a result of the pathways taken by the objects.

Week 3 – Inspired

Concept:

As I was looking for inspiration for my third assignment, I came across a YouTube page named Barney Codes in particular his video on Parlin Noise. He did a simple function where particles move across the canvas to create shapes. However, for this assignment, I wanted to use arrays and classes to do a similar version of what he was doing. It was so hard to decode the logic behind his project and turn it into a class format. A lot of trial and error took form, and I ended up doing multiple p5js codes to get what I wanted. Also, his project reminded me of Starry Nights by Vincent Van Gogh, one of my favorite paintings. As a result, for this assignment, I wanted to play with Barney’s code but also add a sense of darkness and beauty to it.

Highlight on Code:

 I started with some videos about functions, arrays, classes, and Perlin noise. As I was searching and looking I came across a simple function on the Parlin noise graph that I found online. I manipulated the code a little so that I see the different results. I also played with the colors and aesthetics of the image. It was interesting and I realized that every number you add, and every sign makes the image different. However, I did not use this for the final project I wanted. You can see below the code.

let x = 0;
let rectWidth = 1;

function setup() {
    createCanvas(500, 400);
    background(0);
}

function draw() {
    noise1D();
}

function noise1D() {
    while (x < width/rectWidth) {
        // Add randomness to x and freq for shaky movement
        let xOffset = random(-1, 2);
        let freqOffset = random(0.1, 0.09);

        let n = noise((x + xOffset) * (0.001 + freqOffset));
        n = map(n*4, 0, random(10), width/3, 0);
      
        stroke(random(150,220),random(150,220),random(150,220));
      
        rect((x - xOffset) * rectWidth, height = n, rectWidth/6,n);
        x++;
      
    }
}

Then I decided to look at the exercise of the bouncing ball in class. I knew it had a different logic from what I had in mind, but I wanted to start slow. First, instead of a circle, I drew a particle. I gave x and y random values from 0 to 500, my canvas dimensions. Then I started changing the numbers within the code to see what each represents. Then I added color to the project and used the sin and cos because I was hoping they would give some curve to the image, but they did not. I also did not want to use this as my final project for the assignment because I wanted to use Perlin noise.  However, doing this gave me a sense of what can be done to get the image I want. I know that a point is like a pixel so it’s technically zero-dimensional, so I wondered what the variables represent in this code and what are they doing to the point. I added the explanation within the code below, I hope it’s correct.

I stopped for a little to see what colors I wanted my generative art to have. The numbers I chose were a range of what I wanted the most dominant colors to be and whatnot. I found RGB color code tables helpful in this because I picked the colors from there. Then I tried to figure the logic out and write the code.

Reflection:

It was an assignment of exploration. I realized that I love using randoms in my codes because they add to the piece something unexpected. It was a challenge for me to figure out how to create the class, but I did it. One thing that I did not figure out is how to keep the particles within the boundaries of the canvas while the mouse is pressed because they tend to leave. However, I can say it was a choice. There are a lot of possibilities in p5js that I still want to discover in the upcoming assignments. One important thing that I always tell myself is that when you read hard codes or watch hard examples it is okay that you do not understand them because with time you will, so be patient.

A link of me exploring the concept: https://youtu.be/BQlmNmS3-Os

Resources:

https://editor.p5js.org/shn202/sketches/w04RNd0li

https://www.youtube.com/watch?v=sZBfLgfsvSk

https://www.rapidtables.com/web/color/RGB_Color.html

https://happycoding.io/tutorials/p5js/creating-classes


Week 3: A ‘Drift’-ing Gradient

Approach and Concept:

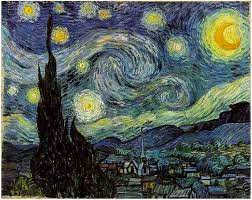
Starting off this project, I realized I could potentially look to screensavers of different kinds for motivating my generative art piece. Upon googling, I was instantly reminded of the iconic Mac screensaver – ‘Drift’.

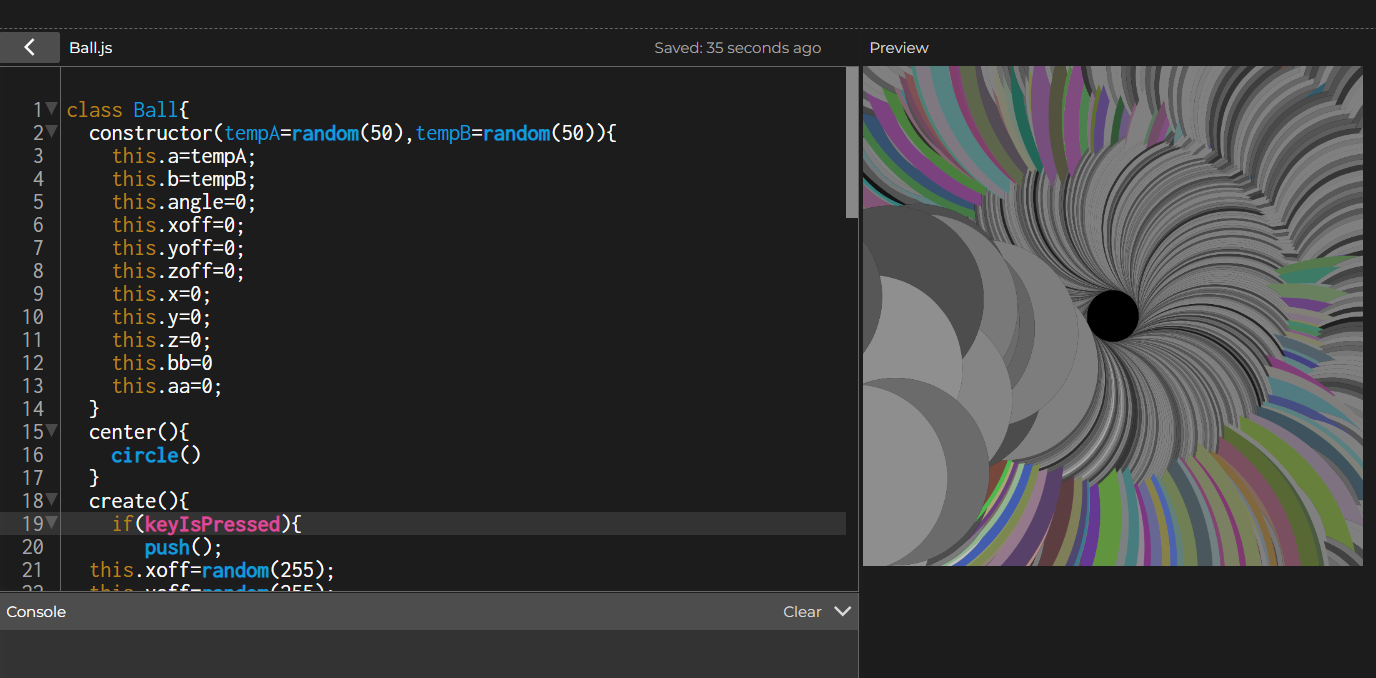
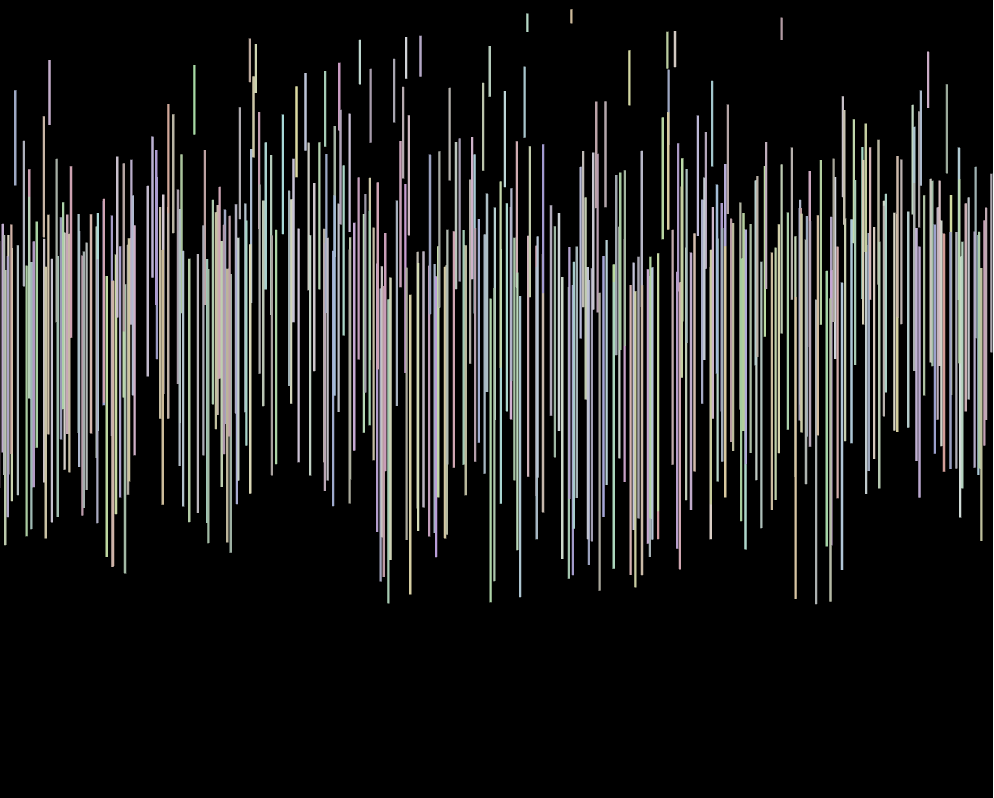
Attempting to recreate the piece proved incredibly hard as it seems to use some sort of fluid-based physics simulation rather than simple noise. Additionally, the particles itself were 3D and detailed with shadows, depth etc. I gave up on the idea for a bit and decided to create a cool ‘background’ first. I did this with an idea I got during my previous project -using Perlin noise on each pixel to evolve the color based on the x,y, and time axes to make an evolving gradient.

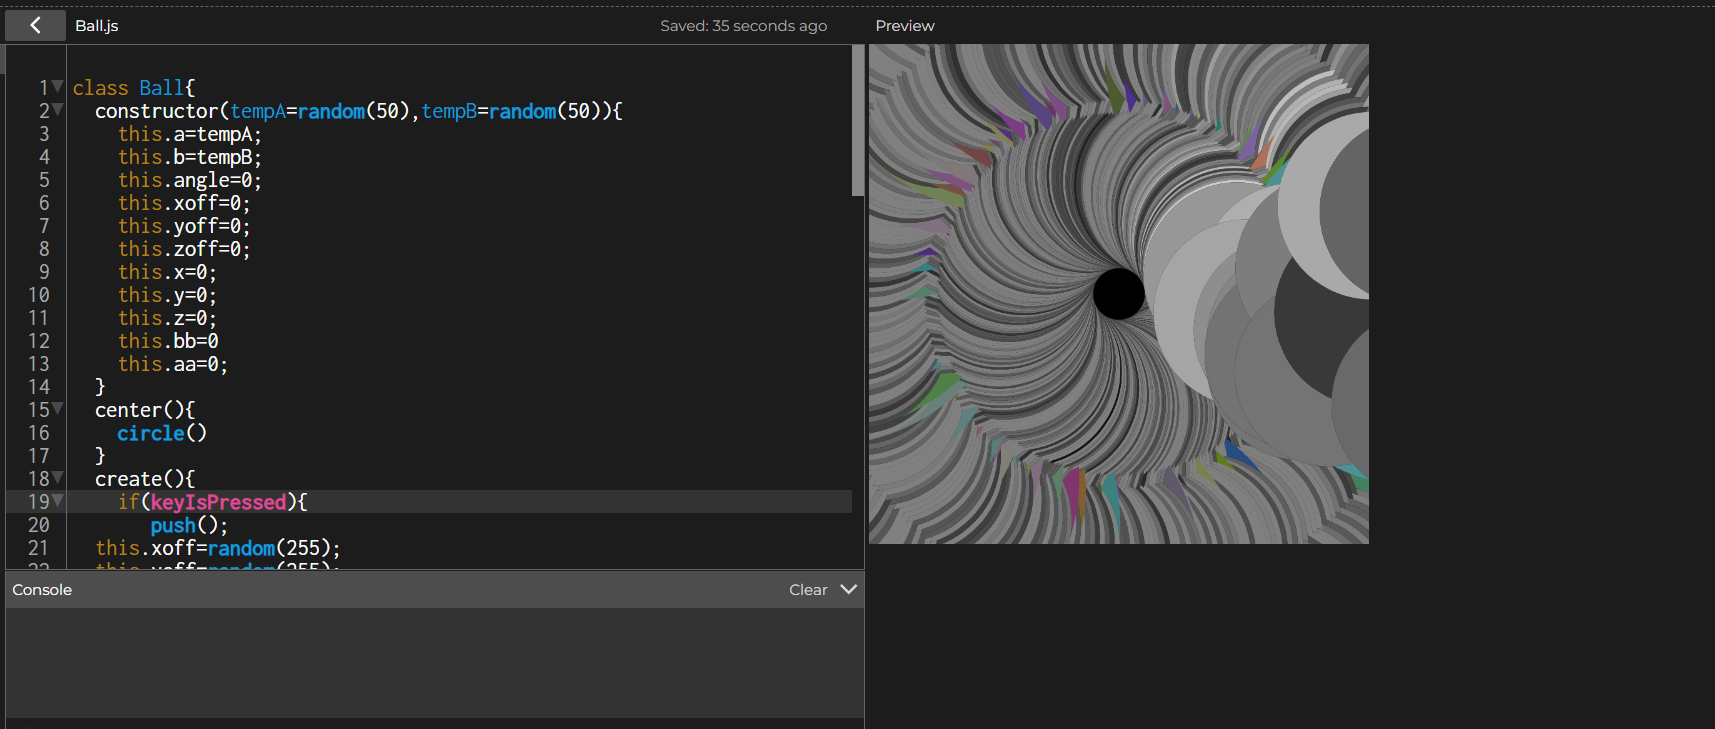
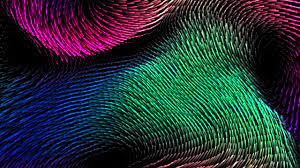
However, this gave me a new idea – what if every pixel was a particle that moved on a trail decided by noise? That could certainly simulate the effect I wanted to an extent! With some code changes, and a lot more tinkering with variables – I finally came up with my final design:

Bonus: Click to see the animation speed change, and hover to see how the particles interact with the mouse!!

Highlights:

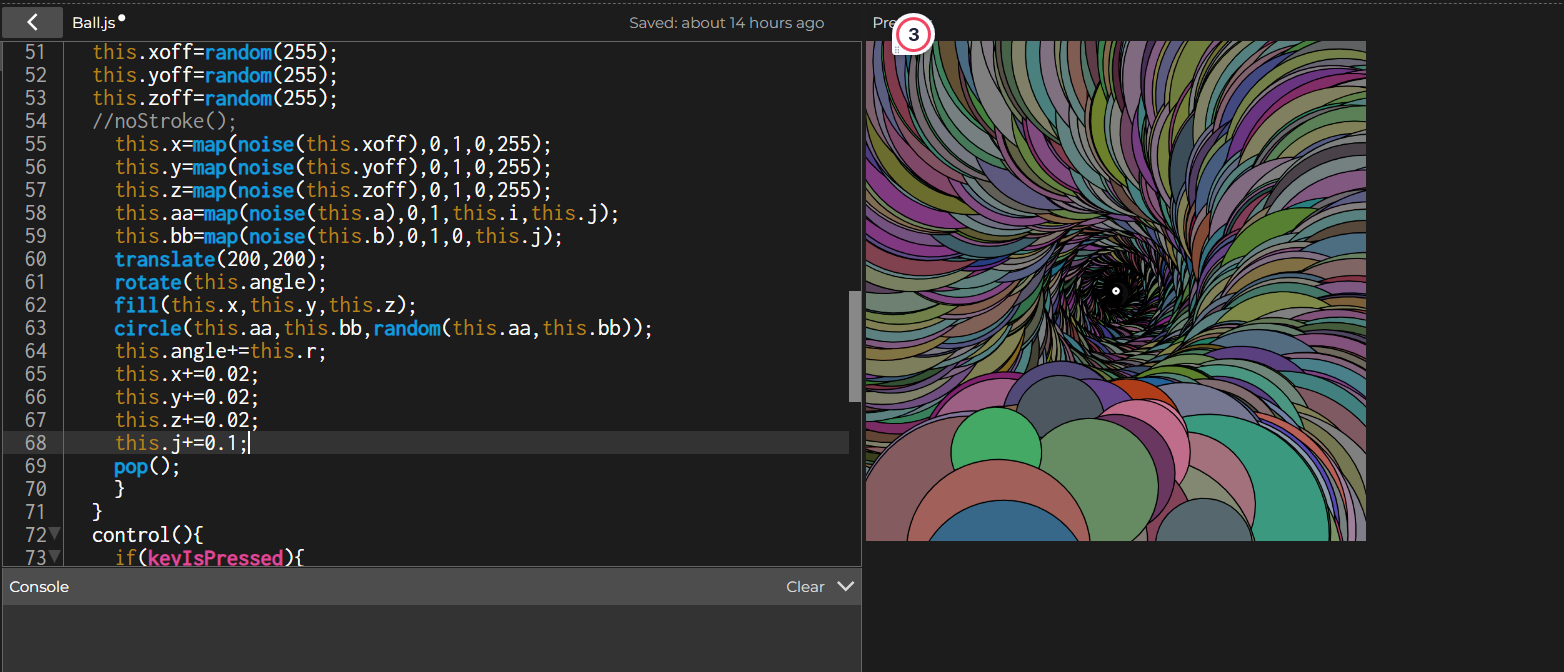
My highlight for this project is modeling the interplay between the noise evolution of every particle’s size,angle, and color. Moreover, I added some user interaction elements by adding an effect when we hover a mouse over the animation: the particles get repelled!

I had to bake in some considerations here so I only made this effect available away from the edges of the screen – so that the user can see the art without the mouse effect easily. I was also worried about the effect strength since the result wasn’t smooth and didn’t go with the aesthetics of my vision originally, but the normalize function came into the rescue here!


update() {
        let r = noise(this.pos.x * noiseScale, this.pos.y * noiseScale, timeC) * 255;
        let g = noise(this.pos.x * noiseScale + 100, this.pos.y * noiseScale + 100, timeC) * 255;
        let b = noise(this.pos.x * noiseScale + 200, this.pos.y * noiseScale + 200, timeC) * 255;
        let alpha = noise(this.pos.x * noiseScale + 300, this.pos.y * noiseScale + 300, timeC) * 150 + 105;
        this.color = color(r, g, b, alpha);

        this.angle = noise(this.pos.x * 0.01, this.pos.y * 0.01, timeMove) * TWO_PI;

        let move = p5.Vector.fromAngle(this.angle);
        move.mult(currSpeed);   //changes the speed based on mouse click
        this.pos.add(move);
        let sizeNoise = noise(this.pos.x * noiseScale, this.pos.y * noiseScale, timeMove*2);
        this.size = sizeNoise*20;  // Change these values to adjust the range of size based on noise
    }

    show() {
        push();
        translate(this.pos.x, this.pos.y);
        rotate(this.angle);
        fill(this.color);
        rect(0, 0, this.size, this.size * 0.3); // making the rectangle elongated like a bristle
        pop();
    }
  
   repulse(point) {
        let dir = p5.Vector.sub(this.pos, point);
        let dist = dir.mag();
        
        if (dist < 100) {  // Only push away if within 100 pixels
            dir.normalize();
            dir.mult(3);  // Adjust for stronger or weaker repulsion
            this.pos.add(dir);
        }
    }


Reflections and Future Work:

My initial goal was to make the particles 3-dimensional. When I actually attempted to do so, and mess with movement in the Z dimension, I ran into several issues both on the aesthetical and technical front. For example, using 3D graphics benefits immensely from the use of shaders – which are very different from the 2D objects we use to both learn and implement. Moreover, it required more geometrical calculations that seemed beyond the scope of the project.

If I had more time I would also try to see what variations I can get with using differently shaped particles, different types of noises etc.

Resources:

I realized at a later stage that this video does what I attempt to do, and took reference towards the last part of my coding:
https://youtu.be/BjoM9oKOAKY?si=tIbnzH-ndMvgCB2R

Another resource I used to understand the concept of vectors in p5.js:

https://www.youtube.com/watch?v=bKEaK7WNLzM&pp=ygUUY29kaW5nIHRyYWluIHZlY3RvcnM%3D

(Also, some other videos in the playlist)

Assignment 3- Reflection

“The Art of Interactive Design, Chapter 1” by Chris Crawford digs into the complexities of interactive design, putting light on its particular problems and spirit. Crawford’s emphasis on interactivity as a two-way conversation between the user and the system struck a chord with me. He correctly points out that interactivity is about active involvement rather than passive consumption. This idea is consistent with my conviction that great interactive experiences should empower users by giving them the ability to make meaningful choices and feel a sense of agency. Crawford’s viewpoint emphasizes the importance of user-centric design, which prioritizes the user’s experience.

However, I couldn’t help but think about Crawford’s pretty harsh perspective on storytelling in interactive design. He contends that interactivity and storytelling are frequently at odds, and that an overemphasis on storytelling might damage a system’s interactive nature. While I understand his concerns about a potential collision, it makes me wonder about the chances of reaching a compromise. Is it possible to include storytelling aspects into interactive design without compromising its interactive essence? This friction between story and interactivity serves as a point of reflection and inquiry for me, challenging me to consider how these two components might coexist happily in design. Crawford’s observations have enhanced my understanding of the nuances of interactive design and the complexities involved in striking the proper balance.