Week 3 – OOP

Concept:

With this assignment, I wanted to further familiarize myself with objects and methods, which I feel like was accomplished. In my last assignment, the backbone of the piece was essentially just a grid of quadrilaterals, and there was really no way to switch it up between other shapes. Learning about OOP has broadened the creative liberty we have and so I experimented to make another grid piece, but this time with random shapes, making each shape an object.
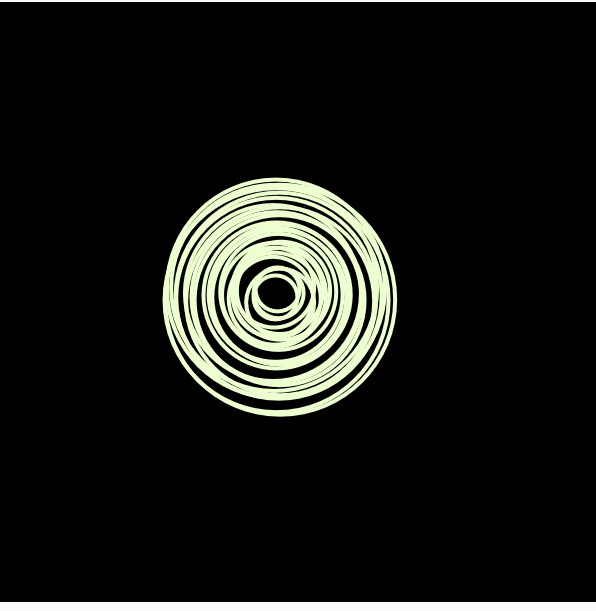
Sketch:

Code Highlight:

With this assignment, I also learned to use the Case conditional statement which I utilized to assign a random shape to the object depending on the argument passed to it in the constructor. I also attempted translation and rotation, and made use of the push() and pop() functions to reset the grid after translations.

  show() {
    fill(random(255), random(255), random(255), 180);
    strokeWeight(0.1);
    switch (
      this.Sides //using a conditinal case statement to assign a random shape to the this.Sides attribute depending on the value it holds between 2 and 4
    ) {
      case 2:
        push();
        circle(this.X, this.Y, 20);
        pop();
        break;
      case 3:
        push();
        translate(this.X, this.Y); // translating the grid so the triangle is centered
        rotate(1);
        triangle(0, -9, -10, 10, 10, 10);
        pop();
        break;
      case 4:
        push();
        translate(this.X, this.Y);
        rotate(0.5);
        rectMode(CENTER);
        rect(0, 0, 20, 20);
        pop();
        break;
    }
  }
}

Reflection:

I would like to go back and figure out how to rotate the shapes where the rotation continues from the same stage even when the shapes change. I would also like to experiment with more methods in this class. I do think this captures the essence of OOP, making use of classes every time the loop iterates.

week#2 – reading reflection

It’s interesting how the juxtaposing binaries of order and chaos are so interrelated together and constitutes a vital component in visual arts. Casey Reas’ talk further enlightened me in this perspective. Randomness in art throughout history has been celebrated and such a chaos is what inspires the many variations of art we see in contemporary times. Yet it’s important to note that such a seemingly liberating practice involves delicate control, a notion that is reiteratively referenced throughout the video. Whilst this may be an implicitly obvious knowledge, it’s usually not something we consciously deliberate upon.

I didn’t know to the extent how closely interconnected the role of control was in chaos and vice versa. Following on from this, it’s intriguing how, even in our deliberate attempts to harness randomness, we are engaged in a kind of controlled chaos. It’s like we’re conducting an intricate symphony, guiding the elements of chance to produce results aligned with our intentions. This challenges the notion that randomness is synonymous with unpredictability; rather, it can be a tool for crafting intentional, yet pleasantly surprising, outcomes.

Nourhane’s Reading Response week#3

Chris Crawford’s “The Art of Interactive Design” provides a thought-provoking exploration into the intricacies of interaction in the digital realm. His distinction between simple reactivity and genuine interactivity sets a clear framework for understanding the depth and quality of user experiences. Crawford challenges the reader to move beyond superficial engagements and to recognize the profound difference between merely responding to a user’s input and providing a deep, meaningful interactive experience. His insights, derived from his extensive experience in game design, highlight the importance of thoughtful design in creating truly interactive digital products.

However, one might argue that while Crawford’s insights are invaluable, they are also rooted in his personal experiences and biases towards complex interactions, possibly overshadowing simpler but equally meaningful interactive experiences. As technology continues to evolve, the boundaries of what constitutes genuine interactivity might also shift, and Crawford’s definitions, though foundational, might need to be revisited. Since, in reflecting upon this reading, I find myself thinking about technologies like virtual reality and augmented reality that are gaining traction, and how might Crawford’s definitions and boundaries of interactivity evolve? And more importantly, how can designers ensure that as interactions become more complex, they retain the depth and meaningfulness championed in this seminal work?

80s disco with a twist

Concept:

While trying to find an idea and looking back at my dance floor from last week I knew it was missing the life that I wanted to give it in order to be as 80s as possible so i choose to add some movement to it using rotating tiles to give it life but also to stimulate the sensation of dancing till we are tired since I imagined this was a common thing in the crazy 80s additionally.

Move the mouse across to see it come to life!

Highlight of the code

// Display the tile at its position, with a specific effect based on its position relative to the circle
display(insideCircle) {
  push();
  translate(this.x + 10, this.y + 10);
  rotate(this.angle);
  if (insideCircle) {
    fill(this.col);
  } else {
    fill(150, 150, 220, 150);
  }
  rect(-10, -10, 20, 20);
  pop();
}

// Rotate the tiles outside the circle
rotate() {
  this.angle += 0.02;

My favorite part of the project was seeing my idea quite literally come to life as the tiles started rotating, it was beautiful and magical in my opinion because i had never use the translate function and as a first time I think it cam out pretty good and exactly how i wanted it to be when i first re-started this piece. Through the rotating tiles I wanted to give the dance floor life but also wanted to through a subtle reference to the funky shapes and neon colors that were trendy at the time hence the choice of color and tile shape and choice to use rotation because I knew that once they are together they will make those funky shapes I was trying to get. Once again I used OpenProcessing (refer to last post to see the details about how to use this goldmine) but also the youtube video “Rotating Tiles and Animation in Tiles” by steve’s makerspace to be able to understand how to do it.

In details, display(insideCircle) draws a tile on the canvas, with its appearance varying based on its position relative to a circle. With the use of push and pop, all of the transformations and styles are localized. It shifts the drawing’s origin to the tile’s center with translate, and then rotates it and sets the tile’s color to be specific randomized color to the tile using an if else, if it’s inside the circle then it will be color, else it will be semi-transparent blue. The tile is drawn centered on the new origin with and the rotate function gradually increases the tile’s rotation angle, creating a spinning effect for tiles outside the circle.

Future changes:

In the future, I would love to be able to add a song and synch the tiles movement to it to make it more rave like and more alive but overall i’m really really happy that i continued to work on it and now has more life than I thought I could give it.

Week 3 – Reflection

Just like every Interactive Media major (or people who intended to major) who once was a freshman fighting to get a spot on any of these courses, I always used to wonder what exactly this name meant. What makes media interactive? And especially, as mentioned in the text, to what extent can (or should) our media be interactive?

Diving into the world of User Experience Design, I learned that interactivity is a result rather than a component we can add to our projects. In some sense, proper user interaction ends up being more of a reward, born from “good/correct” design decisions, rather than a feature added inside our work. As much as it’s ideal to think of interactivity as a simple exchange of information as in: the developer sets a certain function for the user, the user makes use of it, and feedback returns, reality shows us that it is not easy. Humans are attracted to certain things, and interaction is the ultimate signal of respect for them. We touch whatever thing we are curious about, we smell it, we taste it and we look over and over for it. The question comes as to whether our projects are able to return that feeling. Are our objects able to talk? If so, then our interactivity is born essentially from how well they can also listen to the feedback that they will receive. If we can portray information, but most importantly, if we can, at the same time, receive and react to the information that comes back, then we have achieved interactivity.

User interaction has a long way to go. AI has shown that we are easily capable of generating a high level of interaction with machines, either verbally or virtually. Therefore, I am more than excited to see what the future of user experience and interaction has in store for us.


Week 3 – Assignment – Optical Illusion

For this assignment, we had to experiment with concepts of object-oriented programming and arrays. I have made two sketches, both involving these concepts in different ways.

The first sketch is inspired by the example of the bouncing ball done in class. This sketch involves white lines produced on clicking against a colorful background, created using the random function. The movement in the lines is achieved using the noise() function. Finally, the mousePressed() function is used to produce interactivity, allowing the users to control the frequency of creation of the lines.

Applying object-oriented programming, I have defined a class called Shapes within which the required function Line() is defined. An array called ‘list’ stores each line as it is created.

Line() {
    stroke(255);
    strokeWeight(5);
    line(this.n,0,this.n,400);
    //xoff is the variable used for the argument of noise()
    this.xoff+=0.01;
    //the values are enhanced by a factor equivalent to the height
    this.n=noise(this.xoff-this.x)*height;
  }

The second sketch helped me achieve what I had initially hoped to create. It involves an illusion created using a for loop that produces rectangles of different sizes, all rotating at a certain angle. An if condition involving the mouseIsPressed Boolean variable results in the addition of color to the sketch. I wanted the sketch to include specific colors, so I created an array to store the color values, which are randomized and used as an argument for fill.

class Shapes{
  constructor(){
    this.angle=0;
    this.i=0;
    this.colors=["rgb(226,200,126)","rgb(239,165,83)","rgb(236,143,99)","rgb(239,119,110)"]; //array storing colors used as an argument for fill
    
 }
  
  Rectangle(){
    translate(width/2,height/2); //shifts the origin to the center of the canvas
    rectMode(CENTER);
    
    //for loop to decrease the size of squares
    
    for (let x=width; x>=0; x-=20){
      fill(int(random(0,130)));
      if (mouseIsPressed){
        fill(this.colors[this.i]);
        this.i=int(random(this.colors.length));
      }
      rotate(this.angle);
      rect(0,0,x,x);
      fill(int(random(150,255)));
      
      if (mouseIsPressed){
        fill(this.colors[this.i]);
        this.i=int(random(this.colors.length)); //stores a random value from the colors array
      }
      rotate(45);
      rect(0,0,x+20,x+20);
      this.angle+=1;
    }
  } 
}

During the assignment, I encountered several challenges with defining functions within a class and ran into errors while creating the loops. These errors were mainly due to the difference in the syntax used within a class.

Reflecting of the process, I feel both the above sketches involved relatively basic concepts of object-oriented programming, and I hope to enhance my learning by exploring further on these topics.

Week 3 – OOP (Tornado Effect)

Concept/Inspiration:

This week, we dived into object-oriented programming and arrays. I wanted to utilize a certain movement on a set of objects, and for that, I decided to arrange an array of shapes that would be independent but would also have a function that could move them in a certain pattern.

My inspiration came from a phenomenon called the “Butterfly Effect”. For those who don’t know, the butterfly effect is the idea that small things can have non-linear impacts on a complex system. The concept is imagined with a butterfly flapping its wings and causing a typhoon. Butterfly effect - Wikipedia

Therefore, in this sketch, there are multiple variables that rely on the random() function in order to show shapes on screen.

WARNING: The sketch plays multiple colors shaking at a really fast speed. If you are sensible to any of these effects, please proceed with caution.

Code Highlight:

In order to make every shape move on its own, I decided to modify the X, Y values of the object itself. The class would contain a function called move() that would slightly change the X and Y of the object by a random value. This random value will change based on the mouse position to create the idea that the “tornado” is following the mouse.

class Form {
  constructor(x, y, r) {
    this.x = x;
    this.y = y;
    this.r = r;
  }

  move() {
    if(mouseX>=this.x){
      this.x = this.x + random(5);
    }
    else{
      this.x = this.x + random(-5);
    }
    
    if(mouseY>=this.y){
      this.y = this.y + random(10);
    }
    else{
      this.y = this.y + random(-10);
    }
    
    //vibration. Can also use perlin noise.
  }

Future Improvements:

I realized just after writing the code that several parts of the structure could have been improved. One big thing I missed while writing it was the fact that I could have attached the color to the object in order to make every shape a random color. However, I decided to keep it as it is because it would look too fuzzy. In the future, I would like to plan accordingly how I intend to express my inspiration, because even though this topic (butterfly effect) offered many different possibilities, but I couldn’t adapt any of them to P5js.

Ferris Wheel

Concept

Initially I wanted to recreate the Dubai Eye wheel, however due to complexity of the intricate structure of the wheel, I decided to channel my creativity and imagination to design a simpler but visually captivating ferris wheel. The core idea was to create a dynamic scene where a whimsical ferris wheel continuously rotates against a serene evening sky backdrop. This piece combines the charm of a classic carnival ride with the enchantment of a starry night, offering viewers a sense of nostalgia and wonder.

Highlights
class FerrisWheel {
  constructor(x, y, radius, cabins) {
    this.x = x;
    this.y = y;
    this.radius = radius;
    this.cabins = cabins;
    this.angle = 0;
    this.cabinWidth = TWO_PI / cabins;
  }

  update() {
    this.angle += 0.01;
  }

  display() {
    for (let i = 0; i < this.cabins; i++) {
      let cabinAngle = this.angle + i * this.cabinWidth;
      let cabinX = this.x + this.radius * cos(cabinAngle);
      let cabinY = this.y + this.radius * sin(cabinAngle);

      stroke(255);
      fill(220, 220, 220);
      line(cabinX, cabinY, this.x, this.y);
      
      fill(255);
      stroke(0);
      drawCabin(cabinX, cabinY);
    }
  }
}

The highlight of my code would be the ferris wheel class itself. Initially, the cabins on my ferris wheel remained static, failing to mimic the natural rotation of a real ferris wheel. This static appearance detracted from the realism and overall visual appeal of the piece. figuring out the math behind making the cabins move as the wheels rotate made the entire piece look so much more realistic.

The update and display functions play the most important role here. In the “update” function, a subtle but crucial change occurs as the “angle” of the wheel is incrementally adjusted by 0.01 units with each frame update. This seemingly minor alteration is, in fact, the driving force behind the entire dynamic effect. The magic happens in the “display” function. Here, a loop iterates through each cabin, accurately calculating their positions based on the current wheel rotation angle. By incorporating trigonometric functions,”cos” and “sin,” the cabins are positioned equidistantly around the wheel’s circumference. This calculation ensures that each cabin moves synchronously with the wheel’s rotation.

Reflection

In hindsight, while my final art piece has achieved a significantly more lifelike representation, I think there is still room for improvement. If given the opportunity for further refinement, I would consider the addition of towering skyscrapers in the background. This addition would not only serve to augment the visual appeal of the artwork but also create a captivating juxtaposition between the timeless charm of the ferris wheel and the modern urban landscape, further enriching the narrative and depth of the composition.


Week 3 – Reflection

Chris Crawford the author of The Art of Interactive Design includes many of personal concepts of understanding towards the art of interactivity. He starts off by claiming how the term is overused and barely understood. Crawford considered the definition of interaction to be: a cycle process in which two actors alternately listen, think, and speak. Anything can be interactive as long as it is an active action between the two ends of the line.
Crawford then dives more into interactivity design; the key in order to manage a good program that ends up ranging from a website to a game is to understand how and what makes things interactive. He goes back into the three main points of interactivity:

-Listening: In order to manage healthy conversations with other people, listening and carrying a meaningful understanding towards another will gain a sense of mutual respect.

-Thinking: To make this conversation even more successful, recalling and using empathy will help enjoy the company with the other speaker.

-Speaking: Lastly, and here is where interactivity comes, the other party must join in by adding on thoughts related to the subject.

Knowing what makes things interactive is crucial for effectively developing websites, computer games, and software. In his book “The Art of Interactive Design,” Chris Crawford simplifies the concept of interactivity, explaining what it is, how it functions, its significance, and how to create excellent interactive software and websites. Crawford’s maneges to add a hint of an artistic aspect into the concept of interactivity.

Assignment 3 – Insects

Concept: Mimicking Organic Patterns

For this assignment, I wanted to implement insects and add behaviors to them that would give rise to organic patterns that are found in nature. For example, slime mold exhibits fascinating patterns when searching for food.

Slime Mold – Audrey Dussutour, CNRS

I wanted to recreate this effect. However, I was unable to achieve this. Still, I managed to create a class-based visual that is interesting in its own way.

Process

After watching some videos on simulating ants and slime mold, I wanted to work on a similar project as I loved the results. I would play around with the visuals that I could achieve, but I wanted to create the visuals based off of movement of some insects.

I decided to create an insect class that would leave trails behind it as it moved. Initially, I wanted to create trails that would allow ants to seek out the best route to food, and back to their home. However, the logic that I implemented did not achieve this. Instead, I decided to make the trails look aesthetically pleasing and added random movement to give the insects some life-like feeling.

Code Highlights

My favorite part of the code was making the trail diffuse. Since I implemented the trail on a grid layer, all I had to do was to create weaker trails on the surrounding grid cells. The code that does this is as follows:

diffuse() {
    //if the trail  is too weak, don't diffuse
    if (this.life <= 9) {
      return;
    }
    //diffuse the trail
    let i = floor(this.x / gridSize);
    let j = floor(this.y / gridSize);
    let x = i * gridSize;
    let y = j * gridSize;

    let intensity = this.life / 4;

    //add the weaker trails to the surrounding cells

    for (let x = i - 1; x <= i + 1; x++) {
      for (let y = j - 1; y <= j + 1; y++) {
        if (x >= 0 && x < trails.length && y >= 0 && y < trails[0].length) {
          let weakerTrail = new Trail(
            x * gridSize,
            y * gridSize,
            gridSize,
            this.type,
            intensity
          );

          //add the trail  to the cell
          trails[x][y] = weakerTrail;
        }
      }
    }
    this.life = intensity;
  }

Not only do the trails fade over with time, but they spread out if they are strong enough. This is what allowed the fading away effect to emerge.

Reflection

While working on this project, I realized that I need to measure the scale of the project better beforehand. This project was a massive undertaking and so I had to give up some of my goals due to time constraints. Going forward, I need to plan the project with respect to the time frame so that I can achieve what I want to for the project.

However, I love the actual effect that was produced in the end. It reminds me of The Game of Life, and maybe my grid-based implementation for the trail markers is why such a similar effect emerged. Nonetheless, I’m happy with the way this project turned out.

Sources

Slime Mold – Audrey Dussutour

Coding Adventure: Ant and Slime Simulations – Sebastian Lague