Midterm Project | Survive the Semester Game

Hello everyone! I would share my ideas and implementation of my midterm game in this post.

Sleep, rest, study

Sketch Links

You may check out the code and game overall by clicking this link: https://editor.p5js.org/ds6058/sketches/Wdb9MMOe6

Concept

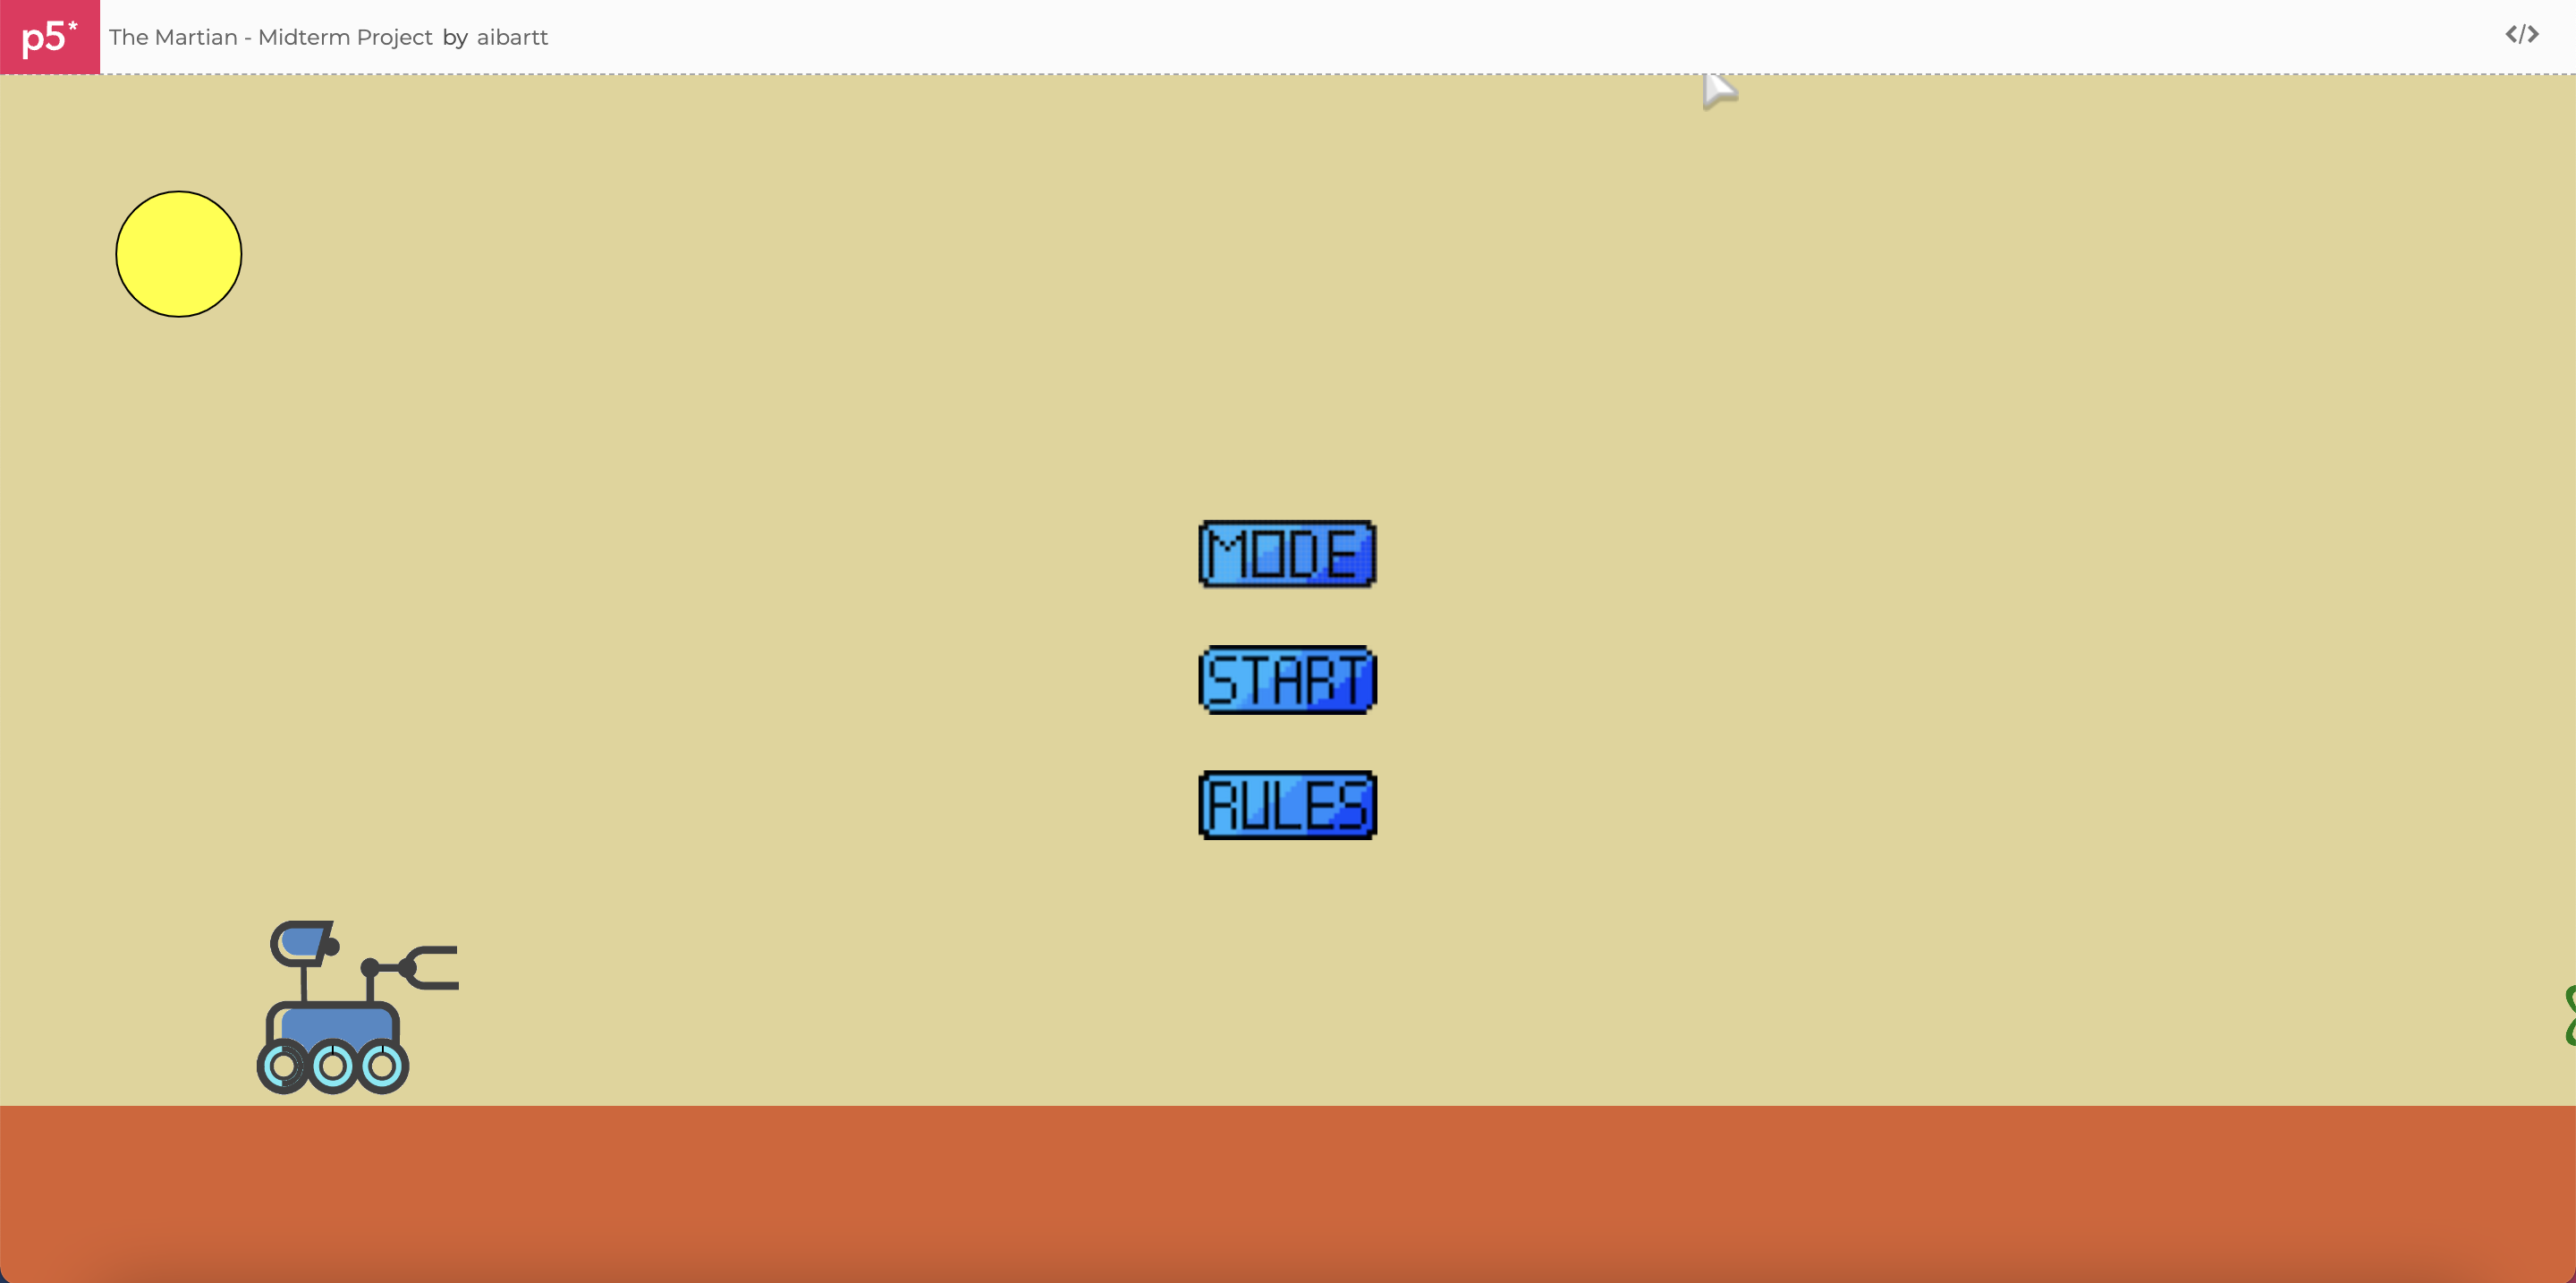
I wanted to create a game related to academics and our daily life for this midterm project. The narrative behind the game is quite simple and intuitive: the main character is a girl named Arti and her goal in the game is to catch falling objects – namely, sleep, rest (I choose to party with friends as the image), and study sessions to ‘survive the semester’. The game has two bars that measure the main character’s joy and health level. The player’s goal to win the game is to keep them as high as possible till time runs out.

Quality is somewhat poor. Above you may see the main interface of the game above. The simplest way to win is to stay active throughout the game. Skipping catching some objects may get side effects on health and joy, as well as catching some objects may actually harm your character if certain levels are already getting low. Specifically, game logic penalizes skipping sleeping and completing a study session with low health harms both health and joy, while partying is the best way to fastly recover from low joy levels.

Speed of falling changes over time and reaches certain peak periods before dropping to lower speeds. Yet, similarly to how the semester progresses, we start with low speed, and then at some periods, our workload gets heavy before dropping to lower speeds. Though, it does not get back to the initial speeds in the first weeks.

Technical Design

Objects [sleep, rest, study] are predefined in the setup() function and are chosen randomly. So, there is no particular algorithm to select, yet with time allocated and speed it is possible to win the game in different random scenarios.

I use two classes Game and ProgressBar to implement the main functionality of my game. They define the main variables and methods used. Below, is a code snippet from the play_game() method in the Game class. Each frame it runs, it checks if the object is within the screen, whether the player has caught the object, or whether time run out.

if (0 == this.time_left) {
  screen_on = game_won_screen;
}
if (this.y > height) { // if object goes out of screen without being catched
  this.is_caught = "no";
  this.update_bars();
  this.create_new_falling_object();
} else if ( //check if the object is caught by comparing mouseX coordinates and object's coordinates
  this.y > height - 150 &&
  this.x > mouseX - 100 &&
  this.x < mouseX + 100
) {
  this.is_caught = "yes";
  this.update_bars();
  this.create_new_falling_object();
  this.score += 1;
  // play sound of scoring if caught
  score_sound.play();
}

Below, there is a part of the code that controls how objects affect health and joy bars.

  // studying with low health is unenjoyable and unhealthy
  if (this.health_bar.level < this.health_bar.max_level / 2) {
    this.health_bar.level = max(0, this.health_bar.level - 10);
    this.joy_bar.level = max(0, this.joy_bar.level - 10);
  } else {
  // studying with ok health adds to joy
    this.joy_bar.level = min(
      this.joy_bar.max_level,
      this.joy_bar.level + 60
    );
  }
} else if (this.is_caught == "yes" && this.object_generated == "sleep") {
  // sleeping helps to increase health bar level
  this.health_bar.level = min(
    this.health_bar.max_level,
    this.health_bar.level + 100
  );
  // sleeping brings joy
  this.joy_bar.level = min(this.joy_bar.max_level, this.joy_bar.level + 30);
} else if (this.is_caught == "no" && this.object_generated == "sleep") {
// missing sleep reduces health bar level
  this.health_bar.level = max(0, this.health_bar.level - 30);

While the implementation of the code snippets above is not challenging, what I am particularly proud of about them and implementation overall is the ease to extend and make logic much more comprehensive [and personal]. The game logic, for now, is simple, yet it brings ideas about priorities, choices and their consequences. It is technically very easy to add more objects, not limiting ourselves just to sleep, rest, and studying.  Adapting new changes to game logic is also possible and is accessible.

I am also a bit proud that my progress bars are working as need them to. I had trouble understanding why changing the width of the rectangle with set x and y of starting point changes starting point as well while running. It was challenging to fix, yet I found a way to go around it.

Some areas of improvement

  • Adding more sounds. I currently have only one, though, it is used frequently throughout the game when a player catches any item.
  • Developing logic further. This one is particularly interesting for me. It is possible to develop a game from this version that would allow for much more thinking behind connections of game implementation and actual students’ lifestyles.
  • Working more on game design with particular attention to the text. The background image is nice, yet displaying of plain black/white text is unappealing and should be substituted to something more appealing to human’s eye.


Midterm

Overall Concept

Link to Sketch: https://editor.p5js.org/mk7592/full/Q3_SYFuO6

Whenever I’m traveling to someplace new, driving around my hometown, or even walking down a new street, I am always intrigued by that one small,  cozy cafe sitting at the corner of the street. The ones with soft, lo-fi music playing in the background with fairy lights hanging all around. For my midterm, I thought of replicating that thought and creating a similar experience but with one important addition: Interaction. I decided to sway away from making games for once and to try something new that I would enjoy just as much. So I came to the conclusion of making a small but interactive cafe experience in p5.

The whole concept behind my idea is to let the user explore the artwork on their own and immerse themselves in the calm environment of the cafe. The way I would make this work is to add small interactable elements in the cafe like books that the user can read, some wall art that they can view, or a boombox that they can use to change the music. All of these elements will be subtle but noticeable enough to make the user want to interact with them. This way, the user will be able to experience something new in every corner.

I decided to keep the design simple but intuitive. The color scheme would be soft and pastel-like and the overall design of the objects in the canvas would replicate SVG images. The cafe would have a calm and relaxing feel to it with soothing music and close-to-real-life sound effects, such as the sound of opening a door when it is clicked.

Initial wireframes I drew for my project:

Workflow/ Parts that Went Well

  • Switching the user perspective from scene-to-scene. For example, displaying the outside of the cafe at first, and then changing the perspective to view the inside of the cafe when the user clicks on the cafe’s entrance. Creating a separate SceneManager class to handle user interactions and changing the layers of the scene proved to be quite useful in organizing my code because if there was a bug with the layers I knew the problem was somewhere inside the SceneManager class. Updating layer booleans upon mouseclicks and updating the scenes accordingly worked side-by-side:
function mouseClicked() {
  // checking which object the user has clicked on and then displaying the relevant layer

  if (scene.onDoor) {
    console.log("Door clicked!");
    // if yes move inside the cafe
    scene.layer1 = false;
    scene.layer2 = true;

    // start playing the music
    dooropen.play();
    if (canStartMusic) {
      sounds[0].play();
      canStartMusic = false; // to prtevent music playing on top whenever the door is clicked
    }
    currentsound = sounds[0];
    currentsoundIndex = 0;
  }
  if (scene.onSmallBoombox) {
    console.log("boombox clicked!");
    // if yes zoom into boombox
    // layer 1 is already false as we're in layer 2
    scene.layer2 = false;
    scene.layer3 = true;
  }
  • Drawing! Utilizing vector images, Canva, and Procreate on my iPad to design the stuff I wanted. Drawing on the same size as my p5 canvas (100x600px) worked very nicely because I didn’t have to worry a lot about positioning the individual interactive pieces inside the p5 canvas. I did have to create a lot of the same images with small tweaks in them, like highlighting a certain wall art frame with the same background. Had I made separate images for small interactables and then positioned them on the canvas, it would have taken a lot of time.
  • Creating a working boombox. The forward and back buttons were tricky to implement because at first, I didn’t realize I had to first check if the music was playing or not and pause it if it was otherwise the next track would play on top of the previous one. Also, simply modding over the list of songs wasn’t enough to switch back and forth between the tracks. There was this little bug that I spent a lot of time on and it happened when we were at the first song in the list and pressed the back button. It should have switched to the last song on the list but instead, it was playing another song in the list. Turns out, it was going on a negative index which was then throwing an out-of-bounds error or playing the wrong song. Separating out the zero index condition solved this issue:
if (scene.onBackButton) {
  // play the previous song
  console.log("back clicked!");
  // same as in next sound but the only difference is we have to take care of index 0
  if (currentsound.isPlaying()) {
    currentsound.pause(); // if the current sound is playing, pause it first
    if (currentsoundIndex == 0) {
      sounds[sounds.length - 1].play(); // if we're at index 0, play the last song in the list
      currentsoundIndex = sounds.length - 1;
      currentsound = sounds[currentsoundIndex];
    } else {
      sounds[(currentsoundIndex - 1) % sounds.length].play(); // otherwise play the previous one
      currentsoundIndex = (currentsoundIndex - 1) % sounds.length;
      currentsound = sounds[currentsoundIndex];
    }
  } else if (currentsound.isPaused) {
    // if it's paused already, repaet the steps without the pausing step
    if (currentsoundIndex == 0) {
      sounds[sounds.length - 1].play();
      currentsoundIndex = sounds.length - 1;
      currentsound = sounds[currentsoundIndex];
    } else {
      sounds[(currentsoundIndex - 1) % sounds.length].play();
      currentsoundIndex = (currentsoundIndex - 1) % sounds.length;
      currentsound = sounds[currentsoundIndex];
    }
  }
}
  • Embedding a previous project (my Japanese tree) inside this project. I did this as a little surprise when the user clicks on one of the frames that looks like a purple tree. It takes the user to a Japanese tree that I made for another project. While doing user testing, everyone really admired this little surprise.
  • I tried to pay special attention to small things like hovering over the door creates a knocking sound but it doesn’t repeat as you’re hovering over it. It will only knock again if you move the cursor out of the door and back on it again. Only playing the initial music when the first time the door is opened and not every time since that would play the music on top of the one that’s already playing: another thing I found on user testing.
let canKnock = true; // to prevent continuous knocking while on door
let canStartMusic = true; // to prevent music playing on top whenever we enter
...
// inside the display() function of the SceneManager class
    //  playing knocking sound when mouse is over the door
    if (this.onDoor) {
      if (!knocking.isPlaying() && canKnock) {
        console.log("inside if");
        knocking.play();
        canKnock = false; // so that we don't repeatedly knock while the mouse hovers over the door
      }
    } else if (!this.onDoor) {
      // making it true back again since we moved the mouse away from the door
      canKnock = true;
    }
  • Switching content inside the books on the shelf. Positioning the text inside the book’s area was somehow a real hassle, eventually, I had to tweak the position till it fit the area of the book I wanted. Especially since the quotes were of varying lengths. I made the quote file myself using my favorite ones and separated them from author names using semicolons. Although this was a bit time-consuming because I had to find enough quotes to make it seem randomized and too repetitive. This was so that I could make the experience more personalized and so that I could add more quotes in the future.

Areas for Improvement

  • I thought about adding an instruction set to let the user know what they’re supposed to do. I’m still a bit conflicted on this idea because the project was meant to be explored by the user as an interactive art piece that would be filled with little surprises. However, having a guide does prove useful to some users. I could make the cafe menu interactable and turn it into an instruction guide inside the cafe, but I think the experience is simple enough for the user to understand for now.
  • A better way to detect clicking on images? I compared mousePos with the coordinates of my objects which was a hassle, but I couldn’t find anything concrete that would help me detect hovers/mouseclicks on images very easily on p5. Then again, some of the images have a transparent background around them which I don’t want to include while detecting mouse interactions, so maybe working with coordinates was in fact the way to go?
  • Adding more interactions with coffee, having the user brew some using a machine. What’s a cafe experience without coffee? I wished to add some features that would let the user play with a coffee machine, but I was going off on a tangent by starting to implement a game using that, which I decided to call off at the end due to time constraints. I would love to add this to my cafe in the future though.

Midterm

Sketch link

Try the experience out for yourself here.

It’s highly recommended to play it through once or twice before reading onwards.

Concept

I wanted to create a short retro game inspired by the original The Legend of Zelda game. Simultaneously I wanted to make the player question what it means to attack and kill digital characters in a game. In the majority of games, the player has to or can choose to kill other characters or enemies in the game, and these deaths are very simple, in that the killed character disappears or stops moving, after which the player can completely forget about them forever. My game is a subversion of that.

The game is intended to be played through in two main ways: without killing anyone, or by killing everyone. In order to not kill anyone, the player can try to lure the enemies and run around them. Also, the dash mechanic (activated by pressing E) should make this easier. In order to kill everyone, the player has to attack them with their sword. After the death, a few things happen which can be described as unsettling: the screen flashes in black and white for a second, the music tones down in pitch, a pool of blood appears where the enemy died, and a ghost of the enemy starts following the player. These things are meant to encourage the player to continue playing in one of two ways: either avoiding to kill any future enemies, or killing everything, pushed by their curiosity of what would happen next.

Also, the ending screen changes depending on how many kills the player has, and subtly encourages the player to do another play-through.

High-level project overview

The project uses the Entity-Component system to structure things in a way that allows easily adding new features and content. My GameEngine class manages several “scenes”, with one currently active scene at any moment. At game start, the Menu scene is active, which just shows the title screen and waits for user input to start the game. Afterwards there is a Play scene which loads the level and plays it. Finally, once the level is completed, an End scene shows the end screen and allows going back to the menu.

At each frame, the GameEngines’s update function is called, which calls the currently active scene’s update function, and then draws things to the screen.

// GameEngine update function
update() {
  if (!this.running || this.sceneMap.size == 0) return;
  const currentScene = this.sceneMap.get(this.currentSceneName);
  currentScene.update();
  currentScene.sRender();
}

// ...
// bunch of code
// ...

// Scene_Play update function
update() {
  this.entityManager.update();

  if (this.paused) {
  } else {
    this.sAI();
    this.sDash();
    this.sMovement();
    this.sStatus();
    this.sAttack();
    this.sCollision();
    this.sOwnership();
    this.sScriptedEvents();
    this.sAnimation();
    this.sCamera();
  }

  this.currentFrame++;
}

Here we can see the main concepts of the Entity-Component system. The logic of the game is divided into several “systems”, which are just functions that do all the work.

What does Entity mean? I do not create separate classes for each different “thing” in the game. In other words, there is no Player class, Enemy class, Tile class, etc. Instead, I have a generic Entity class:

class Entity {
  constructor(id, tag) {
    this.id = id;
    this.tag = tag;
    this.active = true;
    this.c = new ComponentList();
  }

  destroy() {
    this.active = false;
  }
}

Here is the definition of ComponentList:

class ComponentList {
  // A list of components that every entity can have, although they can be null.
  constructor() {
    this.animation = null;
    this.transform = null;
    this.bbox = null;
    this.input = null;
    this.state = null;
    this.lifespan = null;
    this.followPlayer = null;
    this.patrol = null;
    this.health = null;
    this.damage = null;
    this.invincibility = null;
    this.keys = null;
    this.owner = null;
    this.message = null;
    this.trigger = null;
  }
}

To each entity, I add components as I see fit, and the systems above handle things based on which components an entity has. For example: everything that I plan to draw to the screen (the player, enemies, tiles) has an Animation component, which is explained in my Midterm progress blog post. Everything that will have a position, velocity, etc., will have a transform component. Everything that will interact with other things (i.e. collision) will have a bounding box component. Everything that is supposed to have health has a Health component. Everything that is supposed to do damage has a Damage component. And so on.

I’m really happy with my decision to structure things in this way, because after I set things up, it was very straightforward to make changes and add new content. However, this was one of the biggest challenges of the project, and it took a long time to implement.

Another big challenging part for me included figuring out how to create, save, and load the level, which led to me to creating a python script which probably saved me several hours of menial work.

Another thing I’m happy about are the effects that happen when an enemy is killed. I experimented with various ways to manipulate the pixels on the screen. I turn the screen to black and white immediately after an enemy’s death. I also wanted to add a greyscale/desaturation effect which increases in intensity as more enemies are killed, and it looked really good, but unfortunately Javascript is very slow and the game became unplayable, even by just scanning the pixels array from p5 once a frame. In terms of sound, after a kill, the pitch goes up for a second, and then goes down to lower than before.

Bonus screenshots

Room 2, normal view.
Room 2, debug view. Collision boxes and enemy line of sight are visible.

To enable debug view, uncomment the line:

else if (key == "c") this.drawCollision = !this.drawCollision;

And press “c” while in-game.

Reflection

Areas of improvement include the content of the level and the unsettling/horror effects. Details of the level can be improved, such as adding more rooms, more enemy types, more decorations, and so on. The more this looks like a real game, the better the delivery of the second, hidden part of it. Also, many more horror effects can be added. Although outside of the scope of this project, one could add a hidden final boss or obstacle that only appears if the player has chosen to kill all enemies they encounter. This could further distinguish and solidify the two routes the game is intended to be played through.

Midterm – Ghostly Pong


Concept

My midterm project, which is called Ghostly Pong, is similar to the Ping Pong game but instead of 1 disk the players will play with 2, and the disks will keep periodically disappearing and reappearing, just like a ghost.

After hearing some valuable feedback during the class on my midterm progress, I decided to change the concept of my game and make it unique of a kind – something that you can’t play in real life. That was when I came up with the idea of “Ghostly Pong” – a Pong game with a disappearing disk. Furthermore, another special feature that I incorporated into my game which is not present in traditional Pong game is the idea of playing with 2 disks simultaneously.

Game features

  • Each player will have a paddle and an individual score counter
  • Players must hit the disk with their corresponding paddles, if they miss the disk, their opponents will score a point
  • Players can move the paddle only vertically (along the initially specified y-axis)
  • Paddles will be in rectangular shape, the disc will be in circular shape
  • The control key for the player 1 will be “W” and “S” keys, for the player 2 – “UP” and “DOWN” keys
  • The first player to score 10 points wins


Game design

In my code, I created different classes for Disk, Paddle, and Game objects. Each of these classes contains corresponding functions that aim at displaying the object, updating the coordinates, making the object move, and perform other features unique to the object. Every time a new game starts, new instances of these objects would be created.

Also, my game consists of 4 stages: Welcome page, Instructions page, Game, Game Over page. The draw() function will draw will display different screens based on the stage we’re in. Transitions from one stage to another is usually handled by the mouse click.

//display for a welcome page
function welcomePageDisplay(){
    image(bgWelcome, 0, 0, RES_W, RES_H);
    
    //restore default alignment modes
    rectMode(CORNER)
    textAlign(LEFT)
  
    fill(255)
    textFont("Lakki Reddy", 25) 
    let msg1 = "Welcome to the"
    
    //place all the text in the center of the screen
    let tWidth1 = textWidth(msg1)
    text(msg1, RES_W / 2 - (tWidth1 / 2), RES_H / 9)
  
    textFont("Comforter Brush",60);
    let msg2 = "Ghostly Pong Game"
    let tWidth2 = textWidth(msg2)
    text(msg2, RES_W / 2 - (tWidth2 / 2), RES_H / 4)
  
    textFont("Lakki Reddy",15) 
    let msg3 = "Click anywhere to continue to instructions page"
    let tWidth3 = textWidth(msg3)
    text(msg3, RES_W / 2 - (tWidth3 / 2), 10*RES_H / 11)

}

There are two separate functions for updating the screen when the player scores a goal or when the game is over: continueGame() get called when the disk enters one of the goals, hence in this function I create a new instances of only Disk objects. In the function restartGame(), I create a new instance of the whole Game, which in turn automatically creates new instances of Disk and Paddle objects.

The game will always have a background music, which will also change based on the game theme the user chooses. Moreover, the collision of the disk and the paddle, as well as the goals will be accompanied by different corresponding sounds (this can make the game a bit easier by giving some hints about the location of the disk when it disappears from screen).

P.S. For all the sound and images I used, I created a separate text file called “links” with the links to the websites from where I took those elements.

Problems I ran into

In terms of technical side, the most difficult and time-consuming part of this project was writing the code for checking the collision the paddle with the disk and making it bounce off as in the real life. In order to achieve this goal, I decided to rely on the physics’ law of collision: when the disk hits the surface, it will bounce with the same speed as before in the opposite direction(conservation of impulse) and it will also bounce off with the same angle (angle of incidence = angle of reflection). After a few trials and error , I succeeded in implementing this collision check and bouncing correctly.

The below code is where I implemented this logical check.

//Code for managing Disk bouncing when it touches paddles 
function Disk_Paddle_Contact(paddle, disk){
        
        //check whether the disk contacted the left paddle
        if ((disk.disk_xc - disk.disk_w/2 < paddle.px + paddle.pw/2) && (disk.disk_yc + disk.disk_h/2 > paddle.py - paddle.ph/2) && (disk.disk_yc - disk.disk_h/2 < paddle.py + paddle.ph/2)){
            if(disk.disk_speed_x < 0){
              
                //play the collision sound when disk touches the paddle
                collisionSound.play()
              
                //print(paddle.px,paddle.py)
                disk.disk_speed_x = - disk.disk_speed_x
            }
        }      
        //check whether the disk contacted the right paddle      
        else if ((disk.disk_xc + disk.disk_w/2 > paddle.pxr - paddle.pw/2) && (disk.disk_yc + disk.disk_h/2 > paddle.pyr - paddle.ph/2) && (disk.disk_yc - disk.disk_h/2 < paddle.pyr + paddle.ph/2)){
            if(disk.disk_speed_x > 0){
              
              //play the collision sound when disk touches the paddle
                collisionSound.play()
              
              //print(paddle.pxr,paddle.pyr)
              disk.disk_speed_x = - disk.disk_speed_x
        
            }
        }   
}
//Code for managing Disk bouncing when it touches boundaries 
    Disk_bouncing(){
        //this if statement will be executed if the disk touches right-side boundaries of the table
        if(this.disk_xc + this.disk_w/2 > RES_W){
          
          //this indicates, player 2 missed the disk, so play 1 scores one point
          score_player1 += 1
          goalSound.play()
          continueGame() 
        }
                
         //this if statement will be executed if the disk touches left-side boundaries of the table       
        else if(this.disk_xc - this.disk_w/2 < 0){
          
           //this indicates, player 1 missed the disk, so play 2 scores one point
           score_player2 += 1
           goalSound.play()
           continueGame() 
        }
  
       
        //this if statement will be executed if the disk touches upper or lower boundaries of the table
        if(this.disk_yc + this.disk_h/2 > RES_H || this.disk_yc - this.disk_h/2 < 0){
            if(RES_H/2 + 100 < this.disk_yc  || this.disk_yc < RES_H/2 - 100){
                this.disk_speed_y = - this.disk_speed_y
            }   
        }
      
        this.disk_xc = this.disk_xc + this.disk_speed_x
        this.disk_yc = this.disk_yc + this.disk_speed_y 

     }
}

What I’m particularly proud of

I’m proud of the good technical decision to create different classes for each of the Disk and Paddle objects, as this allowed me to easily create new instances of them, independently of each other, later in the game and to write a separate function on a global scope called ” Disk_Paddle_Contact(paddle, disk)” which takes instances of those classes and calculates whether there was a contact. I’m also proud of the good game design and the designs of the Welcome and Game Over pages.

Future improvements

Some people may find it hard to hit the disk as it constantly keeps disappearing. Therefore I decided to add some sound stimuli in terms of the collision sound and goal sound to help the user recognize when he/she scores a goal. One of the suggestions for future improvements would be making the paddles blink when the disk is nearby, thus sending some sort of a “hint” to the player of where the disk is located.

Another possible suggestion would be adding a volume slider for the game_display(), so that the user could control the intensity of a background music, and make it lower if it is too loud.

Midterm Assignment – Wordlaga!

Concept

As soon as I heard our midterm assignment was to make a game, I had a galaga in mind because I knew that would be challenging to make yet so fun to both make and play it. Plus I love galaga, it’s one my favorite classic games. However, for the purpose of this assignment, I came up with my own variation of the galaga game, the wordlaga.

Wordlaga is a game where instead of the galaga’s bug enemies, I had a set of alphabets that form a word as the enemies. Players, as galaga, must shoot down the letterin the correct order that forms the target word. If the enemy collides with player or if player shoots the wrong letter, game will be over. Player can move the galaga left and right using arrow keys and shoot using the up arrow key to shoot down the enemy. The goal of the game is shoot down as many words as you can and achieve the highest score possible, or finish the game by emptying the preloaded word bank… if you can.

I came up with this idea while having a conversation with a friend about educational games and I remembered that I mostly played/enjoyed galaga when I was young. Since galaga is such a simple game, why not recreate it for a somewhat educational purpose where young children can learn words by shooting down the letter that form the word in correct order? Thus, wordlaga was created.

Code

This 400 lines worth of coding took hours of debugging and consists of many parts that I am proud of. The two particular parts I would like to mention where one is a mechanism that I am proud for and one that caused me a mind-splitting headache trying to make it work. The proud part of my code is the enemy-bullet collision detection.

for(let i = 0; i < enemyArr.length; i++){
    enemyArr[i].display();
    enemyArr[i].updateVel(player);
    for(let j = 0; j < galagaBulletFired.length; j++){
      if(enemyArr[i].checkHit(galagaBulletFired[j])){
        //if player didn't hit the right word, game is over
        if(enemyArr[i].ascii + 97 != correctAnswer[count]){
          wrongChoiceSound.play();
          gameOver = true;
        }
        else{
          //for each enemy killed correctly, player gets 100 score
          destroyedEnemyArr.push(i);
          score += 100;
          enemyKillSound.play();
          usedBulletArr.push(j);
          count++;
        }
      }
      
      //if the bullets leave the screen, elliminate them
      if(galagaBulletFired[j].position.y < -20)
        galagaBulletFired.splice(usedBulletArr[j],1)
    }
    //if player collides with enemy game is over
    if(enemyArr[i].collisionDetection(player)){
      explosionSound.play();
      gameOver = true;
    }
  }

In this code, I have a nested for loop where one iterates through the array that contains the enemy instances and the the nested loop iterates through the array of bullets fired. For each each enemy, if the enemy instance returns true for a simple collision detection, then the index of this instance will be recorded in a separate array. The enemy instance array will be iterated again after the check for the collision, where it will be checked if the index stored earlier matches an instance. If it does, then that element will be spliced. This collision also checks the content of the enemy instance and if the wrong letter is shot down, the player will lose the game. I’m particularly proud of this piece of code because while it was a bit challenging to figure out how to destroy enemies when they are shot down, I came up with this solution relatively quickly and it worked right away in few attempts.

Now for the code that caused me anger equivalent to the consumption of mint chocolate,

if(frameCount % (310 - 10 * stageLvl) == 0){
  moveEnemy(enemyArr, int(random(0, enemyArr.length)))
}

...

function moveEnemy(enemyArr, enemyNum){
  enemyArr[enemyNum].movement(player); 
}

...

//helper function for enemy movement. 
  updateVel(player){
    //if this enemy is chosen to move, it will start moving towards the player by the player position passed
    //the speed of the enemy moving will be based on the stage level
    if(this.isMoving){
      if(this.position.y < 400){
        let distanceBetween = player.position.x - this.position.x;
        this.velX = distanceBetween * 0.01;
        this.velY = enemySpeed;
      }
      //if the enemy went passed the player and is off the screen, make it return to the top of the screen
      else{
        this.position.y = -150;
      }
    }
  }

...

movement(player){
  this.isMoving = true;
  this.updateVel(player);
}

...

  //if the enemy instance is not called to move, its velocity is fixed 0, but if it is, display will update the enemy's position
  display(){
    if(!this.isMoving && this.position.y == 75){
      this.velY = 0;
    }
    this.position.x += this.velX;
    this.position.y += this.velY;
    image(sprite[this.ascii], this.position.x - enemySize/2, this.position.y - enemySize/2, enemySize, enemySize);
  }
}

This code deals with the movement mechanism of the enemy. In wordlaga, the enemy alphabet, after some time, will move towards the player and try to collide with them. This particular function makes that happen where after some pass in framecount, a random enemy from the array of instances will specifically move towards the player, and return to the top of the screen after it misses the player and goes out of the screen. Each step of making this was so troublesome because satisfying a condition for one of the said functions became the cause for a bug for another. For example, in order for the enemy to track the player position, the movement function must be kept called in the draw function since the player position will be constantly updated. However, if the movement function is kept called in the draw function, all the enemies continuously started to move instead of one by one. This problem was fixed by separating the function that called for movement and actually updating the enemy position. The time restriction in calling this function periodically was done by using the frameCount and modulo division. After a total full day worth of time of debugging, I have reached this stage of this code where it works. Honestly I at this point I am not even proud of this code I am just thankful that it works.

Areas for Improvements

While I am satisfied with my finished product, I can definitely see some potential improvements for this game. First of all, there could be a different stage design where the number of letters could increase as the stage level progresses or having a multiple life system where the player gets three lives instead of just one. I could also add the mechanism of enemy shooting bullets at the player to make the game more interesting or add explosion animation to make the game more visually appealing. I could think of couple other minor improvements to perfect this game, but frankly I need more time to be able to make these improvements since I was sick the past week and took a toll in preparation time. Also, while it might sound easy to make these improvements, we never know what kind of headache causing bugs could occur. This is actually the lesson I learned from this project while dealing with the enemy movement function bugs: what I might consider to be simple implementation could be very difficult for the computer to understand. Overall I had fun making this whole project and hopefully one day I’ll come back to improve it.

Week 7: Midterm Project – Endure.io

Concept

You and your friend are space travellers who roam around various planets just for the fun of it. Racing against each other as you explore few planets is a hobby for both of you. One day, however, your spaceship malfunctions and crashes into a nearby planet. Your friend was so far ahead on the race that s/he does not realise you have crashed. You do not get injured in the crash but your spaceship is damage and all the equipments in the spaceship, including your laser gun.

An entire alien civilisation has seen you crash and perceives you as a threat. They are coming to attack you! Defend yourself with a damaged gun that shoots laser on random directions as you collect resources scattered around the planet to repair your ship and hopefully get back to your friend.

Game Dynamics

This is a simple game with simple dynamics:

  1. The player is movable through the arrow keys.
  2. The aliens/minions are not playable characters but follows the player wherever they go.
  3. Resources and Health Regen spawn in random places

I have made the game as simple as possible so that the player is not overwhelmed with all the functionality possible. This is mainly a time based game where the player needs to survive for the longest period of time and collect about 50 resources to win the game. However there is a catch. The resources spawn every 5 or so seconds and you will only have at most two resources dropped at any given moment. Thus, the player can not wait for all the resources to be dropped then collect it, rather the player constantly needs to move around to collect he resources. This is true for the health regeneration power up as well, however, you can have at most three of these at any given moment on screen.

Code I am proud of

The biggest thing that made working on the code easier was dividing the whole code into various different JS files and having them only focus on certain aspect. For instance, I divided the player, minion and weapon class into different JS files to make debugging and understanding the code easier. This also makes the filing structure logical and effective.

The hardest part of the project when either the laser or the minion were to be deleted from the canvas and the game environment after a collision. The problem is simple; when the laser hits the minion:

  1. The minion has to be deleted
  2. The arrow has to be deleted

Despite the simplicity of the problem, it was not easy to overcome. Let’s just look at minions for now. I had to figure out:

  1. what deleting a minion from the game environment meant.
  2. which minion to delete, and how do I know which is the minion in the array that I had to delete

For the first problem, I realised that deleting simply meant that I had to remove the minion from the minions array. This would simply not display a minion object, hence removing it entirely. The next problem I ran into right after implementing the deletion code was that: as the player moves around, the minion that was deleted was not the ones that the laser hit. The deletion of minions appeared to be random. I had my eureka moment, when I realised I had to specify an id for each minion so that I could identify which laser hit (the lasers are also id‘ed) which minion. This way I could delete the specific minion and not break the code.

I decided to id the objects using their indices in the array. This meant that I had to decrease the id of the objects of the subsequent objects in their arrays by 1. This made id reusable and limited to the number of minions in any given instance.

detectLaserHit() {
    for (let i = 0; i < lasers.length; i++) {
      let laser_pos = lasers[i].getLaserPos();
      
      let d = dist(laser_pos.x, laser_pos.y, this.pos.x, this.pos.y);
      
      if (d < this.radius) {

        this.health--;
        if (this.health <= 0) {
          // Notice we delete the minion according to their id and reset the id in the following lines
          minions.splice(this.id, 1);

          // since the minion id is linked to its index in the array, we are decreasing the id of every minion that comes after the minion we killed in the array.
          for (let i = this.id; i < minions.length; i++) {
            minions[i].id -= 1;
          }
        }
        
        lasers[i].sturdiness--; 
        if (lasers[i].sturdiness <= 0) {
          lasers.splice(i, 1);
        }
      }
    }
  }

Problems Encountered:

There are various problems I ran into and here is a list of them:

Note: italics means that I was able to solve them, while bolded text mean I was not.

  1. Sound: I had an error while running the code. The error told me that play() was being called when a new sound file was being loaded. It appeared it was an error with createAudio, which I swapped out with loadSound. Another problem was that my sound was clipping because I put my play function inside the draw function, which was calling the play function multiple times. I had to take play the sound in setup function.
  2. Event called more than once: When suppose we are at time 10 seconds in the game, at this time I call the upgrade_weapons function. This was however being called multiple times in the course of the 10th second. So, I had to use a boolean flag to make sure I was only calling the functions once.
    if (endurance_time % 10 == 0 && upgrade_flipper) {
      upgrade_weapons();
      upgrade_minions();
      drop_health_power_up();
    }
    // stop upgrading when upgraded once
    // flipping the flippler to true once the second has passed.
    if (endurance_time % 10 == 1) {
      upgrade_flipper = true;
    }
  3. Minions movement: The minions move towards the player in a trivial fashion, just changing direction straight towards the player. This creates a line of minions in the x-axis and y-axis relative to the player. I tried adding in randomness to their movement but this. I did randomise the speeds of every minion to minimise this effect, but it is still persistent.

Future improvements:

There are a lot of thing to improve on this game. Firstly the game dynamics itself. I could add in different levels and improve the weapon in different level. I could also implement a controllable weapon where you can roughly aim where to hit (with enough resources, you can repair your weapon). Another improvement could be adding in a boss alien when killed would give me tons of resources. This game could take a multiplayer approach, where my friend finds me and helps me escape the planet.

Midterm Final Project:

Final Project:

Idea Refinement:

Since my Midterm Progress report, these were the things I mentioned I still had to do

  • Create the food items and their specific data
  • I have to animate Luffy’s movements
  • I have to work on collision detection with Luffy and the Food objects and the Platform objects.
  • Add a time countdown
  • Create an ending screen (depending on whether the user wins/loses)
  • Allow the user to restart or go back to the Main Menu.

Initially, my game idea was to have a 1 min timer and you had to feed Luffy by keeping his hunger bar above 0. If you fail to do so within that 1 min, you lose, if you can, then you win. However, I did not like this idea so much because it felt like you could easily defeat every difficulty of the game easily and then that’s it, you’re officially done with the game. No need to play anymore.

Hence, I decided to change the structure of my game from this idea to a High-score type game. So essentially in my new idea, there is no more time countdown. There’s still a depleting hunger bar and the goal is to keep feeding luffy by jumping around and eating different kinds of food. Depending on the food item, the more points you get and you gotta try and get the highest possible score you can. The same difficulty settings apply, the greater the difficulty, the faster the hunger bar depletes.

I thought this new idea for the game was so much better because then it brings that addictive nature of “I want to beat my high-score” and allows the user to actually feel rewarded after getting a better score, rather than simply feeding Luffy for 1 min.

Project Structure:

For my code, I decided to implement a screen state system. So, I would have variables for different screen states whether it was for the Main Menu, Instruction Screen, Difficulty Screen, Game Screen or End Screen. Depending on what the user clicks on, it will direct them to that particular screen. This way, my draw function is very simple to understand as it just calls one function depending on the screen state.

For my project structure, I organized all of my coding files in a very specific way. For instance, I have a .js file for:

  • The main skecth.js = contains the setup() and draw() functions
  • A screens.js = contains the functions to display all the types of screens depending on the screen state.
  • A game.js = contains all the necessary functions related to the actual game (game settings)
  • A classes.js = contains all the classes that are used in my code. This includes the Luffy class, Food class, Platform class.

Sections i’m proud of:

I would say i’m particularly very proud of Luffy’s animations because that was the part I worked the hardest on and looks the cleanest in my opinion.

So for Luffy’s movements, I had to get a sprite sheet from the internet, and I found one that I really liked:

However the challenge with this sprite sheet was that it wasn’t evenly divided, so I had to manually divide the sheet myself into four and load those into the code as 4 seperate sprite sheets. Then since they have different widths, I had to divide them equally depending on their width to which some of them weren’t, hence I had to resplit the frames and resize the sprites several times which was quite annoying but at the end I got it to work.

Eventually, I managed to create a test code which works based on the arrow keys. So if you were to press RIGHT_ARROW, then the Running Right sprites would start cycling and so on depending on the directions. Additionally, if no keys were pressed, I would cycle through Luffy’s standing movements which make it seem more realistic.

I also had to animate the jump feature which was quite tricky to think of. After watching certain videos, I realized I would have to incorporate a sort of “gravity”, hence:

jump_settings() {
    this.velocity += this.gravity;
    this.y += this.velocity;
    
    //This ensures that Luffy is always above this.platform (including the ground which is what it is initialized to). Depending on what he's standing on, this.platform will change. 
    if(this.y > this.level) {
      this.velocity = 0;
      this.y = this.level;

      if(keyIsDown(LEFT_ARROW) && keyIsDown(UP_ARROW)) {
        this.velocity += this.boost;
        Jump_Sound.play();
      }

      else if(keyIsDown(UP_ARROW) && keyIsDown(RIGHT_ARROW)) {
        this.velocity += this.boost;
        Jump_Sound.play();
      }

      else if(keyIsDown(UP_ARROW)) {
        this.velocity += this.boost;
        Jump_Sound.play();
      }
    }
  }

This is specifically a function taken from Luffy’s jump class which monitors his jump settings. To essentially I have gravity set to some value (0.3). This will keep adding onto Luffy’s y coordinate to keep him grounded. If he goes beyond a certain y level (aka the ground), that will push him up.

Essentially, if any of the up arrow combinations are pressed, it would give Luffy a jump boost which is some value (10) and this is like how high luffy jumps. We add that to Luffy’s velocity which is essentially like the speed at which he is jumping and then at a certain peak point, since gravity is constantly pulling Luffy down, it will overcome the velocity value and drag him back down.

So overall, in my test code I was able to create this (controllable with the arrow keys):

Overall, i’m very happy with how Luffy’s animations turned out. It honestly feels like a real game which is so cool.

Other additions (Interactivity):

For the food class, I essentially added different 5 different foods, each of which having different “hunger points”:

  • Bone Meat = 200hp (Luffy’s Favourite)
  • Fried Rice = 150hp
  • Cake = 100hp
  • Vegetables = 50hp
  • Devil Fruit = -50hp.

I thought it would be cool to add a food item that would deplete his hunger even further to make it more challenging. Plus it adds to the theme of the show because Devil Fruits make you weaker in the water.

So the food items would spawn only on platforms so I had to make sure that they interact with the Platform class by retrieving its coordinates and spawning them on it. I would spawn them at different rates depending on the difficulty, so if it’s harder, more food should spawn quickly to keep up with the depleting hunger bar.

For the platform class, this was the most challenging because I had to make sure the collision detection for all platforms worked for Luffy and honestly this was the most challenging part.

Challenging Bits and Improvements:

So for the Platform class, I added several platforms onto the screen and I also decided to add a moving platform to make it more interesting. Some of the problems I ran into were with regards to Luffy landing on the platform or his head hiting the platform. It was tricky because as Luffy moved, his coordinates did not exactly match with the coordinates of the platform. Since the platform coordinates are in integers and Luffy’s are in floating points, it never equaled each other.

This was quite challenging, so to fix this, I added a range. So, if Luffy’s coordinates were somewhere in the very small range of the platforms coordinates, then he should be able to stand on it.

It was also difficult to know which platform Luffy was standing on because although Luffy would be in the specific range of being above a platform, it’s difficult to know which platform exactly because the for loop is cycling through all platforms. Hence, to fix this, I saved the x coordinate of the platform Luffy is currently standing on and kept checking, if he left that platform, then make gravity act on him to the Ground.

The moving platform was the most annoying to deal with because its x coordinates constantly moved, so I had to create another if statement for that independently to check if Luffy was on it or not.

Here’s the collision function for that:

//This function checks the collision of Luffy with all of the platforms. It checks if his head hits the platforms that he stays under it. If his feet touch the platform, he will stay on it.
platform_collide(platform, moving_p) {    
  //Checks if Luffy's head hits a platform.
  if(this.y-this.height/2 >= platform.y && this.y-this.height/2 <= platform.y+platform.h && this.x >= platform.x && this.x <= platform.x+platform.w) {
    this.y = (platform.y+platform.h) + this.height/2;
  }
  
  //Checks if Luffy's feet are on the platform.
  if(this.x >= platform.x && this.x <= platform.x+platform.w && this.y+this.height/2 >= platform.y && this.y+this.height/2 <= platform.y+platform.h) {
    this.level = platform.y - this.height/2; //this makes platform y coordinate the new ground
    this.platform_x = platform.x;
    this.platform_w = platform.w;
  }
  
  //This gets the saved platform that Luffy is currently on's x coordinate and width and checks if he is outside the range of the width of the platform. If so, then he will fall to the ground.
  else if(this.x <= this.platform_x || this.x >= this.platform_x+this.platform_w) {
    this.level = Ground;
  }
  
  //This is specifically for the moving platform, since it has constantly changing x coordinates, it has a seperate if statement check. If Luffy is outside the range of its level, he will fall.    
  if((this.x <= moving_p.x || this.x >= moving_p.x+moving_p.w) && this.y+this.height/2 == moving_p.y){
    this.level = Ground;
  }
}

I honestly think there is much room for improvement in this function. Because although it works, it doesn’t seem very elegant to me. Additionally, I haven’t included any collision in terms of Luffy’s sides with any of the platforms, only his head and feet because they were the main ones. Hence, this can definitely be an improvement.

Overall Thoughts:

This was a very long blog post but honestly it’s because I had so much to say. To be honest I don’t even feel like i’ve said everything because there are so many fine details with every single function and class in this game. I felt like I was proud of so many aspects of my code but I only put a few because this would be extremely long then XD.

I think that’s enough to say that I genuinely enjoyed making this code. Gaming has always been a passion of mine and game development is a field i’d love to get in so this entire project was amazing. It’s also why I put so much effort into every little tiny component.

I think the execution of everything is really well organized and the game is very fun and addictive (trust me i’ve played it several times) so I would say that i’m very happy with my midterm project.

The Martian – Midterm Project

The Martian

Sketch link

To play the game in fullscreen click this link -> Click Here to Play the Game

The project code -> Code

Overall Concept

For this Midterm Project I created a game using everything I have learned so far in class. The game is be called “The Martian” and the objective of the game is to guide the Mars Rover through the treacherous terrain of Mars, collecting valuable resources and avoiding hostile alien spaceships and rocks on the surface. The player will have to navigate using keyboard and mouse as they progress through the game. In “The Martian” the player will experience the thrill of driving a Mars Rover on the surface of the red planet. With challenging terrain, hostile aliens, and valuable resources to collect, the game will offer hours of exciting gameplay. The use of p5.js will enable the creation of a visually stunning and engaging game.

The overall concept of this game is a space-themed adventure where the player takes on the role of a NASA satellite specialist who is tasked with rescuing the PERSEVERANCE probe from an alien threat. The game has two modes: collection mode and exploration mode.  Your primary objective is to protect it from any danger by avoiding all the obstacles and enemy UFOs. In pause mode, the obstacles and UFOs will not harm you.

Implementation and Design

How this project works

In the game you are a satellite specialist at NASA, and the probe PERSEVERANCE, is being chased by an alien! It’s your task to save it! Avoid the stones and enemy UFO’s to save it! You will have to use the Space and Down keys to control the rover. I also decided to implement two different modes to the game:

  1. In collection mode- Collecting a Uranium atom is worth 5 points and collecting a water is worth 10 points. While collecting points, remember to dodge the UFO’s and stones on the surface of the red planet.
  2. In exploration mode crossing certain distance automatically gives 1 point. All you have to do is to dodge the UFO’s and stones on the surface of the red planet.

Technical Design/Good technical decisions

The starting screen of the game has three buttons:

  1. Mode button in which you can choose between Collection and Exploration modes according to your preference.
  2. Start button to start the game.
  3. Rules button which gives precise instructions on how to play and control the game.

This creates a user friendly experience where users can easily manage the different aspects of the game from the main page.

The technical decision I am particularly proud of is implementing the two different modes of the game. I initially thought that it would be only Collection mode where you can earn points by collecting really scientifically valuable resources like Uranium atom and Water in Mars. But after I asked my friends for user testing one of them gave me a feedback that not every user wants to collect something to play the game. Considering this feedback I also realized that in the games like Geometry Dash the main goal was to survive not to collect the resources. And this fits the logic because whats the point of your resources if you are dead?! That way the Exploration mode was made.

Collection mode:

Exploration mode:

Code for the two modes:

switch (mode) {
      case "exploration" : score+=0.01;
                      score$=Math.round(score);
                      water.visible=false;
                      atom.visible=false;
                      break;
      case "collection" : water.velocityX=-4;
                          atom.velocityX=-4;
                          if(rover.isTouching(water)) {
                              score+=10;
                              score$=score;
                              water.x=width+Math.round(random(1000,1400));
                              water.y=Math.round(random(rover.y,height-300));
                              jump.play();
                          }
                          if(rover.isTouching(atom)) {
                              score+=5;
                              score$=score;
                              atom.x=width+Math.round(random(299,499));
                              atom.y=Math.round(random(rover.y,height-300));
                              jump.play();
                          }
                          water.visible=true;
                          atom.visible=true;
                          break;
  }

Another technical design I am proud of is the collision detection algorithm/logic. The idea is to detect the collision between Mars Rover and other objects like valuable resources and hostile alien spaceships or rocks. I  came up with an algorithm to distinguish between these various collisions with different objects. Because if the Mars Rover collides with valuable resources the Score should increase and if it collides with the rock or alien spaceship it should end the game and display the restart button.

case "collection" : water.velocityX=-4;
                    atom.velocityX=-4;
                    if(rover.isTouching(water)) {
                        score+=10;
                        score$=score;
                        water.x=width+Math.round(random(1000,1400));
                        water.y=Math.round(random(rover.y,height-300));
                        jump.play();
                    }
                    if(rover.isTouching(atom)) {
                        score+=5;
                        score$=score;
                        atom.x=width+Math.round(random(299,499));
                        atom.y=Math.round(random(rover.y,height-300));
                        jump.play();
                    }
                    water.visible=true;
                    atom.visible=true;
                    break;

else if(touches[0].y<restart.position.y+50&&touches[0].y>restart.position.y-50) {
    if(touches[0].x<restart.position.x+50&&touches[0].x>restart.position.x-50) {
        state="start";
        rover.visible=true;

        water.x=width+Math.round(random(1000,1400));
        water.y=Math.round(random(rover.y,height-300));

        atom.x=width+Math.round(random(299,499));
        atom.y=Math.round(random(rover.y,height-300));

        score=0;

        switchPBtn.visible=false;
        restart.visible=false;
        ufo$.destroyEach();

        click.play();

        frameCount=0;
    }
}
if(water.x==0) {
           water.x=width+Math.round(random(1000,1400));
           water.y=Math.round(random(rover.y,height-300));
       }
if(atom.x==0) {
           atom.x=width+Math.round(random(299,499));
           atom.y=Math.round(random(rover.y,height-300));
       }

Good Game Design

I paid particular attention to my game design elements and UI interface to create the best possible user experience.

Uranium Atom Resource
Water Resouce


Mars Rock
Alien Spaceship

For the User Interface elements and buttons I utilized internet and created some of them using Photoshop tool.

Rules Button
Pause Button
Selection Circle

I am proud of my Pause functionality which not a lot of games of these type have. I think it is essential for the user to have an access to Pause button as he can be busy with other important matter and it would be pity to lose your progress just because of that. Code for Pause Logis:

else if(state=="pause") {

       sd=0;

       rover.velocityY=0;

       atom.velocityX=0;
       water.velocityX=0;
       stone.velocityX=0;
       ufo$.setVelocityXEach(0);

       textSize(20);
       textFont(font);
       fill(rgb(40,99, 235));
       text("Score- " + score$,width/2-30,100);

       restart.visible=true;
       switchPBtn.visible=true;
       switchBtn.visible=false;

       block[0].velocityX=0;
       block[1].velocityX=0;
       block[2].velocityX=0;
       block[3].velocityX=0;
       block[4].velocityX=0;

       block$.velocityXEach=0;
       block$.destroyEach();

       ufo$.velocityXEach=0;
       
       if(touches.length>0) {
           if(touches[0].y<switchPBtn.position.y+50&&touches[0].y>switchPBtn.position.y-50) {
               if(touches[0].x<switchPBtn.position.x+50&&touches[0].x>switchPBtn.position.x-50) {
                   switchPBtn.visible=!true;
                   switchBtn.visible=false;
                   restart.visible=false;

                   block[0].velocityX=-4;
                   block[1].velocityX=-4;
                   block[2].velocityX=-4;
                   block[3].velocityX=-4;
                   block[4].velocityX=-4;

                   click.play();

                   block$.velocityXEach=-4;

                   sd=2;
                   //alert("UP");
               }
           }
           else if(touches[0].y<restart.position.y+50&&touches[0].y>restart.position.y-50) {
               if(touches[0].x<restart.position.x+50&&touches[0].x>restart.position.x-50) {
                   state="start";
                   rover.visible=true;

                   water.x=width+Math.round(random(1000,1400));
                   water.y=Math.round(random(rover.y,height-300));

                   atom.x=width+Math.round(random(299,499));
                   atom.y=Math.round(random(rover.y,height-300));

                   score=0;

                   switchPBtn.visible=false;
                   restart.visible=false;
                   ufo$.destroyEach();

                   click.play();

                   frameCount=0;
               }
           }
       }

Potential Improvements and Challenges

Possible future improvements/ideas enhancing the game’s overall experience:

  • Power-ups can be added to the game to give the player temporary advantages such as invincibility or increased speed. This will make the game more engaging and provide players with a sense of accomplishment.
  • Multiple levels can be included in the game to provide players with different challenges as they progress. Each level can have its own unique obstacles and enemy UFOs, making the game more varied and exciting.
  • Including a high score system in the game can add a sense of competition, encouraging players to try and beat each other’s scores. This will also give players a reason to keep playing and trying to improve their skills.

Challenges

  •  Because I didn’t have any previous background in using sound and animation libraries I have spent quite some time figuring out ways of implementation and tested them extensively.
  • As mentioned in Midterm Progress post  for me the most frightening  or complex part of this midterm project was to implement a collision detection algorithm. I also have to somehow come up with an algorithm to distinguish between these various collisions with different objects. Because if the Mars Rover collides with valuable resources the Score should increase and if it collides with the rock or alien spaceship it should end the game and display the restart button. Luckily it was easier than I expected.
  • Putting different screen views into action and moving between them was a bit challenging for me. Particularly, finding my way back to the Main Page from The End screen without refreshing the sketch took some time to figure out. Eventually, I created a straightforward system that relied on flags to accomplish this.


Midterm Project – Pong (Blindspot Version)

Sketch

Sketch Link: https://editor.p5js.org/swostikpati/full/ShPga9v6_

Inspiration

As a lover of classic arcade games, I have always been fascinated by the simple yet addictive gameplay of Pong. Originally developed in the 1970s by Atari, Pong started as a simple slot machine game before becoming the first commercially successful video game. Its simplicity, accessibility, and fun factor quickly made it a favorite among gamers of all ages.

My inspiration for creating a Pong game on p5.js stemmed from my desire to learn more about game development and to challenge myself to create a game that was both simplistic, visually appealing, and fun to play. Even while doing so, I wanted to add my own creative touch to the game while still retaining its classic feel.

Concept

The concept of the project is simple – to implement the Pong game. But I had to add some unique elements to the game to make it a different experience from the existing pong video games. I thought of revving up the difficulty and consequently the adrenaline rush of the game by adding a “blindspot” in the middle of the screen where the ball disappears and continues to travel in the same trajectory until it appears again from the other side of the blindspot. As the players continue through each rally, the blindspot region keeps increasing and so does the speed of the moving ball making it more and more difficult for both players.

Implementation

The game implementation has two parts to it – the creative process and the technical implementation.

Creative Design

The creative design part of the implementation focuses on the visual aspects of the game, including the graphics, sound effects, animation, and user interface (color choices, font choices, etc).

The game’s colors are kept minimal with almost all the elements switching between absolute black and white.

There are three screens in total – the Start Screen, the Game Screen, and the End (Game Over) Screen.

The Start screen displays the rules of the game with the least bit of information possible as players generally skip the instructions. The controls are shown on a separate half of the page in order for the players to at least get the most essential information required (as the other parts can soon be figured out intuitively). This screen also features a ball moving around the screen just to give a feel of the game before the user starts playing.

The game screen has a background board with two rectangular paddles, one on each side of the screen, and a ball in the center. For the animation, I added smooth movement to the paddles and the ball to give the game a more polished feel. The ball moves in a straight line until it hits a paddle or wall (the top and bottom walls only), at which point it bounces off at an angle based on where it made contact. When the ball hits either the right or left wall, a point is scored, and the ball resets to the center of the screen. I have also made sure that at the start of every rally, the blindspot is temporarily disabled so that the players are able to view the ball at the center of the screen. As soon as the ball makes contact with a paddle, the blindspot is reactivated and the usual gameplay continues. I added a score tracker on the top of the screen for each player. The score is displayed in a large, bold font that is easy to read.

The final screen is the Game Over screen. This screen displays the player who won with a trophy. It also contains a button that gives the user the option to restart the game. The user doesn’t need to refresh the page for this.

I included several sound effects throughout the game to enrich the user experience. There were different sound effects used for a ball tap against the wall or a paddle, a point score, and game over. The fonts that were used at  different places were carefully thought about. The background images that have been imported into the sketch and used in different screens were designed by me on Canva.

The game was tested several times, with several paddle speeds, ball speeds, ball speed increments, blindspots and blindspot increments to make sure there were no glitches or bugs. All in all, every design decision throughout the game was carefully thought about to enhance the overall user experience of the game.

Technical Design

The technical implementation of the game included designing the switch between game screens, implementing the mechanics of the pong game itself with the enhancements as proposed that included paddle and ball movements, collision detection and response, adding sound effects at particular times, etc.

The entire code was written in an object-oriented fashion with classes of ball and paddles, and several functions were used to increase code reusability and modularity.

The code snippets below are used to implement important functionalities in the game.

Paddle Class

// Paddle class
class Paddle {
  constructor(x, y) {
    //     Stores the position of the paddles
    this.x = x;
    this.y = y;

    //     Flags to define whether the paddles are currently moving or not
    this.up = false;
    this.down = false;
  }

  //   displays the paddles(as rects) based on their x and y positions
  draw() {
    rectMode(CENTER);
    fill(255);
    noStroke();
    rect(this.x, this.y, paddleWidth, paddleHeight);
  }

  //   updates the position of paddles based on their movement
  update() {
    //     paddles move up or down by 10 units based on which key is clicked
    if (this.up) {
      this.y -= paddleSpeed;
    }
    if (this.down) {
      this.y += paddleSpeed;
    }
    this.y = constrain(this.y, paddleHeight / 2, height - paddleHeight / 2);
  }
}

Snippets from Ball Class

update() {
    //game over condition
    if (rightScore >= maxScore || leftScore >= maxScore) {
      gameWinSound.play();
      //       storing the winner
      if (rightScore == maxScore) {
        winner = 1; //Player A won
      } else {
        winner = 0; //Player B won
      }
      // print(winner);
      //       transitioning to the gameover screen
      screenView = 2;
    }

    //     updating current position of the ball
    this.x += this.speedX;
    this.y += this.speedY;

    // check for collisions with paddles
    if (
      this.x - ballSize / 2 <= paddleWidth &&
      this.y >= leftPaddle.y - paddleHeight / 2 &&
      this.y <= leftPaddle.y + paddleHeight / 2
    ) {
      //       plays collision sound
      ballHitSound.play();
      //       increments ball speed in a particular rally
      this.speedX = abs(this.speedX) + ballSpeedInr;
      //       increments the blindspot region - there is an upper limit set as well to prevent it from covering too much of the screen
      blindSpot = Math.min(blindSpotInr + blindSpot, maxBlindSpot);
    }
    
}


// check for scoring - one side
    if (this.x - ballSize / 2 <= 0) {
      //       sound effect when a player scores
      scoreSound.play();

      //       ball is brought back to the center of the screen
      this.x = width / 2;
      this.y = height / 2;

      //       speedX and speedY are reset to the original ball speed
      this.speedX = ballSpeed;
      this.speedY = ballSpeed;

      //       score of the corresponding player is incremented
      rightScore++;

      //       to switch off blindspot just till the game starts
      ballFlag = false;

      //       resetting the blindspot region
      blindSpot = 50;
    }

Screen Switching

function draw() {
  // Switches between game screens based on the variable screenView
  if (0 === screenView) {
    startScreen();
  }
  if (1 === screenView) {
    playScreen();
  }
  if (2 === screenView) {
    endScreen();
  }
}

Event Listeners

// listens for key presses to start motion of paddles
function keyPressed() {
  //   listens for up and down movements by player A using up down arrow keys
  if (keyCode === UP_ARROW) {
    rightPaddle.up = true;
  } else if (keyCode === DOWN_ARROW) {
    rightPaddle.down = true;
  }
  //   listening for up and down movements by player B using "W" and "S" keys
  else if (keyCode === 87) {
    leftPaddle.up = true;
  } else if (keyCode === 83) {
    leftPaddle.down = true;
  }
}

// listens for when the keys are released to stop motion of paddles
function keyReleased() {
  if (keyCode === UP_ARROW) {
    rightPaddle.up = false;
  } else if (keyCode === DOWN_ARROW) {
    rightPaddle.down = false;
  } else if (keyCode === 87) {
    leftPaddle.up = false;
  } else if (keyCode === 83) {
    leftPaddle.down = false;
  }
}

// listens for mouse clicks
function mouseClicked() {
  //   transitions from Start Screen to Game Screen and starts the game
  if (0 === screenView) {
    leftScore = 0;
    rightScore = 0;
    ball.x = width / 2;
    ball.y = height / 2;
    screenView = 1;
  }

  //   transitions from End Screen to Start Screen to help user to restart a game without reloading. This happens on clicking the button on the end screen
  if (
    2 === screenView &&
    mouseX > width / 2 - buttonWidth / 2 &&
    mouseX < width / 2 + buttonWidth / 2 &&
    mouseY > height - 100 - buttonHeight / 2 &&
    mouseY < height - 100 + buttonHeight / 2
  ) {
    screenView = 0;
  }
}

Key Challenges and Solutions

  • Implementing different screen views and navigating around them – It took some time for me to figure out the navigation across different screen views – especially returning back to the “Start Screen” from the “Game over” screen without refreshing the sketch. In the end, I implemented a simple flag-based mechanism to do so.
  • Identifying the paddle and ball speeds, increments, and blindspot regions – If even one among the paddles or the ball moved too slow or too fast, it would take away a lot from the overall user experience of the game. Even the increments in speed and the blindspot region had to be decided on carefully. The game had to be the right amount of “challenging” and stimulating for it to hook the users. Too easy and the users get bored. Too difficult and the users get frustrated. The game had to be the right mix of challenging and rewarding. This might feel like a simple thing of deciding a few numbers but it does have a huge impact on the overall gameplay and user experience. I spent quite some time playing around and extensively testing several mixes of numbers before arriving at the ones used in the final code.
  • Figuring out the Game Mechanics and the collision detection algorithm (the most frightening part) – I had talked about this in my previous post where I shared my progress in the midterm project. This was the most frightening part initially as the game was nothing without these two elements figured out and working perfectly.
  • Integrating more features while still keeping the minimalistic feel intact – It was a challenge to maintain the simple and minimalistic feel to the game intact and at the same time integrate more features into it. The balance was key as I wanted to preserve the game as it has been for ages and still make the experience a completely new one.

Potential Developments

  • Giving the option to the players to add their names in the Start screen rather than going by “Player A” and “Player B”.
  • Integrating a database to store high scores and user accounts. This would allow me to also have a leaderboard in the end that could be fetched based on the data from the database.
  • Adding more elements to the game including game animations during scoring and powerups like freezing the opponent’s paddle for a while or combo points for a rally, etc.
  • Making the blindspot region generate at any random position throughout the screen and making it move will add a new layer of challenge to the game.

Reflections

Throughout the development of this project, I have learned a lot about the process of game design and the intricacies that go into creating a simple yet engaging game. I had to experiment with different approaches and techniques to achieve the desired functionality. I was also able to create an algorithm that worked effectively and provided a satisfying gameplay experience. I made sure to focus both on the technical implementation and the creative design process of developing the game. The experience has been both challenging and rewarding, and I am proud of the final product that I have created.

Screens

Start Screen
Game Screen
Game Over Screen

Midterm Project – Zen Garden

Welcome to Zen Garden, a slow-paced experience where you are fully in charge of planting and growing each plant in the garden. Take a deep breath, enjoy the relaxing music, make butterfly friends and take pride in growing a beautiful garden.

Enjoy the experience for yourself here.

The Concept:

I wanted to create an experience rather than a game, since there is no winning or losing. That goes well with the intention of it being a relaxing experience, one which I and many of my peers need during weeks such as the midterms week. I wanted to create an experience where the user has control of what they plant, where they plant it, how many or few plants they want and at what stages they want to leave the plants at. The user controls how much the plants grow – with there being a final fully grown stage (which the user will be made aware by a celebratory sound).

Implementation:

I mainly used Object Oriented Programming to create this game, with my classes being Plant, Water and Butterfly. Within the Plant class are the different stages of a plant, the Water class is used to create individual droplets of water for watering the plant – and it utilizes a gravity() function to get them moving, and the Butterfly class has sprites and keeps track of where in the screen it is.

As for the other code, I had a few clever implementations which needed to be changed to simpler ones to optimize the code. I have a lot of get() functions and even more display() functions, since each item has its own methods for both of these.

In terms of user interaction, I only utilized mouse pressing and clicking. For all of the gameplay I used mouse pressing – regardless of if the user was pressing and holding (such as when they pick up the seed and hold onto it until they get to the planter), I just found that it worked better that way, and I only started utilizing mouse clicks to add sounds (which came at the end of my coding journey).

I use a lot of images for the graphics, but there are things which are drawn on P5, such as the play button, the clock and the white rectangles.

For the planters, I determined their locations and based on just coordinates I determine how many planters there are and where they are – I keep track of these using arrays. The graphics themselves are just a singular image for the whole thing – I initially coded in each block using loops but decided to optimize the code and removed the loops.

Challenges:

A lot of the challenges I faced was with how heavy my program was getting. I found myself needing to optimize my code and remove any loops which could somehow be avoided (such as the individual plots of land being replaced by one image).

The program is unfortunately still quite heavy because I wanted to utilize so many images and clicks, but other than the computer getting loud, it seems there are no problems reflected on the experience itself. I see it as a good compromise to have an aesthetically pleasing program with a lot of engaging sounds.

Another challenge which I realized too late is that the dimensions of the canvas might be a bit small to look at. A bandaid solution I would recommend if the dimensions bother you is to just zoom in on your browser – since the game graphics are intentionally pixelated, the quality will not be compromised much.

In terms of coding, it was quite challenging balancing events which happen at the same time. The draw() function can be quite tricky, since it loops so fast, I found myself jumping between the draw() function and other functions and utilizing a lot of boolean variables to set conditions and different states. After a lot of trial and error, as well as debugging (my most common line before cleaning up my code was probably console.log()), it all works at the end!