Assignment 3

Concept

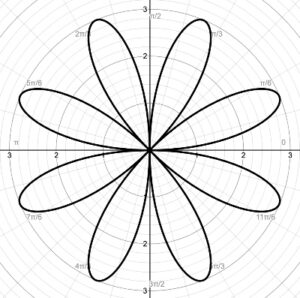
For this assignment, I initially started with the idea of incorporating the polar rose (picture shown below) into the art work. It is a mathematical equation that forms a curve shaped like a flower. With the use of sin and cos, it creates varying number of petals of the flower. However, when I was experimenting with different variables for the number of petals and I chose 4 petals, it resembled more of a butterfly which prompted me to create an artwork about butterflies.

Code

It took me some time to fully understand the noise() function but after getting that sorted, I wanted to make the wings flap. This proved to be quite difficult to understand because I was dealing with two similar codes with different parameters for the upper and lower wings. Through experimenting with x-coordinate and y-coordinate values in the noise function, I was able to achieve the flapping effect by incrementing the y-coordinate through noise which caused a gradual change in the curve of the wings, making it seem as if they’re flapping. I think experimenting with the code in three dimensions for the particles falling was also a very interesting journey. I was particularly happy with the falling effect from the particles.

The butterflies appear randomly on the canvas and if you tap the canvas, a new butterfly appears with a different speed of flapping. Pressing on the same spot creates an almost layered butterfly effect which looks good.

Reflection

I think this assignment took me a lot of time to complete because I was not familiar with the noise() function and I learnt about it more through experimentation than simply reading the topic. I was able to interact with map() function and use classes for both the butterflies and the particles. Despite the prolonged time I spent for this assignment, I am happy with the outcome as I managed to make the different components of the art piece work together, such as random flapping speed, particles, song, and new butterflies when mouse is clicked. 


Assignment 3: OOP DESIGN

Concept & Inspiration:

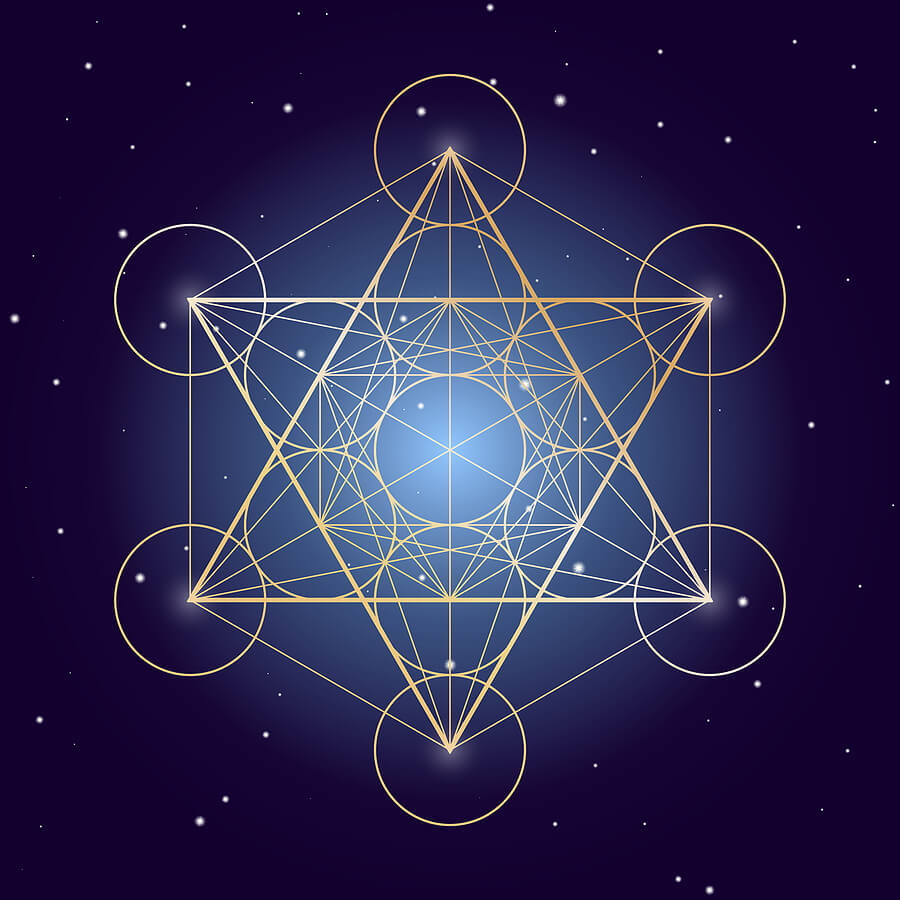
For this assignment, I wanted to create the “Metatron’s Cube,” a sacred geometrical figure that has been used in various spiritual and mystical traditions throughout history. The figure is named after the biblical figure Metatron, who is said to have acted as a mediator between God and humanity. I wanted to use p5.Js to combine digital art with ancient spiritual wisdom. Here’s how this figure looks like:
What Is a Metatron’s Cube — and Why Is It Significant? - Symbol Sage

I didn’t expect that this figure would be really difficult to draw in p5.js. However, for the sake of this assignment and using the ideas of the object-oriented programming, I was able to draw set of nodes, represented as small circles, that move in circular orbits around the center of the canvas. Lines are drawn between nodes that are close enough together. The positions of the nodes are updated based on their angle around the center, which changes over time. Moreover, it allows user to interact by adding or removing nodes with mouse clicks or the backspace key, respectively. The current number of nodes and lines are displayed on the canvas for reference. I was able to draw some thing similar to the “Metatron’s Cube”.  Here’s how the final version look like:

Future Improvements:

Although, I couldn’t really achieve what I wanted to, this project gave me some idea how I can create an actual metatron’s cube using p5.js. So, obviously in future I’d like to create the actual figure. Moreover, I’d like to add meditating music in the background. I’d also like to improve some of the visual aspects of my work such as adding more colors and some objects in the background. Lastly, I think digital art is all about interactions and would like to add more interactivity features such as allowing users to control the speed or direction of the nodes and lines, or to change the color scheme in real-time using user inputs.


Assignment 3 – Generative Art

Concept

Last semester, I was doing my study away in New York and when the semester ended, I decided to travel to the other end of the country to San Francisco, because why not. While I was there, one of the many places on my checklist was the Golden Gate Park. Inside it was a Japanese Tea Garden. It was one of the most aesthetically pleasing and peaceful places I have ever been. One of the many things I really liked about that tea garden were the unique Japanese trees that it had, and so, as a small tribute of remembrance, I tried to make a Japanese tree of my own for this project.

Implementation

I started off by making the basic shapes for the background. I placed the rectangles for the window, pot, sky, wall and circles for the moon. The main part however, were the leaves. To keep it simple, I made a very basic Class for a circular leaf and then went on to add the functions for its movement and appearance. the idea I had was to fill up different clusters of leaves for the tree. I made three clusters or regions of leaves, each having their own set of leaves. The leaves would fall from the clusters in a random fashion and subsequently be deleted from the array when they exit the canvas from the bottom. I also decided it was a good idea to make use of noise for the first time to make the fall seem more natural. So I went on and added noise in the x-direction while making the leave travel downwards simultaneously.

However straightforward this may seem, I encountered quite a few bugs along the way and thankfully managed to resolve them. I will share the significant ones here.

Positioning the Leaves

I started off by creating the x0 and y0 coordinates for the center of the cluster where the leaf object would be. I also specified the clusterWidth and clusterHeight in the leaf’s constructor. The initial position of the leaf was placed randomly in the cluster by selecting a random position in the rectangular area bounded by it:

class Leaf {
  // x0 and y0 specify the center of the cluster of leaves (one of the 3 clusters)
  constructor(x0, y0, clusterWidth, clusterHeight) {
...

Following this, I found out that I had to use a separate variable to store this initial x-position since I was making use of noise in the move() function of the leaf’s class. I couldn’t add the xPos variable to itself to update its value since that would enlarge it too abruptly inside the draw function thanks to the noise() function. It took me quite some while to figure this out as this wasn’t a very straightforward bug, but I eventually got there:

// using a separate variable for the initial position of x since xPos will
    // always be changing in draw() and this will cause abrupt behavior in the
    // leaf's x-movement if used along with noise inside move()

    // positioning initialX, xPos, and yPos within the cluster
    this.initialX = random(x0 - clusterWidth, x0 + clusterWidth);
    this.xPos = random(x0 - clusterWidth, x0 + clusterWidth);
    this.yPos = random(y0 - clusterHeight, y0 + clusterHeight);

...

// for the leaf's falling movement
  move() {
    // only make the leaf fall if the fall attribute of the object is true
    if (this.fall) {
      // giving some noise in the x direction to give a natural feel while falling
      this.xPos = this.initialX + noise(this.xoff) * 100;
      this.xoff += this.xincrement;
      // incrementing y to make the leaf fall vertically
      this.yPos += this.ySpeed;
    }
Removing the Leaves

Since I was keeping a check both on whether a leaf is alive or not and whether it is falling or not, I had to implement both of these concurrently. For instance, if a leaf reached the end of the canvas and it got deleted from the array, the code that randomly chooses a leaf to fall would not know whether the leaf is alive or not and could encounter an empty object. So I added a check for whether the leaf is alive before making it fall and it fixed the bug that I was facing. Moreover, if the leaves[] array becomes empty, the random(0, leaves.length) would return zero and that would cause an error again since the element at index zero doesn’t exist. So I added a check for that as well:

// choosing a random leaf to fall every 20 frames

  // if the leaves[] array becomes empty, it causes an error because the length is 0 but
  // the 0th element doesn't exist anymore so we provide a check for that as well

  if (frameCount % 20 == 0 && leaves.length != 0) {
    // choosing a random leaf index to make it fall from the tree
    index = int(random(0, leaves.length));

    // check if the leaf at the random index is alive and present inside the array
    if (leaves[index].alive) {
      // if yes then make the leaf fall
      leaves[index].fall = true;
    }
  }
Randomizing Leaf Color

At first I tried to do this within the Leaf class itself but then I realized that if I choose the color inside the draw() function of the Leaf class, it would cause the leaf to change color continuously because the draw() function loops continuously. I couldn’t place the array inside the standard draw() function either for the same reason. So I came up with the idea of creating a global array that would store the two leaf colors (shades of purple) and then choose the color inside the attributes of the leaf class as a this.color attribute:

// array which stores the two shades of purple for the leaves
let leafColors = ["#963990", "#4B2454"];

class Leaf {
  // x0 and y0 specify the center of the cluster of leaves (one of the 3 clusters)
  constructor(x0, y0, clusterWidth, clusterHeight) {

...

    // choosing a random shade of purple from the two specified in the global array
    this.color = leafColors[int(random(0, 2))];
  }

...

// drawing the leaf
  draw() {
    noStroke();
    fill(this.color);
    ellipse(this.xPos, this.yPos, this.width, this.height);
  }

Reflection

I feel like I managed to get the kind of aesthetic feel I was going for in this assignment. The color combinations worked really well and the tree stood out within a minimalistic background without being too overwhelming. I went for a kind of peaceful and calm feel and the falling leaves did well to prortray that feeling as well. It was unfortunate that I had to start from scratch after losing progress mid-assignment but gladly I was able to recall the functions I made and how I implemented them. It was disheartening at first but after putting in some extra hours I was able to remake the project exactly how I wanted to in the first place. As for the future, I would definitely like to save my progress often and make the habit of hitting the save shortcut from time-to-time, although it sounds trivial but its something i would definitely like to work on. Excited to see what I can do with transformations for our next assignment!

 

Assignment3: Creative Chaos


Inspiration:

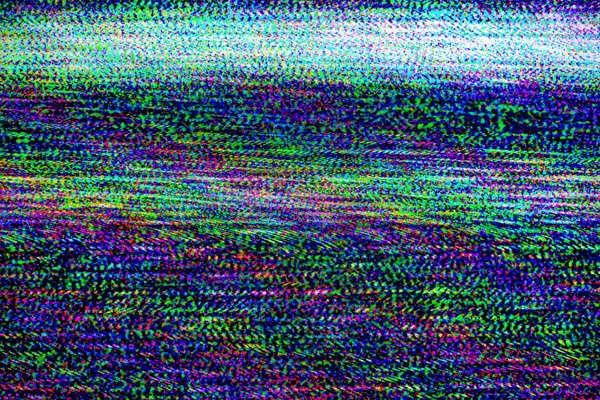
For this project I was inspired by old TV static. Growing up I always wondered about the cause of old TV static. Through intro to Interactive media I was introduced to Perlin noise and the power of computers to produce random like graphics that seem to morph and change organically.

Concept:

In this project I attempted to recreate a noise-like graphic display that mimics a TV static but without using the NOISE() function. The piece displays moving black rectangles and switch to random colours once the the user clicks the mouse. The more frequent the clicks are, the more chaotic and static like design is.

Technicalities:

I used some of the code from the bouncing ball code from class. However, the trick was to remove the background which removes the clean cut aspect of the piece and allows the audience to see everything about the rectangles throughout time.


Yerkebulan Imanbayev – Home Work 3

Glitch in the System

Concept

For this assignment, I wanted to focus on the concepts of chaos and order that we talked about in the previous class.

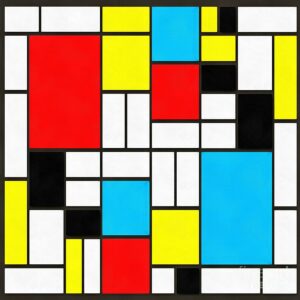
I was really inspired by the work of Edward Fielding, specifically “Modern Art Square”.

This piece is very clean and organized – what we think of when we think of order. My inspiration manifested itself in the idea of opposing that and creating and artwork that draws superficial elements of the piece – squares – and turns them into complete chaos.

The code

In my artwork, I was able to code a certain number of squares using arrays and classes. This algorithm create a variety of squares, in random positions, shapes, colors, and with different borders. These appear in a glitch like manner, and due to the randomness of the algorithm, evokes a feeling of chaos. When the user presses the mouse on the canvas, the aforementioned characteristics change completely, once again creating the sensation of a glitch.

A prominent piece of code

display(){
strokeWeight(this.strokeThickness);
stroke(this.strokeR,this.strokeG,this.strokeB)
fill(this.colorR,this.colorG,this.colorB);
rect(this.rectX,this.rectY,this.rectWidth,this.rectHeight);
} //drawing the rectangles themselves

changeArtWork(){
this.rectX = random(350);
this.rectY = random(350);
this.rectWidth = random(50);
this.rectHeight = random(50);
this.strokeThickness = random(3);
this.colorR = random(255);
this.colorG = random(255);
this.colorB = random(255);
} //the function for changing the position, the parameters,the colors, the thickness of the borders, and the colors of the borders of the rectangles

This piece of code is symbolic to me of the concept of the artwork, because it’s very structured in nature but has the opposite outcome. In this code, every single numerical parameter that could have been used for a function is replaced with a variable, yet these variables are the outputted in a sequence of very chaotic rectangles.

Future

Going forward, I want to improve my work in terms of adding an element of movement to the codes that include arrays and classes. This would allow the user to explore the piece more extensively and spend more time on it.

Artwork


Audio Wave

Introduction:
For this assignment, I wanted to explore how to use sound in p5js and learn how to use object-oriented programming creatively. While exploring my options, I found some ways to do audio visualization, which I found pretty interesting, and then I went on to explore.

Coding and Process
First of all, I learned how to import sounds, use them, and their different functions. Then I familiarized myself with the syntax of object-oriented programming and how to use the classes in p5js. For practice, I tried to make bouncy particles and add features. So, after learning everything, I explored different ways to create audio visualization and took inspiration from the following pictures to recreate an audio-responsive wave with particles around it. Then I learned to use FFT objects and the different functions related to them. It took me time to understand how this works, but the result paid off, I believe.


The part of the code I am proud of is the waveform and how the particles respond to the audio.

let wave = fft.waveform(); //Returns an array of amplitude values (between -1.0 and +1.0)
stroke(random(255), random(255), random(255));

fft.analyze();
amp = fft.getEnergy(20, 200); //Returns the amount of volume at a specific frequency, using which we could use to control the behaviour of particle and thier responsiveness

strokeWeight(2);
beginShape();
//to built the waveform so we use the applitudes and that we got before and then use this to make the wave
for (let i = 0; i <= width; i++) {
  let index = floor(map(i, 0, width, 0, wave.length / 2));
  let x = i;
  let y = wave[index] * 100 + height / 2;
  vertex(x, y);
}
endShape();

let p = new Particle(2);
particles.push(p);

//creates the particle around the wave form
for (let i = 0; i < particles.length; i++) {
  if (!particles[i].edge()) {
    particles[i].move(amp > 100);
    particles[i].show();
  } else {
    particles.splice(i, 1); //if the particle is out of the space then delete it from the array
  }

Final Project

Here’s my code!

Reflection and future improvements

I really enjoyed doing this assignment and exploring my options. The project could be improved by adding more layers or by making a circular waveform and adding more details.


Assignment 3- Generative Arts OOP


In this third assignment, we were to Create a generative artwork using Object-Oriented Programming. Starting with the assignment, I struggled to find a source of inspiration. The artworks I came across that I could use as my inspiration were very difficult to create( at least to my liking ). I finally decided to create something off the ball example we saw in class; I could only think of a snowy scene(something more like a winter period scene).

PROCESS

My implementation basically makes use of shapes(ellipse), sound and an image. As required by the assignment, I used functions, classes, and arrays. I created a Snowflake class that represents a single snowflake. Each Snowflake object has an x and y position, a radius, and a speed that determines how fast it falls down the screen. In the setup() function, I create an array of 100 Snowflake objects with random positions, radii, and speeds. In the draw() function, I update and draw each Snowflake object by calling its move() and draw() methods. The move() method moves the snowflake down the screen and wraps it around to the top if it goes off the bottom. The draw() method simply draws the snowflake as an ellipse on the canvas. I also used the preload function to load a vector image as the background which I downloaded from “deposit photos” and included a piece of royalty-free background music which I downloaded from YouTube.

EMBEDDED CODE

FUTURE IMPROVEMENTS

In a future version I hope to be able to include wind and its effect on the direction of the snowflakes. I also hope to add some clouds and other features to make the whole simulation resemble a real snowstorm.

Generative Artwork Bifrost

Concept and Inspiration

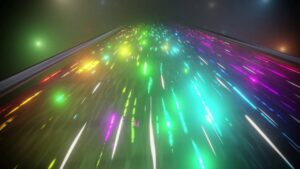
In this assignment we had to create a generative artwork using Object-Oriented Programming elements such as arrays and objects. In this project I tried to recreate the mythological rainbow bridge Bifrost.  In Norse mythology, the Bifröst (also known as the Bifrost Bridge or the Rainbow Bridge) is a bridge that connects the realm of the gods Asgard to the mortal world Midgard. The Bifröst is depicted as a rainbow bridge that shimmers and changes colors. The concept of the Bifröst has been influential in works of fiction, inspiring elements of magic and fantasy in various forms of media. I tried to create an immersive experience of traveling using this Bifröst bridge, and tried to depict how it would look like from inside.

Draft 1

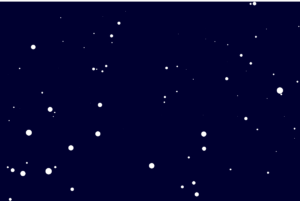
First I created a white stars on black background with an immersive movement. After testing out various angles and parameters for speed and size I integrated rainbow background change and increased the speed.

Final Version

In this assignment I paid extra attention to the structure, clarity, and organization of my program. I made use of functions as needed to organize structure of my program and tried to assign meaningful names for variables.

Code of Project

var star = []; // array to store all the stars
var numOfStars = 200; // number of stars to be displayed
var speed = 8; // speed at which stars move
var backgroundHue = 0; // hue value for the background color

// the setup function is called once when the program starts
function setup() {
  createCanvas(600, 400); 
  for (var i = 0; i < numOfStars; i++) {
    star[i] = new Star(); // creates new instances of the Star object and adds them to the star array
  }
}

// the draw function is called repeatedly until the program is stopped
function draw() {
  backgroundHue = (backgroundHue + 1) % 360; // updates the hue value for the background color
  colorMode(HSB); 
  background(backgroundHue, 100, 100); 
  for (var i = 0; i < numOfStars; i++) {
    star[i].update(); // updates the position of each star
    star[i].show(); // displays each star
  }
}

// the Star object constructor
function Star() {
  this.x = random(0, width); 
  this.y = random(0, height); 
  this.z = random(0, width); // z-coordinate for the star (used for the 3D effect)
  this.h = random(0, 360); // hue value for the star color

  // updates the position of the star
  this.update = function () {
    this.z = this.z - speed; // reduces the z-coordinate to move the star towards the viewer
    if (this.z < 1) {
      this.z = width; // if the star goes off the screen, it reappears at the back
      this.x = random(0, width); // new x-coordinate
      this.y = random(0, height); // new y-coordinate
      this.h = random(0, 360); // new hue value
    }
  };

  // displays the star
  this.show = function () {
    noStroke(); // removes the stroke around the star
    colorMode(HSB); 
    fill(this.h, 100, 100); 

    // calculates the x-coordinate and y-coordinate of the star on the screen
    var sx = map(this.x / this.z, 0, 1, 0, width);
    var sy = map(this.y / this.z, 0, 1, 0, height);

    // calculates the size of the star based on its z-coordinate
    var r = map(this.z, 0, width, 32, 0);
    ellipse(sx, sy, r, r); // draws the star as an ellipse
  };
}

Challenges and Improvements

Creating a believable rainbow effect for the stars and the background can be challenging. It requires careful use of color gradients and blending modes to produce the desired visual effect. Another improvement can be made to star movement. Implementing realistic star movement can be difficult, especially when it comes to creating a 3D illusion on a 2D canvas. It’s important to carefully consider the equations used to move the stars, as well as the way they are drawn on the canvas

Assignment 3: The Sea

Inspiration:

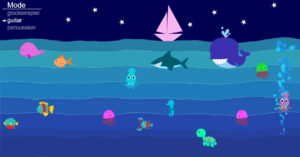
Reference: “Seascales — Catherine Jou”. 2023. Catherine Jou. http://www.catherinejou.com/p5-piano

Initially, I planned to implement Object-Oriented Programming (OOP) with moving insects like butterflies in a forest setting, but it proved to be too complex, so I decided to save that idea for later. Instead, I resorted to the underwater world and created a basic animation of elliptical fish swimming across the screen. The picture I got inspired by is attached above. I added water waves to the scene and kept the sea monotone. However, I only used fish in this project and this is one area where I realized that I could improve my assignment by adding a variety of organisms.

Process:

I used two classes in my code, one for the waves and the other for the fish. For the wave class I learned about new functions in p5.js using sine to make waves. A few of these functions are the vertex(), beginShape(), endShape(). 

While trying to make a few waves move in the right direction and a few in the left direction I accidentally made them vibrate to and fro which resulted in a better and more realistic vibratory motion for the water waves. Therefore, unlike fish which intentionally move from one direction to another, the water waves follow a different movement. 

I used the same idea of wrapping that we learned in class for the fish and made sure they reappeared when they left the canvas or in other words went offscreen(). I also watched a youtube video which mentioned ‘drawingContext.shadowBlur’ to give a glow effect to the objects drawn and I used it in my draw() function to give more definition to the sketch. Other than that I made a basic ship using quad() and triangle() functions. The starry effect on the night sky is also an output of a basic for loop and the random() function together. 

Final Output:

Week 3 – Generative Art with OOP

Concept

As we talked about chaos and order in class, I felt inspired to incorporate these themes in my next art piece. I was also inspired by the rotating hypercubes we looked at in class and wanted to add cubes to my art. Combining these elements, I came up with a streak of cubes exuding from a sphere. An array of cube objects are created and they are translated along the canvas. My love for randomness really influenced this project as this streak of cubes randomly moved around with the sphere while each individual cube rotated as well. Also, the cubes and the sphere are assigned random colors. These rotations and the translations, have a certain order to them, but when the mouse is pressed, the canvas becomes more chaotic! The translations are random within a range of values allowing for a very random and pretty streak of cubes that rotate and rapidly change positions on the screen. There is also a random shooting star that appears and floats on the screen when the mouse is pressed. Also, pressing the mouse also changes the stroke colors and shape colors to shades of grey further enhancing a chaotic effect – it gives a warping effect such as that when space or time is warped by a black hole.

Art and Code

Here is the artwork:

Here is my code:

//define some global variables
gnumOfCubes=80;
gboxWidth = 10; 
gboxHeight = 10;
gboxDepth= 10;
tx=20; //translation along x axis
ty=10; //translation along y axis

//to draw a bunch of cubes
let gCubeArray =[];

function setup() {
  createCanvas(400, 400, WEBGL);
  background(20);
}
function rotateElement()
{
  rotateX(frameCount * 0.01);
  rotateY(frameCount * 0.01);
}
function draw() {
  
  //refresh background so that previously drawn cubes disappear
  background(20);
  
  //for rotation of the elements
  rotateElement();
  
  //when mouse pressed
  if (mouseIsPressed) {
    // a star appears and randomly moves across the screen 
    star = new shootingStar(mouseX,mouseY,50,50,4,7);
    star.update();
    star.display();
    
    //also, color and stroke should become shades of grey when mouse pressed
    fill(random(255));
    stroke(random(255));
  }
  else
    {
      //if not pressed, keep all colors and stroke is black
      stroke(0);
      fill(random(255),random(255),random(255));
    }
  
  //draw a sphere in the center
  sphere(30);
  
  //draw cubes that exude out of the center of the canvas and from a streak by repeatedly translating them 
  drawCubes(gCubeArray,-tx,-ty);
  
  //if mouse is pressed, choose random values for translation along x and y to create a chaotic effect and then draw cubes
 if (mouseIsPressed)
   {
     tx=random(-10,10);
     ty=random(-10,10);
     drawCubes(gCubeArray,-tx,-ty);
   }
  
  //draw a circle to accompany the tip of the streak of cubes
  fill('white');
  ellipse(0,0,50,50);
}

//class for cubes
class Cube{
   constructor(width, height, depth, size){
     this.width = width;
     this.height = height;
     this.depth = depth;
     this.size = size;
   }
  display(){
    rotateElement();
    if (mouseIsPressed)
    {
      fill(random(255));
    }
    else
    {
      fill(random(255),random(255),random(255));
    }
    //use box from WEBGL mode to create the cubes
    box(this.width, this.height, this.depth, this.size);
  }
}

//a shooting star that appears when mouse is pressed and randomly moves around
class shootingStar{
  constructor(x,y, width,height, xSpeed, ySpeed){
    this.x=x;
    this.y=y;
    this.width=width;
    this.height =height; 
    this.xSpeed=xSpeed;
    this.ySpeed=ySpeed;
  }
  
  display(){
    fill('white');
    ellipse(this.x, this.y, this.width,this.height);
  }
  //update position of the store to create motion
  update(){
    this.x += this.xSpeed;
    this.y += this.ySpeed;
  }
}

//function to draw the streak of cubes by pushing cubes onto the cube array and translating them
function drawCubes(gCubeArray,tx,ty)
{
   for (let i=0; i < gnumOfCubes; i++){
    gCubeArray.push(
    new Cube(gboxWidth,gboxHeight,gboxDepth,4)
    )
    gCubeArray[i].display();
    translate(tx,ty);
  }  
}

I used functions, arrays, and object-oriented programming to create this artwork.

Reflection and future improvements

I immensely enjoyed making this art piece. While I had the purpose of creating cubes and having them rotate, I experimented with the transformations and the WebGL mode to finally come up with this work. It was after a lot of experimentation that this work was created and this is the most exciting part of this course – forming a new, different creative piece that you might not have envisioned in the beginning.

In the future, I want to use more classes and functions to further enhance this piece or other works. For example, an entire galaxy of stars could be created in the backdrop while I only created one so that can be added. Moreover, music can be added as well and I also want to experiment with sine and cosine functions in the future.