
Overall Experience
In the first assignment for “Introduction to Interactive Media,” I was eager to dive in and see what the course had in store. As someone who typically prefers to stick to science, I was excited to challenge myself and explore my creative side. Being pushed out of my comfort zone and into the realms of creative programming was a very enjoyable experience to say the least. I was excited to see how p5.js could help me bring my ideas to life and add a unique interactive component to my personal projects. Consequently, working with tool allowed me to imagine the potential for creating interactive and engaging games in the future. One idea that instantly came to mind was an NYUAD themed “Dress Up” game or a game for the bookstore to try on merchandise while shopping online. The initial challenge of using basic shapes to create a realistic portrait was tough, but I was excited to take on the challenge and expand my skills. Additionally, This project not only honed my technical skills, but it also sparked my imagination and allowed me to tap into my inner creativity.
Work Process
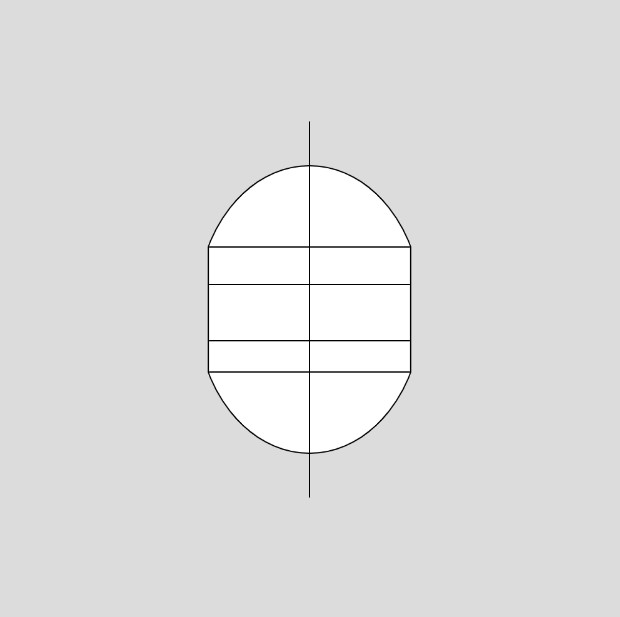
I initially started by creating a canvas of (500, 415) and after some research on how artists create portraits I added a few reference lines to the self-portrait for ease of location, symmetry, and to get the proportions right. I did not want the face shape to be a perfect ellipse so I added a few triangles with strokeWeight(0). At this stage the face shape looked like:
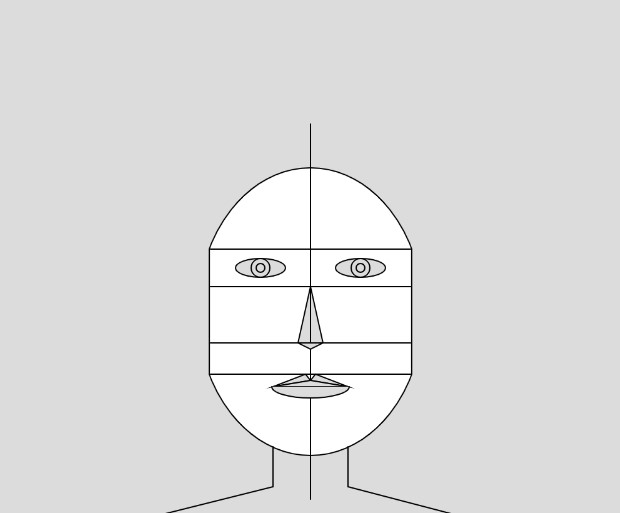
Although it took me a while to understand how layering works in order to hide the rectangles, I was pretty satisfied with my progress. Then I revisited the concepts of arcs, ellipses, rectangles, and lines in order to create the basic structure of eyes, nose, lips and the body. I found drawing the lips to be hardest till this step because it was a combination of three triangles and an arc. It took me a while to figure out how to use the angles in order to change the orientation of the arcs/semi-circles. The reference lines helped save time as I did not have to constantly figure out the co-ordinates. After this step, my self-portrait looked like:
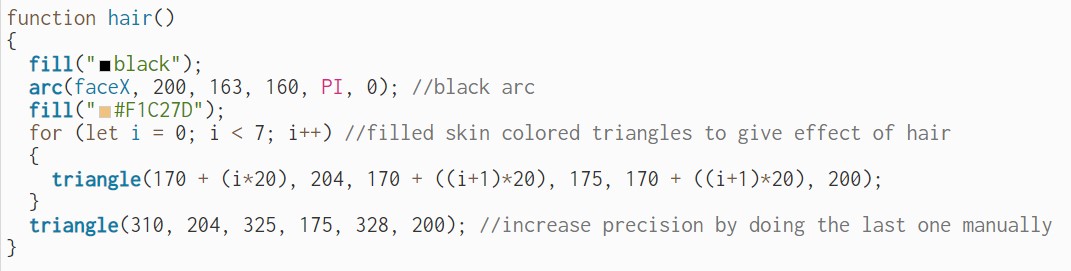
Now came the most crucial step which was ensuring that I had a good hairstyle. Even in real life I have struggled with sticking to a single hairstyle so for this portrait I chose the hairstyle I had back in grade four. I am glad I was able to come up with an equation in a for-loop that saved me from all the manual labor it would have taken me to create the hair effect. The code that I used was:
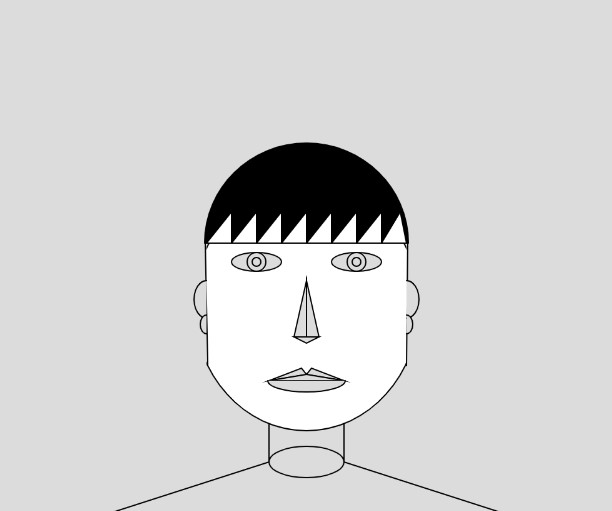
This led me to successfully make the hair style I was looking for. I also added ears using the arc() function and found this to be very challenging as I could not get the shape right but eventually the portrait started looking like:
After that it was all about coloring and making small adjustments. After this project I realized how difficult it can be to choose the right colors and how colors can make or break the project. I tried using three ways to choose colors i.e. RGB, Hexadecimal, and writing the name of the color in string. I am very proud of how I used concepts of simultaneous equations and gradient of lines to figure out where the two lines of the shoulder would meet, in order for me to color them right. After coloring , adding a beard and changing the background, the portrait looked like:
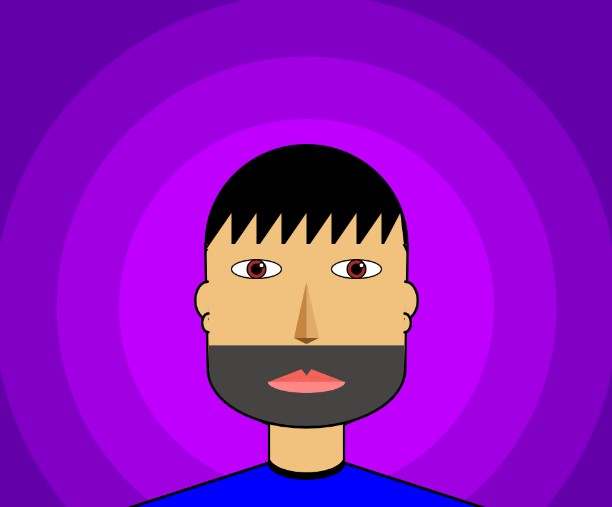
This was supposed to be my final submission but I was enjoying p5.js so much that I wanted to experiment with it more. I was really fascinated by the animations that professor showed us in class and hence I wanted to add something to my portrait as well. I added three buttons to the portrait that add/remove a hat, change the season (background) while also changing the color of the shirt respectively, and add/remove smile from the face. I wanted to show how I am most “happy” when I am wearing my “hat” on a beach in the middle of “summers.” The following picture is a depiction of a happy me:
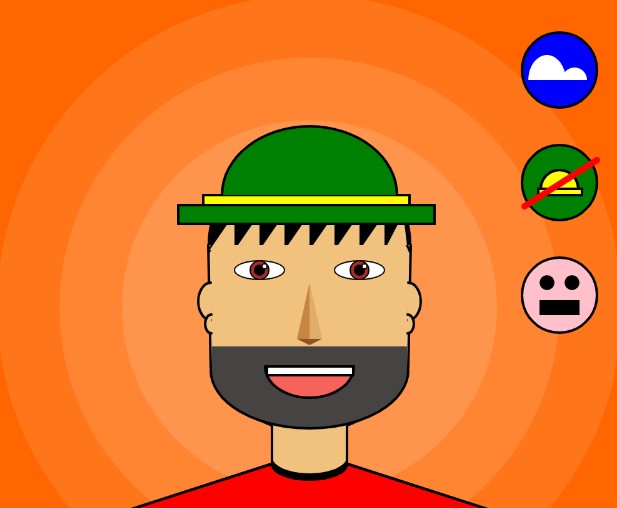
I had a lot of fun ensuring the buttons worked and the animations in them changed as the button is pressed as well. So the final product looks like the following:
Reflection
I really enjoyed the whole process and this project has enabled me to connect more with my creative side. I am glad that I was forced to get out of my comfort zone. For future projects, I would want to continue certain things such as making separate functions for each of the component as that made editing the code really easy. Furthermore, I would want to continue using reference lines or use the mouseX/mouseY values for getting coordinates. There are a few things that I feel I could have improved. One of them is making the portrait look more realistic and I feel like I could have done that by making use of the bezier curves. I found them very difficult to use in this project. Apart from that, I would want to add more unique ways of making the project interactive and more user-friendly. In the future, I would want to every project to have a story and meaning behind it and I look forward to the remaining assignments.