Self Portrait – Aigerim

Inspiration

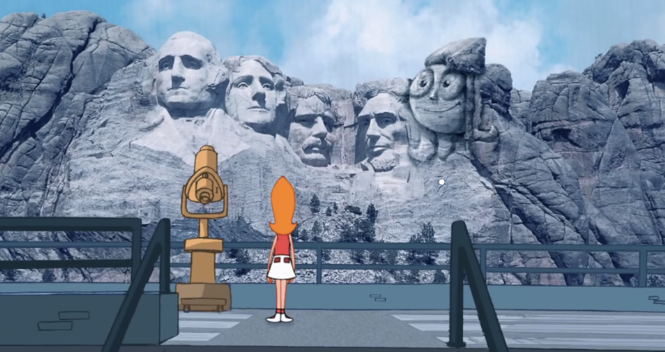
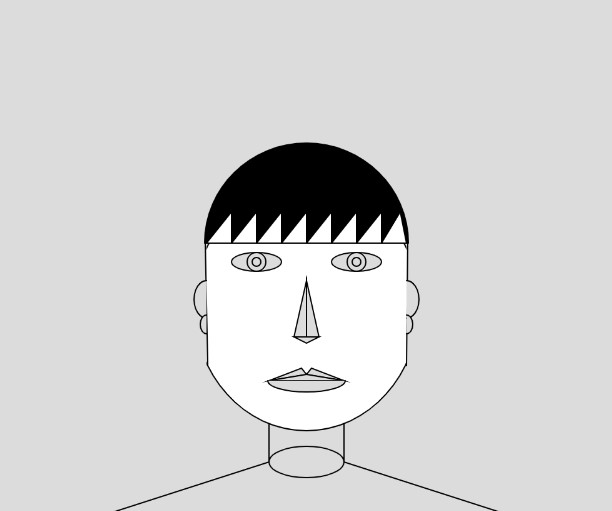
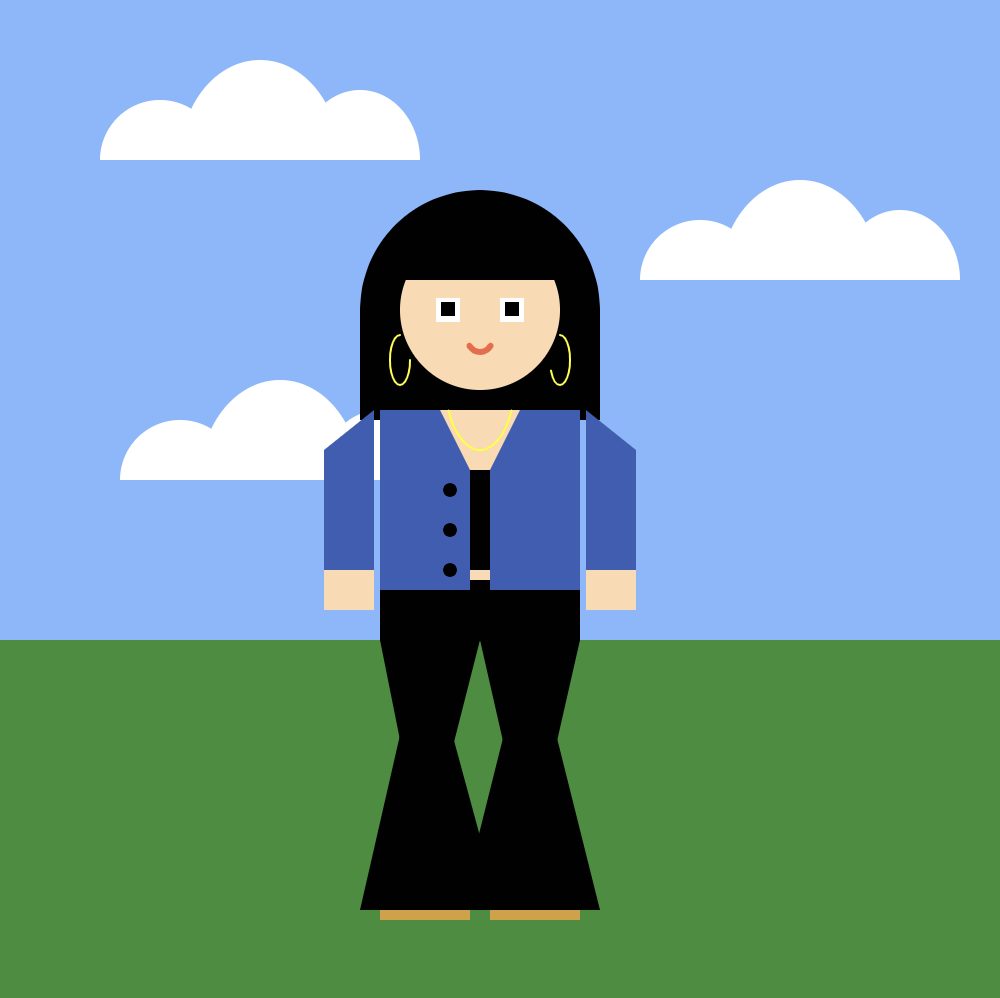
I chose a full-body portrait for my self-portrait as I often use my outfits to express my style and personality. For the base and shape of the figure, I was inspired by Minecraft figures, which I used in the outline and as a base to build my portrait. For the outfit, I got inspired by the outfit I was wearing on the day I started this assignment.

Process

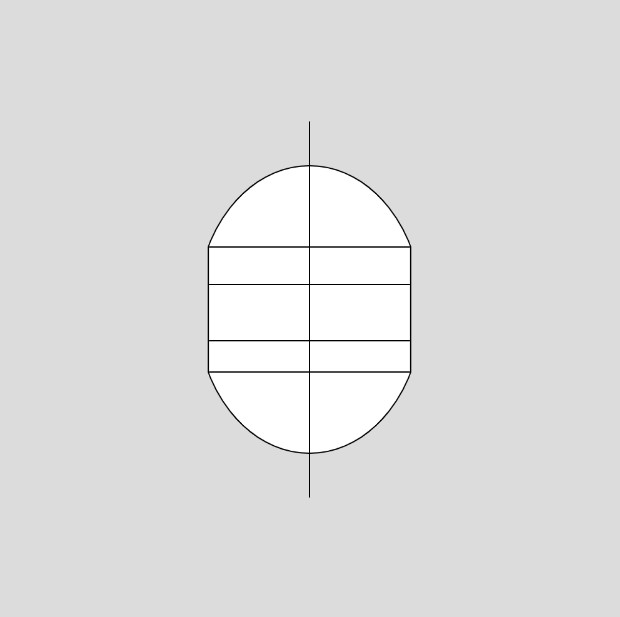
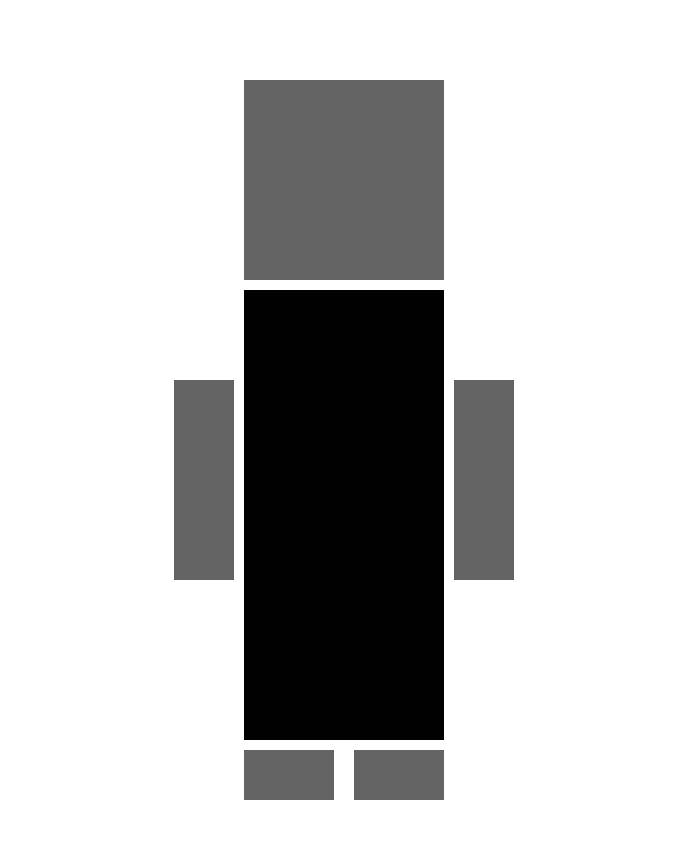
I started off with a quick outline/draft of squares to know where to locate the figures I will use later. I applied the same approach I use when designing games/websites/apps, where the focus is on functionality first (coordinates in this case) and then on aesthetics (colors, clothes, jewelry)

Draft Image of the self portrait
Draft 1 – Aigerim Zhusubalieva

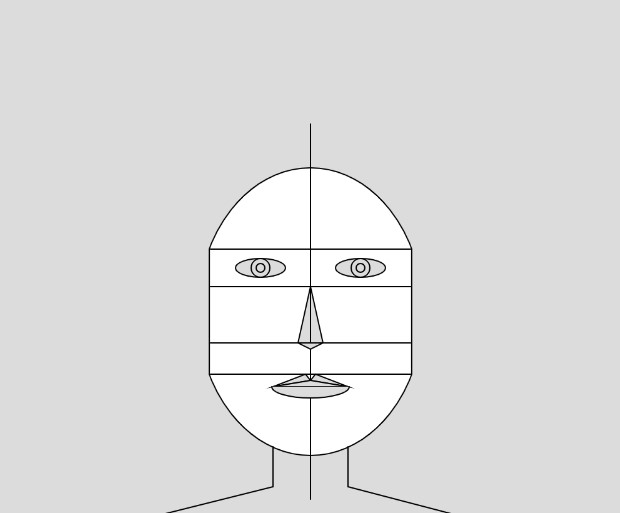
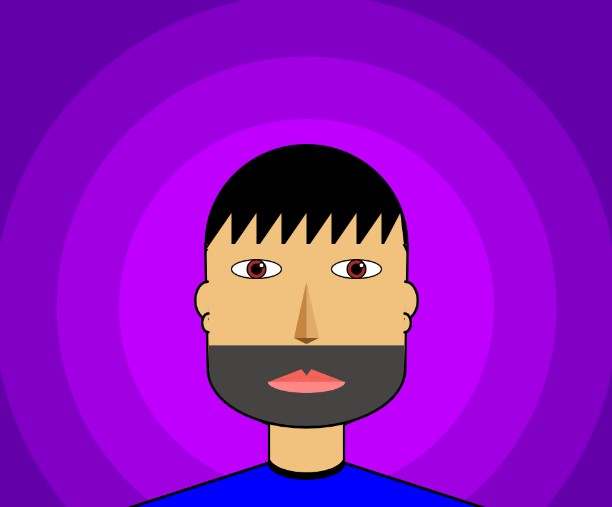
Once I had the outline, it was easy for me to put other things on top of it to personalize the draft. The most challenging part was working with jewelry – figuring out the position, start and end angles, and the size to fit in with the clothes, and it did end up being a nice little touch.

Self-portrait Aigerim
Self-portrait – Aigerim Zhusubalieva

Reflections

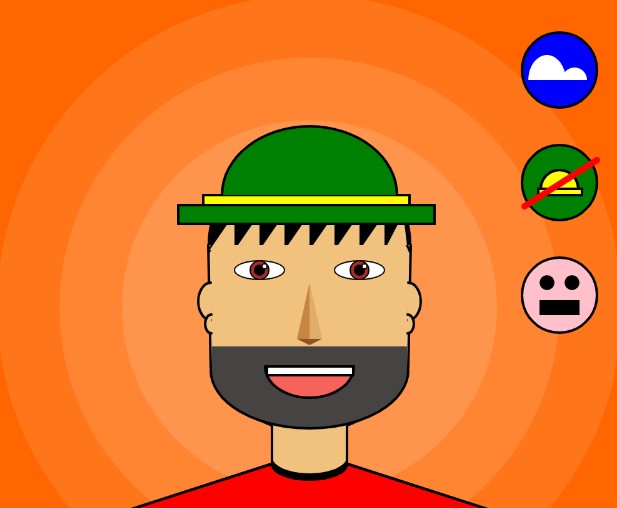
Overall, I am proud of this little project as I see myself in it both literally and figuratively. One thing I want to change or add is I want the clouds to have a parallax effect, but due to time constraints, it is not part of this submission. I hope I get a chance to work with parallax or more sophisticated backgrounds in the future.

Self Portrait – Abraiz

Concept

My sketch is inspired by something that is a big part of my life – Tennis. I could go hours and hours watching or playing it and not even notice the time pass by. The reason I love this sport so much is that it gives me a chance to escape from my stressful and work-intensive routine and not think about anything besides hitting the ball and feeling the satisfaction of it smacking against my racket strings :p

So I thought why not make a self-portrait of me holding a racket on a tennis court while juggling a ball on it.. indefinitely 🙂

Implementation

I tried to play around with shapes as much as I could and place them until they were in the right position. However, some things like making the ball bounce and creating the net in the background are worth mentioning here.

To make the ball bounce, I created a variable called ballSpeed and added it to the y value of the ball inside the draw() function to make it move. However, to keep it inside certain bounds, I made use of an if statement and as soon as it reached one of the bounds, I reversed the direction of the ballSpeed variable, this made it “bounce” within certain bounds.

fill("#AEDA38");
ellipse(x + racketOffsetX, y + racketOffsetY, 30, 30)

// make the ball rebound within a certain area
if (y <= 350 || y > 390) {
  ballSpeed = -ballSpeed;
}

y -= ballSpeed

For making the net, I used a simple for loop to make horizontal and vertical lines. This saved me a lot of time and I feel it was worth mentioning here.

// vertical lines of the net
stroke(10);
strokeWeight(1);
for (let i = 0; i < 50; i++) {
  line(10 + 10*i, 207, 10 + 10*i, 275)
}

stroke(10);
for (let i = 0; i < 8; i++) {
  line(0, 207 + 10*i,  width, 207 + 10*i)
}

Reflection

I found this homework more of an activity than an assignment because I enjoyed every moment of crafting it and making it come to life. I wanted to implement a lot more things, like making the scene transform into one where I would be holding a frying pan in place of the racket and wearing a chef’s hat in place of the tennis cap with a kitchen in the background (yes, I recently discovered that I have a thing for cooking). The ball could be an egg or a pancake maybe? Time was my biggest enemy for this idea but I would love to implement this sometime in the future. I would also love to add live interactions to my projects next time where the user can interact using clicks or button presses to make the experience more immersive.


HW1: Self-Portrait

CONCEPT

For this assignment, I was inspired by sketching in Adobe Illustrator. One way of making complex figures in Illustrator is by drawing lots of intersecting ellipses to outline the figure that you want to build. At the intersection of those ellipses, you get irregular shapes, which will help you in achieving the organic feel in your final drawing. You then reach for the Shape Builder Tool to connect the wanted areas at the intersection of the ellipses. Even before using this tool, you can already see the outline of your figure peeking through the bunch of ellipses.

In my work, I wanted to achieve this rough sketch feel and imitate the way I draw regularly (on paper or in Illustrator).

IMPLEMENTATION

My code was pretty repetitive. The order in which the shapes are placed is important, so I have started by writing in comments all the portrait parts that I need to add in a particular order. I then call for random color with random opacity, choose the angle of rotation, and draw the shape. This process is repeated for each part of the portrait. As a code it looked like the snippet below:

//jaw
fill(random(0,255), random(0,255), random(0,255), random(0,255));
// fill(249, 213, 192, 130);
translate(width / 2, height / 2);
rotate(120);
ellipse(20, 20, 150, 200);

The most challenging part of the implementation was figuring out the angle of rotation for each shape. It didn’t rotate in the way that I would imagine it to. The one-degree difference could make the shape do an actual 180-degree turn on the sketch. I’ll ask for more clarification regarding this issue during the class. Perhaps, it was an easy fix.

REFLECTION

I like the way my sketch ended up. It reminds me of stained glass window drawings that I did with gel paint as a kid. It kind of also gives me cubism vibes. Some random color pallets work better than others, perhaps, I could work on limiting the randomness of colors next time.

Homework 1: Self-portrait

As “Among Us” was a game that I really enjoyed playing at NYUAD, I drew myself as a character from the game. The character is doing the SHHH gesture which I have incorporated with my name “iSHHHmal” to help people pronounce and remember my name correctly.

I have also added the starry night sky in the background because I am very fascinated with space. To do this I used a for loop and randomly placed 700 points on the canvas. Here’s the code for this effect:


// set all content drawn from this point forward
// so that it uses "white" (0 = black, 255 = white)
stroke(255);
for (let i = 0; i < 700; i++)
{
let x = random(600);
let y = random(400);
point(x,y);
}
fill(255);

The most challenging and time-consuming part of the assignment was drawing the hand of the character. There were multiple lines involved and it was important to get the pixels and shapes correct so the gesture looks understandable. Though, I am very proud of the way the hand turned out and it’s exactly like the way I wanted it.

Additionally, to make it easier for me to draw the background circle, I initially filled it with 1 color and then instead of drawing lines and an arc, I drew equal arcs around the circle only to help me achieve that effect. Below is the code for this:


stroke(153, 0, 0);
strokeWeight(4);
fill(240, 196, 66)
ellipse(300,175, 300, 300);
fill(223, 108, 32)
arc(300,175,300,300,radians(255),radians(285))
arc(300,175,300,300,radians(315),radians(345))
arc(300,175,300,300,radians(195),radians(225))
arc(300,175,300,300,radians(135),radians(165))
arc(300,175,300,300,radians(75),radians(105))
arc(300,175,300,300,radians(15),radians(45))

As this was only a simplistic portrait, I did not add the draw function, but in the future I would love to bring it to use and add user interactivity as well! Additionally, the p5 reference site was extremely helpful tool and I found myself referring to it again and again quite a few times.

HW 1 – Self portrait – Yerkebulan Imanbayev

This was the first sketch I have ever created using coding, and my main focus was exploring shapes and colors. The arc is the most prominent shape used in this sketch, as it is also something I had difficulty using. In general, the coordinate system turned out to be some sort of guessing game for me because I had very little awareness as to where my shapes would end up. However, after a bit of practice, I gained more understanding of the coordinate system used in p5.js. My main issue with the project was the conception of the sketch, as I made the mistake of starting out with the code, as opposed to the idea. This is something I hope to work on in the future because I want to have a more clear picture in my head of what I’m creating before delving into the coding.

I am particularly proud of this bit of code:

fill(239, 182, 242);
arc(240, 420, 130, 200, QUARTER_PI + HALF_PI, QUARTER_PI, OPEN);

It took me some time to figure out how the arc works because of its start and stop angles; however, eventually I was able to create a symmetrical open arc that would represent the clothes I am wearing in the portrait.

Homework 1 – Self-Portrait (p5.js)

Hi everyone =) I am finally taking this class and I planned to take it from Freshman Spring! Assignment for today was to create a self-portrait using p5.js. The completion of assignment was quite fun and I enjoyed playing with different shapes and colors. At the end, it turns out to be not really my portrait copy made in p5 but a cute image that I really like.

At the beginning, my initial plan was to stick to my real-life appearance and replicate something alike in code. I tried to convey few features of my appearance with quite noticeable eyebrows and quite long hair. Though, you may barely ever see me without my hair tied.

In the process, I noticed how important is the order. I needed to make sure nothing overlaps in an odd fashion. So, for example, hair code came first, followed by skin and face overall with bang added at the end. For me, the challenging part was to make hair, mouth, and nose appear a bit natural. For hair, I have used arc and rectangle shape to add length. I wanted to use arcs for mouth and nose as well but it turned out to be a bit complicated.

Overall, it was a fun experience and I may continue working on it in my spare time. What I feel may use some improvement is the accuracy of my portrait, yet it should not expected to be 100% exact, right? I browsed through several other projects and I really loved their animation parts and I may recommend myself to add some animation to my image. So, here is my sketch and I will provide my code below it!

function setup() {
  createCanvas(520, 520);
}

function draw() {
  background(163, 187, 236);
  //Hair
  noStroke();
  fill(84, 53, 17);
  arc(260, 260, 300, 380, QUARTER_PI + HALF_PI, QUARTER_PI, OPEN);
  rect(110, 250, 300, 400);
  print(mouseX, mouseY);

  //Neck
  fill(232, 190, 172);
  rect(235, 360, 50, 55, 20);
  //Face
  noStroke();
  fill(232, 190, 172);
  ellipse(260, 255, 200, 260);

  noStroke();
  fill(84, 53, 17);
  arc(300, 120, 150, 100, 0, PI + QUARTER_PI, CHORD);

  //Eyebrows
  stroke(21, 19, 19);
  strokeWeight(7);
  noFill();
  arc(210, 230, 55, 10, PI, TWO_PI, OPEN);
  arc(310, 230, 55, 10, PI, TWO_PI, OPEN);

  //Eyes
  strokeWeight(1);
  fill(57, 36, 12);
  ellipse(210, 260, 28, 35);
  ellipse(310, 260, 28, 35);
  noStroke();
  fill(255);
  ellipse(207, 252, 8, 8);
  ellipse(306, 252, 8, 8);

  //Nose & Mouth
  fill(201, 130, 118);
  triangle(260, 250, 270, 310, 250, 310);

  //Hair (continued)
  stroke(201, 130, 118);
  strokeWeight(10);
  line(250, 335, 270, 335);

  //Shoulders & Shirt
  noStroke();
  fill(239, 246, 138);
  rect(185, 395, 150, 220);
  ellipse(190, 515, 160, 240);
  ellipse(330, 515, 160, 240);
}

Thank you for checking this out!

Youssef’s self portrait

Self portrait project using P5.js. I made this image using different shapes and images. I also managed to add text to it, in order to add the ‘NYU’ on the shirt. It was very interesting working on this project, as it actually allowed me to understand the P5 grid system and how to create and locate different shapes on the canvas. The main challenge I faced was drawing the hair as I had to change the coordinates of each circle in order to create the curly hair effect. I believe that there is probably better way to draw the hair maybe using bezier curves, or different shapes that would give a more realistic look. I however, find this design using circles more fitting in this case as it goes well with the style of the face of the rest of the face.

I am happy about how the torso turned out with the design of the NYU Logo. I also attempted to add an actual picture in the background to create a whole University student vibe with the portrait.

One of the issues I faced was probably overlaying different shapes on the canvas, especially with the neck and the NYU logo. However, I found out the order of the code affects the layer of the shape on the canvas.

One challenge I solved was the code for the Logo. In the beginning, I was thinking I had to create it using different shapes. But, I found out that with this chunk of code I can facilitate the whole issue:

//NYU
textAlign(CENTER, CENTER);
textSize(50);
fill(255);
text(“NYU”, 250, 460);

Assignment 1 – Self Portrait

As I started the assignment, I had a bunch of trouble with the parameters of shapes that I used as well as the coordinate system. Thankfully, I was able to overcome this obstacle by consulting with the p5js Reference. I also used Owen Roberts’ grid code to help me position the shapes properly.

Initially, my idea was to recreate my passport photography in a minimalistic manner. I used a variety of shape primitives in p5 to make this happen and I also explored using RGB and Hex codes for color. Additionally, I wanted a piece of the portrait to represent NYU so I researched the RGB values of the NYU purple and used it as the background.

The following code was used to get the desired result:

function setup() {
  createCanvas(400, 400);
  background(87, 6, 140);
}

function draw() {
  //ears
  fill(232, 190, 172);
  stroke(0);
  ellipse(110, 200, 30, 60);
  ellipse(290, 200, 30, 60);

  //neck
  fill(232, 190, 172);
  stroke(0);
  rect(170, 290, 60, 80);

  //body
  fill("#5A5A5A");
  rect(75, 320, 250, 200, 40);
  fill(232, 190, 172);
  stroke(0);
  arc(200, 320, 80, 40, 0, PI, CHORD);
  fill(232, 190, 172);
  noStroke(0);
  arc(200, 320, 60, 40, 0, PI);

  //face
  fill(232, 190, 172);
  stroke(0);
  ellipse(200, 200, 180, 200);
  //eyes
  fill(255);
  ellipse(160, 180, 50, 30);
  ellipse(240, 180, 50, 30);
  fill("#1569C7");
  ellipse(160, 180, 20, 20);
  ellipse(240, 180, 20, 20);
  fill(0);
  ellipse(160, 180, 8, 8);
  ellipse(240, 180, 8, 8);
  //eye shine
  fill(255);
  ellipse(165, 175, 5, 5);
  ellipse(245, 175, 5, 5);
  // nose
  fill("#9F7967");
  noStroke(0);
  quad(190, 215, 210, 215, 220, 225, 180, 225);
  fill(0);
  ellipse(194, 220, 7, 7);
  ellipse(205, 220, 7, 7);
  stroke(0);
  line(210, 164, 210, 215);
  //hair
  fill("#c89f73");
  noStroke(0);
  ellipse(200, 108, 173, 65);
  triangle(110, 180, 115, 100, 150, 110);
  triangle(290, 180, 285, 100, 250, 110);
  //mouth
  fill(231, 106, 106);
  stroke(0);
  arc(200, 260, 60, 13, 0, PI);
  arc(200, 260, 60, 8, PI, 0);
  fill(0);
  stroke(0);
  line(170, 260, 230, 260);
}

As visible from the code I also played around with the outline of the used shapes.

Following is the final version of the self portrait.

In retrospect, this was a great assignment as an introduction to p5 and I really enjoyed doing it! In the future, I would like to focus more on making artwork interactive as I have a few ideas I would like to explore such as psychedelic art.

HW1: Self Portrait

Inspiration

The assignment required us to play with basic shapes in p5.js and explore around to design a self-portrait. I wanted to add some creativity to the self-portrait so I began with the process of ideation to determine what could be a story behind my self-portrait. I wanted to do something funny.

I stumbled across a number of ideas throughout – including creating a type of animation or using text to create a portrait (but I realized it would go against the spirit of the assignment). But the one that stuck out the most was inspired from an episode of the show Phineas and Ferb – the one where the two brothers carve the face of Candace (their sister) on Mount Rushmore beside the others.

I instantly knew I had to do this. This became the story and purpose behind my self-portrait – To put my face up there on Mount Rushmore!

Project Implementation 

I started by importing the picture of Mount Rushmore from Unsplash. To avoid any lag in displaying the image, I preloaded the image in p5 before the setup function.

let bgImg;

function preload() {
  //preloading background image
  bgImg = loadImage(
    "https://images.unsplash.com/photo-1664048322440-7df65ca19151?ixlib=rb-4.0.3&ixid=MnwxMjA3fDB8MHxwaG90by1wYWdlfHx8fGVufDB8fHx8&auto=format&fit=crop&w=1170&q=80"
  );
}

The next steps involved slowly creating different parts of the face. I started out with an overall arc that would act as the outline of the face, went forward to create eyes, made a nose using a triangle, and used more arcs for the smile and the head, ellipses for ears, and circles for the eyeballs. I made sure to follow a definite order in which I added the different features in order to put them layer by layer. A specific piece that I wanted to add to the portrait was hair falling on the forehead, which sort of makes it more similar to me. I placed a triangle near the head to depict this. Then, I went about adding color to the different parts of the portrait. I copied color codes of natural skin tones from schemecolor.com.

Finally, I wanted to give a left tilt to the portrait to match the original design of the mountain and went about rotating all the components by a few radians and then translating their position to bring the portrait to the right place.

function setup() {
  createCanvas(500, 500);
  background(bgImg);
  
  //to give a tilted feeling
  rotate(radians(3))
  translate(18, -20)
  
  //ears
  fill("#F1C27D")
  ellipse(405, 276, 20, 30);
  ellipse(315, 276, 20, 30);

  //face
  fill("#FFDBAC")
  arc(360, 250, 100, 240, 0, PI, OPEN);

  //eyes
  fill(color(255))
  ellipse(337, 275, 30, 20);
  ellipse(382, 275, 30, 20);
  
  //eyeballs
  fill(color(0))
  circle(338, 278, 13);
  circle(381, 278, 13);

  //mouth
  fill("#FFDBAC")
  arc(360, 315, 60, 60, 0 +radians(25), PI - radians(25));

  //nose
  fill("#F1C27D")
  triangle(360, 290, 370, 317, 351, 317);

  //head
  fill(color(0))
  arc(355, 250, 110, 80, PI, 0, OPEN);

  //dropping hair
  
  noStroke();
  triangle(300, 250, 365, 247, 301, 280);
}

Throughout the process, knowing very specific coordinates was very necessary. For this reason, I used to continuously log the x and y coordinates of my cursor on the console using the draw function and then use those values in creating the different shapes.

function draw() {
  //   useful for finding coordinated on the canvas
  print(mouseX, mouseY)
}

Challenges

Personally, I didn’t face many challenges. There was just one that I would like to highlight. While trying to give the portrait a slight tilt, I used a number of functions before stumbling upon the right one. The ones I used before required the created canvas to be in WebGL format.  I wasn’t aware of WebGL and decided against making the portrait more complicated before stumbling across the right function.

Learnings and Reflections

One of the key takeaways I had from an Interactive Media course I took last semester was to question every creative decision and understand its requirement. My thinking while creating this assignment was the same. Why make a self-portrait? What could be the story behind this?

I believe I feel happy with the result I achieved. I didn’t look at this assignment as to just create a self-portrait, but rather to build a story about it and I feel I was successful in creating the outcome I had hoped for. Through the process, I got to explore the basics of p5 and get comfortable working with shapes and images. It was a great learning experience overall.


Self-Portrait

Overall Experience

In the first assignment for “Introduction to Interactive Media,” I was eager to dive in and see what the course had in store. As someone who typically prefers to stick to science, I was excited to challenge myself and explore my creative side. Being pushed out of my comfort zone and into the realms of creative programming was a very enjoyable experience to say the least. I was excited to see how p5.js could help me bring my ideas to life and add a unique interactive component to my personal projects. Consequently, working with tool allowed me to imagine the potential for creating interactive and engaging games in the future. One idea that instantly came to mind was an NYUAD themed “Dress Up” game or a game for the bookstore to try on merchandise while shopping online. The initial challenge of using basic shapes to create a realistic portrait was tough, but I was excited to take on the challenge and expand my skills. Additionally, This project not only honed my technical skills, but it also sparked my imagination and allowed me to tap into my inner creativity.

Work Process

I initially started by creating a canvas of (500, 415) and after some research on how artists create portraits I added a few reference lines to the self-portrait for ease of location, symmetry, and to get the proportions right. I did not want the face shape to be a perfect ellipse so I added a few triangles with strokeWeight(0). At this stage the face shape looked like:

Although it took me a while to understand how layering works in order to hide the rectangles, I was pretty satisfied with my progress. Then I revisited the concepts of arcs, ellipses, rectangles, and lines in order to create the basic structure of eyes, nose, lips and the body. I found drawing the lips to be hardest till this step because it was a combination of three triangles and an arc. It took me a while to figure out how to use the angles in order to change the orientation of the arcs/semi-circles. The reference lines helped save time as I did not have to constantly figure out the co-ordinates. After this step, my self-portrait looked like:

Now came the most crucial step which was ensuring that I had a good hairstyle. Even in real life I have struggled with sticking to a single hairstyle so for this portrait I chose the hairstyle I had back in grade four. I am glad I was able to come up with an equation in a for-loop that saved me from all the manual labor it would have taken me to create the hair effect. The code that I used was:

This led me to successfully make the hair style I was looking for. I also added ears using the arc() function and found this to be very challenging as I could not get the shape right but eventually the portrait started looking like:

After that it was all about coloring and making small adjustments. After this project I realized how difficult it can be to choose the right colors and how colors can make or break the project. I tried using three ways to choose colors i.e. RGB, Hexadecimal, and writing the name of the color in string. I am very proud of how I used concepts of simultaneous equations and gradient of lines to figure out where the two lines of the shoulder would meet, in order for me to color them right. After coloring , adding a beard and changing the background, the portrait looked like:

This was supposed to be my final submission but I was enjoying p5.js so much that I wanted to experiment with it more. I was really fascinated by the animations that professor showed us in class and hence I wanted to add something to my portrait as well. I added three buttons to the portrait that add/remove a hat, change the season (background) while also changing the color of the shirt respectively, and add/remove smile from the face. I wanted to show how I am most “happy” when I am wearing my “hat” on a beach in the middle of “summers.” The following picture is a depiction of a happy me:

I had a lot of fun ensuring the buttons worked and the animations in them changed as the button is pressed as well. So the final product looks like the following:

Reflection

I really enjoyed the whole process and this project has enabled me to connect more with my creative side. I am glad that I was forced to get out of my comfort zone. For future projects, I would want to continue certain things such as making separate functions for each of the component as that made editing the code really easy. Furthermore, I would want to continue using reference lines or use the mouseX/mouseY values for getting coordinates. There are a few things that I feel I could have improved. One of them is making the portrait look more realistic and I feel like I could have done that by making use of the bezier curves. I found them very difficult to use in this project. Apart from that, I would want to add more unique ways of making the project interactive and more user-friendly. In the future, I would want to every project to have a story and meaning behind it and I look forward to the remaining assignments.