Concept of Project
I decided for the final project to design a game that is very similar to the maze action video game, Pacman. Therefore, the main concept of my game is that there is a main character that looks like a green arc who tries to avoid the ghost enemies and eat circles, the more circles the character eats the more points he gets. The player will win the game if he or she can eat fifteen circles before bumping into one of the ghosts. On the other hand, if one of these ghosts catches the player before reaching a score of 15 circles eaten, then the player will lose the game.
I decided to create a game with this concept because I enjoyed playing Pacman as a kid and wanted to explore if I might be able to make a game that is very similar to my favorite childhood game. To make this project even more interesting, I decided to change some of the instructions of the normal Pacman game. If the main player eats a circle, the circle should change colors from yellow to red. Moreover, the main player can eat a circle more than one time.
This design for the game was implemented in my midterm project. For the final project, I decided to add more stuff to this game and make it controllable using hardware devices. Therefore, I created a physical structure that contains the hardware devices which control the Pacman game. These devices mainly include a joystick and a button and you can see the final output in the video below.
Description of Interaction Design
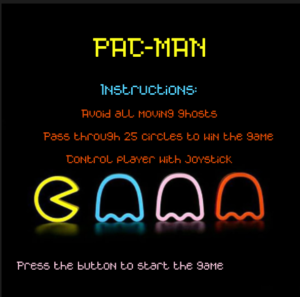
The interaction between the user and the game using hardware was done using mainly a joystick and a button. At first, the user will only see the main menu screen of the game that you can see attached below.
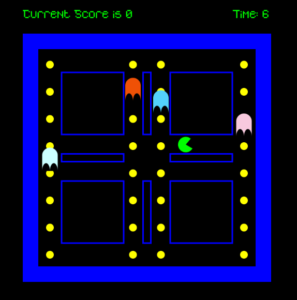
By pressing on the blue button that you can see in the image of the physical structure above, the user can start the game and move to the screen where the play screen of the game that you can see below.
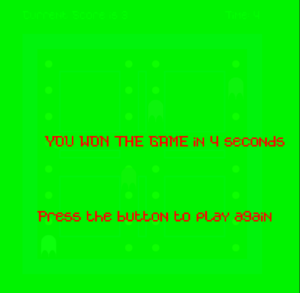
After that, the user can use the joystick to control the motion of Pacman in the game. By moving the joystick to the left PacMan will move to the left, while moving it to the right PacMan will move to the right, by moving the joystick forward PacMan will move up and by moving the joystick backward PacMan will move down. With this control of the PacMan motion the user can play the game easily and smoothly and enjoy one of the most famous classic arcade games. When the user win the game by reaching the score of 255 they will see the following screen
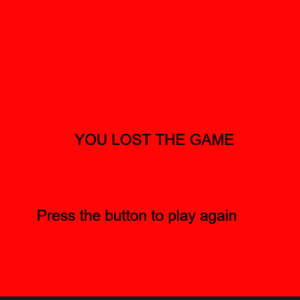
However, when the user loses the game they will see the following screen
By just pressing the blue button the user will be able to restart the game again.
Description of Arduino Code
The Arduino code for my final project is designed to control the joystick and the button in my game. I initialized four different pins that the Arduino code will read based on the inputs from the joystick. This is because the joystick that I am using has five different wires. One wire is connected to the ground while the other four wires are responsible for detecting the motion of the joystick in four different directions, forward, backward, left, and right. Therefore as you can see in this section of my Arduino code I am reading the values of these four different pins in Arduino. I decided to use the pull-up resistor when defining these pins to ensure that the pins are all set to 1 whenever the switch is turned off.
void loop() {

  switchState=digitalRead(12);

  UP = digitalRead(upPin);
  RIGHT = digitalRead(rightPin);
  LEFT = digitalRead(leftPin);
  DOWN=digitalRead(downPin);

  Serial.print(UP);
  Serial.print(',');
  Serial.print(DOWN);
  Serial.print(',');
  Serial.print(RIGHT);
  Serial.print(',');
  Serial.print(LEFT);
  Serial.print(',');
  Serial.println(switchState);
  delay(100); // add some delay between reads
}
Furthermore, I read another value in the Arduino code which is the value of the blue button to determine the state of the switch at any time. After that, I print the values of the four joystick pins as well as the value of the blue button and separate them by commas to send them to p5.js. I added delay between the reads to ensure that there is no unnecessary errors due to fast reads.
Description of P5.js code
The p5.js code contains information about the pacman game. It contains four main states which are the main menu, play state, win and loss states. I showed images of these states above, and to move from one state to another I created a state machine. To come up with the pacman and ghosts in the game I used two different classes. Inside the pacman class I created some functions to draw the pacman, move the pacman and check if the pacman hits any of the boundaries that I draw on the screen.
To create the ghosts in the game I created another class called ghost, in this class I also created functions to draw the ghosts and place them in random positions and move them up and down. I also control the speed of the ghosts in this class. After that, I created a function that detects whenever the pacman hits one of the ghosts to detect when the user is supposed to move to the loss state. I show the code for calling these functions in the playscreen below.
  for (let k = 0; k < 4; k++) {
    ghost[k].moveEnemy();
    ghost[k].checkBounds();
    ghost[k].drawEnemy();
    //check if the main player will hit the enemy
    ghost[k].checkLossState(mainCharacter.xPos, mainCharacter.yPos);
  }
  //draw main character and call different functions of the class
  mainCharacter.drawPlayer();
  currTime = int((millis() - prevTime) / 1000);
  textSize(15);

  text("Time: " + currTime, 300, 30);

  mainCharacter.checkBoundsConditions();
  mainCharacter.movePlayer();
  mainCharacter.eatCircles();
  mainCharacter.displayCount();

  mainCharacter.checkWinningState();
}
Communication between Arduino and p5.js
P5.js should also read 4 different values from arduino which will be the UP position, DOWN position, LEFT position and RIGHT position. If any of these values is zero then in p5.js I will write if statements to move the pacman towards this direction. For instance, if UP is zero then pacman moves towards the up direction.
In addition to this, the p5.js program will read another value from Arduino which will be the current state of the blue button. If the button is pressed, then in the p5.js I can move from one game state to another. For example, if I am in the main menu screen and would like to move to the game screen then I can easily do this by just pressing the blue button.
As a result, in the Arduino part of my project, I will be writing to the serial the 5 different values that I want to send to p5.js which are the four different directions along with the switch state and will separate these values by commas so that they could be easily read in p5.js. I display below the finalized version of my game with sounds implemented in it.
What are some aspects of the project that you’re particularly proud of?
This project especially the hardware and the physical computing part of it was very challenging for me. I spent so much time drilling wood and connecting wooden pieces together, therefore I think that the most challenging part of my project is mainly building the physical structure to house the different hardware devices. Although it was not easy, I am very proud of the result that came out of it because I really like how it looks right now and you can see it in the video that I attached above. Furthermore, I discuss in detail how I came out with this output in my previous post which shows the progress towards my final project.
What are some areas for future improvement?
I believe that I could add more hardware stuff to the game in the future. I would be adding some indicators like LED lights that will display to the user their progress in the game. For instance, if the user needs 25 points to win the game, I will have 5 LED lights and each LED light will light up after the user obtains 5 points. So after the user get the 25 points, he will have the 5 lights all being on.
Furthermore, I would also like to improve more on the software part of the game. This will be done by making the yellow circles disappear when the user goes over them. This will avoid having a glitch in the game where the user can go over the same yellow circle multiple times and still win the game. Overall, I really enjoyed this project and believe that I learned so much from it. I hope I can design more creative things with this knowledge in the future.


