
For this final project, I will be working with Ahmed as a group. We decided to go with our initial idea of making an interactive art piece. However, we considered what Professor Shiloh advised us during class when we shared our idea and started thinking about how we can make it more interactive and not lose the attention of our audience in 5 seconds. Before we started thinking more creatively, we were set on just making an art piece inspired by graphic art. Ahmed’s first post on this concept is linked here.
The art piece looks as if you are looking from above into a room filled with interactive walls. This digital art interacts with the user through mouse or sound control. Initially, we just wanted to replicate this same idea using p5.js and Arduino and make it come to life with materials in the IM Lab.
However, after taking into consideration what Professor Shiloh told us, which was that it would only keep the user entertained for a maximum of five seconds and need to come up with a way to make it more engaging, we did just that.
First, no more boring colorful blocks that look like walls. To be more aligned with our initial theme of depicting a living, breathing, organisms that reacts to different inputs, we have a more specific theme now: Stranger Things. If you are not familiar with stranger things, below is a trailer to season 1.
There are 4 seasons of stranger things now. The monsters that the group of kids fight are living, breathing organisms of some kind. The main things you and the user need to know is that one of the monsters on the show is called a Demogorgon. Below is a picture. The picture shows how it looks when it’s head is closed versus when it is open.
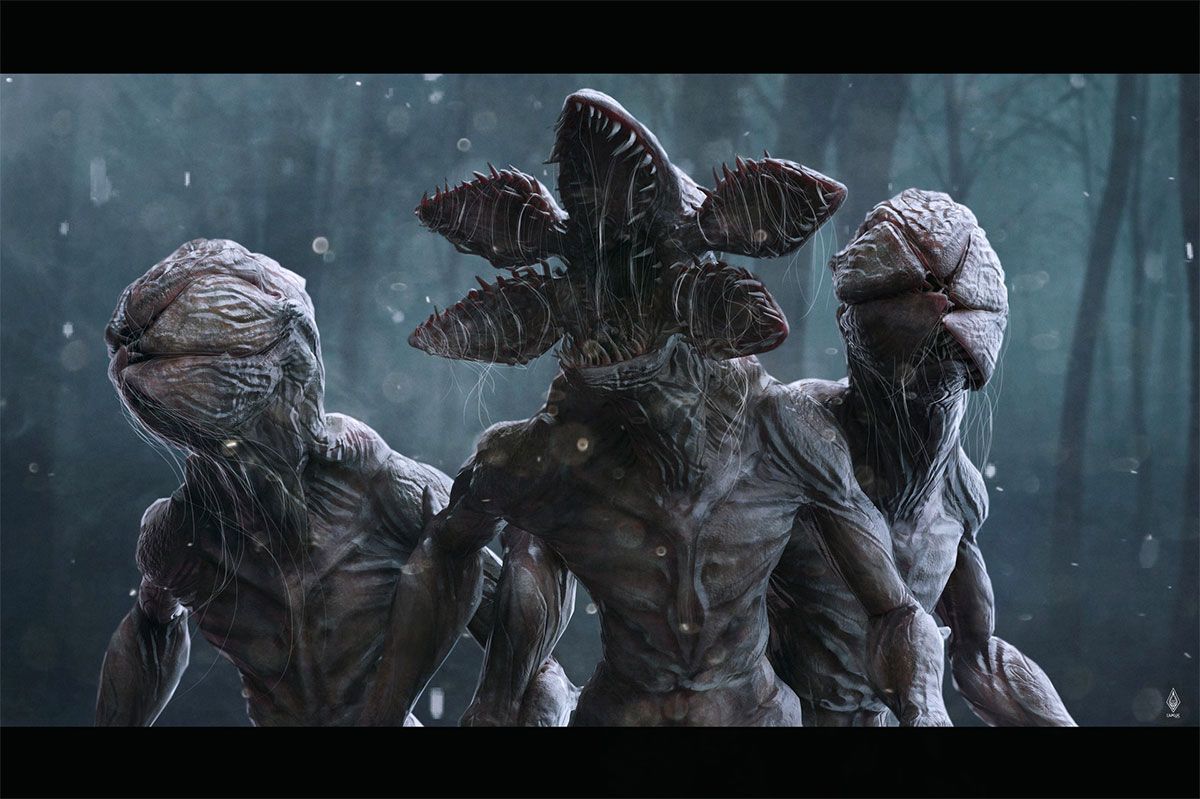
It kinds of looks like a very scary version of the Venus Flytrap plant.

At first, we were thinking of a plant/nature theme where we would depict some type of garden or collection of ferns or Venus Flytraps interacting with each other. It would have been more on the pretty nature side of things, but we thought Stranger Things could spice things up a little. We started looking for inspiration and we found this 3-D printed Demogorgon. We will only 3-D print the head and it would sit upright on the board we built. We plan on having the heads open and close as the user interacts with them through different mediums.

Our interactive Demogorgon project will include speakers playing ominous music, flex sensors, an ultrasonic sensor, and big flaps of the monster’s head being controlled with Servo motors. Using these components, the user will be able to interact with the living, breathing Demogorgons and have a little fun with them.
To make the whole project even more immersive we created a narrative behind the Demogorgon and the user being able to choose to interact with it as the protagonist or the antagonist.
Description of Arduino program will do with each input and output and what it will send to and/or receive from P5
Using Adruino, we will be controlling the Servo Motors, and checking for any analog inputs from the flex and ultrasonic sensors. The sensor values are mapped to (0, 180) using the following section of code:
  OutsideFlexValue = analogRead(OutsideFlexPin);
  delay(15); //adding slight delays to make it stable

  InnerFlexValue = analogRead(InsideFlexPin);
  delay(15);

  servoPositionOutside = map(OutsideFlexValue, 24, 48, 45, 180);  // need it to rest at a midwards position

// int round10(int servoPositionOutside);

  servoPositionInside = map(InnerFlexValue, 24, 48, 45, 180);
It will send out a signal to the p5js program every time it hits a pre-determined threshold value. The out-sent value is to let the P5Js code know to play a growling sound along with the petals opening wide.
Description of what the P5 program will do and what it will send to and/or receive from Arduino
In order for the user to control or choose the interaction they would like to have with the Demogorgon, we will use p5.js. We will display an instruction screen followed by a digital button screen where the user can select presets and change between modes. For instance, the user will be able to choose between using the flex sensors with the glove or with the ultrasonic distance sensors to have different interactions with each.
From arduino it will receive the aforementioned serial communication to let it know when to play certain sounds.
Future Improvements:
- Need to work on the mechanical aspect of the project more. The initial testing has shown that the servo motors cannot be used with a large armature due to force constraints.
- Need to streamline the code to reduce input delay
Sources We Used for Inspiration and Resources:
- For the fonts: https://www.dafontfree.net/play-regular/f157734.htm
- For the coin animation: https://gifer.com/en/gifs/coin
- For the background music:
- For the Flex-Servo control: https://www.youtube.com/watch?v=iNmdfKcG9E0
Problems and Solutions:
- The main problem we had from the start was that there was a lot of interference from the 5v pin on the Arduino which was causing the motors connected in parallel to jitter even when they were not being activated. We tried changing wires, changing components, making the digital pins far away as possible, and even using a different board but none of it worked.
Solution: The solution as the professor suggested was to use a separate battery to operate the servos with only digital PWM pins being connected to the board itself. This reduced the jitter to negligible.
Some Progress Pictures:
Preliminary flex component testing: flexsensor
A demonstration of the fitted component moving: