
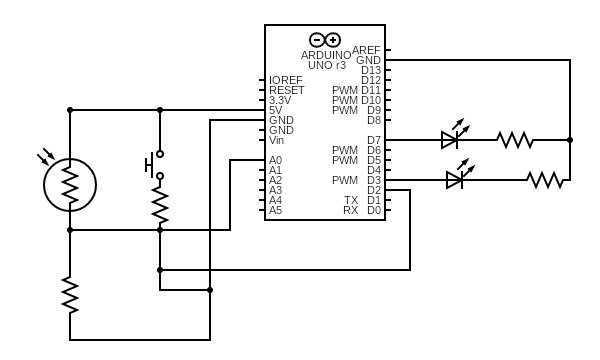
For this assignment, I used a digital sensor (switch) that acts as an ON/OFF button for an LED and an analog sensor (photoresistor/light sensor) to control the brightness of another LED. I built 2 simple LED circuits, each connected to their sensors using code.
Recorded Video: 2 LEDs working
To choose the values for the thresholds of the analog sensor, I first printed the values of the analog output to see what values the photosensor ranges from and to (depending on the room light I was in). Then, I divided them into 4 ranges.
if (brightness < 25) {
  Serial.println(" - Dark");
  analogWrite(blueLEDPin, 0);
} else if (brightness < 50) {
  Serial.println(" - Dim");
  analogWrite(blueLEDPin, 10);
} else if (brightness < 100) {
  Serial.println(" - Light");
  analogWrite(blueLEDPin, 80);
} else if (brightness < 255) {
  Serial.println(" - Bright");
  analogWrite(blueLEDPin, 255);
} else {
  Serial.println(" - Very bright");
}
Reflection: I found digital sensors easier to work with, but analog sensors so much more interesting because there is so much more to do with it.