
Concept
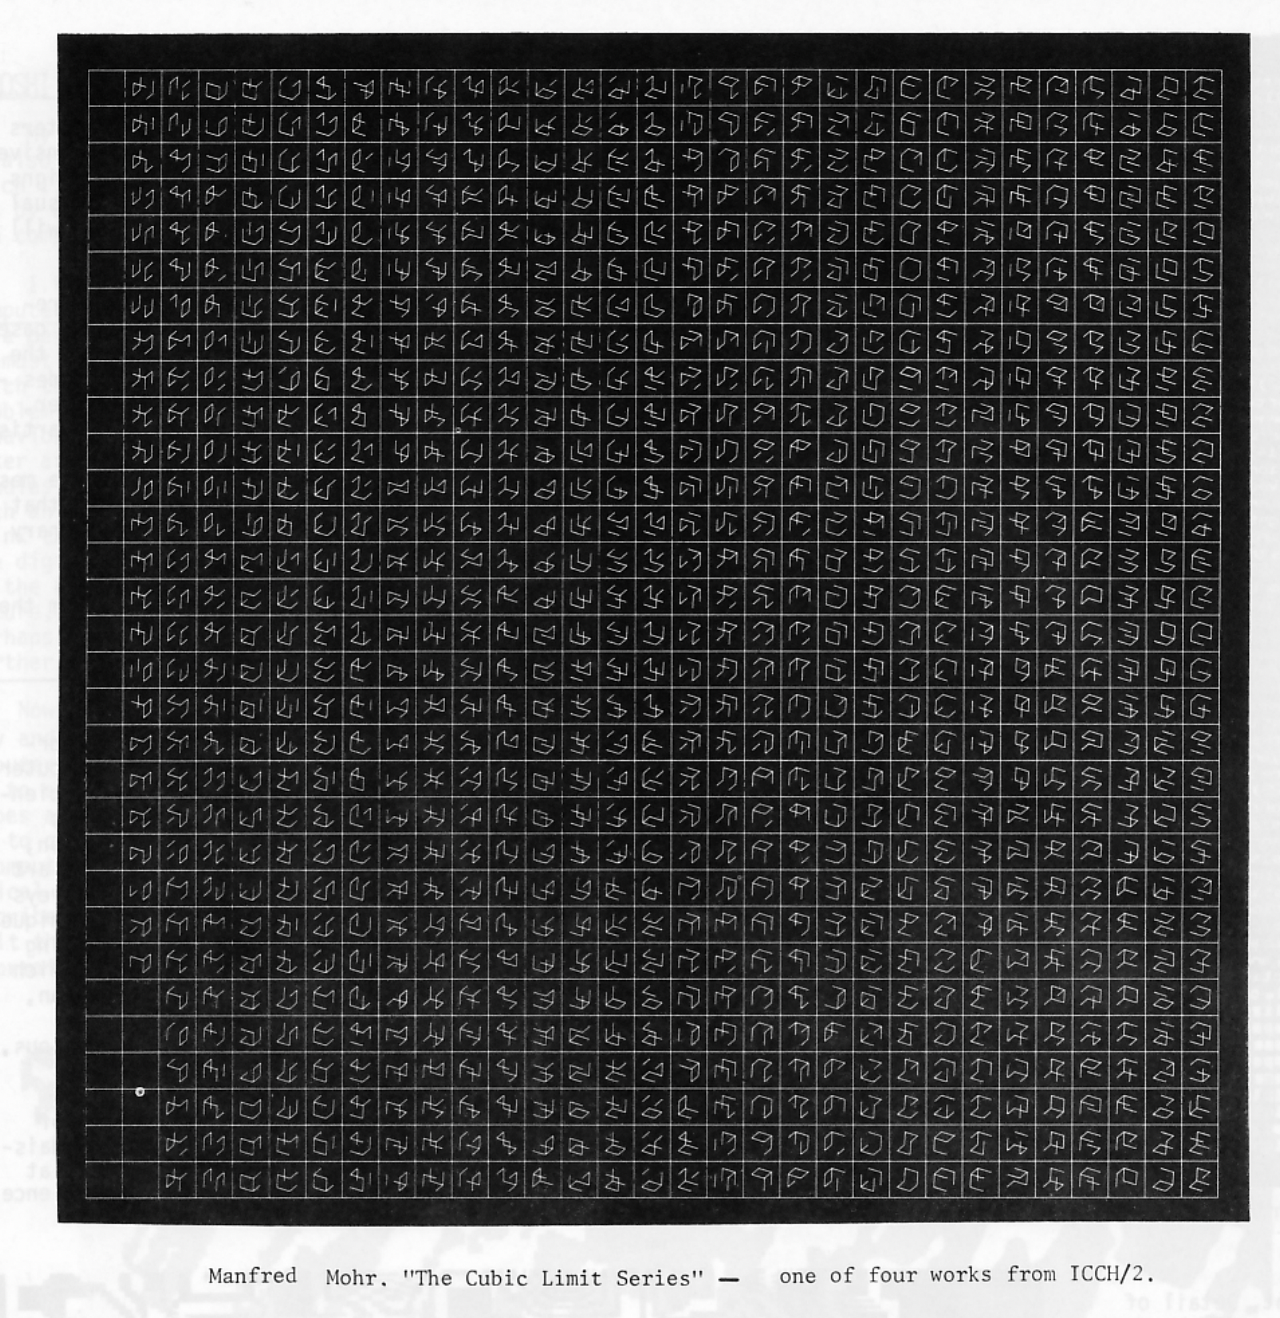
This assignment was inspired by the piece from ‘The Cubic Limit Series’ by Manfred Mohr. Coded in FORTRAN IV, the short film depicts a ‘catastrophe point’ when a rotating cube is dissolved into a set of abstract lines. Thus, I was awestruck by the idea of re-creating art that builds on abstract design but focuses on objects related to me.
Just like Mr. Mohr found his Eureka moment in the form of a ‘cube’, I found mine to be ‘Pac-Man’ — a popular video game as well as the character of the game. Here, I focused on creating a range of shapes – including but not limited to circles, ellipses, arcs, rectangles, spirals and so on. For this, I divided the entire project into five parts:
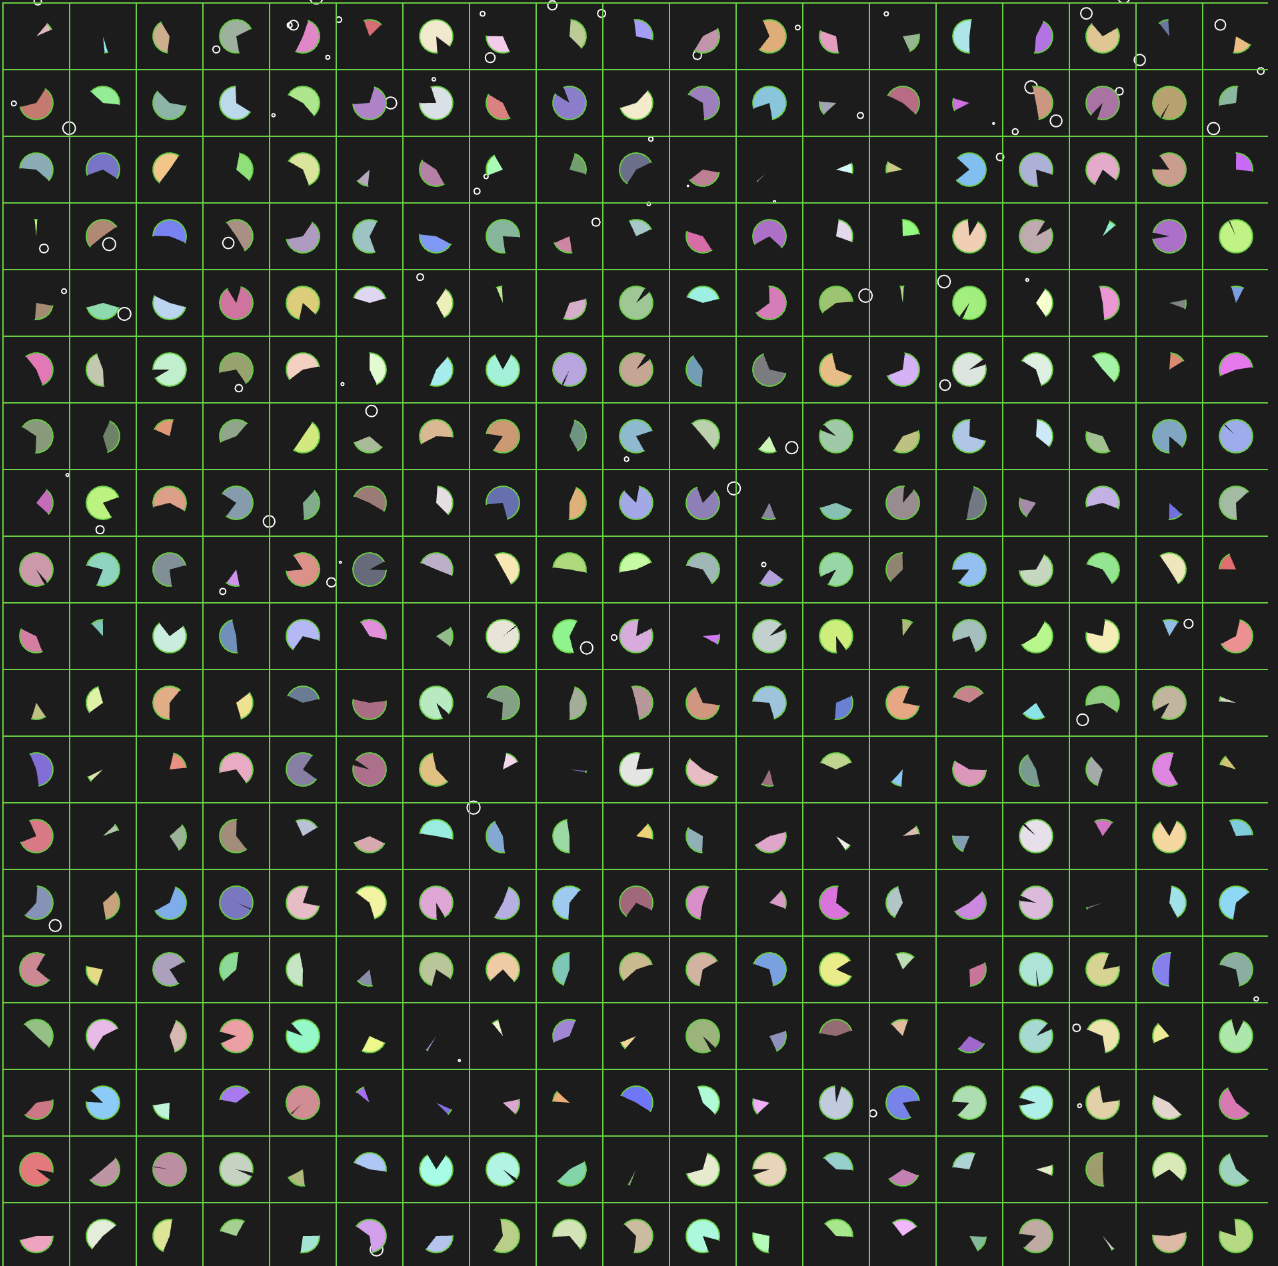
Part 1: Grid Lines [function draw_grid()]
The first and foremost step was to create a grid. To do this, my initial plan was to use two nested loops and use a combination of the line() function, but it was non-uniform, more tedious and its dimensions were not adjustable dynamically. Instead, I opted for the rect() function to draw a single cell.
Thus, the canvas size of 1000 pixels by 1000 pixels was divided into tiny square-shaped cells of 50 pixels (in length) each. Using two for loops (in the nested form), the aforementioned square cells were drawn on the canvas. As a final touch, random red, green and blue (RGB) values were picked for the stroke color. Since the draw() function is called recursively on p5.js, the stroke color changes after each frame.
Part 2: Pac-Man [function fill_pacman(arguments)]
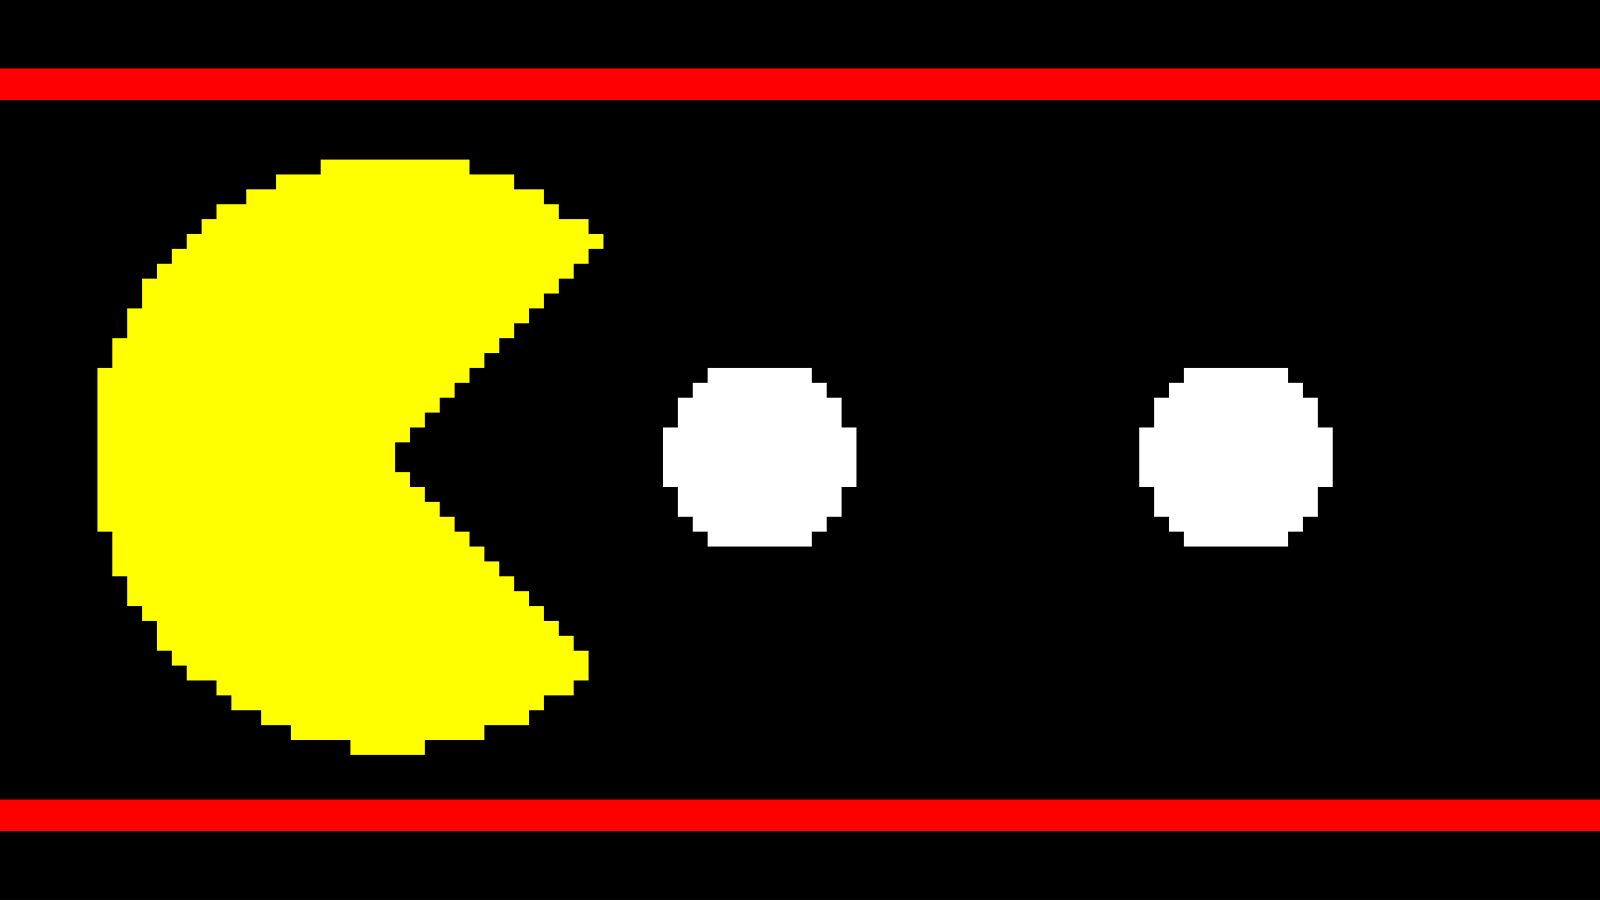
The entire code was wrapped in the fill_pacman() function with its dependency on six arguments – which were the initial and the final value for random() function used to determine the R, G and B values. This function is called in two places — one in the draw function and the other in the draw_circles() function (which will be discussed later).
Part 3: Snowfall like effect [function draw_background() and class fallingFlake()]
I used to play the original Pac-Man game all the time, but during the winter break, it used to be intense. Thus, I wanted to add the snowfall effect to the background of the project. Also, the functionality is handled by the draw_background() function, which depends on the class ‘fallingFlake’. Based on my previous experience, the project becomes more manageable with the help of Object Oriented Programming, thus the use of a class.
The class consists of four arguments taken as input while object instantiation (or creation): x and y coordinates of each snowball, its radius and speed (gravity) and three methods: constructor, update() and display(). The update() method simply updates the y-coordinate of each snowball, while the display() method displays each snow pellet in the form of a circle.
Similarly, the draw_background() function creates and stores a list of randomly instantiated 100 (adjustable) snow pellets using a single “for” loop — in doing so, the x-position and the radius of each snowball are assigned randomly while the gravity is set to be 5. The count of snow pellets keeps on adding after each frame. Then, using another “for” loop, the program iterates through the list of snow pellets to display and update them consecutively.
Part 4: Draw concentric circles [function draw_circles(argument)]
One of the ways to integrate user interaction in the project was by using mouse-click-functionality. Thus, when the mouse is not pressed, grid and Pac-Man are displayed, but as long as the mouse is pressed, a change of screen is visible (which is handled by Parts 4 and 5).
Here, two sets of concentric circles (centered at the cursor’s position and increasing in radii) are created, and these circles change color as the frame is refreshed. The function takes frameRate from the draw() function as an argument, which in return determines the number of iterations of the “for” loop used to draw the circles. In addition, function fill_pacman() is called here, but with parameters such that the RGB value of the screen is different than that of the screen when the mouse is not clicked.
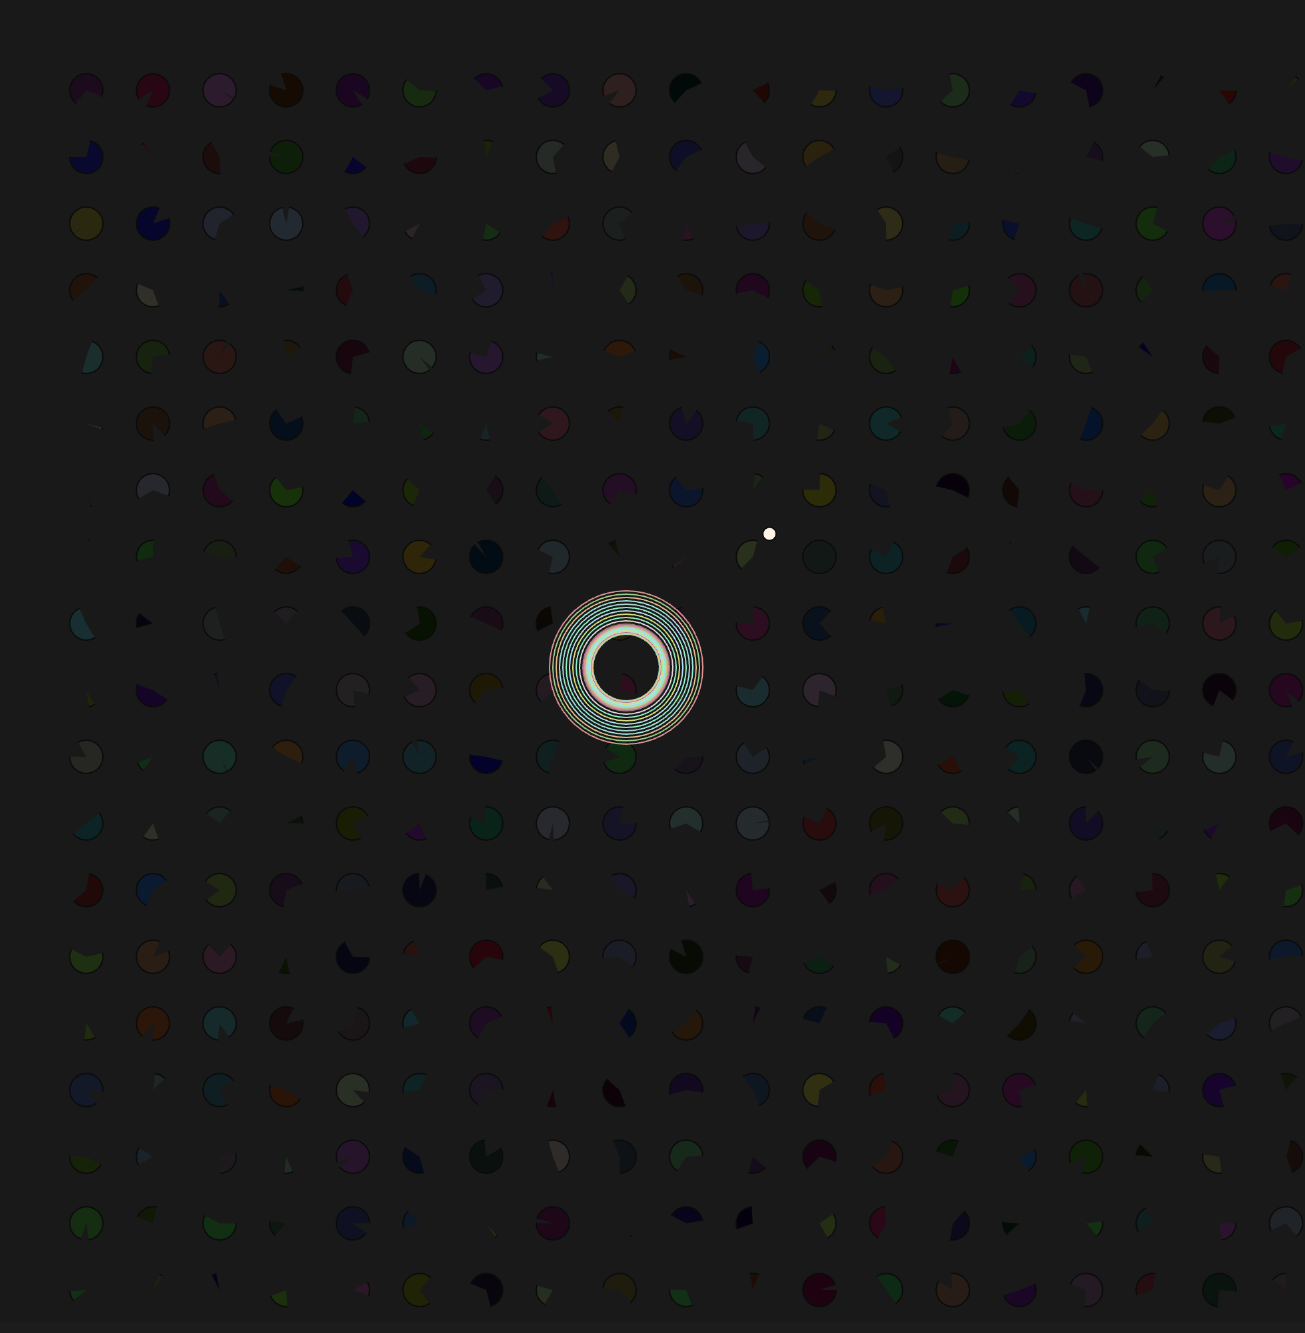
Part 5: Drawing a Fermat’s spiral [function draw_Fermat_spiral()]
The final part and the highlight of the project is creating a spiral. The basic idea was to create a Fermat’s spiral that traces its path as it moves along.
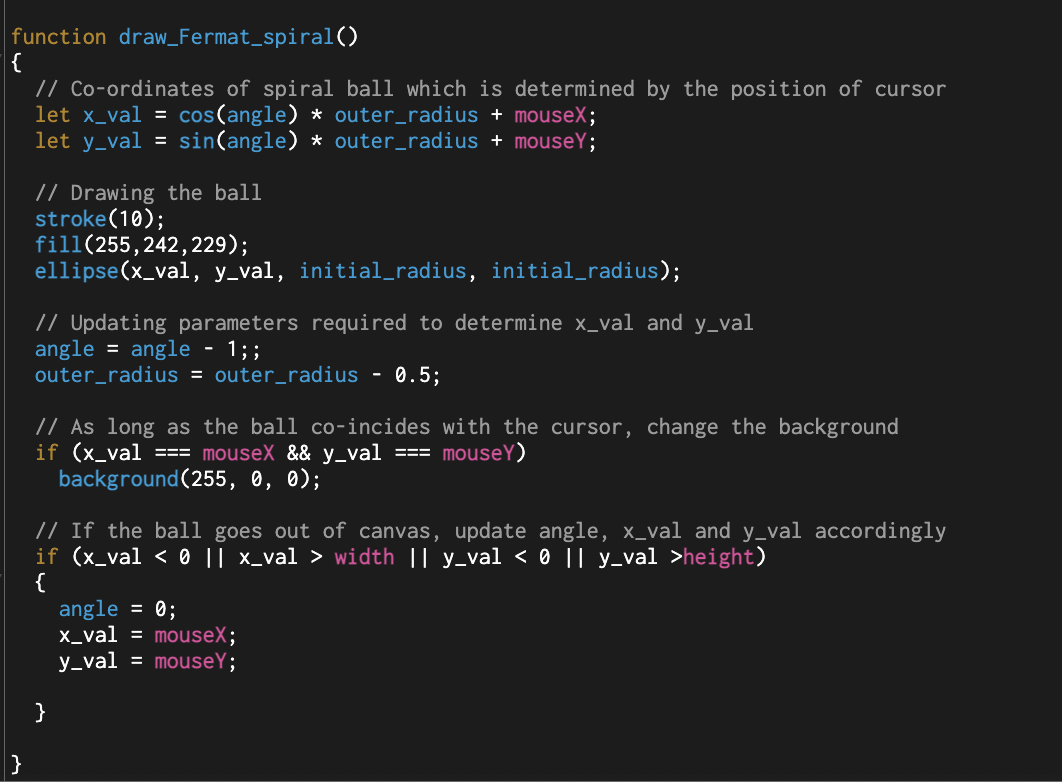
But, to make the overall functionality more interesting as well as to preserve other background components of the project, the code has been modified so that just the leading point of the spiral is visible. The function itself is a short one, but it’s a highlight because of all the Mathematical brainstorming that went behind it.
Determining the x and y coordinates of the leading point of the spiral and updating it while displaying the trace was a major task. After repeated trials, this was done with the help of two Mathematical values (angle of curvature and the main radius of curvature), while the inner_radius sets the radius of the leading circle. Initially, I was using lines to trace the path, but the use of an ellipse combined with two trigonometric ratios simplified the overall spiral creation.
The video shows the pattern the code shown above generates on a plain background:
As mentioned earlier, for this project, the function has been modified so that the user can keep on clicking on the screen, and the spiral will build around the cursor; however, just the head of the spiral is visible to the user, which keeps revolving around the cursor.
Reflection
In short, I am pleased with the final piece. As I spent more time brainstorming than coding, I was dubious about the project, but in retrospect, it proved to be interesting, entertaining as well as rewarding.
There are a few things that I will work on in the future:
- When the mouse is clicked, I originally intended to create a visual music effect. It has been partially done in terms of graphics. Now, adding sound files and maybe synchronizing the expansion of concentric circles with musical beats will be my next target.
- The code is somewhat streamlined in terms of modularity. Nonetheless, it is laggy as the list that stores all the snowball objects keeps on growing in size. Thus, it can be cleared at the end of the program in future versions.
- Incorporating more user interactions into the project.
With these improvements, the code will be more responsive. Plus, the addition of a range of effects as deemed necessary will further enhance the project.
Interesting! I like the effect. The background feels a bit glitchy – instead of each background frame being completely different you could consider making it animate more smoothly. For example instead of picking a new set of angles for each Pacman shape you could have each one grow at a different rate and then reset (pick a random starting “fullness” and a random speed of growing). Similarly for the grid lines you could randomly pick a set of colours and then fade between them. Good to see you’re thinking about the aesthetic composition!