
General Idea:
After a lot of thinking and research we decided we wanted to try something and we honestly didn’t know if it would work or not. Our initial Idea was to created some sort of drum set. We felt like it would be a cool challenge to take on! The idea is to have 6 pads attached to a board, and each pad creates a different sound or tone when you press on it.
First attempt:
In our first attempt we started trying to create the “drums” using piezo buzzers. We assembled together a foam board with 6 pads, each with an piezo buzzer attached to it. We think we got a bit to courageous and we put together the whole instrument and it did not end up fully working. We believe the conceptualization and idea could work (it did work to a certain extent).
We think the reason why it didn’t work is because we wanted each pad to create a sound when we press on it. However, we believe the vibrations created by pressing on one of the pads to create the sound was also picked up by the other pads which made the buzzer go crazy. The serial monitor is what helped us get to that conclusion. We tried to fix it however, we did not have enough time to do so. Hence, we decided to switch it up a bit.
The piezo buzzers we had to remove 🙁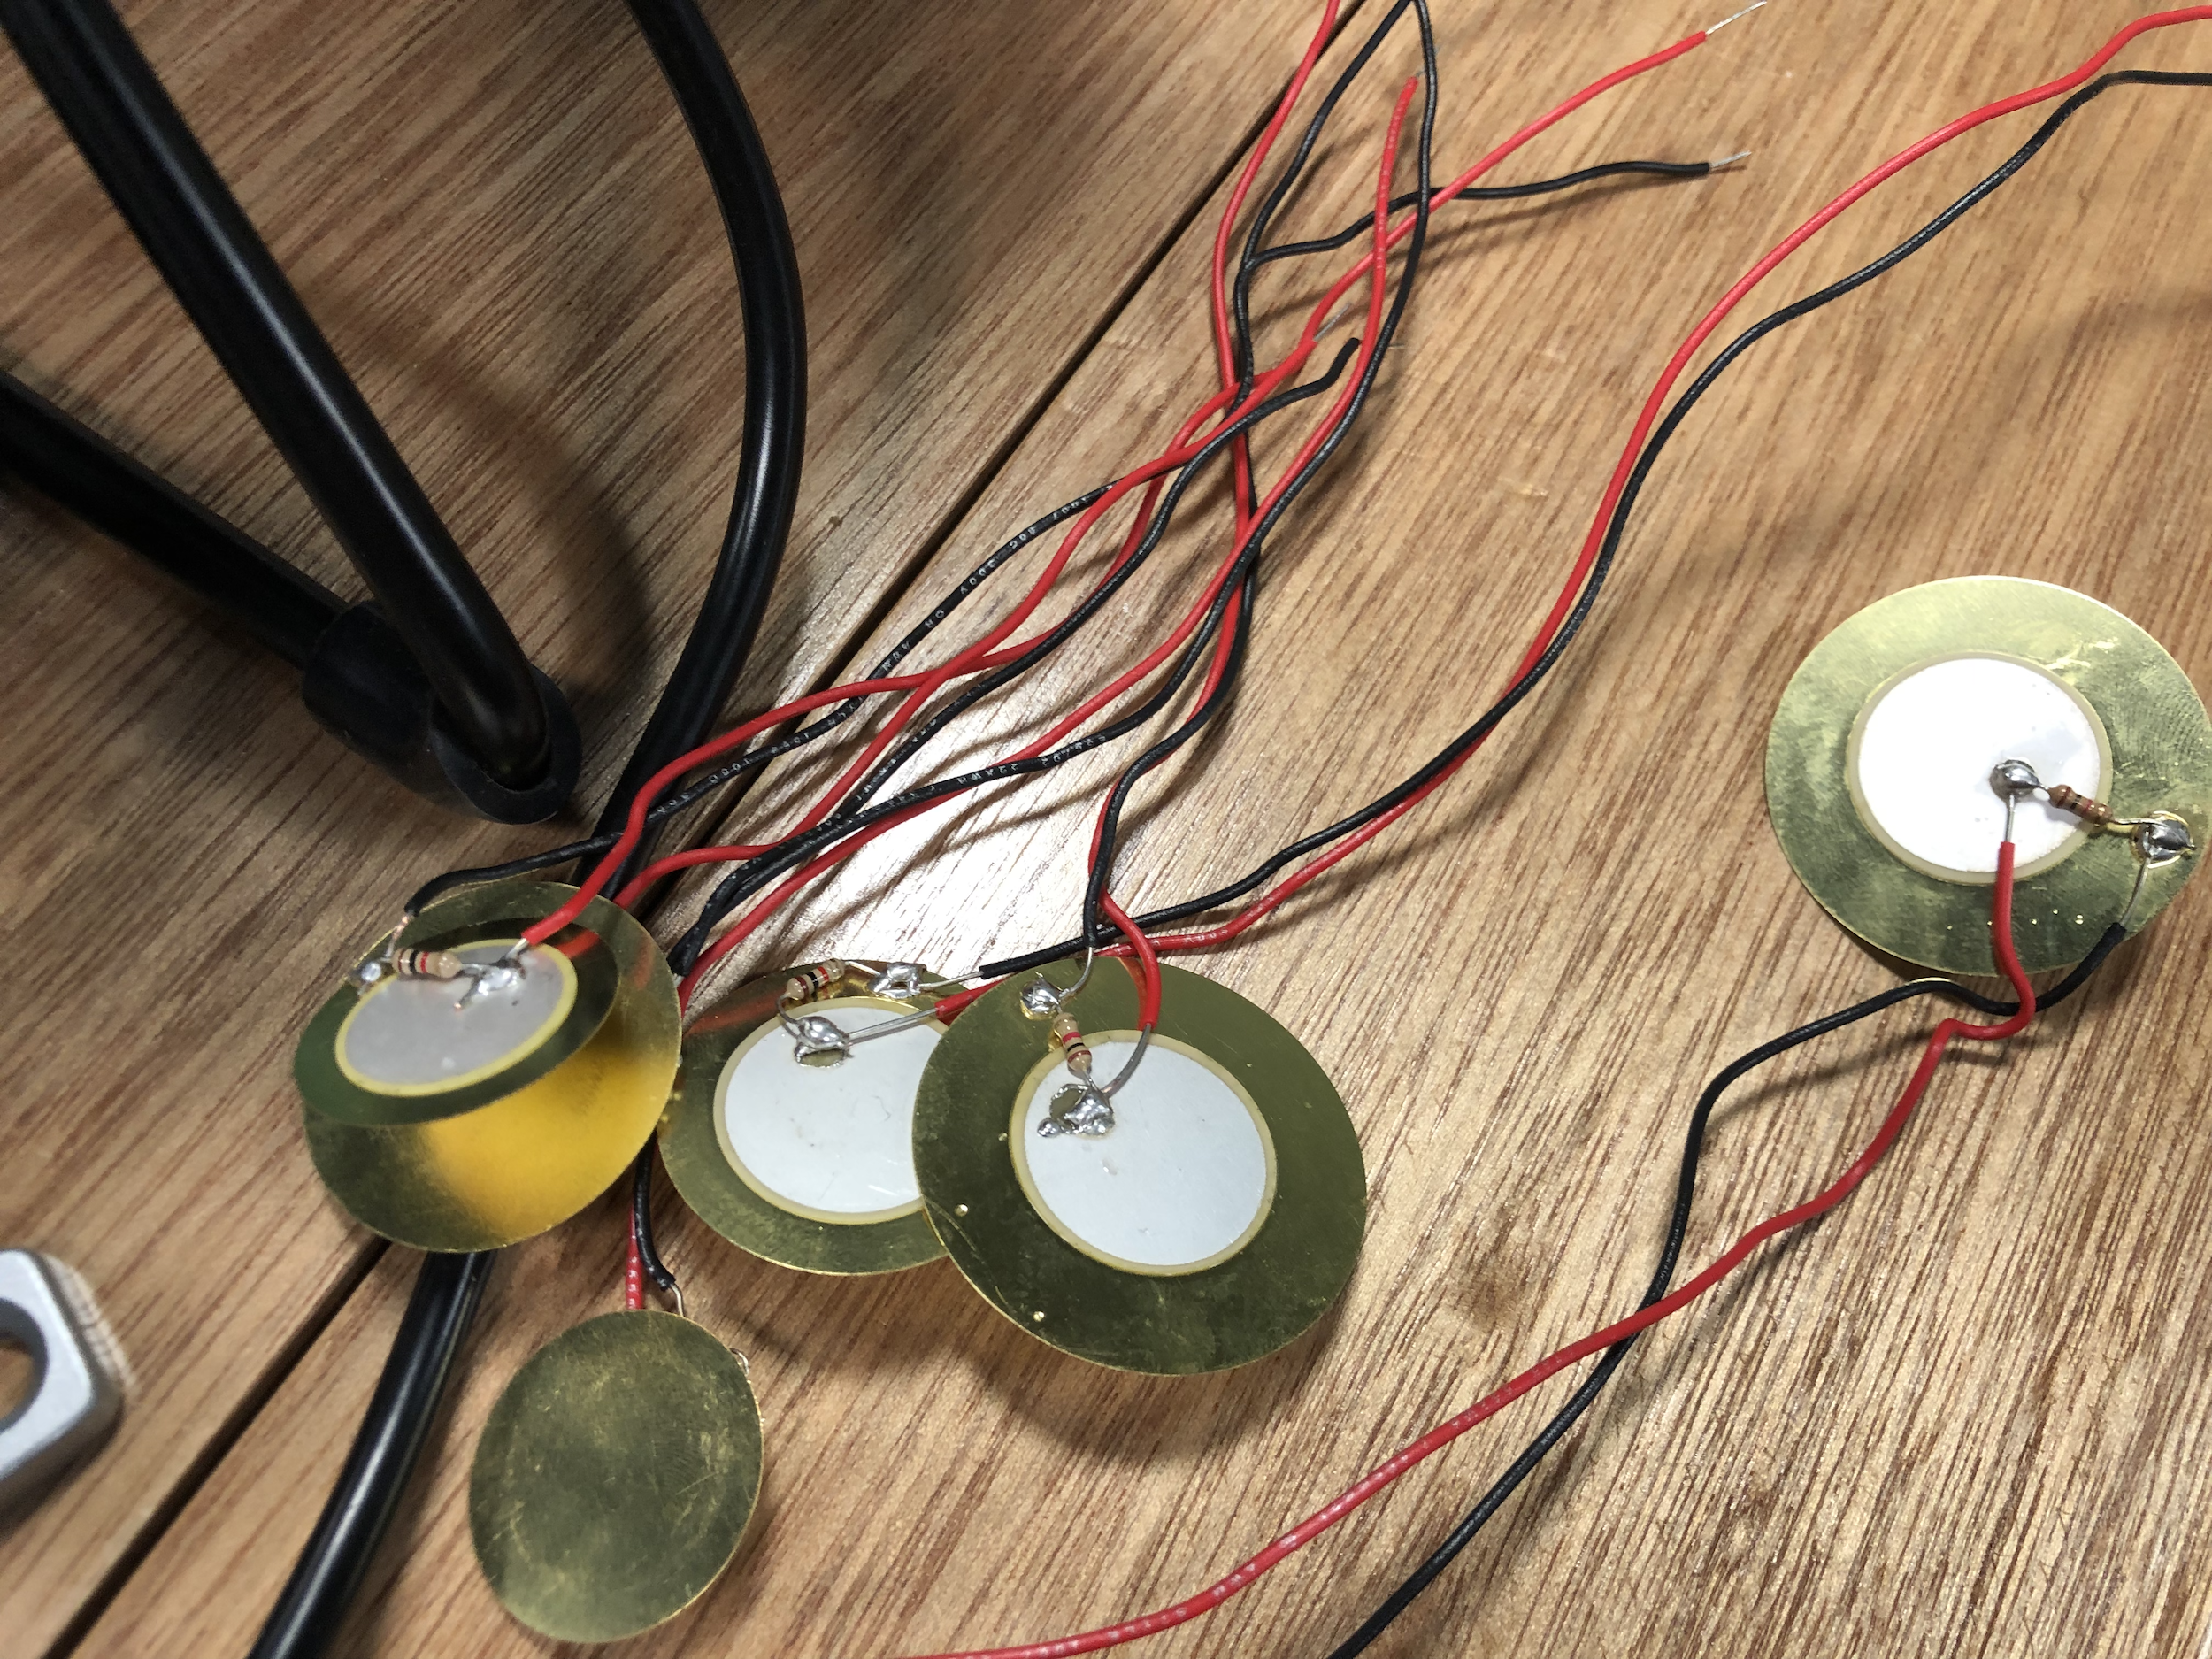
Attempt 2 (This one actually worked :))
We met again, and decided to use force sensitive resistors instead. We reassembled the board and substituted the piezo buzzer with force sensitive resistors, we also added a layer of sponge in the middle between the board and the separate tabs. Each pad has a different tune when pressed on.
We then decided to use a button as our digital read, as a switch for Led lights that we added. The Leds only light up when you press on the pads. So the button switches the LEDS on and off but they only light up when we press on the tabs, if we press on the tabs when the button is off the LEDS won’t light up we we press on the tabs.
This video shows how the button is used:
Final touches:
Just to add some visual appeal to the board we decided to print out pictures off different drums to complete a drum set and stick them on each pad. Even thought the tunes don’t really sound like drums lol 🙂

Finally this our result!