I swear, this title was my friend’s idea. I was going to go with “A R-eye-ot of Colours”. Which in hindsight (*sigh*), isn’t that much better.
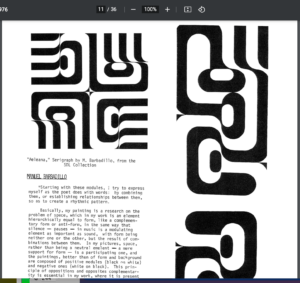
This week, we were supposed to take inspiration from some old computer graphics magazines and make use of loops. I decided on this page:

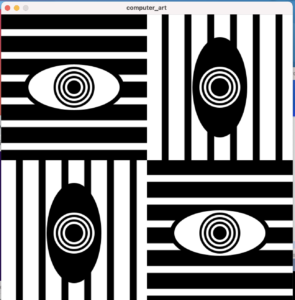
I liked the funky graphics vibe it gave. But once I started trying to recreate it, I ran into some problems. Namely, it was hard to make a loop for all 4 quadrants and use translate() while also rotating the design each time. Eventually, I ended up experimenting with shapes which would only require a vertical-horizontal shift.
I have used the ternary operator in this program. So much. And translate() in the Processing library saved me when I thought making quadrants wouldn’t be possible, and so did pushMatrix() and popMatrix() which had been mentioned in class by name. But after fooling around and using loops in multiple places, I had a design which seemed vaguely decent to my eyes (*siiiigh*).
If you do a very deep interpretation of my reference art, it could look like eyes with eyelashes drawn in block style. I tried.

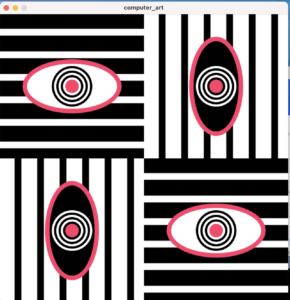
Now you know where all the eye puns are coming from. These had initially been without the black borders, and I thought I should try to make it more artistic and add accents. So I added the borders by making one more ellipse underneath the original ones, and trying out random colours. I decided the “pupil” of the eye also looked better with the same colour filled in.

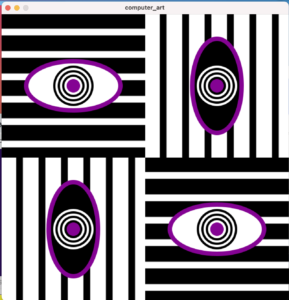
I had previously also experimented with keeping all the ellipses horizontal, but decided that this one was truer to the original and had more flare. However, I couldn’t decide on one colour to use for the final version. This indecisiveness gave rise to a better idea though: I could just add a lot of colours and program it to change on every mouse click. We had done everything required for this in class, and from my previous knowledge of Java I decided to use switch case to make my work easier. So, I decided that I would try to recreate a VIBGYOR palette, but with more colours of the spectrum. I used a counter variable to count the number of mouse clicks, and by using the % operator I made sure the colours would be in the same order each time.
This is what the final code looked like:
color col = color(0);
int ctr = 0;
int squareWidth = 320;

void setup(){
  size(640, 640);
  rectMode(CENTER);
}

void draw(){
  background(255);

  //repeating the processes in each counter
  for(int i=0; i<4; i++)
  {
    //base colours (black/white)
    fill(i==0 || i==3? 0: 255);
    rect(i%2==0? squareWidth/2: squareWidth+squareWidth/2, i<2? squareWidth/2: squareWidth+squareWidth/2, squareWidth, squareWidth);

    pushMatrix();

    translate(i%2==0? 0: squareWidth, i<2? 0: squareWidth); //to shift to the next quadrant
    fill(i==0 || i==3? 255: 0);
    noStroke();
    for(int j=0; j<6; j++)
    {
      if(i==0 || i==3)
        rect(squareWidth/2, 40+50*j, squareWidth, 15);
      else
        rect(40+50*j, squareWidth/2, 15, squareWidth);
    }

    fill(col); //for the coloured boundaries
    ellipse(squareWidth/2, squareWidth/2, i==0 || i==3? 220: 120, i==0 || i==3? 120: 220);

    color prev = color(i==0 || i==3? 255: 0);
    fill(prev);
    ellipse(squareWidth/2, squareWidth/2, i==0 || i==3? 200: 100, i==0 || i==3? 100: 200);

    for(int j = 0; j<7; j++)
    {
      if(j==6) //because we want the innermost circle to be coloured
        fill(col);
      else
        fill(prev==color(255)?0:255);
      circle(squareWidth/2, squareWidth/2, 90-j*10);
      if(prev==color(255))
        prev = color(0);
      else
        prev = color(255);
    }
    popMatrix(); //this ensures that the next translation will start from scratch
  }
}

void mousePressed(){

  int num = ctr%10; //depending on number of colours we have
  switch(num) //order of the colours
  {
    case 0: col = color(0);
            break;
    case 1: col = color(132, 3, 147);
            break;
    case 2: col = color(114, 91, 250);
            break;
    case 3: col = color(91, 201, 250);
            break;
    case 4: col = color(59, 234, 198);
            break;
    case 5: col = color(202, 234, 59);
            break;
    case 6: col = color(250, 244, 63);//(250, 250, 149); a previous shade for keepsake
            break;
    case 7: col = color(252, 154, 74);
            break;
    case 8: col = color(237, 77, 109);
            break;
    case 9: col = color(227, 48, 51);
            break;
  }
  ctr++;
}
Now you’re going to see why the colour puns are there. I am actually quite surprised by the pulsing effect the colours seem to have and how they transition smoothly into each other, it is quite pleasing to the eye (hue hue hue?).
Although I am quite happy with this result, I realised after seeing other posts that I could have used frameCount to make this a continuous animation too. But this was made for indecisive people like me, so that we can stop on whichever colour we like best. And I think it serves that purpose well.
On this note, I don’t think I have much more to add here. I know I promised I would try to be less loopy in these posts, but oh well. Now you see me, now you don’t.
B-eye! 🙂

