Our Final Project:
Overall I am really happy with how our project came out. We went from a rough idea inspired by a VR game to a fully formulated and functioning team building game that really utilizes both the strengths of Arduino and Processing. Shreya was a great partner and we made this come together through great teamwork.
Here is our previous documentation that can show how we have come along
- Final Project Preliminary Idea – by Cole and Shreya
- Final Project Progress – by Cole and Shreya
- Final Project Update 2
Things added as a result of debugging:
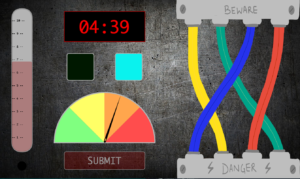
Since we were dealing with both Arduino and Processing, if something went wrong, or wasn’t working the way we expected it, it was really hard to find out where the problem was. It could have been in the circuit, or the Arduino code, or the handshake (arising from the difference in speeds of Arduino and Processing), or the Processing code/logic. So, we used a lot of println() statements to check if the input/output was being read from the Arduino and being correctly passed on to Processing. One problem we faced was on stage 3 when you have to replicate the LED patterns. It would set the bomb off sometimes even if the pattern was correct. After racking our brain on what was incorrect in the logic of our code, we realized that the problem was with the discrepancy in the speed of Arduino and Processing (even after establishing the serial communication) and not our code. Processing wouldn’t read all buttons pressed on the Arduino every time. When we printed these out, we realized where the problem was. This resulted in the addition of a small flashing light on the Processing screen on the bottom left corner to indicate which button color was pressed and read by Processing. If that light doesn’t flash, that means the button input wasn’t read. This proved to be a very important signifier.
Making it a bit harder
So, we coded our program to wait for specific inputs at each stage. But, what if a user by mistake, presses something Arduino/Processing is not waiting for at a specific stage such as a button when submit was expected? Since it is a bomb, ideally it should go off if something incorrect is done. So, to make the game harder and interesting, but not letting the bomb go off at every wrong input, giving the user a little flexibility to play around and have fun, we decided to have 2 checks. 1) Make the bomb explode if an incorrect input is given from one of the input methods the particular stage is waiting for, 2) reduce the time left by 10 seconds if an incorrect input is given from a wrong input method. In our program, you can record an input by either pressing one of the four buttons on the Arduino screen or the submit button on the Processing screen for the distance and potentiometer. If an input is expected from the Arduino button and submit button is mistakenly clicked, it reduces the time. However, if a yellow Arduino button was expected, but a red one was pressed, then the bomb goes off.
Additional Touches and User Experience
We decided to add sounds for user experience and specific feedback to the user. For example, it was essential to indicate to the user when their time was reduced. So we added a sound for this to the Processing program. Then, of course, you want to hear an explosion right when the bomb goes off? Should look real. So, we decided to add a sound to both our end screens – if you win or lose. Finally, we also have the best sound of all, the bomb being defused and the game being won!
Game Design and UI
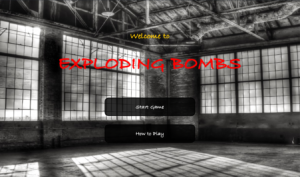
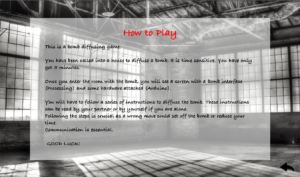
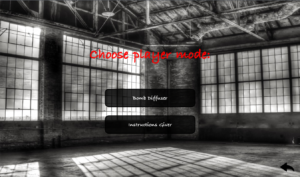
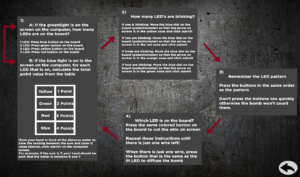
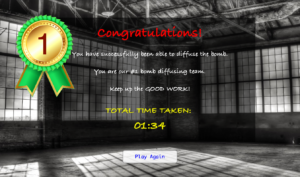
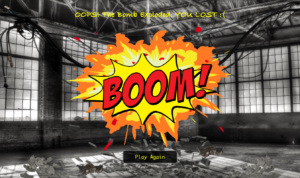
We made a total of 6 screens for the whole game (the last one having 2 parts) – 1) A start/menu screen, 2) a ‘how to play’ screen, 3) a player mode choosing screen which would navigate to the game screen or bomb instructions screen, 4) bomb instructions screen, 5) the game screen, 6) end screen: win screen and lose screen.
Honestly, UI takes quite some time to implement because of all the design, color choices, etc. We even added back buttons for easy navigation and a ‘play again’ button if the user wishes to go back and replay the game, switch roles with their partner, etc.
Our game is also designed in a way that it can be 2 players or 1 player. For one player, all you would have to do is keep a screenshot/printout of the bomb instructions printed out and handy.
See a video for each in the end!
User Testing
Shoutout to all our friends who played the game. Several nights we had friends trying out the game which helped us make several changes. We found that the instructions needed to be written in a more straightforward manner about the flow of the game, non-technical language used to describe the Arduino, as well as some limitations in what Processing was handling.
Final Game Presentation
The video for Team Cole and Shreya:
The video for Cole v/s Shreya
Code
The complete code can be found here.
https://drive.google.com/file/d/1tCewHvnM6zKLZ8ocNCzcTAer62c9MZxg/view?usp=sharing
It can also found on the Github Shreya and I used regularly to merge our code together
https://github.com/crb596/IntroToIMFinal
Interesting Parts of the Code:
Processing/Arduino communication: As Processing is more powerful running on a laptop than on a computer, all the logic about which lights are on is done via Processing. Every handshake involves sending 4 boolean variables, one for each light, as well as two bomb state variables (exploded or defused) to the Arduino. Arduino receives this information, lights up the passed LEDs or goes into an exploded/defused state. Arduino then returns the state of each button, the distance meter reading, and the potentiometer back to Processing.
Random LED: Each time the bomb goes into a new phase, the variables for each light are randomized within the constraints of that round. For example, on the round where a random amount of LEDs flash, first a random number 1-4 is chosen and then that many random LEDs are flashed.
Button Press/Used: Since Processing is running at 60fps(if we are lucky) and Arduino is running at a much faster rate, we had to add a variable that would determine if a button is being pushed, similar to the function mouseClicked(){}. We created a boolean variable that would be set to true whenever a button was recorded being down and back to false when released so we could keep track between rounds and extra inputs were not recorded.
Bomb timer: Processing gives current time in milliseconds using the function millis(). We used milliseconds as a unit to do all timer calculations – recording start time of game, getting current time, calculating time elapsed and time left, periodically updating those and also noting the final time taken to diffuse the bomb for the end screen. However, we wanted the time to be displayed in the usual format of minutes and seconds, so we made a convert time function to display it in the appropriate format.

