Quick summary from Armaan and Thaís
For the past few days we have been working on the Arduino part of the project and how it communicates with the Processing part related to the controller. We had a lot of technical difficulties because the program would load and then crash or a message would appear saying that the port was busy and thus couldn’t be opened by neither Processing nor the Serial window in Arduino.
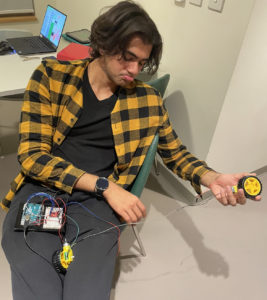
Additionally, the motors sometimes would stop working (wouldn’t move) thus, we couldn’t test the code properly until we got the wheels to move again. We discovered that this was due to the fact that the weight of the Arduino and the bread board was too much for the wheels. We then tried to separate the Arduino and breadboard from the wheels so that they could move without the weight. Unfortunately, this didn’t work since as we tried to extend the length of the wires, many of the extensions would get loose and disconnect, which frustrated our efforts to leave the wheels by themselves. Here is an image of Armaan to demonstrate the sadness we felt when we discovered our brilliant idea was a waste of time:
Since we didn’t want to waste more time, we decided to test the controls with the car in the air in order to check if whether the code we were doing worked or not. The idea is to use the game controller as an input to control the car, map the values of those inputs and then send it to Arduino.
One of the problems we had with this is that even though the joystick of the controller gives values very close to zero when you leave the joystick alone, once those values are mapped, it threw some weird values that made the motors keep on moving. We then had to establish a parameter (between -10 and 10) in order for the motors to activate the brakes. Additionally, the buttons of the controller (which can also be used as brakes) instead of giving a value of either 1 or 0 (as given in the configuration) was instead giving a value of 0 or 8. We also had to fix this by basically hardcoding the fact that the input of the button must be divided by 8.
Testing and fixing the code was very troublesome since every time we disconnected the Arduino the port number changed, so we had to check that the portname was the one we were currently using.
After much struggle, we were finally able to run the code effectively.
What we then decided to do was re-position the wheels below the Arduino in order to balance the weight better and try to see if the car would be able to move. Though it got better, there were still problems with the car stopping after a certain amount of time.
After much pondering, we noticed that the reason why the car was completely stopping was due to the fact that the wheels were curving because the tape we used wasn’t strong enough to hold them in place. We had to get the two sided tape that is used to hang frames from the wall. The position is not perfect, but it got the job done and allowed us to test the car on the ground. There were some issues with turning the car and also with how fast it can go, but after a while of trial and error, we finally succeeded.
Processing
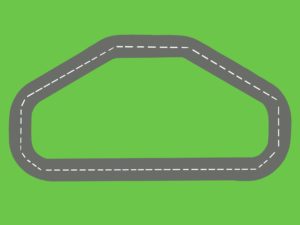
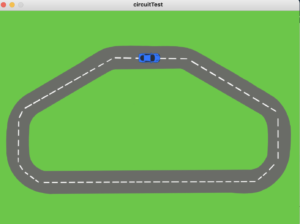
For the processing part, besides using the controller library, we also want to display the road that the car must follow in order for the user to complete the circuit (similar to a spacial intelligence test). For that purpose, we decided to test out how to make sure that the player follows the designated path by using a sample circuit and a car image that will showcase the player’s position in the track.
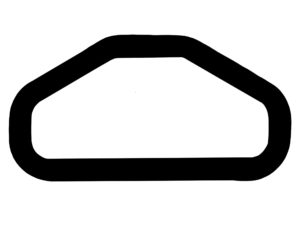
To check the constrains of the player’s track, we decided to use PGraphics. There is a black and white copy of the track and what we do is check if the pixel color of a rectangle at the position of the car matches that of the outside of the track (white pixel on white pixel). Thus, if both pixels are white, the player will not be allowed to go through that zone.
This is the black and white copy of the circuit
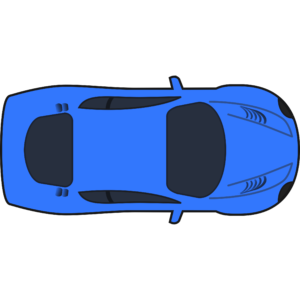
This is the car used to showcase the player position
This is how processing showcased the track with the car along the path.
We are currently working on a more aesthetic model of the track and on a carton cover for the Arduino that will be both for aesthetics and to balance out the weight of the car in order to improve the performance of the car movement.
Note: The controller library that we are using works with our PSP controller only on Windows, so learning how to use the operating software also slowed us down a little, but we are now more comfortable using it (though we still use a Mac to do the Processing side that does not require the controls).

Great work you two!