
I have always loved to hear violins. I have never been a musician myself, neither do I know any basics of music (chords, strings, notes etc.) but violin has always fascinated me. So, for this assignment, I was very tempted to make a violin.
PROCESS and DIFFICULTIES
First of all, it was important to search about violins. What strings it has, how many of them (yes, I did not know violin has 4 strings!), how you play chords on it. Honestly, there was a lot of music terms that I didn’t understand, but hopefully, with the help of my friends, I got the technicalities correct in my Arduino-controlled-violin xD
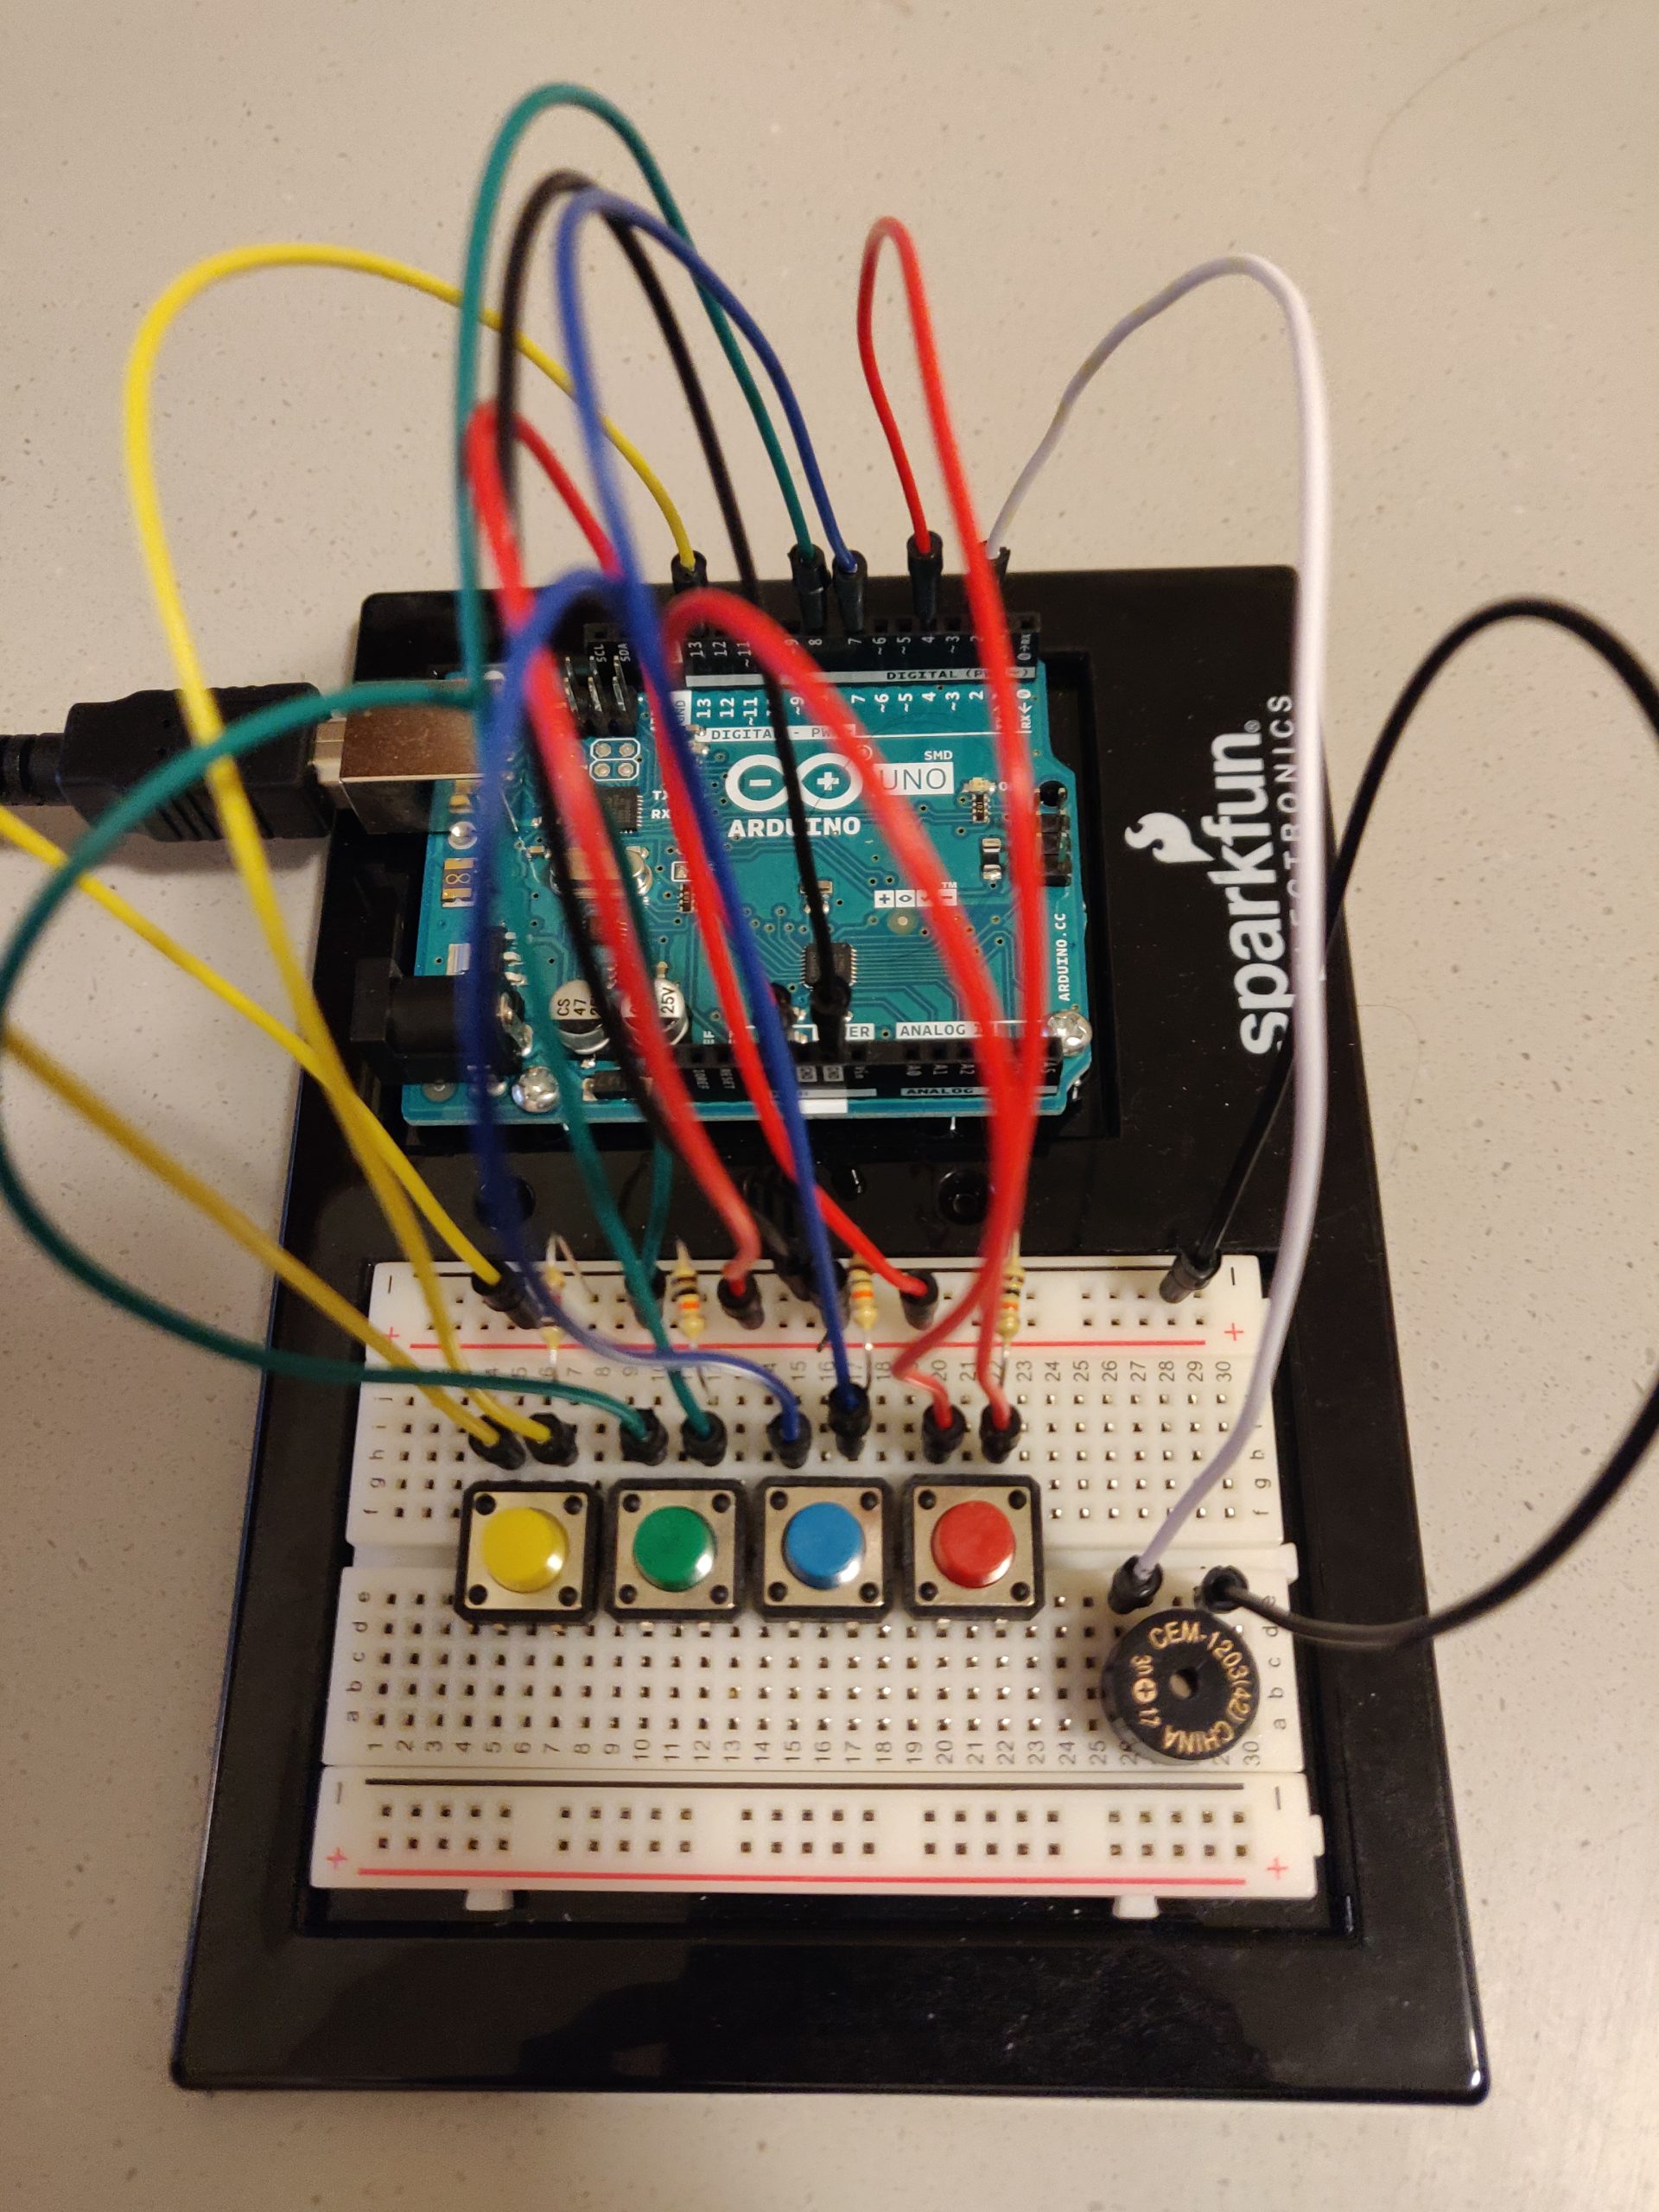
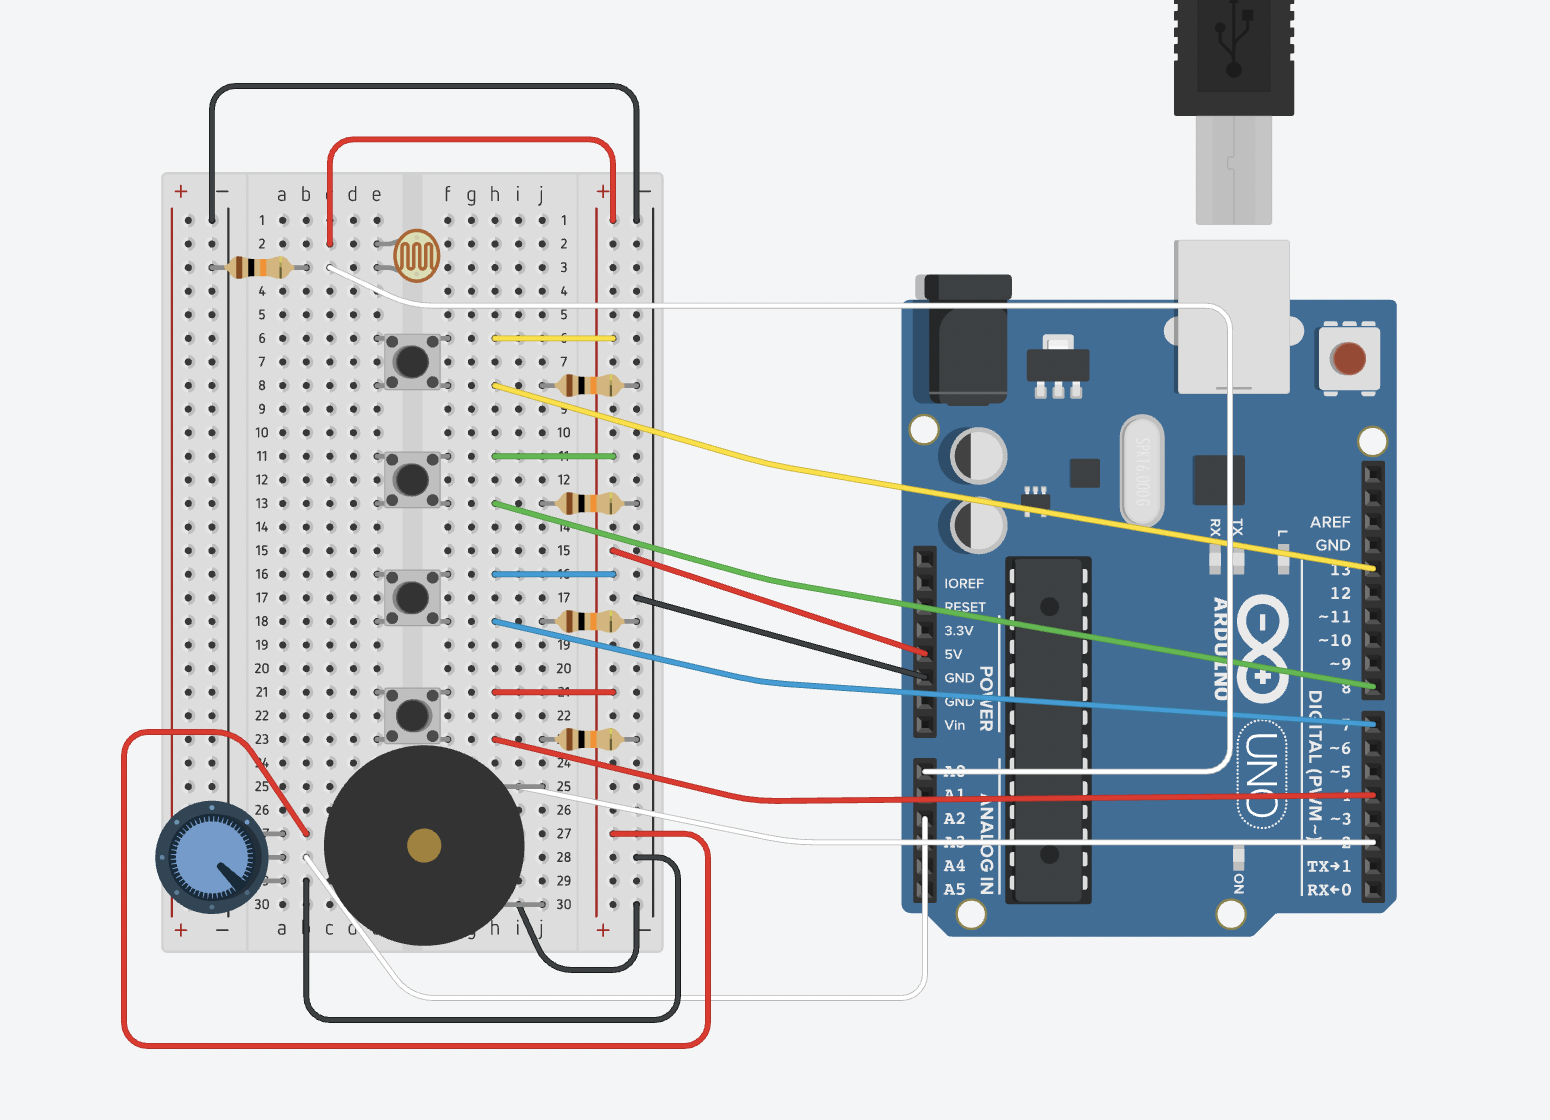
So, to replicate the 4 strings, I placed 4 buttons on my Arduino (see picture below).
If you press a button, it should play the open string note for that button. I problem I faced is here is that if I pressed a button, the sound would keep on continuing even when I released the button. To fix this, I used the noTone() function. I programmed it so that the tune stops playing when I release the button. However, this was not enough. I implemented the following code:
if (b1State == HIGH)
   tone(sPin, b1Note);
else if (prevB1State == HIGH and b1State == LOW)
   noTone(sPin);
A more difficult problem I faced was being able to play sounds from 2 button at a time. If I pressed 2 buttons simultaneously, the voice would become squeaky and annoying. I didn’t know what was happening. (See video below).
After searching on the net, I found that there is a frequency controller inside our buzzer, which can only play one frequency at a time. So, the buzzer can only play one tune at a time and not more. I found a fix for this, using multiple input wires and different resistors along with the alalogWrite() function instead of the tune() function. This would be able to write more than one frequency on the buzzer but this was more challenging to implement than it seemed. I didn’t have the correct resistors to put in. I tried various combinations of series and parallel resistors that could give me the desired Ohm value, but I wasn’t able to achieve it correctly to be able to implement my notes properly.
So, I decided I will restrict the user to one button at a time. I ensured that if another button is pressed while one was already pressed, the second button would not play the tune. Only when the first one is released, will the second one be played. I did this by altering the code in the following way:
if (b1State == HIGH && b2State == LOW && b3State == LOW && b4State == LOW)
   tone(sPin, b1Note);
Next came playing different chords. The best way I thought of implementing this was to use a photocell which when tapped upon, would change the chord of my buttons. Each button would then signify the note played by first, second, third or fourth finger of that chord. I used the following picture as a reference to do so:
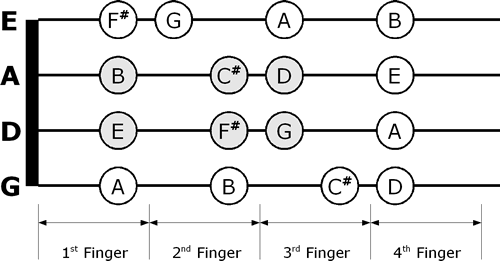
I am not sure my interpretation of t=it is necessarily correct, but being a person with no music background, I would say this is my version of the Violin hehe.
I added a little paper around my LDR to stabilize its readings. Otherwise, the threshold for touch would change depending upon my relative position to it and how much light I had been blocking.
For final touches, I decided to add a way to change the pitch/scale of the notes one was playing. So, I added a potentiometer for that. I wanted to keep a choice of 3 different scales – 3, 4, 5 (I hope they are called scales!) so I dived my potentiometer range into 3, and depending upon its value, the scale would change. One could further divide it to play all the scales if need be.
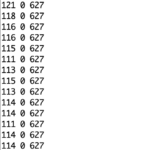
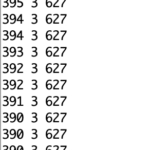
I also printed out the potentiometer readings, and chord choice so the user is aware of the chord and scale they are playing at. I f we keep the serial monitor open while playing the violin, it is a good indicator.
My final output looks like this:
I am very happy with what I made! Also, this project was much more exciting than usual because I learned and searched about music notes and tried to understand them for the first time ever! (It was hard to understand and I still don’t get it fully – I think not unless I start playing an instrument – but nevertheless, it was very fun 🙂 )
TINKER-CAD MODEL
CODE
The pitches.h file is the one Prof. Aaron shade with us in class. Below is the code I wrote (pitches.h file in another tab).
#include "pitches.h"

const int b1Pin = 13; //for the button pin - to play musical notes
const int b2Pin = 8; //for the button pin - to play musical notes
const int b3Pin = 7; //for the button pin - to play musical notes
const int b4Pin = 4; //for the button pin - to play musical notes
const int sPin = 2; //the speaker pin
const int ldrPin = A0; //the photo cell pin
const int potPin = A2; //potentiometer pin

bool b1State = false;
bool prevB1State = false;
bool b2State = false;
bool prevB2State = false;
bool b3State = false;
bool prevB3State = false;
bool b4State = false;
bool prevB4State = false;

int b1Note;
int b2Note;
int b3Note;
int b4Note;

int photoValue;
int prevPhotoValue;
int knobValue;
int chordChoice = 0; //0=E, 1=A, 2=D, 3=G

void setup() {
  pinMode(b1Pin, INPUT);
  pinMode(b2Pin, INPUT);
  pinMode(b3Pin, INPUT);
  pinMode(b4Pin, INPUT);
  pinMode(sPin, OUTPUT);
  pinMode(ldrPin, INPUT);
  pinMode(potPin, INPUT);

  Serial.begin(9600);

}

void loop() {

  b1State = digitalRead(b1Pin);
  b2State = digitalRead(b2Pin);
  b3State = digitalRead(b3Pin);
  b4State = digitalRead(b4Pin);

  photoValue = analogRead(ldrPin);
  knobValue = analogRead(potPin);
  //Serial.println(photoValue);

  if (photoValue < 150 && prevPhotoValue > 150)
    chordChoice = (chordChoice + 1) % 4; //i.e. change chord

  Serial.println((String)photoValue + " " + (String)chordChoice + " " + (String)knobValue);

  assignNotes();

  if (b1State == HIGH && b2State == LOW && b3State == LOW && b4State == LOW)
    tone(sPin, b1Note);
  else if (prevB1State == HIGH and b1State == LOW)
    //this is so that this happens only once when when button is released and not all the time
    noTone(sPin);
  if (b2State == HIGH && b1State == LOW && b3State == LOW && b4State == LOW)
    tone(sPin, b2Note);
  else if (prevB2State == HIGH and b2State == LOW)
    noTone(sPin);
  if (b3State == HIGH && b2State == LOW && b1State == LOW && b4State == LOW)
    tone(sPin, b3Note);
  else if (prevB3State == HIGH and b3State == LOW)
    noTone(sPin);
  if (b4State == HIGH && b2State == LOW && b3State == LOW && b1State == LOW)
    tone(sPin, b4Note);
  else if (prevB4State == HIGH and b4State == LOW)
    noTone(sPin);

  prevB1State = b1State;
  prevB2State = b2State;
  prevB3State = b3State;
  prevB4State = b4State;
  prevPhotoValue = photoValue;
}

void assignNotes()
{
  if (knobValue <= 341) //play on the 3rd scale
  {
    switch (chordChoice)
    {
      case 0:
        b1Note = NOTE_FS3;
        b2Note = NOTE_G3;
        b3Note = NOTE_A3;
        b4Note = NOTE_B3;
        break;
      case 1:
        b1Note = NOTE_B3;
        b2Note = NOTE_CS3;
        b3Note = NOTE_D3;
        b4Note = NOTE_E3;
        break;
      case 2:
        b1Note = NOTE_E3;
        b2Note = NOTE_FS3;
        b3Note = NOTE_G3;
        b4Note = NOTE_A3;
        break;
      case 3:
        b1Note = NOTE_A3;
        b2Note = NOTE_B3;
        b3Note = NOTE_CS3;
        b4Note = NOTE_D3;
        break;
    }
  }
  else if (knobValue > 341 && knobValue <= 682) //play on the 4rd scale
  {
    switch (chordChoice)
    {
      case 0:
        b1Note = NOTE_FS4;
        b2Note = NOTE_G4;
        b3Note = NOTE_A4;
        b4Note = NOTE_B4;
        break;
      case 1:
        b1Note = NOTE_B4;
        b2Note = NOTE_CS4;
        b3Note = NOTE_D4;
        b4Note = NOTE_E4;
        break;
      case 2:
        b1Note = NOTE_E4;
        b2Note = NOTE_FS4;
        b3Note = NOTE_G4;
        b4Note = NOTE_A4;
        break;
      case 3:
        b1Note = NOTE_A4;
        b2Note = NOTE_B4;
        b3Note = NOTE_CS4;
        b4Note = NOTE_D4;
        break;
    }
  }
  else //play on the 5nd scale
  {
    switch (chordChoice)
    {
      case 0:
        b1Note = NOTE_FS5;
        b2Note = NOTE_G5;
        b3Note = NOTE_A5;
        b4Note = NOTE_B5;
        break;
      case 1:
        b1Note = NOTE_B5;
        b2Note = NOTE_CS5;
        b3Note = NOTE_D5;
        b4Note = NOTE_E5;
        break;
      case 2:
        b1Note = NOTE_E5;
        b2Note = NOTE_FS5;
        b3Note = NOTE_G5;
        b4Note = NOTE_A5;
        break;
      case 3:
        b1Note = NOTE_A5;
        b2Note = NOTE_B5;
        b3Note = NOTE_CS5;
        b4Note = NOTE_D5;
        break;
    }
  }
}
Nice job Shreya. Yes, the tone library won’t let you do more then one note at a time. But there is a really nice library that will, Mozzi: https://sensorium.github.io/Mozzi/ It doesn’t sound very good with a buzzer though, I tried it recently. You need a slightly better speaker. But simple things might sound good.