
For my midterm, I am planning to create a memo game that lets players find matching colors, images and sounds and maybe also shapes. I am thinking about incorporating synesthetic associations of sounds to certain colors or similar but will need to do more thinking about this. Currently I am drafting the final visual design and exploring ways of writing efficient and clean code for this assignment.
Month: October 2020
Week 6 Sound
Download this zip for in class examples
Above examples are all on GitHub in this folder
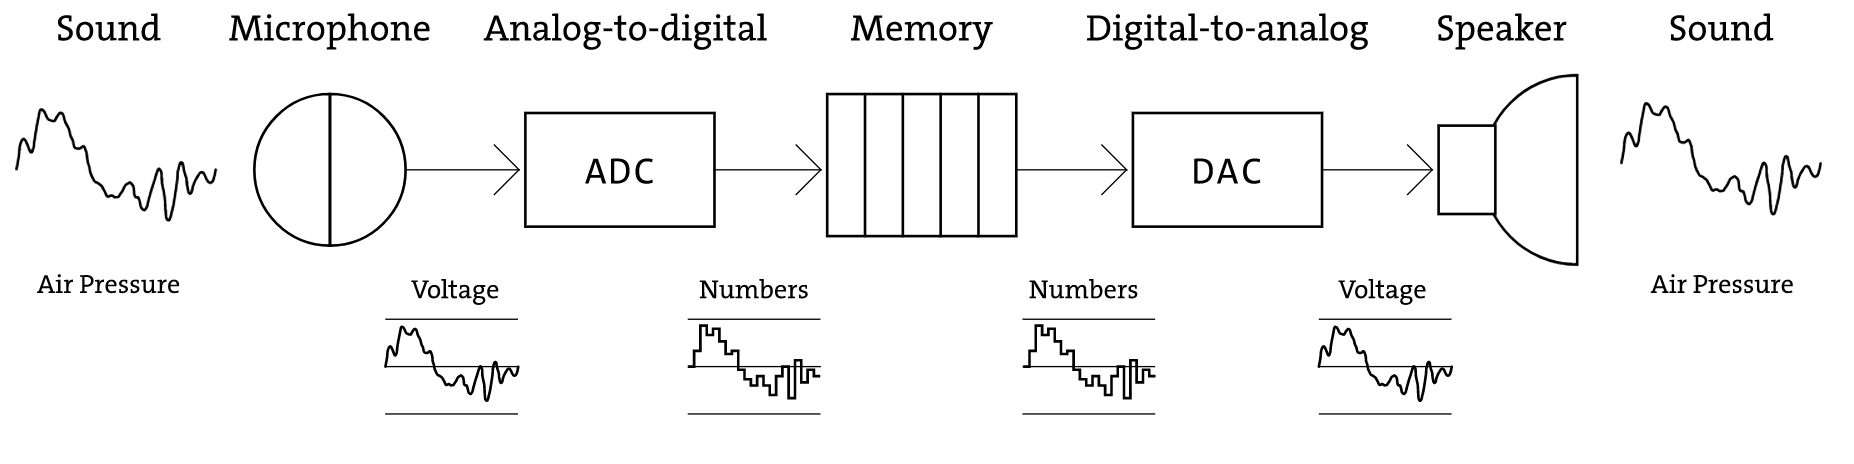
Anatomy of sound:

Analog to digital to analog:
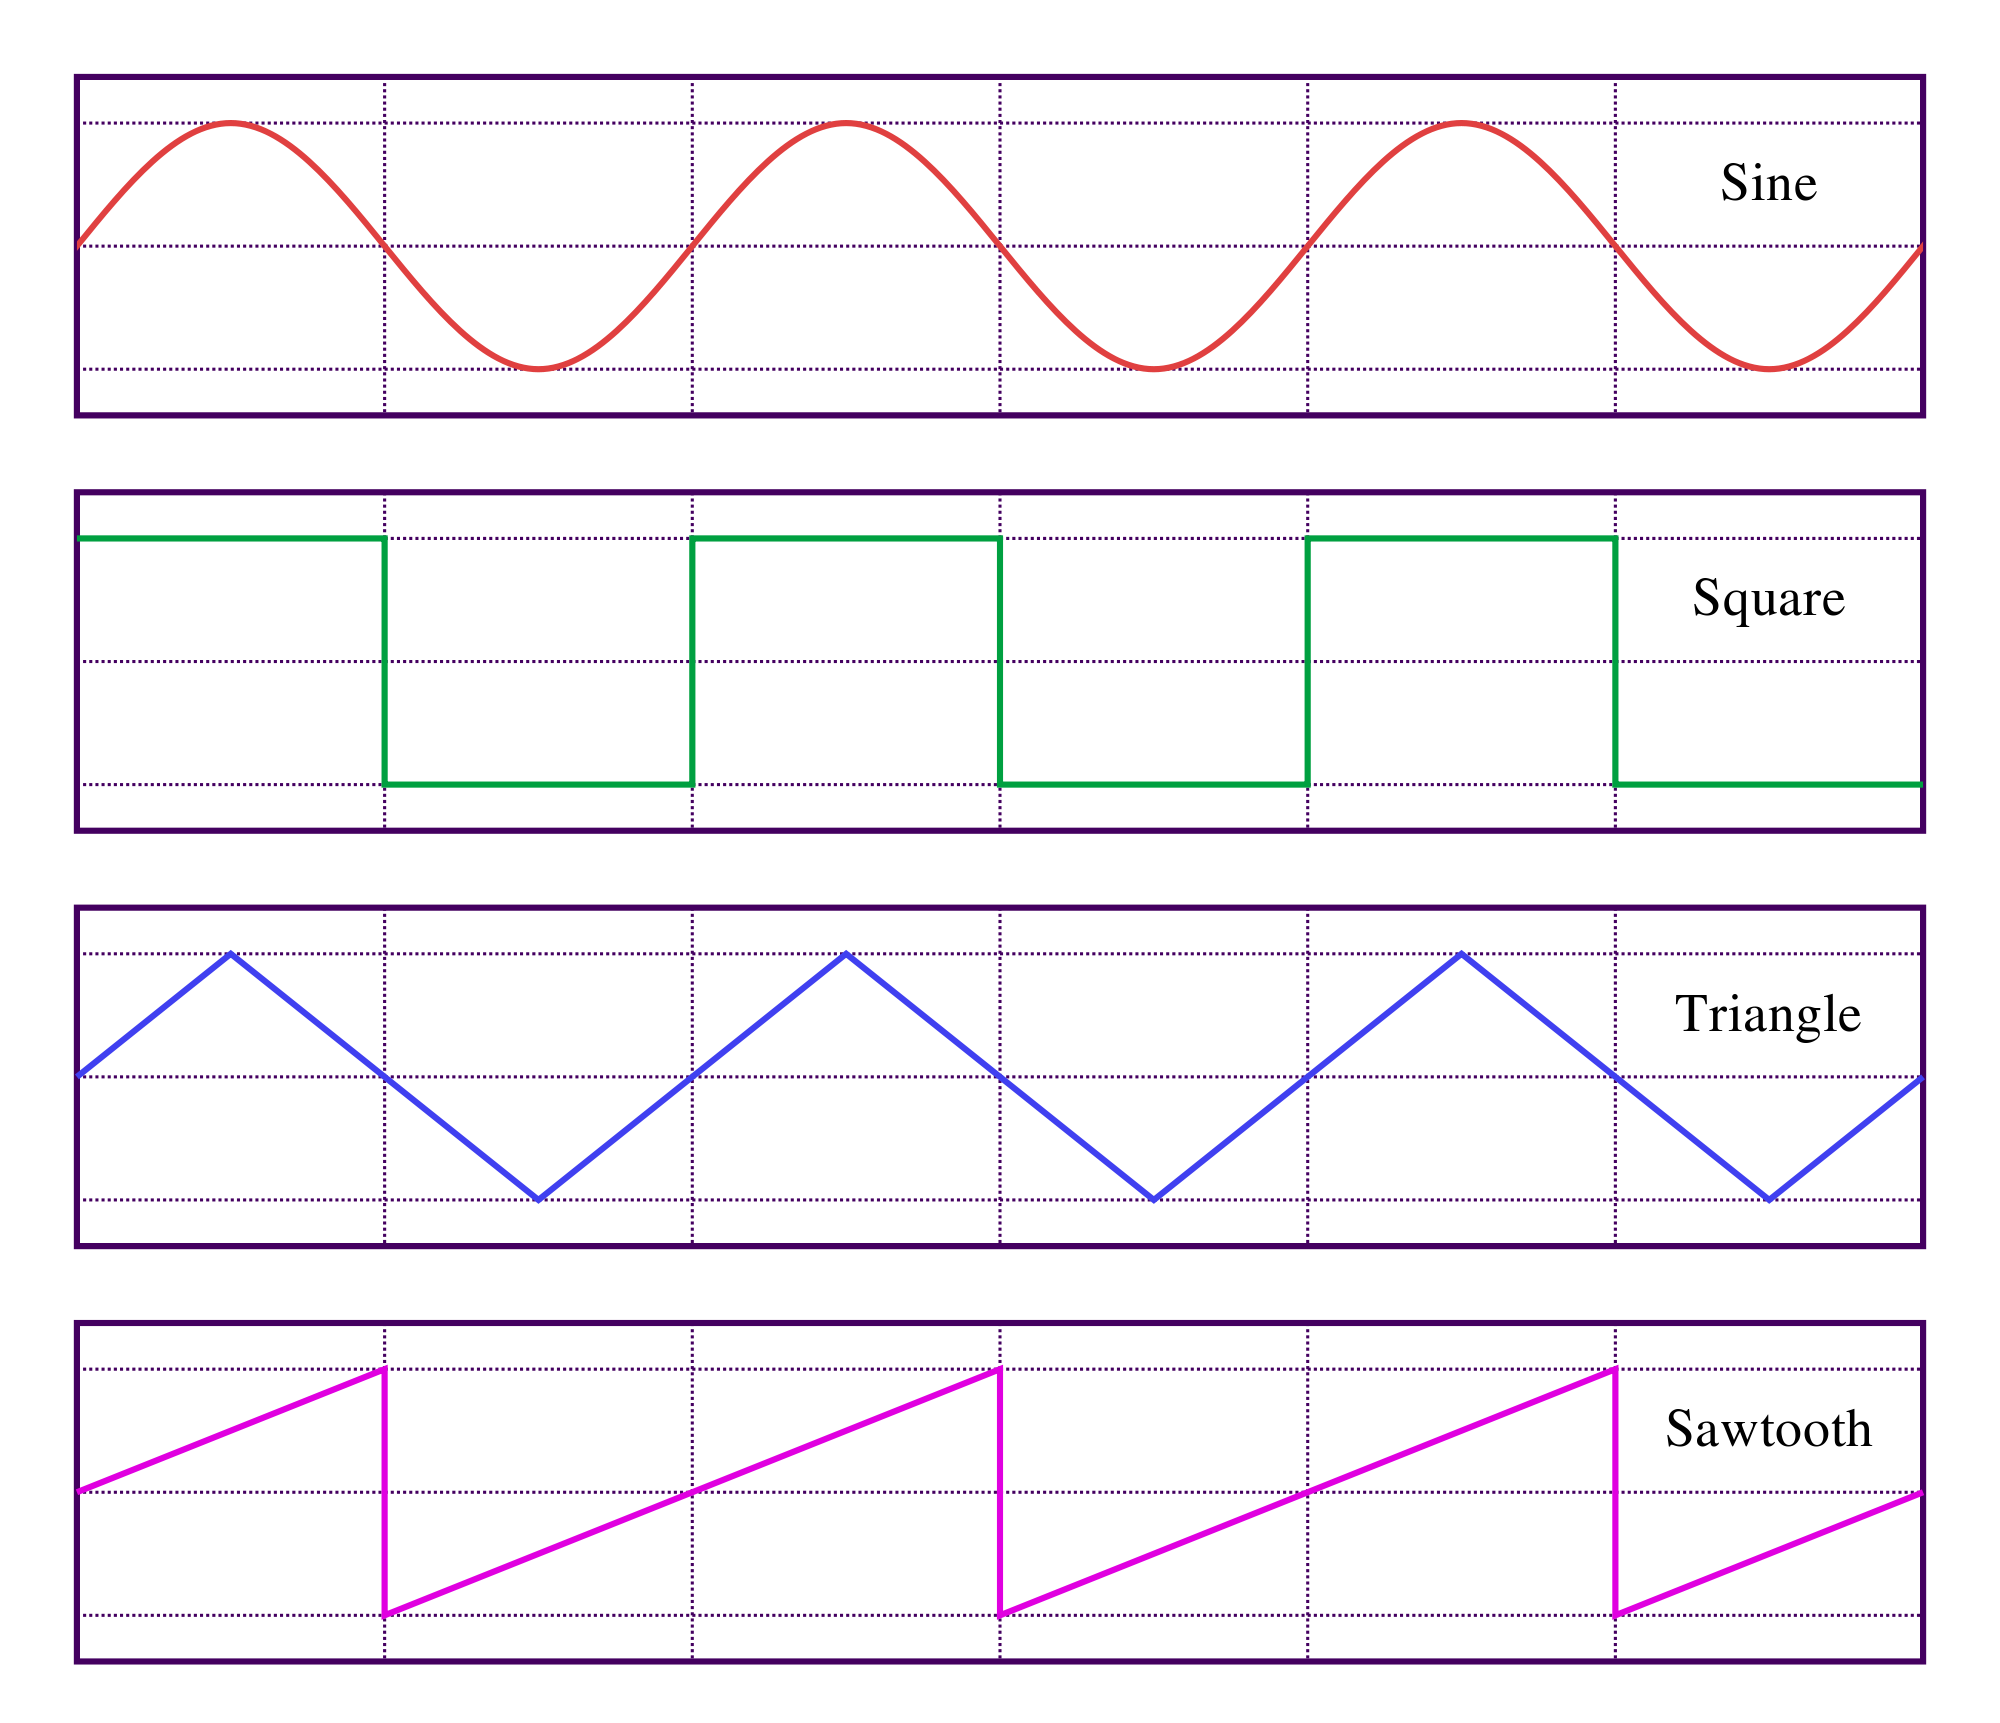
Basic waveforms:
Envelope:

Noise:

Helpful links:
Meera-Wk5
My vision for this project started out by wanting a blurred image to have a sort of spot light that unblurs the parts where the mouse moves. I looked into the Blur example on processing and the spot light example and encountered many obstacles.
From the blur effect:
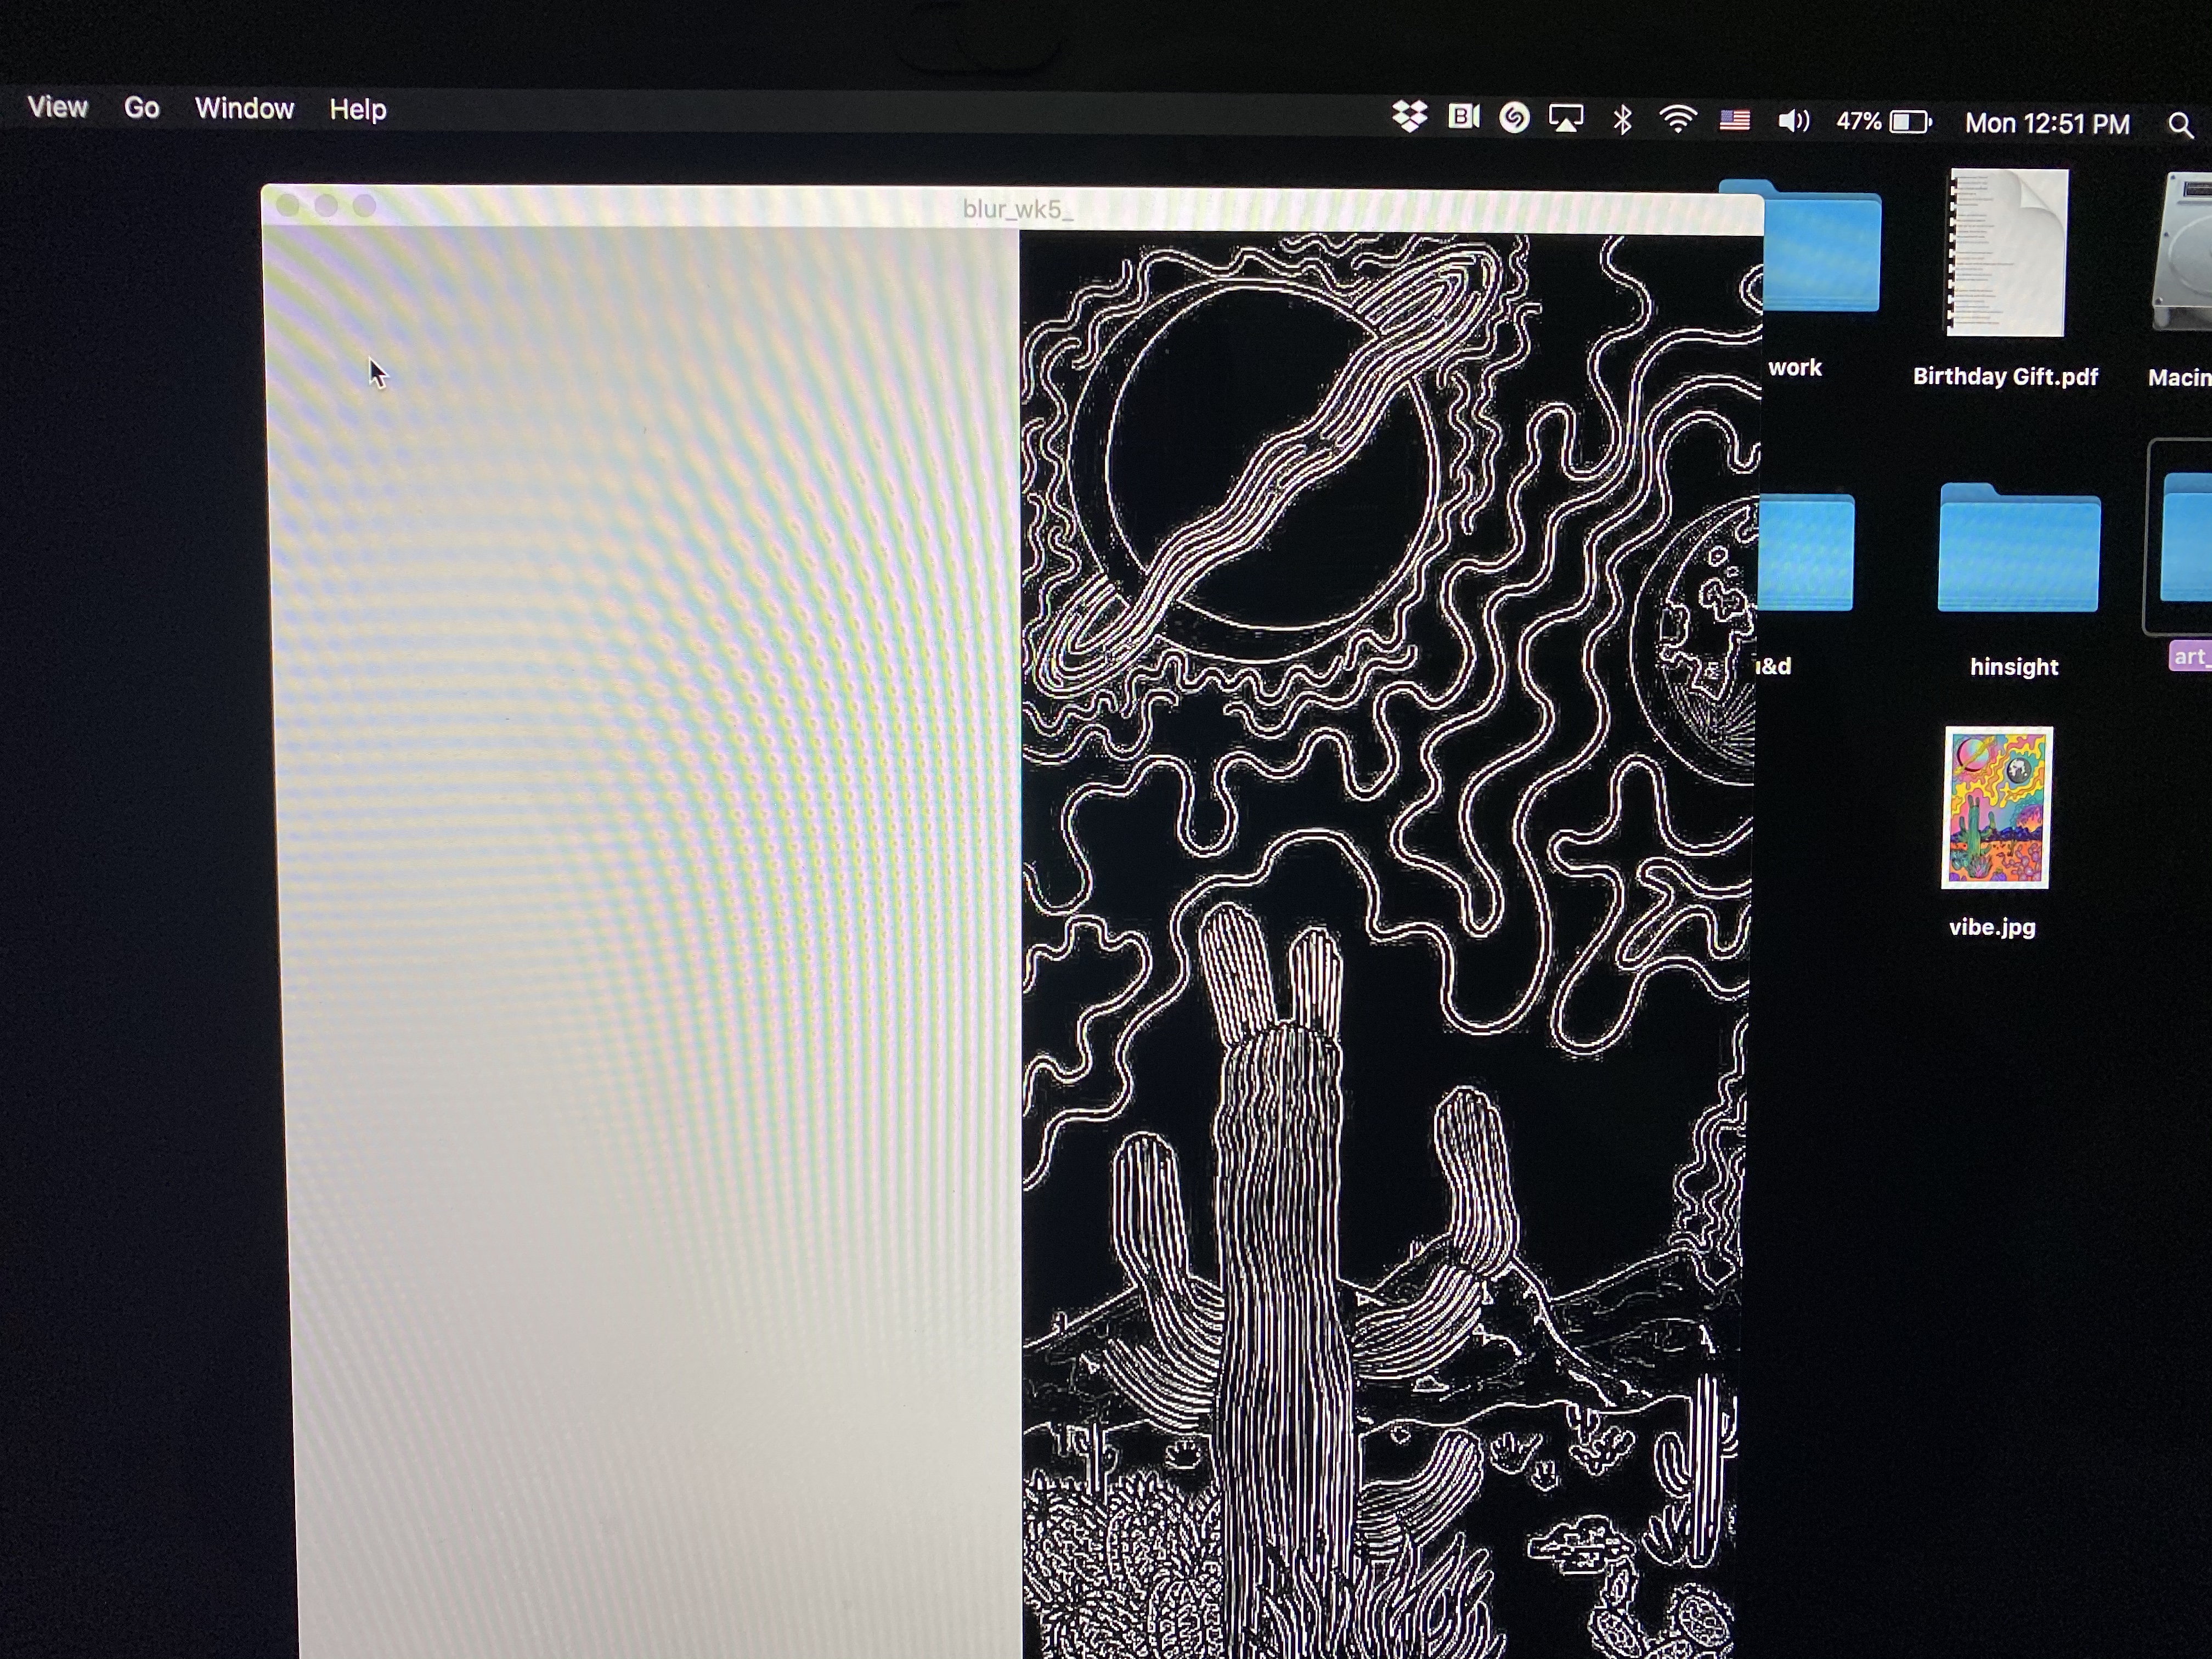
I applied this blur code to my image at first and it showed a side by side image. One was the original image and the other was, a grayscaled version of my image. This was after even after the learning from the professor how to fix this issue. So I experimented with the Kernels and I chose to use the “ Edge detection” way for this effect, rather than blurring it. ( it just seemed cooler )
after that I wanted to remove the side by side view so I inspected that code and found a way to remove the original display. Know I am left with the display with the effect but I wasn’t able to figure out how to move it to the center. I tried many things but my attempts , though they were close, did not work.
After consulting Jack he told me that my issue was at the end of the code, “ image(destination, 400, 0);” this was where my display was controlled.
Once I finished my experiments with this code I started with the spot light
From the Spot light:
In this effect the spot light was working fine by my image was distorted and I didn’t know why,
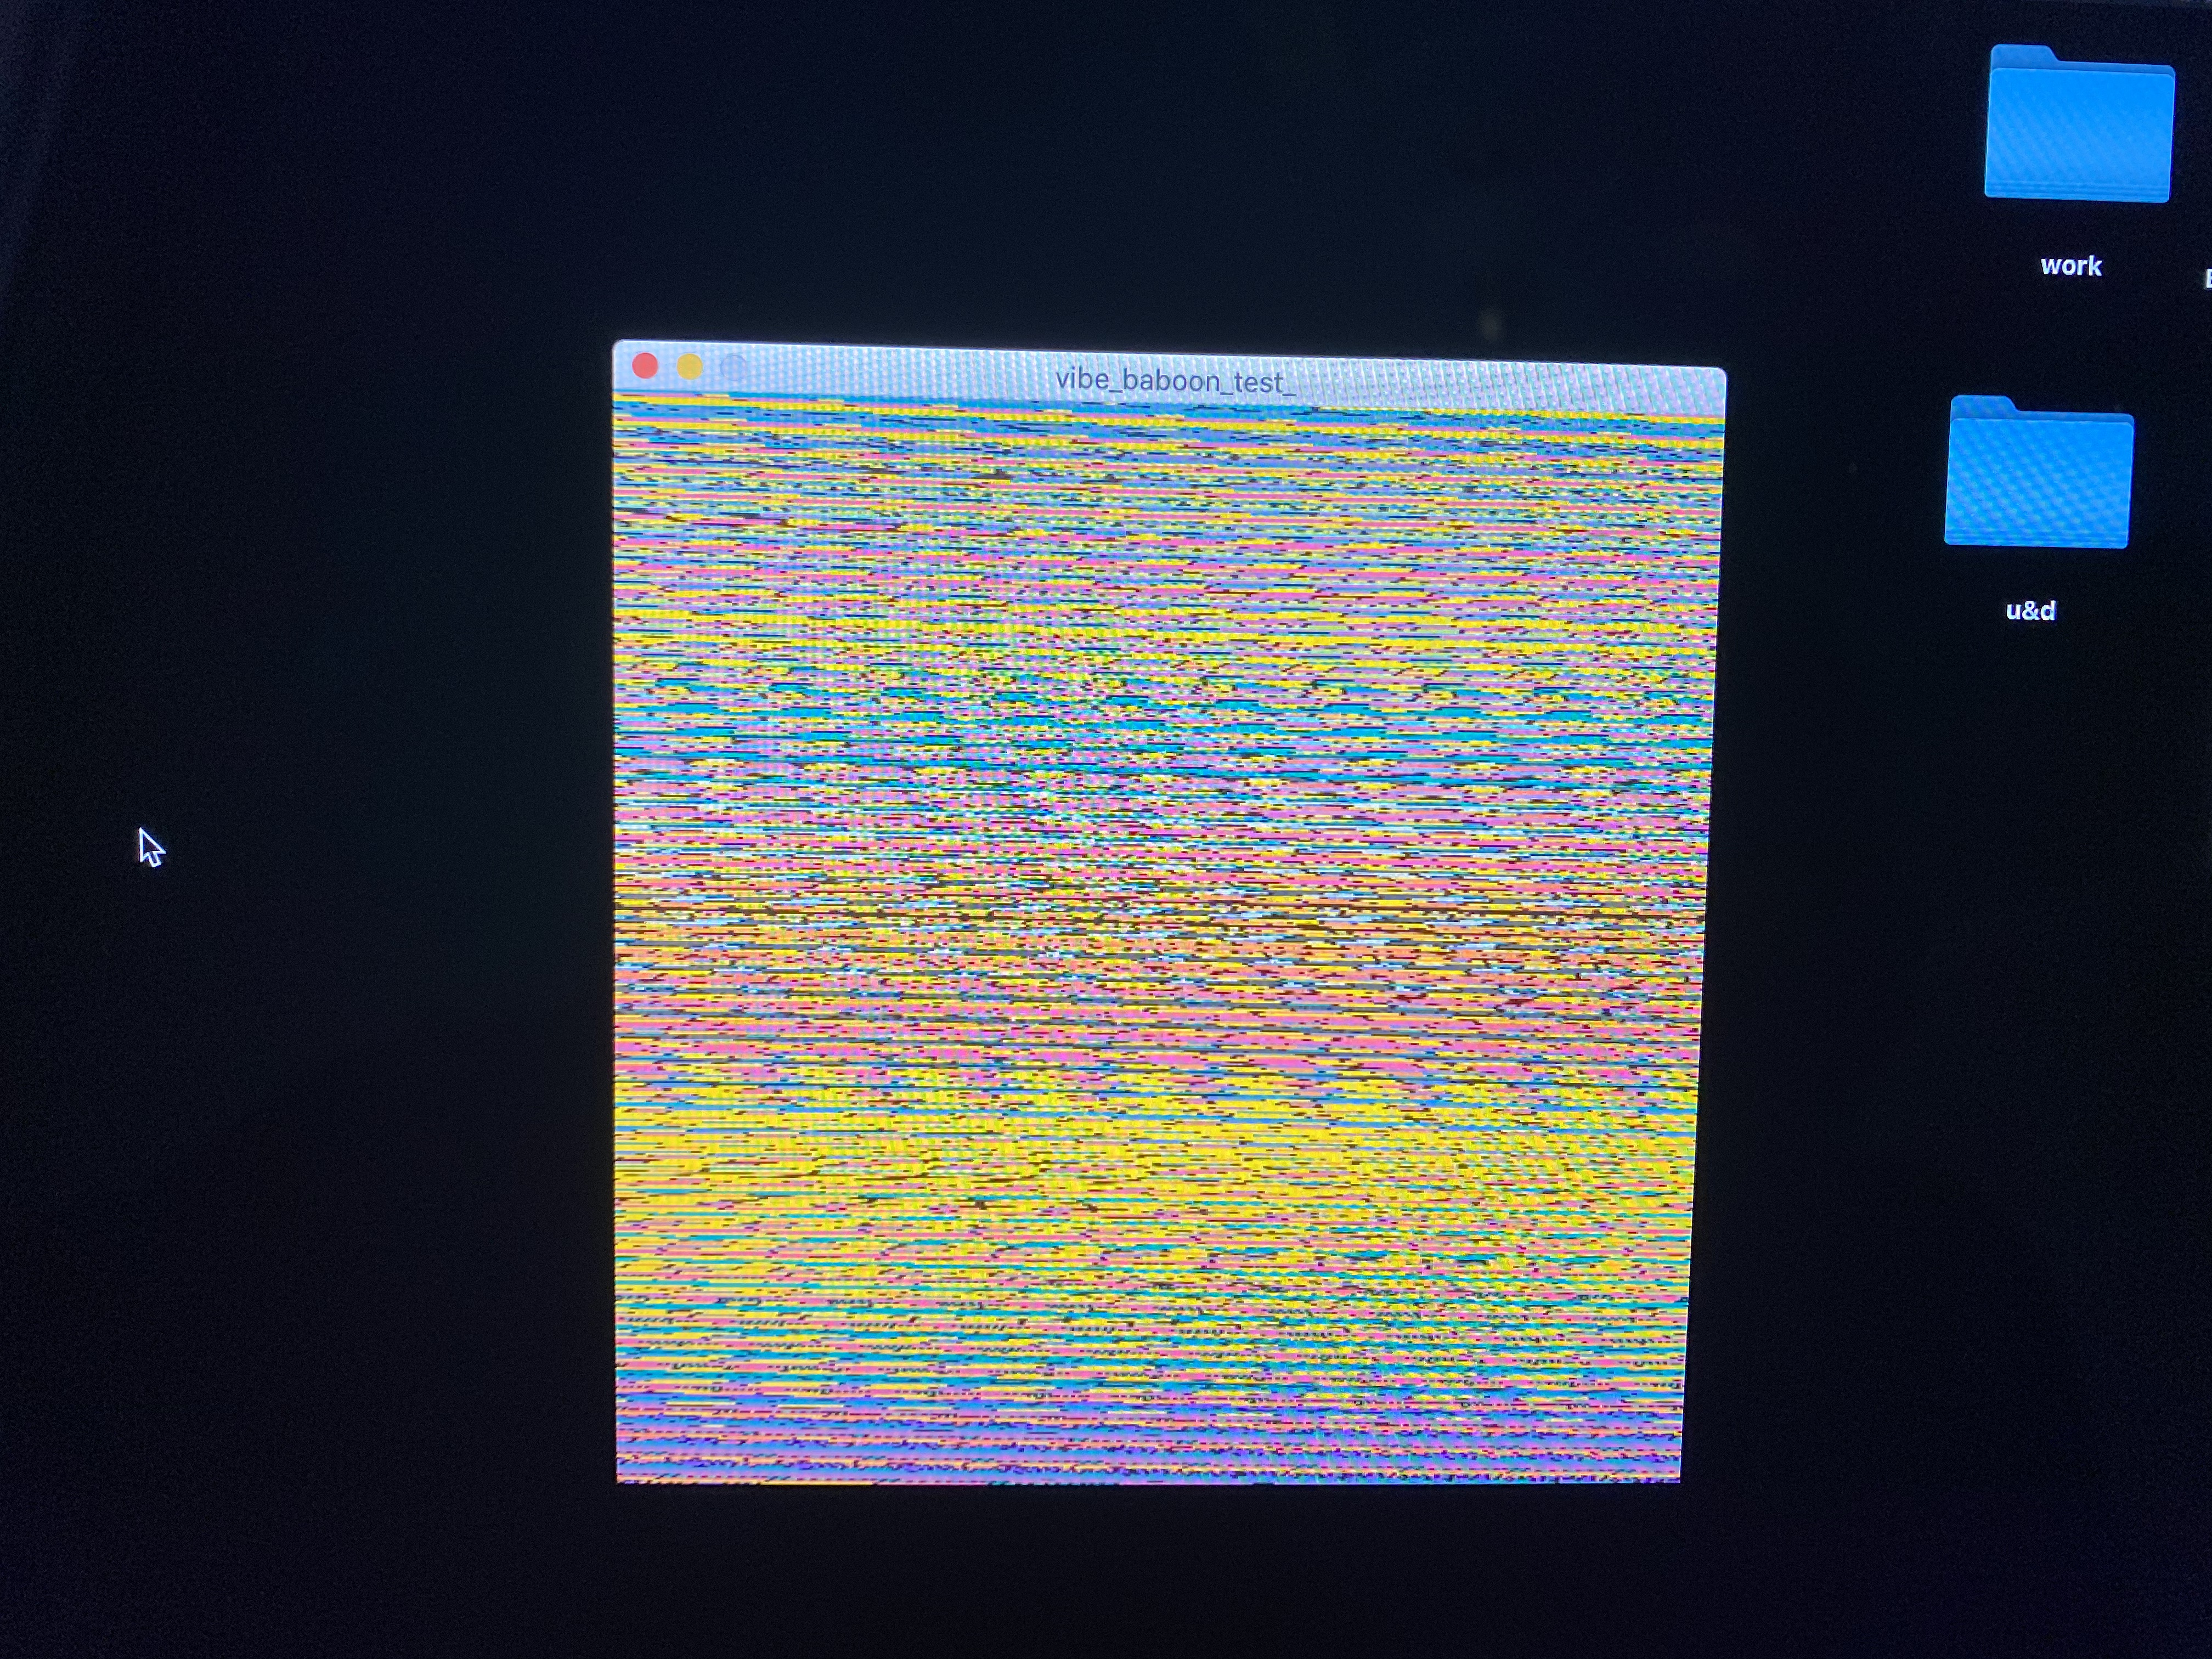
Once I figure out why it’s distorted I can attempt to combine the codes together, I consulted Jack and he told me that my issue was in the “destination code”. Once I fixed that I attempted combing both codes.
Combing codes:
When combing the two codes, the codes didn’t run. I went through it with Jack and fixed a few things within the spot light loops.
When I included these two separate codes into one, they didn’t combine. They were their own separate entity. So I tried to create a trancperancy between them , since they overlapped, but I struggled since I didn’t really understand that code.
In the end my results though it not what I planned it was as close as my abilities can get me ( with help, lol).
so here is my final result :
float v = 1.0;
float[][] kernel = {{ -1*v, -1*v, -1*v},
  { -1*v, 8*v, -1*v },
  { -1*v, -1*v, -1*v }};

PImage img, destination;

void setup() {
  size(800, 800);
  img = loadImage("vibe.jpg"); // Load the original image
  destination = createImage(img.width, img.height, RGB);
  // noLoop();
}

void draw() {
  //image(img, 0, 0); // Displays the image from point (0,0)
  img.loadPixels();

  // Create an opaque image of the same size as the original
  PImage centerImg = createImage(img.width, img.height, RGB);

  // Loop through every pixel in the image
  for (int y = 1; y < img.height-1; y++) {   // Skip top and bottom edges
    for (int x = 1; x < img.width-1; x++) {  // Skip left and right edges
      float sum = 0; // Kernel sum for this pixel
      for (int ky = -1; ky <= 1; ky++) {
        for (int kx = -1; kx <= 1; kx++) {
          // Calculate the adjacent pixel for this kernel point
          int pos = (y + ky)*img.width + (x + kx);
          // Image is grayscale, red/green/blue are identical
          float val = red(img.pixels[pos]);
          // Multiply adjacent pixels based on the kernel values
          sum += kernel[ky+1][kx+1] * val;
        }
      }
      // For this pixel in the new image, set the gray value
      // based on the sum from the kernel
      centerImg.pixels[y*img.width + x] = color(sum);
    }
  }
  // State that there are changes to edgeImg.pixels[]
  centerImg.updatePixels();


  image(centerImg, 0, 0); // Draw the new image

  destination.loadPixels();
  for (int y=0; y<img.height; y++) { // must include img. so that it takes the w/h of the image.
    for (int x=0; x<img.width; x++) {
      int loc = x+(y*img.width);
      float r = red(img.pixels[loc]);
      float g = green(img.pixels[loc]);
      float b = blue(img.pixels[loc]);
      float distance=dist(x, y, mouseX, mouseY);
      float adjustBrightness = (50-distance)/50;//((float) mouseX / width) * 8.0;
      r*=adjustBrightness; //a*=b
 same as
a = a * b
      g*=adjustBrightness;
      b*=adjustBrightness;
      r=constrain(r, 0, 255);
      g=constrain(g, 0, 255);
      b=constrain(b, 0, 255);
      destination.pixels[loc]=color(r, g, b);
    }
  }
  img.updatePixels();
  destination.updatePixels();
  image(destination, 400, 0); // top left is like the bottom
}
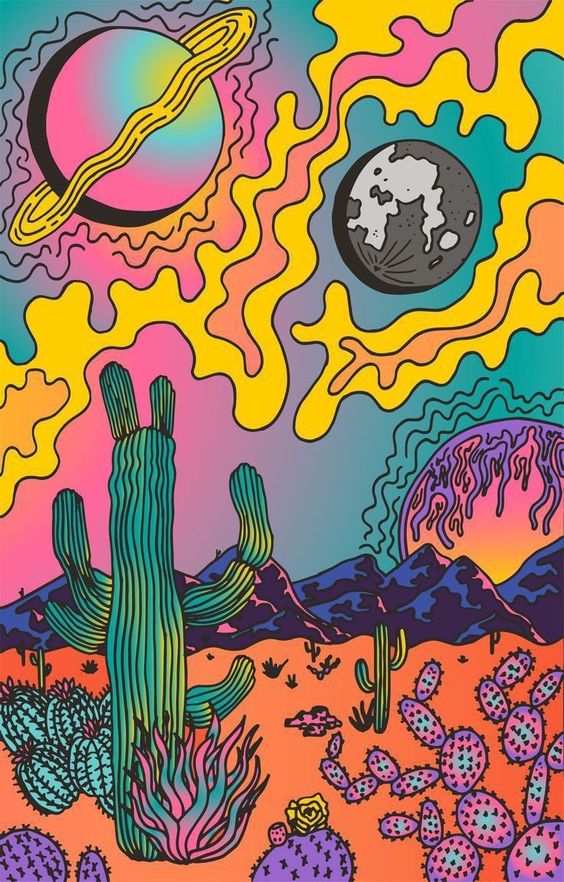
for reference this is the original :
Drowning – Image manipulation
Since October the 10th is World Mental Health Day, I decided to make this week’s assignment somehow related to Depression.
As I was looking for inspiration, I came across this picture: 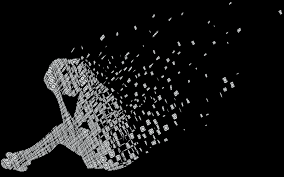 I liked the scattered effect, so I decided to create something similar with Image pixels. After some brainstorming, I got the idea to represent the feeling of depression with a drowning animation and a wave crash effect for the pixels.
The Point class
To do this, I first thought about creating a Point class. Every pixel, of the image used, would be represented by a point. The class includes a drawPoint() function that draws a point at the x and y positions of the pixel with the color of that pixel, and then updates its y-position to give a “bouncing” effect. There is a gravity variable that pulls down the point. When the point reaches the bottom of the screen(or a certain boundary), we multiply by -1 so that it goes back up. There is also slowDown variable to reduce the distance the point travels every time it goes back up or down.
Here is the code for this class:
class Point{
  color col;
  float x,y,vy, gravity, slowDown;

  Point(int x2,int y2,color col2){
    x= x2;
    y= y2;
    col= col2;
    vy = 0;

    gravity = 1;
    slowDown = random(0.5,0.7);
  }

  void drawPoint(){
    vy += gravity;
    y += vy;

    if (y>= height/1.5){
      y = height/1.5;
      vy *= -1;
      vy *= slowDown;
    }
    strokeWeight(2);
    stroke(col);
    point(x,y);

  }

}
Failed Attempts
At first, I tried to keep it simple. So, I wanted to iterate through the image’s pixel, and for every pixel, add a new Point to the array of points (pointsArray). Then, I would iterate through the points and draw them.
However, this made the pixels of the transparent background also get drawn, which resulted in there being too many pixels. This made the animation super slow and it didn’t give the effect I was looking for.
Here is how it looked like:
I didn’t know how to approach fixing this, so with a lot of research and help from online forums, I got the idea to create a new image. This image would be the “difference” (difference in the color of the pixels) between my image and a black image (color values are zeros). This gives us a new image that contains my image but with a black background. Then, all I had to do was iterate through the image pixels and only populate the pointsArray if the pixel isn’t black. (For this to work, make sure the image you’re using doesn’t have any black parts that you want to be drawn.)
However, this resulted in the image being still. This is what was displayed when I ran the program:
 solution

To solve this, I turned to Google once again. Apparently, this was happening because the for loop (that makes the pixels of our new image) nested inside the draw() loop makes the points continuously draw in their initial spot because the new image is consistently being made.
To solve this, I again made the new image be the difference between my image and a black image, BUT THEN, it is turned into the difference between my image and itself. This means that the new image becomes fully black when the draw() is called for the second time, so it isn’t being considered anymore.
I also added a noise wave at the bottom using the code from an example on processing.org (https://processing.org/examples/noisewave.html)
Here is the code for that:
int nPixels;
int imgWidth = 480;
int imgHeight =240;
int[] toBlack, difference;
PImage img, differenceImage;
Point[] pointsArray;
int index;
float yoff = 0.0;


void setup(){
  size(700,700);
  //initializing all variables
  nPixels = imgWidth*imgHeight;
  pointsArray = new Point [nPixels];
  difference = new int[nPixels];
  toBlack = new int[nPixels];
  differenceImage = createImage (imgWidth,imgHeight,RGB); //create a new empty image to be filled with pixels
  img = loadImage("falling.png");
  img.loadPixels();
}

void draw(){
  background(51);

  for (int i = 0; i<nPixels; i++){
    color img_color = img.pixels[i];
    color toBlack_color = toBlack[i]; //here this array just has the values: 0
    //so the first time the difference is made, it only gets rid of the transparent background

    //setting the color variables for the pixels of the new image created
    int r =int(red(img_color)) - int(red(toBlack_color));
    int g =int(green(img_color)) - int(green(toBlack_color));
    int b =int(blue(img_color)) - int(blue(toBlack_color));

    difference[i] = color(r,g,b);
    toBlack[i] = img_color; //we set this to img_color so that from now on, the difference will always give a black pixel
    //and so these pixels won't be considered from now on
}
  //creating the difference image using the array of colors/pixels
  differenceImage.loadPixels();
  for (int i=0; i<img.pixels.length;i++){
    differenceImage.pixels[i] = difference[i];
  }
  //updating its pixels
  differenceImage.updatePixels();

  //populating the Point array with points only when the pixels aren't black!
  int index = 0;
  color col;
  for (int y=0; y<imgHeight;y++){
    for (int x=0; x<imgWidth; x++){
      if(differenceImage.get(x,y)>color(20)){ //needs to be not black(>0) but I put 10 just to be safe
        col = color(img.get(x,y));
        pointsArray[index] = new Point(int(map(x,0,imgWidth,0,width)),int(map(y,0,imgHeight,0,height/2)),col);
      }
      index++;
    }
  }
  //drawing a point for each pixel and moving it up and down like a wave crash
  for (int i=0; i<pointsArray.length;i++){
    if (pointsArray[i]!=null){ //some of the points are empty because we skipped the index where the pixel is black
      pointsArray[i].drawPoint();
    }
  }
  //waves. code copied from an example on processing.org
  fill(0,25,35);
  noStroke();
  beginShape();
  float xoff = 0;
  for (float x = 0; x <= width; x += 10) {
    float y = map(noise(xoff, yoff), 0, 1, 400,470);
    vertex(x, y);
    xoff += 0.05;
  }
  yoff += 0.01;
  vertex(width, height);
  vertex(0, height);
  endShape(CLOSE);

}
Final outcome
Week 5: Image Manipulation
For this week’s assignment, I was not sure about what I wanted to accomplish or work on. Therefore, I just searched online for some image manipulation examples and tried to recreate some of the ones that I thought was interesting or cool, or in this case makes me go “wow”. I stumbled upon this video that demonstrated changing the pixels of an original image in whatever way the person wanted, and that made me go “wow”, so I decided to try to recreate it.
Not only did I learn how to manipulate with the colors of each pixel, but I also learned a tiny tip from the video of how to make a “replica” or “copy” of the original image in order to guarantee that the original image is going to be the way it is while tampering with the replica whatever way we wanted to.
I mainly wanted to try out to two different image manipulation effects: The first one being able to manipulate the pixel colors and create an image filter. The second one being able to control the different grey scaled color gradients in accordance to my position values of my mouse.
Initially, of course, I had no idea how to create it from scratch. But, after looking through many videos and class examples, I learned different functions such as the brightness function from online and also several other techniques from the class. I mainly struggled with understanding the logic behind the codes (since like day one) due to my inexperience in coding, but I realized I am slowly understanding it, and emphasis on the “slow”.
PImage froggie;

void setup() {
  size(940, 412);
  //load image into sketch
  froggie= loadImage("colorful frog.jpg");
}

void draw() {
  displayfrog();
  changefrogcolor();
  changebwfrog();
  updatePixels();
}

void displayfrog() {
  //display image
  image(froggie, 0, 0);
  //loads the pixel data of the picture into the pixel [] array
  loadPixels();
  //might not be necessary to load pixels, but better to load it.
  froggie.loadPixels();
}

void changefrogcolor() {
  if (mousePressed) {
    for (int x=0; x<width; x++) {
      for (int y=0; y<height; y++) {
        int loc = x+y*width;
        //this gets the pixels from the desert image and puts it on the screen at the same location, like making a replica of the original image to mess with the pixels
        //gets the red part of the pixels
        float r = red(froggie.pixels[loc]);
        //gets the green part of the pixels
        float g = green(froggie.pixels[loc]);
        //gets the blue part of the pixels
        float b=blue(froggie.pixels[loc]);
        //places these new colors into the window
        pushMatrix();
        //float factor=random(0,20);
        pixels[loc]=color(random(g), random(b), random(r));
        popMatrix();
      }
    }
  }
}
//the interaction between the black and white color pixels of the frog image
void changebwfrog() {
  if (keyPressed) {
    for (int x=0; x<width; x++) {
      for (int y=0; y<height; y++) {
        int loc = x+y*width;
        //extracts the brightness value from each color of each pixel of the image
        float b=brightness(froggie.pixels[loc]);
        //if the brightness of each pixel is greater than mouse X and less than mouse Y, it'll change a random grey scale color, or else it'll turn into black color
        if (b>mouseX && b<mouseY ) {
          //turns the color that are not greater than mouse X or less than mouse Y into a random grey scale
          pixels[loc]=color(random(255));
        } else {
          //turns the pixels that are not greater than mouse X or less than mouse Y into black
          pixels[loc]=color(0);
        }
      }
    }
  }
}
Image Manipulation – Lakers 2020
I’ve been a Kobe fan for forever and a Lakers fan since 2012, and it’s been a hard decade for the team. hard. So, in light of the Lakers winning the 2020 NBA championship today, I wanted to do something with image manipulation that was related to the lakers.
My idea is to fill the screen with the laker logo, and every time I draw on the screen via my mouse, another image would appear with tints and effects. This way I can draw stuff like “2020 champs” etc etc.
I do feel kind of weird about the project, I felt like to do what I was doing, there were more object-oriented programming than image manipulation. Perhaps next time it might be better to focus on one image and changing its properties than to change a whole bunch of images.
PImage img, lebron;
float unit = 30;    //unit of each picture
int count;          //how many pictures are there in a certain sized frame
Ring[] ring;

void setup(){
  size(1500, 900);
  img = loadImage("lakers.png");
  lebron = loadImage("lebron.png");
  int wideCount = width / int(unit);
  int highCount = height / int(unit);
  count = wideCount * highCount;

  //calling an array of image objects with the width and height counts
  ring = new Ring[count];
  int index = 0;
  for (int y = 0; y < highCount; y++) {
    for (int x = 0; x < wideCount; x++) {
      ring[index++] = new Ring(x * unit, y * unit, width/unit, width/unit);
    }
  }

}

void draw(){
  //running the functions for every image
  for (Ring ring : ring) {
    ring.display();
    ring.update();

  }

}
class Ring {
  float x;
  float y;
  float w;
  float h;

  //for images that have been hovered over
  boolean changed = false;

  Ring(float tempX, float tempY, float tempW, float tempH) {
    x = tempX;
    y = tempY;
    w = tempW;
    h = tempH;
  }

  void display() {
    //original image
    if (changed == false){
      noTint();
      image(img, x , y, w, h);
    }
    //changed images
    if (changed == true){
      tint(165, 111, 124, 50);
      image(lebron, x, y, w, h);
    }
  }

  void update() {
    //checking if an image is clicked on
    if (mousePressed){
      if (x < mouseX && mouseX < x+unit && mouseY > y && mouseY < y + unit){
        changed = true;
      }
    }
  }
}
Week 5 – 2020, so far
Intro
Last week was quite a reflective week for me. I spent a lot of time thinking about how 2020 has been so far. Sure, it kind of sucks for almost all of us, but what I didn’t realize is that it’s going much faster than I ever anticipated and that there’s so much I’m grateful for this year. So, in some way, looking back feels like a blur…I remember everything and nothing at once, and I wanted to use this week’s assignment to communicate that state of mind.
Concept
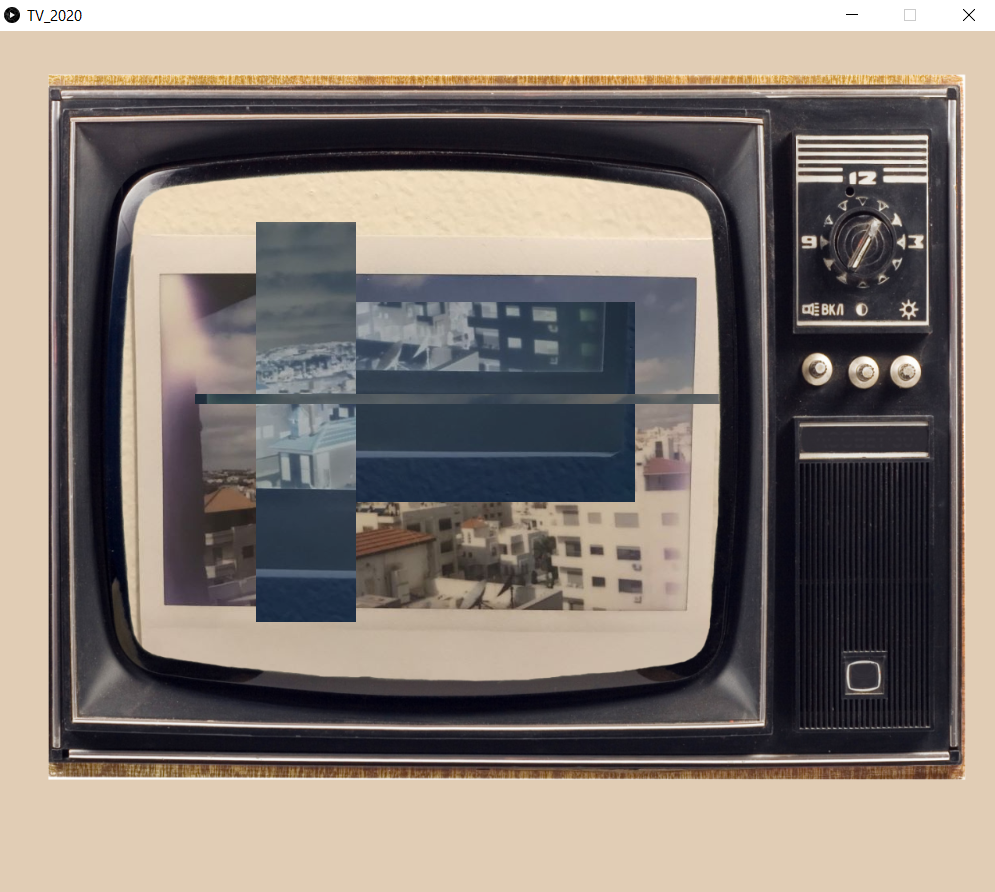
The analogy I made in my brain was: looking back at the year is like watching my memories through a glitchy old TV, and so that’s exactly what I went for!
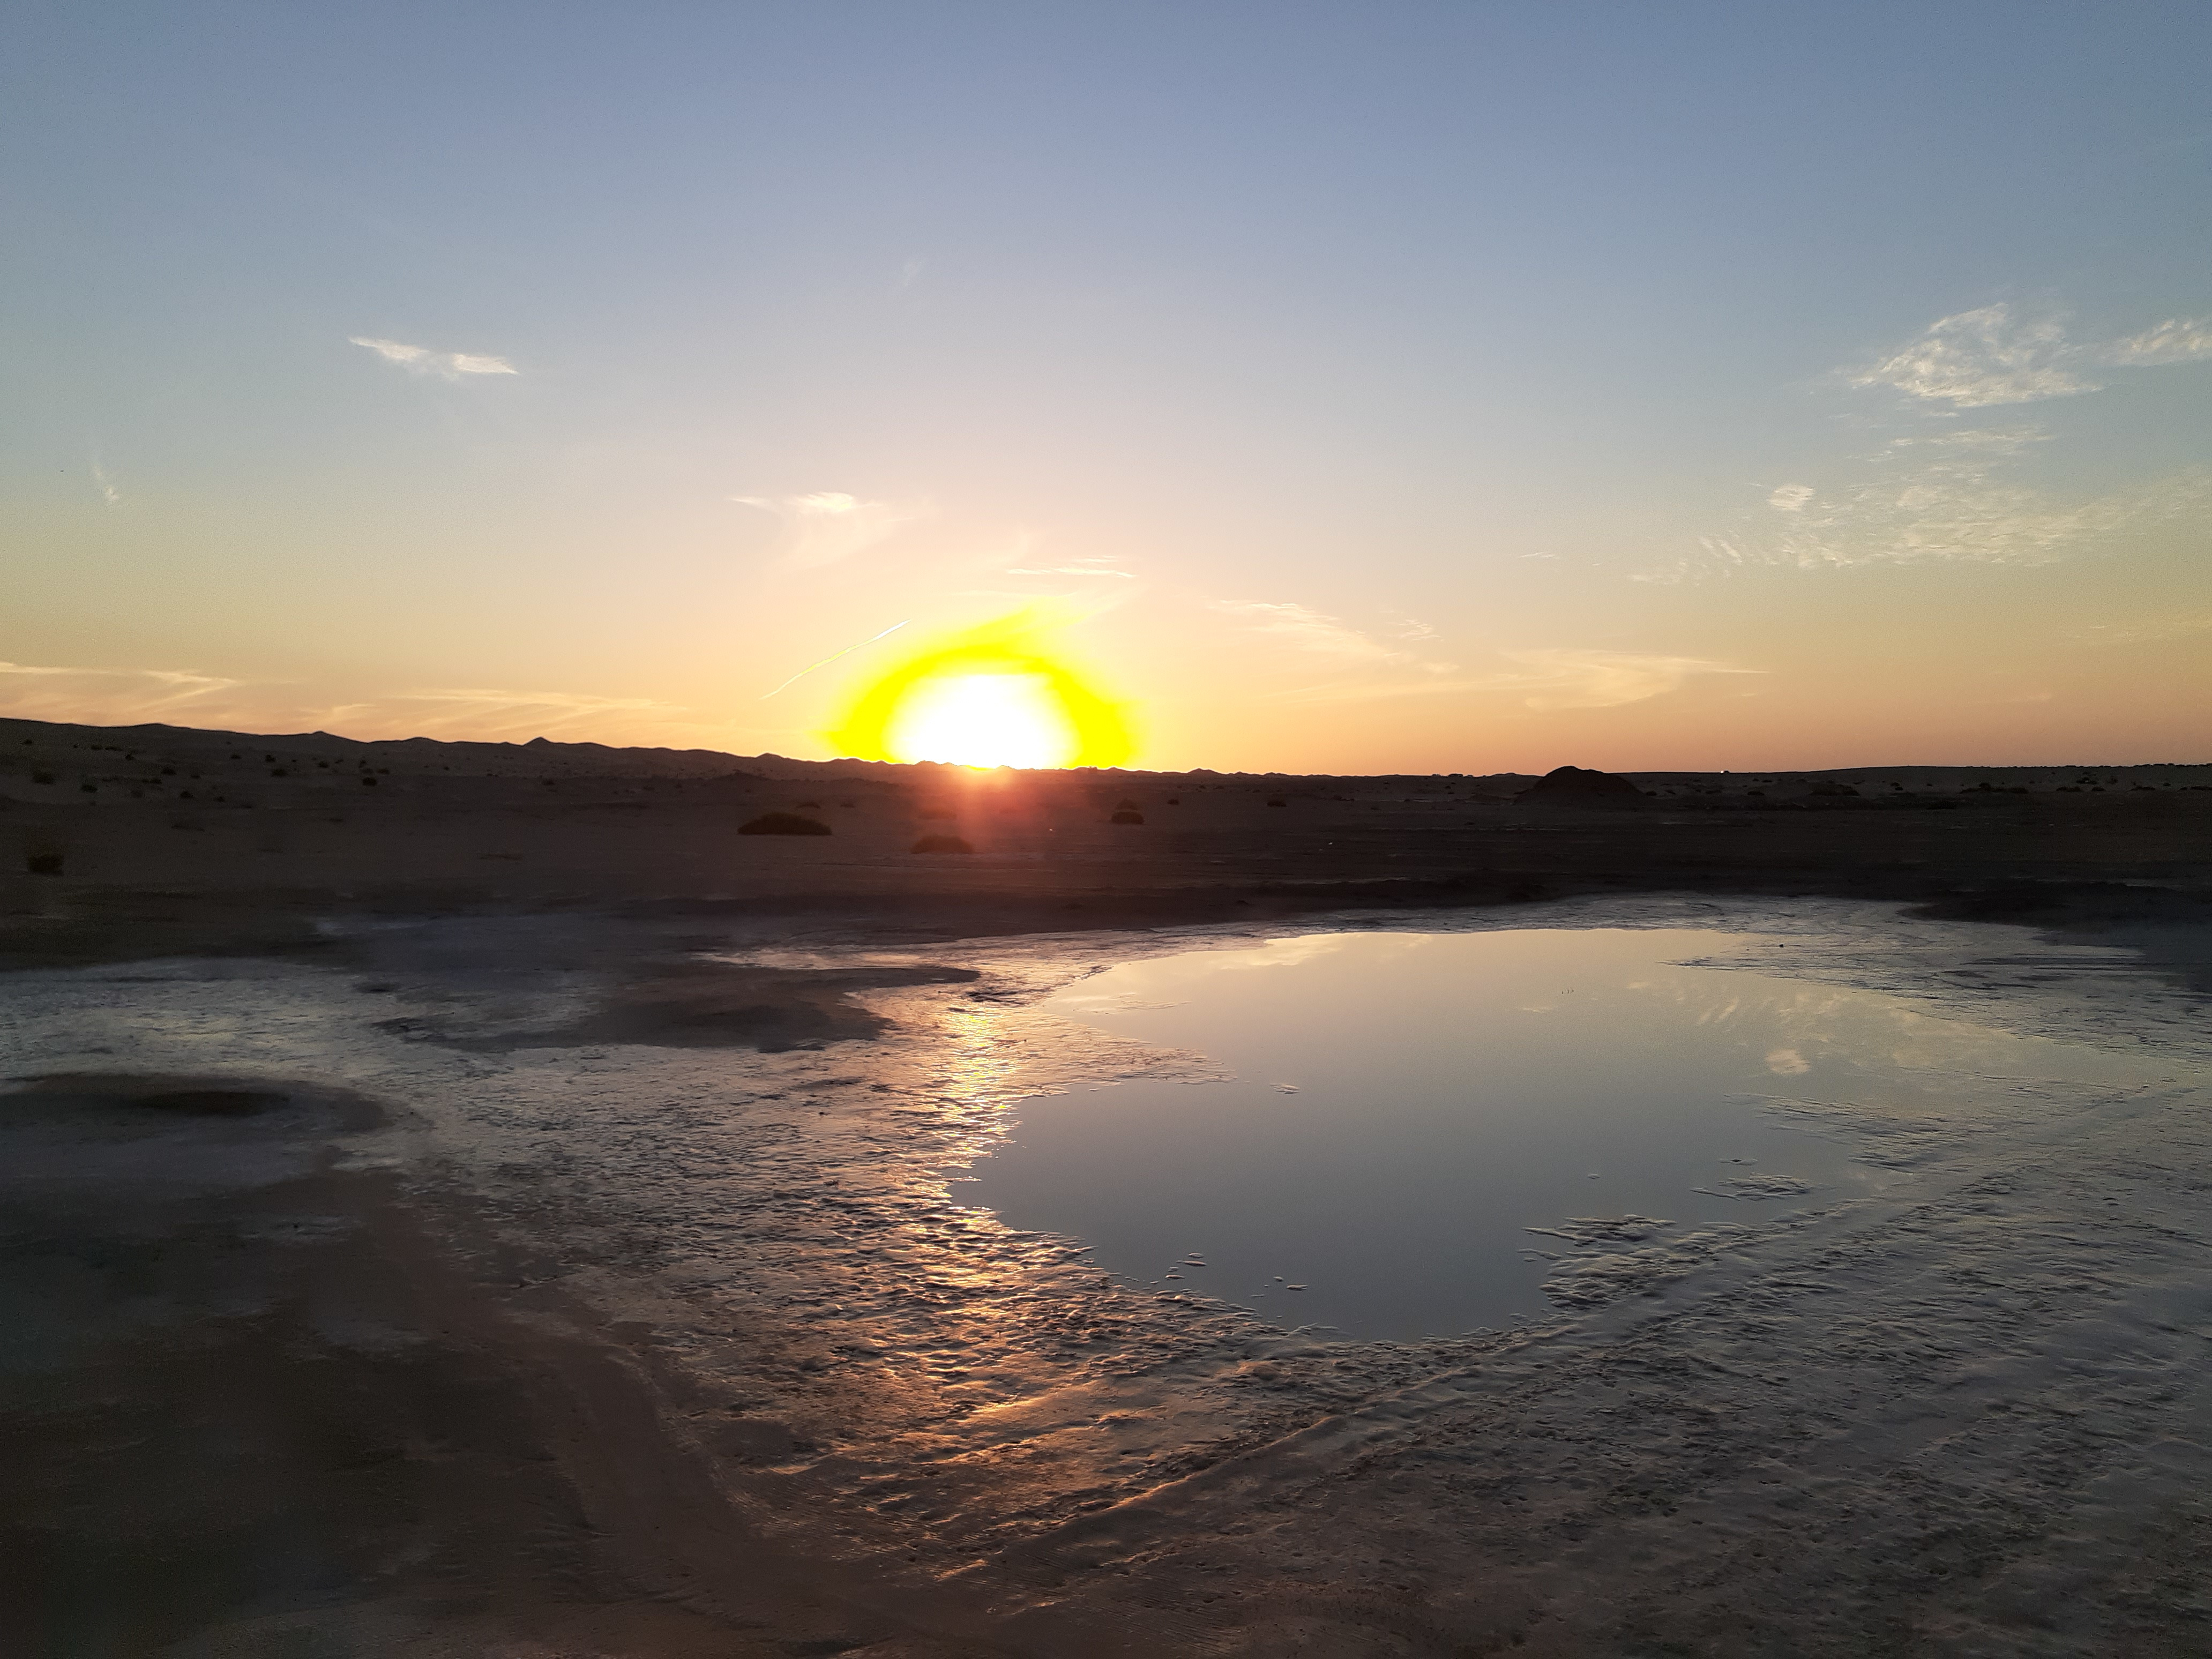
I usually create collections of 10-20 photos that represent every month for me, so I picked one picture from each month of 2020 so far to be displayed through the old tv.
Process
For starters, my first step was collecting my pictures and editing them all to be of the same dimensions and making sure these dimensions go well with the TV frame I had loaded onto my program.
Then, I started putting my images in a “slideshow’ that updates as the program is running. So, I created an array of Images and variables for slide number, Time, and slide duration and looped through my images in the draw() loop.
Afterward, I started experimenting with possible glitches. I looked at the Processing reference and examples online to come up with interesting glitches that simulate a broken TV. I placed each glitch in its own function and used a random variable to call a different glitch each run to give the sketch a more authentic feel.
Glitch 1
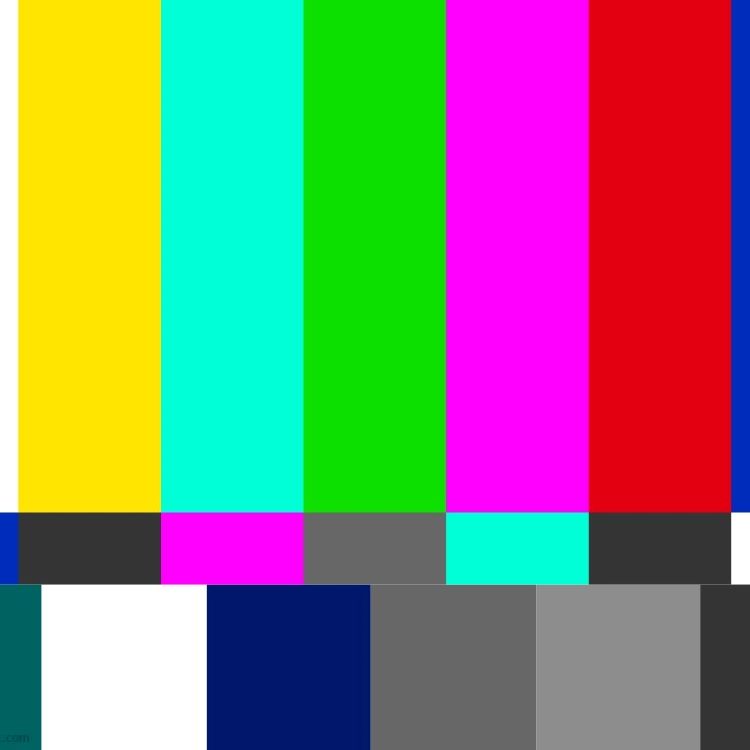
I loaded a no signal image into the sketch and wanted to overlay it onto the pictures I was loading, but I didn’t want it to be too overpowering. So, I explored the blend() function and used the MULTIPLY filter which gave me a realistic result.
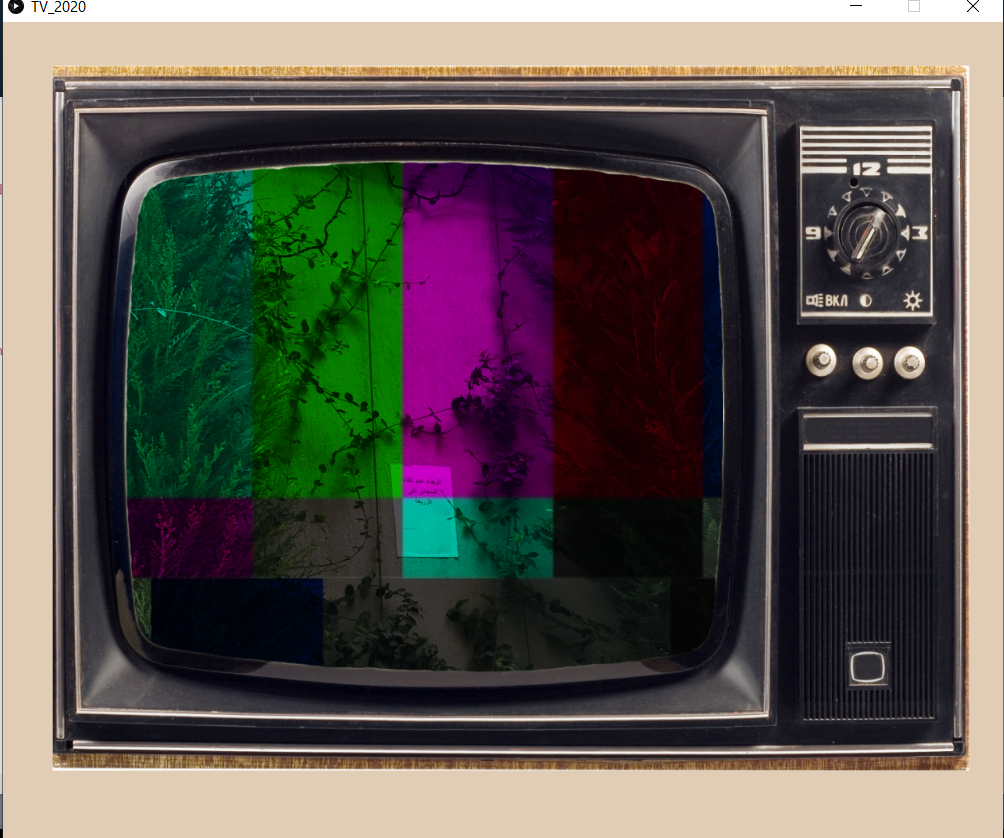
Here’s an example of what the function produces when the program runs.
void glitch1() {
  image(months[currentSlide], width/2-80, height/2-60);
  blend(noSignal, width/2-80-300, height/2-60-300, 600, 600, width/2-80-300, height/2-60-300, 600, 600, MULTIPLY);
}
Glitch 2
My second glitch made use of the pixel array. I loaded the pixels for each image I used and set the color for each. For the Y value, I used a random function to create a bleeding effect so it doesn’t cover the whole TV when it alternates glitches, I also felt like it looked more interesting.
void glitch2() {
  months[currentSlide].loadPixels();
  for (int x = 0; x < months[currentSlide].width; x++) {
    for (int y = 0; y < random(months[currentSlide].height-400, months[currentSlide].height); y++) {
      float pix = random(255);
      months[currentSlide].pixels[x+y*months[currentSlide].width] = color(pix);
    }
  }

  updatePixels();


}
Glitch 3
Here, I used the logic of getting subsections from the main image. I grabbed one fixed subsection (of the middle part always to keep the most important parts of the picture, the center, visible), and two random subsections. I placed these subsections at a random location and used the INVERT filter to create something more visually appealing. I used a modulus loop to slow down this movement. Otherwise, the program would run too fast making the glitch barely visible.
void glitch3() {
  pushStyle();
  tint(255, 20);
  if (time%3== 0) {
    PImage subSection = months[currentSlide].get(300, 370, 500, 200);
    PImage subSection2 = months[currentSlide].get((int)random(0, 550), (int)random(0, 550), 100, 400);
    PImage subSection3 = months[currentSlide].get((int)random(0, 550), (int)random(0, 550), 900, 10);
    subSection.filter(INVERT);
    subSection2.filter(INVERT);
    subSection3.filter(INVERT);
    tint(200,255);
    image(subSection, random(300,722), random(140,640));
    image(subSection2, random(300,722), random(270,500));
    image(subSection3, random(500,722), random(270,500));
    //image(subSection3, random(width/2-80-100, width/2-80), random(height/2-60-200, height/2-30));


  }
  popStyle();


}
Glitch 4
Glitch 4 isn’t really a glitch, I just included a function that loads the image normally as I do at the beginning of the program to maintain some balance in the animation.
void glitch4() {

  image(months[currentSlide], width/2-80, height/2-60);
}
Text
Finally, I thought I’d give the images some context. So I created a string array that contains one thing I’m grateful for each month, and the program uses the slide number to load the matching array.
Final Product
What I was prioritizing this week, is approaching the assignment systematically and in an organized manner. I often feel like I am overwhelmed with ideas and don’t know where to start, I decided to take it step by step this week and did my assignment in separate programs that I put together in the end. This made me feel productive and made the process much more enjoyable. This is one of the reasons this has been my favorite assignment so far, but I think it’s also because I enjoy working with visuals and mixing effects to achieve a specific aesthetic!
For further development, I want to familiarize myself more with the pixel array and explore the possibilities of using it. I would also be interested to see if I can generate pixels for a text if I used the geomerative library to get the points of my string.
Finally, here’s my complete code:
PImage tvFrame;
PImage noSignal;
PImage months[];

String gratefulFor[];
PFont f;
int picsNumber;
int time = 0;
int slideDuration = 100;
int currentSlide = 0;


void setup() {
  size(1000, 1000);
  f = createFont("Nocturne-Rough.otf",60);
  textFont(f);
  tvFrame = loadImage("tv_frame.png");
  tvFrame.resize(1000, 760);

  noSignal = loadImage("noSignal.jpg");
  noSignal.resize(500, 500);
  picsNumber = 9;
  months = new PImage[picsNumber];
  months[0] = loadImage("jan.JPG");
  months[1] = loadImage("feb.JPG");
  months[2] = loadImage("march.jpg");
  months[3] = loadImage("april.jpg");
  months[4] = loadImage("may.JPG");
  months[5] = loadImage("june.jpg");
  months[6] = loadImage("july.JPG");
  months[7] = loadImage("aug.JPG");
  months[8] = loadImage("sept.jpg");
  for (int i = 0; i < months.length; i++) {
    months[i].resize(600, 600);
  }
  gratefulFor = new String[picsNumber];
  gratefulFor[0] = "January: travel";
  gratefulFor[1] = "February: live music";
  gratefulFor[2] = "March: safety";
  gratefulFor[3] = "April: windows";
  gratefulFor[4] = "May: family";
  gratefulFor[5] = "June: archives/memories";
  gratefulFor[6] = "July: nature";
  gratefulFor[7] = "August: loss";
  gratefulFor[8] = "September: friendship";
}


void draw() {
  background(225, 205, 181);
  imageMode(CENTER);
  image(months[currentSlide], width/2-80, height/2-60);
  fill(0);
  textSize(50);
  text(gratefulFor[currentSlide], width/2 - 450, height/2 + 450);

  time+=1;
  if (time>slideDuration) {
    currentSlide +=1;
    if (currentSlide > months.length-1) {
      currentSlide = 0;
    }
    time = 0;
  }


  int glitchNo = (int)(random(1, 5));
  if (glitchNo == 1) {
    glitch1();
  } else if (glitchNo ==2) {
    glitch2();
  } else if (glitchNo == 3) {
    glitch3();
  } else if (glitchNo == 4) {
    glitch4();
  }
  image(tvFrame, width/2, height/2-100);
  //println(glitchNo);
}


void glitch1() {
  image(months[currentSlide], width/2-80, height/2-60);
  blend(noSignal, width/2-80-300, height/2-60-300, 600, 600, width/2-80-300, height/2-60-300, 600, 600, MULTIPLY);
}

void glitch2() {
  months[currentSlide].loadPixels();
  for (int x = 0; x < months[currentSlide].width; x++) {
    for (int y = 0; y < random(months[currentSlide].height-400, months[currentSlide].height); y++) {
      float pix = random(255);
      months[currentSlide].pixels[x+y*months[currentSlide].width] = color(pix);
    }
  }

  updatePixels();


}

void glitch3() {
  pushStyle();
  tint(255, 20);
  if (time%3== 0) {
    PImage subSection = months[currentSlide].get(300, 370, 500, 200);
    PImage subSection2 = months[currentSlide].get((int)random(0, 550), (int)random(0, 550), 100, 400);
    PImage subSection3 = months[currentSlide].get((int)random(0, 550), (int)random(0, 550), 900, 10);
    subSection.filter(INVERT);
    subSection2.filter(INVERT);
    subSection3.filter(INVERT);
    tint(200,255);
    image(subSection, random(300,722), random(140,640));
    image(subSection2, random(300,722), random(270,500));
    image(subSection3, random(500,722), random(270,500));
    //image(subSection3, random(width/2-80-100, width/2-80), random(height/2-60-200, height/2-30));


  }
  popStyle();


}

void glitch4() {

  image(months[currentSlide], width/2-80, height/2-60);
}
Mona Lisa manipulation – David
Mona Lisa is one of my favorite paintings. So I decided to use it for this week’s image manipulation assignment. The product of my image manipulation was not entirely my initial intention, because I arrived at the current outcome upon various trials and failures. First, I manipulated the painting in a way that the image is transformed to a black&white image and disintegrated into small ellipses when the cursor is moved. Following the X and Y axis, the gap and the number of ellipses change, creating a sort of 3D-animated effect (?) from my perspective. Another aspect I decided to add was a certain change when the mouse is pressed. When the mouse is pressed, the cursor turns into a spotlight. I feel that this adds to the somewhat eerie and mysterious atmosphere of my creation. You can find my attempts and addition of different aspect in the videos below.
Here is the code:
//image manipulation assignment

PImage photo;

void setup(){
  size(800,650);
  photo = loadImage("/Users/sangjinlee/Desktop/monalisa.jpg");
  //Using the width and height of the photo for the screen size
  photo.resize(width,height);
}

void draw(){
  if (mousePressed){
    loadPixels();
    photo.loadPixels();
    for(int x= 0; x<width; x++){
      for(int y=0; y<height; y++){
        //location in the pixel array
        int loc = x+y*width;
        float r = red(photo.pixels[loc]);
        float g = green(photo.pixels[loc]);
        float b = blue(photo.pixels[loc]);
        //get distance between the cursor and the pixel
        float d = dist(mouseX,mouseY,x,y);
        float mult = map(d,0,120,1.5,0);
        //the closer the distance, the brighter.
        pixels[loc] = color(r*mult,g*mult,b*mult);
      }
    }
    updatePixels();
  } else{
    background(255);
    fill(0);
    noStroke();

    //Max val for mouseX is 800. So reduce it.
    float ellipseNumber = mouseX / 5;
    //Distance between the ellipses
    float ellipseGap = width / ellipseNumber;

    translate(ellipseGap/2, ellipseGap/2);

    for (int i=0; i<ellipseNumber; i++){
      for (int j=0; j<ellipseNumber; j++){
        //get pixel color corresponding to the changing x and y-axis
        color c = photo.get(int(i*ellipseGap), int(j*ellipseGap));
        //Extract size corresponding to the brightness (0~255) of c we got.
        //Because size is too big, we use map to set the darkest 0 to size 10
        //and to set the brightest 255 to size 0.5.
        float size = map(brightness(c), 0, 255, 10, 0.5);

        ellipse(i*ellipseGap, j*ellipseGap, size, size);
      }
    }
  }
}
Pixel camera
In this weeks work I tried to experiment with live video input.
I decided to distort it by creating a particle class. The video is basically drawn by a collection of particles.
By doing that I tried to achieve a sense of anonymity. Many hackers nowadays can access our laptop cameras easily. Thinking about blurring them out with an external program may be useful and definitely not that hard to code.
https://editor.p5js.org/miki-debicki/sketches/ruqFjPV6r
Pixel Manipulation – Week 5
For this week assignment I was completely out of ideas. So I decided to manipulate the pixel of an image. I load the picture and then in different functions I manipulate each individual pixel of the image.
There are five different manipulations that can take place:
Inverting the RGB values of each pixel
Inverting the R values of each pixel
Inverting the G values of each pixel
Inverting the B values of each pixel
Swapping the pixels in the array
Exagerating the each RGB value with the same random number
Each of the different functions are mapped to keys 1-6 on the keyboard and pressing any other key would reload the original image.
Pressing different keys in different combinations will yield different outcomes.
Advanced Implementation
I tried to add another level of complexity to the sketch by inverting the pixels which in a circular distance of the mouse cursor.
I was able to figure the logic on paper but the logic when translated to code was not.
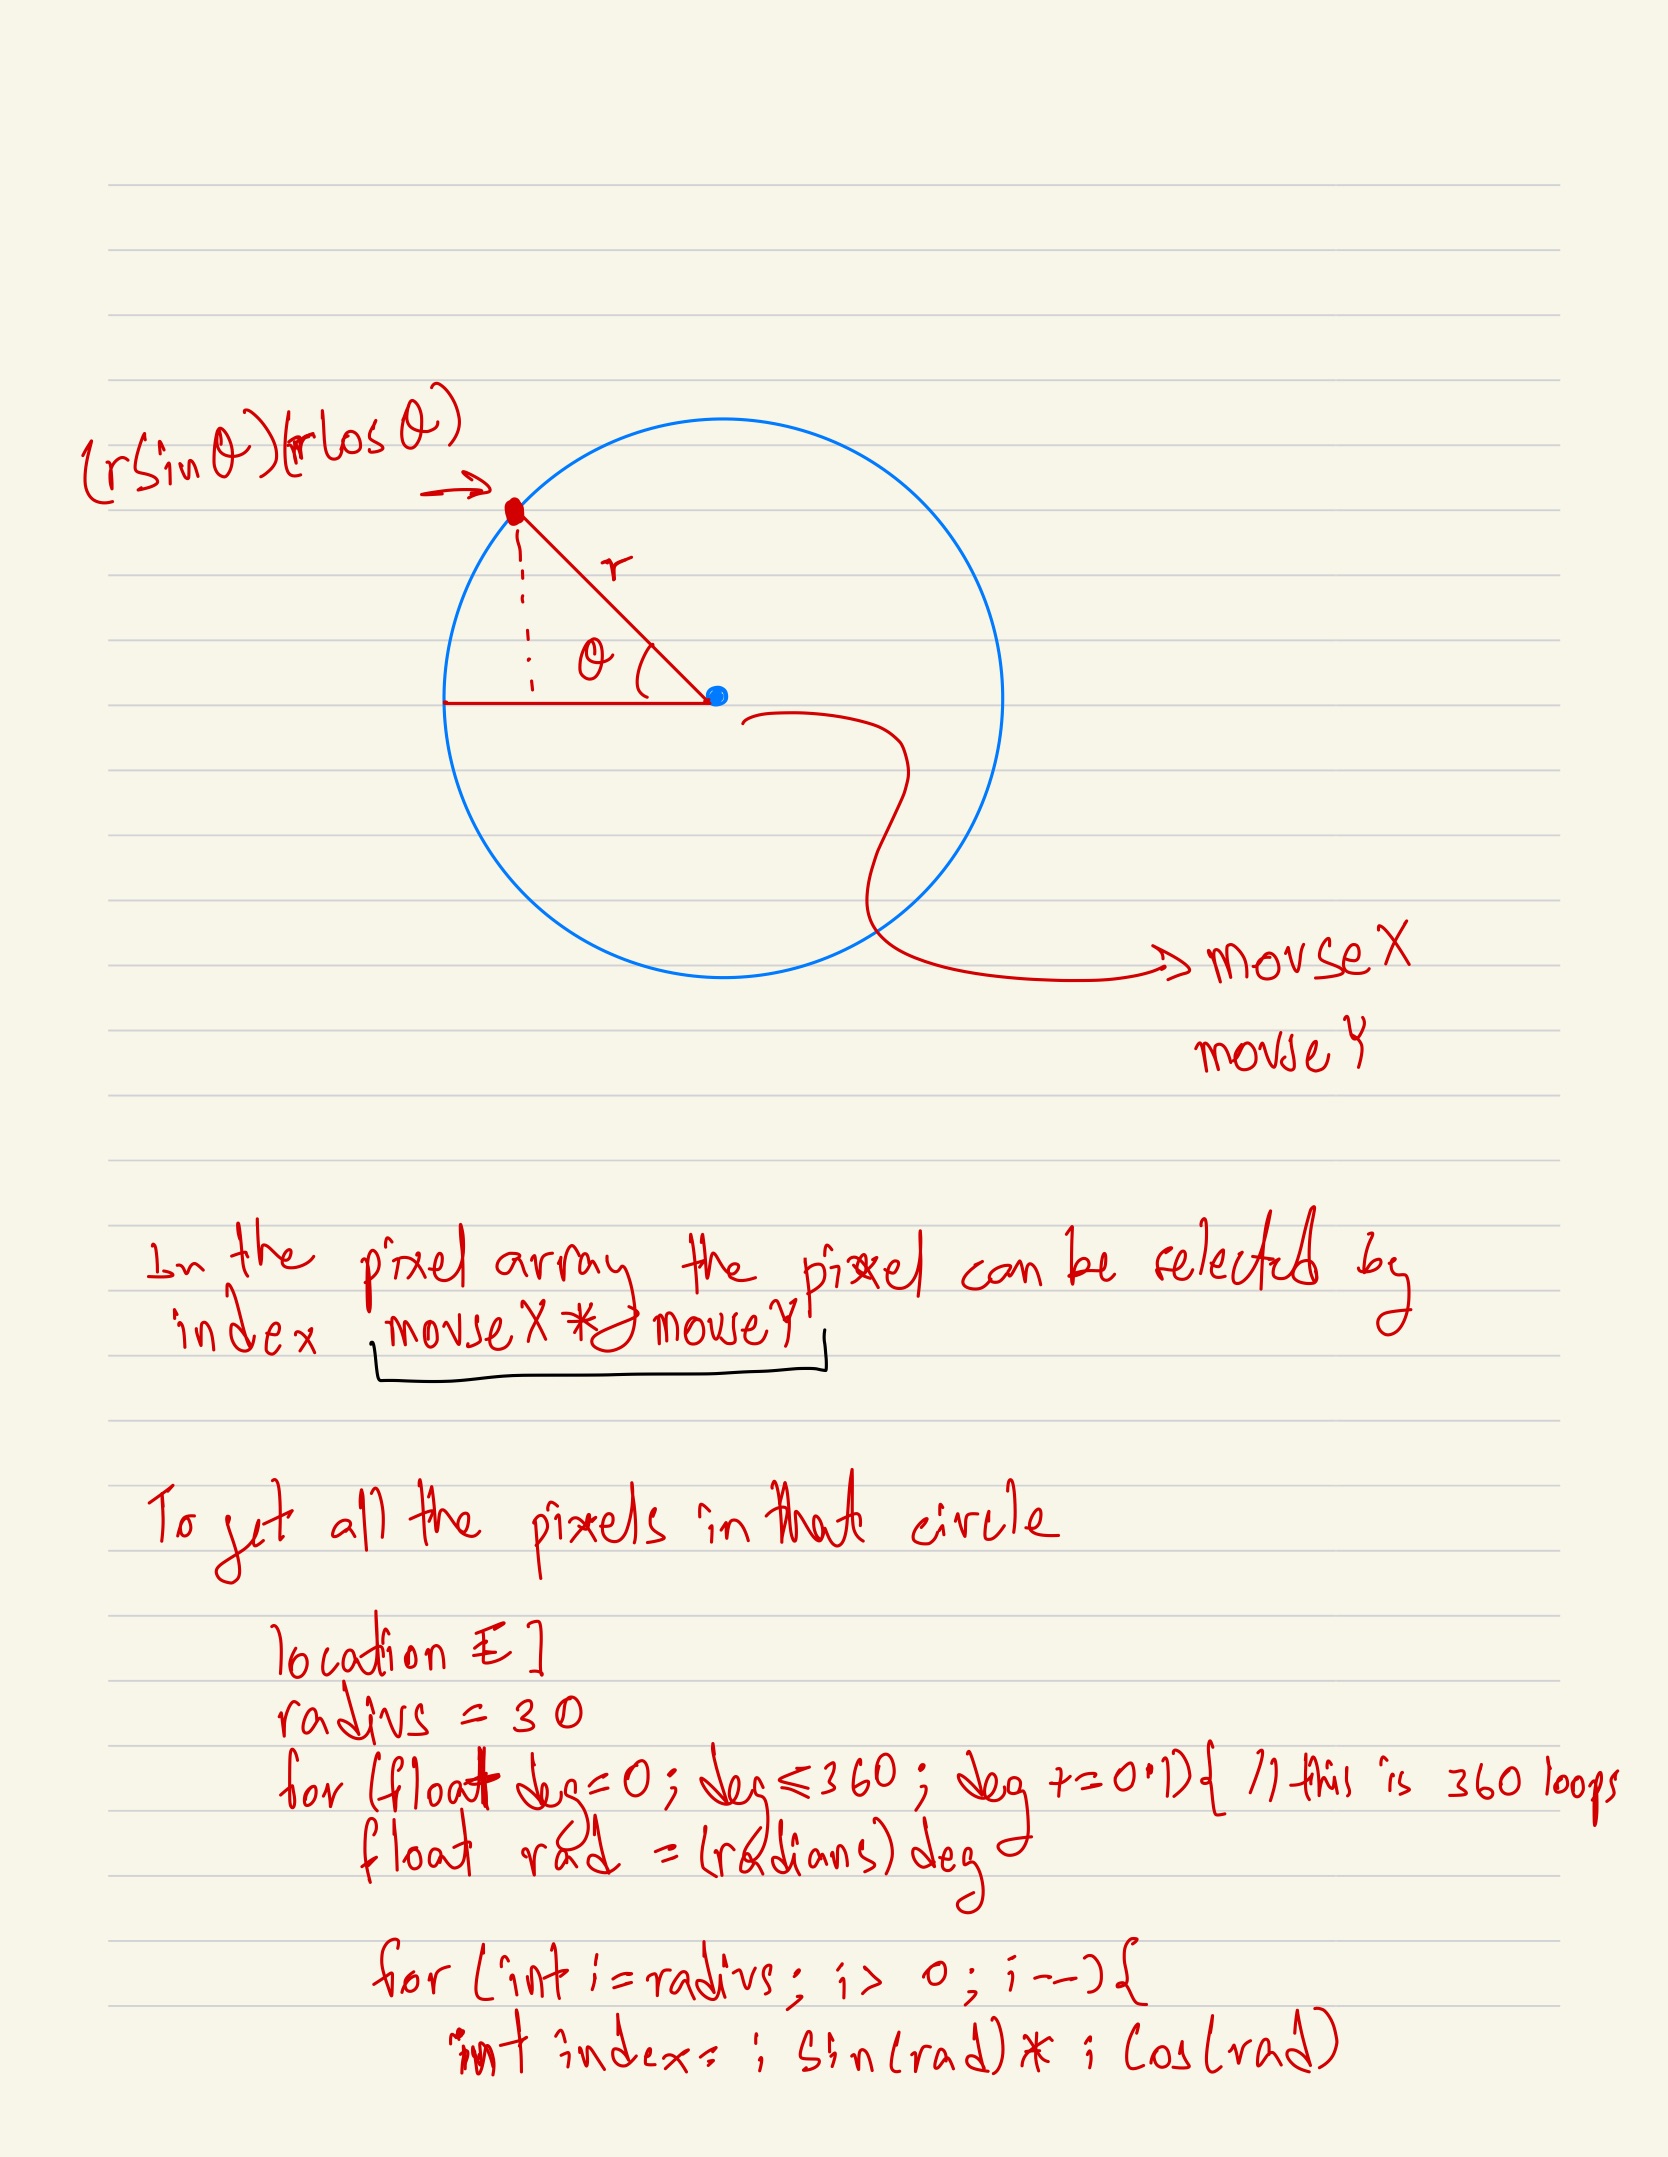
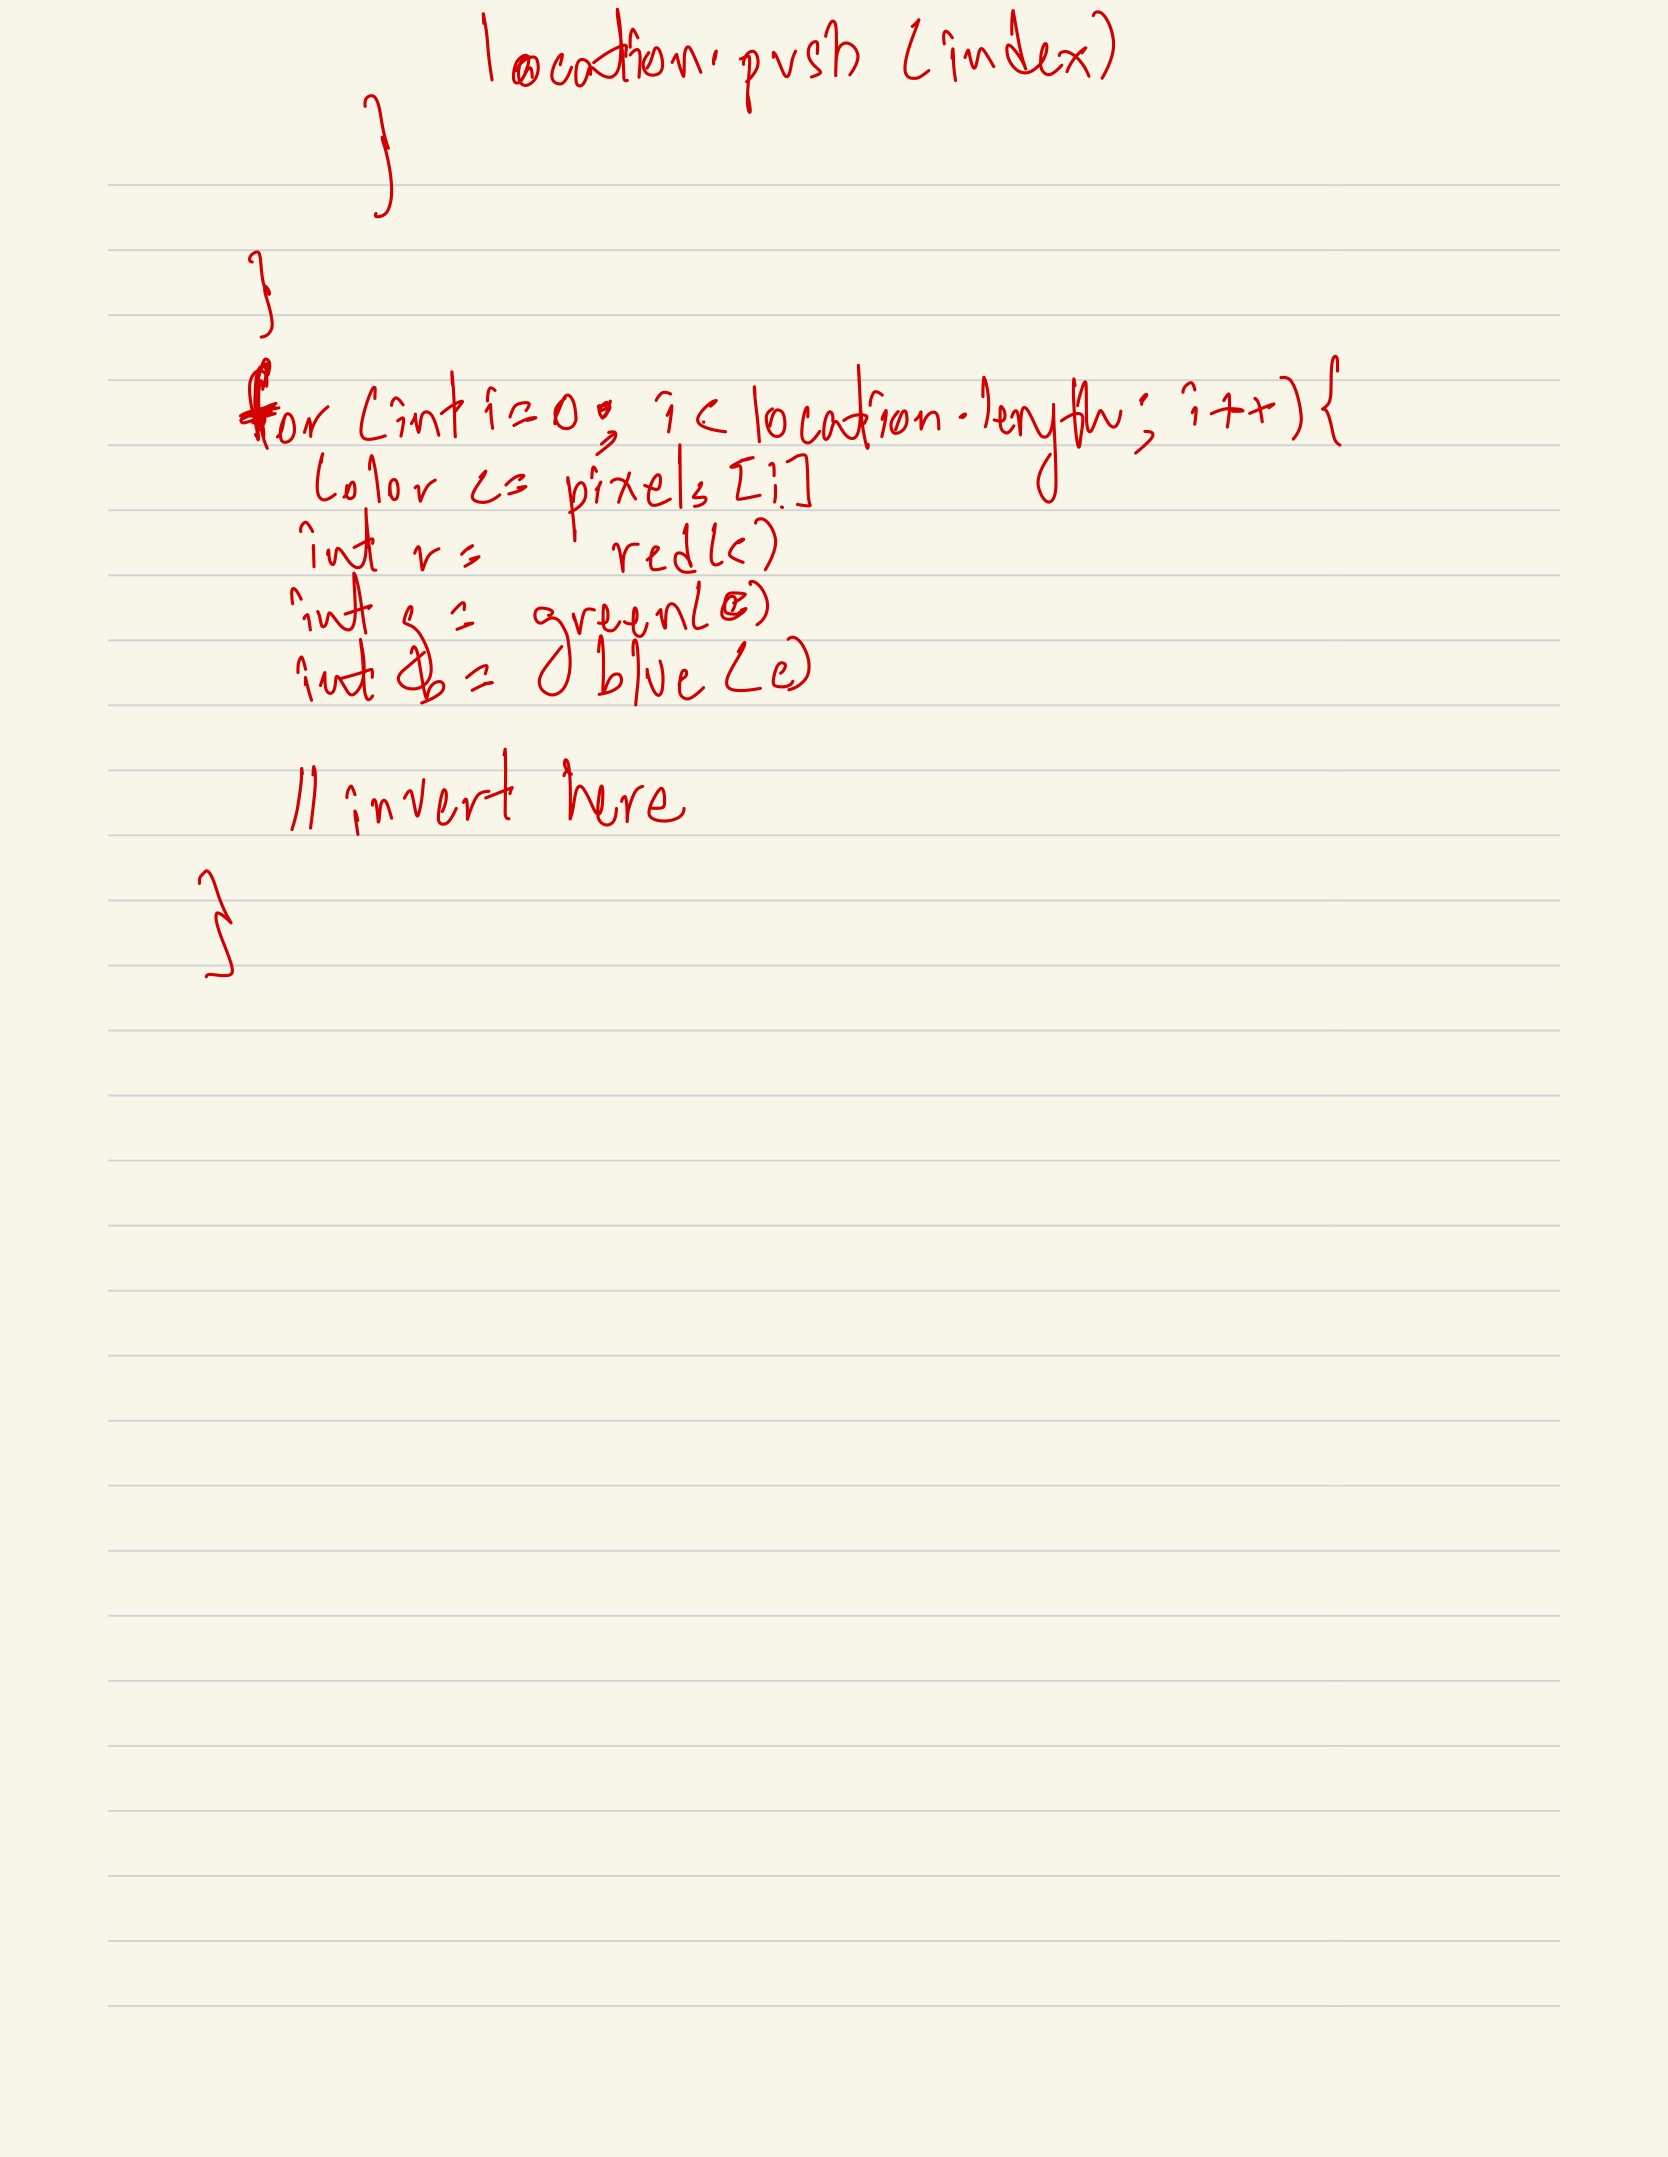
I would like to pursue this further and implement this logic
PImage img;
int counter = 0;
int KeyCode = -1;

void setup() {
  size(1280, 720);
  img = loadImage("scene.jpg");
  image(img, 0, 0, width, height);
  //noLoop();
}

void draw() {
  //if (mouseX>0 && mouseX<width && mouseY>0 && mouseY<height) {
  //  negativeMousePosition();
  //}
}

void keyPressed() {
  float sinVal = radians(180);
  println(sin(sinVal),cos(radians(180)));
  if (keyCode==49) { //1
    invertRGB();
    KeyCode = 49;
  } else if (keyCode==50) { //2
    invertR();
    KeyCode = 50;
  } else if (keyCode==51) { //3
    invertG();
    KeyCode = 51;
  } else if (keyCode==52) { //4
    invertB();
    KeyCode = 52;
  } else if (keyCode==53) { //5
    swapPixels();
    KeyCode = 53;
  } else if (keyCode == 54) { //6
    exagerate();
    KeyCode = 54;
  } else { //anything else
    drawOriginal();
    KeyCode = -1;
  }
}

//void mouseDragged(){
//  negativeMousePosition();
//}

void invertRGB() {
  //img = loadImage("scene.jpg");
  //image(img, 0, 0, width, height);
  loadPixels();
  for (int i=0; i<width*height; i++) {
    int r = (int)red(pixels[i]); //get red value
    int g = (int) green(pixels[i]); // get green value
    int b = (int) blue(pixels[i]); //get blue value
    color c = color(255-r, 255-g, 255-b); // take the complement of the rgb values
    pixels[i] = c; //set the new color value
  }
  updatePixels(); //update the pixels on screen
}

void invertR() {
  //img = loadImage("scene.jpg");
  //image(img, 0, 0, width, height);
  loadPixels();
  for (int i=0; i<width*height; i++) {
    int r = (int)red(pixels[i]); //get red value
    int g = (int) green(pixels[i]); // get green value
    int b = (int) blue(pixels[i]); //get blue value
    color c = color(255-r, g, b); // take the complement of the rgb values
    pixels[i] = c; //set the new color value
  }
  updatePixels(); //update the pixels on screen
}

void invertG() {
  //img = loadImage("scene.jpg");
  //image(img, 0, 0, width, height);
  loadPixels();
  for (int i=0; i<width*height; i++) {
    int r = (int)red(pixels[i]); //get red value
    int g = (int) green(pixels[i]); // get green value
    int b = (int) blue(pixels[i]); //get blue value
    color c = color(r, 255-g, b); // take the complement of the rgb values
    pixels[i] = c; //set the new color value
  }
  updatePixels(); //update the pixels on screen
}

void invertB() {
  //img = loadImage("scene.jpg");
  //image(img, 0, 0, width, height);
  loadPixels();
  for (int i=0; i<width*height; i++) {
    int r = (int)red(pixels[i]); //get red value
    int g = (int) green(pixels[i]); // get green value
    int b = (int) blue(pixels[i]); //get blue value
    color c = color(r, g, 255-b); // take the complement of the rgb values
    pixels[i] = c; //set the new color value
  }
  updatePixels(); //update the pixels on screen
}

void drawOriginal() {
  image(img, 0, 0, width, height);
}

void swapPixels() {
  //img = loadImage("scene.jpg");
  //image(img, 0, 0, width, height);
  loadPixels();
  //println(pixels[1]);
  //println(pixels[width*height-2]);

  for (int i=0; i<(width*height)/2; i++) {
    int temp;
    temp = pixels[i];
    pixels[i] = pixels[width*height-1-i];
    pixels[width*height-1-i] = temp;
  }

  updatePixels();
  //println(pixels[1]);
}

void exagerate() {
  //img = loadImage("scene.jpg");
  //image(img, 0, 0, width, height);
  loadPixels();
  for (int i=0; i<width*height; i++) {
    int r = (int)red(pixels[i]); //get red value
    int g = (int) green(pixels[i]); // get green value
    int b = (int) blue(pixels[i]); //get blue value
    int randomR = (int) random(255);
    int randomG = (int) random(255);
    int randomB = (int) random(255);
    color c = color((r+randomR), (g+randomG), (b+randomB)); // take the complement of the rgb values
    pixels[i] = c; //set the new color value
  }
  updatePixels(); //update the pixels on screen
}