
After my first not-so-successful-exposure to Processing this summer, I was terrified to play around with it ever again. All these numbers and pixel-counting seemed nothing but confusing. However, three months later, here I am: sitting in front of my laptop and trying to battle Processing by drawing a whole self-portrait, now in Java!
With all of my courage and creativity, I decided to first draw (more like draft?) what I was about to code:
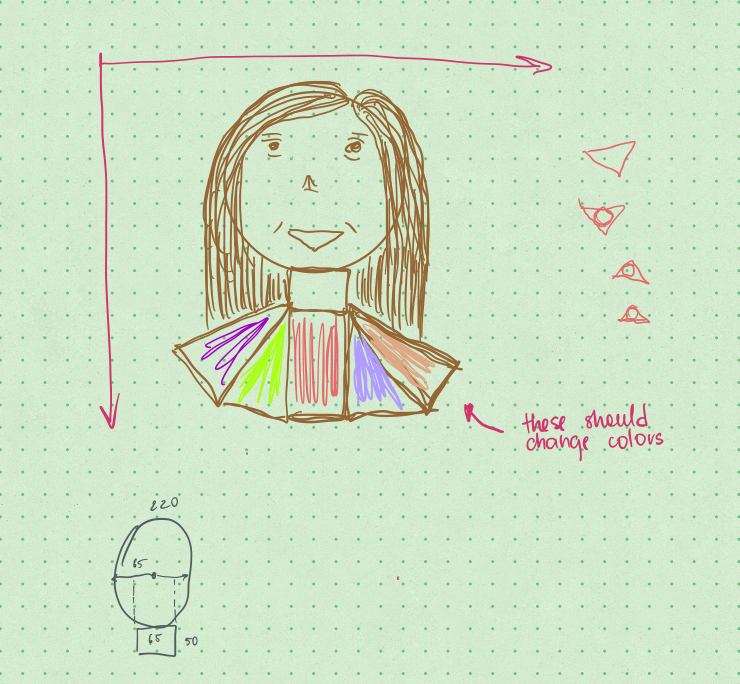
The main challenge was to figure out which features to use, which functions to include, and…count the pixels to place everything where it should be. For my hair and face, I decided to go with circles, triangles, and rectangles in the draw() function. From the previous class, I got a little curious about the pressedKey() color-changing feature and have decided to try it in my portrait. As a result, I got a portrait of myself that changes the color of the shirt whenever the ‘c’ button is pressed.
Here is how it looks like:
And, of course, the code:
// This is Amina's Portrait!

float shirt_color_r = 170;
float shirt_color_g = 125;
float shirt_color_b = 206;

// Let's set this up...
void setup() {
  size(440, 500);
}

// Let's draw!
void draw() {

  // How about a sunset sky?
  fill(140, 83, 131);
  noStroke();
  rect(0, 0, 440, 280);

  // Earthy background...
  fill(204, 188, 188);
  rect(0, 280, 440, 560);

  // Hair...
  fill(135, 107, 85);
  circle(220, 170, 200);
  rect(120, 170, 200, 200);

  // Here is the face and the neck!
  fill(247, 212, 184);
  ellipse(220, 200, 150, 180);
  rect(190, 270, 60, 45);

  // Eyes:
  fill(255, 255, 255);
  triangle(190, 170, 180, 180, 200, 180);
  triangle(260, 170, 250, 180, 270, 180);
  fill(135, 107, 85);
  rect(180, 160, 20, 3);
  rect(250, 160, 20, 3);
  circle(190, 180, 10);
  circle(260, 180, 10);

  // Nose:
  fill(215, 173, 157);
  triangle(220, 200, 210, 230, 230, 230);

  // Lips:
  fill(215, 173, 157);
  stroke(245, 157, 151);
  triangle(220, 265, 190, 250, 250, 250);
  //triangle();

  // Fancy t-shirt!
  noStroke();
  fill(shirt_color_r, shirt_color_g, shirt_color_b);
  rect(190, 315, 60, 100);
  triangle(250, 315, 250, 415, 350, 415);
  triangle(190, 315, 190, 415, 100, 415);
  rect(100, 415, 250, 100);
}

void keyPressed() {
  if (key == 'c') {
    shirt_color_r = random(255);
    shirt_color_g = random(255);
    shirt_color_b = random(255);
  }
}
It was a fun experience mastering the RGB-color system, the shapes syntax for Processing, and counting pixels for the frame. As there is still a lot for me to learn, coming into the future and having more time to work on the assignment, I would have made several improvements to the portrait by:
-
-
- eliminating hardcoding numbers for the pixels/dimensions;
- implementing different movement features with mouseX and mouseY functions, such as closing the eyes or smiling;
- using more advanced programming concepts and syntax, not just filling my code with shapes like rect(), triangle(), and circle();
- doing more research about Processing features and focusing on quality than quantity – thanks to my classmates who posted here now I know about arc(), strokeWeight(), vertex().
-
I am glad that I finally am becoming more comfortable using Processing and cannot wait to improve building on the present experience. Next time, I will try to be more careful with pre-assignment research and will pay close attention to the quality of my code.
One step at a time…
Amina, I am glad you enjoyed working with Processing this time and I really like how you designed the eyes in your portrait using triangles and circles. Also changing the color of the shirt is a nice addition. I was also curious about the pressedKey () function so I let the hair color change in my portrait. One step at a time 🙂