
This week, I made a combination of multiple switches and LED lights into a status indicator. The basic idea is to tell the user if they have successfully pressed a button by looking at the blinking lights. I got inspired to create this device while I was playing a game called Limbo. In Limbo, our protagonist is allowed to do three kinds of moves: forward move, backward move, and jump. Since I was playing on iPad, a touchscreen device, I had to move my fingers rightward, leftward or upward to make the moves. Sometimes, I failed to jump over a barrier because I swept across the screen so softly that the screen did not detect my finger movement. I wish there were signals telling me that I did not trigger the jump move. I thought that a physical button would be much easier to control than to sweep across the screen. Therefore, I created this device to tell the users if they have successfully pressed the button by the status of the LED lights.
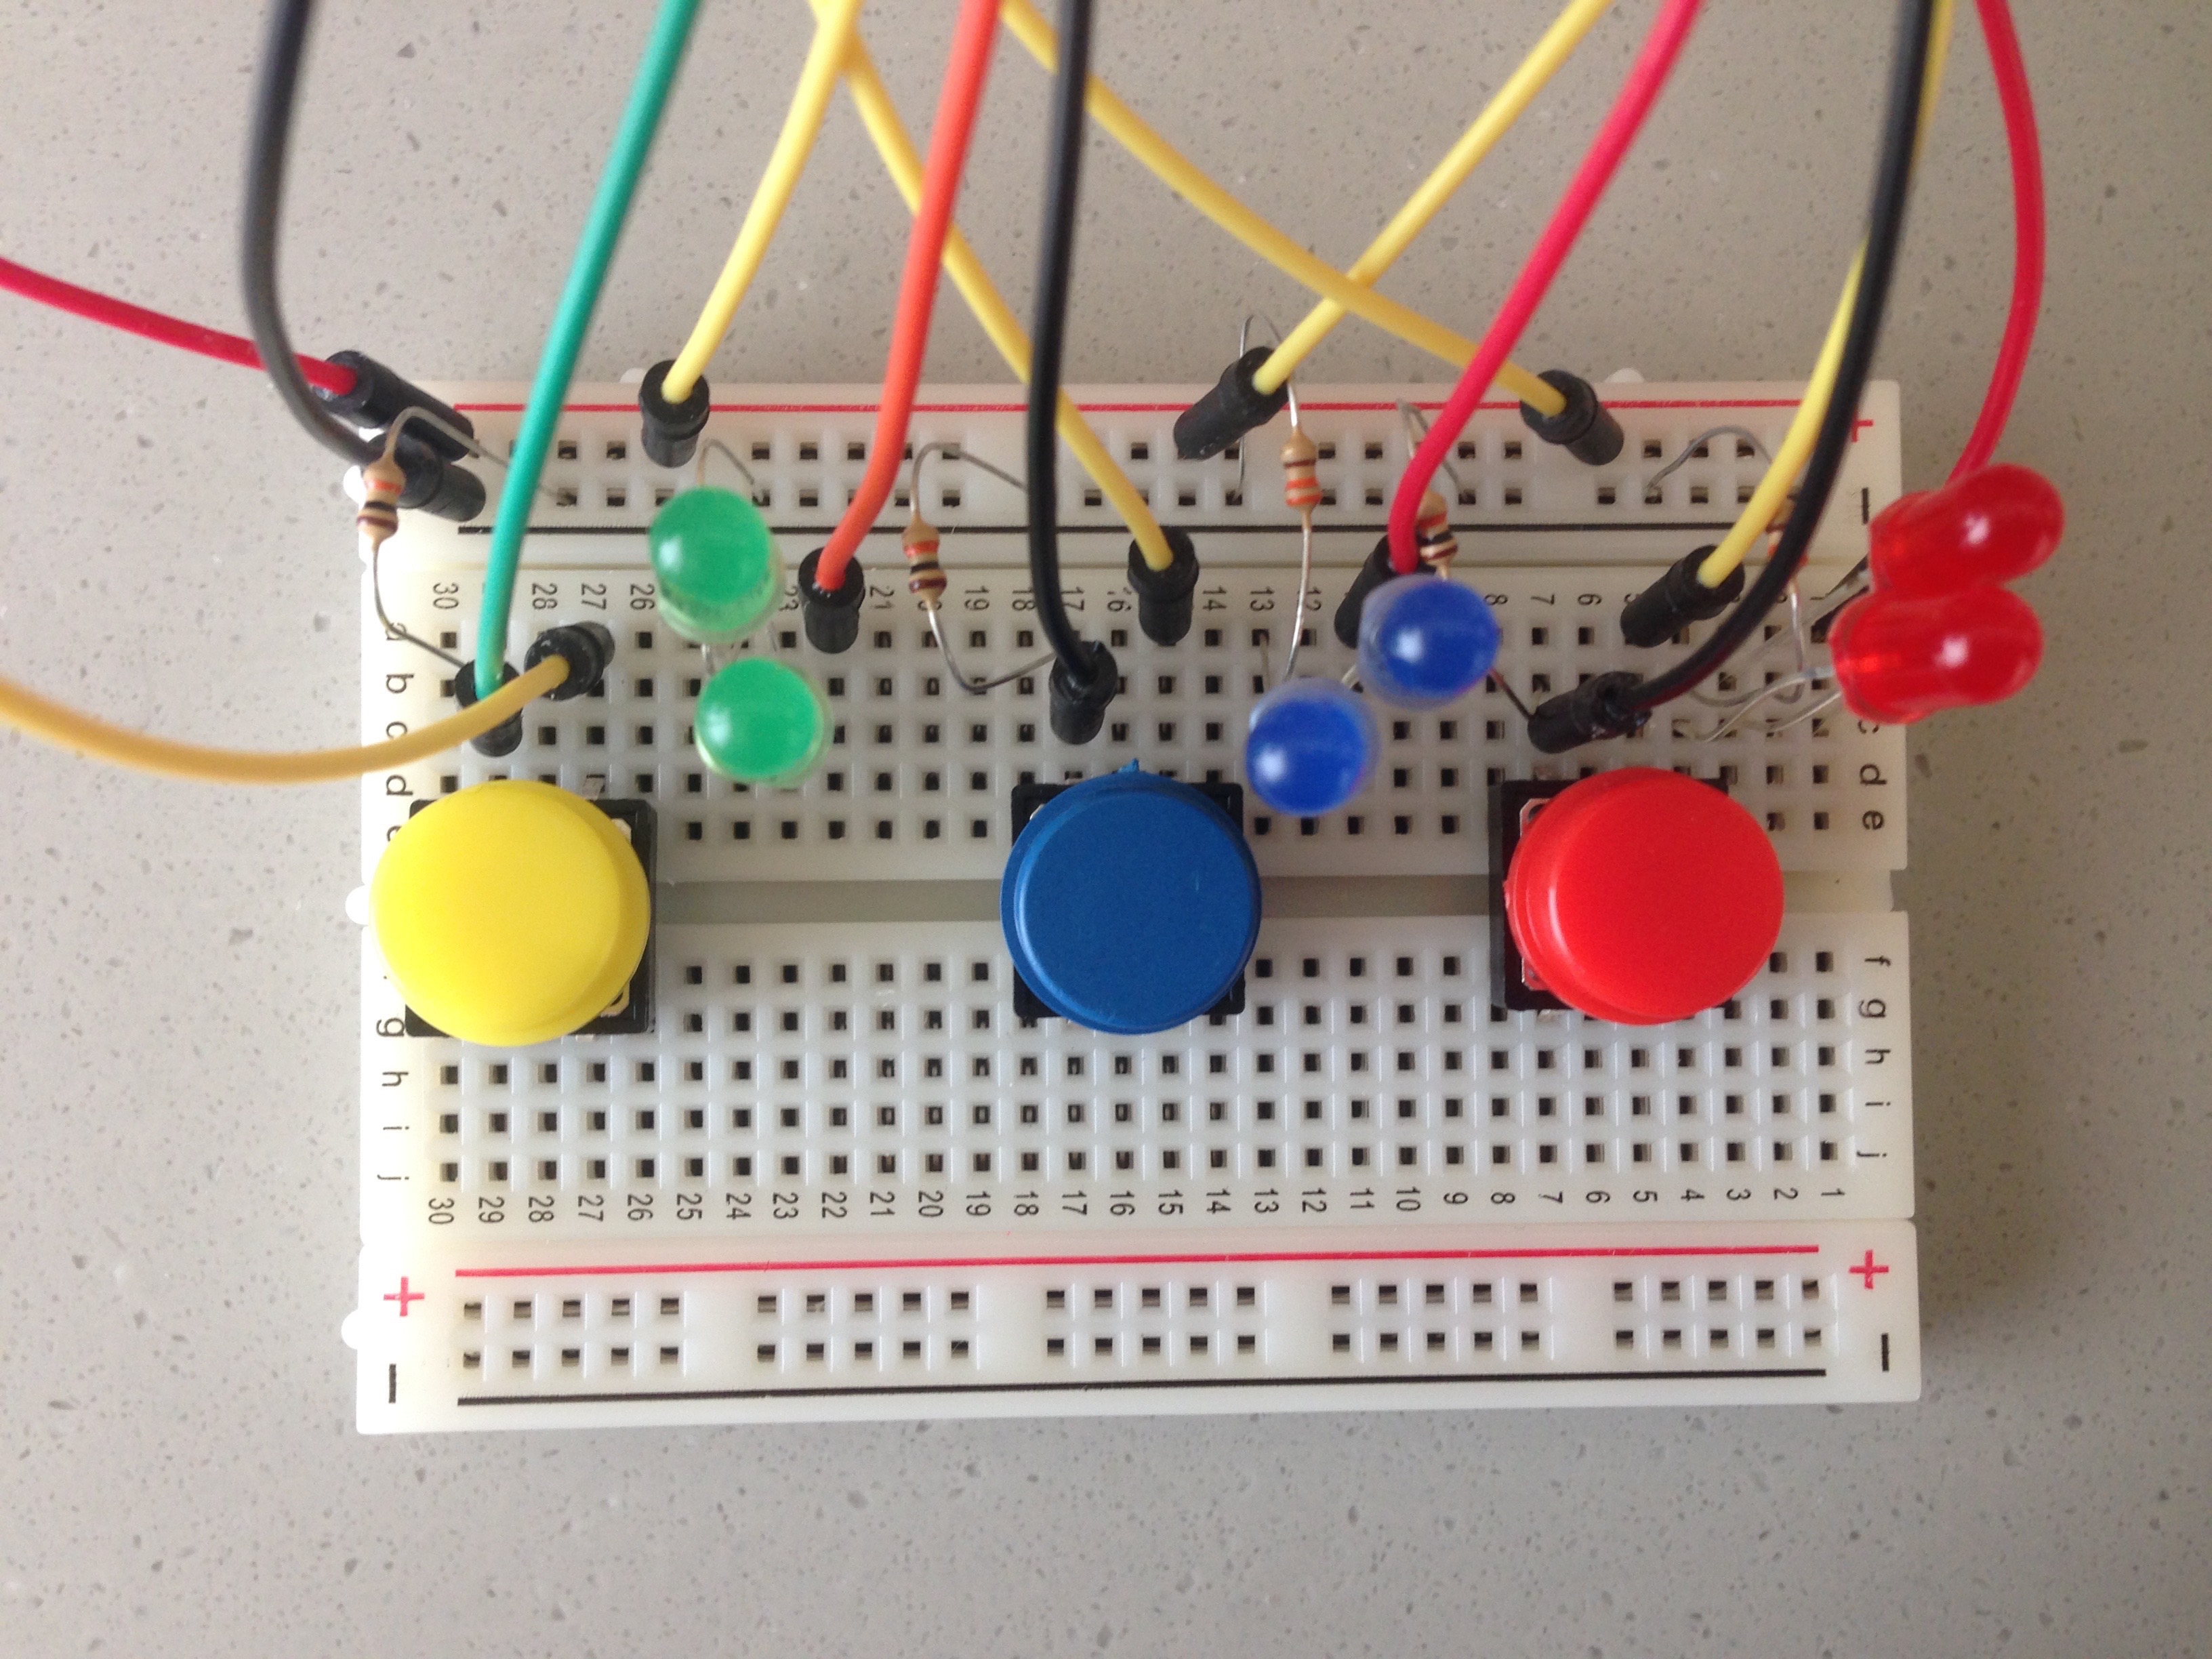
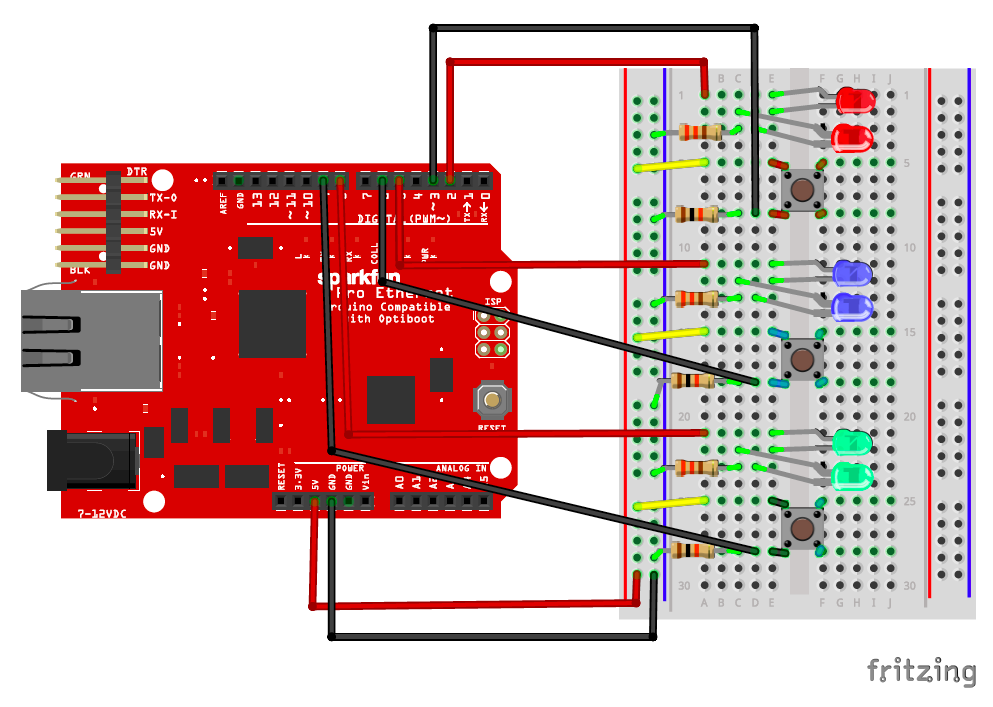
To begin with, I put three groups of LED lights on my breadboard. They are red, blue and green, respectively. Each group of lights is put in series with a 330 ohms resistor, and they are also connected to power and ground. Apart from the lights and resistors, a switch button is added in each of the three groups. In each group, the switch is not connected to the lights and 330 ohms resistors but is connected to a 10k ohms resistor as well as power and ground. This is what my breadboard looks like.
To make the lights blinking once the button is pressed, I wrote a little Arduino program to control the lights and switches. The code is attached below.
void setup() {
  // put your setup code here, to run once:
pinMode(2,OUTPUT);
pinMode(3,INPUT);
pinMode(4,OUTPUT);
pinMode(5,INPUT);
pinMode(8,OUTPUT);
pinMode(9,INPUT);
}

void loop() {
  // put your main code here, to run repeatedly:
if (digitalRead(3) == LOW && digitalRead(5) == LOW && digitalRead(9) == LOW){ //if no button is pressed
 digitalWrite(2,HIGH);
 delay(50);
 digitalWrite(2,LOW);
 delay(50);

 digitalWrite(4,HIGH);
 delay(50);
 digitalWrite(4,LOW);
 delay(50);

 digitalWrite(8,HIGH);
 delay(50);
 digitalWrite(8,LOW);
 delay(50);

 }else{
     if (digitalRead(3) == HIGH){  //if the red button is pressed
     digitalWrite(4,LOW);
     digitalWrite(8,LOW);
     digitalWrite(2,HIGH);
     delay(50);
     digitalWrite(2,LOW);
     delay(50);
     }

     if (digitalRead(5) == HIGH){ //if the blue button is pressed
     digitalWrite(2,LOW);
     digitalWrite(8,LOW);
     digitalWrite(4,HIGH);
     delay(50);
     digitalWrite(4,LOW);
     delay(50);
     }

     if (digitalRead(9) == HIGH){ // if the yellow button is pressed
     digitalWrite(2,LOW);
     digitalWrite(4,LOW);
     digitalWrite(8,HIGH);
     delay(50);
     digitalWrite(8,LOW);
     delay(50);
     }
 }
}
After my device is connected to power, all three groups of LED lights are going to blink. The reason I didn’t keep the lights off at the beginning is that the blinking of all lights tells the users that the device is ready to function. (Imagine a device with all lights off at the beginning. No one would be able to tell if the device is working or not.) Once the device is ready, the user can press any button, and he will see the lights next to button blinking. Here’s an illustration video.