All Posts

WaterBox Prototype Stage

The progress of the prototype stage of the final project has been going smoothly. I have tested the kinect v2 code with additional calibrations on a container that has water in it – and the kinect was able to successfully capture the ripples and waves. Since I am catching only the blue pixels, I have placed blue acrylics at the bottom of the water container as a a prototype to test it out.

Also, for the sound part, I have inserted additional codes that I got from Aaron that uses the Processing Sound library. Currently in the code, I am calculating the minimum number of pixels shown (due to some possible errors in calibrations like reflections from the container, etc.), and I use the minimum and the maximum values of pixel counts to map the pixel count values to an amplitude between 0 and 1. The following code creates an effect where the more ripples there are in certain sections, the louder the sound becomes.

After encountering an idea of capacitive touch sensing from Aaron, so-called Touche for Arduino: Advanced Touching Sensor, I have decided to include as a part in the project and change how the final version of the project is going to look like. The capacitive touch sensor will be a trigger to initiating different loops/sound – for instance, one finger plays one sound, two finger plays two sound together or other sound alone, etc. And, the pixel counts from the waves detected from the Kinect v2 will serve as a the value for the reverb of all loops.

The below is the prototype video of using the touche advanced touching sensor library with water and fingers as the trigger for different music loops:

Prototyping My Final Project

What I have now is definitely somewhat of a prototype, although I think I might have to work extra hard this weekend to have everything done by Monday – I do not want to pull an allnighter on Wednesday and panic before the showcase.

Physical Aspect

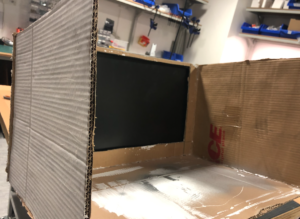
I made a prototype of the physical aspect of it. It looks quite nice, but I am going to remake it for better matching and to better the overall aesthetics of the box.

Coding Aspect

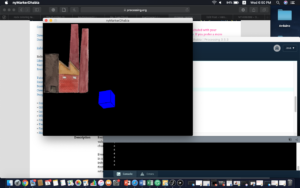
The code I have right now is a major improvement than what I had back on Sunday. I can make the png images appear when scanning the markers. I have also managed to draw every marker separately. I managed to also load the factory image (the only one I made into a png so far) and assign it to a marker (Marker number 4).

Things I will need help with: How can I make it so the building stays and does not disappear once a marker is removed from the camera? Do I have to make a boolean variable for every single marker?

More Progress

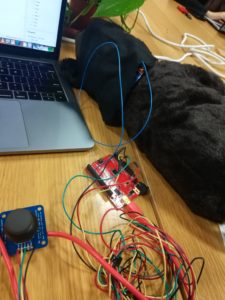
I’ve now connected the tilt sensors to control the Processing screen. Currently, because I don’t have my el wires yet, I’m currently substituting the el wires with strings and the strings are attached to placeholders (the tripod in the IM room). The tilt sensors are attached to the string with resistors right now and I’d probably just end up using that to attach it for the show because the resistors are small enough so people can’t see it. I’ve also added music to the strumming of the string (mainly guitar notes). The tilt sensors aren’t too sensitive so it works perfectly because very light touches of the string will not do much.

For the rest of the project, I mainly have to have the room and the el wires to come in so I can position everything correctly. I’ll also be added 3 more wires so 3 more tones (acoustic guitar — D, A, E, G, B, Low E — found on soundcloud).

Final Project Prototype

I have continued to work on my final project. However, after attempting to solder additional components (a FSR) to a circuit board, my project no longer uses any soldered components for the time being. Aaron advised me to use capacitive touch instead of a FSR with the stuffed animal, and I have tested this yesterday and it works fine and responds well to touch. I eventually plan on sewing this to the animal. As I move into finalizing the project this weekend.

I have refined my code slightly and have fixed a few technical issues revolving around changing stages and some of the animations.

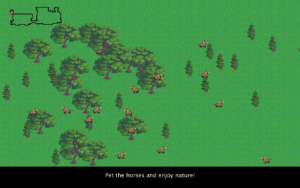
I plan on adding another FSR, which I will attach to a block of wood. I will also create a tool (most likely a hammer) that will have a foam cushion at the end. If the FSR’s reading goes above a certain value, the player will harvest the resources. I plan on going into the scene shop to quickly building these tools and testing out the FSR tonight.

The game is playable and a few of my friends have tested out the game. However, some refinements still need to be made in progression.


Here is a video of the prototype in action:

Three hardest parts of my final project: Coding, coding and coding…

My project is the claw arcade game. So you pull out a thing on the screen and an actual object falls behind the screen. So the hardest part is to make that claw game on computer. I have created a prototype of this game (but its too easy for now, will make it harder of course). The claw picks up and object within its range and holds it until the claw is open. Sounds basic, but it actually is hours and hours of coding 🙂 Here is the result (ignore Tori hating Kyle on the background):

Computer Vision for Artists and Designers

The reading starts off discussing how computer vision technologies have become more and more accessible than in the past. They were restricted to military and law-enforcement use but now they’re available for artists and people of all crafts to enjoy and make something really beautiful. Some of the artworks reminded me of things we saw in class and discussed in the past like the belt installation. We saw one before that was the same concept but with mirrors, and we did something sort of similar with the googly eyes in processing.   The reading discussed the technical aspects of computer vision a lot and was sort of dense,  but it helped when it came to the various aspects of computer vision when it comes to detections, tracking, and interaction. The part of the reading that intrigued me the most was the one on the Suicide Box and how it recorded 17 suicide cases whereas the police only recorded 13. It showed how much social awareness artworks made with computer vision can raise.

Final Project Progress

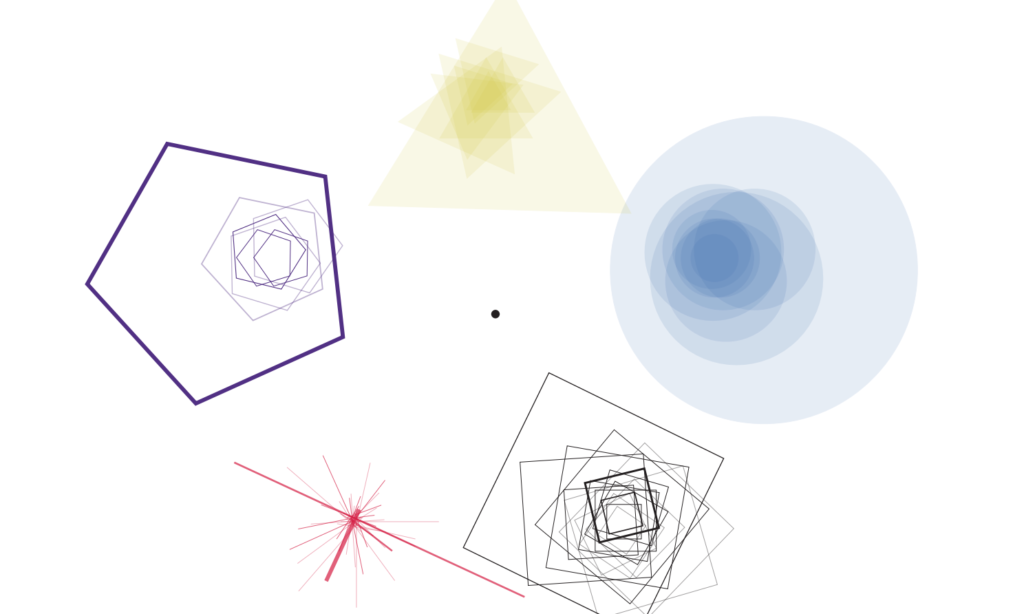
My and Nisala’s final project is slowly coming to life. We started by finalizing the inputs we want to collect: 5 emotions (through 5 buttons), the stress level (using a microphone) and an energy level (using a potentiometer). Then we roughly sketched the way we want the data to be visualized- divided into 5 segments of 5 different shapes (based on the chosen emotion), having the microphone and potentiometer input adjust the size, speed, and radius of each individual shape.

When we started programming our first class, we struggled a bit with figuring out the logic of how to make individual shapes to be open to adjustments only until a new shape is drawn. We solved this by including a “submit button” at the end, which also makes it easier for the user to play around the different inputs, see how it reflects on the screen and submit the values only when all the inputs are finalized.

A similar problem occurred when we were recording the volume of the microphone input. The interaction was not clear- the volume kept changing even after the scream (so unless you were continuously screaming and simultaneously pressing the submit button, the size of the shape would not be changed). Therefore we decided to include another button, which would mimic the way we record voice messages on our phones. The user will simply hold the button down in order to record the scream – but even after that, he is able to record again and adjust other inputs before submitting the response.

The next uncertainty/challenge is definitely the physical part of the project that shapes the user experience. So far we heavily focused on the conceptual part and coding, therefore we really need to finalize how we are going to organize all of the components to achieve a smooth and straightforward interaction. We also need to figure out a couple of other details regarding the aesthetics of the shapes as well as how to distinguish the shape that is being adjusted at the moment from all the other ones that are already drawn.

Computer Vision and Gimmicks

It’s not hard to understand the basic components of computer vision and be absolutely astonished by it; immediately going to your computer and trying to figure out how to make something like this work. I, of course, have not taken the lesson on computer vision with Aaron, yet, but have my interests peaked nonetheless. This fascination with computer vision, I doubt, is rare. Given the range of artworks described in the post, I can imagine many artists running to their computers (and visions.. haha) to program beautiful artworks. The crux of my reaction, however, is the notion of the gimmick.

When does something highly desirable become a gimmick?

This happens in all forms of art design so frequently. Many are aware of the Great Marbling movement of the late early 2000s, or the drop shadows of the 90s. What started as innovative became both a trademark of a time period and an annoyance.

At first, this frustrates me, but I then think of this process as cyclical. This high saturation of a particular technique, art, or design in a particular time period can desensitize us to its beauty. But we quickly find balance. Drop shadows are now a classic if you will, maybe computer vision will become one too.

Final Project Update – Crisis? I think so.

The screen and buikding aspect – I took measurements of the screen and I am going to start building the box Tuesday afternoon. I’m not stressed about this at all, I think the box is going to turn out very pleasing aesthetically and visually. I know how high the screen will be off the desk, and its h x l measurements.

The Coding aspect – Remember when I mentioned those mental breakdowns? They’re hitting a bit too early with this project. All the code I spent time with the professor writing is gone. I didn’t save it, my laptop ran out of charge and now I have to remember what we did and try to do it again tonight. I – will not say anything else about that. Will probably have to book an appointment (or several) with a few lab instructors tomorrow and get it sorted out.

As for the visual aspect of the process, it is going well, I found a way to turn the drawings into vectors and to cut them perfectly for the interface.

Kyle Thinks About Computer Vision

I think it is valuable to learn about the history of computer vision, especially when considering the ways in which it affects our everyday lives. CAPCHA has been used since the 90s to prevent computers from doing human things online such as open accounts and buy things. In the last couple years however, Computers have become so good at processing images, that these tests have become obsolete. As a result, CAPCHA has had to innovate and develop new methods of getting passed computers. (If you are curious about this, check out episode 908 of the podcast, Planet Money, titled “I Am Not A Robot.”

Image result for i am not a robot test

Computer vision on its own is a powerful tool, and as the article discusses, can be used for many applications from  interactive artwork to measuring human reactions. When used in combination with machine learning however, a whole new world of applications opens up. It gives hackers new ways to grab information, and researchers have been able to use it to analyze the content of millions of  posts on social media. In this way, it is at the cutting edge of computer technology today.

But despite all the fancy applications, computer vision is just cool. There is something magical about being able to interact with a computer with only motion.