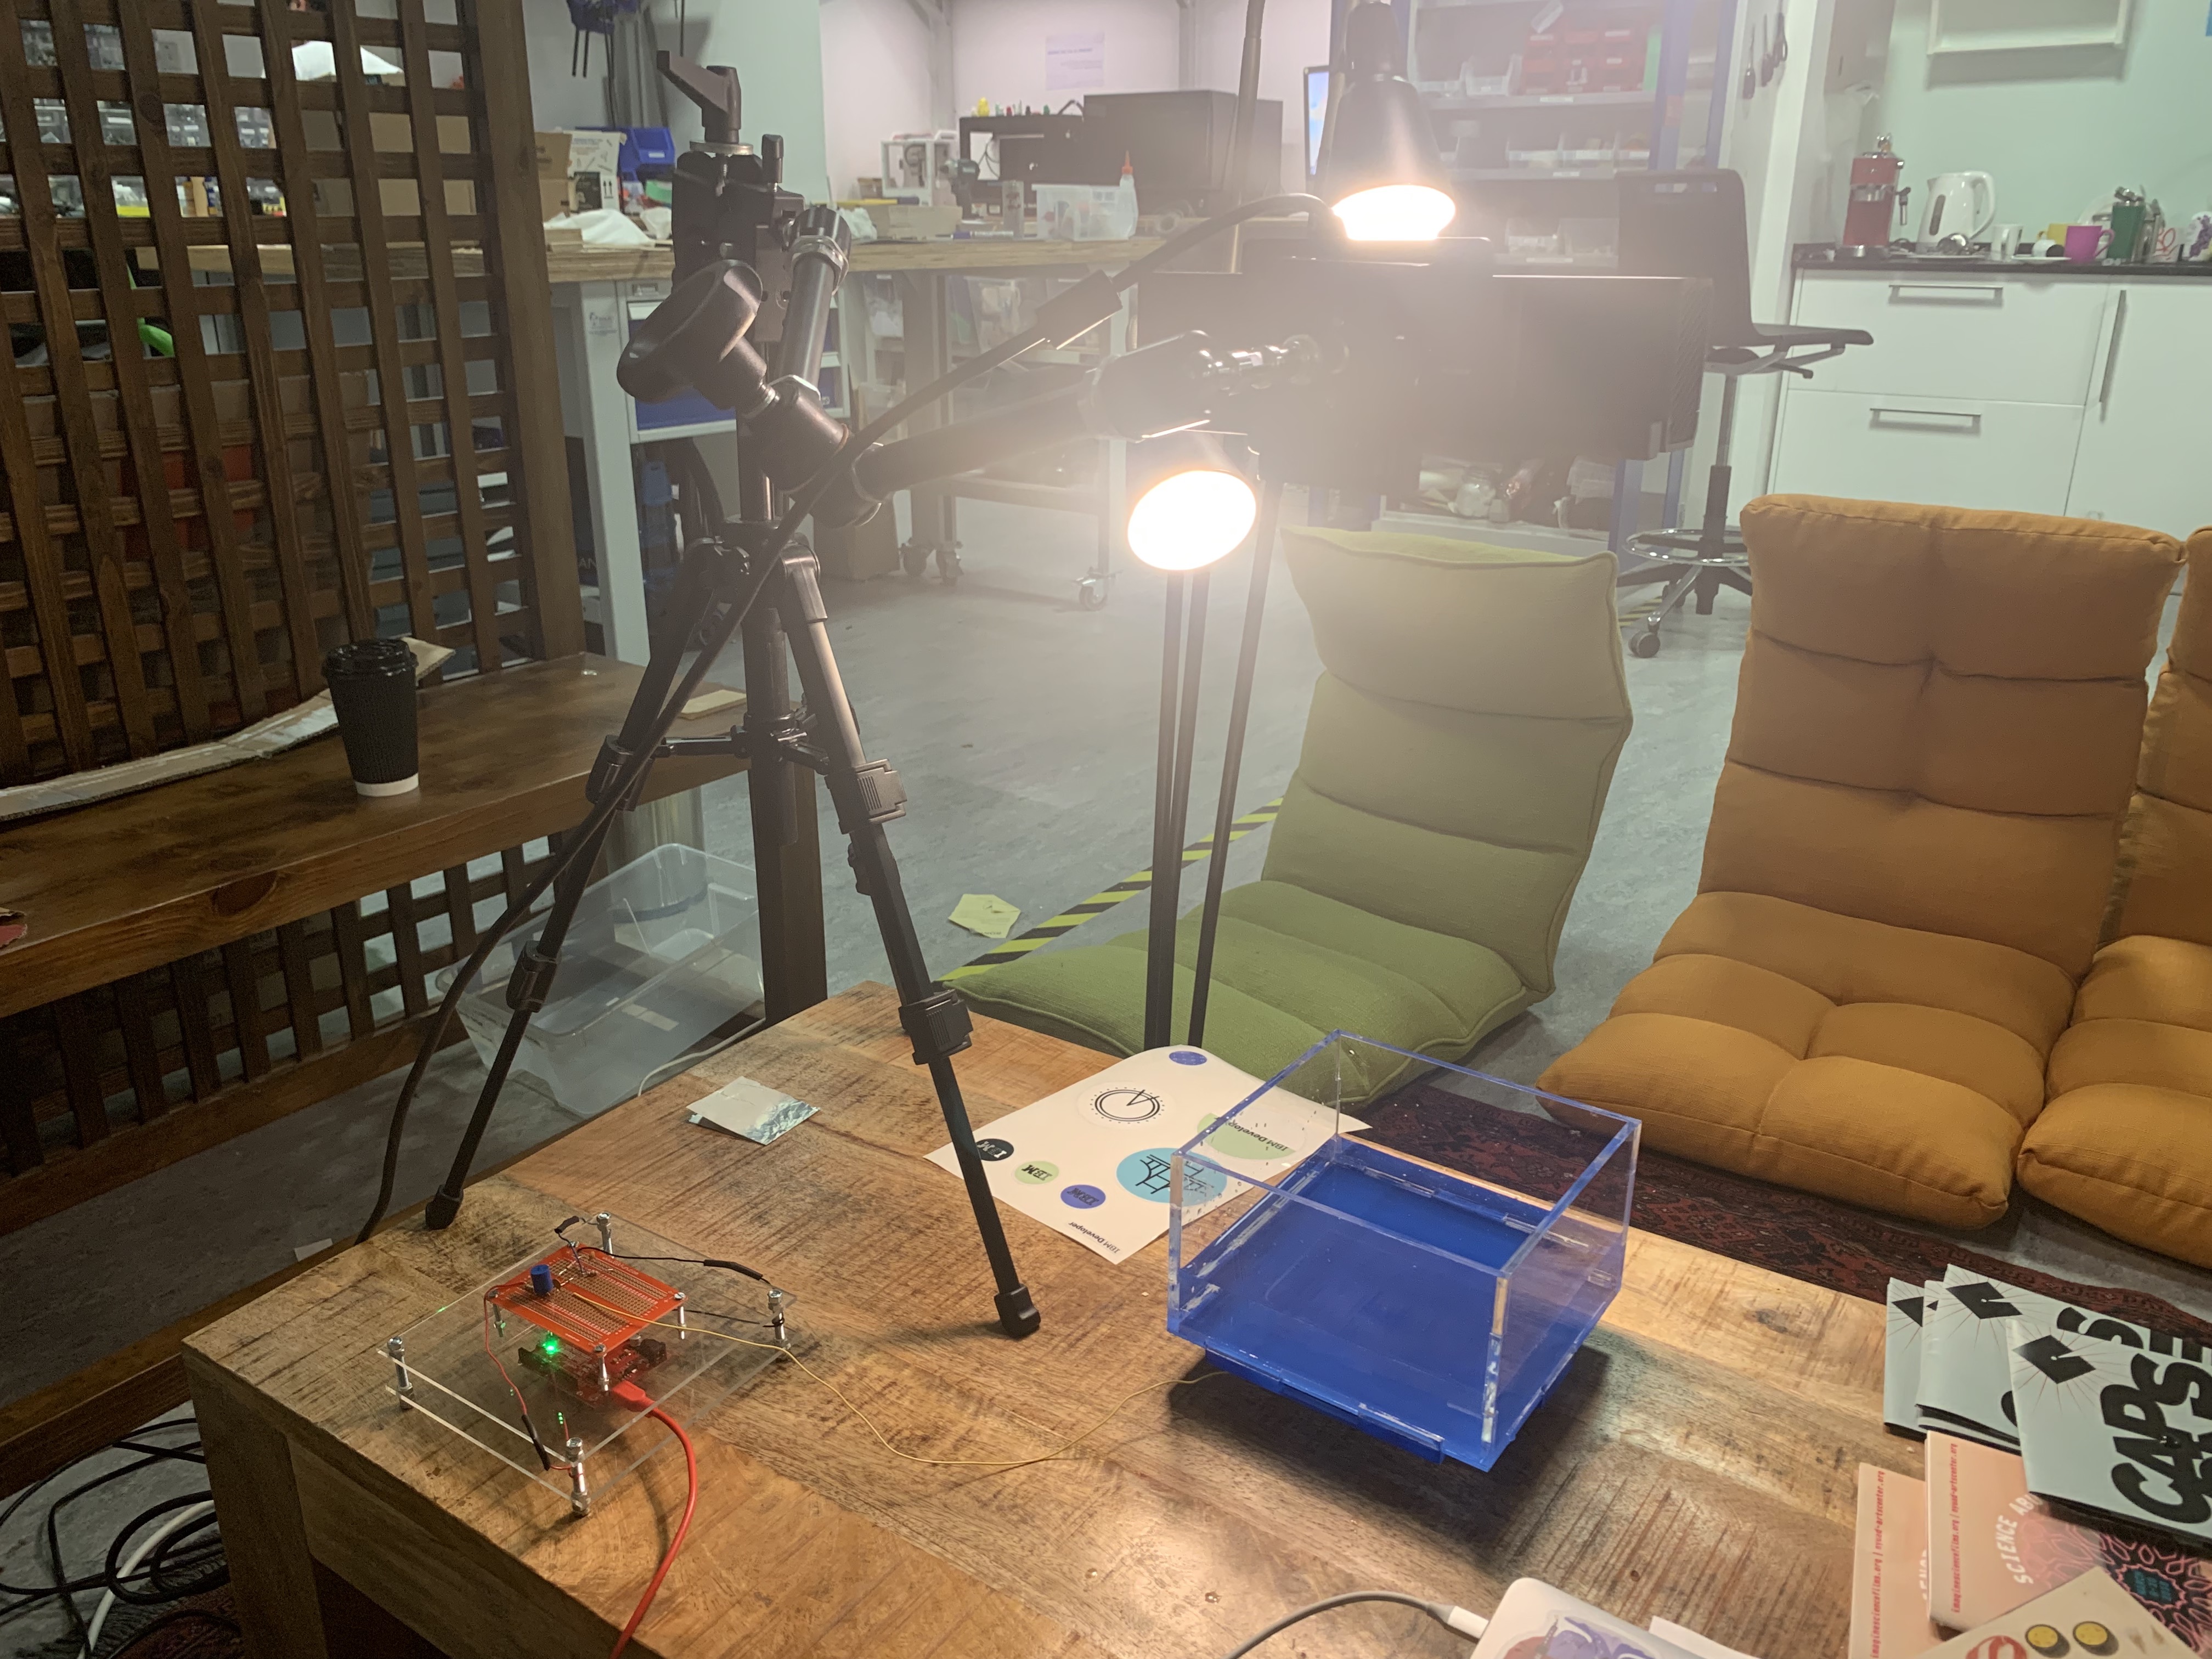
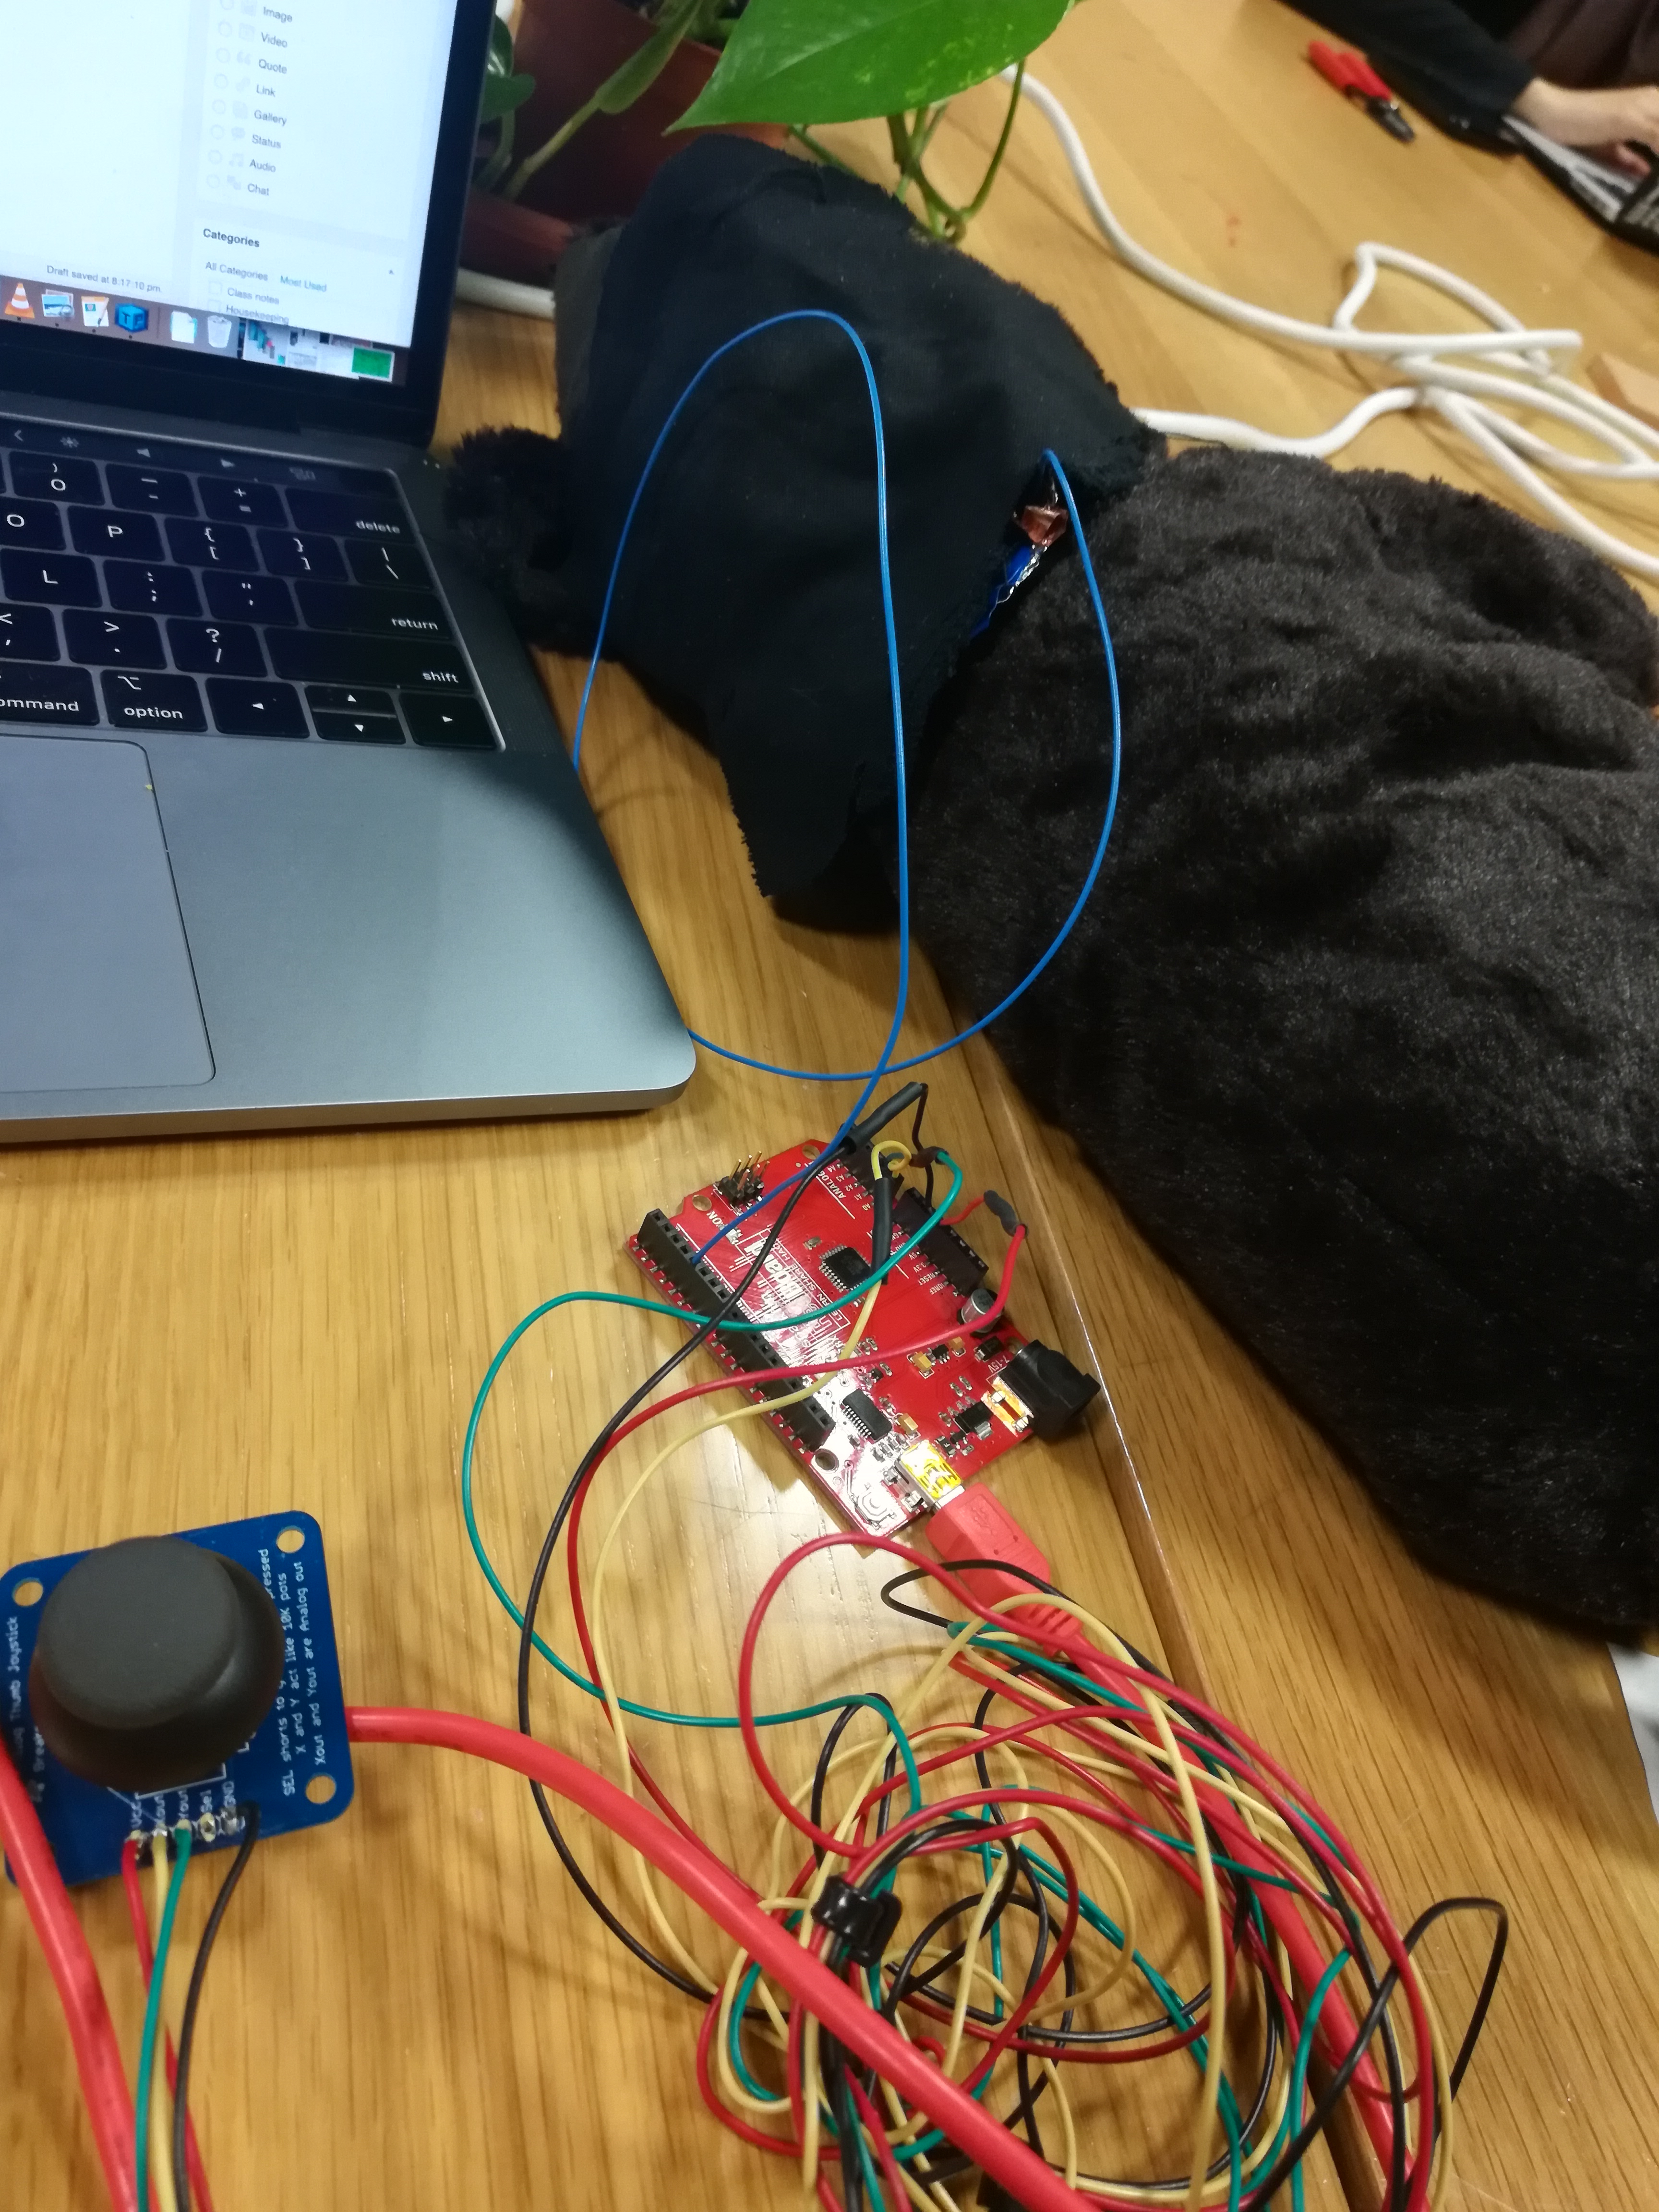
WaterBox is a musical loop station where depending on the user’s physical interaction with water plays different loops either individually or simultaneously. And, the track type changes depending on the roughness of the waves and ripples of the water surface. The final prototype is created using Kinect v2 to capture the waves of the water surface by its depth, and Touche Advanced Touch Sensor with Arduino for the capacitative sensor and interaction with water. Through the WaterBox, I wanted to share the rich feeling of interacting with water and fun of creating different music with physical motion of your hands in the water.
The calibration for the depth and the pixel counts for activating the change of track types was the most difficult part due to different lightings and positions of user’s arms. The final version will be carefully calibrated in the space with the accurate placement of supplement lighting to minimize the error caused in some of the user-testing videos. Also, I had a difficult time with the Touche library for the capacitative sensor code for calibrating and separating the different user inputs.
The following videos are user testing of the prototype:
The main feedbacks/questions that I have received are the following:
What happens if there is a user that has a long blue shirt?
For the above question, I have decided to edit a portion of the code (the minThresh) in order to ignore any pixels that are above the box height to disregard possible errors.
It will be good if there are some signs of possible interactions
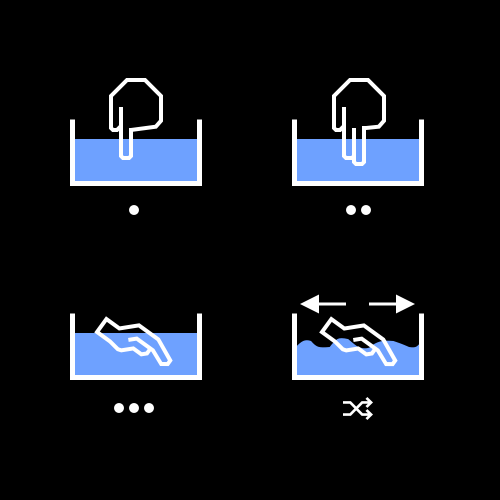
For this feedback, I thought of creating a page of possible interactions in a succinct way. For instance, a page with a diagram and a text: “one finger, two fingers, the whole hand, or make waves” can provide basic instructions while not giving the whole idea of what the project is about.
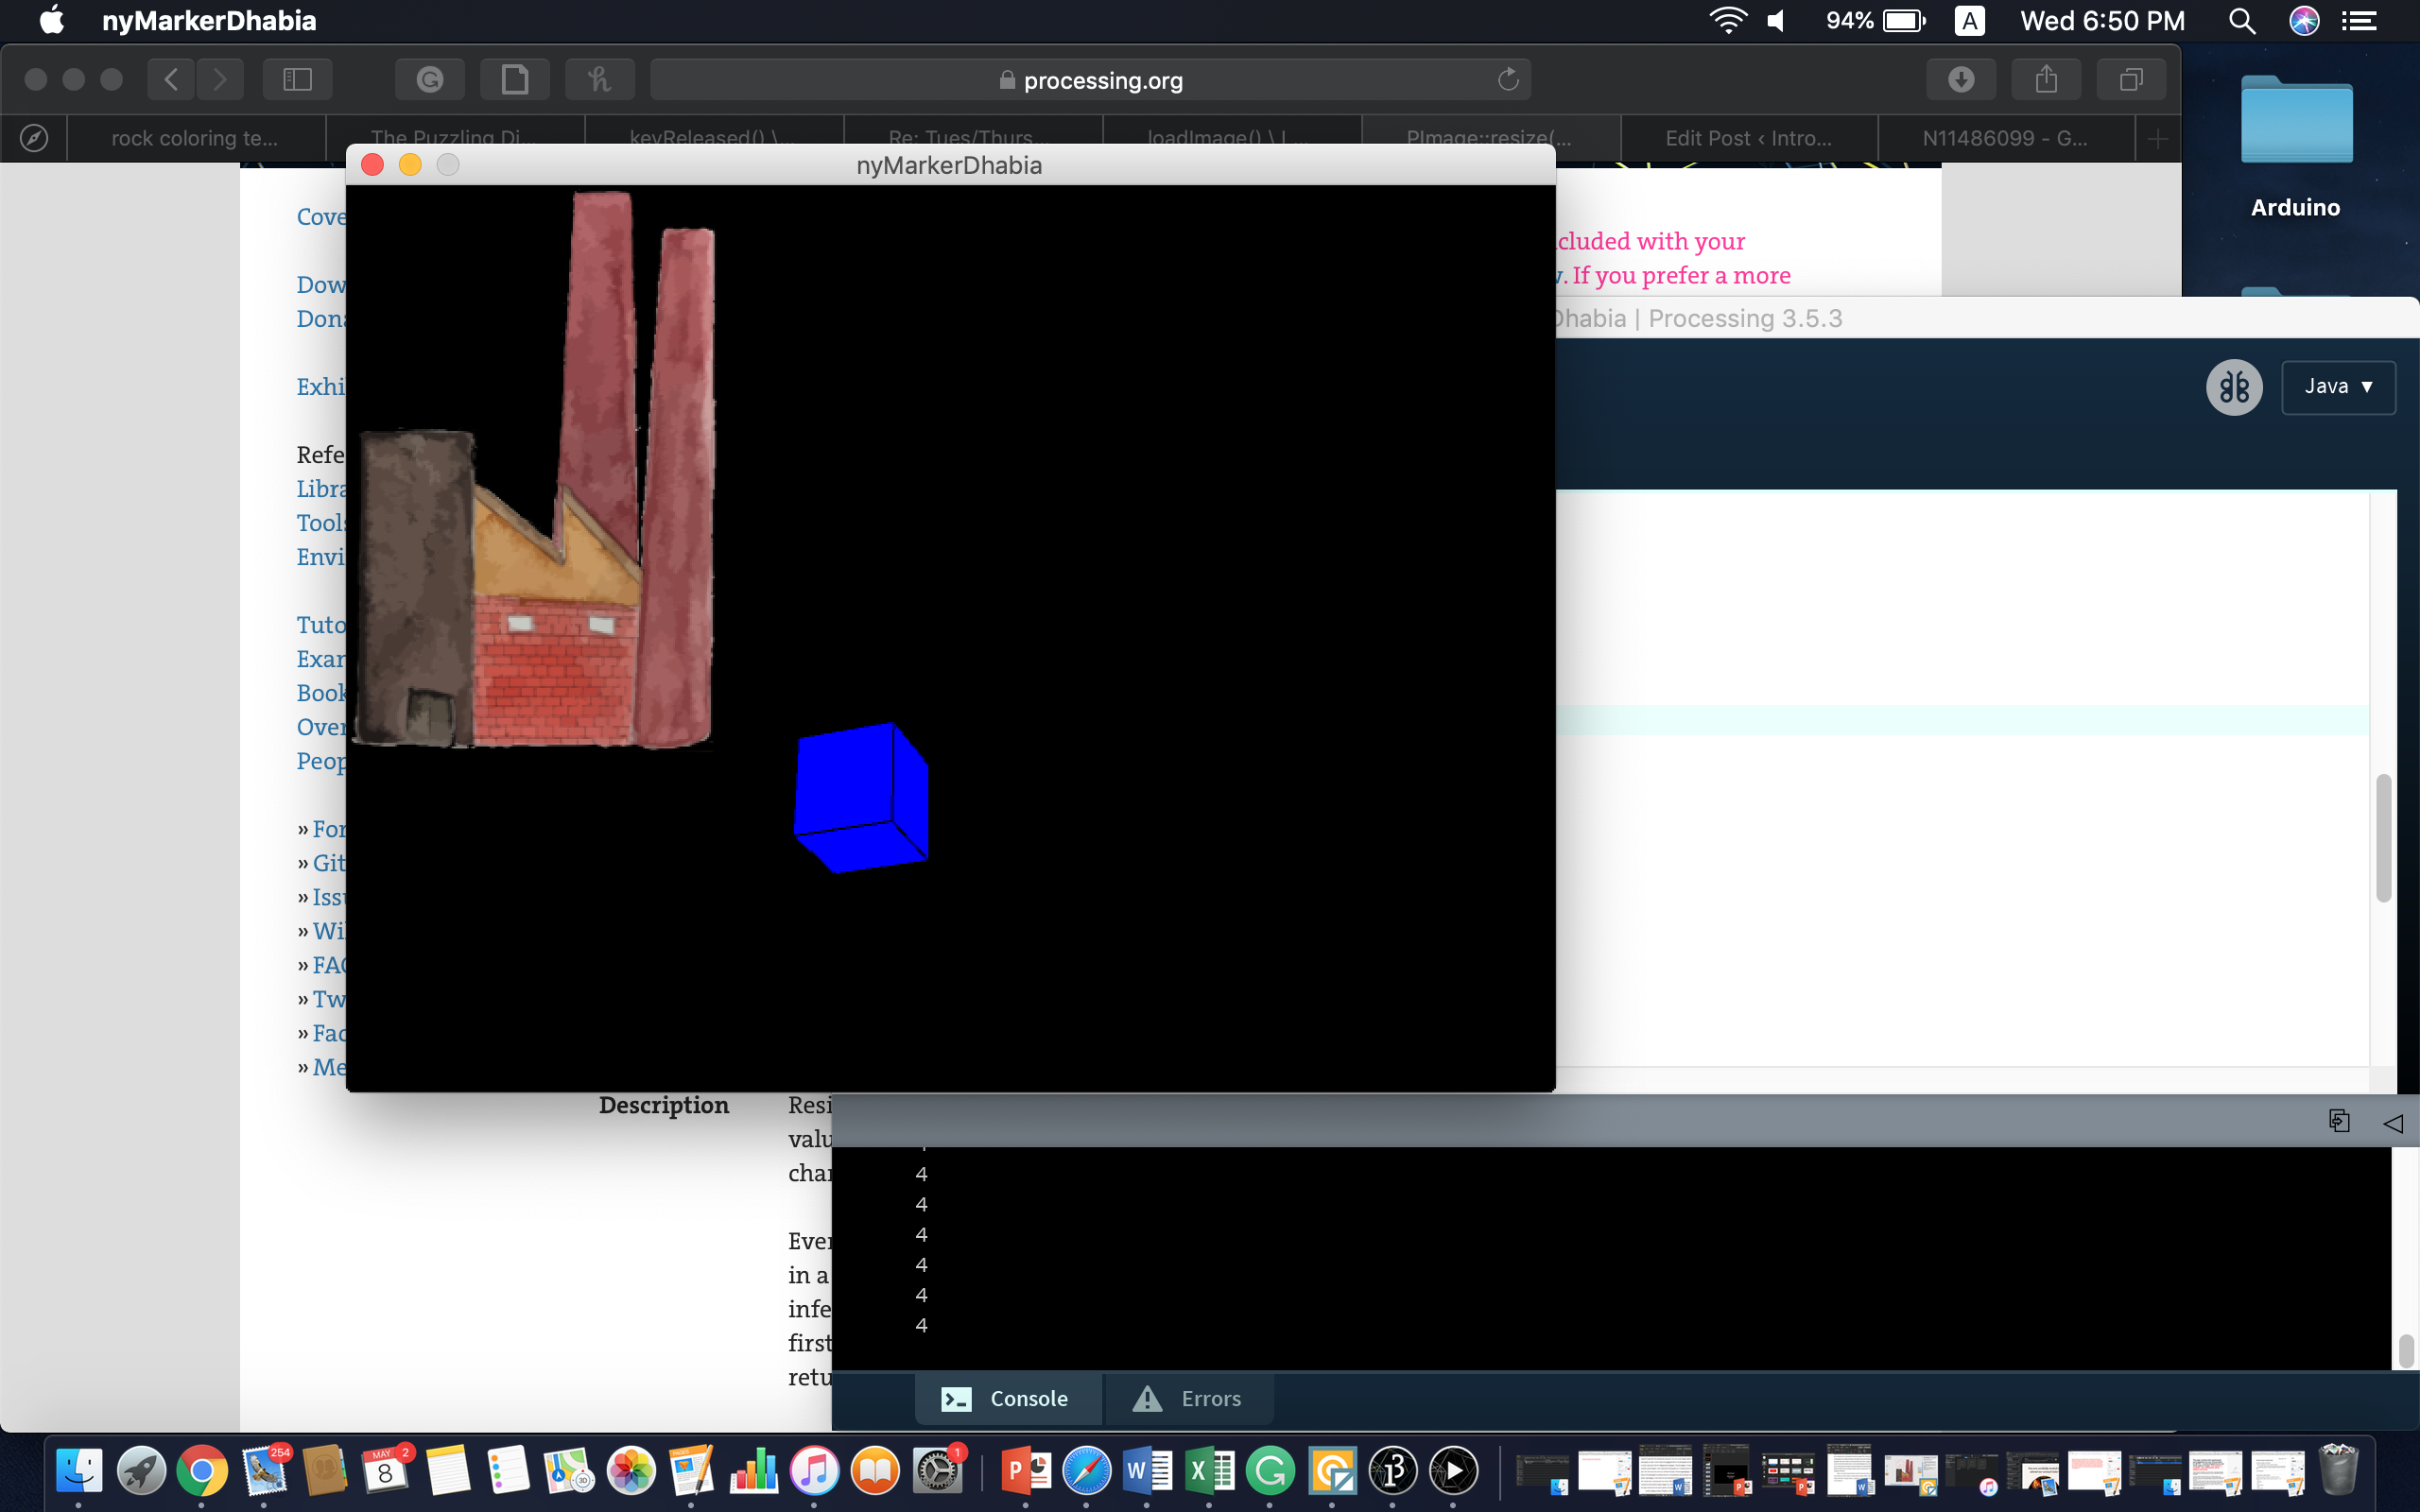
I started with the idea of using AR markers by placing them on the side of the page and having the drawing projected onto each page but then I decided that I really want to focus on creating the feeling of each of the drawings coming to life, so I was determined to find a way to use my drawing itself as the marker. Through research and trial and error, I finally got it working properly. I tried out different things and learnt that AR markers actually don’t need to be in square form, only the edge needs to be a square. So I inserted the final drawing marker into the data folder and changed the code, edge percentage, and positioning, and size. I used example AR code that displayed a cube on top of the marker, and changed the code so as to have a video file play on top of the marker.
However I need to now test this out with a webcam and projector to see if it works to have a full drawing animation projected on top of the drawing or if I need to create a different video file with only the moving elements to be projected. I plan to include around 5 drawings and have them on different pages of a hard paper book to avoid bending of the paper, which would affect the marker detection and projection.
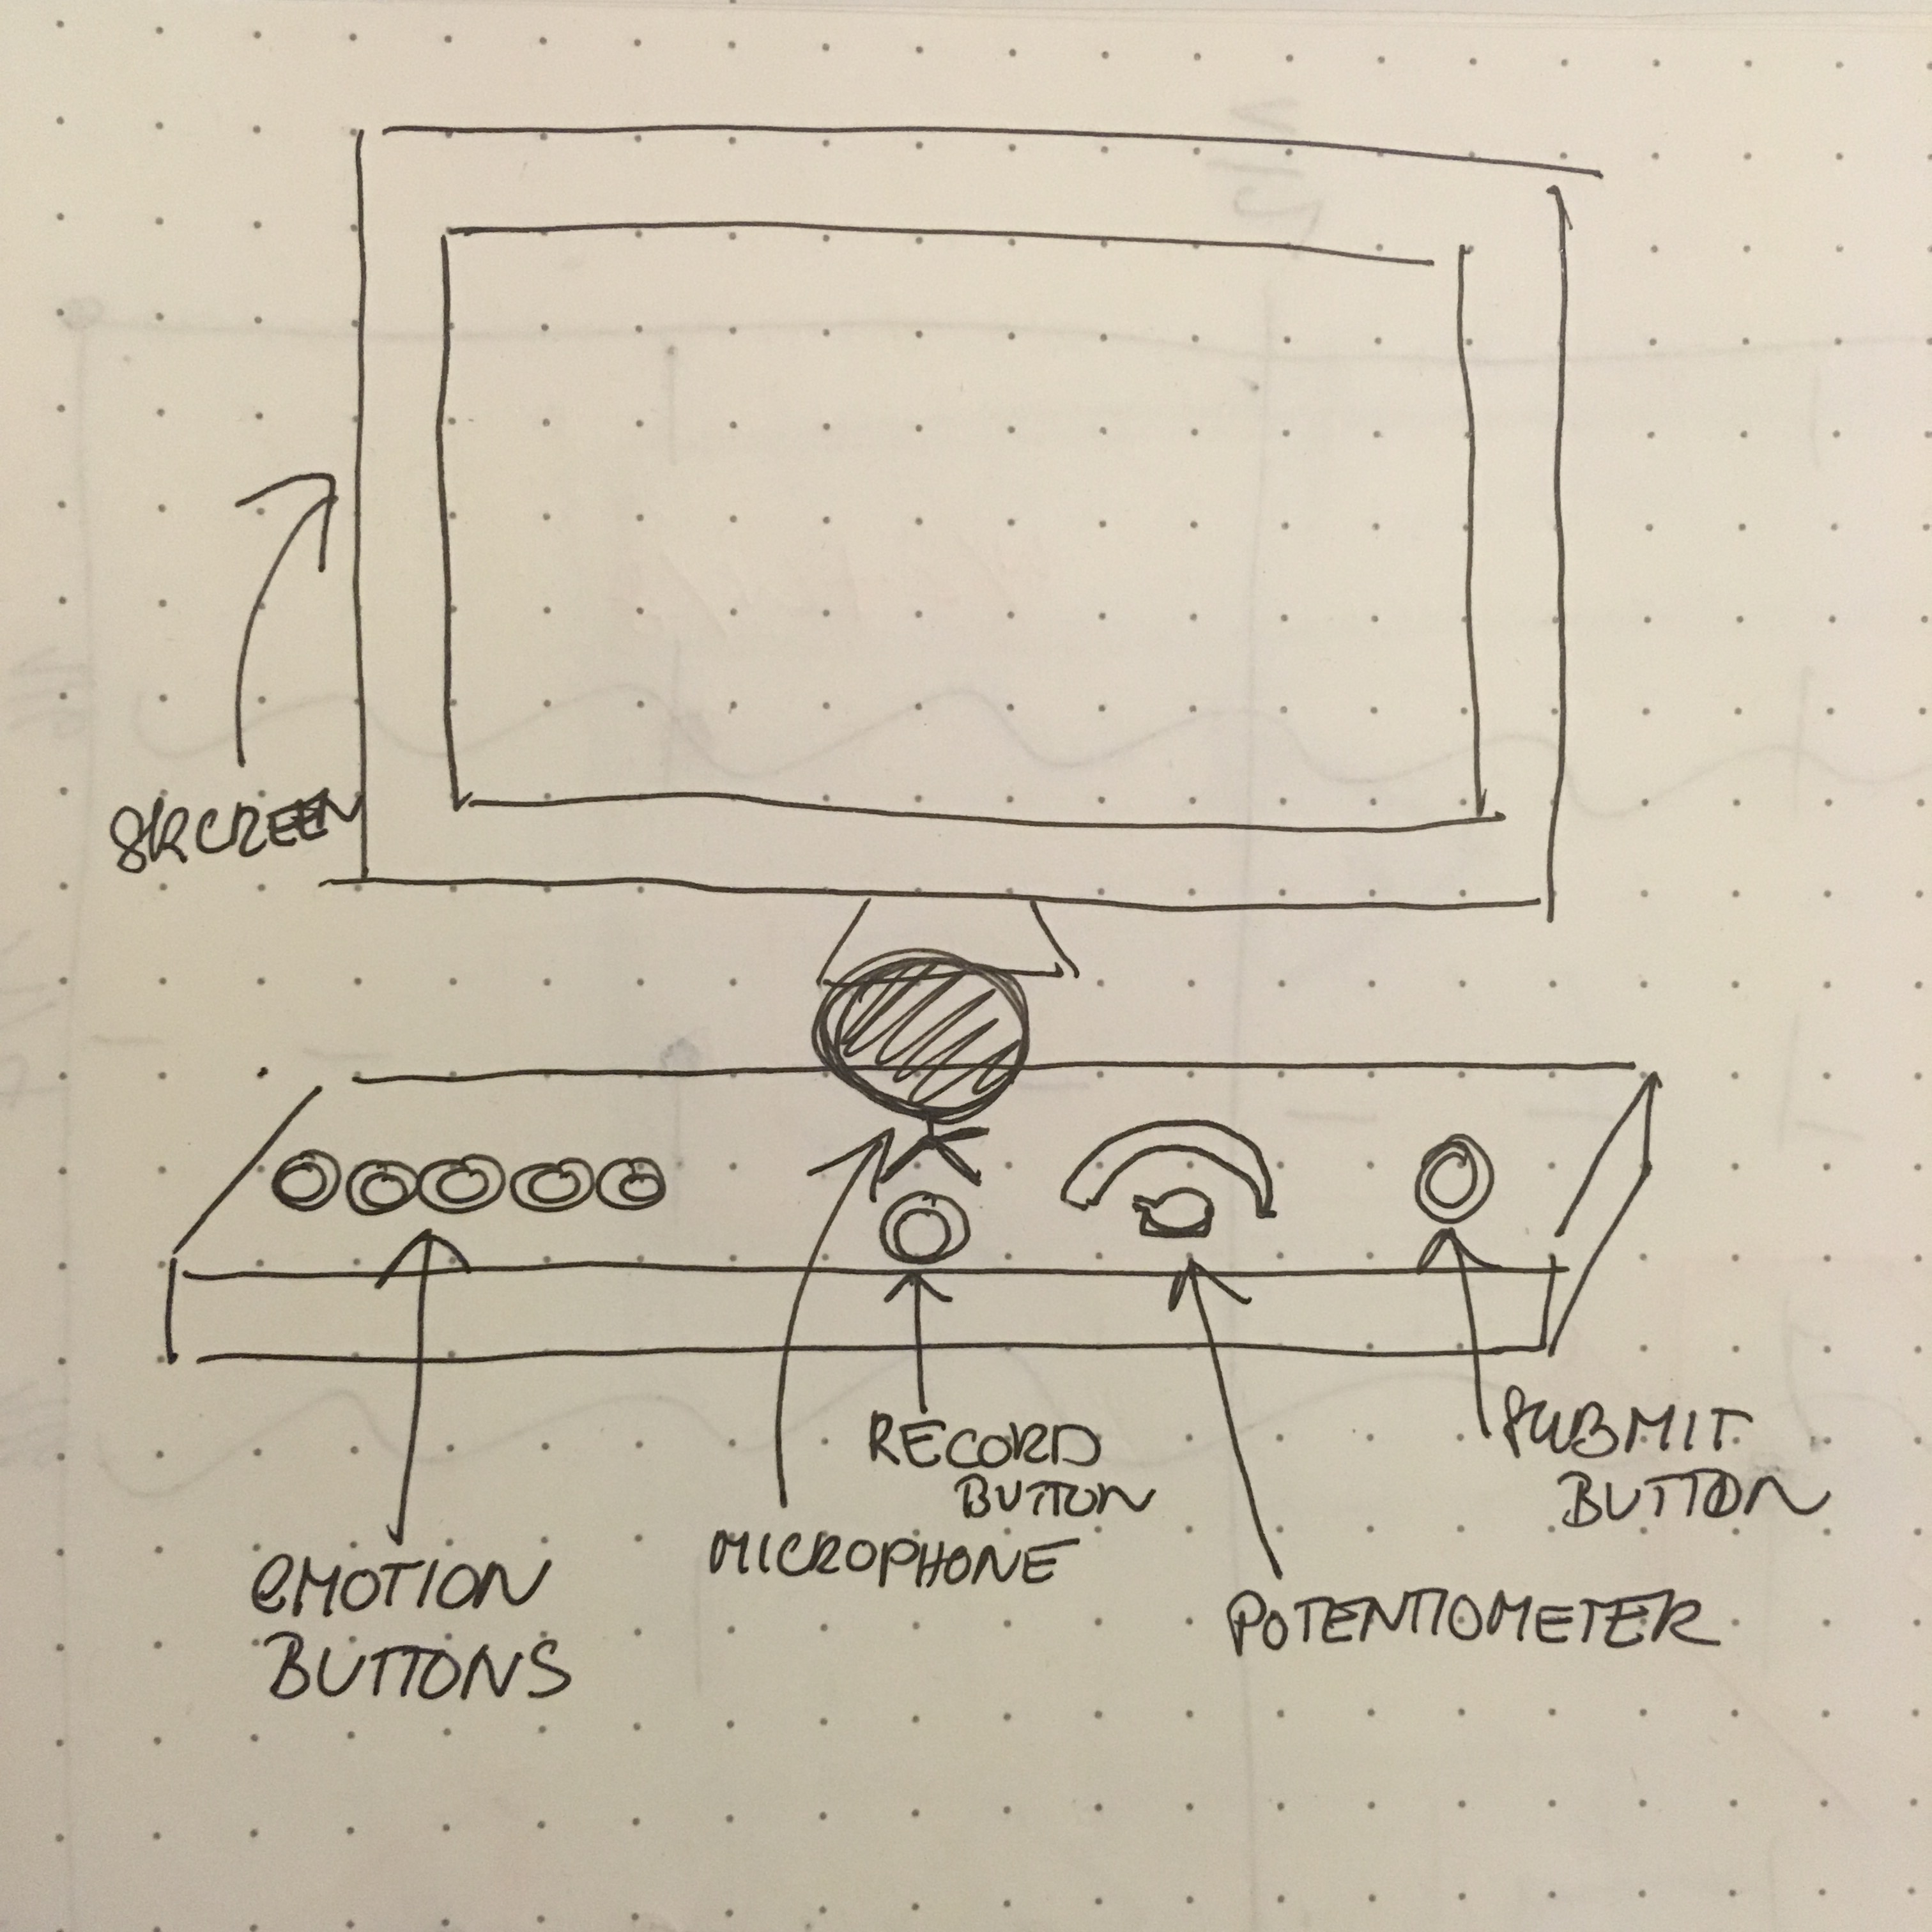
Here’s what I have so far, including the missing parts in brackets:
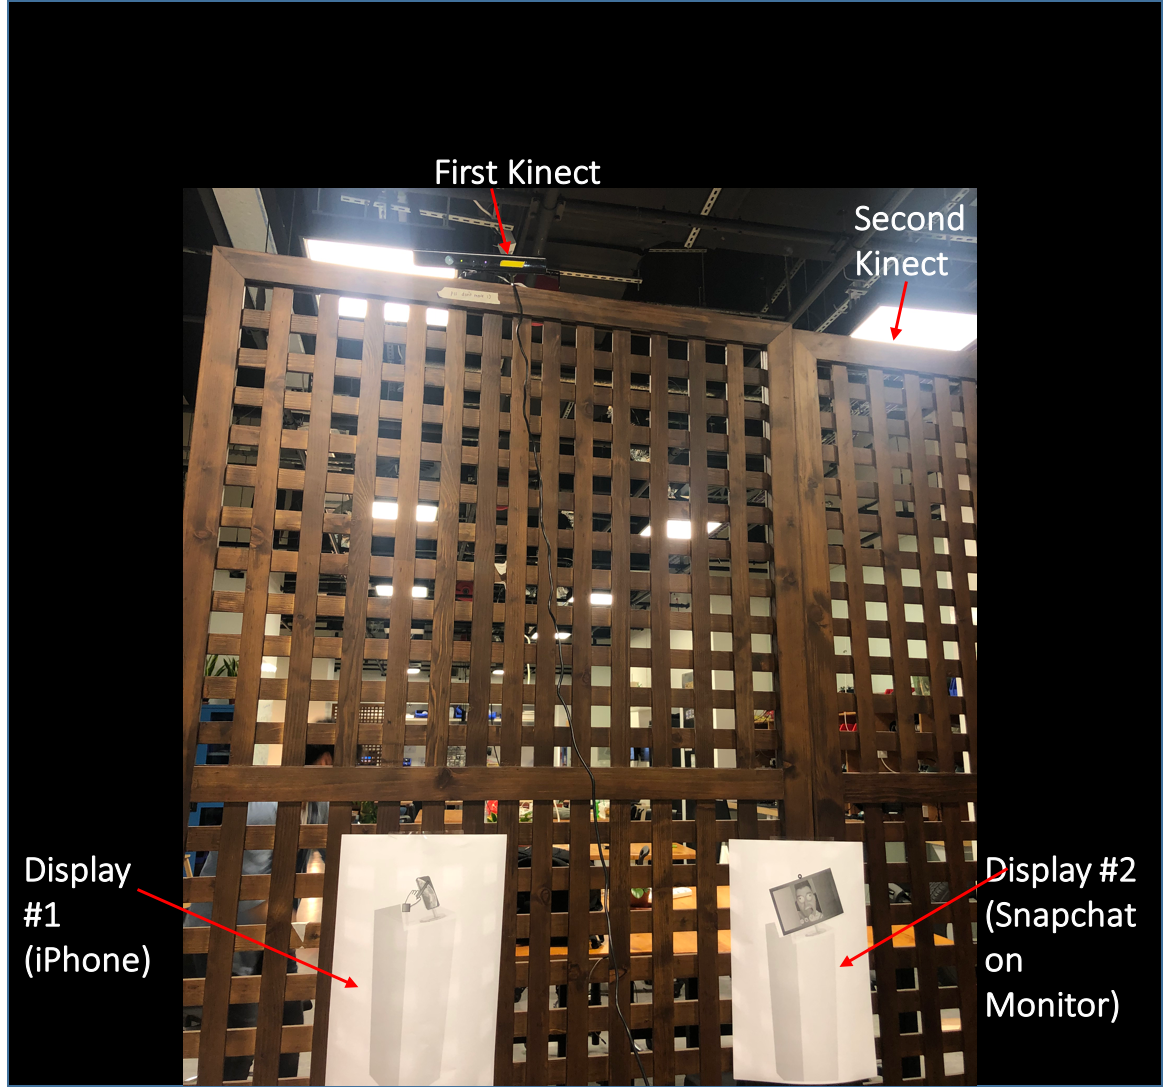
-One Kinect camera connected to the display’s soundtrack. (It will be easy to add the second Kinect for the second display, seeing as I already have the code).
-A soundtrack for my display. (I would like to re-record it using professional equipment for better quality).
-Half of my Snapchat simulator/booth sketch. (I still need to add the filters and map them onto the user’s face.)
-A functioning stylus for the iPhone connected to a motor. (I still need to connect it to my IR sensor)
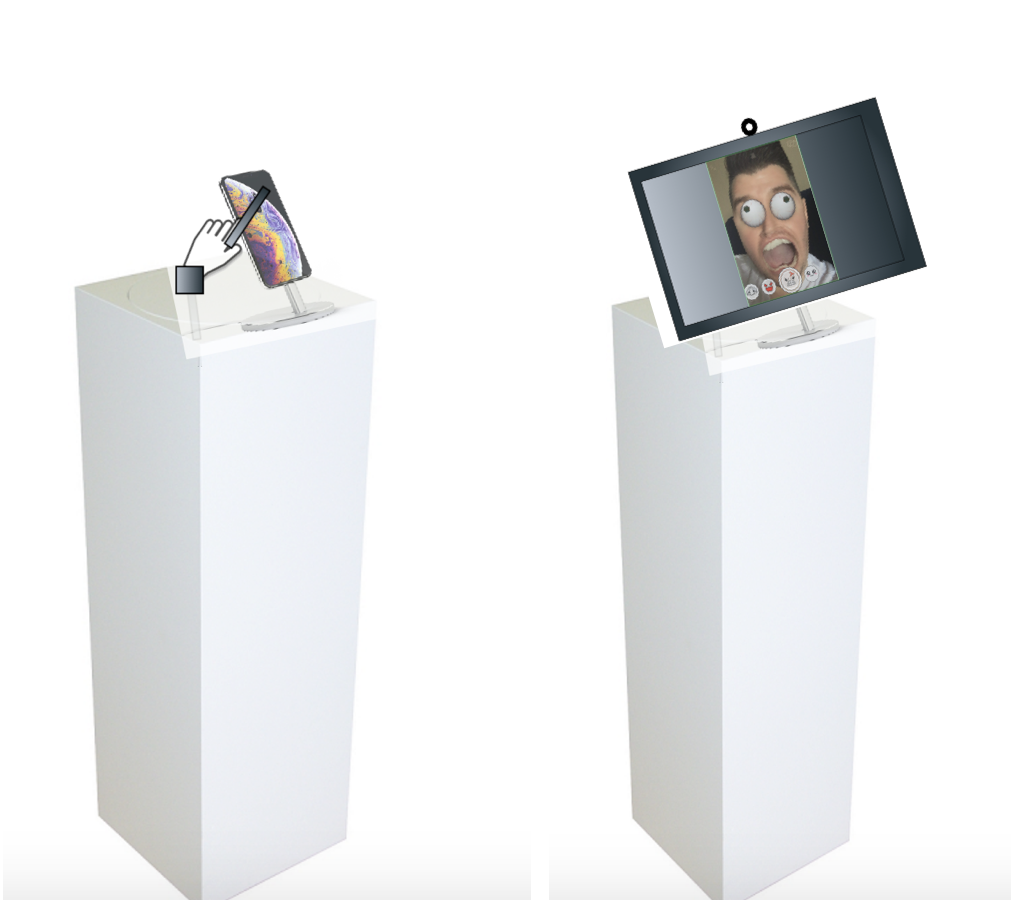
Since I don’t have the pedestals yet, I printed out sketches just to show where how the display would be set up:
So for example, this is how the two pedestals would look next to each other.
The sound would be controlled based on the movements tracked by the Kinect camera to measure the person’s distance from the display. Here’s a demo of me walking towards the display (thus playing the soundtrack), and walking away from it (stopping the soundtrack):
Here’s my code so far:
Kinect + Sound (Complete) :
// Credits: Daniel Shiffman, Depth thresholding example

import org.openkinect.freenect.*;
import org.openkinect.processing.*;
import processing.sound.*;

Kinect kinect;

SoundFile soundfile;
//SoundFile[] files;
// Depth image
PImage depthImg;

//soundtrack playing
boolean playing = false;

// pixels to be shown
int minDepth =  60;
int maxDepth = 900;

// kinect's angle
float angle;
float L;

void setup() {
  size(1280, 480);

  kinect = new Kinect(this);
  kinect.initDepth();
  angle = kinect.getTilt();

  // blank image showing everything
  depthImg = new PImage(kinect.width, kinect.height);

  //load soundtrack
  soundfile = new SoundFile(this, "futuremuse.aiff");
  //files = new SoundFile[2];
  //println("Duration= " + soundfile.duration() + " seconds");
  //L=soundfile.duration();
  // for (int i = 0; i < files.length; i++) {
  //  files[i] = new SoundFile(this, (i+1) + ".aif");
  //}


}

void draw() {
  // draw the raw image
  image(kinect.getDepthImage(), 0, 0);

  // threshold the depth image
  int[] rawDepth = kinect.getRawDepth();
  int counter =0;
  for (int i=0; i < rawDepth.length; i++) {

    if (rawDepth[i] >= minDepth && rawDepth[i] <= maxDepth) {
      depthImg.pixels[i] = color(255);

      counter++;

    } else {
      depthImg.pixels[i] = color(0);
    }
  }

  if (counter > 10000){
    if (!playing)
    {
        soundfile.play();
        playing = true;
    }
  }
  else
  {
    if (playing)
    {
       soundfile.stop();
       playing = false;
    }
  }

  // Draw the thresholded image
  depthImg.updatePixels();
  image(depthImg, kinect.width, 0);

  fill(0);
  text("TILT: " + angle, 10, 20);
  text("THRESHOLD: [" + minDepth + ", " + maxDepth + "]", 10, 36);

}

//// Adjust the angle and the depth threshold min and max
//void keyPressed() {
//  if (key == CODED) {
//    if (keyCode == UP) {
//      angle++;
//    } else if (keyCode == DOWN) {
//      angle--;
//    }
//    angle = constrain(angle, 0, 30);
//    kinect.setTilt(angle);
//  } else if (key == 'a') {
//    minDepth = constrain(minDepth+10, 0, maxDepth);
//  } else if (key == 's') {
//    minDepth = constrain(minDepth-10, 0, maxDepth);
//  } else if (key == 'z') {
//    maxDepth = constrain(maxDepth+10, minDepth, 2047);
//  } else if (key =='x') {
//    maxDepth = constrain(maxDepth-10, minDepth, 2047);
//  }
//}
#include <Servo.h>

Servo myservo;  // create servo object to control a servo
// twelve servo objects can be created on most boards

int pos = 0;    // variable to store the servo position

void setup() {
  myservo.attach(10);  // attaches the servo on pin 9 to the servo object
}

void loop() {
  for (pos = 0; pos <= 20; pos = 1) { // goes from 0 degrees to 180 degrees
    // in steps of 1 degree
    myservo.write(pos);              // tell servo to go to position in variable 'pos'
    delay(25);                       // waits 15ms for the servo to reach the position
  }
//  for (pos = 180; pos >= 0; pos -= 1) { // goes from 180 degrees to 0 degrees
//    myservo.write(pos);              // tell servo to go to position in variable 'pos'
//    delay(15);                       // waits 15ms for the servo to reach the position
//  }
}
After a little freak-out moment, when the whole project stopped working after rewiring some buttons (which was solved by moving them from Pin 1 and starting at Pin 2) , we managed to bring it back to life (relatively) fast and finished up with the prototype. We finished all of the classes so they all draw different shapes (based on the emotion), scale them according to the volume input, and change their path and speed of movement based on the potentiometer value (that reflects an energy level of the respondent).
What also gave us a little (or a LOT) of troubles was making a shape that is not rect() or ellipse() – as they have one center point that is easily manipulated with- and move and scale the shape while still maintaining the same proportions. Push and PopMatrix() was the solution for this as well as the scale() function within the Matrix.
Now when the code is fully working in its intended essence, we still need to work on making it more visually attractive so it better represents the data. Also, the sizes of the objects are little uneven, so we need to adjust the mapped values (and distinguish the ones that are being adjusted at the moment so that the respondent can see it clearly). User testing, however, is what will get us the closest to the most suitable range of values.
We also finalized the design for the interface and hopefully will get to building it tomorrow so that we can get to the user testing stage as fast as possible.
So far we have improved the accuracy of the Kinect, although we still want to put more conditions to make it more accurate. In the beginning, we use an algorithm that set up thresholds for aiming and shooting, after realizing that this algorithm was not enough for the accuracy that we wanted we added the condition where the closest the aiming box will be created in the pixel with the closest distance to the Kinect sensor in that aiming or shooting threshold. The code will be attached below. Now we are currently working to destroy targets once the user shoots at it.
Also, we have been working in what we think will the toughest challenge that is creating the main menu and buttons to store the scores, to show in the screen who has been the best iron man from all the participants during the IM showcase. The code will attach below
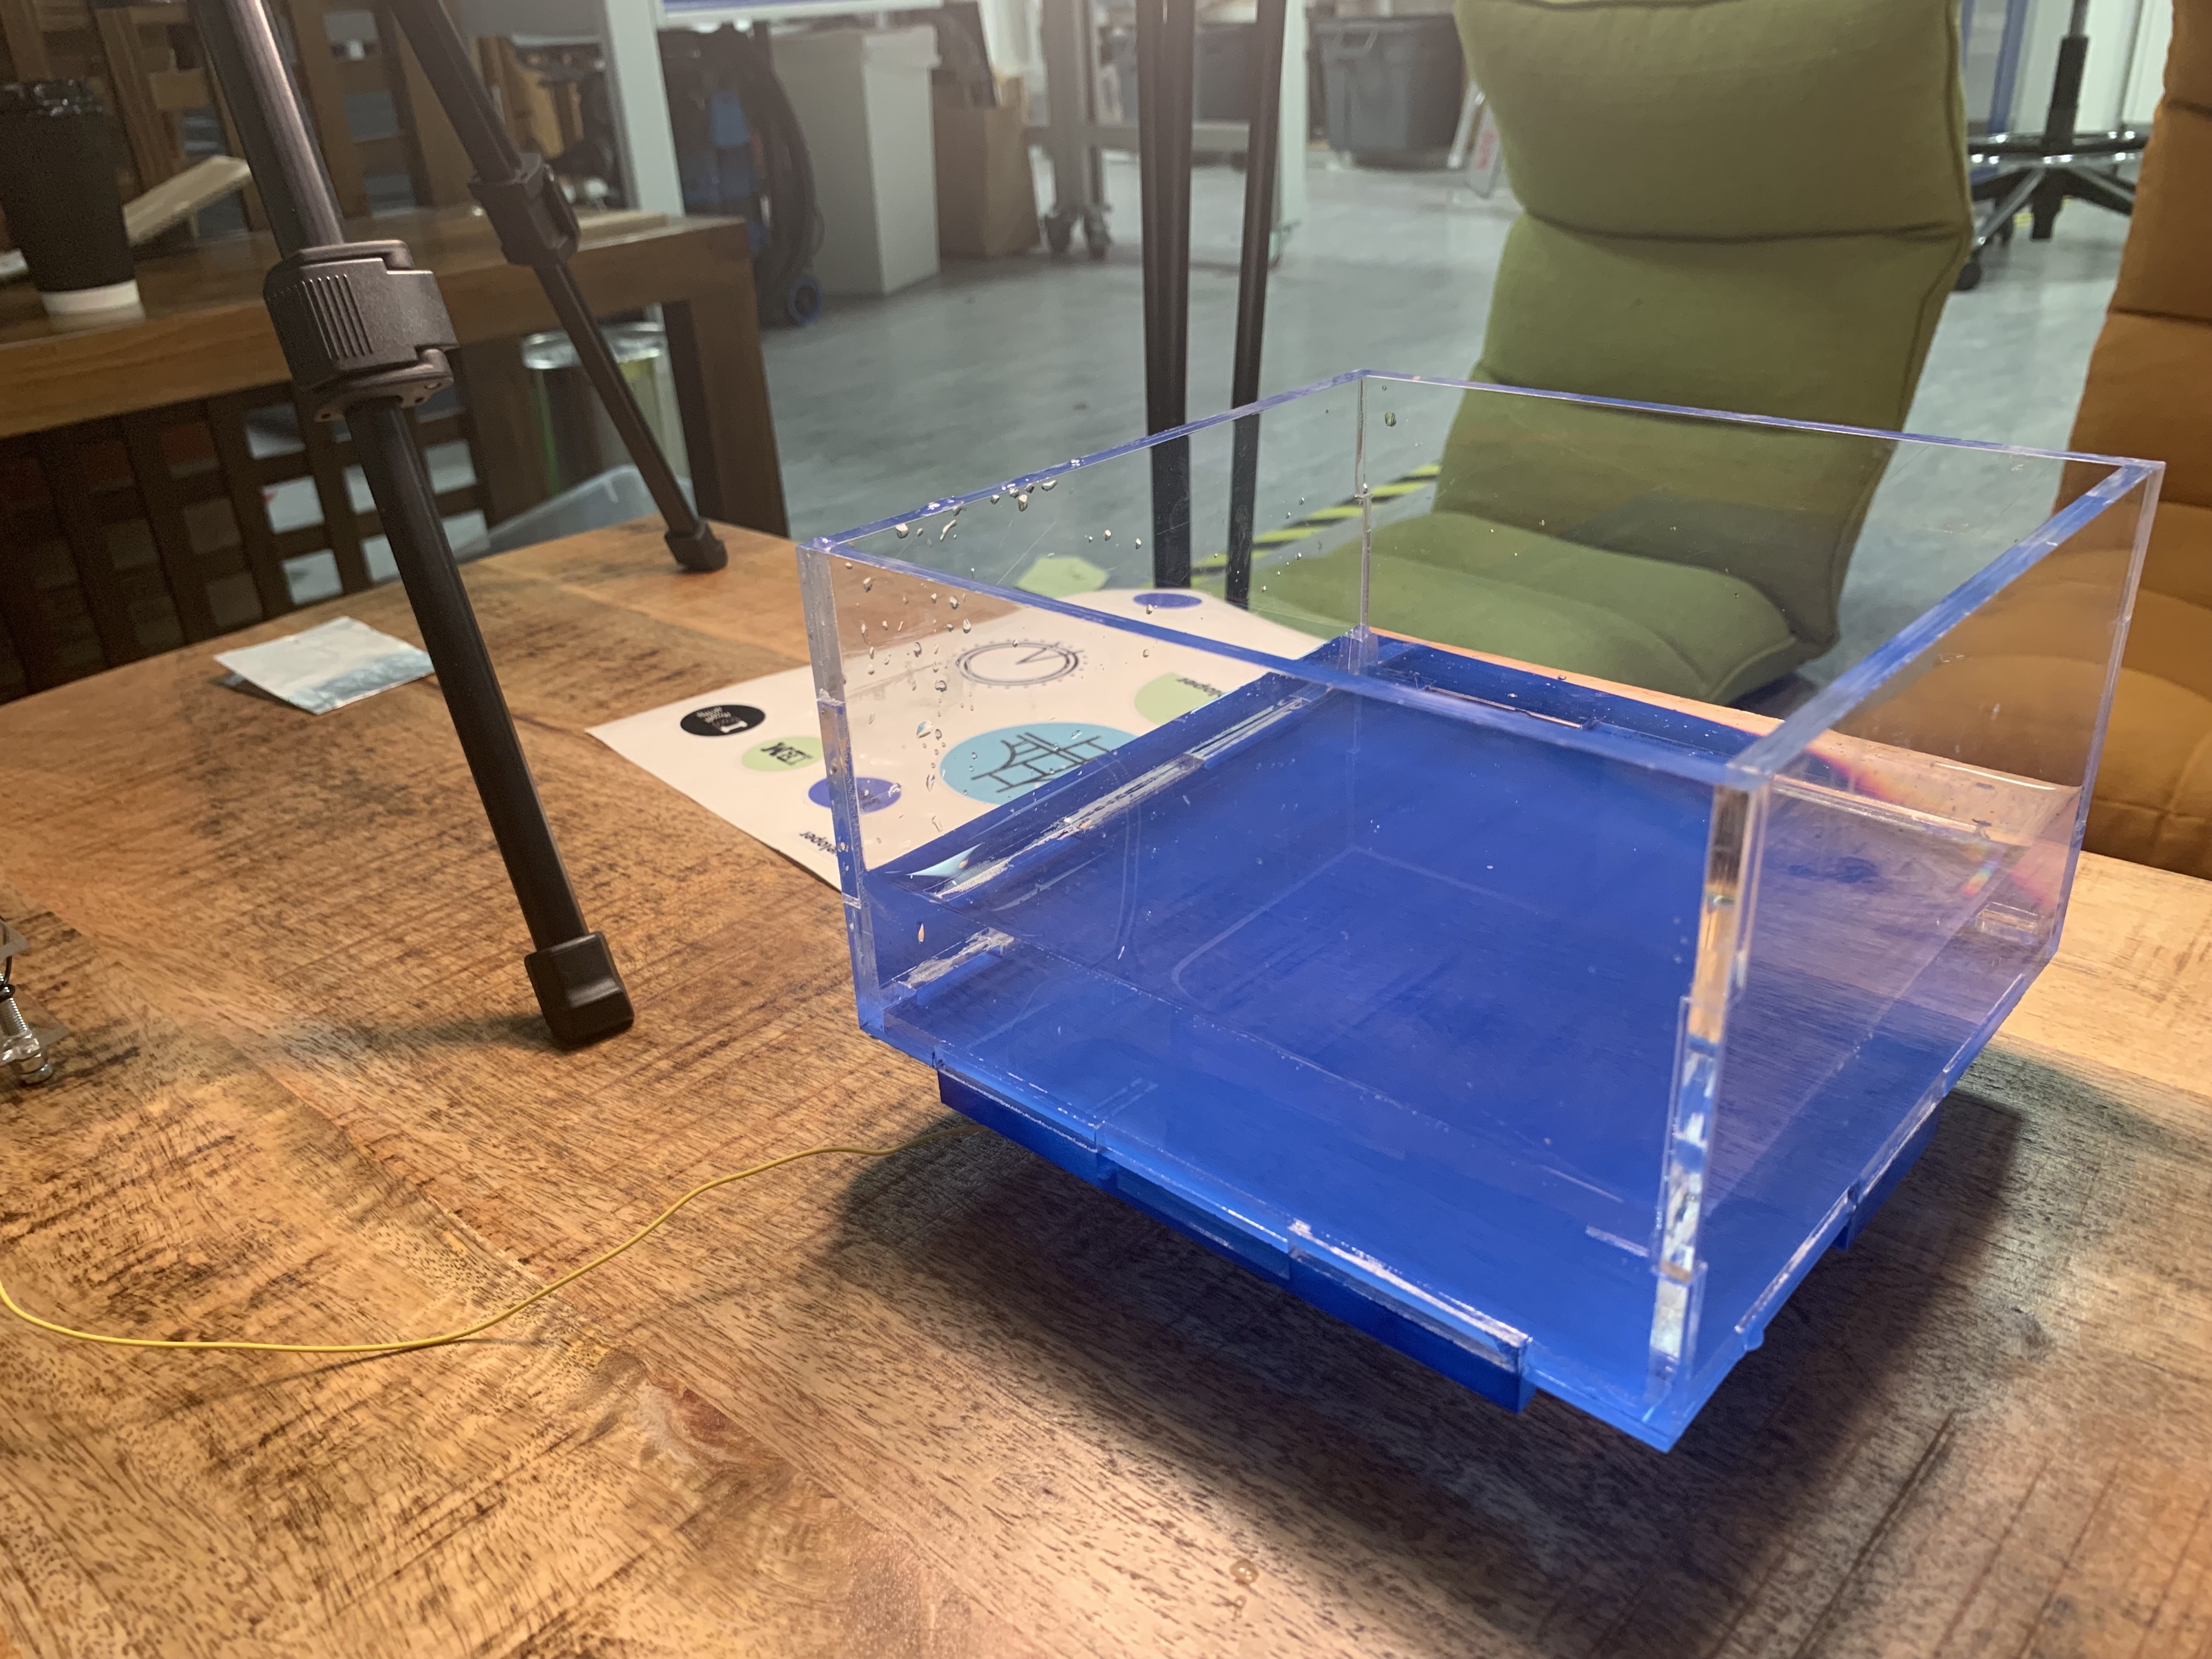
The progress of the prototype stage of the final project has been going smoothly. I have tested the kinect v2 code with additional calibrations on a container that has water in it – and the kinect was able to successfully capture the ripples and waves. Since I am catching only the blue pixels, I have placed blue acrylics at the bottom of the water container as a a prototype to test it out.
Also, for the sound part, I have inserted additional codes that I got from Aaron that uses the Processing Sound library. Currently in the code, I am calculating the minimum number of pixels shown (due to some possible errors in calibrations like reflections from the container, etc.), and I use the minimum and the maximum values of pixel counts to map the pixel count values to an amplitude between 0 and 1. The following code creates an effect where the more ripples there are in certain sections, the louder the sound becomes.
After encountering an idea of capacitive touch sensing from Aaron, so-called Touche for Arduino: Advanced Touching Sensor, I have decided to include as a part in the project and change how the final version of the project is going to look like. The capacitive touch sensor will be a trigger to initiating different loops/sound – for instance, one finger plays one sound, two finger plays two sound together or other sound alone, etc. And, the pixel counts from the waves detected from the Kinect v2 will serve as a the value for the reverb of all loops.
The below is the prototype video of using the touche advanced touching sensor library with water and fingers as the trigger for different music loops:
What I have now is definitely somewhat of a prototype, although I think I might have to work extra hard this weekend to have everything done by Monday – I do not want to pull an allnighter on Wednesday and panic before the showcase.
Physical Aspect
I made a prototype of the physical aspect of it. It looks quite nice, but I am going to remake it for better matching and to better the overall aesthetics of the box.
Coding Aspect
The code I have right now is a major improvement than what I had back on Sunday. I can make the png images appear when scanning the markers. I have also managed to draw every marker separately. I managed to also load the factory image (the only one I made into a png so far) and assign it to a marker (Marker number 4).
Things I will need help with: How can I make it so the building stays and does not disappear once a marker is removed from the camera? Do I have to make a boolean variable for every single marker?
I’ve now connected the tilt sensors to control the Processing screen. Currently, because I don’t have my el wires yet, I’m currently substituting the el wires with strings and the strings are attached to placeholders (the tripod in the IM room). The tilt sensors are attached to the string with resistors right now and I’d probably just end up using that to attach it for the show because the resistors are small enough so people can’t see it. I’ve also added music to the strumming of the string (mainly guitar notes). The tilt sensors aren’t too sensitive so it works perfectly because very light touches of the string will not do much.
For the rest of the project, I mainly have to have the room and the el wires to come in so I can position everything correctly. I’ll also be added 3 more wires so 3 more tones (acoustic guitar — D, A, E, G, B, Low E — found on soundcloud).
I have continued to work on my final project. However, after attempting to solder additional components (a FSR) to a circuit board, my project no longer uses any soldered components for the time being. Aaron advised me to use capacitive touch instead of a FSR with the stuffed animal, and I have tested this yesterday and it works fine and responds well to touch. I eventually plan on sewing this to the animal. As I move into finalizing the project this weekend.
I have refined my code slightly and have fixed a few technical issues revolving around changing stages and some of the animations.
I plan on adding another FSR, which I will attach to a block of wood. I will also create a tool (most likely a hammer) that will have a foam cushion at the end. If the FSR’s reading goes above a certain value, the player will harvest the resources. I plan on going into the scene shop to quickly building these tools and testing out the FSR tonight.
The game is playable and a few of my friends have tested out the game. However, some refinements still need to be made in progression.
My project is the claw arcade game. So you pull out a thing on the screen and an actual object falls behind the screen. So the hardest part is to make that claw game on computer. I have created a prototype of this game (but its too easy for now, will make it harder of course). The claw picks up and object within its range and holds it until the claw is open. Sounds basic, but it actually is hours and hours of coding 🙂 Here is the result (ignore Tori hating Kyle on the background):