All Posts

Even more dots

For this week’s assignment, we were supposed to use one of our Processing creations and connect it with Arduino. I decided to go with my Computer Art recreation, as I saw a lot of possibilities to play with the work a little bit.

What I ended up doing is simply mapping the potentiometer values to the number of dots in each segment as well as the size of the dots. In this way, if put on the maximum potentiometer value, the dots gradually consume the whole screen.

There were almost no issues with this, as I was working with an already existing code that worked properly. All I had to do is to start the communication with Arduino and add mapping of the values. The only thing that gave me a little trouble was finding the right values so that the increase in the size and number of dots is smooth and gradual. It just took a couple of trials and errors to achieve the desired effect and voilà.

Here is the Processing code:

//setting up the number of dots used in different segments
int numberCirclesA = 700;
int numberCirclesB = 1000;
int numberCirclesC = 3000;
int numberCirclesD = 5000;

//setting up communication with arduino
import processing.serial.*;
Serial myPort;


//setting up variables for x, y locations, and width of the dots
float x;
float y;
float w = 3;


void setup() {
  size (800, 390);
  //noLoop(); // to be activated only to see the exact replica of the original image


//setting up communication with arduino
  printArray(Serial.list());
  String portname=Serial.list()[51];
  println(portname);
  myPort = new Serial(this, portname, 9600);
  myPort.clear();
  myPort.bufferUntil('\n');
}


void draw () {
  background (255);
  noStroke();
  fill(0);


  // different segments in which the dots are being drawn
  
  for (int i = 0; i < numberCirclesA; i++) {
    pushMatrix();
    x = random(0, width);
    y =random(0, height);
    ellipse (x, y, w, w);
    popMatrix();
  }
  for (int i = 0; i < numberCirclesB; i++) {
    pushMatrix();
    y = (random(110, 150));
    x = (random(0, width));
    ellipse(x, y, w, w);
    popMatrix();
  }

  for (int i = 0; i < numberCirclesA; i++) {
    pushMatrix();
    x = random(0, width);
    y = (random(0, height -30));
    ellipse (x, y, w, w);
    popMatrix();
  }

  for (int i = 0; i < numberCirclesB; i++) {
    pushMatrix();
    y = (random(40, height - 70));
    x = random(0, width);
    ellipse(x, y, w, w);
    popMatrix();
  }

  for (int i = 0; i < numberCirclesC; i++) {
    pushMatrix();
    y = (random(20, height - 150));
    x = random(0, width);
    ellipse(x, y, w, w);
    popMatrix();
  }

  for (int i = 0; i < numberCirclesD; i++) {
    pushMatrix();
    y = (random(60, height - 200));
    x = random(0, width);
    ellipse(x, y, w, w);
    popMatrix();
  }
  for (int i = 0; i < numberCirclesD; i++) {
    pushMatrix();
    y = (random(40, height - 175));
    x = random(0, width);
    ellipse(x, y, w, w);
    popMatrix();
  }

  //tracking the mouser cursor
  print(mouseX);
  print (" ");
  println(mouseY);
}


//mapping the values of a potentiometer to number and width of the dots
void serialEvent(Serial myPort) {
  String s=myPort.readStringUntil('\n');
  s=trim(s);
  if (s!=null) {
    w=(int)map(int(s), 0, 1023, 3, 15 );
    numberCirclesD=(int)map(int(s), 0, 1023, 5000, 20000);
    numberCirclesA=(int)map(int(s), 0, 1023, 700, 20000);
    numberCirclesB= (int)map(int(s), 0, 1023, 1000, 20000);
    numberCirclesC= (int)map(int(s), 0, 1023, 3000, 20000);
  }
  println(numberCirclesD);
  myPort.write('0');
}

And here is Arduino code we used in class:

void setup() {
  // put your setup code here, to run once:
  Serial.begin(9600);
  Serial.println('0');
  pinMode(2, OUTPUT);
}

void loop() {
  if(Serial.available()>0){
    //inByte reads the values from Processing
    char inByte=Serial.read();
    int sensor = analogRead(A0);
    delay(5);
    Serial.println(sensor);
    digitalWrite(2, inByte);


The Story So Far…

Personally, this class has opened my eyes to a whole new world. Before this, computing (and I think mostly programming) was a very distant concept to me. It was not something that I thought could add anything to my life.  However, after doing all the work and especially the readings that we have done this semester, I truly think that computing is one of the most important things in the world and affects many aspects of my and other people’s lives that I had never considered.

I think computing has brought the world a lot closer together by improving communication – be it, between individuals through machines, between individuals and machines or machines on machines – the capacities of these have greatly increased innovations and have revolutionized in how the world responds to issues. I’m not yet sure how computing could make me a better person specifically but it has definitely taught me patience and perseverance – to not give up when something goes wrong but instead, to keep at it until it works (or ask for help!). It has also taught me to have a lot more respect for those that are in the computational field as I understand how things that appear simple on the surface are actually more complicated than you think. I know that this is not necessarily my field of interest and is actually very far from my comfort zone, but I hope I continue to learn more and enhance my skills in this area because I really have enjoyed pushing myself.

Processing and Arduino

I combined Processing and Arduino in this example by getting an RGB LED to change colors according to the pixels on the screen (using processing).

The codes:

int redPin   = 9;   
int greenPin = 10;
int bluePin  = 11;  

long int inByte;

void setup()
{
  pinMode(redPin,   OUTPUT);  
  pinMode(greenPin, OUTPUT);
  pinMode(bluePin,  OUTPUT);

  Serial.begin(9600);
}


void outputColour(int red, int green, int blue) {
  analogWrite(redPin, red);
  analogWrite(bluePin, blue);
  analogWrite(greenPin, green);
}


int* getColour() {
  int* colour;
  int i;

  i = 0;

  while (i < 4)
  {
    if (Serial.available() > 0) {
      colour[i] = Serial.read();
      i++;
    }
  }

  return colour;
}

void loop()
{
  if (Serial.available() > 0) {

    inByte = Serial.read();

    if (inByte == 'C') {
      int* one;
      one =  getColour();

      outputColour(one[1], one[2], one[3]);

    }
  }

  delay(10);
}
import processing.serial.*;

PImage img;  
Serial myPort;

void setup() {
  //set these to the size of the image

  size(512, 512);
  // printArray(Serial.list());
  // String portname=Serial.list()[1];
  // println(portname);

  img = loadImage("pixels.jpg");
  myPort = new Serial(this, Serial.list()[1], 9600);
}

void draw() {
  background(0);
  image(img, 0, 0);
  img.loadPixels();
}

void mousePressed() 
{
  myPort.write("CL");
  myPort.write(int(red(img.pixels[mouseX+mouseY*img.width])));
  myPort.write(int(green(img.pixels[mouseX+mouseY*img.width]))); 
  myPort.write(int(blue(img.pixels[mouseX+mouseY*img.width])));
}


I got help using the following tutorials:

https://www.hackster.io/hardikrathod/control-arduino-using-gui-arduino-processing-2c9c6c

https://www.instructables.com/id/RGBs-with-Arduino-and-Processing/


Lessons from Computing

This class was my first introduction to anything related to computing. I had always thought of it as such a cool thing to be able to do, like if you learned it, so many opportunities would open for you. I always admired people who could code.

Now, having just dipped my toe into what it means and what I can do with computing, I can assure my past self that it is just as rewarding to be able to code. Seeing your idea come to life on your computer screen is such a rush of satisfaction. It’s immediate success, but it can also be immediate failure, and for me, since I rely heavily on small but fast-paced successes to keep me motivated, this is perfect.

Every class I have, I know I’m going to just be blown away by what I’m able to do on my computer. Before this semester, I would never have thought I would be able to do this or even be able to learn. Learning has really made me more confident in myself and helped me figure out where I may go in the future. If anything, it’s done exactly what I thought it would do: open up new possibilities.

One of the biggest lessons I learned in the moments of frustrations was to take a step back, take a break, and then just write out exactly what you want to happen in plain text, not in code. Then, once you have the steps down, find the logical solution in code. Most of the time, this works really well if I’m overwhelmed with a task in processing or if I can’t figure out how to logically make something happen.

But another lesson I’ve learned and am still learning is to ask for help, look things up, collaborate with classmates, and generally just admit when you aren’t sure of something. In class, it’s so important to go line by line and make sure we understand but we don’t always have time for this, so our classmates become one of our most valuable resources. Having each other, Aaron, Jack, and the other lab assistants to go to when we need help has made learning this new skill so much smoother and a much more positive experience than it would have been if I tried to do it alone.

Lessons from Computing

As a CS major, I have been “computing” for a long time, so in that field the new experiences I had were mostly learning more about Arduino and Processing. But in other senses, computing this semester has helped me in other ways. Some days, when projects are due, I would pull an all-nighter to work things out and get tasks done, and for my midterm project that was the similar case. Actually, for Intro to IM in general, I used the computer for prolonged periods of time since most of the work done was on Arduino or Processing. This experience of using the computer for IM and multiple other classes simultaneously for a long time taught me a valuable lesson.

That lesson is to take a break. It might sound simple, but there are a lot of instances I see where people are frustrated with coding and their minds are filled with stressed. I feel that way too sometimes. But this semester especially, when I felt that I could not work after a few hours, I would take nature walks and small breaks where I would eat some snacks and talk to other people. This really aided in re-organizing my thoughts and when I came back I would perform better and sometimes realize that it was only a small mistake I made that was preventing my work from functioning properly. Now that I practice this method from time to time, I believe it has and will help me numerous times in throughout my lifetime.

LED CONTROLLER

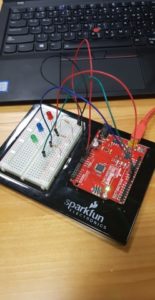
For this week’s project, I had the choice of making a physical input or output, given that I just needed to use the serial monitor to connect between Arduino and Processing. So I decided to make an LED controller that would switch on if you press the button for each one, and would turn off if you pressed an “off” button.

Overall it was not bad, but I had a few mistakes especially since I was using a new library and I had to get used to the syntax. Also, when I created the functions for each of the buttons, I didn’t know the names had to match but that was silly of me, since the functions wouldn’t work obviously if the names didn’t match. Finally, it was interesting to see that when Processing uses the “COM4” port that my Arduino is linked to, I cannot open the Serial Monitor in Arduino since it says that my Serial Port is busy (probably used in Processing).

The program is simple: it uses characters transferred within the Serial Monitor to communicate between the hardware and the software. The functions in Processing write on the port the characters that match with the buttons, then the Arduino reads those characters and if they match with each LED color (code in Arduino) the corresponding lights will turn on.

Below is the code, the pictures, and a video of me testing it out!

Arduino:

void setup(){
  pinMode(8,OUTPUT);
  pinMode(9,OUTPUT);
  pinMode(10,OUTPUT);

  Serial.begin(9600);
}

void loop(){
    
   if(Serial.available()){
    char val = Serial.read();

    if(val == 'r'){
      digitalWrite(8,HIGH);
    }
    if(val == 'b'){
      digitalWrite(9,HIGH);
    }
    if(val == 'g'){
      digitalWrite(10,HIGH);
    }
    if(val == 'f'){
      digitalWrite(8,LOW);
      digitalWrite(9,LOW);
      digitalWrite(10,LOW);
    }
    }
   }

Processing:

import controlP5.*;
import processing.serial.*;

Serial port;
ControlP5 a;
PFont b;
void setup(){
  size(400,600);
  
  printArray(Serial.list()); //print available ports
  port = new Serial(this,"COM4",9600); //connection time!  
  a = new ControlP5(this);
  b = createFont("Verdana",30);//bigger font to put for the buttons 
  
  
  //buttons:
  a.addButton("red") //name
    .setPosition(30,150) //position
    .setSize(150,100) //size
    .setFont(b) //font
    ;
  a.addButton("blue")
    .setPosition(220,150)
    .setSize(150,100)
    .setFont(b)
    ;
  a.addButton("green")
    .setPosition(30,350)
    .setSize(150,100)
    .setFont(b)
    ;
  a.addButton("off")
    .setPosition(220,350)
    .setSize(150,100)
    .setFont(b)
    ;
}

void draw(){
  background(227,154,118);
  textSize(15);
  text("INSTRUCTIONS: PRESS A BUTTON AND FIGURE OUT!",15,50);
  
  
}

void red(){
  port.write('r');
}
void blue(){
  port.write('b');
}
void green(){
  port.write('g');
}
void off(){
  port.write('f'); //press f in chat  
}

Images:

The Controller:The LEDs:

Video:

Tori and Kyle: Dart Board!

Oh come on, you knew we were gonna work together.

Concept: 

A dartboard with two panels layered on top of each other, one more permeable (conductive fabric). When you throw the dart, it connects both panels and triggers an output in processing.

Based on where the dart landed, processing effect with your score. (if too simple in processing, make a game out of it?)

A speaker that plays “Congratulations”

Technical Requirements:

LEDS (of course), projector, computer, redboard, conductive fabric, conductive paint, various wires and other circuit stuff

Equipment Needs: 

Corkboard, darts, plastic protection (for edges so darts don’t harm wiring) 

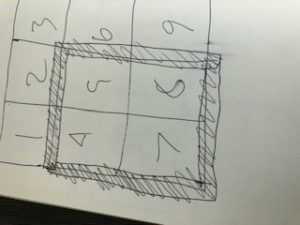
Block Diagrams: 

The Handshake of the Lines

I connected my computer generated artwork with the potentiometer to change how lines are drawn in the circle.

//Circles and Lines_Nisala Saheed


class DrawLine {

  PVector point1;
  PVector point2;

  float angle;
  float angle2;
  float radius;

  float x;
  float y;

  float x2;
  float y2;


  DrawLine(float _angle, float _angle2, float _radius) {

    point1 = new PVector(x, y);
    point2 = new PVector(x2, y2);

    angle=_angle;
    angle2=_angle2;
    radius = _radius;
  }

  void update() {

    angle2 = angle * sin(modifier) * 4;

    x = center.x + cos(angle)*radius;
    y = center.y + sin(angle)*radius;


    x2 = center.x- cos(angle2)*radius;
    y2 = center.y- sin(angle2)*radius;

    angle += PI/120;
    angle2+=PI/90;
  }

  void display() {

    stroke(modifier, 220, 160);
    line(x, y, x2, y2);
  }
}


DrawLine myLine[];
PVector center;
float angle;
float angle2;
float radius;
int numLines = 15;
float change;
float increment;
float modifier = 0;

import processing.serial.*;

Serial myPort;


void setup() {
  size(600, 600);

  printArray(Serial.list());
  String portname=Serial.list()[31];
  println(portname);
  myPort = new Serial(this, portname, 9600);

  center = new PVector (width/2, height/2); // we need to know the center of the cirlce that we are drawing.
  angle = 0;
  angle2 = 0;
  radius = 100;

  change = map (mouseX, 0, width, 0, 10);
  increment = TWO_PI/numLines;
  myLine = new DrawLine[numLines];

  for (int i=0; i<numLines; i++) {
    float ang = i*increment;//this is how much the angle increments by.
    myLine [i] = new DrawLine (ang, ang*sin(3)*4, radius);
  }

  //increase i as an increment for the number of lines, until it reaches the desired number of lines
}
void draw() {
  //background(50);
  noStroke();
  fill(20, 30); 
  rect(0, 0, width, height);

  //if you want to see the center
  //ellipse(center.x, center.y, 10, 10);
  //draw the lines

  //change = map (mouseX, 0, width, 1.5, 3);


  for (int i=0; i<numLines; i++) {
    myLine[i].display();

    map(modifier, 0, 1023/4, 2, 3);
    myLine[i].update();
  }
}

void serialEvent(Serial myPort) {
  modifier = myPort.read();
  myPort.write(0);
}


void setup() {
  // put your setup code here, to run once:
  Serial.begin(9600);
  Serial.write(0);
}

void loop() {
  if(Serial.available()>0){
    int inByte=Serial.read();
    int sensor = analogRead(A0);
    delay(1);
    sensor/=4;
    Serial.write(sensor);
  }
}


For my final project, I am considering creating an audio-visualizer. Most of the complexity of this should lie in coding processing, but I would need a sound sensor that can detect various frequencies. If such a sensor is not available I could create a relationship between a particular visual and how loud a sound it, or where it is coming from. This could take form in a small object that listens to music, or a larger piece that requires an individual to move within a designated space to impact a visual.

On the note of coding.

I have come to develop a particular relationship to the idea of coding. I used to consider it purely ambiguous and inscrutable numbers and words that randomly create some beautiful thing. However, after taking this class, I consider it something that is not one and the same as numbers. I think of it as a regularized, replicateable process. When we first explored processing, I wanted to begin creating graphics and beautiful images using the coding platform, despite having access to illustrator. In my frustration at my lack of skill in creating images in the software, I came to think of medium, and which medium is appropriate for what work.

As such, I consider processing and the logical nature of code and computing as a medium by which express myself.


An Explosion of Generative Text

For this week’s assignment, I decided to go for the generative text but with a playful twist in relation to misheard lyrics from famous songs. The process was very challenging at first, since I wasn’t able to get a more organic transition from the text to the pixels. But after discovering several in-built functions in Processing, such as get() and set() it was easier to manipulate the pixels. get() was particularly useful and interesting to use, since it allowed me to extract the non-black pixels within set parameters. I also struggled a lot with the values being returned by my functions as they were doing almost the opposite of what I intended, until I used the function abs() – which returns positive values no matter what, and ultimately allowed me to scroll the text in the correct orientation.

I feel like at this point there are so many functions built in Processing that can help make my life easier and more interesting, and I’m making it my life’s mission to uncover these functions one by one.

Sweet dreams are indeed made of cheese!

Code:

ArrayList p;
PFont font; 

void setup() {
  int i, x, y;
  color c;
  size (640, 480);
  frameRate(60);

  p = new ArrayList();
  createText();
  
  //set font
  font = createFont("Arial", 100); 

  background(0);
  stroke(255);
  fill(244, 154, 194);
  rect(0, 0, 240, 480);
}

void createText() {
  PGraphics pg;
  int x, y;
  color c;

  pg = createGraphics(5000, 500);
  pg.beginDraw();
  pg.background(0);
  pg.fill(255);
  pg.stroke(255);
  pg.textSize(200);
  pg.textAlign(LEFT, CENTER);
  pg.text("Sweet dreams are made of cheese", 0, 200);
  pg.endDraw();

  // Extract all non-black pixels
  for (x=0; x<5000; x++) {
    for (y=0; y<480; y++) {
      if ((c=pg.get(x, y))!=color(0)) {
        p.add(new pxl(x+1000, int(y+100*sin(x/(PI*80))), -80000*5, 0, c, color(0)));
      }
    }
  }
}
void draw () {
  int i;
  pxl a;

  fill(154, 194, 244);
  triangle(0, 0, 240, 240, 0, 480);
  for (i=0; i<p.size(); i=i+1) {
    a = (pxl) p.get(i);
    a.moveSpecial();
  }
}

Pixel Class:

class pxl {
  // Position and speed is x>>16 
  int x, y, xorg, yorg;
  int xspeed, yspeed;
  color c;              // pixel color
  color b;              // background color
  color c_temp;
  int gravity = 00;
  int resistance = 20;

  pxl(int _x, int _y, int _xspeed, int _yspeed, color _c, color _b) {
    x = xorg = _x<<16;
    y = yorg = _y<<16;
    xspeed = _xspeed;
    yspeed = _yspeed;
    c = _c;
    b = _b;
  }
  void display() {
    c_temp = get(x>>16, y>>16);
    set(x>>16, y>>16, c);
  }
  void hide() {
    set(x>>16, y>>16, b);
  }
  void updateSpeed() {
    long t = xspeed;
    xspeed = xspeed - ((int) (t * resistance)>>16);
    t = yspeed;
    yspeed = yspeed - ((int) (t * resistance)>>16);
    yspeed = yspeed + gravity;
    if (abs(xspeed)<100 && abs(yspeed)<100) {
      xspeed = int(random(-500000, 500000));
      yspeed = int(random(-500000, 500000));
    }
  }
  void moveSpecial() {
    int yt;
    hide();
    x = x + xspeed;
    y = y + yspeed;
    if ((x>>16)<=(240-abs(((y>>16)-240)))) {
      x = x - xspeed;
      y = y - yspeed;
      // change speeds 
      xspeed = int(random(1<<16, 10<<16));
      yt=int(-240+(y>>16))/48;

      yspeed = int(random((yt-5)<<16, (yt+5)<<16)) ;
      c = color(random(255), random(255), random(255));
    }
    display();
    updateSpeed();
  }
}


Text generation

I tried a bunch of different text generation ways. I watched a video on the coding train and now I feel I have a much deeper understanding of text generation. I decided to go with a simple text fade.

float imeInterval;
float timePast;

int textAlpha = 100;
int textFade = 2;
float timeInterval = 2000.0f;
PFont f;
void setup() {
  size(400,400);
   timePast = millis();
   f = createFont("Zapfino", 64);
  
}

void textFade() {
  if (millis() > timeInterval + timePast){
  timePast = millis();
  textFade*= -1;
}
textAlpha += textFade;
}
void draw() {
background(0);
textFade();
textSize(90);
textFont(f,50);
fill(255,255,255, textAlpha);
text("Dream", width/4, height/2);
}