MidTerm Progress – Infinite fall

Concept

For the midterm, I am planning to create a game in which a character falls and lands on different platforms that keep emerging from the bottom. The main goal is to stay on the platforms that are within the canvas dimensions for as long as possible and the time plus added components decide a player’s score for the round. It is a score based game and going above or below the top and bottom of the canvas respectively ends the game. 


I was intimidated by the code where I had to keep the ball (Player) on the platforms but by making separate classes of ball and platforms I was able to manage that as well. I still need to add more conditions to make the movement and fall of the ball smoother.

Further Work

I have only been able to get done with the basic idea of the game and still need to add the following features: 

  • Cause the ball to move as long as the key is pressed
  • Make the platforms appear in a more organized sequence
  • Fix the error where the ball seems to be passing through the platforms
  • Set conditions on how the game is lost (by touching the top of the canvas)
  • Add elements such as slowing down the speed etc. 

Midterm Assignment Progress

Concept:

For the midterm project I decided to make a galaga game. While my version of galaga would be a little different from the original galaga game, I will try my best to keep the essence of the galaga game while adding something more from what we learned in class.

Code:

Unfortunately I was sick over the weekend and I couldn’t do much with the project so so far my progress is the basic game mechanism where you can start the game by pressing the space bar and move the galaga ship using left and right arrow keys and shoot bullets using the up arrow key. For each enemy killed you get 100 scores and if you eliminate all the enemies, you advance a level. So far the mechanism is not yet completely finished and I hope to add enemy movement manipulation and enemy shooting bullets as well with a more concrete stage level progression mechanism and showing of it.

I also need to get better polished images and add music but again I couldn’t because I was/am sick… I hope to do the polishing as soon as I get better.

Chellange:

The challenege in this project so far was the enemy movement maniulation and the the stage progression which I am still working on it now. Another difficulty I found was reseting the game after the end of the game which I have encountered bugs that I’m not sure why its happening. I plan to tackle all this as soon as I get better.

Week 5: Midterm Progress Report

Concept:

I have been playing “Survivor.io” as a leisure game whenever I have free time or in-between classes just to pass the time. This game is a small mobile based game with the objective of surviving waves of attacks from a swarm of enemies that approach you and inflict damage when they touch you. We are given with a basic weapon in the beginning which we upgrade as we kill the enemies and survive the wave. The objective of the game is to farm weapons and survive for the longest time possible. I thought of implementing this game in p5js as my midterm project.

Survivor.io - Apps on Google Play

I have made quite a progress with my game by implementing the following features:

  1. A starting screen which describes the objective of the game.
  2. A playing screen where the player can control a character and kill minions. For now, the players, minions and weapons are just blobs with color.
  3. A game over screen where the time the player endured the waves is shown with a “Play Again” button.

Most Terrifying Part:

The most frightening part of the code so far was the collision detection of the “weapon & minions” and “minions & player” and killing the minions or the player when enough collision is made. The confusion lied on how to detect collision for all the minions and all the weapons. The solution I came up with is as follows:

  1. Weapons & Minions: I would detect the collision in the Minions class. Then we consider all the Arrows for the current minion. We call this detectArrowHit in the Minions class for all the minions in the minions array.
  2. Minions & Player: The same concept was applied for this collision, except the collision algorithm is implemented in the Player class, where we consider all the Minions present in the minions array.

As for the effects of the collision, I am still working on it and fine-tuning the effects of the collision. For now, I delete the minion which are hit from the minions array.  In doing so, it brings the problem of indexing in the minions array which is used to identify a minion in the canvas.

Future Progress and Reflection:

So far, the project is going smooth with all the bugs that I encountered getting solved fairly quickly. Here are a few things I need to work on:

  1. Sound track for the entire game.
  2. Sound effects for weapon firing, minions and player dying.
  3. Power-up for the player when it gets very hard to survive.
  4. Mechanism to regain health when certain criteria is matched.
  5. Images for the player, minions and weapons

The code is getting longer and longer very quickly, so I will probably divide the code into more JS files, just to make everything readable and understandable.

ASCII Art

Introduction:
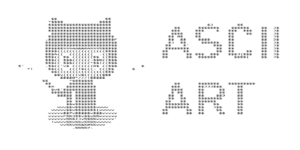
For this assignment, I was inspired by the ASCII art in front of the IM lab, so I tried to create such generative art.

Coding and Process
For the process, I first started looking into different possible projects that could be done using data visualization and generative texts. I really found this project of drawing images through different ASCII characters. So at first, I had to learn what is a pixel array, understand how it works, and use it to give different colors to the letters at one pixel. Once I understood how it worked, then it was me just experimenting around and playing with texts.

Final Project

Reflection and future improvements
For future purposes, I can have something interactive and live and could engage with the audience.

Yerkebulan Imanbayev – Home Work 4

For this project, I was inspired by a video piece that was meant to spread awareness about dyslexia and how dyslexic people perceive written text.

Link to the video: https://drive.google.com/file/d/1A8b0rKX24hairV4tFCItGpdnE2iSorkR/view?usp=sharing

With this assignment, I tried to create a disorienting feeling initiated by written text that would allow the user to understand the condition of dyslexia. The words appear in different sizes and move, similar to the way the words move in the clip.

display(){
fill(this.textColor);
this.textColor = this.textColor+1;
textSize (this.Size);
textFont(newFont);
this.textX = this.textX + 1;//allows the words to move to the right
text(splitString,this.textX,this.textY);
if(this.textX>400) {
this.textX = -70;//allows the word to move back to its initial position
}
}

I used a class in order to make more words appear on the screen. In the piece of code included above, I made the text move so that once it’s out of the frame, it re-enters from the other side of the screen. Furthermore, I wanted the text to change and attain a different speed when the screen is clicked.

For the future, I want to be able to code it so that new words appear as the screen is clicked. Furthermore, I want the words to move in a more chaotic manner. Overall, I want to gain more knowledge on the tools that would allow me to convey a deeper sense of disorientation.

Assignment 4: Fish Histogram

Overview

Since I have past experience working with CSV files,  I decided to utilize them again for this assignment. After careful consideration, I chose to create a bar graph, or more specifically, a histogram, as it is an effective way to visualize and compare data. Despite the CSV file containing multiple variables, I found it more appropriate to focus solely on the weight of the fish (which serves as the y-axis variable for my bar chart) in order to ensure a clear and concise representation of the data, rather than presenting a cluttered array of variables. I loaded the lines in the CSV file into the array of strings as taught in class and then continued to make separate arrays for storing the names and weights of the fish from the specific rows in the CSV file.

The Data file I chose had a total of 161 fish data but I limited it to 10 fish being represented at a time which were randomly chosen and changed to another set of 10 randomly chosen fish from the data file with the help of a mouse click.

Final Output

Concluding Remarks

I am happy to incorporate more animation into this assignment compared to my previous ones. Additionally, I also added a water bubbling sound effect to enhance the interactivity of the project. However, I am aware that there is room for improvement in terms of the accuracy of the data representation. Specifically, I believe I could provide more detail regarding the weight unit and markings on the y-axis to create a more precise depiction of the data, rather than solely relying on the height of the bars.


Week 4 – Love Yourself :)

Overview:

For this assignment, I tried to utilize the typography concepts learned in class in combination with WebGL (Web Graphics Library), to create an interactive generative text.

Concept:

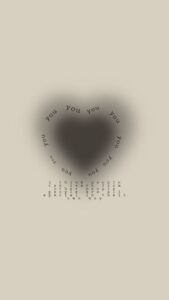
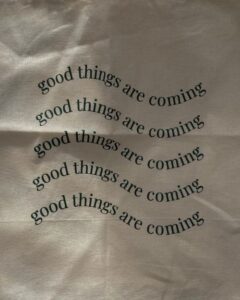
I’m really into typography and generative text art, so I particularly enjoyed working on this assignment. I was surfing though Pinterest for inspiration, and was inspired by the works below. Unable to choose between those two works, I decided to combine them.

The concept of this work is self-love and simplicity. I like setting these kind of photos as my phone wallpaper as a reminder to not compare my journey with other’s journey, because it’s hard to forget it or ignore it when it’s right in front of my nose 🙂 Therefore,  I decided to create my own wallpaper using the code.

Since the concept is “self-love”, I relied on the colors associated with love, such as red, white and black (as they’re basic colors). I also played around with the opacity of the text, and created a fade-away effect for the text as it progresses down the row.

Code:

The major highlights of my code are the sine-wave text and heart made of the word “love”. First, I created a sine-wave by using by displaying the string character by character and using sin() function to make y-value dependent on the x-value of the text.

To draw the heart, I used the mathematical formula based on the polar coordinates which is described in this video. However, I adapted the formula used there to my code so that instead of the vertices, my shape will consist of  the words “love”. I used beginShape() and endShape() to connect the words together to form a heart shape, and I used push() and pop() to limit the rotation only to the heart. To make the rotation effect, I utilized the rotateY() function of the WEBGL library, which allows us to rotate the shape around the y-axis.

I also tried to integrate some interactivity to this work: the user would be able to change the “mode” of the artwork from bright to dark by pressing the mouse (when the mode changes, the main text also changes). Also, the user can control the rotation by stopping or continuing it through the key “s”.

Here are the parts of the code I referenced:

//draw the heart
  let letter= "love";
  textSize(sizeHeart);
  
  //create a shape to be able to rotate it later
  beginShape();
  //use push and pop to apply the rotation only to the heart shape
  push();
  
  if(toStop==false){
    //rotate the heart around the y-axis
      rotateY(millis() / 1000);
  }

  
  //opacity of the heart is modifiable
  fill(210, 4, 45,heartOpacity);
   stroke(0);
  
  //if we set a to be 0.01, we will get a heart with densely located letters 
  for(let a=0; a<TWO_PI; a+=0.05){
    let r=10;
    let x= r*16*pow(sin(a),3);
    let y=-r*(13*cos(a) - 5*cos(2*a) - 2*cos(3*a) - cos(4*a))
    text(letter,x,y);
  }
  pop();
  endShape();
//draw the text
  let textLength = msg1.length;
  let tWidth = textWidth(msg1);
  noStroke();
  textSize(sizeMsg);
  
  //plce the text in the center
  let textStart_x = 0 - (tWidth / 2) + 20;
  
   //make the characters of the string follow a sine wave pattern
  for(j=0; j<5; j++){
    
    //since we have 5 rows of the same text, each of the rows will start at different y locations
    let textStart_y = -20 + j*20;
    
    for(i=0; i<textLength; i++){
      
      //change the text and its opacity when the mouse is pressed
      if(mouseIsPressed){
        fill(255,255,255,80*(j+1));
        msg1="trust yourself trust yourself trust yourself trust yourself trust yourself";
      }
      else{
        fill(0,0,0, 30*(j+1));
        msg1="love yourself love yourself love yourself love yourself love";
      }
      
      //print the text by printing characters one by one
      text(msg1[i],textStart_x+i*10, textStart_y+10*sin((textStart_x+i*10)/30));
    }
  }

Reflection and future Improvements:

Overall, I really enjoyed working on this assignment (I enjoyed it as much as making my self-portrait, haha) and I’m content with how my work turned out as well. One of the suggestions for further improvement would be using more heart shapes of different size and making them rotate in different pace and direction to emulate the heart-shaped medallion. Also, playing around with the color of the text and applying different colors to different rows or characters is also one suggestion.

Assignment 4: Data Visualization

Concept:

Upon looking at a bunch of open source data sets, I found a data set for Exoplanets that have been documented outside our solar system by NASA: https://www.kaggle.com/datasets/adityamishraml/nasaexoplanets

I thought this would be pretty cool to implement as a form of data visualization as I don’t think I’ve seen any examples of data visualization for astronomy or space hence, I decided to implement this into my assignment.

Process and Planning:

For visualizing the exoplanets, I didn’t want to simply draw an ellipse as I thought it wouldn’t look that great and it would be too simple. Hence, I found some nice planet art online and used some of them to visualize some of the exoplanets:
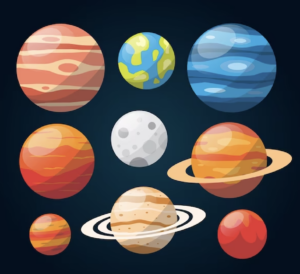
I used a few of these planets and put them into some img variables and then put them all into an array of planet designs so that I could access any design I wanted from this array anytime I wanted. I also loaded the entire exoplanets.csv dataset into an array called exoplanet_data which I would plan to use later in my code.

function preload() {
  exoplanet_data = loadStrings("exoplanets.csv");

  planet1_img = loadImage("Planet1.png");
  append(planet_designs, planet1_img);
  
  planet2_img = loadImage("Planet2.png");
  append(planet_designs, planet2_img);
  
  planet3_img = loadImage("Planet3.png");
  append(planet_designs, planet3_img);
  
  planet4_img = loadImage("Planet4.png");   
  append(planet_designs, planet4_img);
  
  planet5_img = loadImage("Planet5.png");
  append(planet_designs, planet5_img);
}

I knew that I would have to create a class in which each exoplanet would be its own object, hence I made one here:

class ExoPlanet {
  constructor() {
    this.x;                  //X coordinate for the planet                    
    this.y;                  //Y coordinate for the planet 
    this.planet_radius;      //Radius of the planet image
    this.design_num;         //Type of planet design from planet_designs
    this.data;               //String data of the planet
    this.data_split;         //Splits the data into an array of its data
    
    this.init();
    this.printData();
  }
  
  //This function initializes all the variables for each exoplanet.
  init() {
    this.design_num = int(random(5));
    this.planet_radius = planet_designs[this.design_num].width/10;
    
    this.x = mouseX;
    this.y = mouseY;
    
    this.data = exoplanet_data[data_count];
    this.data_split = split(this.data, ',');
    if(data_count != exoplanet_data.length) {
      data_count++;
    }
    else {
      print("All planets printed!");
    }
  }
  
  //This function takes a random planet image and draws it at a random (x,y) coordinate on the canvas
  draw() {
    image(planet_designs[this.design_num], this.x, this.y, planet_designs[this.design_num].width/5, planet_designs[this.design_num].height/5);   
  }
  
  displayData() {
    fill(255, 255, 180);
    rect(mouseX, mouseY, 500, 120);
    
    textAlign(LEFT);
    fill("black");
    
    text("Planet Name:", mouseX+10, mouseY+30);
    text("Distance from Earth (ly):", mouseX+10, mouseY+55);
    text("Stellar Magnitude (brightness):", mouseX+10, mouseY+80);
    text("Planet Type:", mouseX+10, mouseY+105);
    
    fill("red");
    text(this.data_split[0], mouseX+140, mouseY+30);
    text(this.data_split[1], mouseX+235, mouseY+55);
    text(this.data_split[2], mouseX+290, mouseY+80);
    text(this.data_split[3], mouseX+125, mouseY+105);
  }
  
  //This function is for debugging and code checking to ensure everything runs smoothly.
  printData() {    
    print("Planet Image:",this.design_num);
    print("Planet Radius:",this.planet_radius);
    print("Planet Data:",this.data);
    
    print("Planet Name:",this.data_split[0]);
    print("Distance (from Earth):",this.data_split[1]);
    print("Stellar Magnitude:",this.data_split[2]);
    print("Planet Type:",this.data_split[4]);
  }
}

In this class, each planet has:

  • An (X, Y) coordinate of the planet on the canvas (this would be where the user’s mouse is when they click)
  • The radius of the planet (so when the user moves close to the planet, its data pops up)
  • Design number: This indicates any one of the planet images shown perviously.
  • Data: This entails the particular planet data from the csv file for that planet.
  • Data_Split: This variable would be an array of each component of the data of the planet, hence, it would be easier to print out its data.

I had an initialize function, init(), to initialize it with some variables. I had another function which would draw the planet onto the canvas using the image(). Finally, I had a displayData() function which would print out a rectangle containing some of the vital information of the exoplanet’s data.

How does the data pop up?

//Here we continuously draw the planets on the canvas
for(let j=0; j<exoplanets.length; j++) {
  exoplanets[j].draw();
  planet_dist = dist(exoplanets[j].x, exoplanets[j].y, mouseX, mouseY);
  
  //If the mouse coordinates hit's the planet, it will print the data of that planet.
  if(planet_dist < exoplanets[j].planet_radius) {
    exoplanets[j].displayData();
  }
}

Essentially, in the draw() function, it will continuously print the exoplanet using the draw function from the class. It calculates the planet_dist between the planets coordinates and the user’s mouse. If the user’s mouse touches the planet, then it will call the displayData() function.

I added it such that the user can add a planet onto the canvas by simply clicking their mouse as well.

Final Piece:

Overall Thoughts:

Overall, I’m pretty happy with the interactivity and design with my assignment. Perhaps, for improvements I could have included more planet shapes, and maybe even added some cool sound effects to enhance the experience a little more. More improvements, I could have also made sure that if the planet size was bigger, the planet drawn could also be bigger and vice versa. This way the data visualization is even stronger.

Midterm Project Ideas:

For my midterm, I wanted to develop a game since I really love games and would love to get into game development. Some of the ideas that initially sparked in my head was perhaps something like “Battleship” or maybe something like a parody of “Subway Surfers” where the user can continuously run and get the highest score or something like that. For now these are the ideas I thought of initially but I’d love to come up with a cool unique game of my own.

Week 4 – Neon Sign

Inspiration:

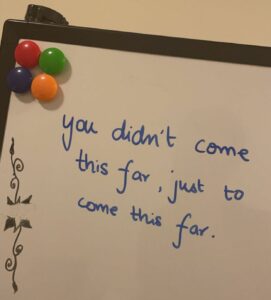
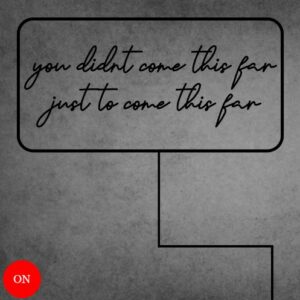
I had a particularly challenging time with this assignment because I struggled to determine what to make for this topic. Despite scouring the internet for inspiration, I found examples that were either beyond my coding abilities or too basic. I tried multiple projects but was not satisfied because they weren’t creative enough. However, my fortunes changed when I received a Snapchat memory today, reminding me of a quote a friend wrote on my dorm’s whiteboard exactly one year ago. This quote has always been a source of inspiration for me to stay focused on my work and avoid procrastination, and it remains one of my favorite quotes. The Snapchat memory was:

I needed to come up with a unique way to showcase this text, which is when my roommate’s suggestion came in handy. While discussing ways to decorate our room, my roommate proposed the idea of using neon lights. The moment he mentioned this, I realized that adding a neon light effect to the quote could work.

Coding Process:

To begin with, I searched online for neon signs that can be used as room décor and was drawn to those with a cursive font. Hence, I opted for a cursive font and explored multiple websites until I found the “Havelberg” font. Following this, I researched how to add and implement this font using p5js. Once I gained this knowledge, I created a preliminary layout of the project, outlining where everything should be placed. The final skeleton looked somewhat like this:

Initially, I encountered challenges in making the project appear more visually appealing and imaginative. To tackle this, I got the idea of incorporating electricity that would flow through the wires and illuminate the sign upon pressing the “on” button. However, as I progressed, I realized that the end result was not as aesthetically pleasing as I had hoped. As a solution, I decided to remove the grey background and start with a blank canvas of darkness. The code for the electricity flowing looked like this:

if (on_button == true) {
    if (!sound.isPlaying()) {
      sound.play(); //the electric static voice
    }
    fill("gold"); //for the wires
    noStroke();
    //since upspeed is in negative values that is why we subtract
    if (height + upspeed > uplimit) {
      upspeed = upspeed + vertical_speed;
      rect(360, 400, wire_width, upspeed); //the first part of the wire and looks like electricity is travelling up
    } else {
      rect(360, 400, wire_width, upspeed); //when it has reached its limit, then it stops and stays there
      if (width + leftspeed > leftlimit) {
        //as soon as the wire part 1 has reached its designated limit, now we start moving to the left
        leftspeed = leftspeed + horizontal_speed; //horizontal speed is the same as upspeed so that it looks uniform
        rect(360, uplimit, leftspeed, wire_width); //leftspeed keeps updating so it looks like it is moving to the left
      } else {
        rect(360, uplimit, leftspeed, wire_width); //same as above
        if (height + upspeed2 > uplimit2) {
          upspeed2 = upspeed2 + vertical_speed; //upspeed2 is different from upspeed since the starting and ending points are different
          rect(360 + leftspeed, uplimit, wire_width, upspeed2);
        } else {
          rect(360 + leftspeed, uplimit, wire_width, upspeed2);
          stroke(57, 255, 20);
          strokeWeight(4);
          noFill(); //make rectangle after the last wire reaches the rectangle
          rect(25, 25, 350, 175, 20); //rectangle but with curved edges
          strokeWeight(1);
          fill(57, 255, 20, sin(frameCount * 0.1) * 255); //fills the text and adds a flicker effect to it
          text("you didnt come this far", 45, 95);
          text("just to come this far", 70, 145);
        }
      }
    }
  }

After adding the button, audio, and the mouseClicked() feature, the final product looked like this:

Reflection:

Despite feeling proud of the code I developed to create the electricity flow, I did not derive much personal satisfaction from this assignment. I felt that my creative potential was hindered and that the piece could have been more visually appealing if I had managed to let my creativity flow more freely. Unfortunately, I was experiencing a creative block that prevented me from fully enjoying the project. However, I plan to revisit this piece at a later date and explore ways to enhance its aesthetics. Apart from the creative aspect of it, I would want to add multiple neon signs in the future that take on random quotes from a csv file.

Generative Text – Week 4

Concept

This code defines a sketch that displays the letters “Zaid” in a random and animated way on a black background. The code is creating a canvas and for manipulating visual elements on the canvas. The code defines a font named “Courier New” and arrays for holding the letters to be displayed and the colors of those letters. It also creates a slider to adjust the speed of the animation. In the setup function, the canvas is created, the background color is set to black, and the font and text size are set.

The draw function is where the animation of the letters takes place. It starts by setting a slightly transparent black background. Then, it gets the value of the speed slider and iterates through the letters array. For each letter, it randomly changes its position, rotation, and size based on noise functions and the current frame count. It then uses the fill function to set the color of the letter based on the corresponding color in the colors array, and finally draws the letter using the text function. Overall, the code creates a dynamic and visually interesting display my name “Zaid” that changes in real-time based on the slider value.

Code

// Define the font to be used
let font = "Courier New";

// Define arrays for the letters and colors
let letters = [];
let colors = [];

// Define an array with the letters to display
let zaidLetters = ["Z", "a", "i", "d"];

// Define a variable to hold a slider for adjusting the speed
let speedSlider;

// Set up the canvas and other variables
function setup() {
  createCanvas(400, 400); // create a canvas with a size of 400x400 pixels
  background(0); // set the background color to black
  textFont(font); // set the font to the one defined earlier
  textSize(120); // set the text size to 120
  textAlign(CENTER, CENTER); // center the text alignment
  for (let i = 0; i < zaidLetters.length; i++) {
    letters.push(zaidLetters[i]); // add the letter to the letters array
    colors.push(color(random(255), random(255), random(255))); // add a random color to the colors array
  }
  speedSlider = createSlider(1, 10, 5); // create a slider for controlling the speed with a default value of 5
  speedSlider.position(10, 10); // set the position of the slider
}

// Draw the letters and animate them
function draw() {
  background(0, 20); // set the background color to a slightly transparent black
  let speed = speedSlider.value(); // get the value of the speed slider
  for (let i = 0; i < letters.length; i++) {
    // Randomly change the position and rotation of each letter
    let x = map(noise(i + frameCount / (50 * speed)), 0, 1, 0, width);
    let y = map(noise(i + 1000 + frameCount / (50 * speed)), 0, 1, 0, height);
    let angle = noise(i + 2000 + frameCount / (100 * speed)) * TWO_PI;
    let size = map(sin(i + frameCount / (30 * speed)), -1, 1, 90, 120);

    push();
    translate(x, y);
    rotate(angle);
    fill(colors[i]);
    textSize(size);
    text(letters[i], 0, 0);
    pop();
  }
}

Reflection / Future Improvements

This code is a fun and creative way to display text in a dynamic and animated way. It uses a combination of noise functions and various mapping techniques to generate the position, rotation, and size of each letter, resulting in a unique display with each run of the sketch.

One possible improvement for this code could be to add user interactivity by allowing the user to input their own text and select their own color palette. This could make the sketch more engaging for the user and allow for a wider range of creative possibilities. Another possible improvement could be to add more animation effects, such as scaling, fading, or moving the letters in different directions. This could add more visual interest and complexity to the sketch, making it even more dynamic and engaging. With some additional improvements and modifications, it could be further developed into a fully-featured text animation tool. The project was very fun to work with but it took time to get the hang of how to use text in a rather creative and artistic way.