Simple work of Art!

Intro:

It wasn’t easy for me to do the assignment this time. I had a difficult time deciding on the simple art piece I was going to create. The self-portrait assignment was easier because I had certain guidelines and image in mind, but the creative freedom given to us in this assignment made it both exciting yet difficult at the same time.

Initial Ideas:

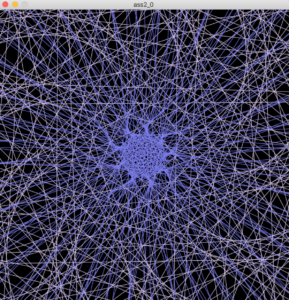
I wanted to do something random yet you can see the patterns and artistic idea behind it, I also didn’t want it to be still to make it more interesting. I decided to make a spiral art piece using lines. The steps were as follows: 1) Draw lines, 2)rotate it, 3)animate it, 4)randomize it, 5) make it look good.

Draw Line(and make more lines):

I started with one line, then used for loops to make a lot of lines for the spiral. Using the for loop, I created a lot of lines, but they are not spiraled yet.

Rotate to create spiral:

In order to create the spirals I had to change the position of the x and y in the lines. To rotate the lines so I needed an angle, so I added rotate(); then I needed an angle for rotate to function which is what dictates the patterns of the spirals, so I used float to add a random angle so that every time there is a different spiral.

Adding Motion:

After researching a lot on how to add motion to the art piece, I found that using sin waves is a good way to do so, so I declared  the variable movement sin(radians(framecount)). I plugged it in to get an infinite looping animation. But when I did this I found that the lines were moving but barley it wasn’t very visible. This is because sin waves use very small decimal points between -1 and +1 so I had to put in a mouse event that will dictate the sine wave and spiral shape, so I declared a variable m, where I multiplied movement by the new mouseX, which will also impact the speed, if I increase the 1000, to 3000 It will be much faster.


Final project:

I added a purple/blue color with white, to make it better looking.

youtube video for the motion:

https://www.youtube.com/watch?v=Uuq6_Hawb78

float randomangle=random(30,30);


void setup(){
  size(600,600);
  smooth();
  frameRate(60);
}


void draw(){

  stroke(126,128,240);
  background(0);
  translate(width/2,height/2);
  float movement=sin(radians(frameCount));
  float m = movement*map(mouseX, 0, width, 1000, 0);
  
  for (int i=0;i <400;i++){
    rotate(randomangle);
    line(850,i-m/2,-850,i++);
stroke(126,128,240);
     line(-850,-i+m,550,i++);
     stroke(220,203,245);
      line(850,i-m,-850,i++);
    
  }
}


Fun project!!

Week 2: Design using loops

DESCRIPTION

Using loops (for() or while()) in some way, along with everything that you’ve learned so far, make a simple work of art.

PROCESS:

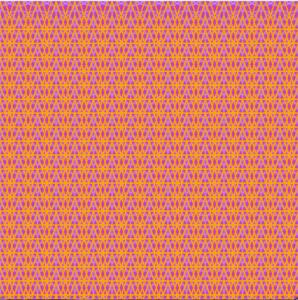
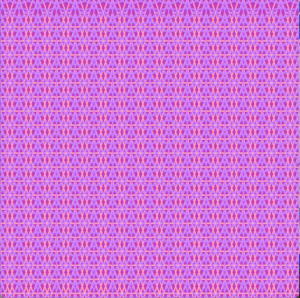
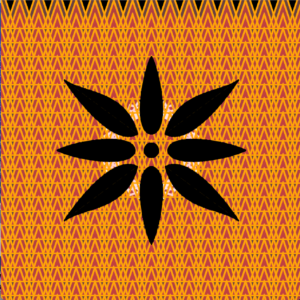
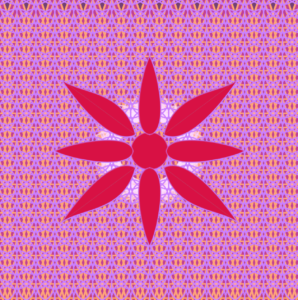
Background:   I started with giving my design a base by making the background of the design black. Thereafter, I used the loop function to create several triangles as I filled them with partially transparent shade of orange and a strong stroke to highlight the image. I had another similar idea in mind where instead of orange triangles, I wanted to use purple circles. In the end, I used to the “mousepressed” function to help me switch between the two. Here’s how the two turned out to be:
Foreground: After setting the background, I made a (sort of) flower in the middle as a part of my design, using the circle function as the the centre and the bezier function for the petals. Originally, I filled it with the colour black because it was going well with the orange background but then I used the random function for the colours when clicked using the mouse, to give it a mood-altering effect. I also change the circle’s diameter to random between 10 to 80 to give it a growing effect.
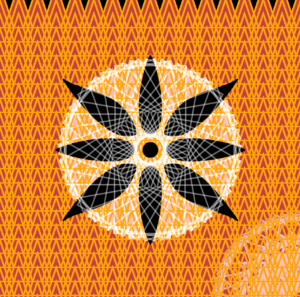
Finally I used the “keypressed” function, to give the final effect. For the last I saved the most difficult to figure out. I put the rectangles in a loop to create multiple of them, and used the rotate function and frameCount to put them in a circular motion giving it an aesthetic sense. A picture is also given below 🙂
Initially, It was challenging to make the design because of figuring out the rates and maths, but once I got the hang of it, it was extremely fun and satisfying.

void setup(){
  size(640,640); // size of the viewer
  background(0); //base
  //loop
  for( int i = 0; i<480;i++);
  };

//introducing the variables 
int centerX= 640/2;
int centerY=640/2;
int rectSize = 150; 
float angle;


void draw() {
  smooth();//smoothing the edges of the shapes
  //condition for the background
  if( mousePressed== true){
    fill(202,129,255,2);//purple
    stroke(202,129,255,155);
    strokeWeight(2);
 //loop
  for (int x = -40; x<= height; x+=40){
    for(int y= -30; y<= width; y+=30){
      circle(x ,y,80);
    }}
  } else {
    fill (255,190,70,2); //orange
    stroke(255,165,3,155);
    //loop
    for (int x = -40; x<= height; x+=40){
    for(int y= -30; y<= width; y+=30){
      triangle(x ,y,x-30,y+90,x+30,y+90);
    }}
  };
  //condition
  {if (mousePressed == true)
  {
  //filling with random colours with each frame
  fill(random(0,255),random(0,255),random(0,255));
  circle(centerX,centerY,random(10,80));//random diameter of circle
  //top petal
  bezier(centerX,centerY-35,centerX+40,centerY-40,centerX+20,centerY-160,centerX,centerY-200);
  bezier(centerX,centerY-35,centerX-40,centerY-40,centerX-20,centerY-160,centerX,centerY-200);
  //right petal
  bezier(centerX+35, centerY, centerX+40, centerY-40, centerX+160,centerY-20, centerX+200, centerY);
  bezier(centerX+35, centerY, centerX+40, centerY+40, centerX+160,centerY+20, centerX+200, centerY);
  //bottom petal
  bezier(centerX,centerY+35,centerX+40,centerY+40,centerX+20,centerY+160,centerX,centerY+200);
  bezier(centerX,centerY+35,centerX-40,centerY+40,centerX-20,centerY+160,centerX,centerY+200);
  //left petal
  bezier(centerX-35, centerY, centerX-40, centerY-40, centerX-160,centerY-20, centerX-200, centerY);
  bezier(centerX-35, centerY, centerX-40, centerY+40, centerX-160,centerY+20, centerX-200, centerY);
  //upper right petal
  bezier(centerX+30, centerY-35, centerX+75, centerY-10, centerX+145, centerY-90, centerX+185,centerY-150);
  bezier(centerX+30, centerY-35, centerX+55, centerY-130, centerX+145, centerY-120, centerX+185,centerY-150);
  //bottom left petal
  bezier(centerX-30, centerY+35, centerX-75, centerY+10, centerX-145, centerY+90, centerX-185,centerY+150);
  bezier(centerX-30, centerY+35, centerX-55, centerY+130, centerX-145, centerY+120, centerX-185,centerY+150);
  //upper left petal
  bezier(centerX-30, centerY-35, centerX-75, centerY-10, centerX-145, centerY-90, centerX-185,centerY-150);
  bezier(centerX-30, centerY-35, centerX-55, centerY-130, centerX-145, centerY-120, centerX-185,centerY-150);
  //bottom right petal
  bezier(centerX+30, centerY+35, centerX+75, centerY+10, centerX+145, centerY+90, centerX+185,centerY+150);
  bezier(centerX+30, centerY+35, centerX+55, centerY+130, centerX+145, centerY+120, centerX+185,centerY+150);
  } else {
    fill(0);//fill black
    stroke(0);
    //top petal
    bezier(centerX,centerY-35,centerX+40,centerY-40,centerX+20,centerY-160,centerX,centerY-200);
    bezier(centerX,centerY-35,centerX-40,centerY-40,centerX-20,centerY-160,centerX,centerY-200);
    //center
    circle(centerX,centerY,30);
    //right petal
    bezier(centerX+35, centerY, centerX+40, centerY-40, centerX+160,centerY-20, centerX+200, centerY);
    bezier(centerX+35, centerY, centerX+40, centerY+40, centerX+160,centerY+20, centerX+200, centerY);
    //bottom petal
    bezier(centerX,centerY+35,centerX+40,centerY+40,centerX+20,centerY+160,centerX,centerY+200);
    bezier(centerX,centerY+35,centerX-40,centerY+40,centerX-20,centerY+160,centerX,centerY+200);
    //left petal
    bezier(centerX-35, centerY, centerX-40, centerY-40, centerX-160,centerY-20, centerX-200, centerY);
    bezier(centerX-35, centerY, centerX-40, centerY+40, centerX-160,centerY+20, centerX-200, centerY);
    //upper right petal
    bezier(centerX+30, centerY-35, centerX+75, centerY-10, centerX+145, centerY-90, centerX+185,centerY-150);
    bezier(centerX+30, centerY-35, centerX+55, centerY-130, centerX+145, centerY-120, centerX+185,centerY-150);
    //bottom left petal
    bezier(centerX-30, centerY+35, centerX-75, centerY+10, centerX-145, centerY+90, centerX-185,centerY+150);
    bezier(centerX-30, centerY+35, centerX-55, centerY+130, centerX-145, centerY+120, centerX-185,centerY+150);
    //upper left petal
    bezier(centerX-30, centerY-35, centerX-75, centerY-10, centerX-145, centerY-90, centerX-185,centerY-150);
    bezier(centerX-30, centerY-35, centerX-55, centerY-130, centerX-145, centerY-120, centerX-185,centerY-150);
    //bottom right petal
    bezier(centerX+30, centerY+35, centerX+75, centerY+10, centerX+145, centerY+90, centerX+185,centerY+150);
    bezier(centerX+30, centerY+35, centerX+55, centerY+130, centerX+145, centerY+120, centerX+185,centerY+150);
  };
  
  }}; 
  
void keyPressed(){
      //condition
      if (key== 's');
      //for center
      translate(centerX,centerY);
      rectMode(CENTER);
      stroke(255,115); //white
      strokeWeight(3);
      noFill();
         //loop
        for(float a=0; a<360; a+=10){ 
       pushMatrix(); //saving the coordinate systerm
       rotate(radians(a)); //rotate
       rect(frameCount*rectSize*sin(radians(angle))*0.001,frameCount*rectSize*cos(radians(angle))*0.0001,rectSize,rectSize);//rectangle
       popMatrix();//restoring the coordintes saved
   };
   angle++;//increasing the angle
};


Week 2: Loops

For the second week’s task, I wanted to use lines and circles to make some kind of pattern of motion. After adding lines, I quickly realized that adding circles would crowd the screen and be too overwhelming, so I decided to stick with lines only and develop them a bit further. My final sketch is displayed in the video below:

Challenges:

I faced two main challenges.

The first one relates to the motion of the lines. After adding the set of lines on the left, I was stuck on the set of the lines on the right. The amount of variables involved confused me, and I was unable to figure out how to set the motion of this set to be opposite to the other one. After tweaking the variables and trying to introduce new ones, I solved the issue by drawing a rough sketch of the lines on my phone and marking different parts of it, defining the variable which controls it.

The second challenge I faced related to the coloring of the sketch. I wanted to make the color of the lines’ stroke to change over time. I tried using random() and noise() to introduce random colors smoothly. However, it was difficult to make the color change smooth after experimenting with many numbers. I think the difficulty resulted from the fact that three parameters control the resulting RGB color. I tried looking up how to use Hex colors, but that was difficult to implement as well. So I just decided to go with a lighter shade of gray

Decision-making:

I wanted the lines to rotate and after some time reverse and rotate the other way. I used frameCount at first, but I realized it was difficult to utilize since I wanted a variable that decreases after a certain amount of time. At the end, I decided to make my own variable that increases and decreases.

Code:

int counter;
float speed;
boolean increaseCounter;

void setup() {
  size(640, 480);
  
  counter = 0;
  speed = 0.007;
  increaseCounter = true;
}

void draw() {
  background(0);
  
  stroke(200);
  if ((counter+1) * speed >= radians(90)) {
      increaseCounter = false;
    } else if (counter <= 0) {
      increaseCounter = true;
    }
    if (increaseCounter) {
      counter++;
    } else {
      counter--;
    }
  
  for (int i = 20; i <= width; i += 40) {
    float frequency = (counter * speed);
    pushMatrix();
    translate(i, i);
    strokeWeight(1.5);
    rotate(frequency);
    line(-i, 0, width-i, 0);
    popMatrix();
  }
  
  for (int i = width; i >= 0; i -= 40) {
    float frequency = (counter * speed);
    pushMatrix();
    translate(i, width-i);
    strokeWeight(1.5);
    rotate(-frequency);
    line(-i, 0, width-i, 0);
    popMatrix();
  }
}


Metropolis Loop Art

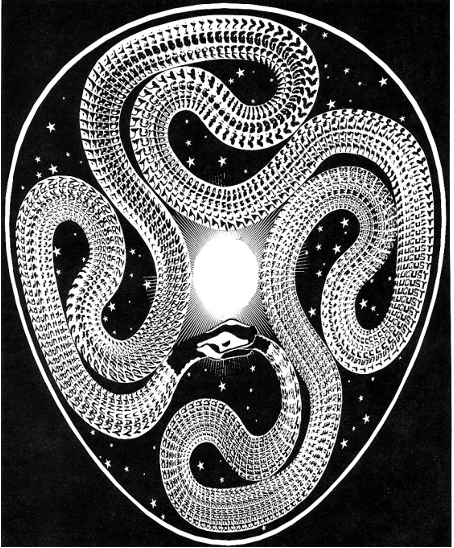
I had a hard time settling down on an idea for this week’s assignment. The main objective of the week was to create artwork using the loops for() or while(). I ended up working on something that was miles away from my initial idea. Initially, I was inspired by the work Rainbow’s Egg by Colin Emmett and as I worked on recreating that work, I ended up creating an animation with circles in an attempt to mimic a snake.

The movement of the circles pushed me to work on something based on them and I began getting more ideas for it in terms of colors, positions, and shapes with loops as opposed to my idea of recreating the Rainbow’s Egg. I was more inspired by this which was a definite indication for me to start afresh with this idea.

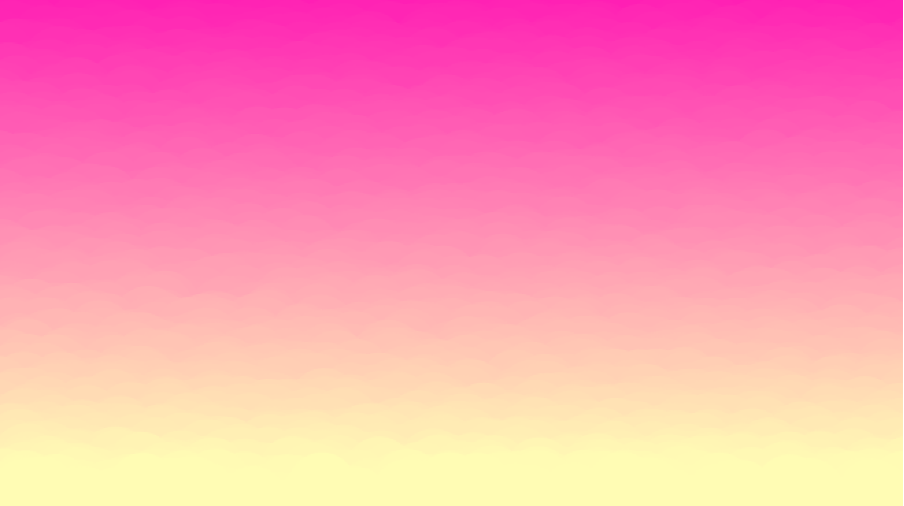
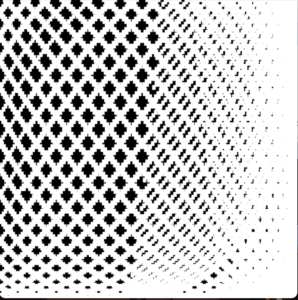
I wanted to work with loops not only to make multiple shapes and animate them but on color as well to achieve a sort of gradient. When thinking of gradients from real life, the first thing that came to mind was the sunsets at NYU Abu Dhabi. In order to recreate it, I looked into the RGB codes of red, yellow, and orange and looked at how the codes change amongst these colors in order to change variables in the loop to achieve the gradient. Here were my first attempts trying to get a sunset-like gradient. I wanted to check out how the output would look without a stroke and I was able to achieve a very subtle shading of the sky and I was very happy with this result:

I played a lot with colors here and I got to see how easily colors change the mood of a work. Here are some examples:

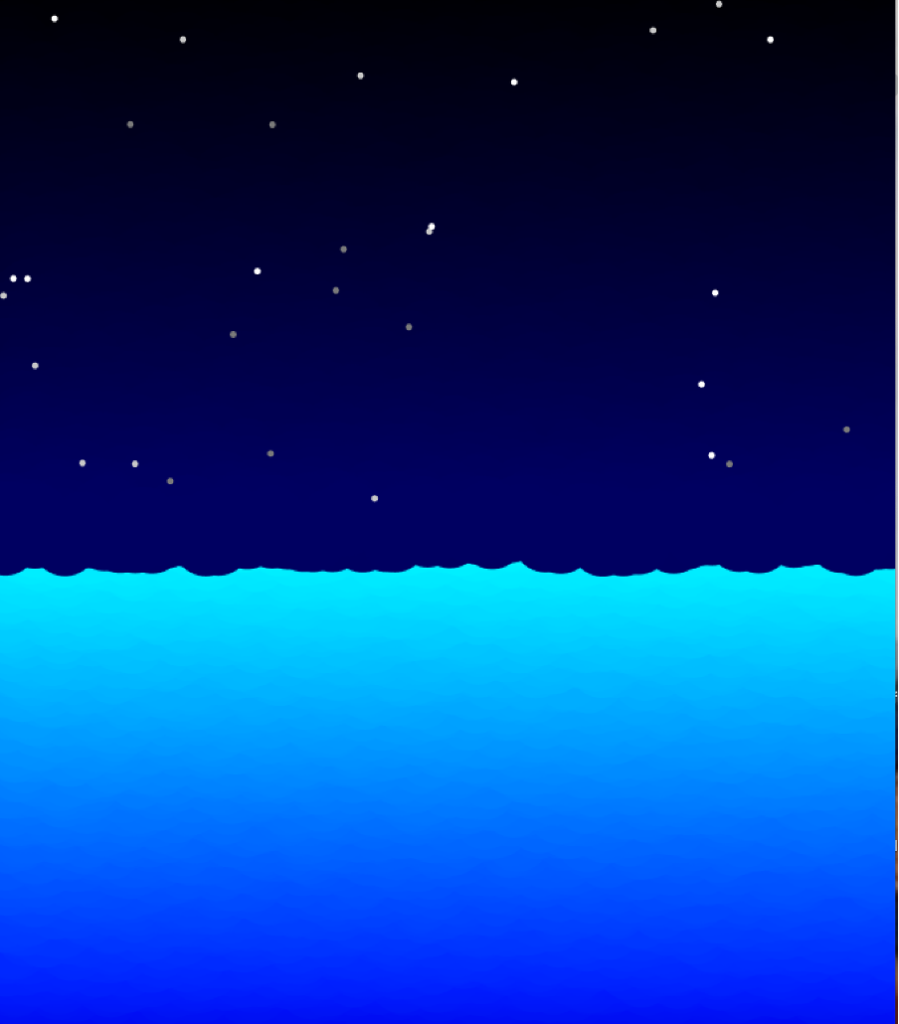
After this, I thought of expanding my canvas and perhaps draw a cityscape and waters. I also dabbled into making an oceanic scene with a more darker-blue shade gradient. I put in some star-like objects which I had made when I was making the Rainbow’s Egg sketch. The colors I used for the stars varied in shades of greyish-white and I used random() to get the position to achieve a twinkle effect.

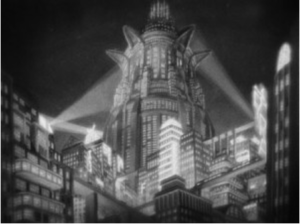
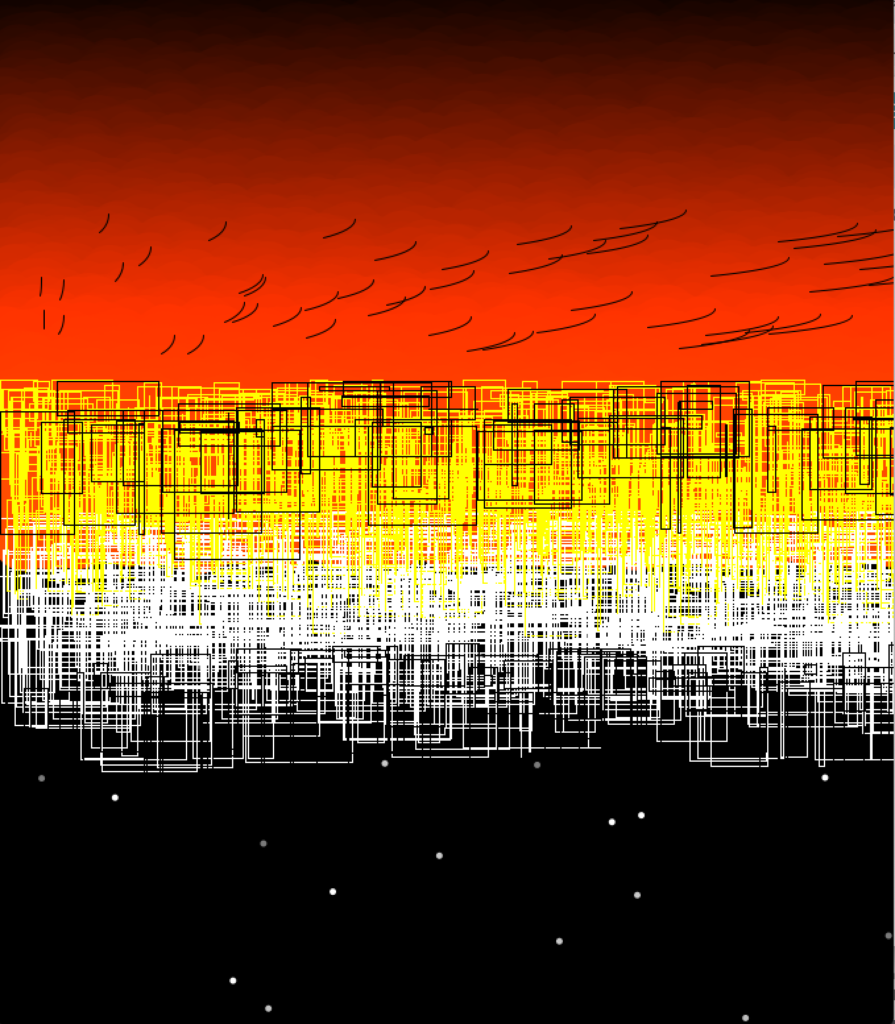
With so many ideas and sceneries in my mind, I settled on creating a cityscape and I was heavily inspired by the movie, Metropolis (1927). For what is it, some of the visuals and elements portrayed in the movie were very captivating to me and so, I decided to work with a cityscape with the colors achieving a reddish gradient, to paint some darker emotions. Then for creating a multitude of buildings of all sizes and shapes, I used loops and random() and the colors: yellow and black. Inspired by the seascape art I made earlier, I put in a mirror image of the cityscape but with tones of black and white. I put in stars as well. Finally, I used loops to create some arcs to portray some birds :))

Visuals from Metropolis (1927)

On the whole, I see the work as the two shades of the city – day and night, but I also interpret this as the underground city against the colossal buildings in Metropolis with the underground city stripped of all shades and tones of colors and working around the heavy, massive structures of the skyscrapers in the city, but with no light, just darkness. Here’s a video showing the final piece.

Screenshot of the final work


I’m very happy with how it turnt out, I love looking at it and seeing the shapes and colors. The more I look at it, different interpretations keep popping up in my head and I love that about this piece! Documenting this was pretty interesting because for this work, I hadn’t started off with a concrete idea but rather, I kept experimenting and I stuck to elements that were appealing, and over time, this work came to be. Here’s the code:

int offset = 30;


void setup() {
  size(680, 780);
  //noLoop();
}


void draw() {
  noStroke();
  background(0, 0, 0);

  sky();
  stars();
  buildings();
  birds();
}


void sky() {
  for (int i=0; i<height/2; i++) {
    for (int j=0; j<50; j++) {
      fill(i, i*0.2, 0);
      circle((5+random(24)+20*j), (i+random(24)), 50);
    }
  }
}


void stars() {
  for (int i=0; i<10; i++) {
    fill(255);
    ellipse(random(width), height/2+random(height/2), 5, 5);
    fill(122);
    ellipse(random(width), height/2+random(height/2), 5, 5);
    fill(200);
    ellipse(random(width), height/2+random(height/2), 5, 5);
  }
}


void buildings() {
  noFill();
  for (int i =0; i<width; i++) {
    stroke(255);
    //rect(i,height/2-10,random(50),random(50));
    rect(i, height/2-random(100)+100, random(100), random(100));
    stroke(255, 255, 0);
    rect(i, height/2-100-random(100)+100, random(50), random(100));
  }
  for (int i =0; i<width; i+=10) {
    stroke(0);//rect(i,height/2-10,random(50),random(50));
    rect(i+random(40), height/2-100+random(40), random(100), random(100));
    rect(i+random(40), height/2+100+random(40), random(50), random(100));
  }
}


void birds() {
  for (int i =0; i<width; i+=10) {
    stroke(0);
    arc(i+random(40), height/3-random(100), i, 40, radians(0), radians(45));
  }
}


Assignment Week 2 – Jade

Documentation:

For this assignment, I used sin, cos, radians, map and for loop functions to make up waves to simulate texture of clothes. I referred to this website for the basics of waves.

The most challenging part is to imagine what the outcome would be like when entering parameters for the map function, so I kept trying different values to achieve what I expect. I actually didn’t have a blueprint in my mind at first, instead, I was inspired as I adjusted the parameters. As I changed the rate of “frameCount” and the index “I”, the small rectangles started to gradually make up specific patterns.

The up-left corner of my work came out unexpectedly, but it caught my eyes for its regularity. At the beginning, it looks like this:

It moves like it’s knitting and sewing, so I thought that I can try to make patterns of textures. The first problem I encountered is that as the white rectangles move, they started to pile up, and eventually covered the entire screen, so it became all white after some time. To solve this, I introduced waves into color setting, where I wrote this line of code:

float color1 = map(cos(radians(frameCount)*5), -1, 1, 0, 255);

This line basically changes the color every time the draw function runs, so that they will never be able to fill the entire screen, but gradually changes.

But one pattern still seems too simple, so I decided to add more with different styles. I set the size to be (500, 500) to hold four patterns regularly.

The up-right corner is almost the same pattern with the left one in a different color, but I found it interesting that the waves of lines are harmonically connected. For the two textures below, I combined different parameters and they are knitting and moving in different ways. The left bottom one is like it is printed out, and the right bottom is made up of numerous dots. It takes some time for these two to form the final patterns.

Finally, I set them all to share the similar speed so that they can synchronize with each other as the pattern changes.

For my simple work of art, I chose to display textures of clothes in a dynamic way. For me, usually I pay more attention to the patterns and designs of clothes, not the textures, but texture is actually the most basic and significant element of clothes.

void setup() {
  size(500, 500);
  background(0);
}

void draw() {
  noStroke();
  for (int i=0; i<80; i++) {

    float wave1 = map(sin(radians(frameCount * 0.8 + i)), -1, 1, -100, 500);
    float wave2 = map(cos(radians(frameCount + 10*i)), -1, 1, -100, 500);
    float color1 = map(cos(radians(frameCount)*5), -1, 1, 0, 255);
    fill(color1);
    if (wave1 > 0 && wave1 < 250 && wave2 > 0 && wave2 < 250) {   
      rect(wave1, wave2, 6, 8);
    }
    
    
    float wave11 = map(sin(radians(frameCount * 0.8 + i)), -1, 1, -100, 500);
    float wave22 = map(cos(radians(frameCount)+i), -1, 1, -100, 500);
    float color2 = map(cos(radians(frameCount)*2), -1, 1, 0, 100);
    fill(color2);
    if (wave11 > 250 && wave11 < 500 && wave22 > 0 && wave22 < 250) {   
      rect(wave11, wave22, 5, 5);
    }
    
    
    float my_color1 = map(cos(frameCount * 2), -1, 1, 0, 255);
    float x = map(sin(frameCount * 0.8 + i), -1, 1, -100, 500);
    float y = map(cos(frameCount - 10 * i), -1, 1, -100, 500);
    fill(my_color1);
    if (y > 250 && y < 500 && x > 250 && x < 500) {
    rect(x, y, 2, 2);
    }
    
    float my_color2 = map(sin(frameCount * 10), -1, 1, 0, 255);
    float x1 = map(sin(radians(frameCount * 0.9)), -1, 1, -100, 500);
    float y1 = map(cos(radians(frameCount * i)), -1, 1, -100, 500);
    fill(my_color2);
    if (y1 > 250 && y1 < 500 && x1 > 0 && x1 < 250) {
    rect(x1, y1, 3, 3);
    }
  }
}


Week 2 Assignment: Beautiful Chaos

Week 2: Draw a Computer Graphic using Loops


Introduction:

As for the week 2 assignment, I must explore more features of processing.org. The hardcoded way of drawing sketches and graphics is time consuming and takes a lot of computer memory. In this assignment, I got the opportunity to explore how to repeat the functionalities to enhance the reusability of code. Furthermore, I explored some new mathematical functions which helped me put some sort of randomization in my graphics. This assignment not only aided in building my logic behind computer graphics, but also how to visualize a genuine look for the shapes.

The inspiration behind computer graphic image:

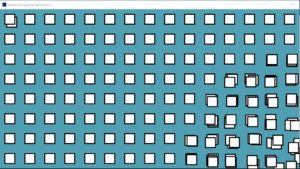
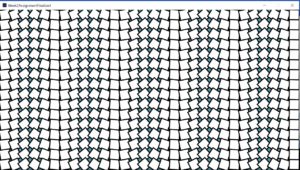
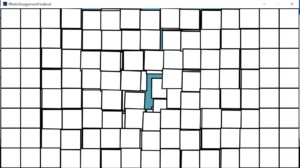
I should draw an old era computer magazines computer graphic via processing. The computer graphic I selected was from Computer Graphics & Art. The main point that drew me into it is its imperfection. The squares are not in perfect order, but it is still colorful and beautiful. It looks pleasing to the eye and its main attraction is its chaotic imperfection. In short, it represents a beautiful yet chaotic work of art. It does not have to be perfect to be beautiful.

Challenges and Problems:

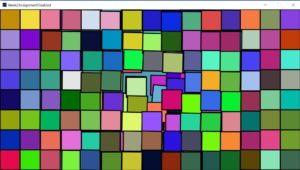
The computer graphic I selected is simple and consistent during visualization on screen but building the back end logic is challenging on its own. I faced issues while attaching each brick to the right place with some movement either in a horizontal or vertical direction which makes the center of image looks like its breaking apart. It was challenging for me to move the square shapes in random directions with random rotation. I worked more on the center of the wall as most of the random movement and rotation of bricks was concentrated at the center. Not only was giving more randomization at the center a challenging task, but also providing less randomization at the corners to give the computer graphic image a sense that it is breaking from the center was not easy either. At a point when I was using loops, I got stuck. Running the code while trying to move the shapes for infinite times made it hard for me to organize the code in a reusable pattern.

Procedure:

First, I read out the official processing built-in functions and their use to try and learn them better. In the very first step, I compiled a list of built-in functions which I thought would be useful later in my code. I took note of those built-in functions signature and parameter for further usage. The most frequent used function is the random () function. However, randomization always requires some initial value. I sketched out the logic and began sketching the graphic from the screen central point. I initialized each brick size and then used each brick central point to place every other brick next to each other. I placed all the bricks next to each other in vertical and horizontal directions by using two loops which iterates continuously in horizontal and vertical directions. This is ongoing until the bricks fill up the whole screen. The whole grid was constructed by the nested for () loop. During the placement of each brick, Brick Position () function is calculating how far the brick is from the screen center. Thus, based on that gap, the rotation and movement of brick is calculated by using the dist () function. The parameters I gave to dist() function was the position of the brick and screen central positions x and y coordinates. Later, I normalized the gap in the bricks, where if the gap is large, then random rotation and movement will be less.
 //Global Varible for Screen Width and height
float ScreenH,ScreenW;

//Global Varible for the size of one brick.
//Assuming width and height of each brick is same
int SizeOfBrick;

//Gobal Variable to calculate how much space between two bricks
float InterSpaceLengthScale;

//To find out Space between Brick and Centeral Screen Area
float BrickPosition(int brickx,int bricky)
{
  return dist(brickx,bricky, ScreenW/2, ScreenH/2);
}
This is achieved by multiplying the random values with the space normalized gap that is between each brick and screen central area. Meanwhile, to give each brick a random color scheme, I picked a random value of red, green, and blue from 0 to 255. Then, when each brick is placed on the right place with the right movement and rotation, I fill the brick with a random RGB value using fill () function.
void setup() {
  
  //Initializing the screen of given demensions
  size(1500, 800);
  strokeWeight(5);
  ScreenW=width;
  ScreenH=height;
  
  SizeOfBrick = 100;
  InterSpaceLengthScale=SizeOfBrick;
  
  // Changing the origin of rectangle shape towards center
  rectMode(CENTER);
  
  background(#519FB2);
 
  DrawBricksGrid();
}
What was interesting to learn was that I can use functions inside any function, unless the function is used as a parameter return value in a required data type. I found out that processing built-in draw () function and for() loop works in the same way. The only difference was that draw () function works for infinite time with non-termination, while in for () loop we give it a termination condition. So, the internal for () loop terminates when the height of screen fills up while the outer for() loop terminates when the screen width fills up.

Bricks Movement:

Inside the nested for loop (), I gave a random movement and rotation to each new brick using translate () and rotation() function. The translate () function moves the brick to a random position from its original position. In the image below, I used Brick Movement() function which is returning some random new position based on the original position of the brick and the gap from the screen center.
//Calculating InterSpace Scale.
void BrickSpan(float InterSpaceLength)
{
  if (InterSpaceLength > SizeOfBrick*6)
  {
        InterSpaceLengthScale = InterSpaceLengthScale * .01;
  }
  else
  {
    InterSpaceLengthScale= 1/InterSpaceLength * 100;
  }
}


//Bricks Movement in 2D place along X and Y axis
float BrickMovement()
{
  return  random(50) * InterSpaceLengthScale;
}


Bricks rotation:

Each brick is rotating to some angle which is calculated based on the original brick position and central screen position. I implemented BrickRotation() function which returns a random angle value by multiplying the new random angle with the normalized gap between brick original position and screen central point. As I drew the graphic on a 2D plane, I made use of pop Matrix() and pushMatrix() when drawing each brick to its current and previous state of the 2D plane coordinate system. The random transformation applies to each and every brick inside the nested for() function.
//Rotation of Brick
float BrickRotation()
{
  return random(PI/60) * InterSpaceLengthScale;
}

void DrawBricksGrid()
{
   for (int i=SizeOfBrick/2; i<ScreenW; i=i+SizeOfBrick) 
  {
    
    for (int j=SizeOfBrick/2; j<ScreenH; j=j+SizeOfBrick)
    {
      
      float gap = BrickPosition(i,j);
      BrickSpan(gap);
      
      float r = random(256);
      float g = random(256);
      float b = random(256);
      fill(r,g,b);
      pushMatrix();
     
      translate(i+BrickMovement(), j+BrickMovement());
      rotate(BrickRotation());
     
      rect(0, 0, SizeOfBrick, SizeOfBrick);
      popMatrix();
    }
  }
}


Final Artwork Images :


Conclusion:

In this assignment, I understood the proper use of for() loops to draw shapes multiple times, how to apply transformation of shapes, how to move objects from one position to another, as well as object rotation. I can better organize my code and enhance its reusability by implementing custom functions. Moreover, I got the knowledge on how to apply randomization in function calling, and on how to draw shapes to give the art piece a consistent look.Thus, I learned how to work on what you see is what you get pattern by calling custom implemented functions and using built in functions. Finally, I can also reserve the 2D plane coordinate system state by using popMatrix() and pushMatrix() functions.

Final Masterpiece:

Full Code Packed All Together:

//Global Varible for Screen Width and height
float ScreenH,ScreenW;

//Global Varible for the size of one brick.
//Assuming width and height of each brick is same
int SizeOfBrick;

//Gobal Variable to calculate how much space between two bricks
float InterSpaceLengthScale;

//To find out Space between Brick and Centeral Screen Area
float BrickPosition(int brickx,int bricky)
{
  return dist(brickx,bricky, ScreenW/2, ScreenH/2);
}

  //Calculating InterSpace Scale.
  void BrickSpan(float InterSpaceLength)
  {
    if (InterSpaceLength > SizeOfBrick*6)
    {
          InterSpaceLengthScale = InterSpaceLengthScale * .01;
    }
    else
    {
      InterSpaceLengthScale= 1/InterSpaceLength * 100;
    }
  }
  
  
  //Bricks Movement in 2D place along X and Y axis
  float BrickMovement()
  {
    return  random(50) * InterSpaceLengthScale;
  }


//Rotation of Brick
float BrickRotation()
{
  return random(PI/60) * InterSpaceLengthScale;
}

void DrawBricksGrid()
{
   for (int i=SizeOfBrick/2; i<ScreenW; i=i+SizeOfBrick) 
  {
    
    for (int j=SizeOfBrick/2; j<ScreenH; j=j+SizeOfBrick)
    {
      
      float gap = BrickPosition(i,j);
      BrickSpan(gap);
      
      float r = random(256);
      float g = random(256);
      float b = random(256);
      fill(r,g,b);
      pushMatrix();
     
      translate(i+BrickMovement(), j+BrickMovement());
      rotate(BrickRotation());
     
      rect(0, 0, SizeOfBrick, SizeOfBrick);
      popMatrix();
    }
  }
}

void setup() {
  
  //Initializing the screen of given demensions
  size(1500, 800);
  strokeWeight(5);
  ScreenW=width;
  ScreenH=height;
  
  SizeOfBrick = 100;
  InterSpaceLengthScale=SizeOfBrick;
  
  // Changing the origin of rectangle shape towards center
  rectMode(CENTER);
  
  background(#519FB2);
 
  
}

void draw()
{
  frameRate(1);
  DrawBricksGrid();
  
  
}

Thank you and hope you enjoyed it 🙂


Self-Portrait Chi-Ting Tsai

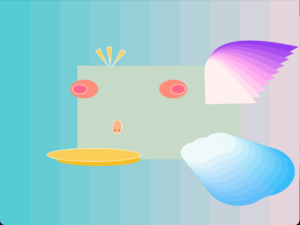
In general, I decided to not do a realistic or cartoonish portrait as I think animals would reflect more of my spirits and character.

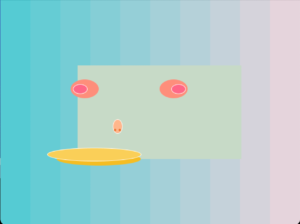
At first, I drew a pair of split eyes and a red nose. I intentionally left out the ears because my friends would always make fun of me for not understanding the conversation and recognizing people. I also make the background with color gradient rectangles. I enjoy bubbly and dreamy colors. Hence the background. 

Then, I was pondering over what I should do for its legs and tail. Not being inspired by anything, I started messing around with beziers and using for loops to create different effects. It proceeded to become wings and clouds in the image below.  

Oh! Also, three strands of hair popped out from the scalp.

This self-portrait reflected all my social character traits and my free spirits that will keep on exploring new avenues.

Challenges:

It was difficult to fully translate and execute my design in processing. My technical skills could not match my imagination, so I chose to try different functions to gain inspiration instead. I had a strong urge to drag the shapes around as I am used to drawing with Illustrator and Pro-Create. However, once I got familiar with the coordinate system, everything else went smoothly.

week 1: self portrait

This week’s assignment was to make a self portrait on processing. For my self portrait, I went with an emoji-type of style. (It’s more of a smiley face than a portrait, honestly)

I started by making a circle for the face , with a skin color fill. Then, I made the eyes , irises and highlights with circle().

I used a rectangle with rounded edges and an arc for the hair. (I was confused with the arc and would’ve liked it to look differently, but it’s okay)

I used ellipse() for the ears and earrings, and I made a variable (space) for the ear spacing.

I made the smile with arc().

I used different fill colors using the color selector, and  I tried different strokes.

I wanted to add triangles or lines for eyelashes, but I couldn’t figure out how to place them so I scrapped that idea.

(This is the final product! 


not a super accurate representation of me, but it’ll work.

CODE:

(ill just paste it here)

size(480, 480);
background(214, 244, 255);
int space = 180;

fill(57, 37, 37);
rectMode(CENTER);
rect(width/2, height/2, 380, 390, 120, 120, 12, 18);
//arc(width/2, 60, 100, 75, 0, PI, PIE);
//hair (long part)
fill(240, 216, 184);
noStroke();
circle(width/2, height/2, 350);
//face
ellipse(width/2-space, height/2-20, 40,60);
ellipse(width/2+space, height/2-20, 40,60);
//ears
fill(57,37,37);
ellipse(width/2-space, height/2, 10,10);
ellipse(width/2+space, height/2, 10,10);
//earrings
stroke(100);
fill(255);
circle(width/2-60, height/2-50, 80);
circle(width/2+60, height/2-50, 80);
//eyes
stroke(180);
fill(116, 75, 48);
circle(width/2-60, height/2-40, 50);
circle(width/2+60, height/2-40, 50);
//eye color
fill(255);
circle(width/2-70, height/2-50, 10);
circle(width/2+50, height/2-50, 10);
//eye highlight
fill(232, 140, 168);
arc(240, 280, width/4+50, height/4+50, 0, PI, CHORD);
//smile
fill(57, 37, 37);
noStroke();
arc(width/2, 60, 280, 220, 0, PI, PIE);
//bangs
stroke(0);
fill(57, 37, 37);
//hair

Week 1: Self Portrait Ant Man – Theyab Alalawi

Introduction:

In this interactive media course, I am learning about science behind graphics. In this first week assignment, I revised my basic concepts of math and geometry to prepare myself for basic graphical shapes. I worked on processing software in java programming language and draw a self-portrait using basic shapes. The sketching art with coding is totally different by sketching art with manual paper pencil work. I found the way of graphical coding interesting and fun and at same time I faced some hurdles while understanding the root science of graphics and art.

The idea for self-portrait:

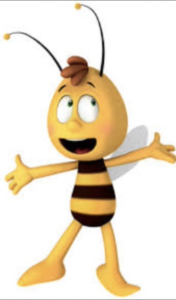
My spare time often spent with my little brother. I was watching cartoon with him and I observe that there are many cartoon characters whose looks like humans. It was an animation cartoon movie in which ants and insects doing small activities in their farms. I planned to sketch an ant man with some aged look. The movie inspired me a lot and I researched a little more on google about ant cartoons. I found many ant characters, some have round faces, and some have rectangle faces.

Later I sketched my idea and brainstorm on my idea. I decided to portrait a man looking ant character with hairs, eyes and many legs and arms. Below are some characters from which I inspired for my self-portrait.


Challenges and Problems:

The processing code is in java programming language. It’s a little challenging for me to understand the syntax and code flow in processing while using java programming. The syntax is bit different from native java language. The big challenge I faced during connecting different shapes together to visualize my portrait. Very hard to memorize each and every pixel x and y values on the screen and doing math calculation to move on to specified next pixel location or point on screen. My most of time spent on sketching face. Testing my code on processing is also very hectic task for me as I have to run the code after each new statement of code. It’s a challenging task for me to understand the planes structures and how coordinate system works for processing to draw shapes. The documentation of processing is not so elaborative, they just mentioned about the functions calling and syntax. Its challenging for me to try multiple angles and values on same functions to get the desired results as this thing reduced the reusability of my code.

Procedure:

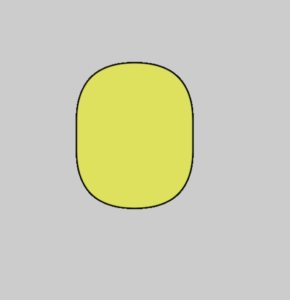
The very first thing I did is drew a rectangular shape for face. I gave large value for radius of rectangle to make the corners round. I used in my code local variable in float data type to store the location of rectangle.

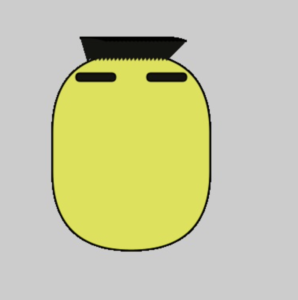
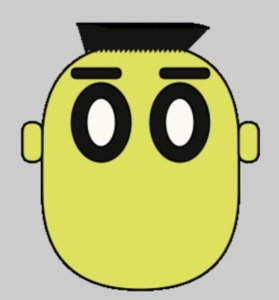
I fill the whole face with yellow color and eyes with white and black combination. Then I code two rectangles for eye brows and fill the rectangles with black color. After placing eye brows I started work on hairs on the upper part of rectangular face shape. For hairs I outline a small part of arc curve to place the hairs in zig zag pattern on face head location. I repeated the arc shapes multiple times to fill the head face in same pattern to outline hairs on face head.

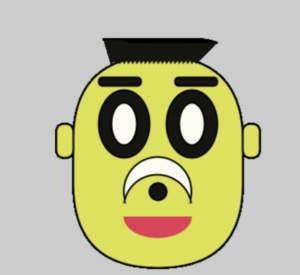
Then based on the rectangle location is code, I code two arcs of circular shapes for eyes. I gave angle values for arc in radians. Then I placed the arcs on right locations relative to the rectangular shape. Then I fill the colors of the shapes. I made eyes a little large from normal eyes size to give look n feel of an ant man. After placing eyes on right place on face I stored the eyes location x and y values to new temporary variables. Then I worked to draw ears which are of rectangular shape and placed on right places on each side of rectangular face relative to the eyes location.

Then I moved forward to sketch nose and mouth parts. For this I code arcs and place one after each other and filled them with white and black combination to sketch nose with moustache. Fill the moustache part white and nose with black color. For mouth I trim the circular arc shape in half and fill the lower half circle with reddish color.

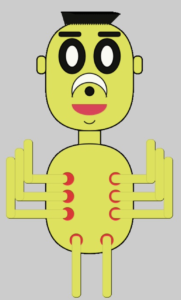
After completing the face shape, I worked on body shape. While coding circular and rectangular shapes, I gave different values to stroke weight function. I used arc functions to distinguish the origins of legs and arms on body. I placed 3 arms on each side of body and 2 legs below the body.

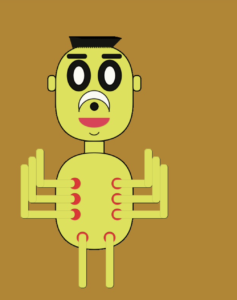
Finally I gave background color to make the portrait more focusable as my self-portrait was most of in yellow color.

Final Portrait:

After connecting multiple curves and shapes, I came up with my final self-portrait which is according to my brainstorm idea and imagination.

Code

void setup()
{
size(700,800);
background(#B7841E);
}


void draw()
{
fill(#DDE33E);
strokeWeight(2);


//drawing face
rect(150,120,200,250,450);
float fcy=150;
float fcx=120;

//drawing hairs
fill(#141510);
arc(fcy+145,fcx+10,100,60,radians(260),radians(300));
arc(fcy+140,fcx+10,100,60,radians(260),radians(300));
arc(fcy+135,fcx+10,100,60,radians(260),radians(300));
arc(fcy+130,fcx+10,100,60,radians(260),radians(300));
arc(fcy+125,fcx+10,100,60,radians(260),radians(300));
arc(fcy+120,fcx+10,100,60,radians(260),radians(300));
arc(fcy+115,fcx+10,100,60,radians(260),radians(300));
arc(fcy+110,fcx+10,100,60,radians(260),radians(300));
arc(fcy+105,fcx+10,100,60,radians(260),radians(300));
arc(fcy+100,fcx+10,100,60,radians(260),radians(300));
arc(fcy+95,fcx+10,100,60,radians(260),radians(300));
arc(fcy+90,fcx+10,100,60,radians(260),radians(300));
arc(fcy+85,fcx+10,100,60,radians(260),radians(300));
arc(fcy+80,fcx+10,100,60,radians(260),radians(300));
arc(fcy+75,fcx+10,100,60,radians(260),radians(300));
arc(fcy+70,fcx+10,100,60,radians(260),radians(300));
arc(fcy+65,fcx+10,100,60,radians(260),radians(300));
arc(fcy+60,fcx+10,100,60,radians(260),radians(300));
arc(fcy+55,fcx+10,100,60,radians(260),radians(300));
arc(fcy+50,fcx+10,100,60,radians(260),radians(300));
arc(fcy+45,fcx+10,100,60,radians(260),radians(300));

//drawing eye brows
fill(#141510);
rect(fcy+30,fcx+25,50,10,450);

fill(#141510);
rect(fcy+120,fcx+25,50,10,450);

//drawing ears
fill(#DDE33E);
rect(fcy-20,fcx+80,20,40,80);

fill(#DDE33E);
rect(fcy+200,fcx+80,20,40,80);

//drawing eyes
fill(#141510);
arc(fcy+60,fcx+80,60,80,radians(0),radians(360));
fill(#FAFAF2);
arc(fcy+60,fcx+80,30,50,radians(0),radians(360));
fill(#141510);
arc(fcy+140,fcx+80,60,80,radians(0),radians(360));
fill(#FAFAF2);
arc(fcy+140,fcx+80,30,50,radians(0),radians(360));

//drawing nose upper
fill(#FAFAF2);
arc(fcy+100,fcx+160,80,80,radians(160),radians(380));
fill(#DDE33E);
arc(fcy+100,fcx+180,80,80,radians(190),radians(350));
//drawing nose
fill(#141510);
arc(fcy+100,fcx+160,20,20,radians(0),radians(360));

//drawing nose
fill(#141510);
arc(fcy+100,fcx+160,20,20,radians(0),radians(360));

//drawing mouth
fill(#EA3254);
strokeWeight(0);
arc(fcy+100,fcx+190,80,50,radians(0),radians(180));

strokeWeight(2);
fill(#DDE33E);
arc(fcy+100,fcx+220,30,30,radians(30),radians(140));


//drawing neck
fill(#DDE33E);
rect(fcy+75,fcx+250,50,40,0);

fill(#DDE33E);
rect(fcy,fcx+280,200,250,450);
float fby=fcy,fbx=fcx+280;

//drawing arms
fill(#ED1D2B);
strokeWeight(0);
arc(fby+50,fbx+80,30,30,radians(0),radians(360));
arc(fby+160,fbx+80,30,30,radians(0),radians(360));

arc(fby+50,fbx+120,30,30,radians(0),radians(360));
arc(fby+160,fbx+120,30,30,radians(0),radians(360));

arc(fby+50,fbx+160,30,30,radians(0),radians(360));
arc(fby+160,fbx+160,30,30,radians(0),radians(360));
float army=fby+50,armx=fbx+80;
fill(#DDE33E);
strokeWeight(0);
rect(army-100,armx-10,100,20,50);
rect(army-120,armx+30,120,20,50);
rect(army-140,armx+70,140,20,50);
//arms 1
rect(army-100,armx-90,20,100,50);
rect(army-120,armx-70,20,120,50);
rect(army-140,armx-50,20,140,50);
//arm 2
rect(army+100,armx-10,100,20,50);
rect(army+100,armx+30,120,20,50);
rect(army+100,armx+70,140,20,50);
//arm 3
rect(army+180,armx-90,20,100,50);
rect(army+200,armx-70,20,120,50);
rect(army+220,armx-50,20,140,50);

//legs
fill(#ED1D2B);
strokeWeight(0);
arc(fby+70,fbx+220,30,30,radians(0),radians(360));
arc(fby+140,fbx+220,30,30,radians(0),radians(360));
float legy=fby+70,legx=fbx+220;
fill(#DDE33E);
strokeWeight(0);
rect(legy-10,legx-10,20,140,50);

rect(legy+60,legx-10,20,140,50);
}


Conclusion:

This assignment was a fun for me. It supports me to enhance my imagination power and transformed my thinking as an artist mindset. I came up with lot of more ideas while doing this assignment. I made a grip on processing software and basic of java coding for graphics. I comprehend the use of points on 2D plane. This assignment increase my knowledge about how to combine basic shapes to sketch more useful shapes for visualization of different objects.

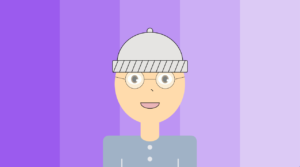
Week 1: Self-Portrait

Description:

For the first assignment, the prompt was to create a self-portrait in Processing using only basic shapes (ellipses, lines, rectangles, arcs…), which might seem easy at first but gets slowly but surely harder.

Size:

I opted for a basic 1280×720 size (16:9 aspect ratio), also known as the standard HD.

size(1280,720);

Background:

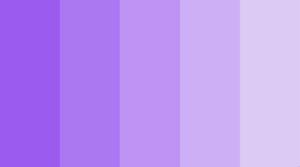
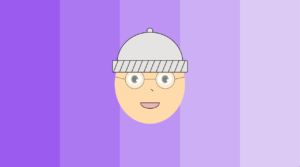
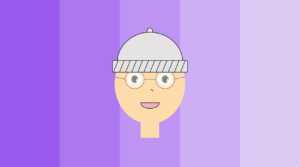
For the background, I decided to go for a “blocky” left-to-right gradient to match the rest of the portrait, instead of switching between colors gradually. The five shades of purple (for NYUAD) I used were: #9b5bee, #ac78f1, #bd94f3, #ccaff5, #dccaf5 (darker to lighter).

// Background
noStroke();
fill(#9b5bee);
rect(0,0,256,720);
fill(#ac78f1);
rect(256,0,512,720);
fill(#bd94f3);
rect(512,0,768,720);
fill(#ccaff5);
rect(768,0,1024,720);
fill(#dccaf5);
rect(1024,0,1280,720);
Hat:

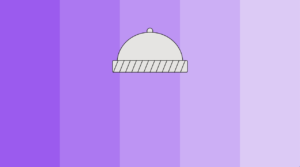
In order to draw the Beanie, I mainly used ellipses, arcs, rectangles, and a set of diagonal lines. The color used to fill the hat is platinum (a light shade of yellowish-gray). Its hex code is #e5e4e2. For the diagonal lines, I used a for loop to avoid unnecessary repetition.

// Hat
fill(#e5e4e2);
ellipse(width/2,height/2-225,25,25);
arc(width/2, height/2-90, 280, 260, PI, 2*PI);
rect(width/2-160,height/2-100,320,50,6,6,6,6);
for(int i=0; i<=300; i+=26){
line(width/2-136+i,height/2-100,width/2-156+i,height/2-50);
}
Face & Eyes: 

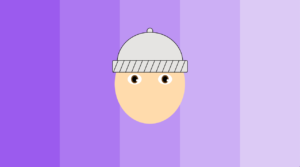
To match my skin tone, I have used the color with the hex code #ffdbac, then #6e4318 for brown eyes. In terms of shapes, ellipses were sufficient to do the iris and the pupils. I used “width/2” and “height/2” variables to center the portrait in the display window.

// Face
fill(#ffdbac);
ellipse(width/2, height/2, 300, 340);

//Eyes
fill(255);
ellipse(width/2-65, height/2-20, 60, 45);
ellipse(width/2+65, height/2-20, 60, 45);
fill(#6e4318);
ellipse(width/2-65, height/2-20, 30, 35);
ellipse(width/2+65, height/2-20, 30, 35);
fill(0);
ellipse(width/2-65, height/2-20, 20, 25);
ellipse(width/2+65, height/2-20, 20, 25);
fill(255);
ellipse(width/2-65+11, height/2-15, 10, 10);
ellipse(width/2+65+11, height/2-15, 10, 10);
noFill();
Glasses:

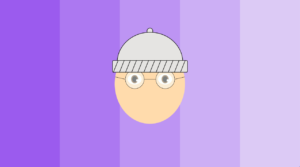
I have set the transparency (alpha) to half (127) to get realistic glass color. The color used is #f6feff. I have used two ellipses, 2 diagonal lines, and one straight line.

// Glasses:
fill(#f6feff,127);
stroke(1);
ellipse(width/2-65, height/2-20, 80, 80);
ellipse(width/2+65, height/2-20, 80, 80);
line(width/2-65+40,height/2-20,width/2+65-40,height/2-20);
line(width/2-65-40,height/2-20,width/2-65-83,height/2-30);
line(width/2+65+40,height/2-20,width/2+65+83,height/2-30);
Nose & Mouth:

To draw a clear nose and mouth, I have increased the stroke weight to 2, then used an arc as well as lines to draw them. The color used for the mouth is #ebb5b8.

//Nose
noFill();
strokeWeight(2);
stroke(10);
arc(width/2, height/2+30, 25, 12, 2+PI, 2*PI);

// Mouth
fill(#EBB5B8);
arc(width/2, height/2+80, 80, 50, 0, 3.14);
line(width/2-40, height/2+80, width/2+40, height/2+80);
Neck: 

A single rectangle was enough!

// Neck
fill(#ffdbac);
noStroke();
rect(width/2-40,height/2+150,80,80);
Shoulders & Shirt:

I have used a couple of ellipses, an arc, and a rectangle with rounded edges. The colors used were: #a0b2c6 for the shirt, and #e4e6eb for the buttons.


// Shoulders
fill(#a0b2c6);
rect(width/2-200,height/2+220,400,180,28,28,28,28);
fill(#ffdbac);
arc(width/2, height/2+220, 80, 50, 0, PI);

// Shirt
fill(#e4e6eb);
ellipse(width/2, height/2+270, 20, 20);
ellipse(width/2, height/2+320, 20, 20);
stroke(#e4e6eb);
strokeWeight(5);
line(width/2-120, height/2+320,width/2-120,height);
line(width/2+120, height/2+320,width/2+120,height);