Before we began to work, we needed to sort out a grand variety of details. Which materials were we going use? How would we use them? When would we meet and build our project? Given that Lily is a senior and has her capstone paper due in less than 2 days, and her presentation a few days before the final submission, our team needed to make sure we were properly managing our time and planning realistic deadlines according to our schedule. We wrote a detailed outline with parts of our project and internal deadlines that we plan to keep in order to make our project the best final project. During this initial planning meeting, we also gave our project the name Dance Breaker. It is an ode to breakdancing AND hints to how the game will work: the music will stop (break) and you need to press the sensors to un-break it. Get it?
We also created our internal deadline system into google calendar and set working hours. Once we had our work cut out for us, we began the execution of our plan.
Building Progress
Game Mechanics:
We worked mostly on the P5.js code for the songs and serial connection. To do this he constructed a board with smaller sensors and pieces from a previous project that would allow for testing on a smaller scale. He also began to work with computer vision. The current p5.js sketch loads pixels and has a light threshold akin to previous class exercises. It took a long time to figure out how to mirror the image in order to have a comprehensive experience. Furthermore, he built conditional statements so that all sensors need to be pressed in order for a song to play. The arduino code should not require any changes after today except for the addition of the reward system.
Next steps for the game mechanics are:
Implement a functioning random timer (which was already created but not aligned with the music) to stop the song randomly and resume the game.
Randomize the sensors that need to be pressed in order for the music to continue.
Add a design to the computer vision beyond a threshold.
void setup() {
  Serial.begin(9600);

}
void loop() {
  int oneValue = analogRead(A0);

  int twoValue = analogRead(A1);

  int threeValue = analogRead(A2);

  int fourValue = analogRead(A3);

  int fiveValue = analogRead(A4);


    int sensorValue = oneValue;
    Serial.print(sensorValue);
    Serial.print(",");
    sensorValue = twoValue;
    Serial.print(sensorValue);
    Serial.print(",");
    sensorValue = threeValue;
    Serial.print(sensorValue);
    Serial.print(",");
    sensorValue = fourValue;
    Serial.print(sensorValue);
    Serial.print(",");
    sensorValue = fiveValue;
    Serial.print(sensorValue);
    Serial.println();
    delay(1);

  }
Physical Component: Dance Mat and Projector
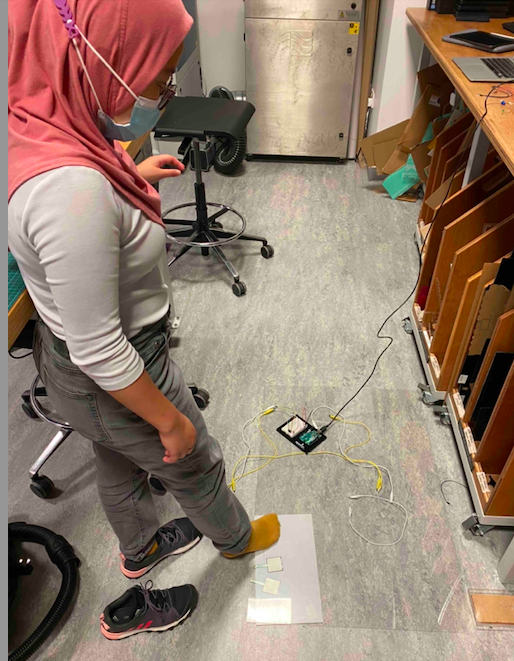
We booked the necessary materials (a vertical projector, a camera) through the portal.
We also picked up the necessary sensors and acrylic to build our dance mats. We ran some simple tests with the materials in order to make sure that they work as imagined, and have begun to build the illustrator sketches for the laser cutting.
Next steps for the physical components are:
Finish the illustrator design and laser cut the materials
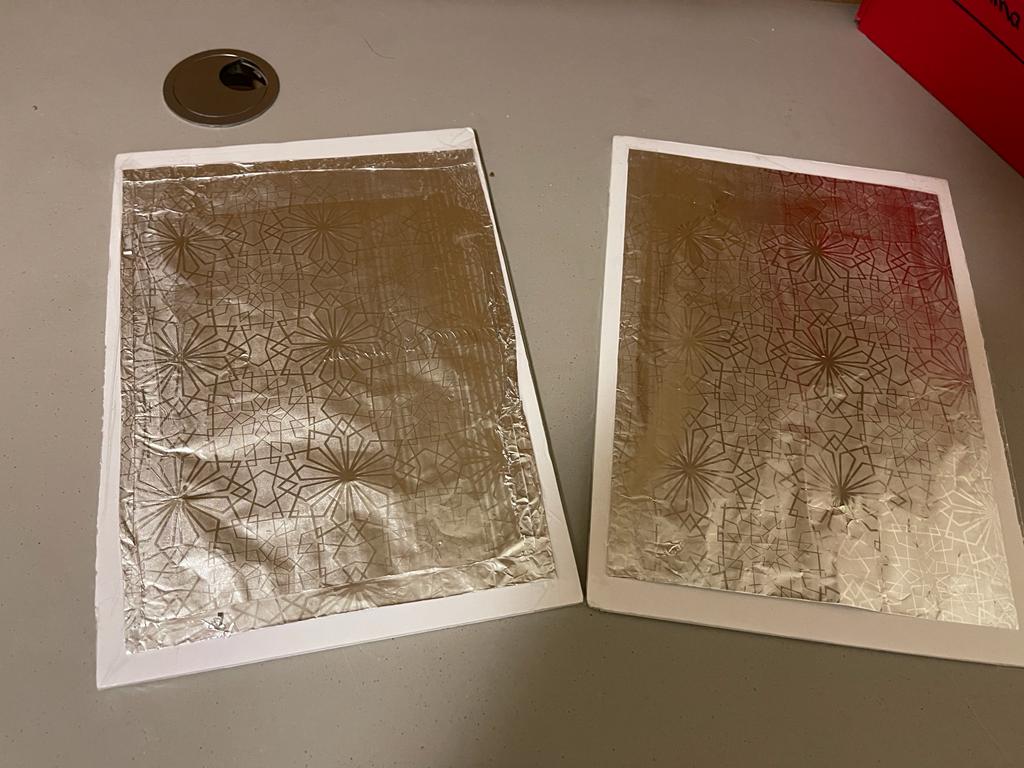
In week 8, we were given task which involved using Arduino and hardware. We had to create a unique & creative type of switch which could be operated without the use of our hands. By using this switch, we could turn the led on and off as required. So, I mainly learnt about building a simple led circuit using both the breadboard and resistor. I have built an aluminium foil-based switch platform separated by a non-conductive foam which is operated by force. So, the switch on happens by applying force on the platform.
IDEA:
I decide to make my own switch using conductive foils on cutted foam boards which was then separated by a non-conductive material. One side of the stranded wires were stuck to the foam board with the aluminium, using a clear tape and the other side of it which was stripped was connected with the jumper wires stripped using an electrical tape. At last, due to force, the terminals would come in contact with each other and circuit would be complete, thus LED would turn on and as the person stands up, the led would turn off.
INSPIRATION:
COVID-19 has become our new normal. Wearing masks, social distancing, constant use of cleaning wipes and sanitizers until our hands dry out is now integrated into our daily routines. This project was inspired by the COVID-19 regulations, specifically the social distancing requirement. In public seating, there is a required empty seat to be set empty between an individual and the person sitting next to them. What is currently being used are stickers and/or tape indicating on which seats it is permitted to sit. This project aims to improve this application. Every time someone sits on an undesignated seat, the LED lights up to tell the person to change their seat. This project’s purpose is to further develop and add technology to accommodate our new normal.
CHALLENGES & PROBLEMS:
The concept I had finalized for completing this task involved was the use of two aluminium foils which had to be wrapped around a carboard sheet and separated by a non-conductive material. Also, I had to find a way to stick the wires to the aluminium foil as soldering would not make them hold on the foil. Thus, since I had not worked on wiring and hardware much before, using the hardware was new for me. Another things I had to be very careful about is not to mix the +ve and -ve supplies as it could lead to the system getting damaged. The jumper wires were not fitting the Arduino board completely which made me put some force which bended some of them. So , now I take on the lesson that it only needs to be in-tact, no need to be fully on. To conclude, the entire process of sticking wire to the aluminium foil took a lot of time as the tape was not sticking to the foil. Thus, this was a very important process as without this, the switch won’t work for me, but eventually it all worked out.
PROCEDURE:
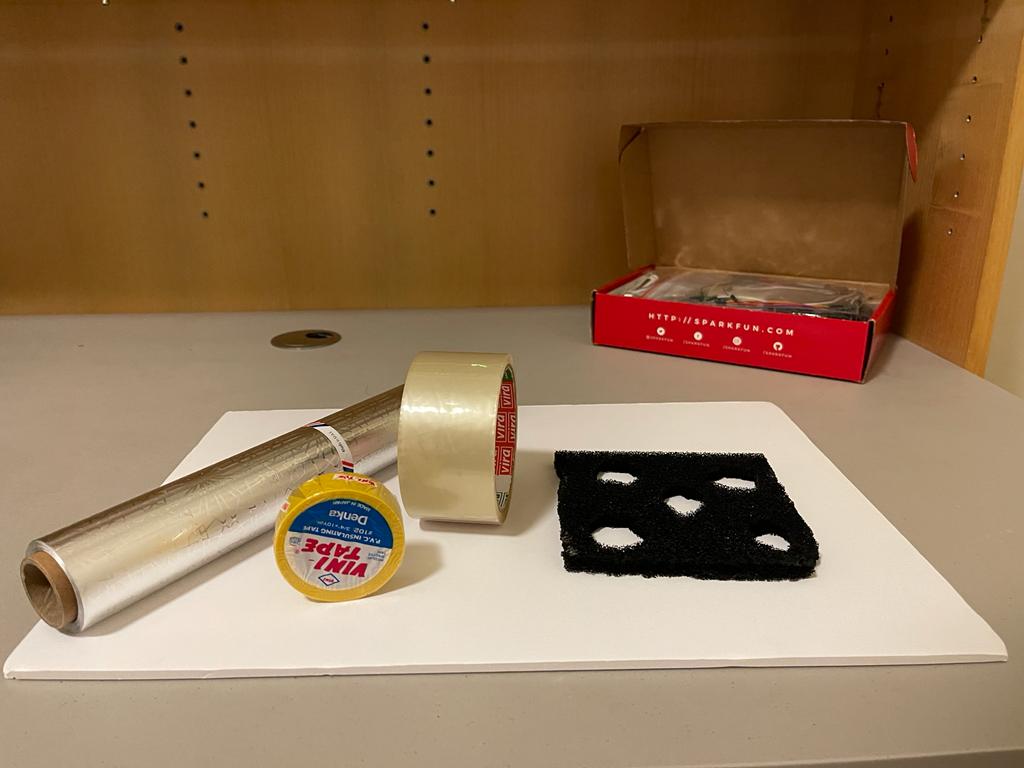
The first target was to blink an LED using Arduino and to do that I have gathered the following hardware:

Arduino board - LED - Resistor of value 330 Ohms -Jumper wires - USB Cable

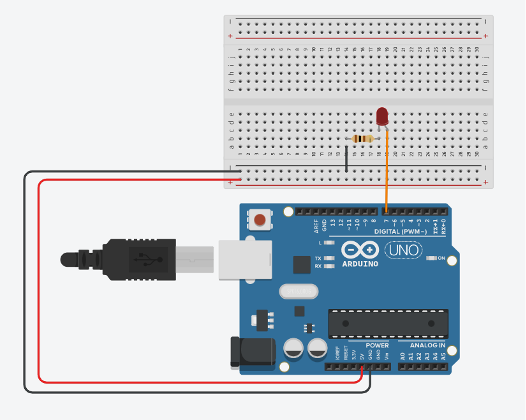
The circuit diagram which we referred was as following:
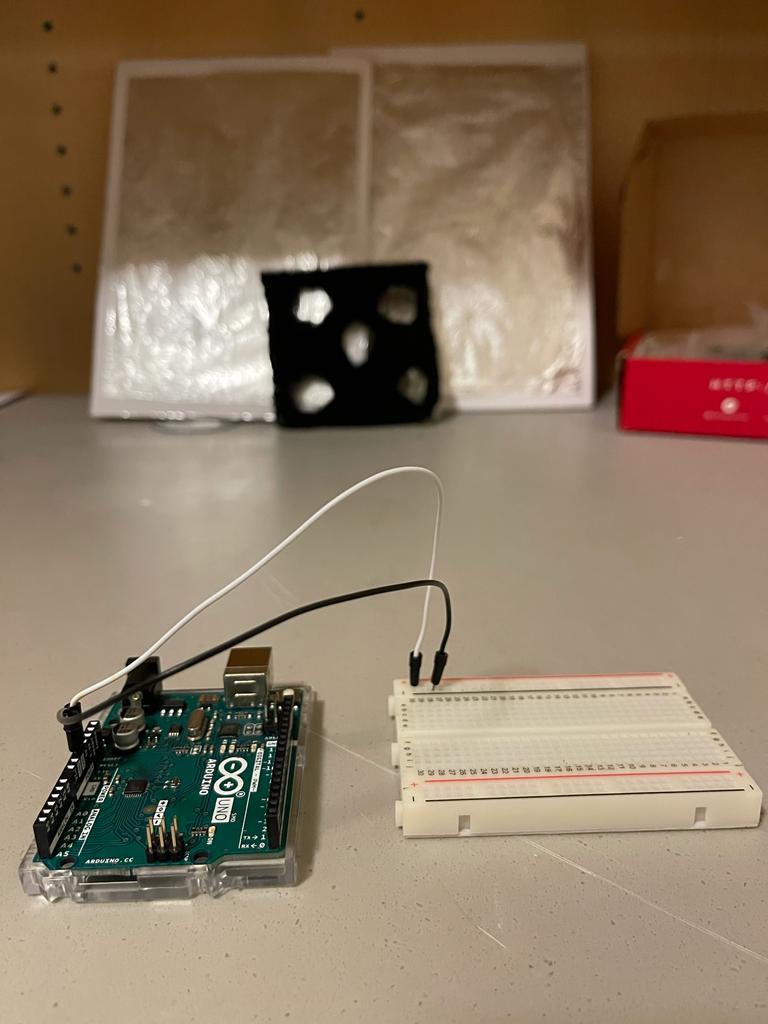
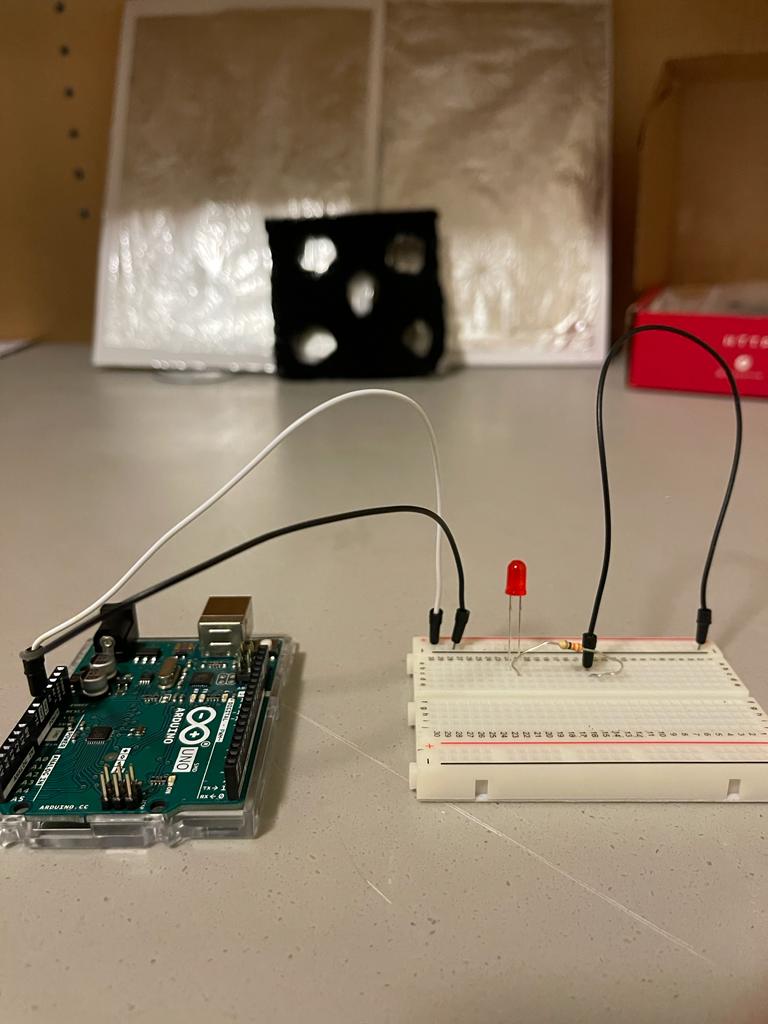
So, I used the hardware to power the + and – rails of the breadboard so that the entire circuit can use + and – from these rails if and when required in future connections. In the following image, the white wire goes into the +ve rail and the black wire goes into the -ve rail.
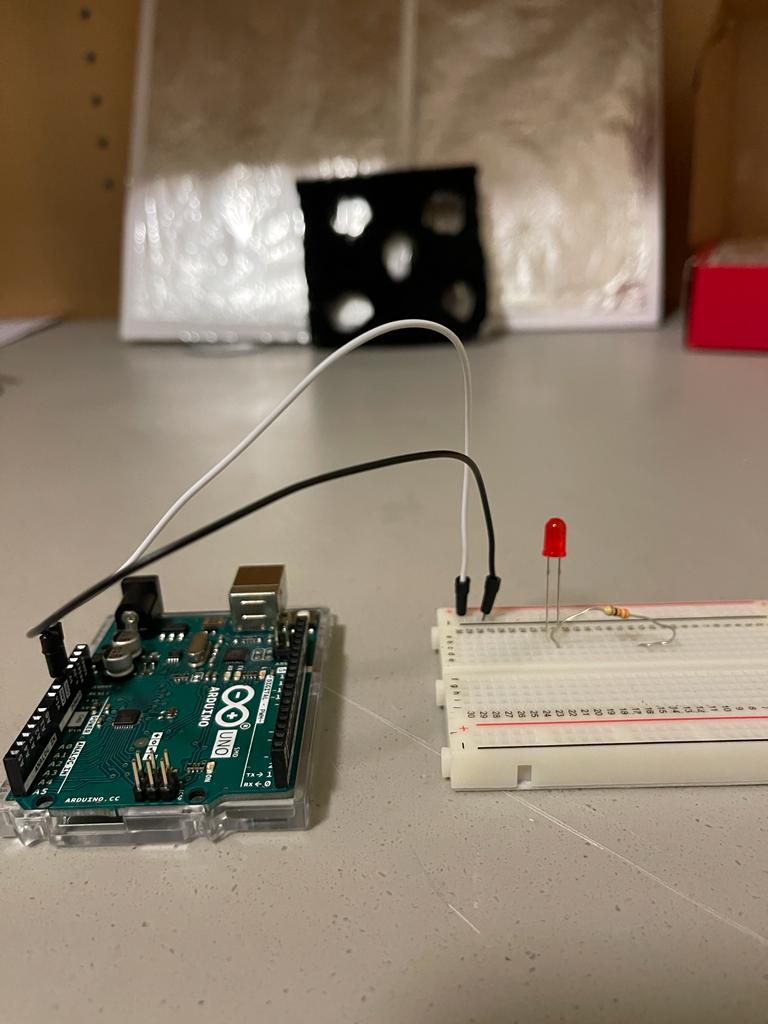
Next, we used a led, identified its Anode and Cathode (cathode has the shorter leg), and connected a resistor with it as shown. Resistor is used to limit the current through the led. We chose a value of 330 ohms as we read that led requires 20 – 25 mA of current for proper operation so resistor value of 100 ohms to 330 ohms work well.
Then I connected the other end of resistor to the ground to give it a -ve or GND signal
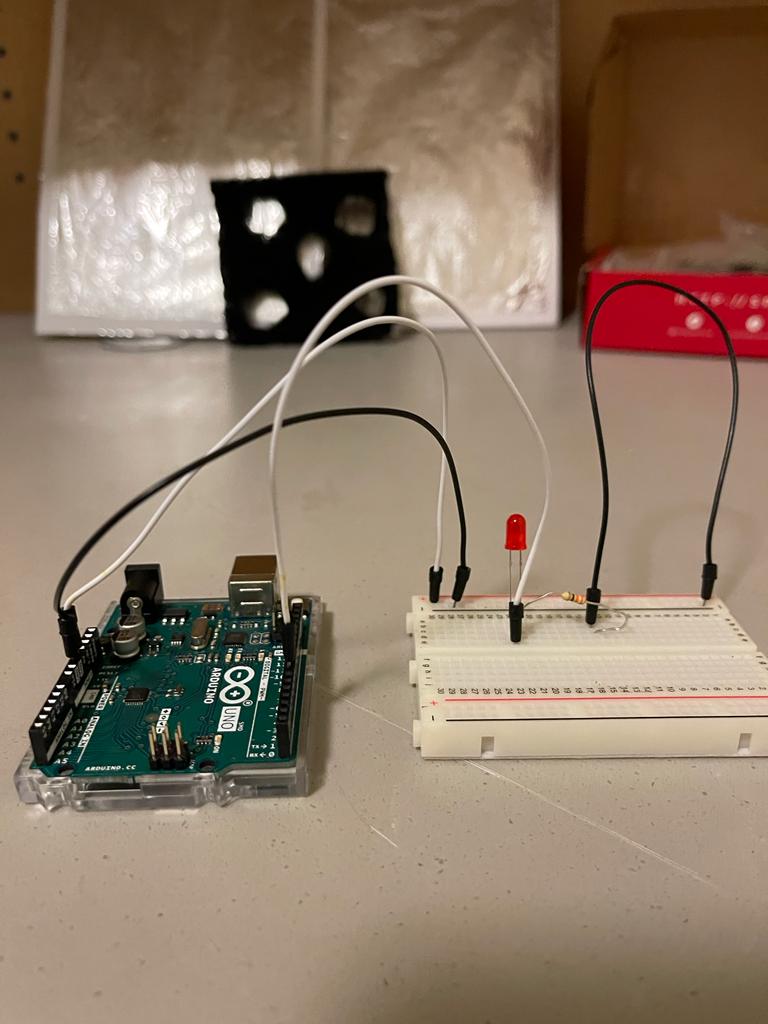
In this step, I connected the digital pin 7 from Arduino to Anode of led using a yellow jumper wire as shown.
Afterwards, I wrote a simple program to blink the led connected to digital 7 and uploaded it to our Arduino board by using the following settings on Arduino software. I selected usbmodem 143141 (Arduino Uno)
// C++ code
//
void setup()
{
  pinMode(7, OUTPUT);
}

void loop()
{
  digitalWrite(7, HIGH);
  delay(1000); // Wait for 1000 millisecond(s)
  digitalWrite(7, LOW);
  delay(1000); // Wait for 1000 millisecond(s)
}
Once the code was uploaded, we could see the led blinking on and off with a gap of 1000 ms
Once my LED circuit was complete, I started gathering material for making my own switching platform.
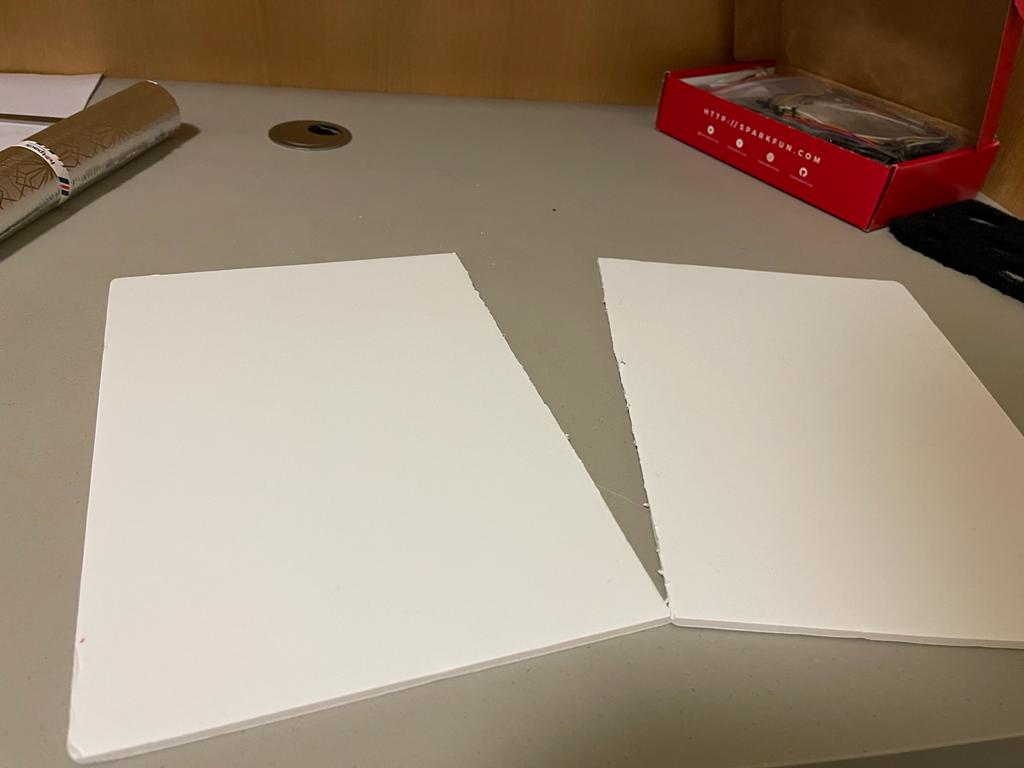
Next, I have cut the carboard in two different parts and these would serve as two different terminals of the switch.
Then I used foil and put it on the foam cardboard using clear tapes as shown.
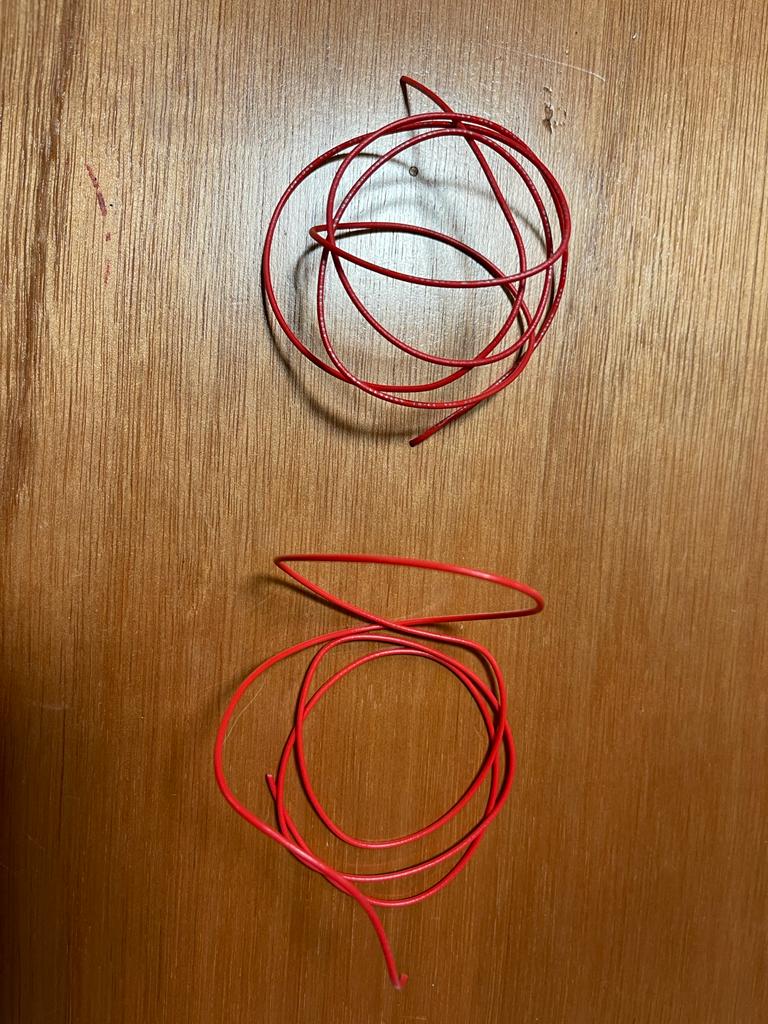
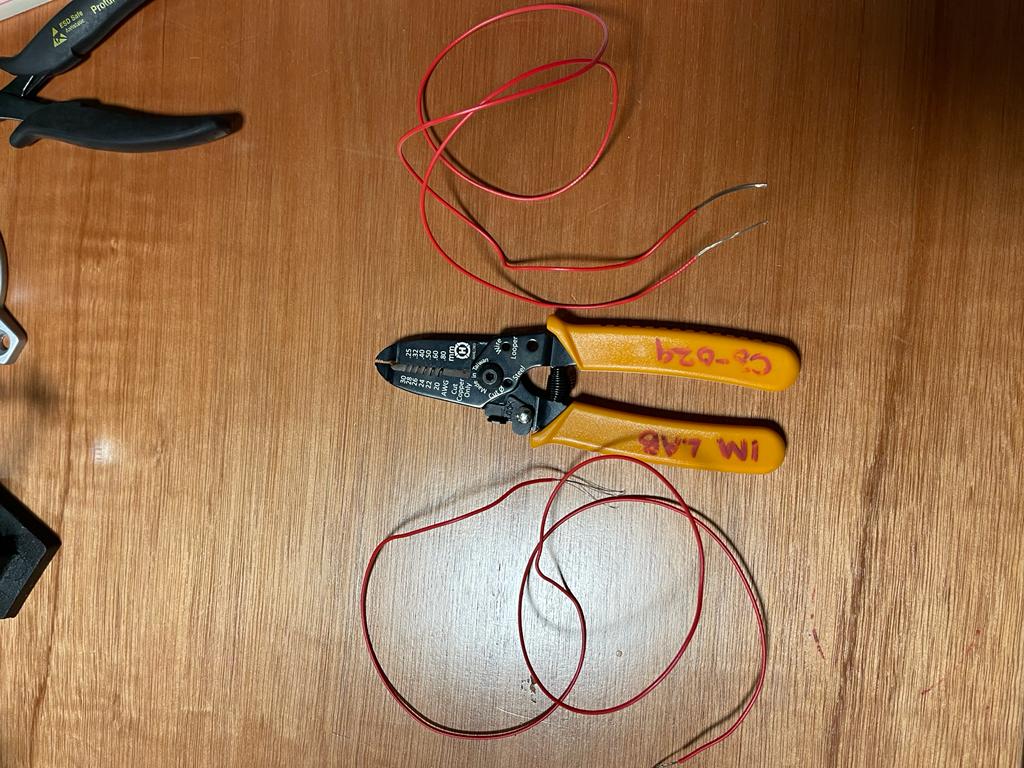
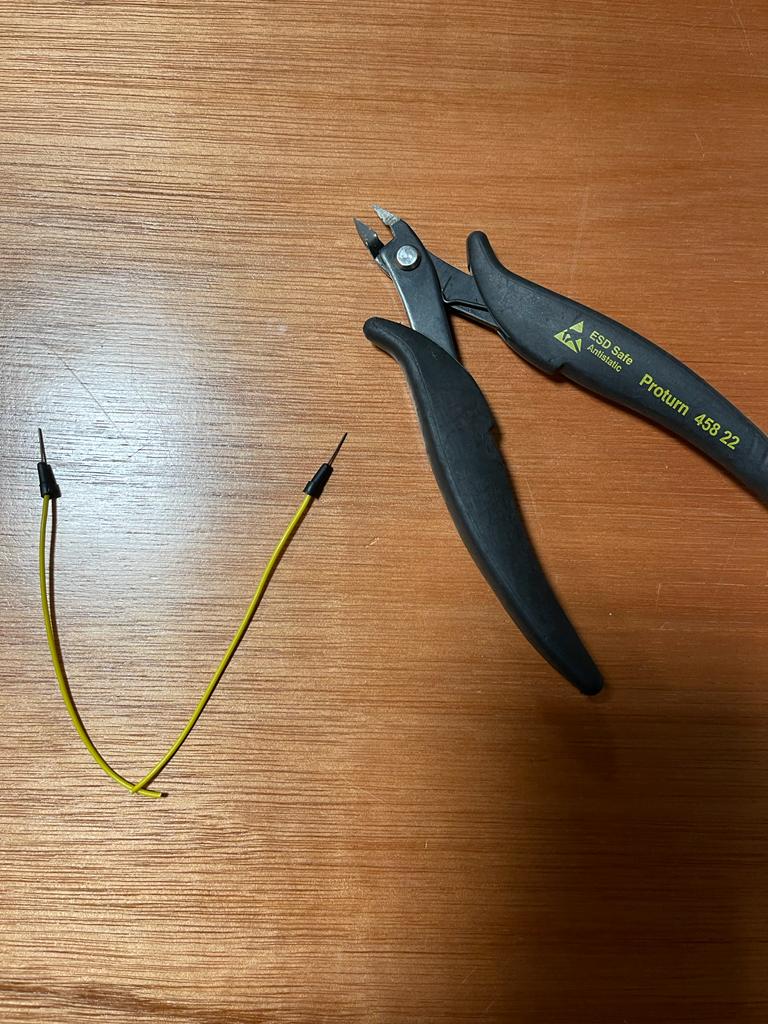
Now, I needed multi-strand wires to be connected to the foil. So, I used a single wire and cut it into two parts using a cutter, one for each foil board.
Using a wire stripper, both the ends of the two pieces of wires were stripped like shown
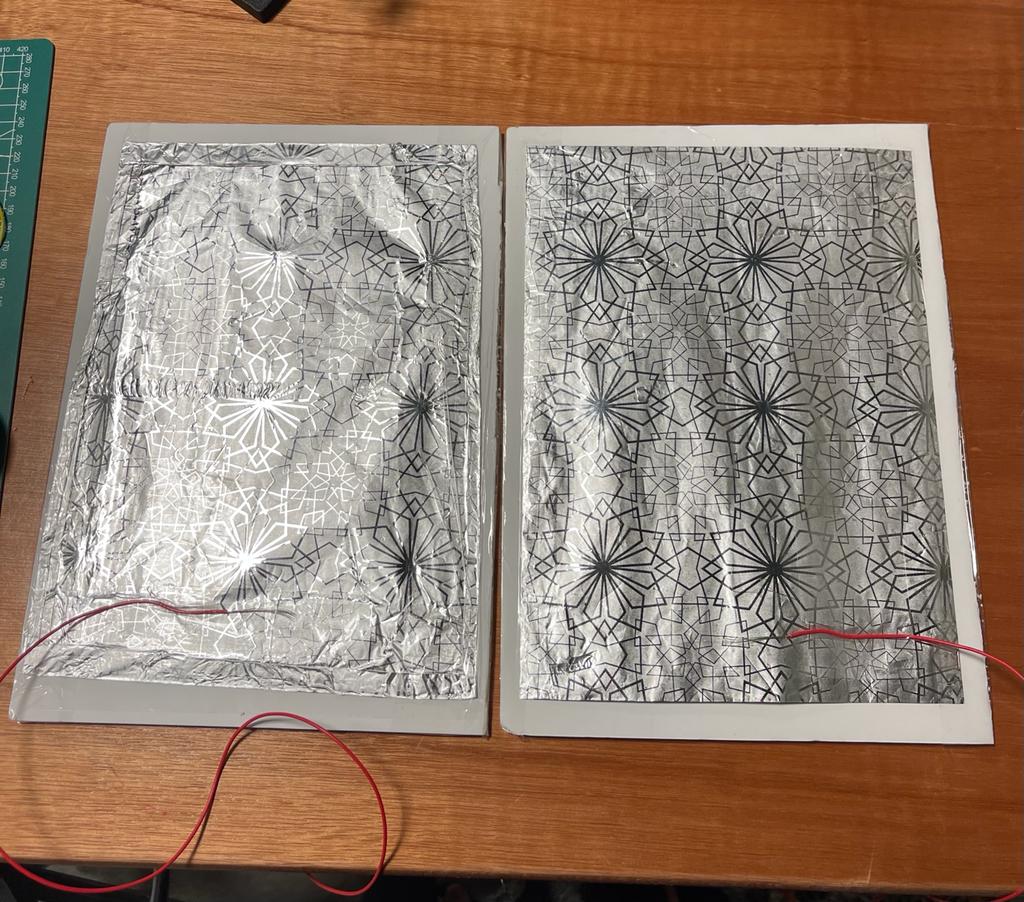
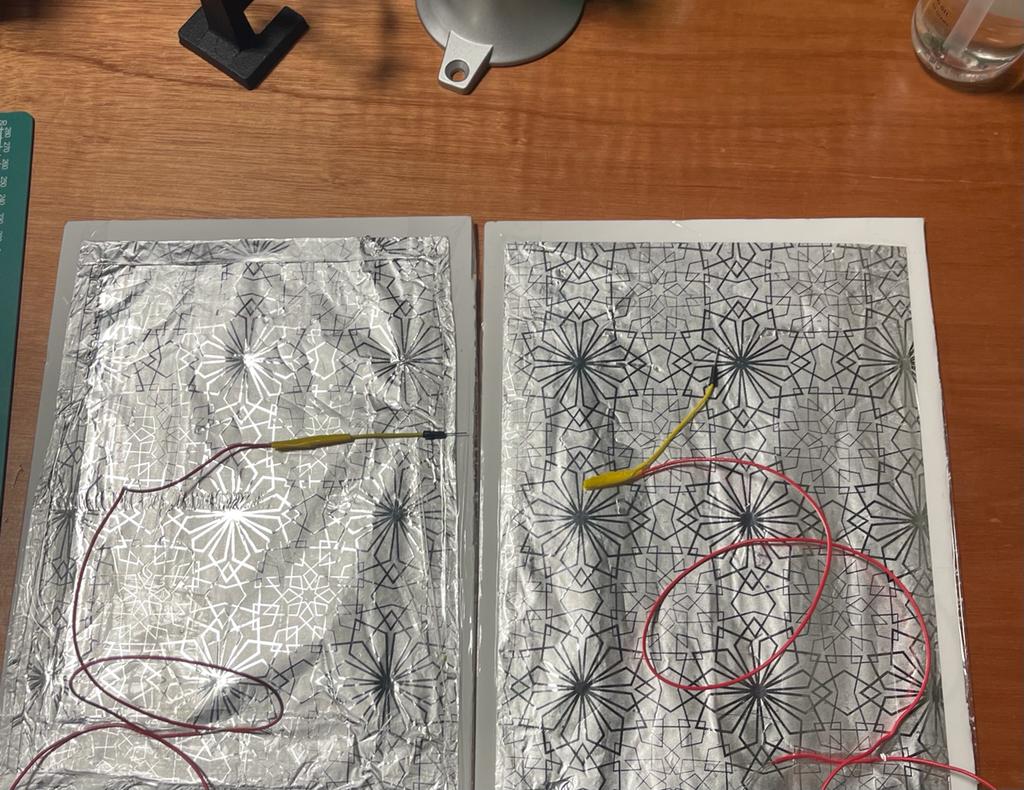
Afterwards, I used electrical tape to stick one end of each wire to the foil in such a way the wire strands were in contact with the conductive surface of the foil.
Later, I used a male-to-male jumper wire and cut it from middle using a wire cutter.
The other end of the wires taped to the foil was taped to male end of jumper wire as shown below.
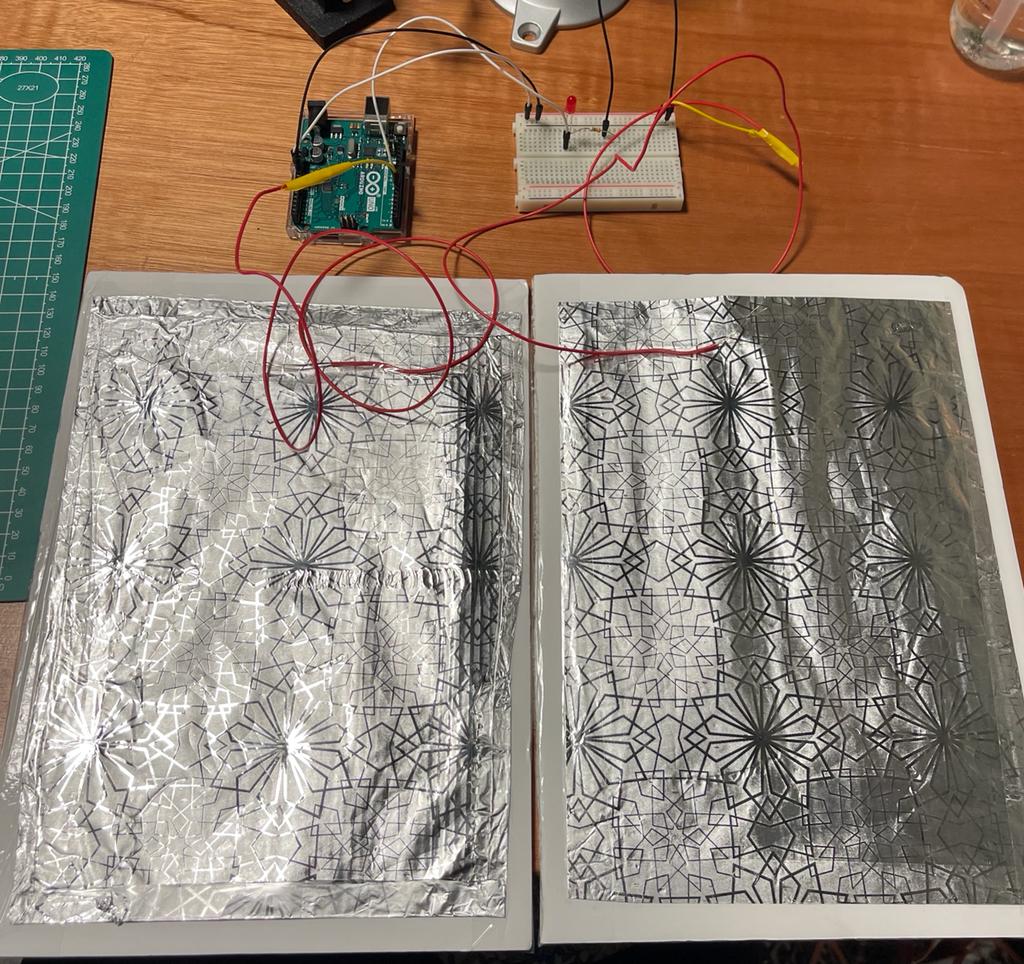
Now, I am ready to test my switch with my led circuit. I connected one foil arrangement to ground and the other was connected to a digital IO of Arduino as per my code.
The, I used the following code in my Arduino circuit and tested the foil switch which I made.
// C++ code

int led = 7;
int sensor = 6;

void setup()
{
  pinMode(led, OUTPUT);
  pinMode(sensor,INPUT_PULLUP);
}

void loop()
{
  if(digitalRead(sensor)==LOW)
  {
    digitalWrite(led, HIGH);
  }
  else
  {
    digitalWrite(led, LOW);
  }
}
So, I observed that the LED switched on once the two foils were made in contact with each other and switched off once the foils were separated which is how a switch works.
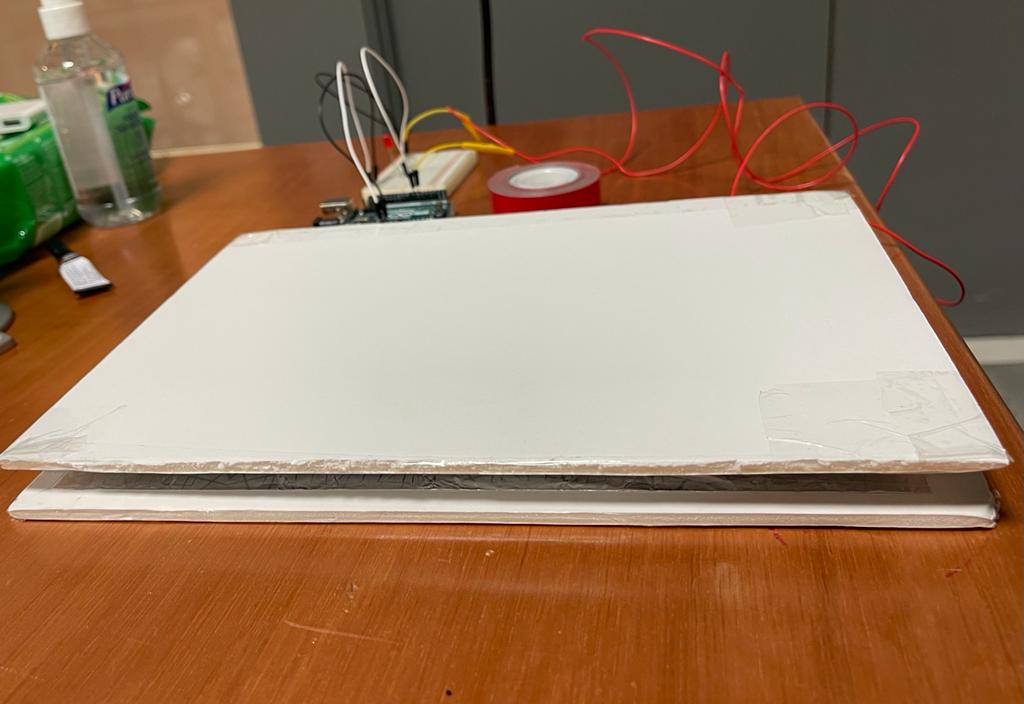
At the last step, I used the black non-conductive foam as a separator between the two foil boards and put everything together like a sandwich in which the non-conductive material ensured the foil would turn on only if someone puts force on the two boards. In this case the two foils would come in contact and the LED would turn on. The final arrangement looked like this.
FINAL WORK:
CONCLUSION:
There were a lot of ups and downs in this assignment, but I pulled it off at the end and had a great time exploring with the construction of my mini project. Furthermore, I will hopefully be taking this experience to achieve much more complicated tasks in the future.
HOPE YOU ENJOYED , HERE IS THE FULL CODE with the comments 🙂
// Shamma's Sit at your own risk Program
//C++ coding in Ardiuno

// Setting Global Variables
int led=7;
int sensor =6;


// This code runs only once
void setup()
{
  // only declaring input and ouput
  pinMode(led, OUTPUT); //  define the LED connected on pin 7 as an output

  // I did not use the input because it wont work properyly with what I builded
  // So,  input_pullup was used because it requires no external components and can be turned on & off in software during program execution
  //Another thing is that is it used to read switches properly and prevent missed readings
  pinMode(sensor,INPUT_PULLUP);// the proximity sensor acts as an input devide which will take an anction , in our case presnece of an obstacle
}


// This runs forever as long as system is turned on
void loop()
{
  if(digitalRead(sensor)==LOW)// reading if an obstacle (someone infront of sensor) is present
  {
    digitalWrite(led, HIGH);// turning on LED by giving the anode of LED +5 volt signal

  }
  else
  {
    digitalWrite(led, LOW);// if no one is present, turn off LED by giving low signal
  }
}
This week was an especially difficult one because I had a lot of deadlines and tasks and responsibilities that needed to be done within the short time period of a week and adding to that I was just finding it quite hard to get the inspiration to create a piece of art. But thankfully it finally dawned on me and I decided to pursue a rather cliche idea but give it a twist thanks to all that I have learned in the recent days about Processing.
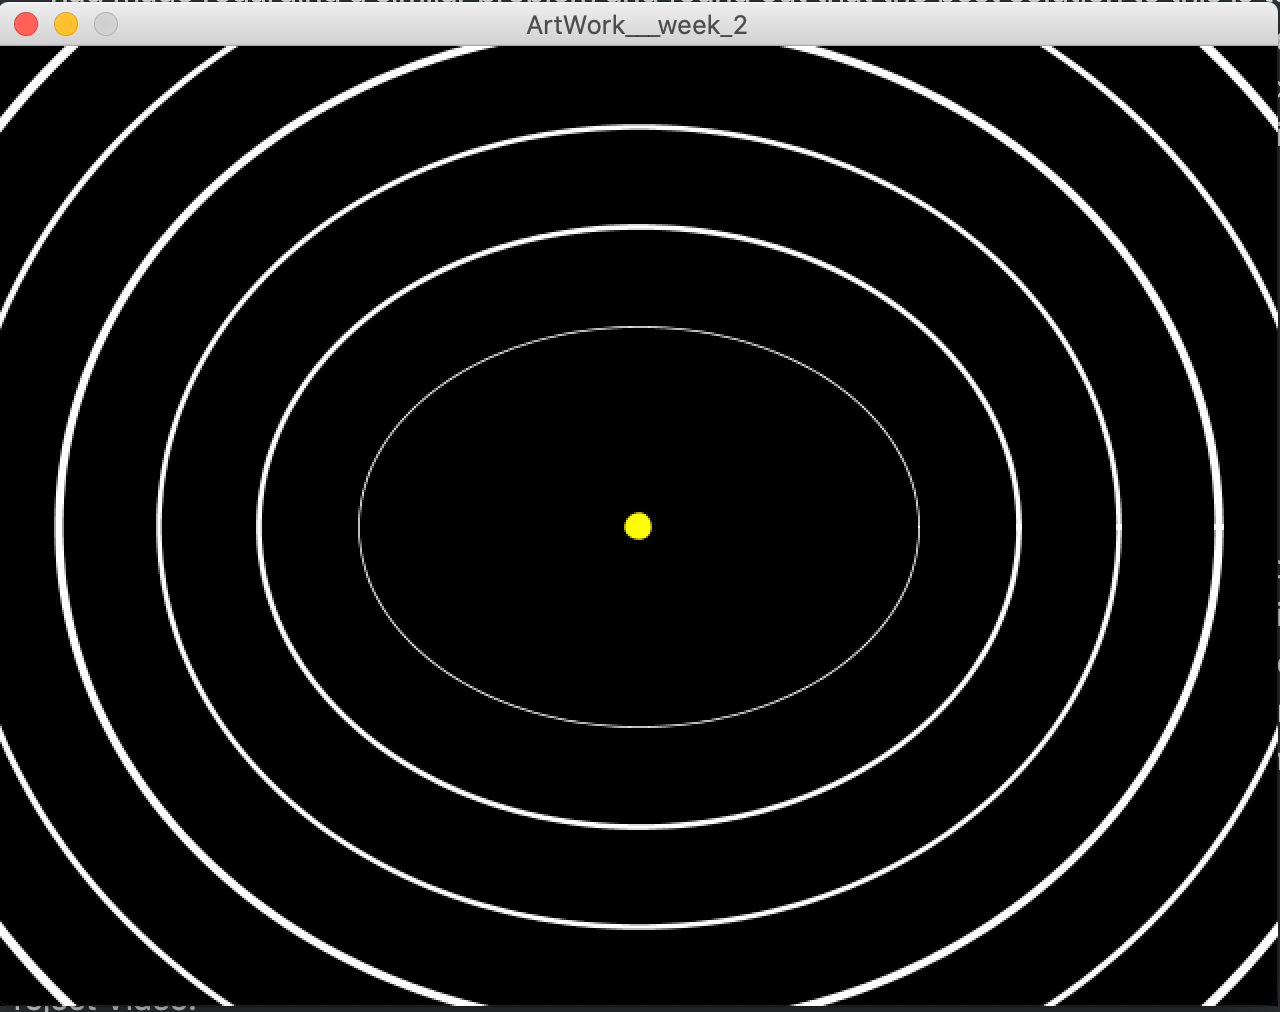
So I ended up creating my own idea of the big bang and created a star that can be controlled to be bigger or smaller and if it is bigger than a specific size, it erupts and ends up in an asteroid blast.
Difficulties:
As I mentioned before, I was really struggling to get an idea this week and tried coming up with multiple ideas to see what might work. However, none of them seem to really appeal to me but thankfully I decided to pursue the Big Bang Idea in the end.
The big challenge that I was facing apart from actually getting an idea to make something, was to get the asteroids to work. I had experimented with multiple different ways of trying to make them appear out of the screen but every time I tried a technique I would run into some kind of problems. Sometimes, the asteroids would not spawn properly, other times they would not move the way I wanted them to (appear out of a screen in a 3D sort of fashion) and basically would not give out the right sense of an asteroid blast that I had imagined.
Resolution:
In order to solve the asteroid problem, I decided to watch some videos that TheCodingTrain had made regarding a similar problem and found out that the best solution to this is to actually use the concept of classes. And so to implement that I made an asteroid class and added the functions, show and update to it. This allowed me to create multiple asteroids and then manipulate them in the way I wanted. Thus, the utilization of OOP helped me solve this problem.
Elements in the project
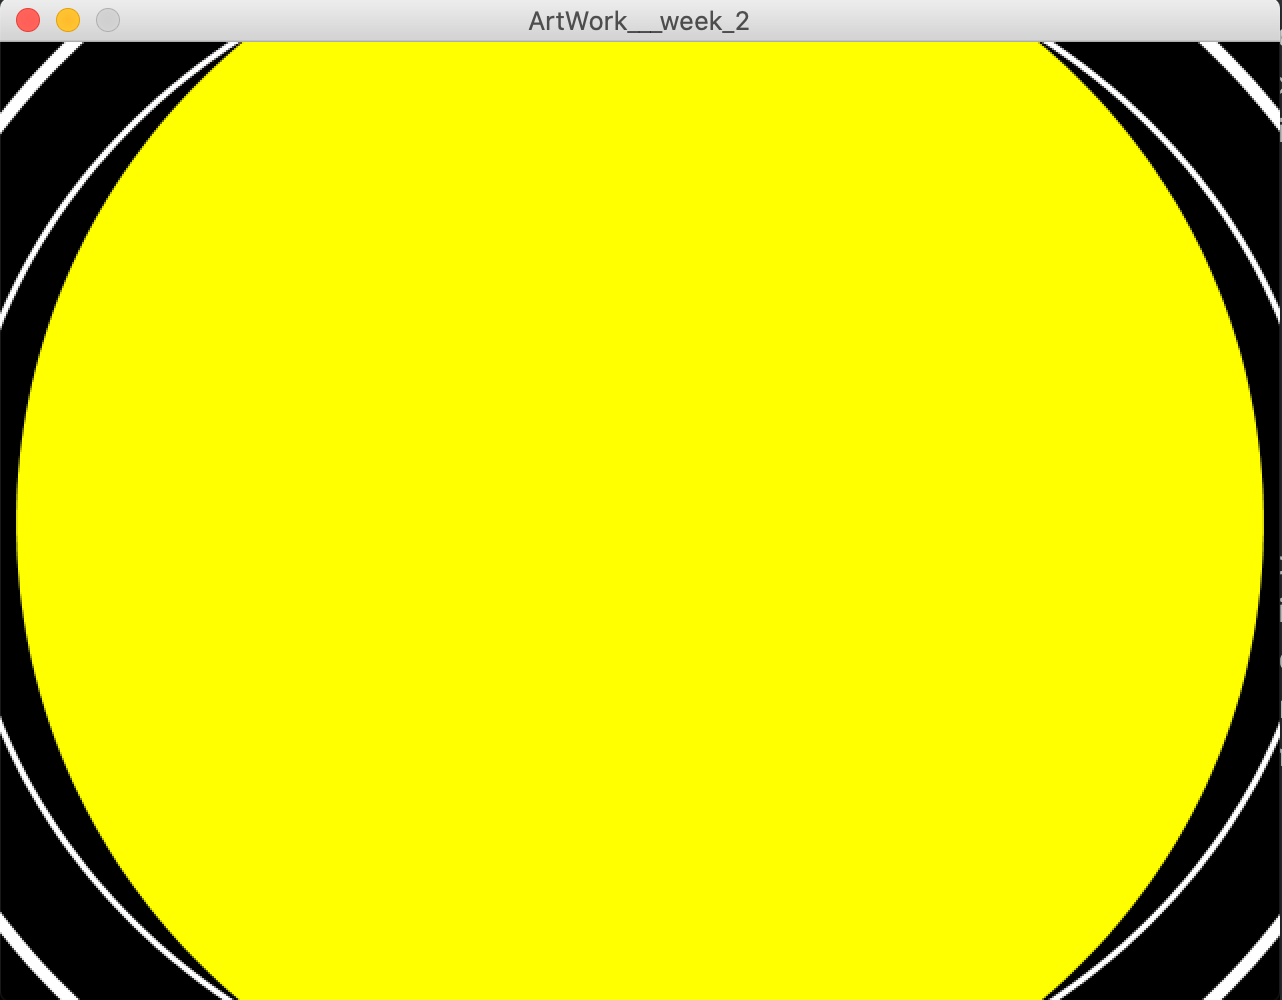
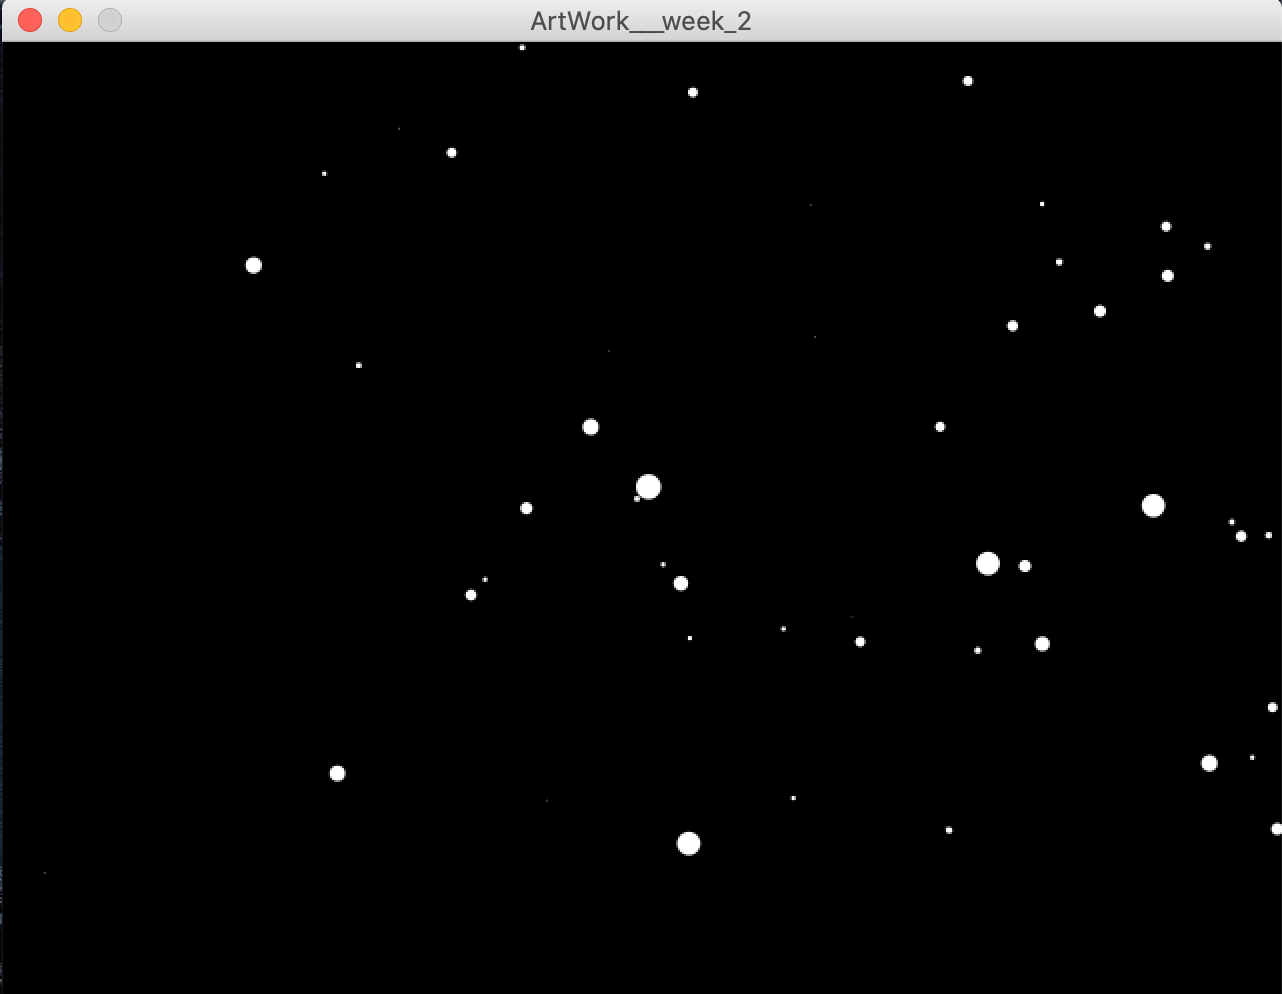
The project has two scenes – one of an exploding star and the other that of an asteroid blast. It revolves around the concept of a big star bursting so as to create an asteroid shower. The player can control the size of the star – making it bigger or smaller. Once the star reaches a certain limit of the size, going beyond that would cause it to explode and release an asteroid shower. At every point in the visual, the user can pause the animation and play it again and can also make it go faster or slower (done by altering the Frame Rate). During the asteroid shower, the user can control the speed by which the asteroids come using the mouse. Sliding it to the right will increase the speed whereas going to the left will decrease it.
Start Screen of a small starStar getting biggerAsteroid Shower
Concepts Learned:
This project taught me how to better utilize the random and noise functions better along with obviously teaching me how to use loops to create art works. By using random and noise in this project, I sort of got this understanding that a noise is a more controlled expression of generating a random number between a specified range and the fact that its value is retained (or remembered) whereas in random I feel like the generation of random numbers is more uncontrolled and more dispersed if I were to say.
I learned to implement the concepts of OOP in processing.
Project Video:
I will be uploading a vlog about my experience with this project soon by tonight!
Project Code:
//this artwork is a depiction of a big bang and the asteroids that come after that
float speed = 0.01;   //for noise value of the star, determines the pace of the vibration like movement
float extent = 0.7;  //for noise value of the star, determines the limit to which size comes up and goes down
int StarSize = 10;   // variable star size that increases and decreases

float StrokeSpeed = .01;
float StrokeExtent = 0.7;
int StrokeSize = 5;     //for the throbbing effect of orbits

float noiseStrokeValue;
float noiseStarValue;

color bg_color;


float Asteroid_speed;    //to determine speed of asteroid


class Asteroid
{
  float Asteroid_x;
  float Asteroid_y;
  float Asteroid_d;


  Asteroid()
  {
    Asteroid_x = random(-width, width);
    Asteroid_y = random(-height, height);
    Asteroid_d = random(width);  //helps create an illusion that it is a 3d space
  }

  void update() {
    Asteroid_d -= Asteroid_speed;
    if (Asteroid_d < 1)
    {
      Asteroid_x = random(-width, width);
      Asteroid_y = random(-height, height);
      Asteroid_d = width;
    }
  } //allows for movement

  void show_Asteroid() {
    fill(255);
    noStroke();
    float sx = map(Asteroid_x/Asteroid_d, 0, 1, 0, width);
    float sy = map(Asteroid_y/Asteroid_d, 0, 1, 0, height); //taking a ratio and then increasing and decreasing it to make it look 3d
    float size = map(Asteroid_d, 0, width, 16, 0);
    ellipse(sx, sy, size, size);
  }  //shows random asteroids on screen
};

//Asteroid class to create asteroids and to update and show them on screen


Asteroid[] asteroids = new Asteroid[400]; // 400 Asteroids created
void setup() {
  size(640, 480);

  for (int i = 0; i<asteroids.length; i++)
  {
    asteroids[i] = new Asteroid();    // each element is made into an instance of the Asteroid class
  }
}

void draw() {

  background(bg_color);
  Asteroid_speed = map(mouseX, 0, width, 0, 20); //speed controlled by mouse Pointer
  if (StarSize < 510)  //first star gets bigger
    Big_Bang();
  else
    AfterMath();  //after a certain size it bursts and asteroids follow
}


void Big_Bang() {
  bg_color = color(0);
  noFill();
  translate(width/2, height/2);
  stroke(255);
  noFill();


  for (int s=2; s<8; s++)
  {

    strokeWeight(random(s));
    arc(0, 0, s*100+80, s*100, 0, TWO_PI);  //6 orbits created
  }

  noiseStrokeValue = noise(frameCount*StrokeSpeed);
  noiseStrokeValue += StrokeExtent;
  noiseStrokeValue *= StrokeSize;  //adding flashing effect to orbit

  noiseStarValue = noise(frameCount*speed);
  noiseStarValue += extent;
  noiseStarValue *= StarSize;  //adding movement to star


  stroke(255, 255, 0);
  fill(255, 255, 0);
  strokeWeight(noiseStrokeValue);
  circle(0, 0, noiseStarValue); //making star
}


void AfterMath()
{

  translate(width/2, height/2);
  for (int i = 0; i<asteroids.length; i++)
  {
    asteroids[i].update();
    asteroids[i].show_Asteroid();
  }
}


void keyPressed()
{
  if (key == 'a') //slow
  {

    frameRate(frameRate-20);
  }

  if (key == 'b') //pause
  {
    noLoop();
  }

  if (key == 'c') //play
  {
    loop();
  }

  if (key == 'k') //fast
  {

    frameRate(frameRate+20);
  }

  if (key == 'w') //increase_Star_size
  {
    StarSize += 50;
    print(StarSize);
  }

  if (key == 's') //decrease_Star_size
  {
    StarSize -= 50;
    print(StarSize);
  }
}

void keyReleased()
{
  frameRate(60);
}
For this project, we were supposed to use coding to make a portrait of ourselves, or other versions of ourselves (cartoon, anime, avatars, etc). I call her Avatar Aysha.
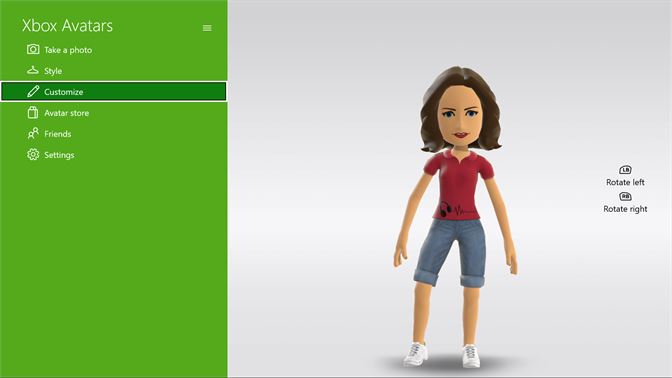
I started off with a simple sketch for my simple portrait. I just wanted it to be an avatar that I could play with in a video game. I think that growing up, I got used to my xbox avatar, which is where I got some of my inspiration from.
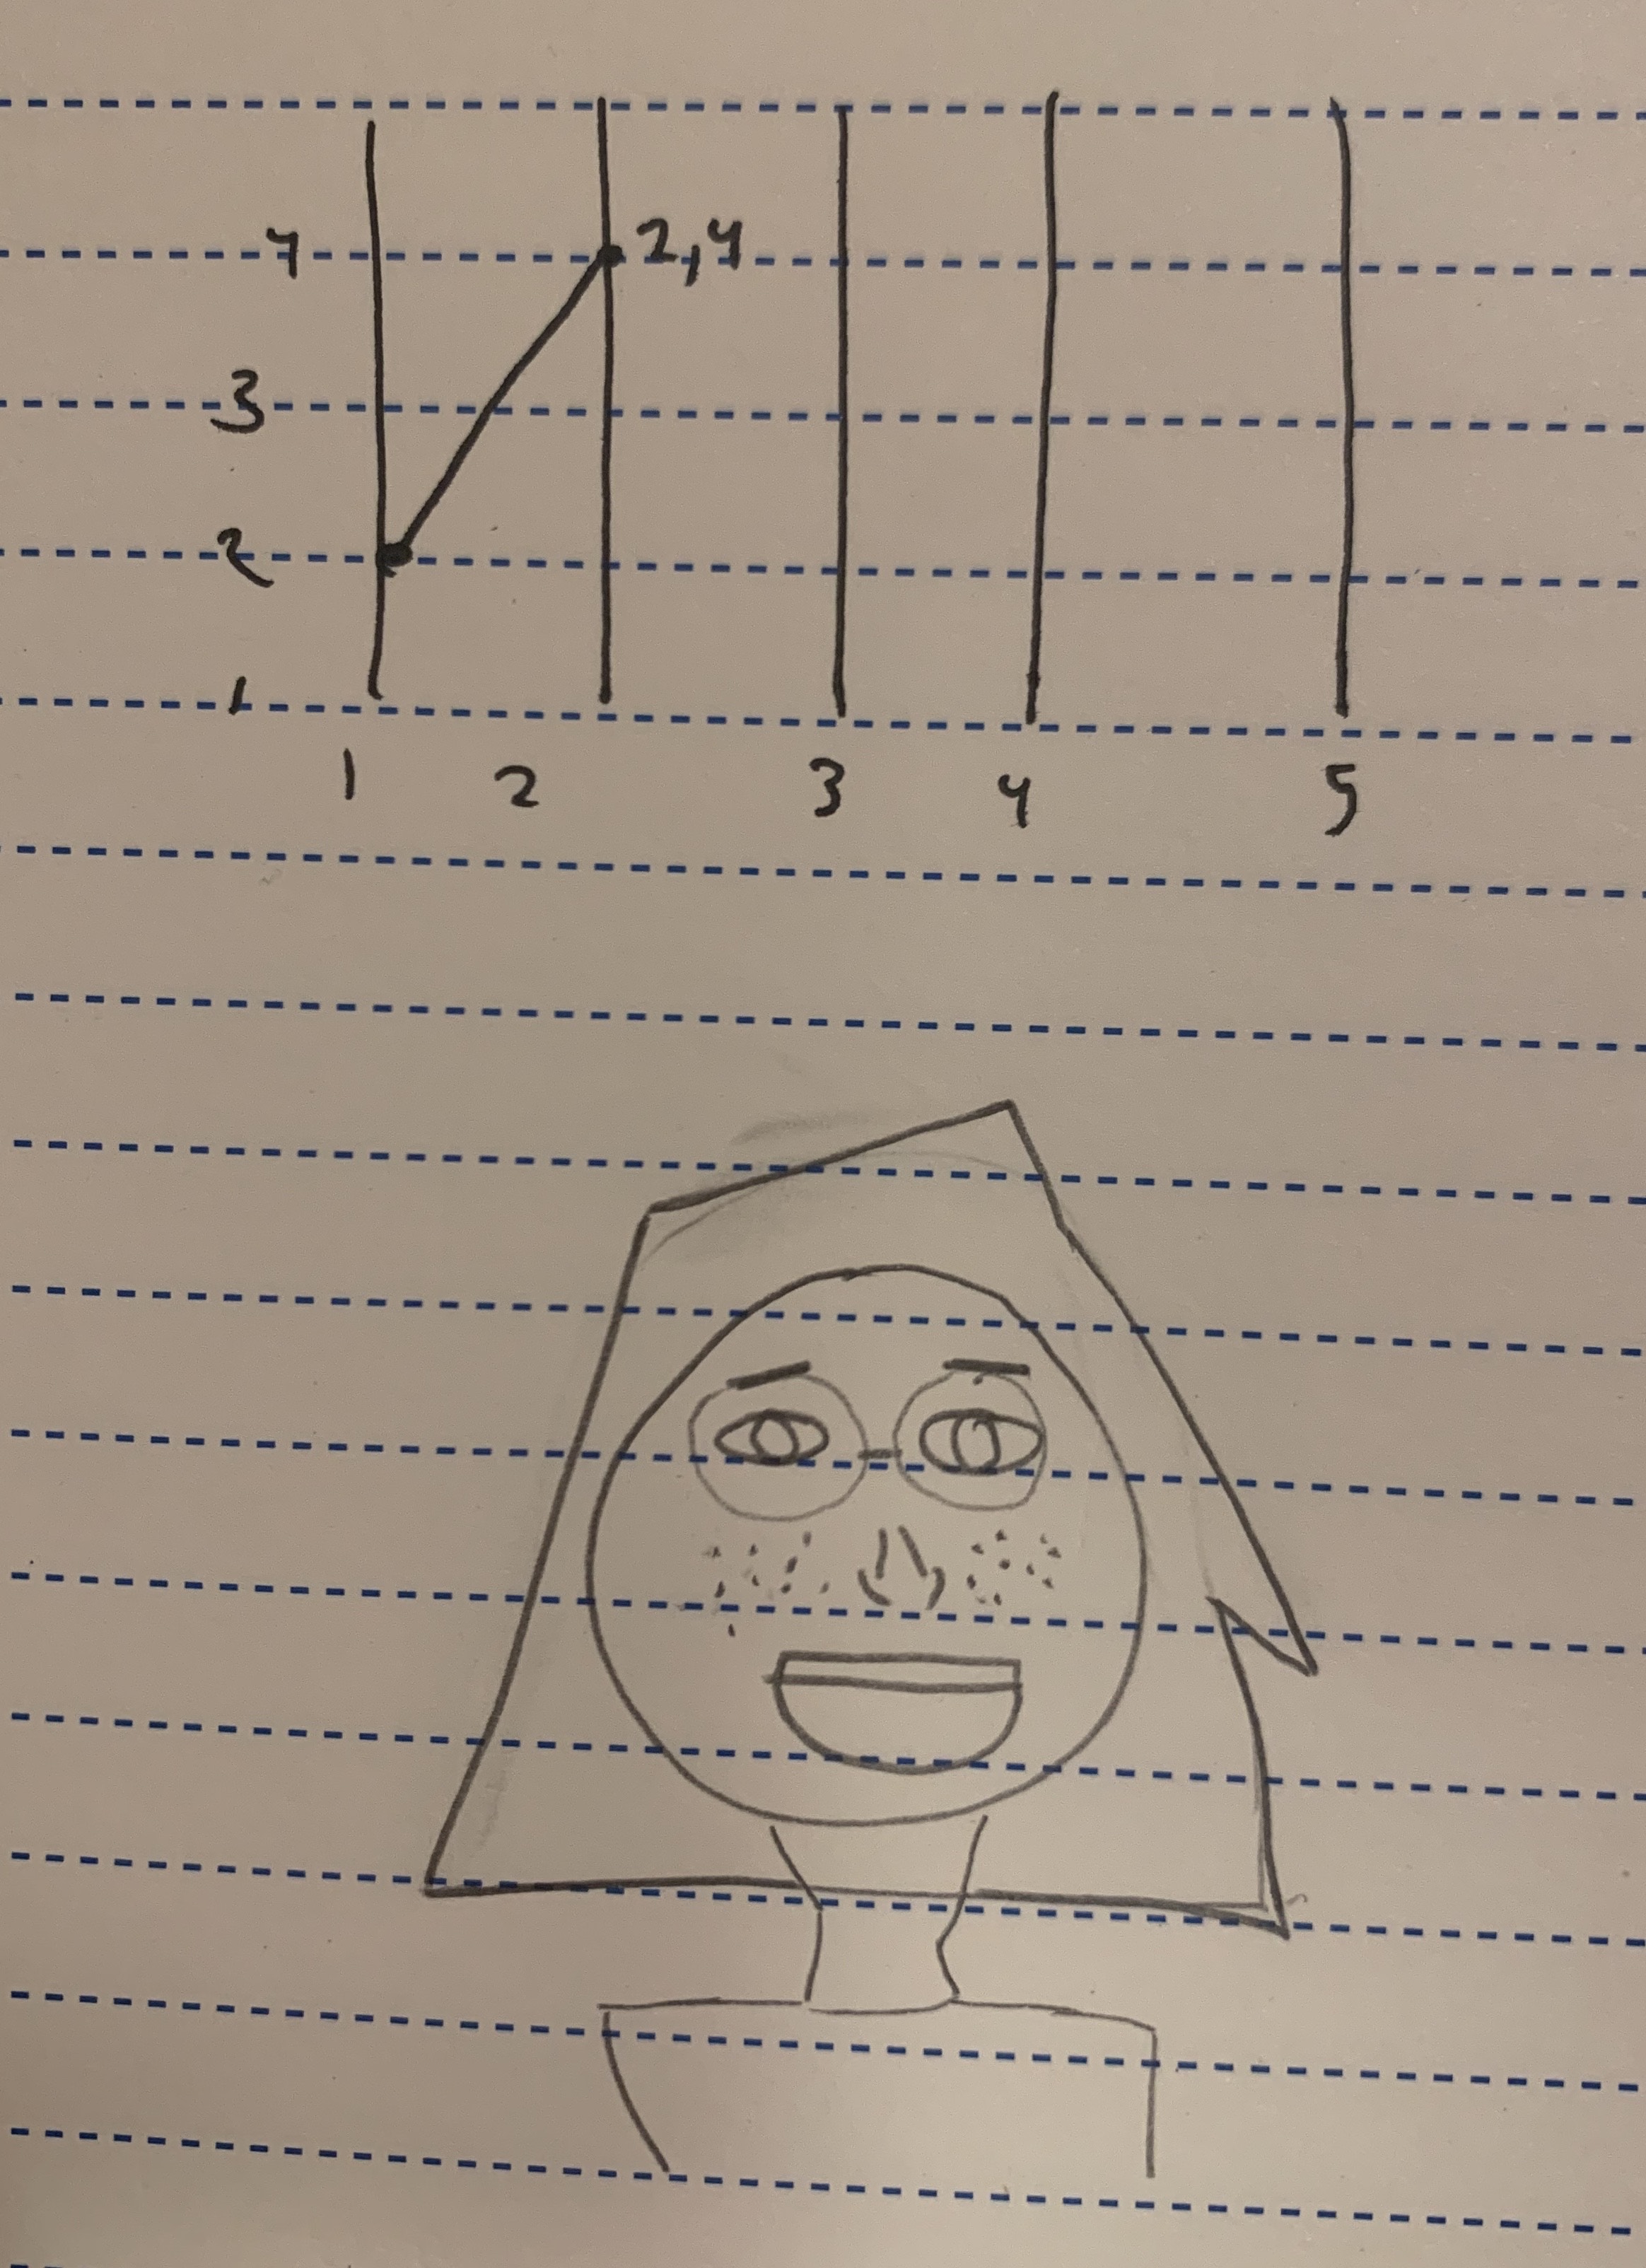
An example of an Xbox avatarSketch! And me trying to make sense of the line function.
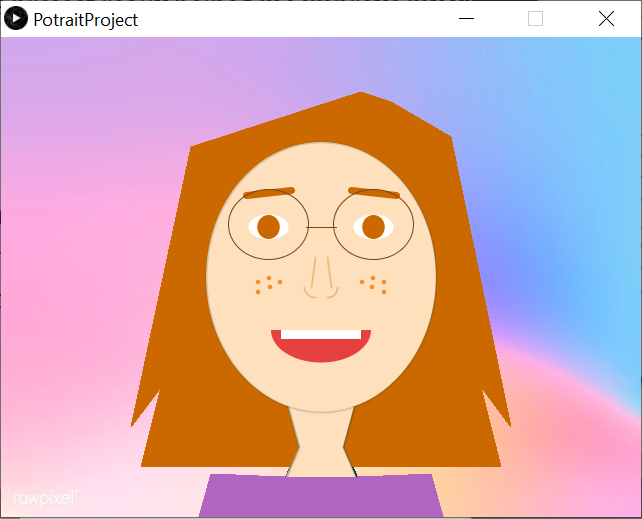
Aysha’s Avatar
This is my avatar in her NYUAD violet T-shirt. It may not look on camera, but my eye color matches both my eyebrow and hair color so I added that to my portrait. I would also NEVER forget my glasses. I added some freckles, nostrils, and teeth.
I also wanted to add a simple interaction for the sake of experimenting and having fun. By pressing the keys from 1-7, a background from NYUAD campus appears, considering we’re all in quarantine :(. Choose your background and say cheese!
Here’s a simple demonstration.
This project really helped me improve my visual skills and visual imagination. At the beginning, I mainly struggled with drawing a line and with the function beginShape(). I mostly nailed the shapes by multiple trial and errors. However, later on, with enough practice I started to understand the x and y axes and their four quadrants. Moreover, creating the nostrils was a challenge for me as I needed to fully understand the angles in radians for the arcs. I also learned new functions such as arc(), strokeWeight(), beginShape() and endShape().
Personally, “Find in Reference” was a life-saver. I was also often inspired from the processing website itself, and its option for finding “related” functions.
Overall, I had so much fun doing this assignment! Hopefully more is yet to come!
For this week’s assignment, we were asked to create a project that combines both Arduino and Processing by allowing them to perform a serial “handshake”.
To do this, I used my OOP processing project and replaced the mouse interaction with a rotary potentiometer. This was, for the most part, easy to do. We completed an in-class example where we controlled a basic ellipse shape across the X-axis as well, and I was surprised that I could apply the same simple code (with a few minor tweaks) to a processing sketch that was a bit more complex, without breaking the code.
Here is a video demonstration:
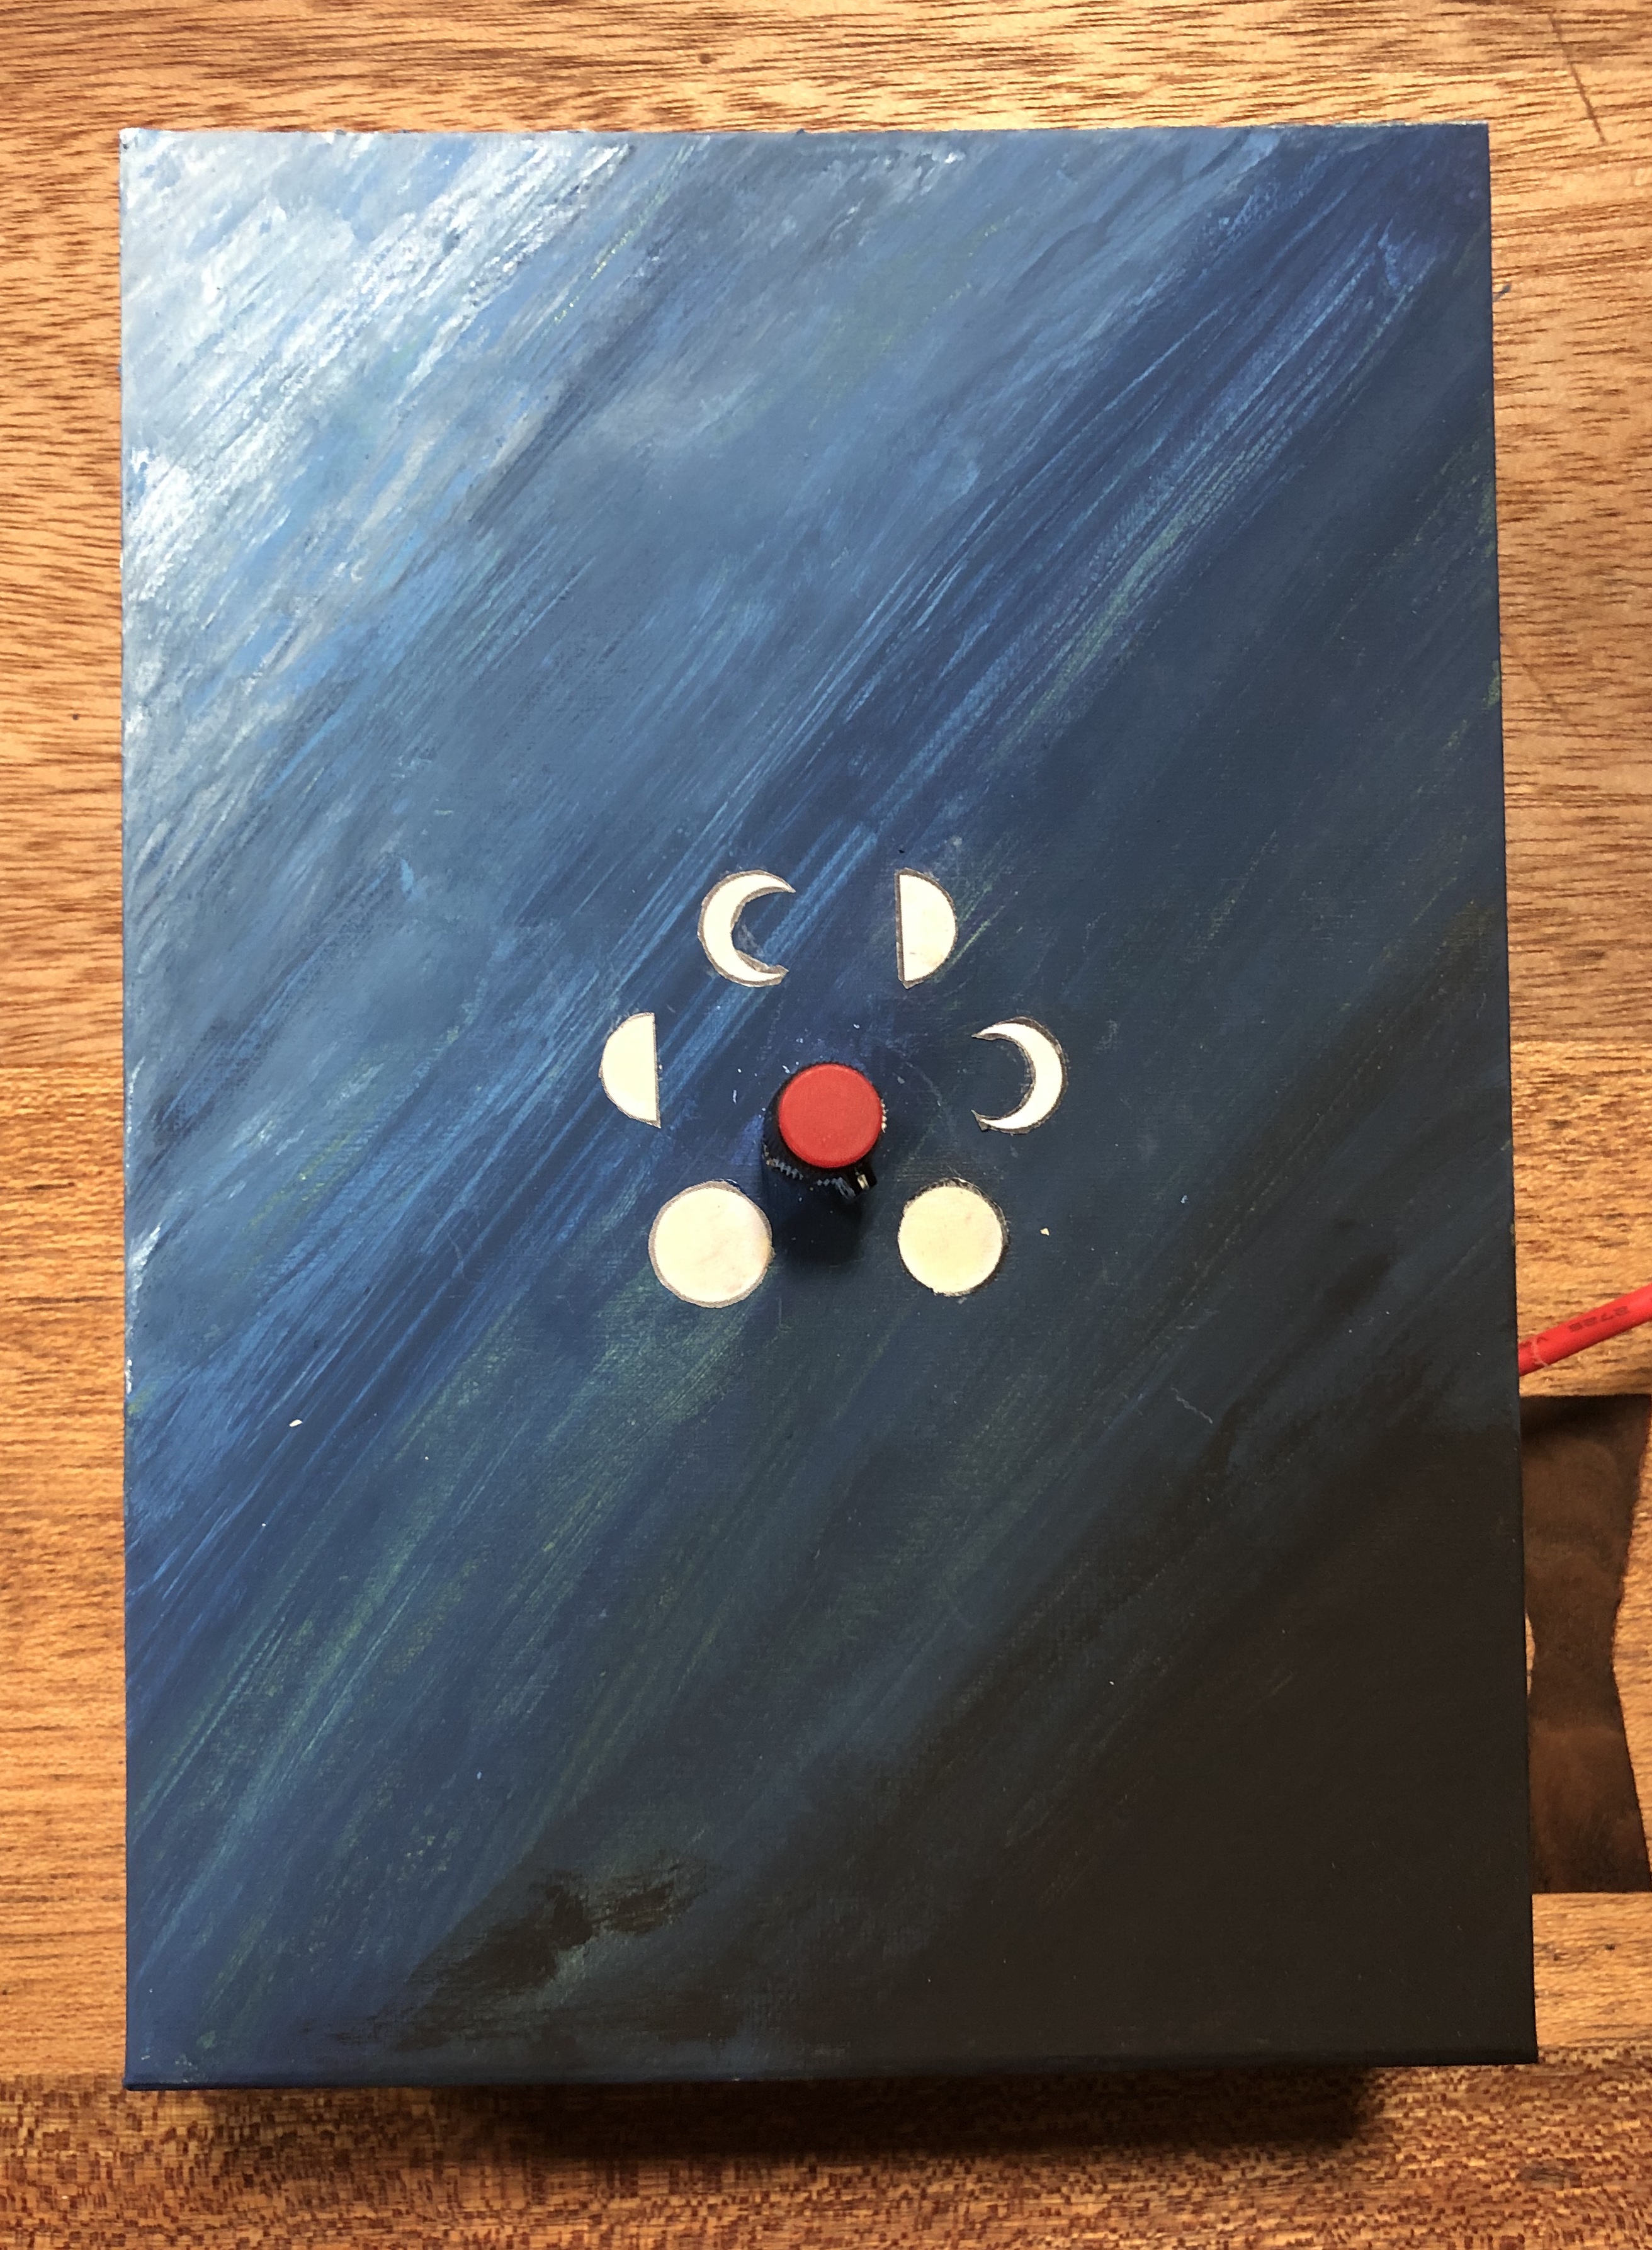
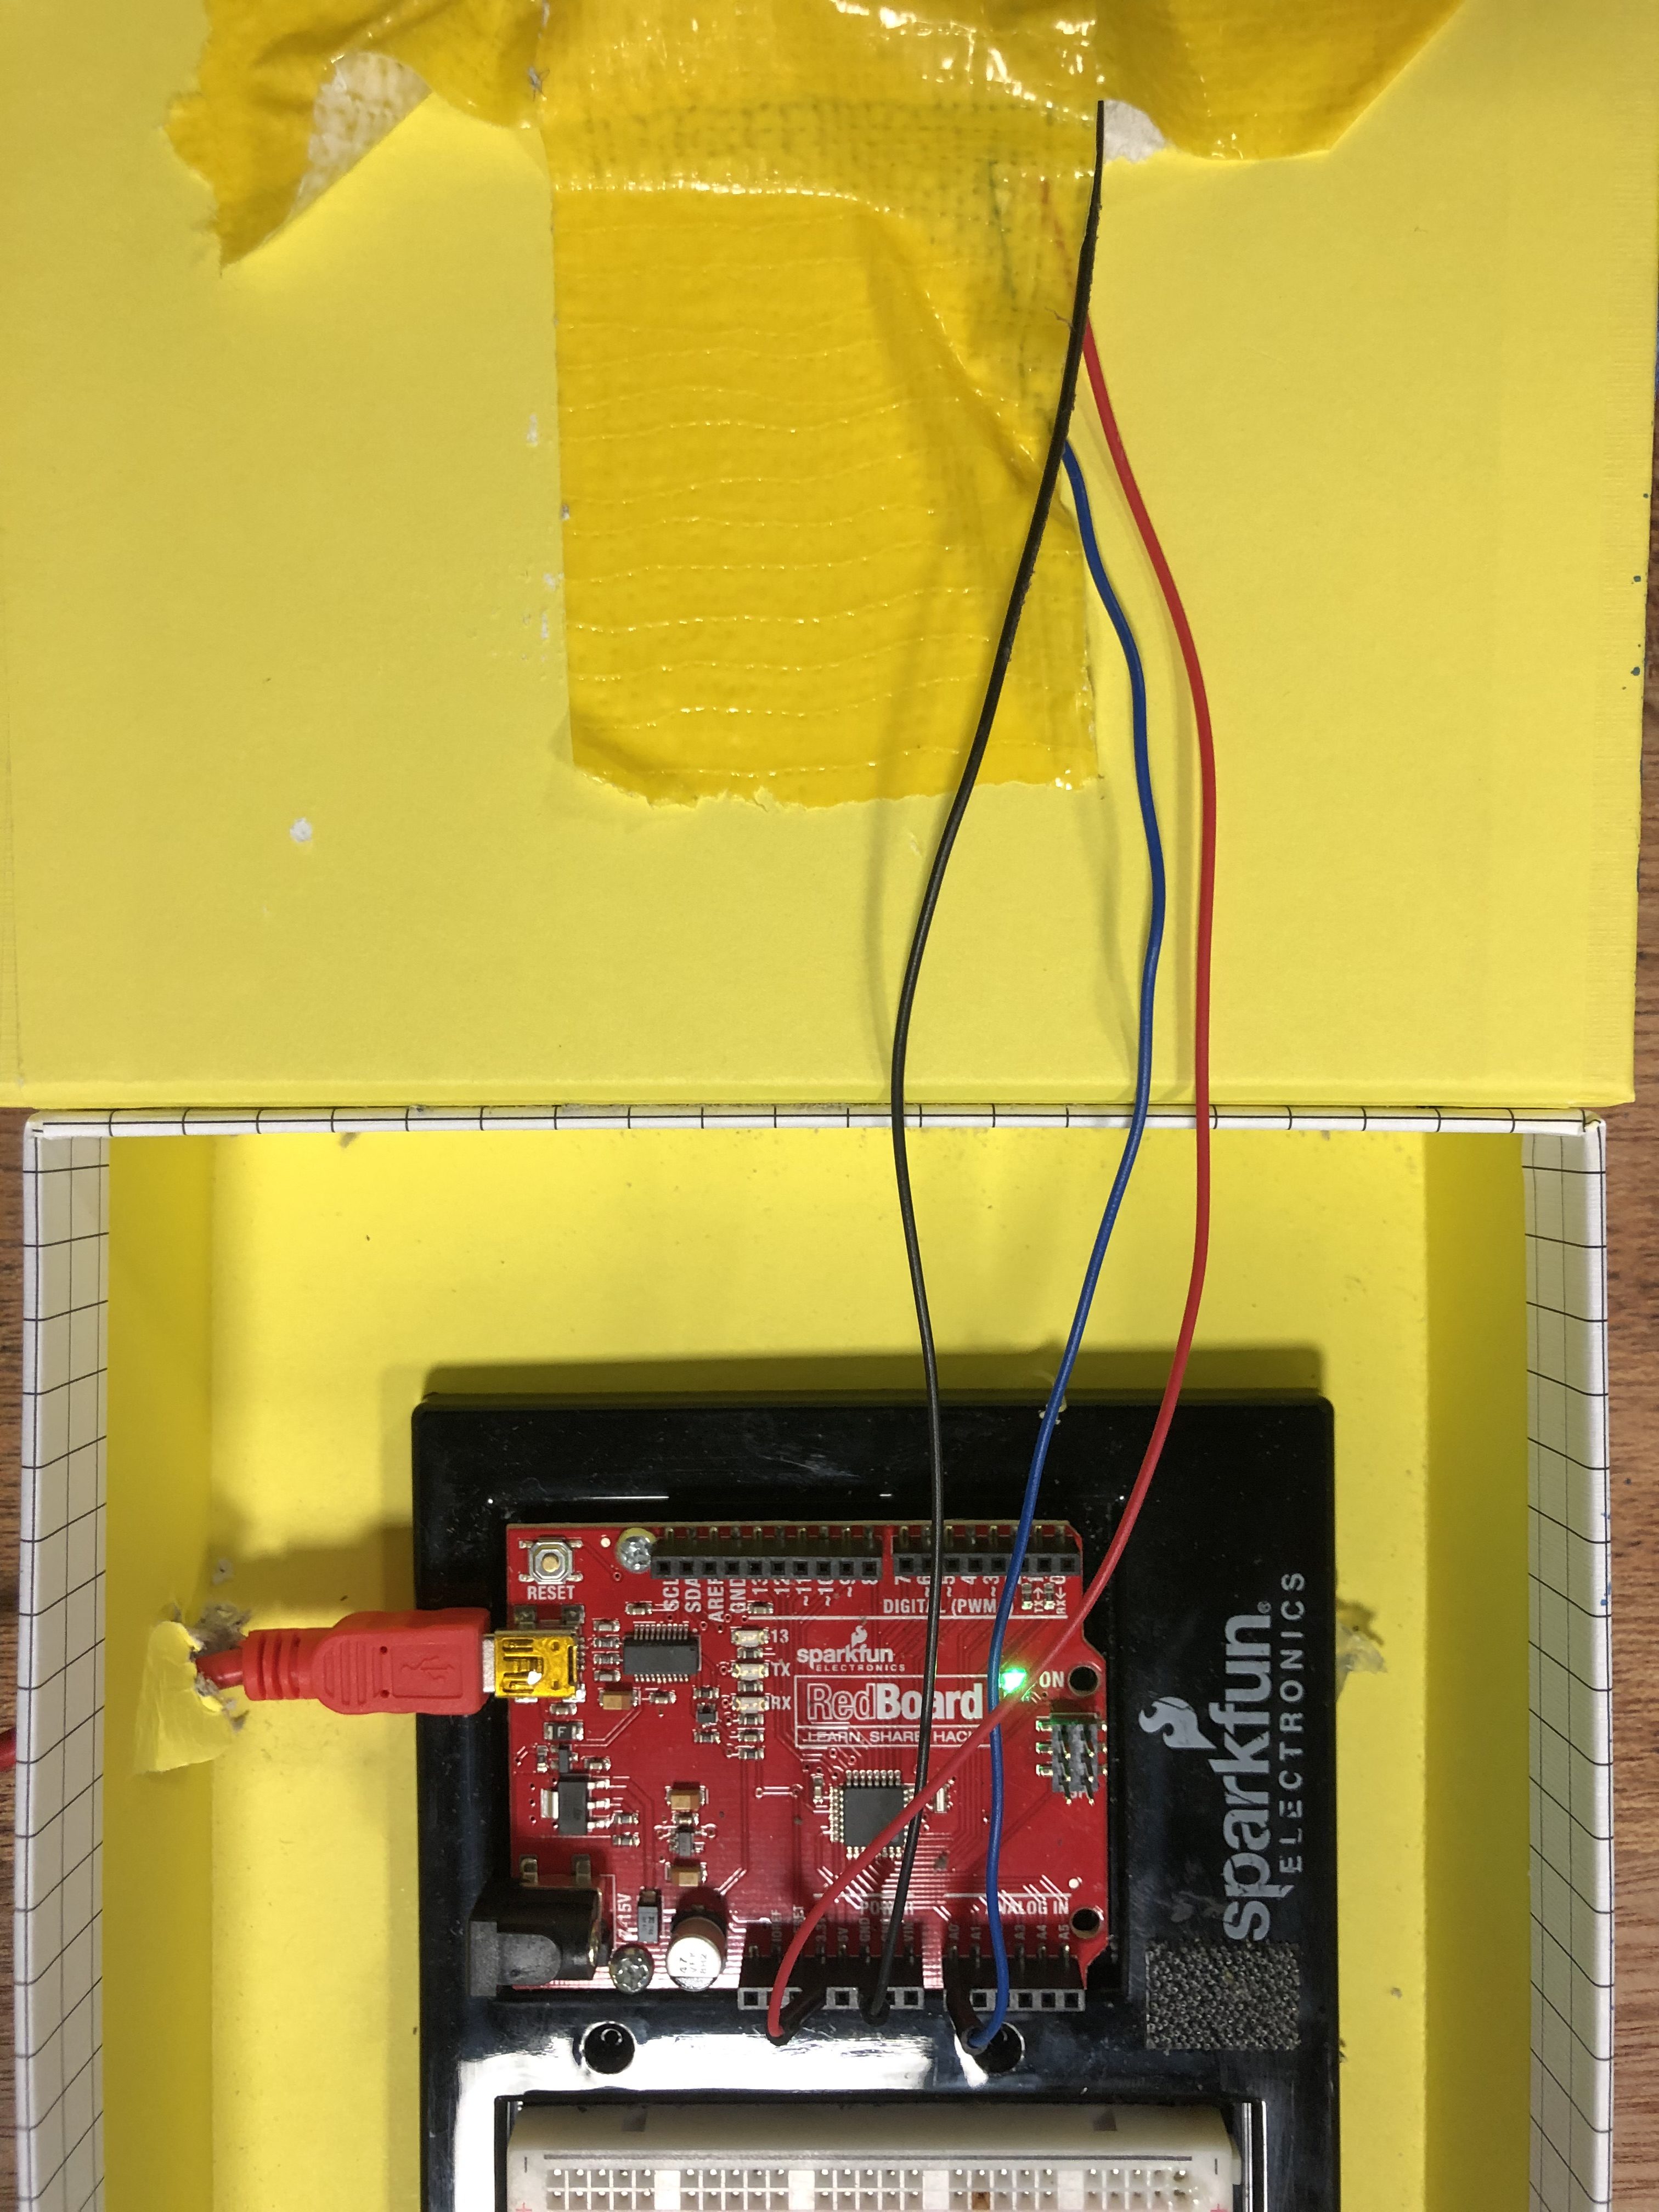
I created a box for the potentiometer, in an attempt to make it a little bit more visually appealing.
Here’s my code:
Arduino:
void setup() {
  // put your setup code here, to run once:
  Serial.begin(9600);
  Serial.println('0');
}

void loop() {
  if(Serial.available()>0){
    char inByte=Serial.read();
    int sensor = analogRead(A0);
    delay(0);
    Serial.println(sensor);

  }
}
Processing:
//arrayList to hold all stars
ArrayList<Star> stars = new ArrayList<Star>();

import processing.serial.*;
Serial myPort;
int xPos=0;
int State = 0;
//instantiate new moon object
Moon moon = new Moon();
int modifier;
float raindrop;
int red, green, blue;

void setup()
{
  size(585,430);
  background(0);
  raindrop= 0;

  printArray(Serial.list());
  String portname=Serial.list()[1];
  println(portname);
  myPort = new Serial(this,portname,9600);
  myPort.clear();
  //myPort.bufferUntil('\n');

  //generate 30 random stars
  for (int i = 0; i < 30; i++)
  {
    //adds them to star ArrayList for easy access
    stars.add(new Star());
  }
}

void draw()
{

  //move raindrop down screen
  raindrop = raindrop + 4; //speed

  //if raindrop falls below canvas, reset to zero
  if (raindrop >= height)
    raindrop = 0;

  //map xPos to rgb values of background
  red = int(map(xPos, 0, width, 83, 0));
  green = int(map(xPos, 0, width, 157, 0));
  blue = int(map(xPos, 0, width, 253, 0));


  modifier = int(map(xPos, width/2, width, 29, 0));


  background(red, green, blue);

  if (xPos > width/2)
  {
    for (int i = 0; i < stars.size() - modifier; i++)
    {
      Star s = stars.get(i);
      s.drawStar();
    }
  }

  moon.update();
  moon.drawMoon();
//rainfall

  fill(211,211,211);
rect(10, raindrop, 2, 5);
rect(50, raindrop+20, 2, 5);
rect(80, raindrop, 2, 5);
rect(110, raindrop+100, 2, 5);
rect(140, raindrop+150,2, 5);
rect(180, raindrop-200, 2, 5);
rect(200, raindrop-150, 2, 5);
rect(240, raindrop-50, 2, 5);
rect(240, raindrop, 2, 5);
rect(300, raindrop+20, 2, 5);
rect(440, raindrop, 2, 5);
rect(440, raindrop, 2, 5);
rect(550, raindrop+100, 2, 5);
rect(530, raindrop-250, 2, 5);
rect(530, raindrop-200, 2, 5);
rect(580, raindrop-300, 2, 5);
rect(300, raindrop-400, 2, 5);
rect(140, raindrop-350, 2, 5);
rect(400, raindrop-300, 2, 5);
rect(400, raindrop-250, 2, 5);
rect(400, raindrop-200, 2, 5);
rect(550, raindrop, 2, 5);

//this part of my code uses & adapts from "skyline" by Shiwen Qin on OpenProcessing

 //building 1
  fill(250);
  rect(35,255,5,55);
  fill(250);
  rect(40,250,40,60);
  fill(51, 51, 51);
  quad(80,250,80,310,95,310,95,260);
  fill(106,106,71);
  for (int y=258; y<310; y+=8){
    fill(106,106,71);
    rect(36,y,2,2);
  }
  for (int y=258; y<300;y+=10){
    for(int x=44; x<78; x+=10){
    fill(106,106,71);
    rect(x,y,3,3);
    }
  }

   //building 2
  fill(51, 51, 51);
  rect(93,265,40,60);
  for (int y=270; y<300;y+=10){
    for(int x=96; x<130; x+=10){
    fill(165,160,102);
    rect(x,y,5,3);
    }
  }

    //building 3
  fill(220,220,220);
  rect(150,225,15,120);
  fill(220,220,220);
  rect(164,215,10,140,6);
    fill(169,169,169);
  rect(166,218,2,140,7);
  fill(105,105,105);
  arc(170,250,70,70,-PI/2,0);
  rect(170,250,35,140);
    fill(192,192,192);
  arc(170,250,60,60,-PI/2,0);
  rect(170,250,30,140);
   fill(192,192,192);
  arc(170,250,40,40,-PI/2,0);
  rect(170,250,20,140);


    //fourth building
  fill(250);
  fill(250);
  rect(235,225,5,75);
  fill(250);
  rect(240,225,40,80);
   fill(106,106,71);
  for (int y=258; y<310; y+=8){
   fill(106,106,71);
    rect(236,y,2,2);
  }
  for (int y=258; y<300;y+=10){
    for(int x=244; x<278; x+=10){
   fill(106,106,71);
    rect(x,y,3,3);
    }
  }


 // fifth building
 fill(102, 102, 102);
 rect(300,185,36,120);
 fill (51, 51, 51);
 rect (295, 185, 5, 120);
 rect (305, 185, 5, 120);

  //sixth building
  fill(51, 51, 51);
  rect(376,172,2,10);
  rect(375,180,3,15);
  quad(350,206,350,316,380,316,380,190);
  fill(102, 102, 102);
  quad(375,198,375,316,405,316,405,215);
  fill(51, 51, 51);
  rect(387,215,1,115);
  rect(396,215,1,115);

  //seventh building
  fill(51, 51, 51);
  rect(430,200, 40 ,150);
  fill(250);
  rect(430,200, 40 ,5);
  rect(470,200, 2 ,150);

  //seventh building .2
  fill(192,192,192);
  rect(490,200, 40 ,150);
  fill(250);
  rect(490,200, 40 ,5);
  rect(500,200, 2 ,150);


  //eighth building
   fill(51, 51, 51);
  rect(225,225,10,120);
  rect(270,225,10,120);
    //building 8
  arc(540,190,70,70,-PI*4/6,-PI*1/6,CHORD);
  quad(523,159,523,325,570,325,570,172);
  for(int y=170;y<325 ;y+=5){
   fill(106,106,71);
  quad(523,y,570,y+2,570,y+4,523,y+2);
  }

  //ninth building
  fill(51, 51, 51);
  quad(585,165,615,155,620,325,585,325);
  fill(31,30,72);
  triangle(614,155,622,158,619,325);
  for(int y=210;y<325 ;y+=5){
   fill(106,106,71);
  quad(585,y,615,y-1,615,y+1,585,y+2);
  }
  for(int y=210;y<325 ;y+=5){
   fill(64,64,34);
  quad(615,y-1,621,y,621,y+2,615,y+1);
  }

  //shore
  fill(69, 137, 163);
  rect(0,310,900,400);

   //mangroves, forloop
   for(int x=0;x<900;x+=20){
   mangroves(x,310,10,10,3,28,5,255);
   //varying parameters for mangroves
      mangroves(x+10,305,8,8,6,41,8,255);
      mangroves(x+5,300,5,4,14,62,17,255);

   }
}

void cloud(int x,int y,int w,int h,int red,int green,int blue,int a){
 fill(red,green,blue,a);
 ellipse(x,y,w,h);
}

//sets variables they're being created in
void mangroves(int x,int y,int w,int h,int red,int green,int blue,int a){
 fill(red,green,blue,a);
 ellipse(x,y,w,h);
 ellipse(x+5,y+5,w,h);
 ellipse(x-5,y-3,w,h);
 ellipse(x+3,y-5,w,h);
 ellipse(x-3,y+5,w,h);
}


void serialEvent(Serial myPort){
  String s=myPort.readStringUntil('\n');
  s=trim(s);
  if (s!=null)
    xPos=(int)map(int(s),0,650,0, width); //jere
  println(xPos);
  myPort.write(State);
}
class Moon
{
  int x;
  int y;
  int sizeMod = 0;

  Moon()
  {
    //instantiate moon at x = 60, y = 90
    this.x = 60;
    this.y = 90;
  }

  void drawMoon()
  {
    int blue, green;

     //map xPos to green and blue rgb values for moon
     green = int(map(xPos, 0, width, 221, 250));
     blue = int(map(xPos, 0, width, 0, 205));

     noStroke();
     fill(255, green, blue);

    //map Pos X to rgb values for background/sky
    int bg_red = int(map(xPos, 0, width, 83, 0));
    int bg_green = int(map(xPos, 0, width, 157, 0));
    int bg_blue = int(map(xPos, 0, width, 253, 0));

    //map xPos to variable sizeMod, starting at 0, ending at 20
    sizeMod = int(map(xPos, 0, width/6, 0, 20));

    //width/6 divides canvas into 6, for each moon/sun phase
    if (xPos <= width/6)
    {
      //sizeMod decreases size of moon, starts at 80, ends at 80 - 20 = 60
      ellipse(x, y, 80 - sizeMod, 80 - sizeMod);
    }
    else if (xPos > width/6 && xPos <= 2 * (width/6))
    {
      arc(x, y, 60, 60, HALF_PI, 3 * HALF_PI, OPEN);
    }
    else if (xPos > 2 * width/6 && xPos <= 3 * width/6)
    {
      ellipse(x, y, 60, 60);
      //draw two overlapping circles to give illusion of crescent moon
      fill(bg_red, bg_green, bg_blue);
      ellipse(x + 10, y, 50, 50);
    }
    else if (xPos > 3 * width/6 && xPos <= 4 * width/6)
    {
      ellipse(x, y, 60, 60);
      //can't figure out how to flip arc, just cover with rectangle
      fill(bg_red, bg_green, bg_blue);
      rect(x - 30, y - 30, 30, 60);
    }
    else if (xPos > 4 * width/6 && xPos <= 5 * width/6)
    {
      ellipse(x, y, 60, 60);
      //draw two overlapping circles to give illusion of crescent moon
      fill(bg_red, bg_green, bg_blue);
      ellipse(x - 10, y, 50, 50);
    }
    else
    {
      ellipse(x, y, 60, 60);
    }
  }

  void update()
  {
    x = xPos;
  }
}
class Star
{
  int x;
  int y;

  Star()
  {
    //instantiate star with random x and random y values, every time you restart sketch it' random
    this.x = int(random(0, width));
    this.y = int(random(0, height/3));
  }

  void drawStar()
  {
    fill(255);
    ellipse(x, y, -1.5, -1.5);
  }
}
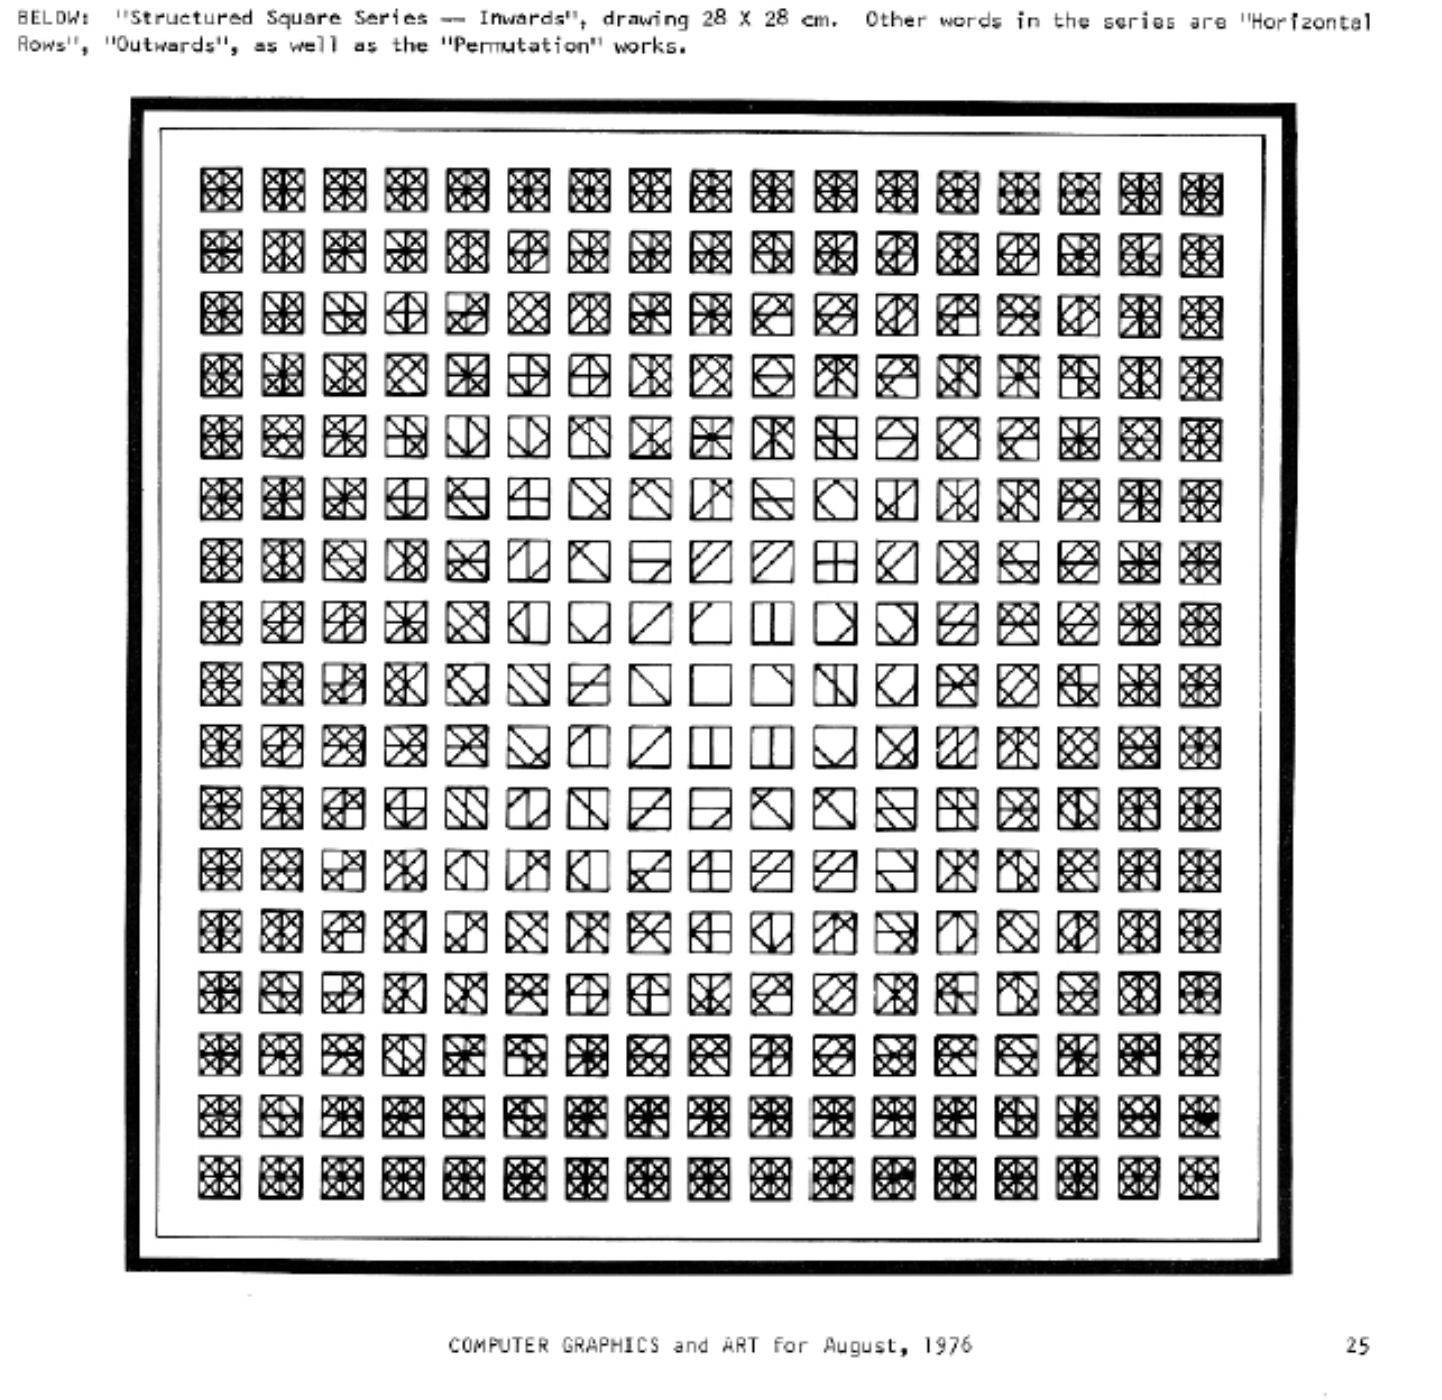
For the following exercise, I have chosen to recreate “Structured Square Series — Inwards” featured in Computer Graphics and Art for August, 1976.
In the computer generated art below, the title of the piece gave me the biggest clue of how this operates as well as how the piece was designed. In the piece, the outer layer has total of 8 lines within the box (horizontal, vertical, diagonal [R-L], diagonal [L-R], and four lines triangulating the square into total of 16 equal triangles. And, as each you approach the middle of all the layers, a line is omitted – when you reach the middle, all the lines are omitted.
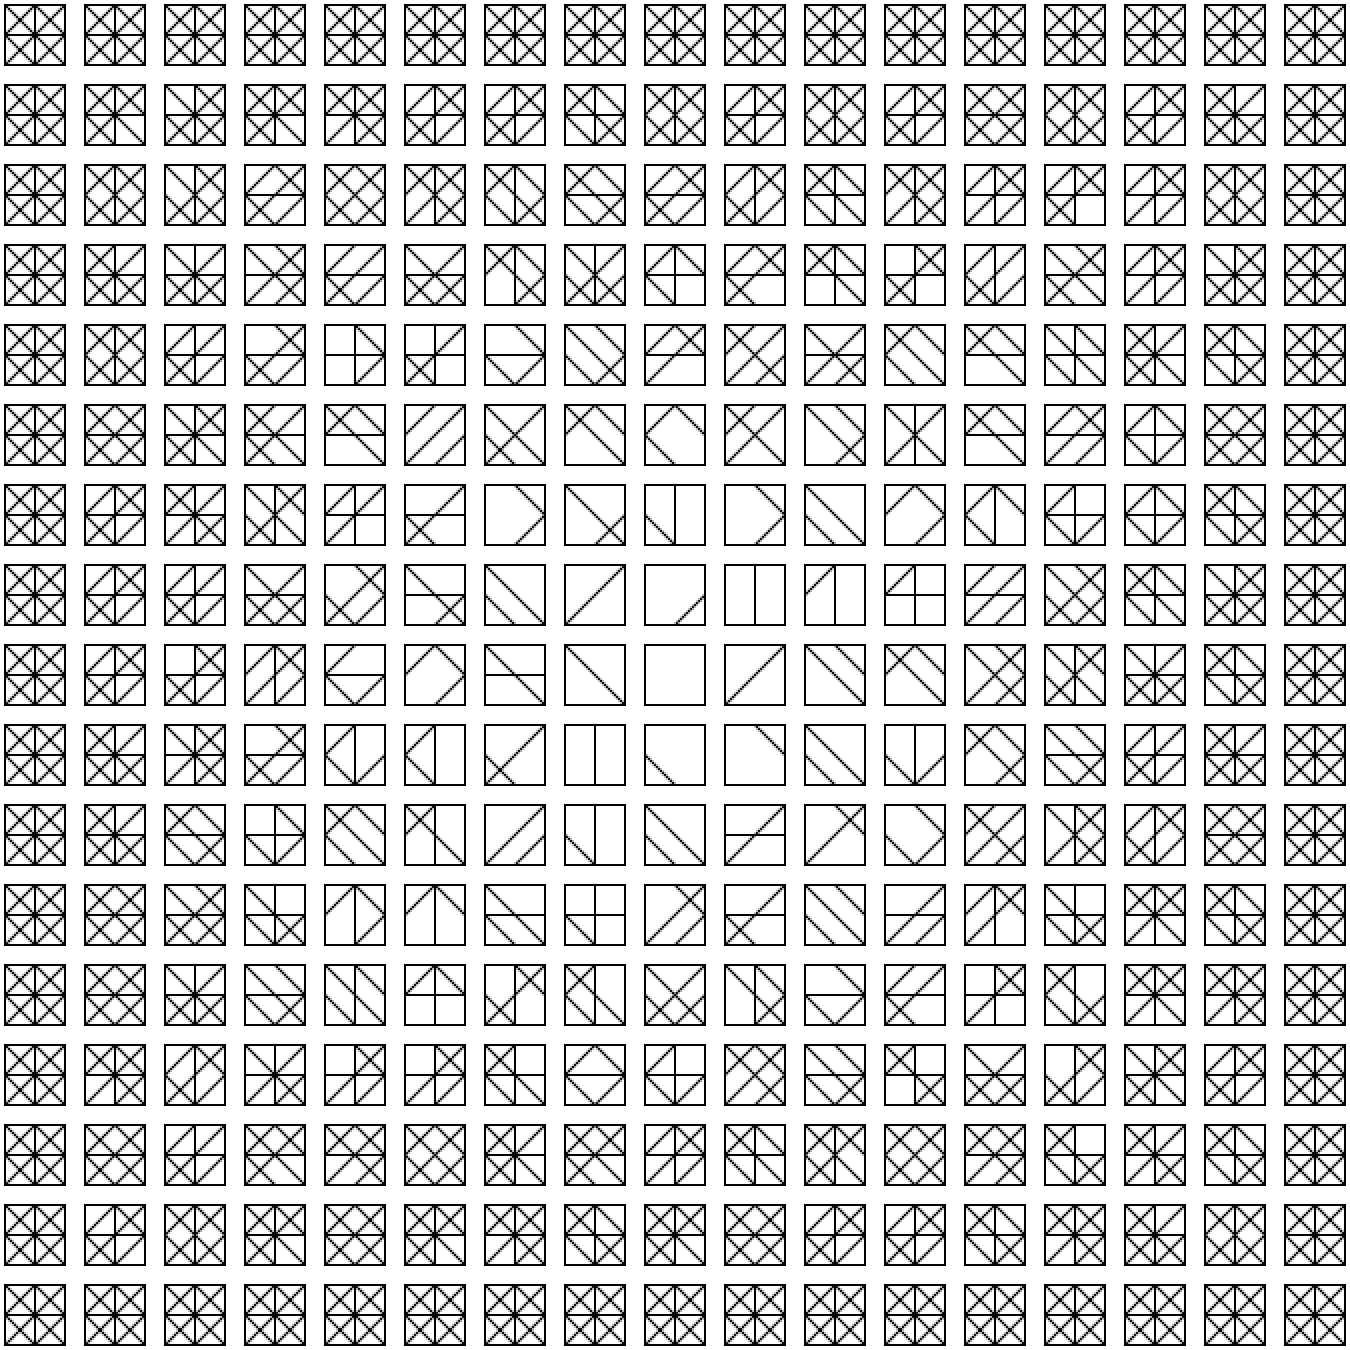
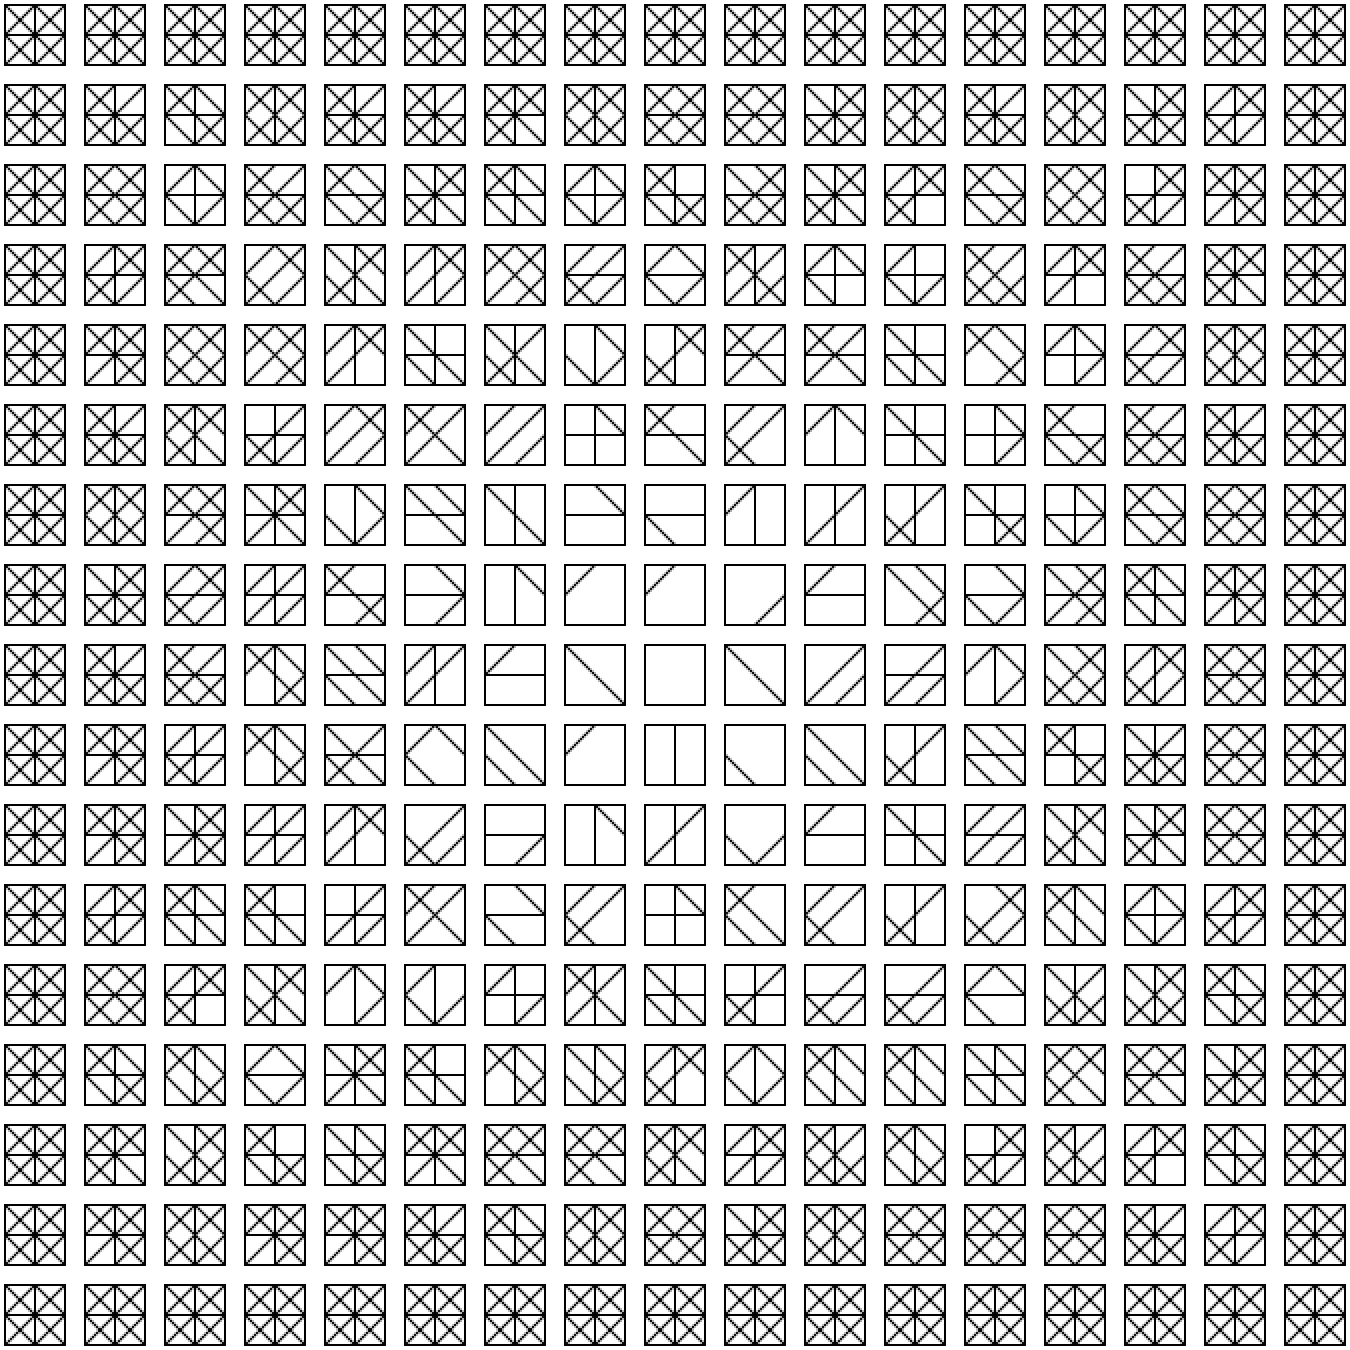
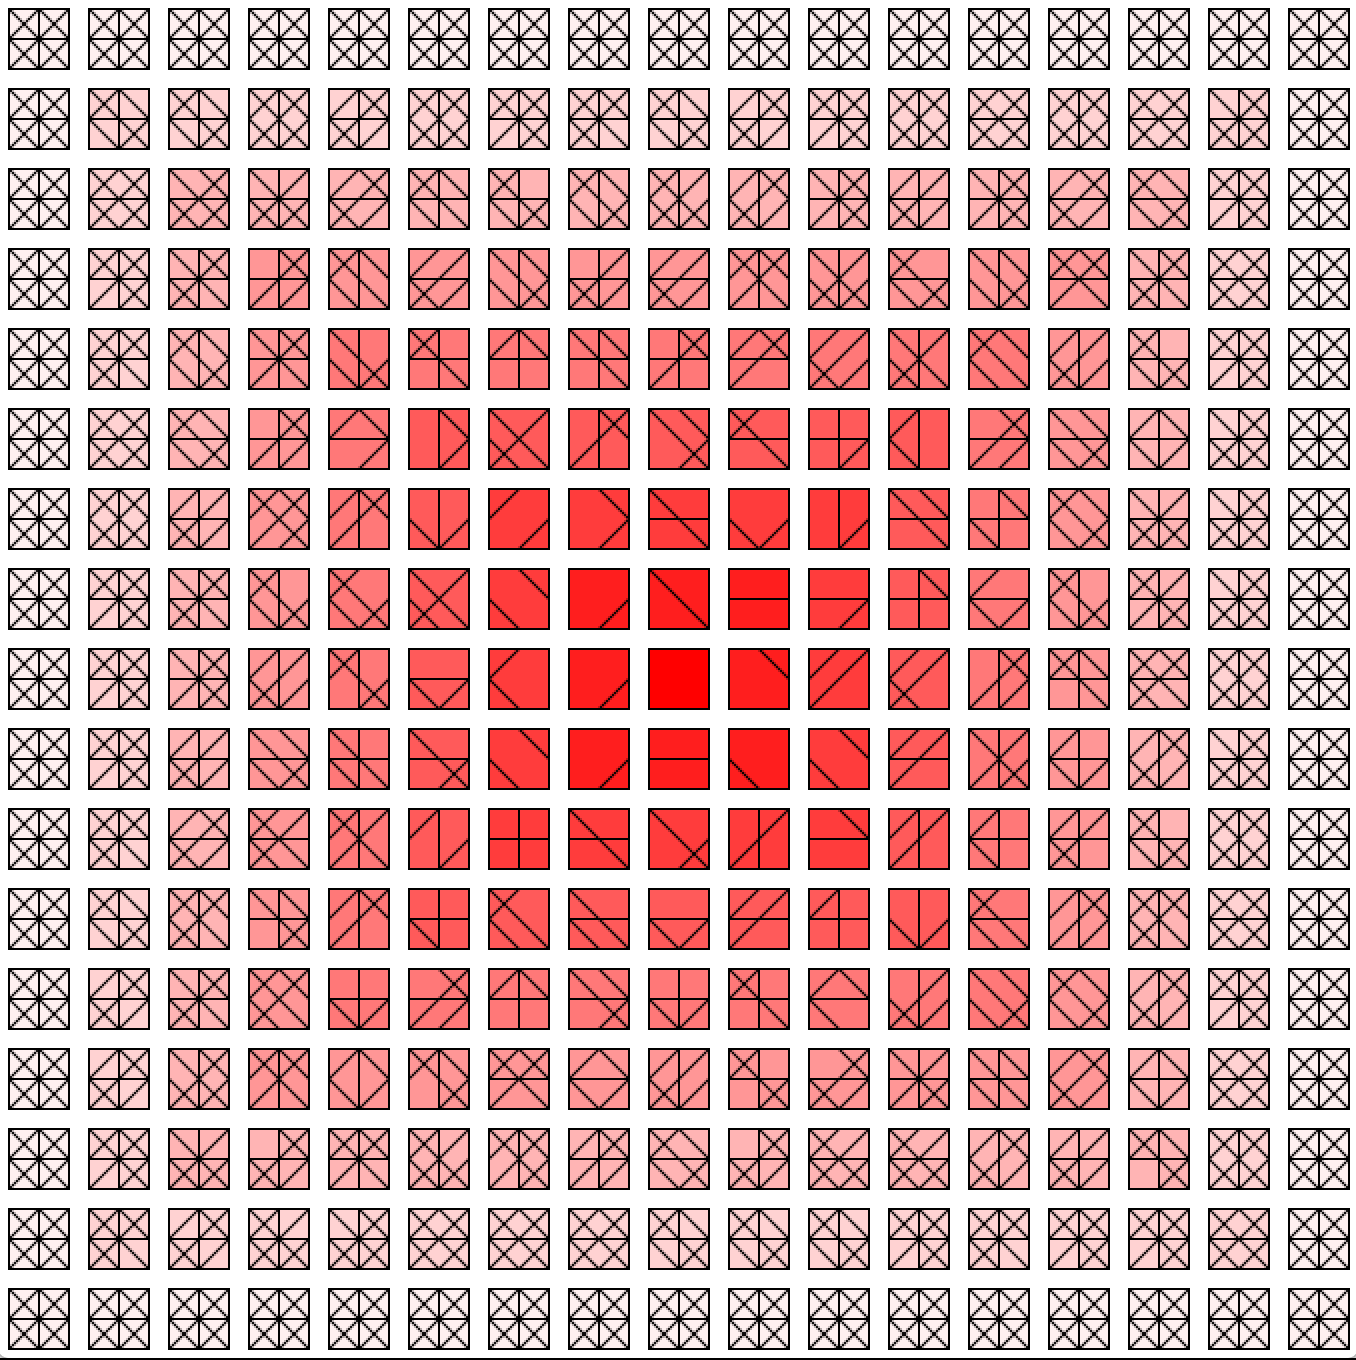
So, I have recreated the above artwork using processing and the results are show in the images below. For the recreation process, I have used an ArrayList and an IntList, where the arrayList contains eight arrays of quads that represent the coordinates for the triangulating lines and the IntList containing integers from 0 to 7 to represent the indexes for accessing the arrays in the arrayList.
The inner loop for k runs from k=0 to k=7 with incrementing k for every loop, and I have utilized this with a conditional check depending on the location of the squares. For instance, if the location of the square is at the third layer from the outside, it should have 6 lines drawn – and I was able to do this by adding a conditional statement that it should draw the line when k < 6. This was done for each layer to recreate the art piece correctly. Also, to create the random configuration of strokes, I have used the shuffle function of the IntList to mix the order of the stroke quads for each squares.