Exercises
Exercise 1
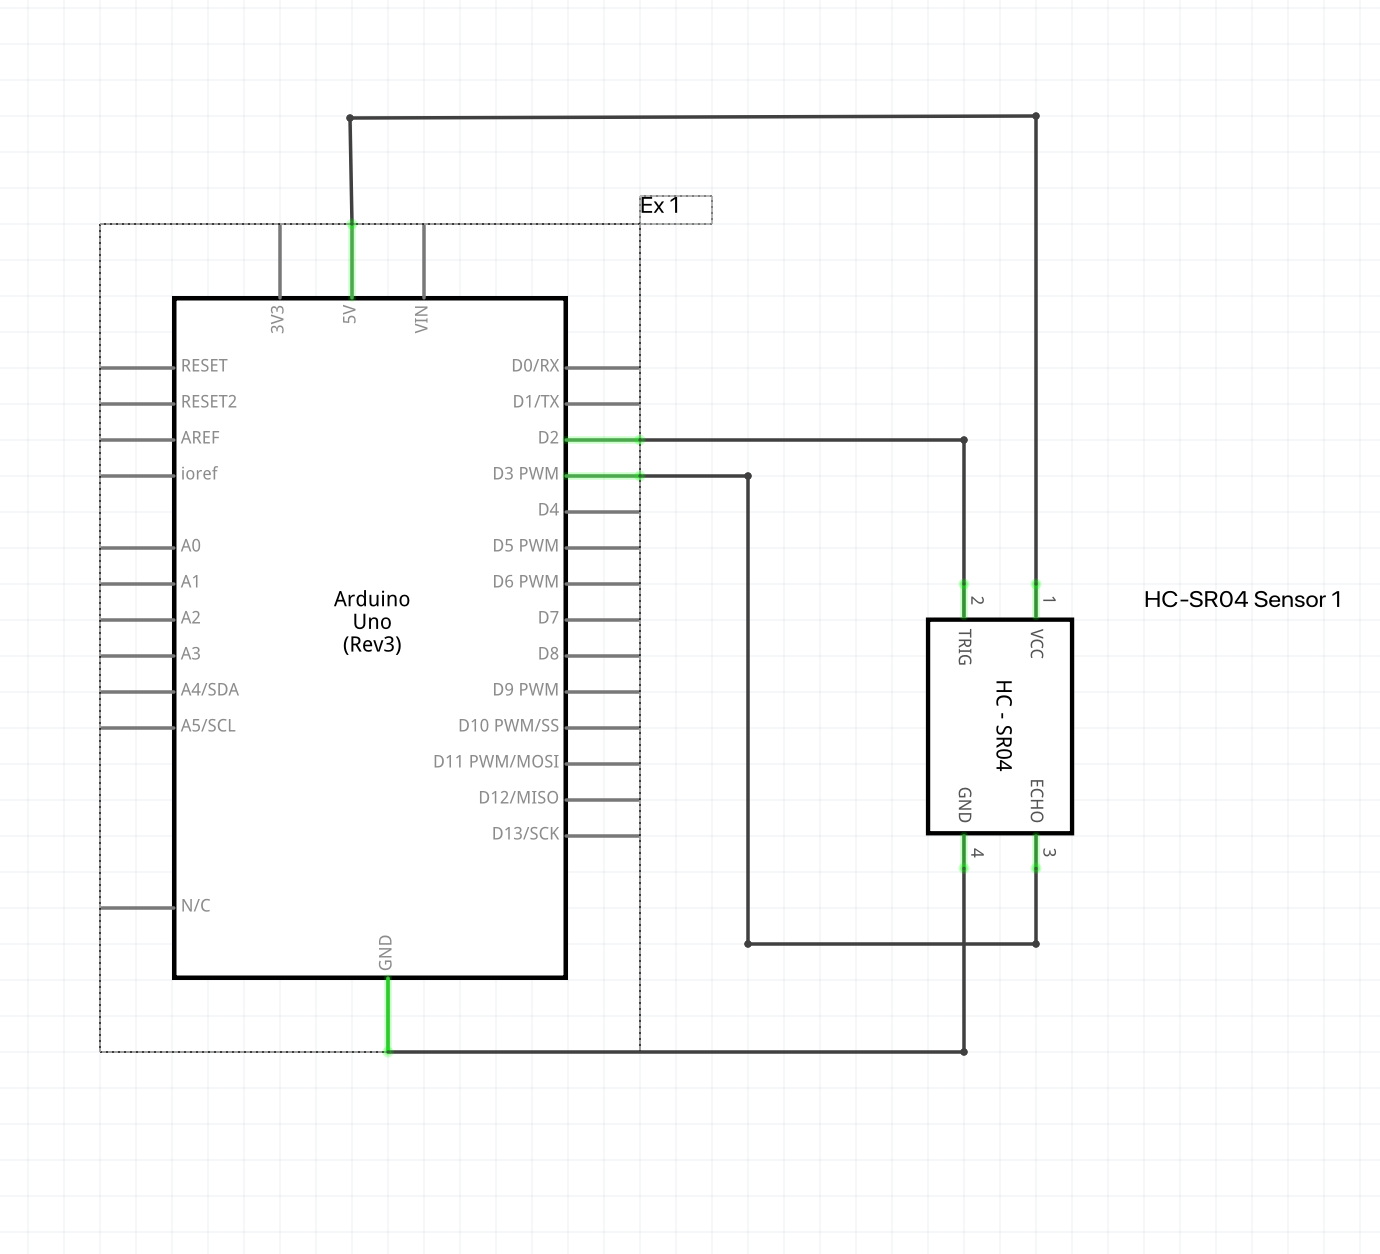
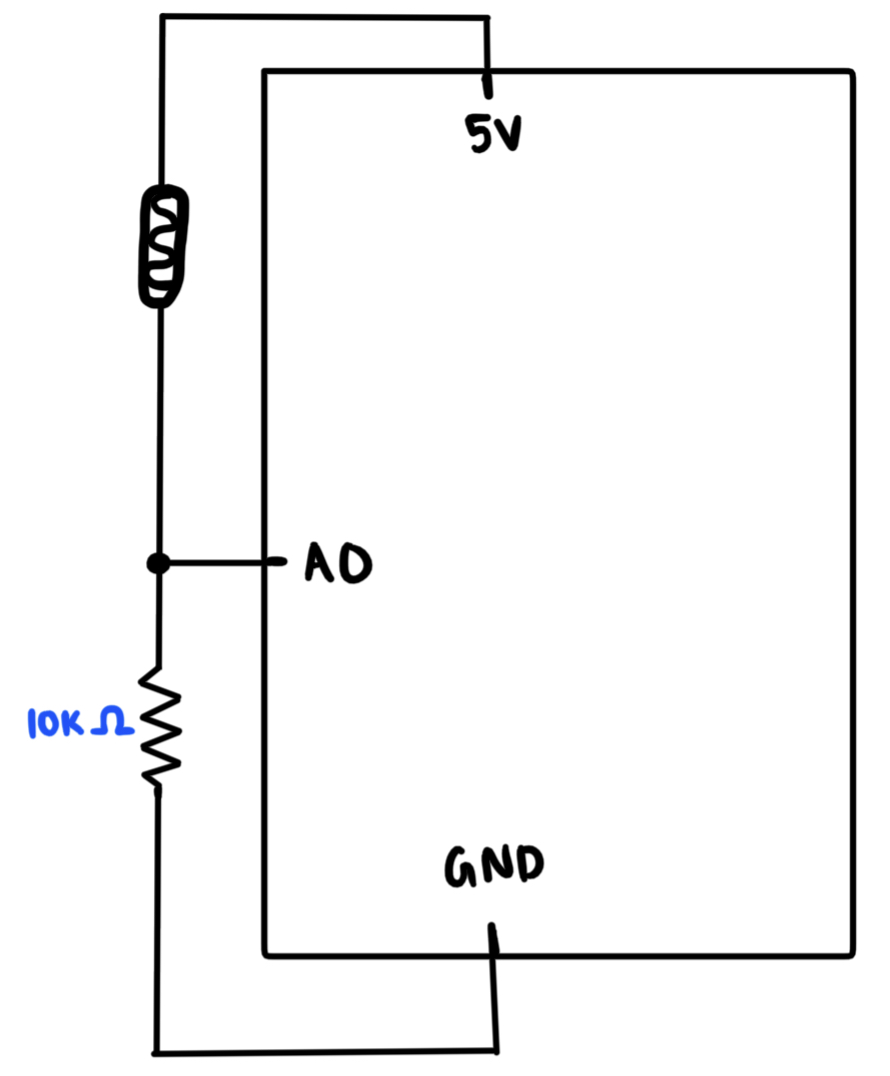
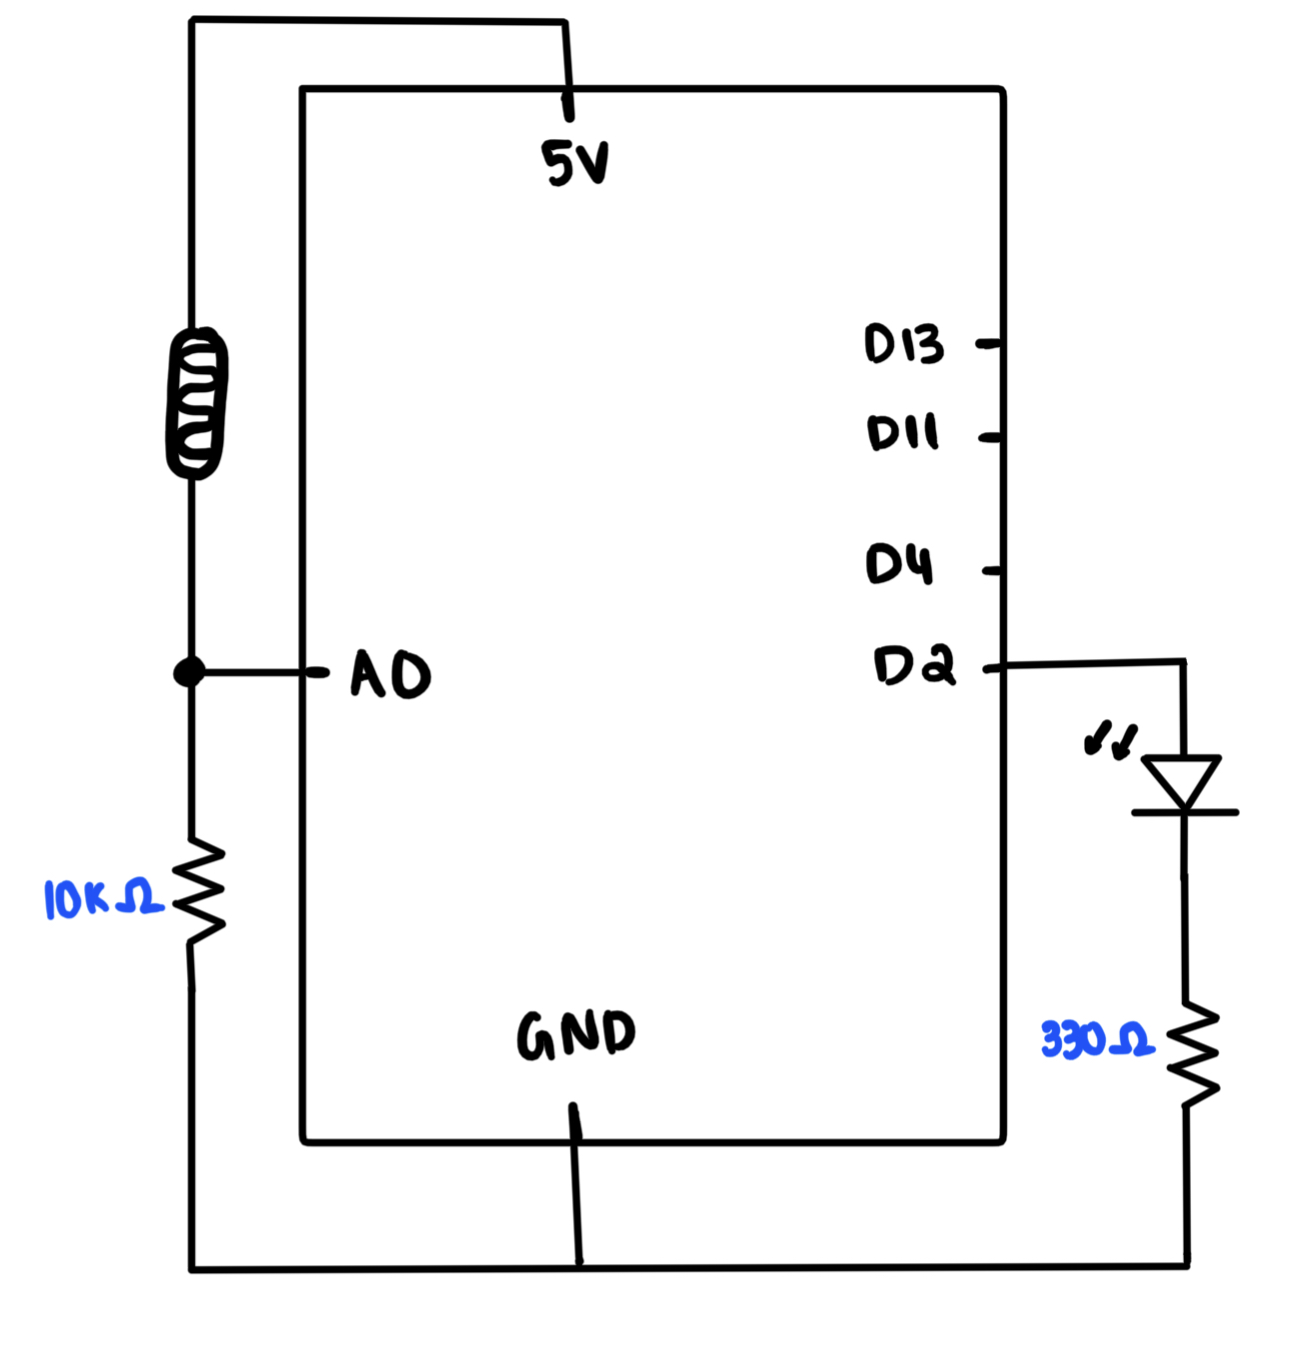
For exercise 1, we used a light sensor. As brightness of light in the surrounding was changed, the ball moved along the horizontal axis in p5. Higher the brightness, the farther right the ball moved.
The values from the light sensor roughly ranged between 0 and 500,000 so we mapped them between 0 and width of the screen and used the mapped value as x-coordinate of the ellipse
//Exercise 1 P5js Code

let ellipseX; // Variable to store ellipse's x-coordinate

function setup() {
  createCanvas(400, 400); // Create a canvas of 800x400 pixels
  ellipseX = width / 2; // Set initial x-coordinate of ellipse to middle of the screen
  noStroke(); // No stroke for the ellipse
}

function draw() {

  background(220); // Refresh background on each frame
  fill(255, 0, 0); // Set fill color to red
  ellipse(ellipseX, height / 2, 50, 50); // Draw ellipse at current x-coordinate and middle of the screen

  if (!serialActive) {
    text("Press Space Bar to select Serial Port", 20, 30);
  } else {
    text("Connected", 20, 30);}
}


function keyPressed() {
  if (key == " ") {
    // important to have in order to start the serial connection!!
    setUpSerial();
  }
}

// this callback function
function readSerial(data) {
  ////////////////////////////////////
  //READ FROM ARDUINO HERE
  ////////////////////////////////////

  if (data != null) {
    // make sure there is actually a message
    // split the message
    console.log(data);
    console.log("fromArduino");

    let fromArduino = split(trim(data), ",");
    // if the right length, then proceed
    if (fromArduino.length == 1) {
      // only store values here
      // do everything with those values in the main draw loop
      console.log("working");
//values from light sensor roughly ranged between 0 and 500,000 so map them between 0 and width of the screen
//use the mapped value as x-coordinate of the ellipse
      ellipseX = map(data,0,500000, 0,width);
    }

    //////////////////////////////////
    //SEND TO ARDUINO HERE (handshake)
    //////////////////////////////////
   let sendToArduino = fromArduino + "\n";
   writeSerial(sendToArduino);
  }
}
//Exercise 1 Arduino Code

void setup() {
  Serial.begin(9600); // Start serial communication at 9600 bps

  pinMode(LED_BUILTIN, OUTPUT);
// start the handshake
  while (Serial.available() <= 0) {
    //digitalWrite(LED_BUILTIN, HIGH); // on/blink while waiting for serial data
    Serial.println("0,0"); // send a starting message
    delay(300);            // wait 1/3 second
    //digitalWrite(LED_BUILTIN, LOW);
    delay(50);
  }
}
void loop() {

  // wait for data from p5 before doing something
    while (Serial.available()) {
    digitalWrite(LED_BUILTIN, HIGH); // led on while receiving data

  // Read sensor value
  int sensorValue = analogRead(A0);
   Serial.print(sensorValue);
  // Map sensor value to screen width (e.g. 0 to 800 pixels)
  int screenValue = map(sensorValue, 0, 1023, 0, 800);

  // Send mapped value to p5.js
  Serial.println(screenValue);

  delay(50); //    for stability
}
digitalWrite(LED_BUILTIN, LOW);
}
Exercise 2
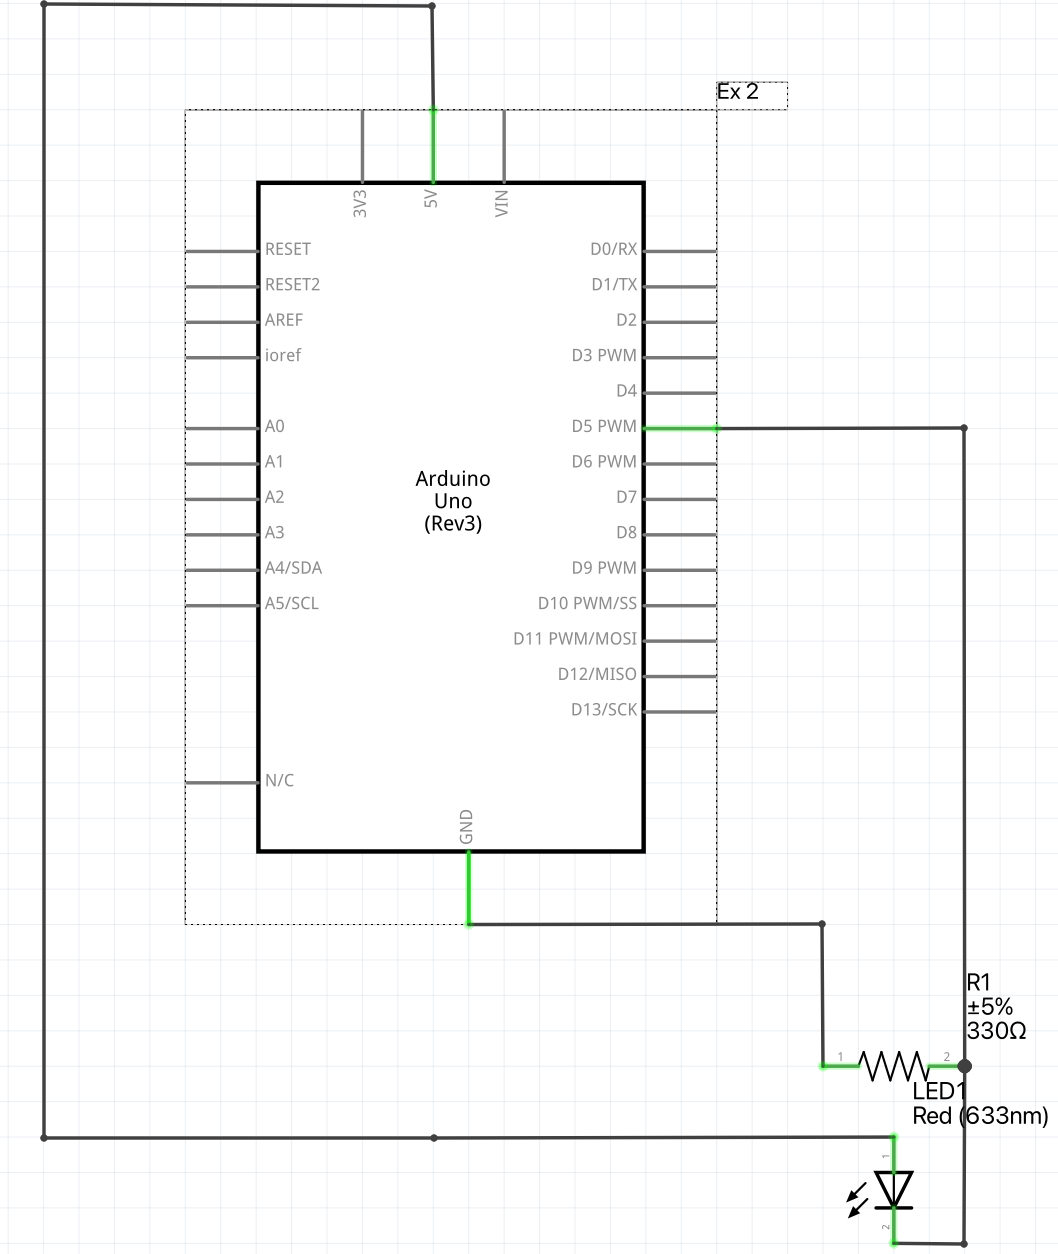
For this exercise, we used a slider in p5 to control brightness of the LED. Value of slider ranged between 0 and 255 and these values were sent to Arduino and used as brightness for the LED.
//Exercise 2 P5js Code
let slider;
function setup() {
   createCanvas(400, 400); // Create a canvas of 800x400 pixels
  slider = createSlider(0, 255, 0);
  slider.position(160,height/2); // Set the position of the slider
  slider.style('width', '80px'); // Set the width of the slider


  noStroke(); // No stroke for the ellipse
}
function draw() {

  background(255); // Refresh background on each frame

  if (!serialActive) {
    text("Press Space Bar to select Serial Port", 20, 30);
  } else {
    text("Connected", 20, 30);}
}
function keyPressed() {
  if (key == " ") {
    // important to have in order to start the serial connection!!
    setUpSerial();
  }
}
// this callback function
function readSerial(data) {
    ////////////////////////////////////
    //READ FROM ARDUINO HERE
    ////////////////////////////////////
    //////////////////////////////////
    //SEND TO ARDUINO HERE (handshake)
    //////////////////////////////////
    console.log(slider.value());
    let sendToArduino = slider.value() + "\n";
    writeSerial(sendToArduino);

}
//Exercise 2 Arduino Code

const int ledPin =3;
int brightness = 0;
void setup() {
  Serial.begin(9600); // Start serial communication at 9600 bps

  pinMode(LED_BUILTIN, OUTPUT);
  pinMode(ledPin, OUTPUT);
// start the handshake
  while (Serial.available() <= 0) {
    digitalWrite(LED_BUILTIN, HIGH); // on/blink while waiting for serial data
    Serial.println("0,0"); // send a starting message
    delay(300);            // wait 1/3 second
  }
}
void loop()
{
  // wait for data from p5 before doing something
    while (Serial.available())
    {
    digitalWrite(LED_BUILTIN, HIGH); // led on while receiving data
    int brightness = Serial.parseInt(); //get slider value from p5
    Serial.println(brightness); //just to view the value

     if (Serial.read() == '\n') {
       analogWrite(ledPin, brightness); //set brightness of LED

      }else
      {
        digitalWrite(LED_BUILTIN, HIGH);
      }
    }
}
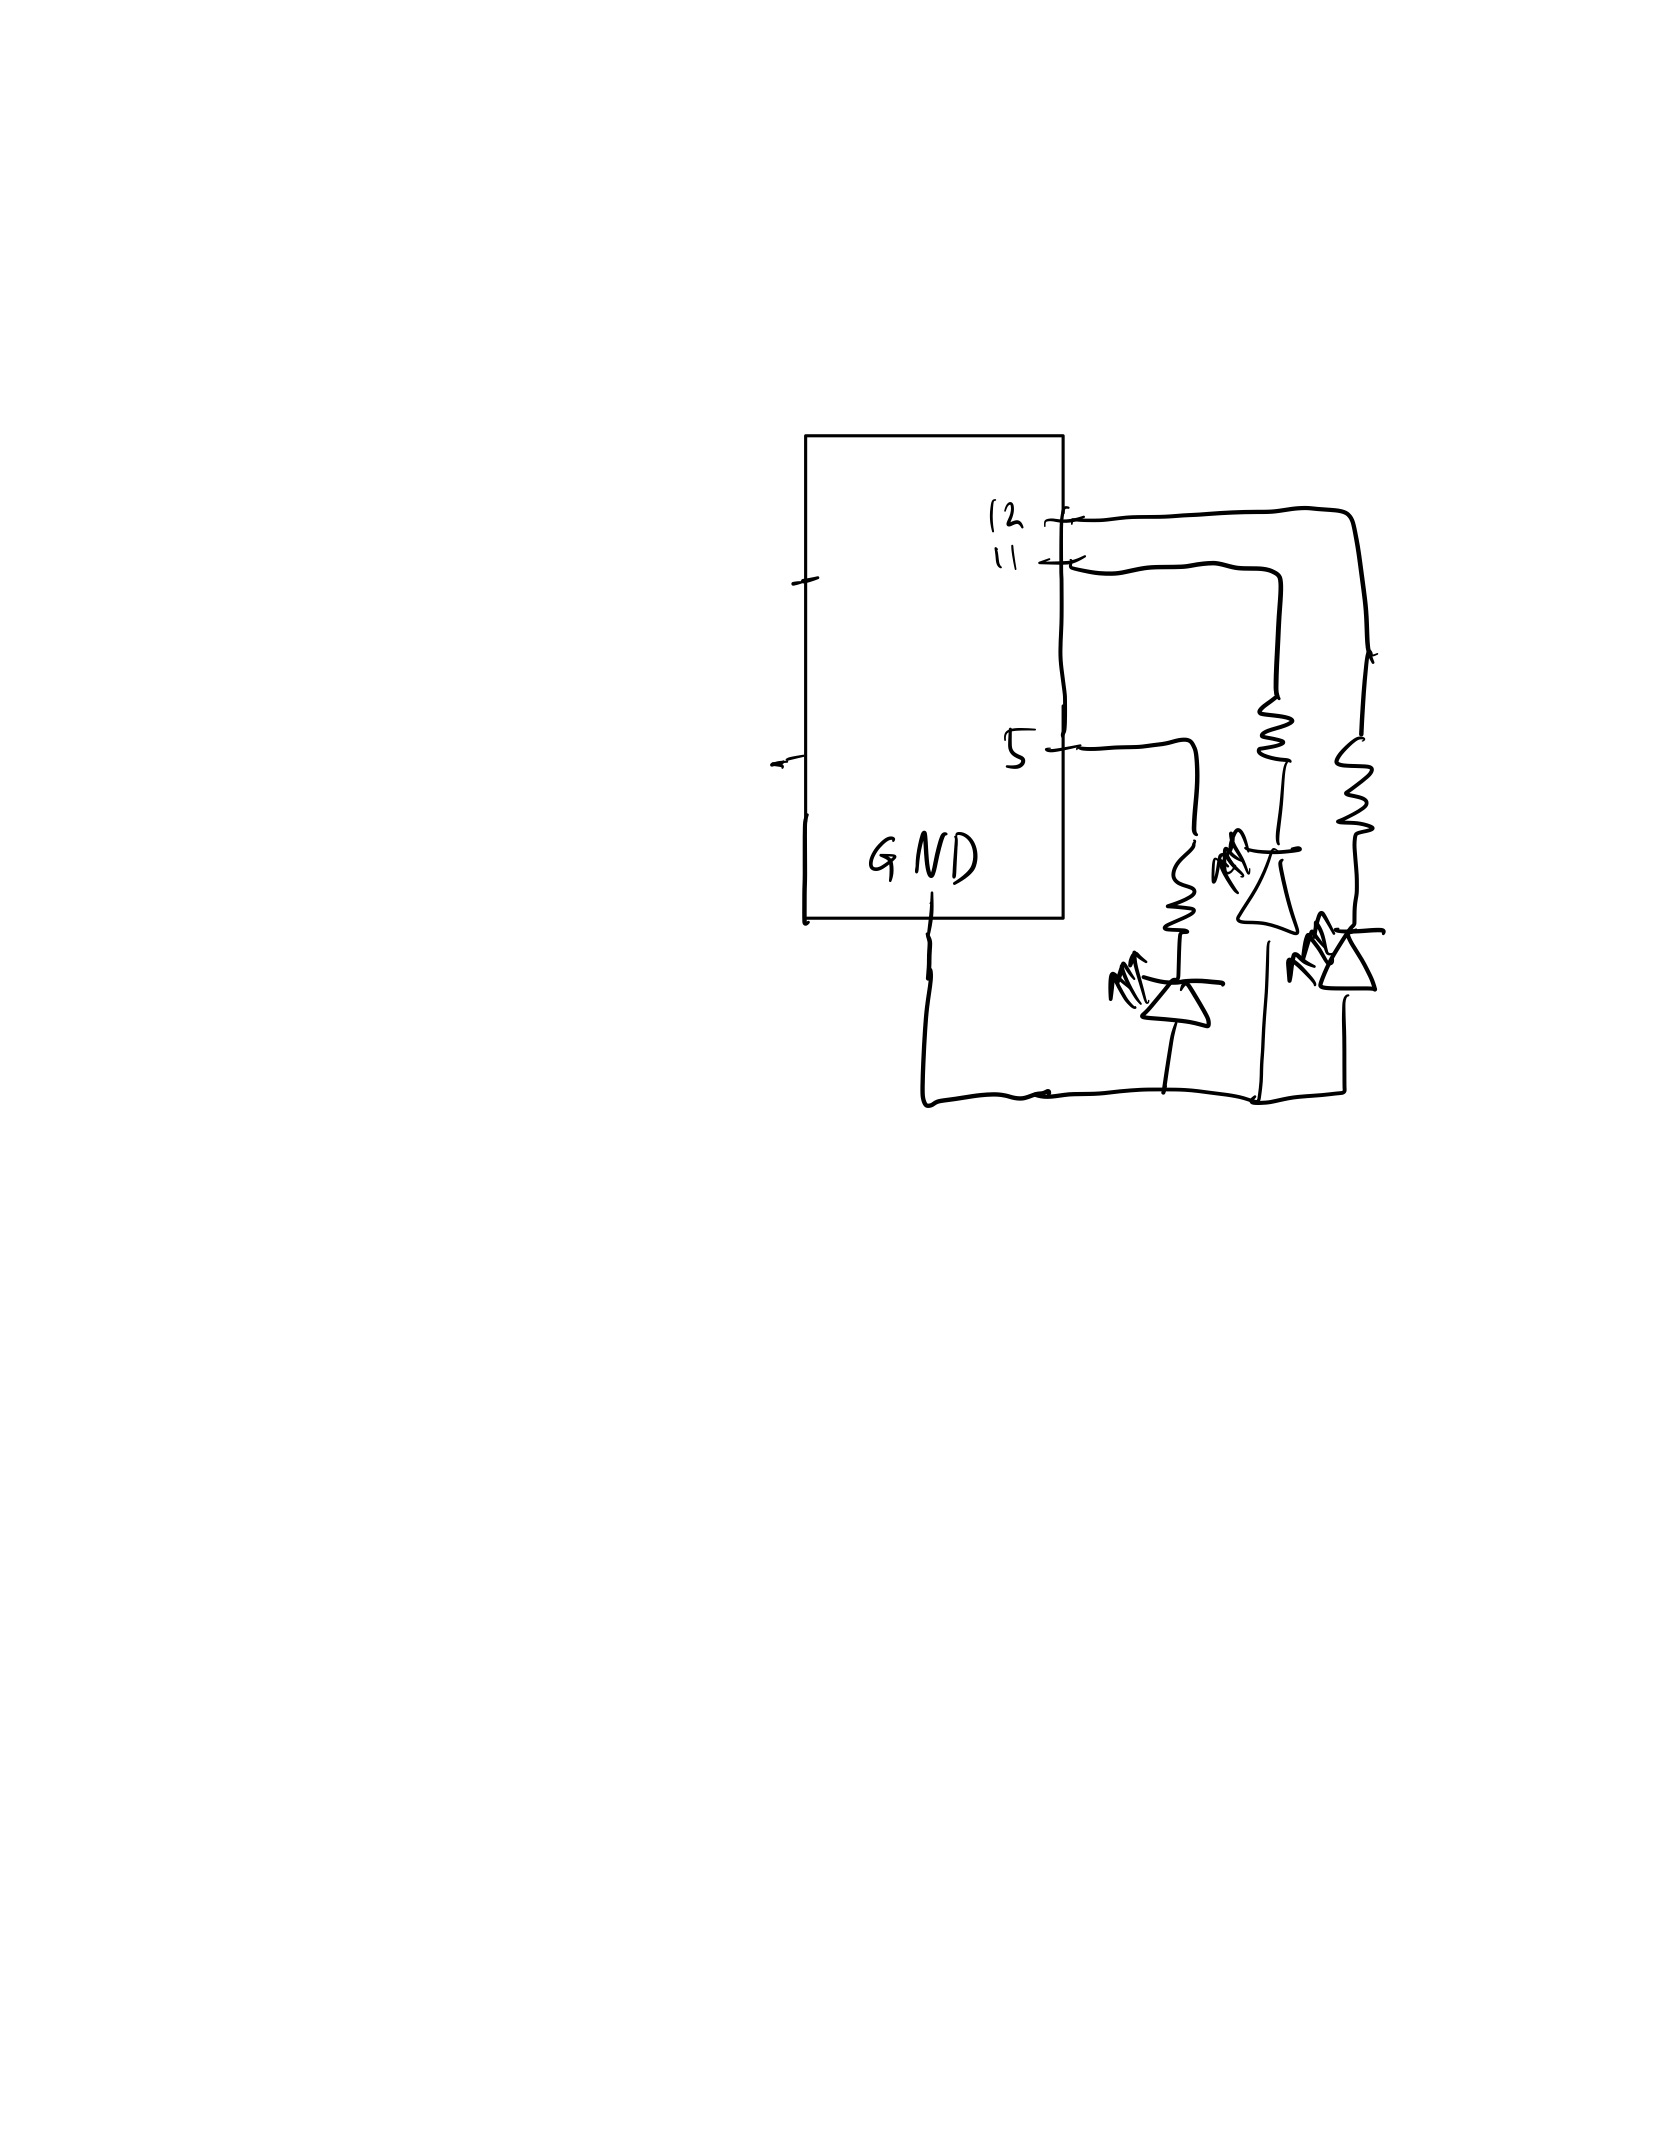
Exercise 3
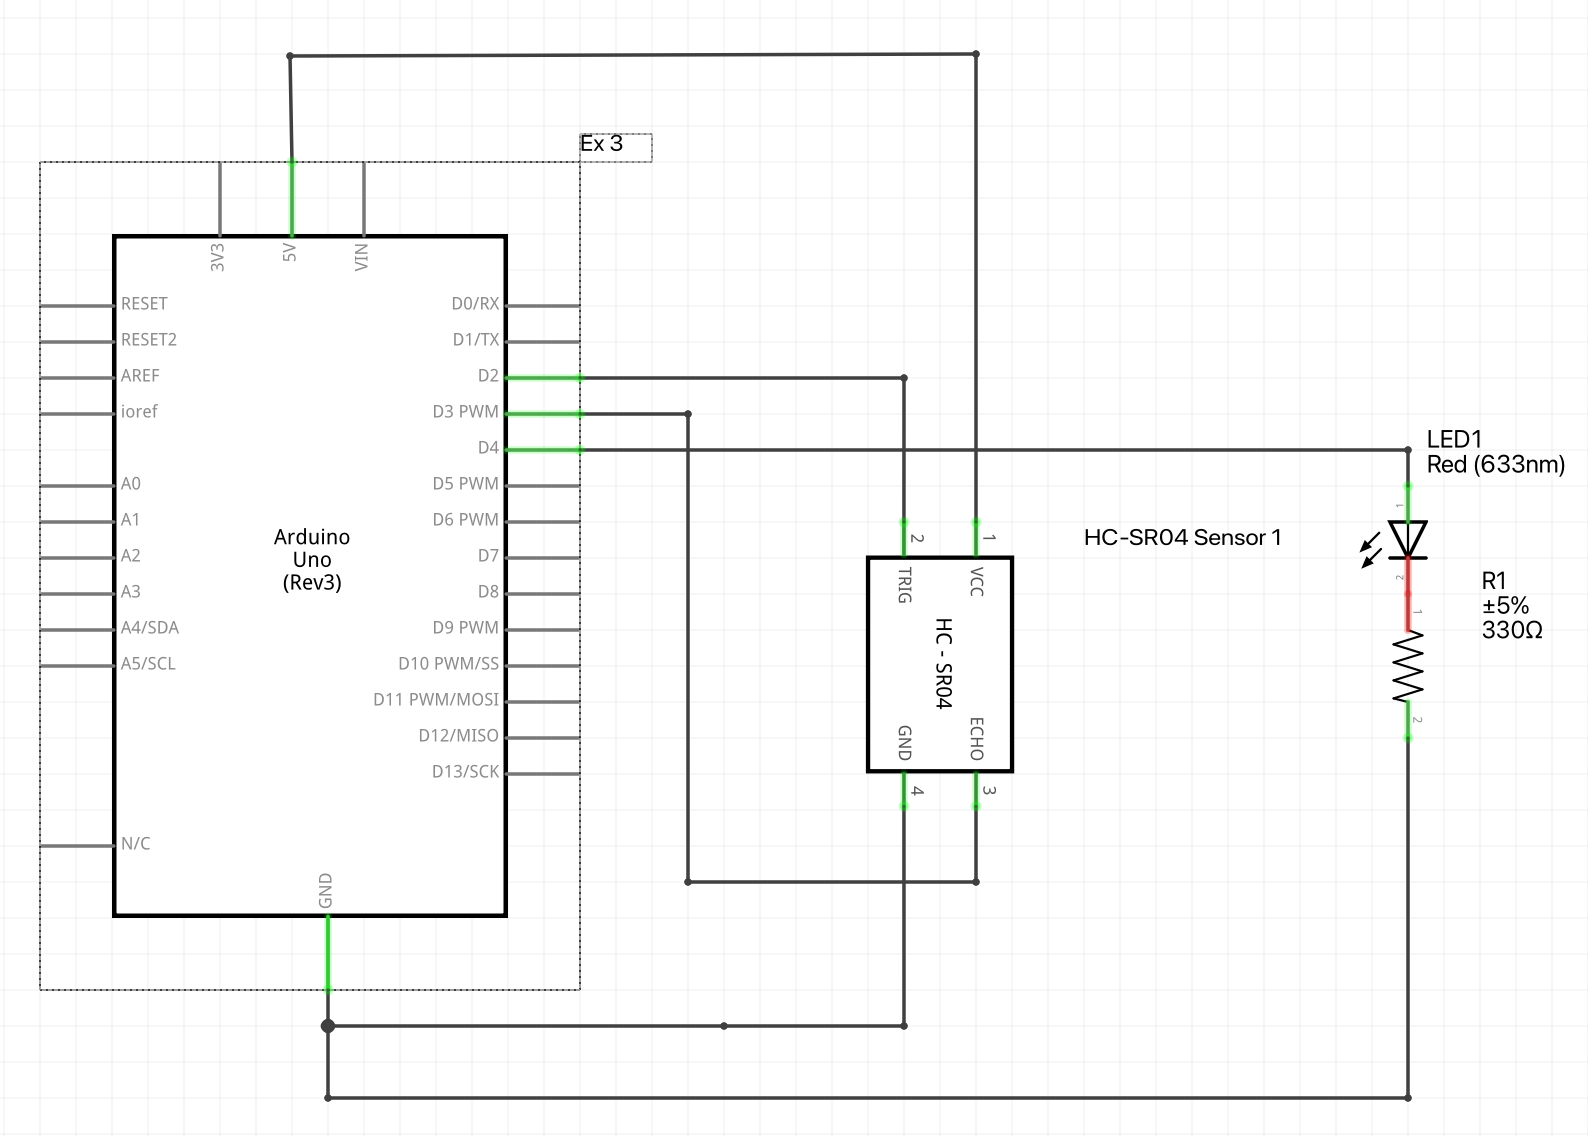
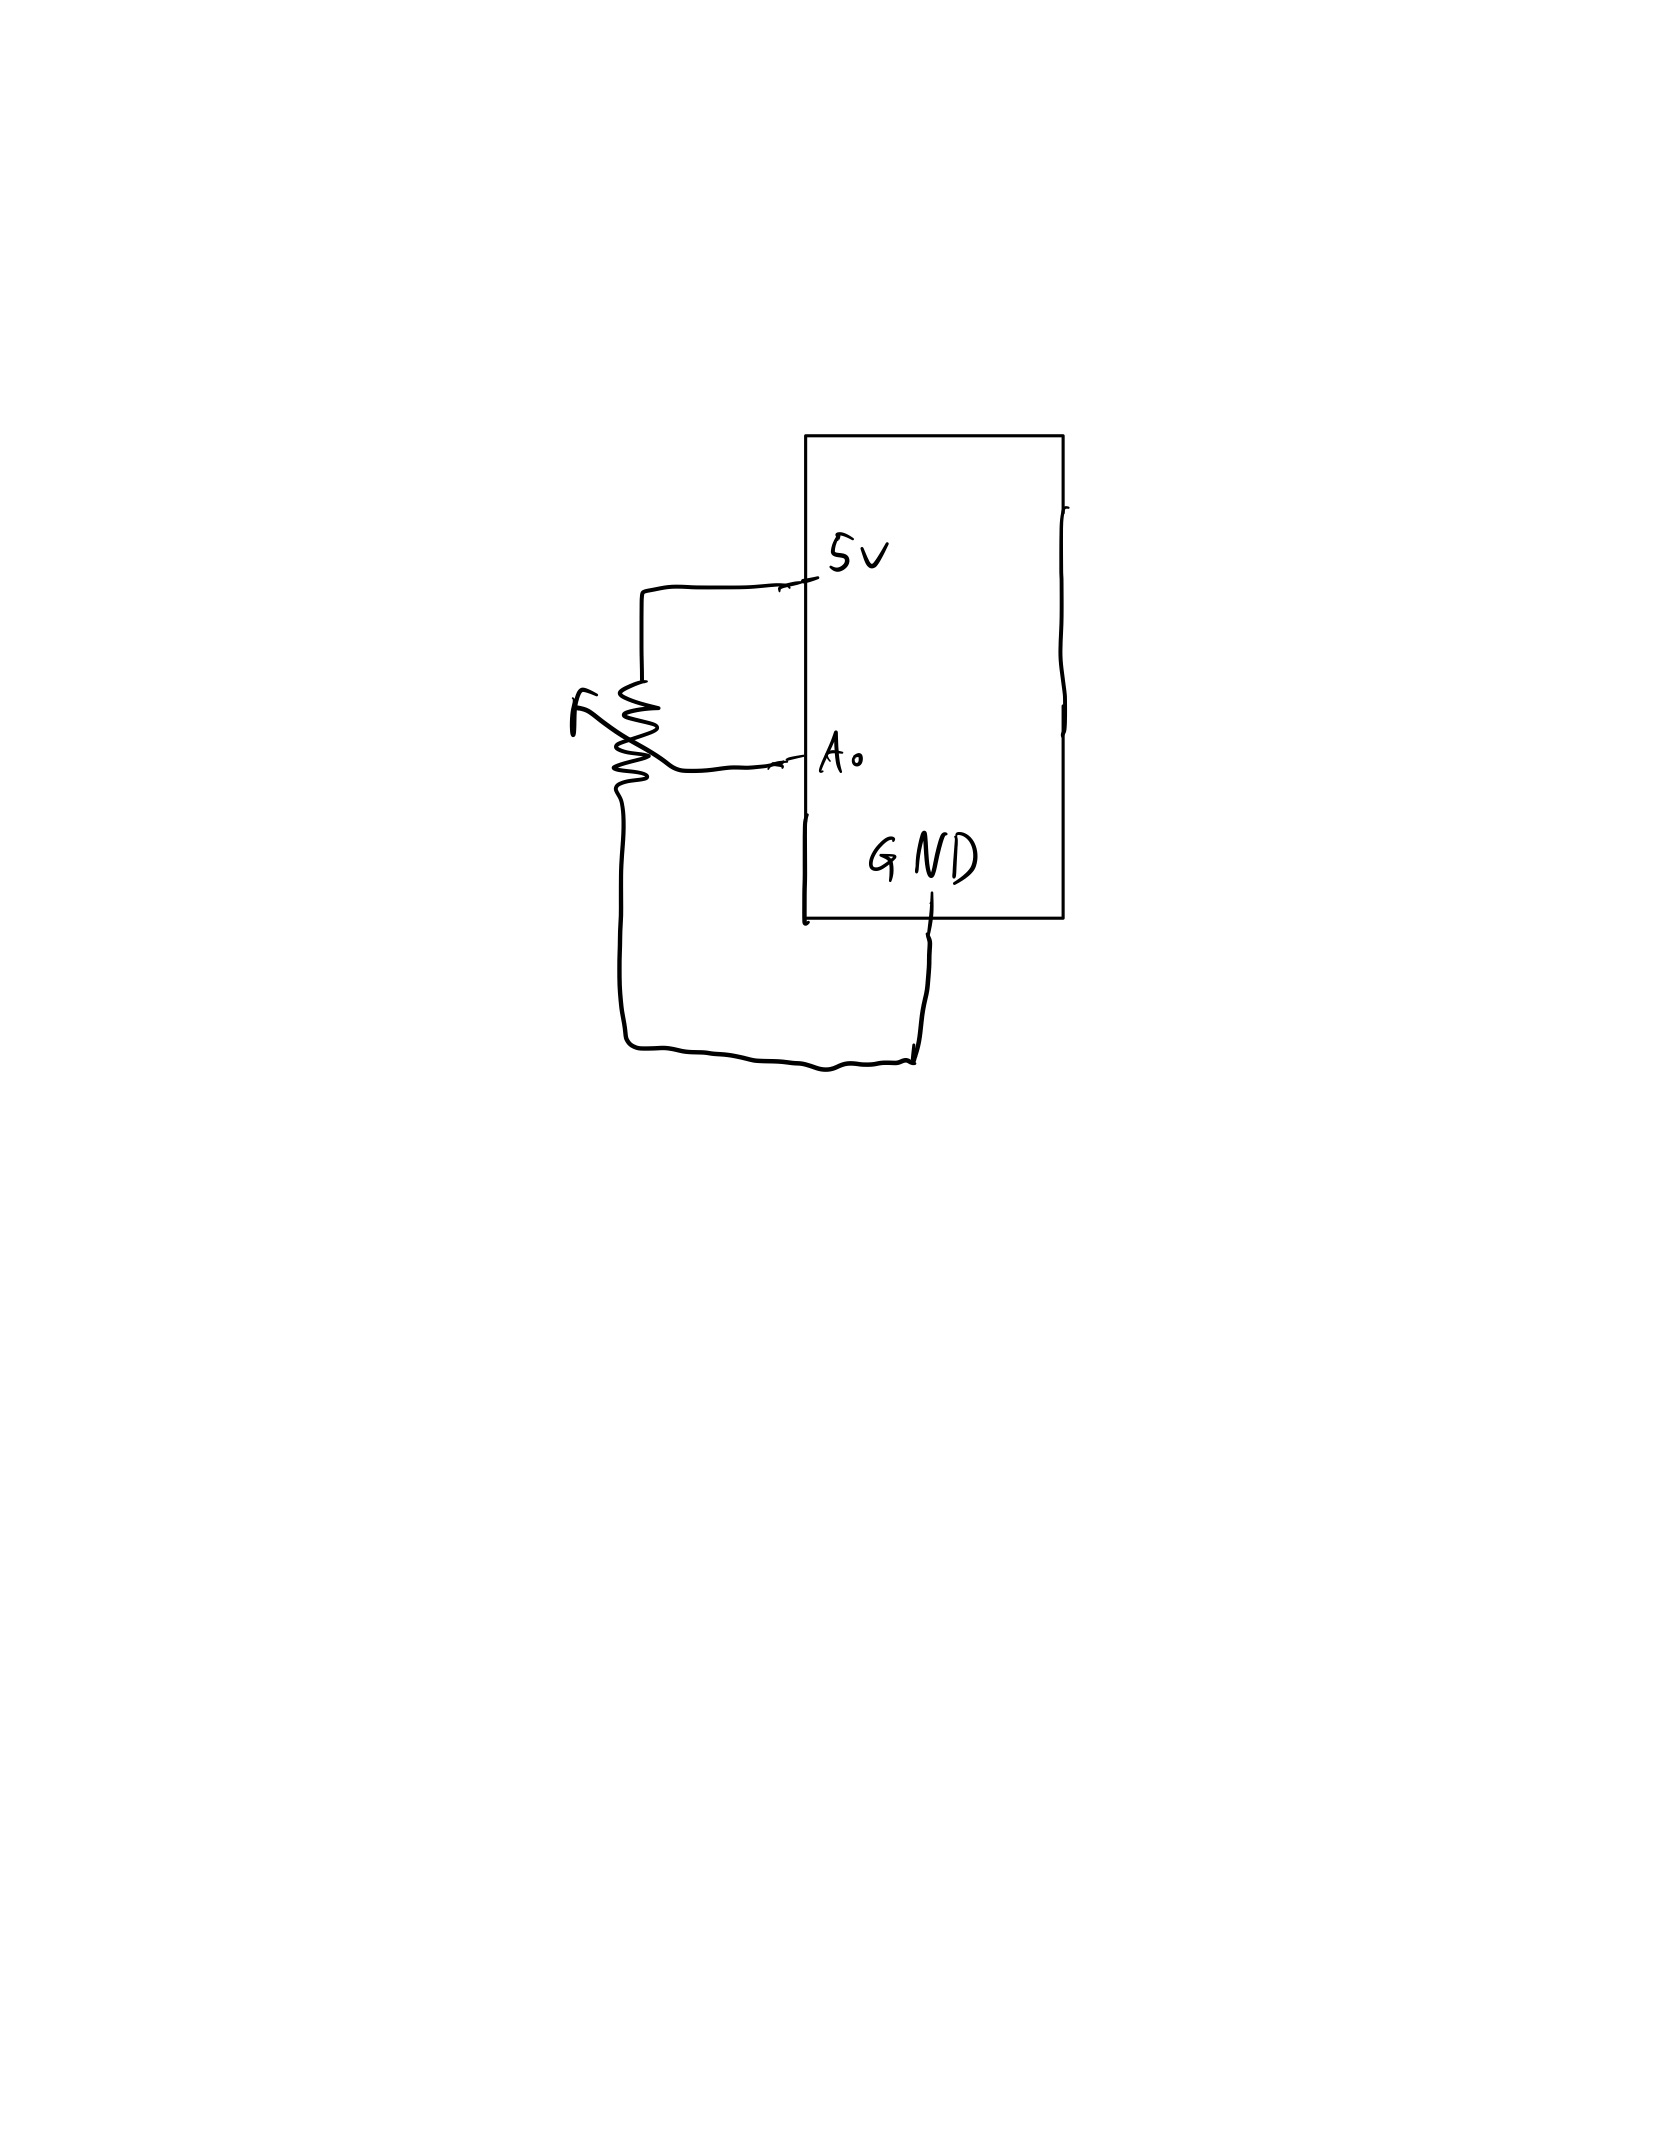
For this exercise, we used a potentiometer to control the wind. The potentiometer’s values ranged between 0 and 1023. So, for any value less than 500, wind moved the ball forward/wind blew to right. We added this layer that if value was between 500 and 600, wind stopped so the ball stopped. Finally, if value was above 600, wind blew in opposite direction moving the ball in the opposite direction.
For LED part, we used a flag called heightOfBall. Whenever ball touched the ground, this flag was set to zero. Otherwise, it was set to one. This was sent to Arduino to check whenever ball bounced. When this happened, LED would be turned on. Otherwise it would be turned off.
//Exercise 3 P5js Code

let velocity;
let gravity;
let position;
let acceleration;
let wind;
let drag = 0.99;
let mass = 50;
let heightOfBall = 0;

function setup() {
  createCanvas(640, 360); // Create a canvas of 800x400 pixels

  noFill();
  position = createVector(width/2, 0);
  velocity = createVector(0,0);
  acceleration = createVector(0,0);
  gravity = createVector(0, 0.5*mass);
  wind = createVector(0,0);
}

function draw() {
  background(215);
  fill(0);

  if (!serialActive) {
    text("Press Space Bar to select Serial Port", 20, 30);
  } else
  {
    text("Connected. Press s to jump.", 20, 30);

  applyForce(wind);
  applyForce(gravity);
  velocity.add(acceleration);
  velocity.mult(drag);
  position.add(velocity);
  acceleration.mult(0);
  ellipse(position.x,position.y,mass,mass);
  //heightOfBall set to zero whenever ball is touching the ground. Otherwise it is set to 1.
  if (position.y > height-mass/2) {
      velocity.y *= -0.9;  // A little dampening when hitting the bottom
      position.y = height-mass/2;
    heightOfBall = 0;
    } else {
      heightOfBall = 1;
    }
  }
}
function applyForce(force){
  // Newton's 2nd law: F = M * A
  // or A = F / M
  let f = p5.Vector.div(force, mass);
  acceleration.add(f);
}

function keyPressed() {
  if (key == " ") {
    // important to have in order to start the serial connection!!
    setUpSerial();
  }
  else if (key=='s'){
    mass=random(15,80);
    position.y=-mass;
    velocity.mult(0);
  }
}

// this callback function
function readSerial(data) {
    ////////////////////////////////////
    //READ FROM ARDUINO HERE
    ////////////////////////////////////

     if (data != null) {
    // make sure there is actually a message

    let fromArduino = split(trim(data), ",");

       // if the right length, then proceed
    if (fromArduino.length == 1) {
//sensor value is the input from potentiometer
      let sensorVal = int(fromArduino[0]);
      console.log("Sensor value: ")
      console.log(sensorVal);

//sensor values range between 0 and 1023
//for any sensor value less than 500, make wind move ball forward/wind blows to right
      if (sensorVal <500){
        wind.x=1
      }
//if sensorVal between 500 and 600, wind stops so ball stops
      else if(sensorVal >=500 && sensorVal < 600){
        wind.x = 0
      }
//if sensorVal over 600, wind blows in opposite direction moving ball to left
      else {
        wind.x =-1
      }
          //////////////////////////////////
          //SEND TO ARDUINO HERE (handshake)
          //////////////////////////////////
    }

//send heightOfBall to arduino to indicate if ball is on the floor or not
    let sendToArduino = heightOfBall  + "\n";
    writeSerial(sendToArduino);
  }
}
//Exercise 3 Arduino code

const int poten_pin = A0;
const int ledPin =3;

void setup() {

  Serial.begin(9600); // Start serial communication at 9600 bps
  pinMode(LED_BUILTIN, OUTPUT);
  pinMode(ledPin, OUTPUT);
  pinMode(poten_pin, INPUT);

  // start the handshake
  while (Serial.available() <= 0) {
    digitalWrite(LED_BUILTIN, HIGH); // on/blink while waiting for serial data
    Serial.println("0,0"); // send a starting message
    delay(300);            // wait 1/3 second
    digitalWrite(LED_BUILTIN, LOW);
    delay(50);
  }
}
void loop()
{
  // wait for data from p5 before doing something
    while (Serial.available())
    {
      digitalWrite(LED_BUILTIN, HIGH);
      digitalWrite(ledPin, LOW);
//read the position of ball from p5
      int position = Serial.parseInt();

      if (Serial.read() == '\n') {
        // Read potentiometer value
      int sensorValue = analogRead(poten_pin);
      //send value to p5
      Serial.println(sensorValue);
      }
//if ball is touching the ground i.e. height is zero, turn LED on
      if (position == 0)
      {
        digitalWrite(ledPin, HIGH);
      }
      else{
        digitalWrite(ledPin, LOW);
      }
    }
      digitalWrite(LED_BUILTIN, LOW);
    }
Video for Exercise 3:
Teammate: Ramsha Bilal
Final Project Proposal
I have decided to take inspiration from one of the classic mobile games of the past generations: Flappy Bird!

Flappy Bird became popular due to how made it made people when they could just never get the mechanics down for the game.
This of course led many people to break their phones and scream loudly. Well with my idea, you get to let out your energy while playing my game. I will be connecting a microphone up to my own version of this game where, in order to make the character fly, you have to scream into the mic!
SO best prepare your vocal cords and have a drink to soothe them afterwards for when my game eventually comes to fruitition!