[Week 4] Data visualization: quarantine

For week 4 assignment with data visualization, I take my inspiration from the class demo with Google Trends data and the breakout room session in which Simran and I came up with an idea for data visualization but ended up not being able to finish it. The goal was to show the data in a more general fashion, only going into details upon request. That is, the idea is to aggregate interests by months instead of displaying them in weeks.

The particular set of data that I chose was the Google Trends data for the term “quarantine” recorded within the year 2020.

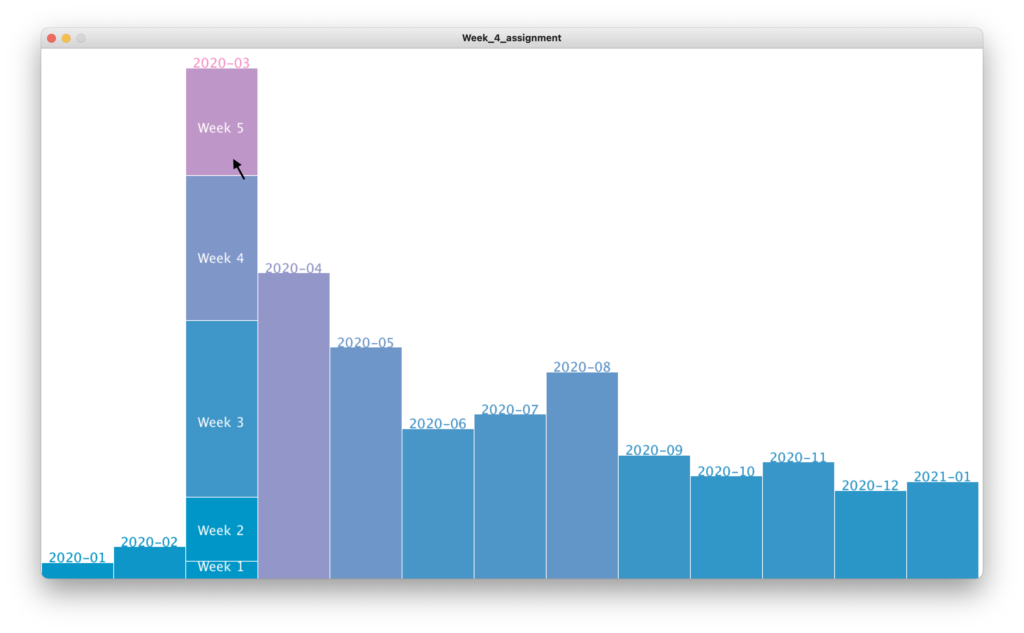
Here is a quick shot of my final product. When hovered on, a particular month column will show stacked columns of its weeks and their respective contributions to the month’s interest. (The black arrow represents the current position of my mouse. Apologies for this substitution; my actual mouse is not showing up in the screenshot.)

The code and the csv file can be found at the end of the post.

Processes

The data is easy to obtain and is already in relatively neat form, the only further cleaning necessary was to delete the first and last few unrelated rows. The next step was to break down the data into months, since it was originally divided into weeks. Since the time column of the .csv file was of the form "YYYY-MM-DD", I could use the String.substring() function to filter out the month, and add interests of the same month together. From this, drawing columns for months was relatively straightforward.

With the individual week data, first I was thinking along the line of having them also in column form that it would make the width of the week columns inconsistent, since some months have more weeks than others, and since month width was kept constant, the months with 5 weeks would appear to look more packed than those with only 4. For this reason, I decided to make the weeks into stacked columns instead, with the heights of all weeks in the same month adding up to the height of the respective month column.

Pitfalls

From a data perspective, in hindsight, I’m not sure if the form I chose for the graphs is a suitable one to visualize this particular set of data. When aggregated into months, some months became disproportionally higher than others (for instance, March vs. January). Because of this, months like January became so ‘short’ that the week names could not be properly and visibly displayed.

What I learned

I made extensive use of HashMaps since I found them particularly useful for looking up data using an index, especially if the index is not of type int (in this case, my HashMaps are searchable by names of months). I also found that they accept a wide range of data type, for instance, one HashMap I used has keys of type String and values of type ArrayList<Integer>.

Code

import java.util.Map;

Table table;
int numRow;
float monthWidth;
HashMap<String, Integer> interestByMonth = new HashMap<String, Integer>();
HashMap<String, ArrayList<Integer>> weekStacked = new HashMap<String, ArrayList<Integer>>();
ArrayList<String> nameOfMonths = new ArrayList<String>();
int maxInterest = 0;

void setup() {
  size(1280, 720);
  loadData();
  breakData();
  monthWidth = width/nameOfMonths.size();
}

void draw() {
  background(255);
  noStroke();
  drawMonths();
}

void loadData() {
  table = loadTable("multiTimeline.csv", "csv");
  numRow = table.getRowCount();
}

void breakData() {
  for (int i=0; i<numRow; i++) {
    TableRow row = table.getRow(i);
    String time = row.getString(0);
    // date in the form of "YYYY-MM-DD"
    //                     -0123456789-
    String month = time.substring(0, 7);
    int interest = row.getInt(1);
    if (interest > maxInterest) {
      maxInterest = interest;
    }
    if (!interestByMonth.containsKey(month)) {
      interestByMonth.put(month, 0);
      ArrayList<Integer> listOfWeeks = new ArrayList<Integer>();
      weekStacked.put(month, listOfWeeks);
      nameOfMonths.add(month);
    }
    int oldValue = interestByMonth.get(month);
    interestByMonth.put(month, oldValue+interest);

    ArrayList<Integer> listOfWeeks = weekStacked.get(month);
    listOfWeeks.add(interest);
  }
}

float drawEachMonth(String month, int order) {
  int interest = interestByMonth.get(month);
  float monthHeight = map(interest, 0, 300, 0, height); // the 300 is hardcoded
  float colorFactor = map(interest, 0, 300, 0, 255);
  int alpha = 255;
  stroke(255);
  if (int(mouseX / monthWidth) == order) {
    stroke(255);
    alpha = 0;
  }
  fill(colorFactor, 150, 200, alpha);
  rect(order*monthWidth, height-monthHeight, monthWidth, monthHeight);
  textAlign(CENTER);
  textSize(18);
  fill(colorFactor, 150, 200);
  text(month, (order+0.5)*monthWidth, height-monthHeight);
  return monthHeight;
}

void drawMonths() {
  for (int i=0; i<nameOfMonths.size(); i++) {
    String month = nameOfMonths.get(i);
    float monthHeight = drawEachMonth(month, i);
    drawWeeks(month, i, monthHeight);
    float throwaway = drawEachMonth(month, i);
  }
}

void drawWeeks(String month, int order, float monthHeight) {
  ArrayList<Integer> weekList = weekStacked.get(month);
  ArrayList<Float> weekHeights = new ArrayList<Float>();
  int numWeek = weekList.size();

  // Populate array of week heights w.r.t month height
  int monthInterest = interestByMonth.get(month);
  for (int i=0; i<numWeek; i++) {
    int curInterest = weekList.get(i);
    float ratio = float(curInterest)/float(monthInterest);
    float weekHeight = monthHeight * ratio;
    weekHeights.add(weekHeight);
  }

  for (int i=0; i<numWeek; i++) {
    float aggHeight = 0;
    for (int j=0; j<=i; j++) {
      aggHeight += weekHeights.get(j);
    }
    String weekLabel = "Week " + str(i+1);
    fill(map(i, 1, numWeek, 0, 255), 150, 200);
    stroke(255);
    rect(order*monthWidth, height-aggHeight, monthWidth, weekHeights.get(i));
    fill(255);
    textAlign(CENTER);
    text(weekLabel, (order+0.5)*monthWidth, height-aggHeight+weekHeights.get(i)*.6);
  }
}

Data

multiTimeline


Week 4: Data Visualization

Overview:

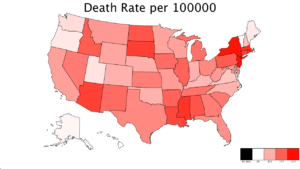
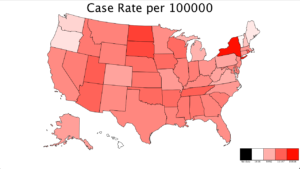
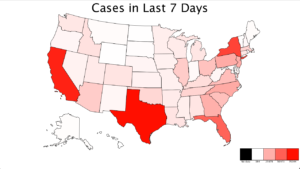
This week our task was to either make some sort of word art or create a data visualization. Pursing the latter, I decided the most relevant data that is out there right now is information relating to COVID-19. My goal was to create a color valued map, the most intuitive data visualization in my mind.

Process:

The trickiest part in my opinion was creating the map itself. To create shapes which could colored in processing I would have to create a shape through a series of points. At first I considered loading a map and the pixel values of the boarders by hand but I quickly realized how time consuming and inaccurate this would be when considering features such as rivers. I had a look at an SVG picture of the US and realized that to render the vector based image all the coordinates were already stored there by state. I then had to create a reader to take in this SVG path data, and convert this information to processing equivalents. I found what each svg command meant, C, L, M, z, and translated those into Processing shape functions.

With each path stored in a custom State object. I could easily draw a shape with a simple function call, and set the fill of it with a method.

I then had to take in my COVID data from the CDC, and process it to each state. Using the state codes that the data is associated with, I stored the respective data with the respective state in a table. This way when the state is drawn, it could easily find a value for a certain data point such as total cases.

With the data stored, I had to map it to a fill color. To do so I found the max value and min value of each type of data by iterating through the states. I then mapped a HSB saturation value from the min to the max. This gave me a range of colors from white to red, with the darkest red being the highest values.

I then used the min and max values and color mapping to create a scale that displayed is there was null data points, the min color, the max color, and the third and two third colors and their respective values. This gives viewers a sense of severity.

I then made this interactive where the right and left arrow keys allow users to toggle between data types such as deaths, cases, etc.

Results:

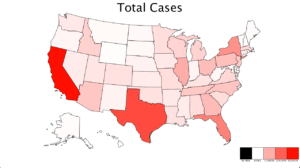
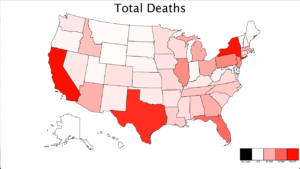
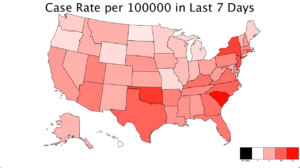
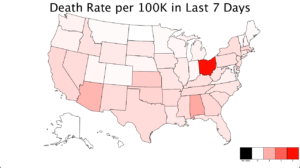
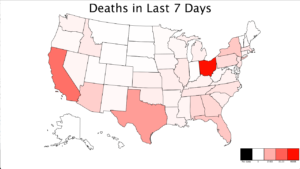
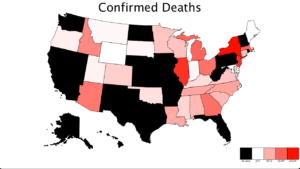
Here is my code and screenshots of the resulting maps.


//Variables for laoding state data file
String[] lines;  //Used to process svg file 

ArrayList<State> stateArray = new ArrayList<State>(); //Holds all states
ArrayList<Data> dataArray = new ArrayList<Data>();  //Holds data for states  

int col = 0;  //Which col of the dataArray is being shown

int xOffset, yOffset;

void setup() {
  size(1280, 720);
  lines = loadStrings("mapData.txt");
  loadStateData();
  loadCovidData();
  colorMode(HSB, 100);
}

void loadStateData() {
  int index = 0;
  //Loop through states
  while (index < lines.length) {
    int stringIndex = 0;
    String[] words = split(lines[index], ' ');  //Split each cord or 
    State newState = new State(words[stringIndex]);
    stringIndex++;
    //Loop through data and save into the state's table
    while (stringIndex < words.length) {
      //See what the command is
      if (words[stringIndex].equals("M")) {
        String[] points = split(words[stringIndex+1], ',');
        newState.saveSVGData(words[stringIndex], float(points[0]), float(points[1]));
        stringIndex += 2;   //For command and point pair
      } 
      else if (words[stringIndex].equals("L")) {
        String[] points = split(words[stringIndex+1], ',');
        newState.saveSVGData(words[stringIndex], float(points[0]), float(points[1]));
        stringIndex += 2;   //For command and point pair
      } 
      else if (words[stringIndex].equals("C")) {
        String[] pointOne = split(words[stringIndex+1], ',');
        String[] pointTwo = split(words[stringIndex+2], ',');
        String[] pointThree = split(words[stringIndex+3], ',');
        newState.saveSVGData(words[stringIndex], float(pointOne[0]), float(pointOne[1]), float(pointTwo[0]), float(pointTwo[1]), float(pointThree[0]), float(pointThree[1]));
        stringIndex += 4;   //For command and 3 point pairs
      } 
      else if (words[stringIndex].equals("z")) {
        newState.saveSVGData(words[stringIndex]);
        stringIndex += 1;   //For command and point pair
      } 
      else {
        stringIndex++;
        println("Error loading data");
      }
    }
    stateArray.add(newState);
    index++;
  }

  //Move US to center of screen (hardcoded cause translate doesnt work)
  xOffset = width/7;
  yOffset = height/15;
}

void loadCovidData() {  
  // Load CSV file into a Table objects
  Table covidTable = new Table();
  covidTable = loadTable("united_states_covid19_cases_and_deaths_by_state.csv", "csv");
  //Loop through data columns  
  for (int j = 1; j < 13; j++) {
    Table subTable = new Table();
    subTable.addColumn("State");
    subTable.addColumn("Data");
    //Loop through all states
    for (int i = 1; i < covidTable.getRowCount(); i++) {
      TableRow newRow = subTable.addRow();
      newRow.setString("State", covidTable.getRow(i).getString(0));
      //Check for no data points
      if (covidTable.getRow(i).getString(j).equals("null") || covidTable.getRow(i).getFloat(j) == 0) {
        newRow.setFloat("Data", -1);
      } 
      else {
        newRow.setFloat("Data", covidTable.getRow(i).getFloat(j));
      }
    }
    Data newDataPoint = new Data(covidTable.getRow(0).getString(j), subTable);  //Create new datapoint
    dataArray.add(newDataPoint);
  }
}

void draw() {
  background(0, 0, 100);
  //Draw states
  for (State state : stateArray) {
    float stateData = dataArray.get(col).returnData(state.getState());
    color stateColor = dataArray.get(col).returnColor(stateData);
    state.drawState(xOffset, yOffset, stateColor);
  }
  
  //Write title
  textAlign(CENTER);
  fill(0);
  textSize(50);
  text(dataArray.get(col).getHeader(), width/2, 50);
  
  //Draw scale
  dataArray.get(col).drawScale(width - width/5,height - height/8);
}


//Change what data is being displayed
void keyPressed() {
  if (keyCode == LEFT) {
    if (col == 0) {
      col = 11;
    } 
    else {
      col--;
    }
  }
  if (keyCode == RIGHT) {
    col = (col+1)%12;
  }
}
class Data {
  String header;  //What is the data of
  Table dataTable;  //Table of the data values with the state identifier 
  float min = -1;
  float max = -1;  //min and max val variables
  int scaleWidth = 50;  //how wide is the scale
  int hue = 1;  //HSB hue value, 0-100

  Data(String header, Table data) {
    this.header = header; //Data type
    dataTable = data;

    //Find max, min
    for (int i = 0; i < dataTable.getRowCount(); i++) {
      //If Max
      if (max == -1 || dataTable.getFloat(i, "Data") > max) {
        max = dataTable.getFloat(i, "Data");
      }
      //If min
      if (min == -1 || dataTable.getFloat(i, "Data") < min) {
        min = dataTable.getFloat(i, "Data");
      }
    }
  }

  //Returns float associated with state
  float returnData(String state) {
    return dataTable.matchRow(state, "State").getFloat("Data");
  }
  String getHeader() {
    return header;
  }
  //Return the mapped color
  color returnColor(float data) {
    //If no data
    if (data == -1) {
      colorMode(HSB, 100);
      return color(100, 100, 0);
    } else {
      colorMode(HSB, 100);
      float s = map(data, min, max, 0, 100);
      return color(hue, s, 100);
    }
  }

  //Draw the scale being used
  void drawScale(int x, int y) {
    colorMode(HSB, 100);
    //Draw null data
    fill(color(100, 100, 0));
    rect(x, y, scaleWidth, scaleWidth);
    //Draw min
    fill(returnColor(min));
    rect(x+scaleWidth, y, scaleWidth, scaleWidth);
    //Draw 1/3
    fill(returnColor(min+((max-min) * 0.333)));
    rect(x+scaleWidth*2, y, scaleWidth, scaleWidth);
    //Draw 2/3
    fill(returnColor(min+((max-min) * 0.666)));
    rect(x+scaleWidth*3, y, scaleWidth, scaleWidth);
    //Draw max
    fill(returnColor(max));
    rect(x+scaleWidth*4, y, scaleWidth, scaleWidth);

    //Text
    fill(color(100, 100, 0));
    textAlign(CENTER);
    textSize(10);
    text("No data", x+(scaleWidth/2), y + (1.2 * scaleWidth));
    text(int(min), x+(scaleWidth*1)+(scaleWidth/2), y + (1.2 * scaleWidth));
    text(int(min+((max-min) * 0.333)), x+(scaleWidth*2)+(scaleWidth/2), y + (1.2 * scaleWidth));
    text(int(min+((max-min) * 0.666)), x+(scaleWidth*3)+(scaleWidth/2), y + (1.2 * scaleWidth));
    text(int(max), x+(scaleWidth*4)+(scaleWidth/2), y + (1.2 * scaleWidth));
  }
}
class State {
  String code;  //2 Character code to identify state
  Table data = new Table();  //Table of svg command at points

  //Default constructor
  State() {
    code = "";

    //Populate table columns
    data.addColumn("Command");
    data.addColumn("x1");
    data.addColumn("y1");
    data.addColumn("x2");
    data.addColumn("y2");
    data.addColumn("x3");
    data.addColumn("y3");
  }  
  State(String code) {
    this.code = code;

    //Populate table columns
    data.addColumn("Command");
    data.addColumn("x1");
    data.addColumn("y1");
    data.addColumn("x2");
    data.addColumn("y2");
    data.addColumn("x3");
    data.addColumn("y3");
  }

  //Getter and setter for state code
  String getCode() {
    return code;
  }
  void setCode(String code) {
    this.code = code;
  }

  //Passed a stiring with an SVG command and series of points, processes them into the table, three methods store different amound of cords
  void saveSVGData(String command) {
    TableRow newRow = data.addRow();
    newRow.setString("Command", command);
  }
  void saveSVGData(String command, float x1, float y1) {
    TableRow newRow = data.addRow();
    newRow.setString("Command", command);
    newRow.setFloat("x1", x1);
    newRow.setFloat("y1", y1);
  }
  void saveSVGData(String command, float x1, float y1, float x2, float y2) {
    TableRow newRow = data.addRow();
    newRow.setString("Command", command);
    newRow.setFloat("x1", x1);
    newRow.setFloat("y1", y1);
    newRow.setFloat("x2", x2);
    newRow.setFloat("y2", y2);
  }
  void saveSVGData(String command, float x1, float y1, float x2, float y2, float x3, float y3) {
    TableRow newRow = data.addRow();
    newRow.setString("Command", command);
    newRow.setFloat("x1", x1);
    newRow.setFloat("y1", y1);
    newRow.setFloat("x2", x2);
    newRow.setFloat("y2", y2);
    newRow.setFloat("x3", x3);
    newRow.setFloat("y3", y3);
  }

  //Draw state from given SVG path data
  void drawState(int xOffset, int yOffset, color fillColor) {
    fill(fillColor);
    //Iterate through data table and draw shape based on symbols.
    for (TableRow row : data.rows()) {
      //Get command      
      //Move
      if(row.getString("Command").equals("M")){
        beginShape();
        vertex(row.getFloat("x1")+xOffset, row.getFloat("y1")+yOffset);
      }
      //Line
      else if(row.getString("Command").equals("L")){
        vertex(row.getFloat("x1")+xOffset, row.getFloat("y1")+yOffset);
      }
      //Bezier Curve
      else if(row.getString("Command").equals("C")){
        bezierVertex(row.getFloat("x1")+xOffset, row.getFloat("y1")+yOffset, row.getFloat("x2")+xOffset, row.getFloat("y2")+yOffset, row.getFloat("x3")+xOffset, row.getFloat("y3")+yOffset);
      }
      //End shape
      else if(row.getString("Command").equals("z")){
        endShape();
      }
    }
  }
  
  //getter for state name, no setter as wont change
  String getState(){
    return code;
  }
  
}

Data Distortion / Misrepresentation:

This data is all taken from the CDC so can be considered fairly reliable in my opinion. The issue with any data visualization is that misrepresentation is fairly easy. For starters, some states don’t report on the same data or with the same accuracy, hence why in the last image “Confirmed Deaths”, there are several states blacked out with no data points. Furthermore, color can easily distort the severity of a situation. With a simple mapping from the min to max, in the map “Death Rate per 100k in the Last 7 Days”, the state of Ohio looks much more severe than the rest of the country, when in reality its value is at 5, only slightly higher than most other states around 3. The type of data being displayed is also important. In the total case and total death maps, large and high population states appear far more severe. This may be in terms of quantity, but in reality per 100k is a much more useful metric. Would a city with 5 cases and 10 residents really be considered safer to be in that a city with 10 times as many cases but 1000 times as many residents?


dancing planets

Idea:

At first, I wanted to make a galaxy portrait where most of the screen would consist of stars of different shapes and sizes. But, then I realized in order to do that with oop, every star would be an individual object and I was not sure how I would make the program construct objects by itself. Since, for instance, it is impractical to make 100 objects to display 100 stars. So, instead,  I decided to make a portrait of the solar system. I made a class where I could use to make any celestial object (planet, meteor, star, etc.). The class was quite simple so I added the random generators to give different y values for the planets; planets do not orbit at the same rate so it made sense. Every time the user runs the program, the location of the planets will change. After I was done with the class and the planets, I still needed the stars in the background, so I tried again with stars. However, this time I used two for loops, the Perlin noise function, and a random generator to make the stars spin around and I really liked how they turned out. But, they did not quite match the static planets so I thought I’d make the planets move. After doing so, the planets looked like they were vibrating. I was listening to a song at that time and they vibrated with the music as if they were dancing to it. So, I called it a day to the dancing planets portrait.

class celestial {
  
  float y;


   celestial(){

     y = random(height/3, height/2);
     
  
}

 //void color(){
 
 //   fill(r, g, b);

 // } 

 //void size(){
 
 //   ellipse(xUnique, yUnique, radius, radius);

 // }

  void shape (float r, float g, float b, float radius, float x){
  
  fill(r, g, b);
  ellipse(x, y, radius, radius);
  
  }
 

}


celestial sun;
celestial mercury;
celestial venus;
celestial earth;
celestial mars;
celestial jupiter;
celestial saturn;
celestial uranus;
celestial neptune;


int sunSize;
int xSun;
float xStar;
float yStar;
void setup() {

  size (1000, 1000);
  
  sun = new celestial();
  mercury = new celestial();
  venus = new celestial();
  earth = new celestial();
  mars = new celestial();
  jupiter = new celestial();
  saturn = new celestial();
  uranus = new celestial();
  neptune = new celestial();
  
  
  sunSize = 600;
  xSun = -40;
  xStar = random(width);
  yStar = random(height);
}


void draw(){

  background(0, 17, 46);
  
  // stars 
    stroke (245, 237, 24);
  for (float i = noise(width); i < width; i = i+random(width/2)) {
    for(float j = noise(height); j < height; j = j+random(height/2)){
    
      line(i, j, i+2, j+2);
    }
} 


// plants
  noStroke();
  
  for (float i = noise(width); i < width/200; i = i+random(width/4)){
    sun.shape(250, 232, 92, sunSize, xSun-70+i);
    mercury.shape(224, 179, 72, sunSize/40, xSun+sunSize/2-50+i);
    venus.shape(214, 130, 41, sunSize/35, xSun+sunSize/2+i);
    earth.shape(58, 161, 199, sunSize/25, xSun+sunSize/2+90+i);
    mars.shape(191, 76, 38, sunSize/30, xSun+sunSize/2+150+i);
    jupiter.shape(145, 128, 71, sunSize/8, xSun+sunSize/2+250+i);
    saturn.shape(191, 185, 117, sunSize/10, xSun+sunSize/2+350+i);
    uranus.shape(22, 219, 216,sunSize/14, xSun+sunSize/2+475+i);
    neptune.shape(28, 53, 138, sunSize/19, xSun+sunSize/2+550+i);
  }
  

}


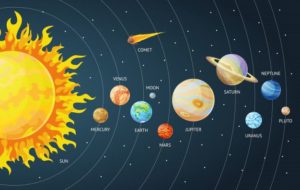
I used this picture for reference (idk why it’s so compressed here):


Here are the final results (the music is not from the program;-;):


Week 3: Game Assignment using OOP


Description:

This project consisted of creating a game using Object Oriented Programming.


Idea:

For this assignment, I first wanted to create an artwork with OOP. However, I later changed my mind to create a game as I thought it would be better for me to understand the concept of OOP. I liked the idea of using cars in the assignment so I decided to recreate a game I had seen before. The game consisted of a car on a road with the objective of avoiding being hit by an obstacle.


Challenges:

I had a lot of challenges with this assignment. First, it was very challenging for me to come up with an idea to make the obstacles appear repeatedly. I tried several ways by investigating how an array in Java worked. In the end, I decided to use one obstacle and make it repeatedly appear on the screen. The next challenge was that I had trouble coming up with a way to check if the car was colliding with an obstacle. This was hard to do because I was unaware of the distance function. After the class I had on Monday, I was able to use the dist() function to accomplish what I wanted to do. I also had a big challenge trying to figure out how to use the keys to accomplish the movement of the car. Finally, the last challenge I had was finding a way to make the scene move. The yellow marks in the road make an effect to make it look as if the car is moving. However, calculating the timing and distance of this took me a long time. 


Process: 

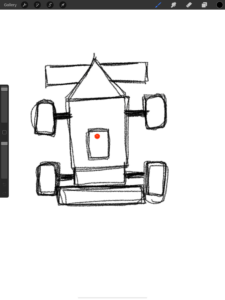
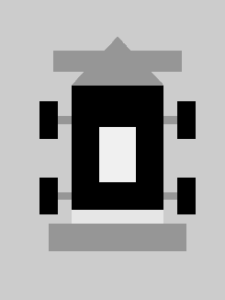
For this project, I first designed the car with basic shapes so that I could recreate it on Processing using the shape functions. Then I tried to plan what kind of classes I needed and the attributes and methods linked to the class. Then I tried to finish all the methods and make sure they were working properly. At the end, I decided to add a background to make the game seem more interesting. However, I realized that the scene was not really engaging and it looked like the car was not moving. Therefore I decided to implement a way to make the scene more active by creating the road with yellow marks. 

LINK to VIDEO:

Conclusion:

Overall I think I failed to manage my time on this project and I underestimated the difficulty in working with Object-Oriented Programming. As the code gets longer, it gets harder to fix errors that appear. I had a hard time fixing various errors because I didn’t know what they meant by such errors. On the other hand, I think I worked well with the attributes part and avoiding hardcode. Although I hardcoded some numbers throughout this assignment, I think I have improved a lot on this part of the class. Although I am not very proud of the outcome in terms of design, I think I am satisfied with the functionality of the methods. The methods worked exactly as I expected initially.


Car car;
Obstacle obs;
Environment env;

void setup(){
  size(600,600);
  car = new Car(color(random(255),random(255), random(255)));
  obs = new Obstacle();
  env = new Environment();
}

void draw(){
  background(255);
  //Environment
  fill(0,255,0); //Green Parts
  rect(0, 0, width, height);
  
  fill(220); //Gray parts
  rect(100, 0, 50, height);
  rect(300, 0, 50, height);
  rect(500, 0, 50, height);
  
  env.drawenv();
  car.drawCar();
  obs.obsdraw();
  
  float distance = dist(car.posX, car.posY, obs.posX, obs.posY);
    if ( distance <= car.carHeight){
      obs.obsnew();
      car.live--;
      car.gameloss();
    }
}

void keyPressed(){
  if(keyCode == RIGHT){
    if(car.roadpos < 1){
      car.changetoright();
    }
  }
  if(keyCode == LEFT){
    if(car.roadpos >= 0){
      car.changetoleft();
    }
  }
}
class Car {
  float posX, posY, roadpos;
  float velocity; 
  float direction;
  color carcolor;
  float carWidth, carHeight;
  float wheelWidth, wheelHeight;
  float positioncarroad;
  float live; //Counter for the lives remaining

  Car(color c) {
    posX = width/2;
    posY = height/2 + height/3;
    roadpos = 0;
    carWidth = 20;
    carHeight = 35;
    wheelWidth = 5;
    wheelHeight = 10;
    carcolor = c;
    live = 3;
  }
    
  void drawCar() {
    advanceposition();
    noStroke();
    rectMode(RADIUS);
    //Wheels
    rect(posX, posY-carHeight*0.5, carWidth*1.4, carHeight*0.05); //Wheel Supporter
    rect(posX, posY+carHeight*0.6, carWidth*1.4, carHeight*0.05); //Wheel Supporter
    fill(0);
    rect(posX-carWidth*1.5, posY-carHeight*0.5, wheelWidth, wheelHeight);
    rect(posX+carWidth*1.5, posY-carHeight*0.5, wheelWidth, wheelHeight);
    rect(posX-carWidth*1.5, posY+carHeight*0.6, wheelWidth, wheelHeight);
    rect(posX+carWidth*1.5, posY+carHeight*0.6, wheelWidth, wheelHeight);
    //Car Body
    fill(carcolor);
    rect(posX, posY, carWidth, carHeight); //Main big rectangle of car
    fill(240);
    rect(posX, posY, carWidth*0.4, carHeight*0.4); //Window inside big rectangle
    fill(230);
    rect(posX, posY+carHeight, carWidth, carHeight*0.2); // Back of the car
    fill(150);
    rect(posX, posY+carHeight*1.2, carWidth*1.5, carHeight*0.2); //back of the Car
    triangle(posX-carWidth, posY-carHeight, posX+carWidth, posY-carHeight, posX, posY-carHeight*1.7); //front triangle of the car
    rect(posX, posY-carHeight*1.35, carWidth*1.4, carHeight*0.15); //Front Rectangle of the Car
  }
  
  void changetoleft(){ //Changing to left with keyboard
    posX -= width*0.33;
    roadpos--;
  }
  
  void changetoright(){ //Changing to right with keyboard
    posX += width*0.33;
    roadpos++;
  }
  
  void advanceposition(){ //Record the position of the car
    positioncarroad += 1;
  }
  
  void gameloss(){
    if(live == 0){
      fill(255);
      rect(0, 0, width, height);
      noLoop();
      textSize(32);
      fill(0);
      textAlign(CENTER);
      text("Game Over", width/2, height/2);
    }
  }
}
class Environment {
  float posY1 = 0;
  float posY2 = 200;
  float posY3 = 400;
  
  void movinglines(){ //Drawing the lines
    fill(255, 239, 0);
    rect(100, posY1, 10, 50);
    rect(300, posY1, 10, 50);
    rect(500, posY1, 10, 50);
    rect(100, posY2, 10, 50);
    rect(300, posY2, 10, 50);
    rect(500, posY2, 10, 50);
    rect(100, posY3, 10, 50);
    rect(300, posY3, 10, 50);
    rect(500, posY3, 10, 50);
  }
    
    
  void movement(){ //Making the lines move
    posY1 += 5;
    posY2 += 5;
    posY3 += 5;
  }
    
    
  void drawenv(){
    movinglines();
    movement();
    if(posY1 > 600){
      posY1 = 0;
    }
    if(posY2 > 600){
      posY2 = 0;
    }
    if(posY3 > 600){
      posY3 = 0;
    }
}

}
class Obstacle{
  float posX, posY;
  float velocity;
  float direction;
  float obsWidth, obsHeight;
  color obscolor;
  
  Obstacle() {
    posX = (width/2)-(width*0.3)-20+int(random(0, 3))*(width/3);
    posY = 0;
    velocity = 5;
    obsWidth = 20;
    obsHeight = 20;
    obscolor = color(255, 0, 0); 
  }
    
  void velocityobs(){ //Update the object Y position
    posY += velocity;
  }
  
  void obsdraw(){
    rect(posX, posY, obsWidth, obsHeight);
    fill(255, 0, 0);
    circle(posX, posY, 30);
    
    velocityobs();
    if(posY > height){
      obsnew();
    }
  }
  void obsnew(){
    posY = 0;
    posX = (width/2)-(width*0.3)-20+int(random(0, 3))*(width/3);  
  }
  
}


Week 3 – Go, get that 4.0!

For the Week 3 assignment, I decided to make a game, and in order to make it a little more fun, I decided to make it NYUAD-themed (at least a little). However, this turned out a little harder than I expected it to be. I had the idea of a fun but very simple game, but the implementation was not-so-simple.

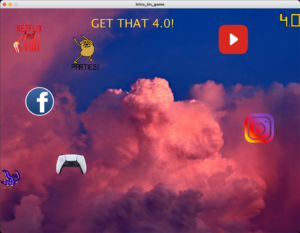
My game is based on a very basic concept. The player plays the game as Faiza the Falcon, and uses arrow keys to help Faiza dodge all distractions on the way and to eventually reach the 4.0 GPA. I was so excited when I started making the game that I created the sprite for Faiza myself using https://www.piskelapp.com/. Attached below is a screenshot of the game. A screen recording is also attached at the end (I’m sorry for the lag, my laptop does not cooperate when I start screen recording).

Implementation

Even when I started creating the game, it was clear that I had to create it using four classes; the Faiza class, the GPA class, the Distractions class and the main Game class.

Within the Faiza class, I had to work on controlling Faiza through the arrow keys, checking edges to ensure that Faiza didn’t go beyond the screen, displaying Faiza, and checking Faiza’s collisions with the distractions and with the GPA (collision with the GPA marked the end of the game). I made a separate distance() method within the Faiza class for collision detection. This method would return the distance between Faiza and the other object, and if this distance was less than the sum of their radii, then a collision was detected. Figuring this out was one of the more difficult parts of making the game.

The GPA class was straightforward and was nothing more than displaying the GPA.

The distractions class involved some additional elements. I instantiated each distraction at specific coordinates (because if it was random then there could be a scenario where it would be almost impossible to win the game). I assigned random x and y velocities (but within a certain range) to each distraction which would mean that the structure of the game was different every time. It was also important to ensure that the distractions would rebound whenever any of them hit any of the walls.

Lastly, the game class was mainly about displaying text and calling display methods of other objects.

Challenges

Firstly, I had a hard time working with methods of classes. The update and display methods of each class left me confused. I knew I had to use these two methods but couldn’t figure out how to exactly work with them. I ended up calling my update() method inside the display() method, and now I understand how it did the job for me.

Working with image objects was confusing for some reason. I never intended to use so many different images but then the game would look boring. I had to do a lot of research to get comfortable with using images.


Attached below are the video and the code.

import java.lang.Math;
import processing.sound.*;
SoundFile file;

String audioName = "intro.mp3";
String path;

PImage[] images;
Game game;

// creating an array for distractions which are used later
Distractions[] distractions;

class Faiza{
  float posX, posY;
  float radius;
  float velocityX;
  float velocityY;
  float imgwidth, imgheight;
  String directionX;
  String keyY, keyX;
  boolean alive;
  int counter, frame;
  
  Faiza(float x, float y, float r, float img_w, float img_h){
    posX = x;
    posY = y;
    radius = r;
    velocityX = 0;
    velocityY = 0;
    imgwidth = img_w;
    imgheight = img_h;
    directionX = "right";
    keyY = "none";
    keyX = "none";
    alive = true;
    counter = 0;
    frame = 0;
  }
  
  void display(){
    update();
    if (directionX == "right"){
      image(images[0], float(int(posX - imgwidth/2)), float(int(posY - imgheight/2)), imgwidth, imgheight, int(frame * imgwidth), 0, int((frame + 1) * imgwidth), int(imgheight));
    }
    else if (directionX == "left"){
      image(images[0], float(int(posX - imgwidth/2)), float(int(posY - imgheight/2)), imgwidth, imgheight, int((frame + 1) * imgwidth), 0, int(frame * imgwidth), int(imgheight));
    }
  }
  
  void update(){
    //The condition below is for when Faiza moves left
    if (keyX == "left"){
       velocityX = -2;
       if (posX - radius + velocityX < 6){
         velocityX = 0;
       }
       posX += velocityX;
    }
                    
    //The condition below is for when Faiza moves right
    else if (keyX == "right"){
      velocityX = 2;
      if (posX + radius + velocityX > 1018){
        velocityX = 0;
      }
      posX += velocityX;
    }

    //If none of the left and right keys are being pressed, Faiza stops moving horizontally
    else{
      velocityX = 0;   
    }        
    
    if (keyY == "up"){
      velocityY = -2;
      if (posY - radius + velocityY <= 5){
        velocityY = 0;
      }
      posY += velocityY;
    }
                    
//The condition below is for when Faiza moves downwards
    else if (keyY == "down"){
      velocityY = 2;
      if (posY + radius + velocityY >= 762){
        velocityY = 0;
      }      
      posY += velocityY;
    }
                    
//If none of the up and down keys are being pressed, Faiza stops moving vertically
    else{
    velocityY = 0;
    }
  
    if (distance(game.gpa) <= (radius + game.gpa.radius)){
      game.level += 1;
    }
    
    if (!(posX >= 0 && posX <= 100 && posY >= 530 && posY <= 640)){ 
      for (int i = 0; i < 6; i++){
        if (distance(distractions[i]) <= radius + distractions[i].radius){
          counter += 1;
          println(counter);
          alive = false;
        }
      }
    }
  }
  
  // this distance method will be used to check for collisions with distractions
  double distance(Distractions target){
    float a = (posX - target.posX);
    float b = (posY - target.posY);
    double c = Math.pow(a, 2);
    double d = Math.pow(b, 2);
    return Math.pow(c + d, 0.5);
  }
  
   // this distance method will be used to check for collisions with the gpa (marking the end of the game)
   double distance(GPA target){
    float a = (posX - target.posX);
    float b = (posY - target.posY);
    double c = Math.pow(a, 2);
    double d = Math.pow(b, 2);
    return Math.pow(c + d, 0.5);
  }
}

class Distractions{
  float posX, posY;
  float radius;
  float imgwidth, imgheight;
  int frame;
  PImage img;
  float velocityX, velocityY;
  
  Distractions(float x, float y, float r, String _img, float img_w, float img_h){
    posX = x;
    posY = y;
    radius = r;
    img = loadImage(_img);
    imgwidth = img_w;
    imgheight = img_h;
    frame = 0;
    velocityX = random(2,5);
    velocityY = -1 * random(2,5);
  }
  
  void update(){
    if (posX + radius >= 1024){
      velocityX *= -1;
    }
    if (posX - radius <= 0){
      velocityX *= - 1;
    }
    if (posY - radius <= 10){
      velocityY *= -1;
    }
    if (posY + radius >= 780){
      velocityY *= -1;
    }
    
    posX += velocityX;
    posY += velocityY;
  }
  
  void display(){
    update();
    image(img, float(int(posX - imgwidth/2)), float(int(posY - imgheight/2)), imgwidth, imgheight, int(frame * imgwidth), 0, int((frame + 1) * imgwidth), int(imgheight));
  }
}

class GPA{
  float posX, posY;
  float radius;
  float imgwidth, imgheight;
  int frame;
  
  GPA(float x, float y, float r, float img_w, float img_h){
    posX = x;
    posY = y;
    radius = r;
    imgwidth = img_w;
    imgheight = img_h;
    frame = 0;
  }
  
  void display(){
    image(images[1], float(int(posX - imgwidth/2)), float(int(posY - imgheight/2)), imgwidth, imgheight, int(frame * imgwidth), 0, int((frame + 1) * imgwidth), int(imgheight));
  }
}

class Game{
  float game_width, game_height;
  Faiza faiza;
  GPA gpa;
  int level;
  
  Game(float game_wth, float game_hght){
    level = 1;
    game_width = game_wth;
    game_height = game_hght;
    faiza = new Faiza(34, 585, 27, 66, 66);
    gpa = new GPA(990, 35, 25, 70, 56);
  }
  
  void update(){
    if (faiza.alive == false){
      faiza.posX = 34;
      faiza.posY = 585;
      faiza.alive = true;
    }
  }
  
  void display(){
    update();
    
    image(images[2], 0, 0);
    
    if (level == 1){
      textMode(CENTER);
      textSize(40);
      fill(255, 213, 43);
      text("GET THAT 4.0!", 310, 65);
    }
    
    if (level != 1){
      textSize(150);
      fill(255, 213, 43);
      text("GAME", 270, 220); 
      text("OVER", 290,350);
      textSize(50);
      text(faiza.counter + " distractions later,", 240, 550);
      text("you achieved that 4.0 GPA!", 200, 600);
    }
    
    if (level == 1){
      faiza.display();
      gpa.display();
    }
    
    for (int i = 0; i < 6; i++){
      distractions[i].display();
    }
    
  }
}
  

void setup(){
 size(1024,768);
 game = new Game(1024, 768);
 path = sketchPath(audioName);
 file = new SoundFile(this, path);
 file.loop();
 images = new PImage[3];
 images[0] = loadImage("faiza.png");
 images[1] = loadImage("gpa.png");
 images[2] = loadImage("background.png");
 
 distractions = new Distractions[6];
 distractions[0] =  new Distractions(100, 300, 58, "jake.png", 120, 120);
 distractions[1] =  new Distractions(444, 333, 48, "insta.png", 100, 100);
 distractions[2] =  new Distractions(900, 120, 48, "facebook.png", 100, 100);
 distractions[3] =  new Distractions(887, 635, 48, "netflix.png", 100, 100);
 distractions[4] =  new Distractions(134, 587, 48, "youtube.png", 100, 100);
 distractions[5] =  new Distractions(55, 100, 48, "ps.png", 120, 120);
}

void draw(){
  background(255, 255, 255);
  game.display();
}

// allowing key presses to dictate Faiza's movement
void keyPressed(){
  if (key == CODED){
    if (keyCode == RIGHT){
      game.faiza.keyX = "right";
    }
    if (keyCode == LEFT){
      game.faiza.keyX = "left";
    }
    if (keyCode == UP){
      game.faiza.keyY = "up";
    }
    if (keyCode == DOWN){
      game.faiza.keyY = "down";
    }
  }
}
    
    
void keyReleased(){
  if (key == CODED){
    if (keyCode == RIGHT){
      game.faiza.keyX = "none";
    }
    if (keyCode == LEFT){
      game.faiza.keyX = "none";
    }
    if (keyCode == UP){
      game.faiza.keyY = "none";
    }
    if (keyCode == DOWN){
      game.faiza.keyY = "none";
    }
  }
}


Week 3: Using Classes

In my Computer Systems Organization class last year, one of our homework assignments was to code Conway’s Game of Life in C. The Game of Life is a cellular automaton game developed by a British mathematician named Conway. 


The rules of the game (according to Wikipedia):
1. Any live cell with two or three live neighbours survives.

2. Any dead cell with three live neighbours becomes a live cell.

3.  All other live cells die in the next generation. Similarly, all other dead cells stay dead.

The version we did in CSO was pretty lame simply using 1s and 0s printed, so I thought I could make a graphic version for my practice this week. I also lost access to the code I wrote, so I wanted to see if I could do it again and track whether it felt easier to build a year later as an indicator of my progression. The only thing I remembered from that assignment was creating classes for the Cell and Game.

My code was pretty straightforward. In general, I created the Cell and Game classes. I first began with coding the Cell class. Originally, I only had an attribute for the current state. However, when it came time to visually display it, I realized I needed a way to keep track of where to draw it. I ended up adding the x and y positions and size with each cell. The display of the tile occurred at the cell level with each cell being represented by a rectangle with its fill determined by whether it was currently alive or dead. 

I first created the grid through a nested for loop setting up a cell at each row and column intersection. Then, for each generation of the cells, I looped through each cell and then counted how many of its neighbors were alive. Based on the rules of the game, I used its current state and number of live neighbors to determine its state in the next round. After each generation of the cells, I redrew the board.

The main struggles I had:

  1. Creating the 2D array. I kept getting an undefined length for the array. The problem? I didn’t actually define the dimension variable. Oops.
  2. Handling the edges of the grid. I ended up just checking to make sure the neighbor was within the bounds of the array, but I’m sure there’s a more efficient way to do this.
  3. Getting the right neighbor count. I realized I was double counting the cell itself if it was alive so ended up just subtracting it from the neighbor count.

I wanted to add some level of interaction and user input so ended up just making simple buttons with dimension size choices. I originally wanted to have a slider or a text input box so the user could have more choice in determining the size of the board, but these seemed quite laborious to implement in Processing. When clicking the button, a degree of user feedback is provided in the board changing sizes and the rectangle lighting up.

Here’s my sketch and code!


//Game of Life
//Any live cell with two or three live neighbours survives.
//Any dead cell with three live neighbours becomes a live cell.
//All other live cells die in the next generation. Similarly, all other dead cells stay dead.
//rules from https://en.wikipedia.org/wiki/Conway%27s_Game_of_Life

//the decision to create a Cell and Game class was based on the instructions given in my Computer Systems Organization course last year when we had to do this as a mini homework assignment in C
//in that lab we simply used 1s and 0s so I wanted to graphically represent it. I also lost access to the code I wrote for that course so wanted to refresh my memory by retrying creating the game of life

Game game;
//array of grid dimension choices for the user
int[] sizeChoice = new int[]{ 10, 25, 50, 100 };

//each cell has attributes of what its current state is
//to graphically display the cell, i also include the x, y, and size in the class
class Cell {
  boolean currAlive;
  int x;
  int y;
  int size;
  
  Cell(int x_pos, int y_pos, int size_) {
    //randomly decides if its alive or not by picking 0 or 1 randomly and casting that as a boolean
    currAlive = boolean(int(random(2)));
    x = x_pos;
    y = y_pos;
    size = size_;
  }
  
  void drawCell() {
    //if cell is alive, color it white
    if(currAlive) {
      fill(240);
      //if the cell is dead, make it black
    } else {
      fill(0);
    }
    //draw a tile to represent each cell
    rect(x,y, size, size);
}
}

class Game {
  Cell[][] grid;
  int dimension;
  int size;
  
  Game(int dimension_) {
    //create a grid given what is passed to the constructor
    dimension = dimension_;
    grid = new Cell[dimension][dimension];
    createCells();
  }
    
    void createCells() {
      //make the size of tile responsive to the dimension
      size = width/dimension;
      //loop through each row and column to create a cell and draw the tile representing it
      for (int r = 0; r < dimension; r++) {
        for (int c = 0; c < dimension; c++) {
          grid[r][c] = new Cell(r*size, c *size, size);
          grid[r][c].drawCell();
        }
      }
    }
    
    void generation() {
      //loop through each row and column in the grid to count neighbors
      for (int r = 0; r < dimension; r++) {
        for (int c = 0; c < dimension; c++) {
          //restart neighbor count for each cell
          int n_count = 0;
          //I kept getting the wrong cell count and realized that I forgot to exclude the cell itself
          n_count = n_count - int(grid[r][c].currAlive);
          //looping over its neighbors
          for (int i = -1; i < 2; i++) {
            for (int j = -1; j < 2; j++) {
              int x = r + i;
              int y = c + j;
              //found it difficult to check for the edge cells
              //ended up just checking to make sure the counting was within the array
              if(0 <= x && x < dimension && 0 <= y && y < dimension) {
                if(grid[x][y].currAlive) {
                  n_count += 1;
                }
              }
              }
            }
            //for the rule if the cell has less than 2 or more than 3 neighbors, it dies in the next generation
            if (grid[r][c].currAlive && (n_count < 2 || n_count > 3)) {
                grid[r][c].currAlive = false;
            } 
            //if the cell is dead but has 3 live neighbors, it becomes alive in the next generation
            if (!grid[r][c].currAlive && n_count == 3) {
              grid[r][c].currAlive = true;
            }  
        }
      }
    }
    
    //redraw the grid after each generation
    void drawGrid() {
      for (int r = 0; r < dimension; r++) {
        for (int c = 0; c < dimension; c++) {
          grid[r][c].drawCell();
        }
      }
    }
}

void setup() {
  size(500,600);
  //default grid size is 25 x 25
  game = new Game(25);
}

void draw() {
  background(0);
  //creates buttons to change grid dimensions
  for (int n=0; n < sizeChoice.length; n++) {
    fill(123);
    int x_pos = width/8 * n + 20;
    rect(x_pos, height - 50, 30, 20);
    fill(255);
    text(sizeChoice[n], x_pos + 8, height-35);
  }
    text("Conway's Game of Life", width/3 * 2 - 20, height - 45);
    text("Change grid size with button", width/3 * 2 - 20, height - 25);
    //each frame is a new generation
    //redraw grid after every generation
    game.generation();
    game.drawGrid();
}

void mousePressed() {
  //checks if button is clicked
  if(mouseX < 50 && mouseX >=  20 && mouseY >= height - 50 && mouseY < height - 30) {
    pressButton(0);
  }
  if(mouseX < width/8 + 50 && mouseX >= width/8 + 20 && mouseY >= height - 50 && mouseY < height - 30) {
    pressButton(1);
  }
  if(mouseX < width/8 * 2 + 50 && mouseX >= width/8 * 2 + 20 && mouseY >= height - 50 && mouseY < height - 30) {
    pressButton(2);
  }
  if(mouseX < width/8 * 3 + 50 && mouseX >= width/8 * 3 + 20 && mouseY >= height - 50 && mouseY < height - 30) {
    pressButton(3);
  }
}

void pressButton(int n) {
    //changes fill if button is clicked and recreates the game with the new dimension
    fill(200);
    rect( width/8 * n + 20, height - 50, 30, 20);
    fill(255);
    text(sizeChoice[n],  width/8 * n + 20 + 8, height-35);
    game = new Game(sizeChoice[n]);
}


Week 3 || Airplane Game

The aim of the 3 week assignment is to understand reasons to use classes as a part of object-oriented programming.

Inspiration

During the pandemic we all have to stay at home, but fortunately  I travelled to campus and this inspired me to create a game, which is connected with sunsets, clouds and flights. Looking on the map we can really understand how  big this world is and especially planes can help us to skip hundreds of kilometers in a short amount of time to see people from all over the world.

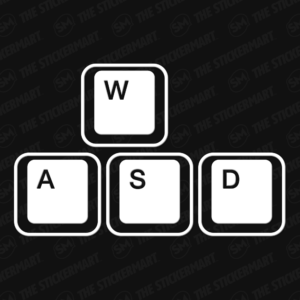
 I have created a game, where you can manage plane trying  to avoid clouds and not crash plane, at the same time you can collect coins.  You can manage plane movement with 4 keys: “w” is to direct to the up, “a” to the left, “d” to right and “s” to the bottom. Keep in mind  that plane is a fast moving object, so you should always control its position.

The game is not ideal, because physic collision doesn’t really work.


Code

Plane, clouds, coins are separated classes

The main part

Coin coins;
Plane plane;
Cloud clouds [];
int Y_AXIS = 1;
int X_AXIS = 2;
color b1, b2, c1, c2;

void setup(){
  size(1280, 720);
   b1 = color(255);
   b2 = color(0);
   c1 = color(149, 187, 241);
   c2 = color(217, 136, 159);
   coins = new Coin();
   plane = new Plane();
   clouds = new Cloud[9];
   for (int i=0; i<clouds.length; i++){
    clouds[i] = new Cloud();
     }
    }

int posBallX=1150;
int posBallY=300;
void draw() {
  
  setGradient(0, 0, width, height, c1, c2, Y_AXIS);

 coins.runCoin();
 plane.runPlane();
 
for (int i = 0; i<clouds.length; i++){
    clouds[i].run(); 
}
}
 
 
void setGradient(int x, int y, float w, float h, color c1, color c2, int axis ) {

  noFill();

  if (axis == Y_AXIS) {  // Top to bottom gradient
    for (int i = y; i <= y+h; i++) {
      float inter = map(i, y, y+h, 0, 1);
      color c = lerpColor(c1, c2, inter);
      stroke(c);
      line(x, i, x+w, i);
    }
  } 
}
class Cloud {
  float posX, posY;
  color CColor;
  float acceleration;
  
  Cloud() {
    posX = random(width);
    posY = random(height);
    CColor = color (30, 35, 100) ;
    acceleration = random(2, 6);
    
  }

  void drawClouds() {
    fill(CColor);
    noStroke();
    rectMode(CENTER);
    rect(posX+20, posY-1, 135, 70);
    fill(CColor);
    ellipse(posX-31, posY-10, 120, 90);
    ellipse(posX+90, posY-7, 90, 80);
    ellipse(posX+60, posY-17, 90, 100);
    ellipse(posX, posY-50, 80, 70); 
  }
  
  void moveClouds() {
    posX += acceleration;
  }

  void checkEdge() {
    if (posX > width) {
      posX = 0;
      posY = random(0, height); 
    }
  }

  void run() {
    moveClouds();
    drawClouds();
    checkEdge();
  }
}

Class for coin

class Coin {
  float sizeH;
  float posXC, posYC;
  float acceleration;

Coin(){
    posXC = 0;
    posYC = random(height);
    acceleration = 2;
}
void drawCoin(){
    fill(255, 229, 15);
    stroke(255, 190, 0);
    ellipse(posXC, posYC, 40, 40);
    fill(255, 190, 0);
    ellipse (posXC, posYC, 25, 25);
}
void moveCoin() {
   posXC += acceleration;
}
 void checkCoin() {
    if (posXC > width) {
      posXC = 0;
      posYC = random(0, height); 
    }
  }


void runCoin() {
    moveCoin();
    drawCoin();
    checkCoin();
    }
}

I also decided to put plane into separate class

class Plane {
  float posPlaneX;
  float posPlaneY;

  Plane() {
    posPlaneX = 1115;
    posPlaneY = 300;
  }

  void drawPlane() {
    fill(255);
    noStroke();
    triangle(posPlaneX-70, posPlaneY, posPlaneX+30, posPlaneY-70,posPlaneX-20,posPlaneY);
    triangle(posPlaneX-70, posPlaneY, posPlaneX+30, posPlaneY+70,posPlaneX-20,posPlaneY);
    triangle(posPlaneX-70, posPlaneY, posPlaneX+30, posPlaneY+70,posPlaneX-20,posPlaneY);
    triangle(posPlaneX+45, posPlaneY,posPlaneX+95,posPlaneY-50,  posPlaneX+75, posPlaneY);
    triangle(posPlaneX+45, posPlaneY,posPlaneX+95,posPlaneY+50,  posPlaneX+75, posPlaneY);
    ellipse (posPlaneX, posPlaneY, 200, 30);
    
 }
  void keyPressed(){
  if (key == 'w')
   posPlaneY-=10;
  if (key == 'a')
  posPlaneX-=10;
  if (key == 's')
  posPlaneY+=10;
  if (key == 'd')
  posPlaneX+=10;
}

 void runPlane(){
  keyPressed();
  drawPlane();
 }
}

New skills

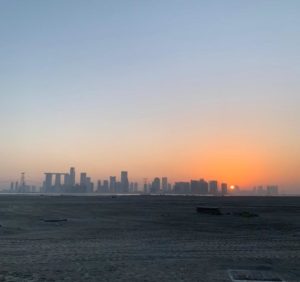
This week I continue to experiment with colors, that is why I added gradient on the background to represent beautiful sunsets in Abu Dhabi

Beginning

The idea of navigation came to my mind after some attempts to create something. At the beginning I wanted to make airstrip to land the plane or something like this. By the way, ball here is a future plane.


If not the vaccine, then this

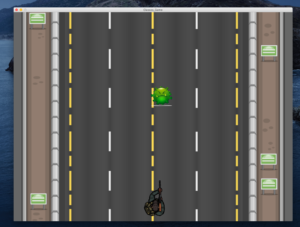
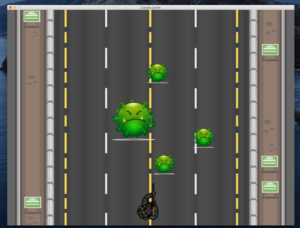
I was quite excited for this week’s project as it was about making a game and thought of the ideas that I could pursue to make a game that would be fun to play. I was initially thinking of something where the user has a specific time limit to book the gym slot and if he is unable to do so, he loses the slot. But then I realized that the game does not implement the concept of classes that well and hence won’t be that relevant to this week’s topic. Therefore, I thought of making a shooter game in which you battle the world’s number one enemy, the Corona virus!

Difficulties:

  • Although this game was really fun to make, I did run into a bunch of really annoying problems. The first major problem I ran into was to make bullets that would appear and shoot on my command. In my first attempt of doing so, I had created something in which when I would press the command to shoot, the bullet would just extend indefinitely and not work as a bullet does. After this was resolved, I faced another challenge of aligning the movement of the bullet with that of the player. Initially, when I would move the player, the bullet would not move accordingly and hence I needed to figure a way around that.
  • The next major challenge that I faced was to actually find a game mechanic that would allow the bullet to kill the virus when it touched it. I was struggling to find a clean and simple solution to this problem as I was going with the incorrect approach of emphasizing the fact that whether a bullet has gone through many viruses or not and making checks for that. This logic obviously did not work as it was actually the viruses that needed to be checked and seen if the bullet passed through them or not. Once I changed my logic and coded accordingly, the function began to work.

Resolution:

  • In order to properly implement the bullet mechanics, I decided to nest the bullet class in the player class. This allowed to easily link the data of the player with that of the bullet and made it easy to correlate their positions. Previously, I had experimented with the bullet class inheriting from the player class but realized that the player and bullet do not have a Is-a relationship but have a Has-a relationship and therefore nesting would work best for this problem (I could have used composition but decided to go with nesting).
  • The way I tackled the problem of killing the virus with the bullet was by creating a function that would check if the bullet is in the vicinity of the virus and then running it to check for every virus and every bullet.

Ideation:

  • My ideation for this task primarily involved the following:
    • Game Concept Idea
    • Game Play Idea

Game Concept:

  • For the concept, as I had mentioned before, I was inclined towards making a game for the gym slots but this idea of a shooting game, dawned upon me when I was siting in a cafe and just being frustrated over the fact that my mask was irritating me.

Game Play:

  • As I started building this game, I knew that I would be building a top down game wherein the virus appears to be falling down the screen and the player is positioned in the end of the screen and can only move in the horizontal direction while his bullets travel vertically up and can interact with the virus to kill them. I believe that for the time being the top down approach works well but I would like to experiment with different view points of playing the game. I tried looking at the first person perspective but apparently that required P3D rendering. However, this could be something I could try out for my midterm project.

Notes:

  • While this game solves the purpose of this week’s assignment, I am hopeful that I can develop this much better than this and probably turn it into my midterm project. This version is therefore a prototype that will be worked upon as I learn more about processing in the following weeks.

Concepts Learned:

  • This project taught me how to nest classes and how to better link one class to the next.
  • It taught me to scout for game art and then effectively apply them in my own projects using the PImage, img and images() functions in Processing.
  • This project taught me how to work with the ArrayList function.

Game Art

Project Video:

Project Code:

Main draw() Class

ArrayList<Virus> viruses = new ArrayList<Virus>(); //gives the list of viruses
Player player; //player object
boolean shoot = false; // ensures that the player only shoots when commanded
ArrayList<Player.Bullet> bullets = new ArrayList<Player.Bullet>(); //bullet list

void setup()
{
  size(1280, 960);
  
  imageMode(CENTER);
  viruses.add(new Virus(random(width*0.25, width*0.75), 0, int(random(1, 3)))); //initialising the list of viruses to spawn in between the roads of the game
  player = new Player();
}

void draw()

{
  PImage bg;  
  bg = loadImage("background-1.png");
  bg.resize(int(width),int(height));
  background(bg); //background is the top down view of a road
  Player_Mechanics();
  Virus_Mechanics(); 
}


void Player_Mechanics()
{
  
  player.drawPlayer();  //draws the Player on Screen
  
  for(int i =0; i< bullets.size(); i++)
  {
    
    bullets.get(i).draw_Bullet();
    bullets.get(i).shoot_Bullet();  //if bullets are present, draws them and shoots them
    if(bullets.get(i).bullet_posY_1 < 0 )
      bullets.remove(i); //removes the bullet once they are out of frame
  }
  

}


void Virus_Mechanics()
{
  for (int i = 0; i < viruses.size(); i++)
  {   
    viruses.get(i).drawVirus();
    viruses.get(i).moveVirus(); //draws and moves virus on screen
    if(viruses.get(i).posY > height + viruses.get(i).size)
      viruses.remove(i);  //removes the virus once they are out of frame
    if( bullets.size() > 0 && viruses.size() > 0 )
    {
      for(int j=0; j<bullets.size(); j++)
      {
        if( bullets.size() > 0 && viruses.size() > 0 )
        {
          if(viruses.get(i).vicinty_check(bullets.get(j).bullet_posX,bullets.get(j).bullet_posY_2))
            {
              viruses.remove(i); //kills the virus and removes it once bullet touches it
            }
        }
      }
    }
  }
}

void keyPressed()
{
  if (key == ' ')
  {
    viruses.add(new Virus(random(width*0.25, width*0.75), 0, int(random(1, 3)))); //spawns a virus
  }

  if (key == 'a')
  {
    player.moveLeft(); //player goes left
  }

  if (key == 'd')
  {
    player.moveRight(); //player goes right
  }
  
  if (key == 'f')
  {
    bullets.add(player.new Bullet(0));  //shoots bullets
  }
}

Player Class

class Player {

  public float posX = width/2;  
  public float posY = height-100;
  PImage player;  
  int movement=20;
  int size =200;


  Player()
  {

    player = loadImage("player_rifle.png");
    imageMode(CENTER);
  }


  void drawPlayer()
  {
    player.resize(size, 0);
    pushMatrix();
    translate(posX, posY);
    rotate(radians(270));
    image(player, 0, 0);
    popMatrix(); //resizes and rotates the image of the player on screen so that it is appropriate for the game
  }

  void moveLeft()
  {
    
    if (posX > size/2)
      posX -= movement; //player moves left
  }

  void moveRight()
  {
    
    if (posX < width-size/2)
      posX += movement; //player moves right
  }


  class Bullet {    //nested bullet class in player class

    float  bullet_posX = posX + size*0.15;
    float  bullet_posY_1 = posY - size/2; 
    float  bullet_size = size * 0.1; 
    float  bullet_posY_2 = posY - size/2 - bullet_size; 
    int bullet_speed = 20; 


    Bullet(float y)
    {
      bullet_posY_1 -= y;
      bullet_posY_2 -= y;    //assigns intial position to bullet
    } 
    void draw_Bullet()
    {
      stroke(195,153,83);
      strokeWeight(6);
      line(bullet_posX, bullet_posY_1, bullet_posX, bullet_posY_2);  //draws a line for a bullet
    } 

    void shoot_Bullet()  

    {
      bullet_posY_1 -= bullet_speed;
      bullet_posY_2 -= bullet_speed;  //moves bullet
    }
  }
}

Virus  Class

class Virus {

  float posX;
  float posY;
  int speed = 2;
  int size;
  PImage corona;


  Virus(float x, float y, int s)
  {
    posX = x;
    posY = y;
    size = s*100;
    corona = loadImage("corona.png");
    imageMode(CENTER);
  }

  void drawVirus()
  {

    corona.resize(size, 0);
    image(corona, posX, posY);  //resizes and draws the virus
  }

  void moveVirus()
  {
    posY += speed;  //moves the virus
  }

  boolean vicinty_check(float x, float y)
  {
    if ((x < posX+size/2 && x > posX-size/2) && (y < posY+size/2 && y > posY-size/2))  //checks if anything exists in the vicintiy of the virus's body
      return true;
    else
      return false;
  }
}


yet another kinda art [week 3]

This time around I was feeling very inspired to improve on my previous week’s forest animation work. Although it did work, it didn’t work as it was intended with a background. Only after the class, I realized that I should have added for class and put all the curve inside the for loop and give a variable that would constantly instantiate on itself.

Laser show animation inspired by Art NOW. It’s mesmerizing to look at a laser show, just like fire you could stare at it endlessly. I tried to recreate the laser show by using multiple rectangles that will rotate from the center and clash between each other from different angles that would give the abstract laser-like feel.

This time, however, I tried to implement waves using sin as it reminds me of soundwaves, rotating them and doing it for rectangles would have created a unique look.

The difficulty was in aligning to the center, from the very first tries it would only be rotating over the top left corner until I remembered about the translate function to place all the rotations to happen right in the center of the screen.

Randomizing the angle for the rotate function creates a new pattern each and every time and that’s the beauty of generative art. strokeWeight(map(laser, -1, 1, 0.5,weight )); makes the lines fade out and look smooth. By putting mouseX now it is also interactive to speed up and have control over the rotating rectangles. The only backlash is it’s really difficult to control speed, I specifically don’t get why is it fast in the beginning.

float angles= random(0.1,30);// to randomize angles
float colorstroke=random(0,255); //to randomize colors
float weight=random(0.25,3); //fadeaway effect

void setup() {
  size(940,680);
  smooth();
  
}

void draw() {
  background(0);
  
  center(); //shifts 0,0 coordinates to the center
  
  float laser= sin(radians(frameCount));
  float l= laser*map(mouseX,0,height,2000,0); //rectangle waves
  
  for (int i=0; i<300; i++){
    rotate(angles);
    noFill();
    stroke(255);
    strokeWeight(map(laser, -1, 1, 0.5,weight ));
    rect(550,i+l,-550, i++ );
    
    noFill();
    stroke(colorstroke,0,colorstroke);
    strokeWeight(map(laser, -1, 1, 0.5,weight ));
    rect(550,i-l,-550, i++ );
    
    noFill();
    stroke(0,colorstroke,colorstroke);
    strokeWeight(map(laser, -1, 1, 0.5,weight ));
    rect(550,i-l/2,-550, i++ );
  }
}

void center(){
  translate(width/2,height/2);
}