Final Project

Aaron, Majid, Hassan.

CONCEPT

How would someone virtually learn how complicated it is to drive a car? Would teaching someone how to drive a car virtually save a lot of money and decrease potential accidents associated with driving? These questions inspired our project, which is to create a remote-controlled car that can be controlled using hand gestures (that imitate the driving steering wheel movements), specifically by tracking the user’s hand position and a foot pedal. The foot pedal will be used to control the acceleration, braking, and reversing. We will achieve all these by integrating a P5JS tracking system into the car, which will interpret the user’s hand gestures and translate them into commands that control the car’s movements. The hand gestures and pedal control will be synced together via two serial ports that will communicate with the microcontroller of the car.

Experience

The entire concept is not based only on a driving experience. We introduce a racing experience by creating a race circuit. The idea is for a user to complete a lap in the fastest time possible. Before you begin the experience, you can view the leaderboard. After your time has been recorded, a pop-up appears for you to input your name to be added to the leaderboard. For this, we created a new user interface on a separate laptop. This laptop powers an Arduino circuit connection which features an ultrasonic sensor. The ultrasonic sensor checks when the car has crossed the start line and begins a timer, and detects when the user ends the circuit. After this, it records the time it took a user to complete the track and sends this data to the leaderboard.

This piece of code is how we’re able to load and show the leaderboard.

function loadScores() {
  let storedScores = getItem("leaderboard");
  if (storedScores) {
    highscores = storedScores;
    console.log("Highscores loaded:", highscores);
  } else {
    console.log("No highscores found.");
  }
}

function saveScores() {
  // make changes to the highscores array here...
  storeItem("leaderboard", highscores);
  console.log("Highscores saved:", highscores);
}


IMPLEMENTATION(The Car & Foot Pedal)

We first built the remote-controlled car using an Arduino Uno board, a servo motor, a Motor Shield 4 Channel L293D, an ultrasonic sensor, 4 DC motors, and other peripheral components. Using the Motor Shield 4 Channel L293D decreased numerous wired connections and allowed us space on the board on which we mounted all other components. After, we created a new Arduino circuit connection to use the foot pedal.

The foot pedal sends signals to the car by rotating a potentiometer whenever the pedal is engaged. The potentiometer value is converted into forward/backward movement before it reaches p5.js via serial communication.

P5/Arduino Communication

At first, a handshake is established to ensure communication exists before proceeding with the program:

//////////////VarCar/////
// Define Serial port
let serial;
let keyVal;
//////////////////////////
const HANDTRACKW = 432;
const HANDTRACKH = 34;

const VIDEOW = 320;
const VIDEOH = 240;

const XINC = 5;
const CLR = "rgba(200, 63, 84, 0.5)";

let smooth = false;
let recentXs = [];
let numXs = 0;

// Posenet variables
let video;
let poseNet;

// Variables to hold poses
let myPose = {};
let myRHand;

let movement;
////////////////////////

let Acceleration = 0;
let Brake = 0;
let data1 = 0;
let data2 = 0;

let s2_comp=false;

function setup() {
 // Create a canvas
  //createCanvas(400, 400);

  // // Open Serial port
  // serial = new p5.SerialPort();
  // serial.open("COM3"); // Replace with the correct port for your Arduino board
  // serial.on("open", serialReady);

  ///////////////////////////
  // Create p5 canvas


The Hand Gestures

Two resources that helped detect the user’s hand position were PoseNet and Teachable Machine. We used these two resources to create a camera tracking system which was then programmed to interpret specific hand gestures, such as moving the hand right or left to move the car in those directions. This aspect of our code handles the hand tracking and gestures.

if (myPose) {
    try {
      // Get right hand from pose
      myRHand = getHand(myPose, false);
      myRHand = mapHand(myRHand);

      const rangeLeft2 = [0, 0.2 * HANDTRACKW];
      const rangeLeft1 = [0.2 * HANDTRACKW, 0.4 * HANDTRACKW];
      const rangeCenter = [0.4 * HANDTRACKW, 0.6 * HANDTRACKW];
      const rangeRight1 = [0.6 * HANDTRACKW, 0.8 * HANDTRACKW];
      const rangeRight2 = [0.8 * HANDTRACKW, HANDTRACKW];

      // Check which range the hand is in and print out the corresponding data
      if (myRHand.x >= rangeLeft2[0] && myRHand.x < rangeLeft2[1]) {
        print("LEFT2");
        movement = -1;
      } else if (myRHand.x >= rangeLeft1[0] && myRHand.x < rangeLeft1[1]) {
        print("LEFT1");
        movement = -0.5;
      } else if (myRHand.x >= rangeCenter[0] && myRHand.x < rangeCenter[1]) {
        print("CENTER");
        movement = 0;
      } else if (myRHand.x >= rangeRight1[0] && myRHand.x < rangeRight1[1]) {
        print("RIGHT1");
        movement = 0.5;
      } else if (myRHand.x >= rangeRight2[0] && myRHand.x <= rangeRight2[1]) {
        print("RIGHT2");
        movement = 1;
      }
      // Draw hand
      push();
      const offsetX = (width - HANDTRACKW) / 2;
      const offsetY = (height - HANDTRACKH) / 2;
      translate(offsetX, offsetY);
      noStroke();
      fill(CLR);
      ellipse(myRHand.x, HANDTRACKH / 2, 50);
      pop();
    } catch (err) {
      print("Right Hand not Detected");
    }
    print(keyVal)


The Final Result & Car Control

The final result was an integrated system consisting of the car, the pedal, and gesture control in P5.JS. When the code is run in p5.js, the camera detects a user’s hand position and translates it into movement commands for the car.

The entire code for controlling the car.

//////////////VarCar/////
// Define Serial port
let serial;
let keyVal;
//////////////////////////
const HANDTRACKW = 432;
const HANDTRACKH = 34;

const VIDEOW = 320;
const VIDEOH = 240;

const XINC = 5;
const CLR = "rgba(200, 63, 84, 0.5)";

let smooth = false;
let recentXs = [];
let numXs = 0;

// Posenet variables
let video;
let poseNet;

// Variables to hold poses
let myPose = {};
let myRHand;

let movement;
////////////////////////

let Acceleration = 0;
let Brake = 0;
let data1 = 0;
let data2 = 0;

let s2_comp=false;

function setup() {
 // Create a canvas
  //createCanvas(400, 400);

  // // Open Serial port
  // serial = new p5.SerialPort();
  // serial.open("COM3"); // Replace with the correct port for your Arduino board
  // serial.on("open", serialReady);

  ///////////////////////////
  // Create p5 canvas
  createCanvas(600, 600);
  rectMode(CENTER);

  // Create webcam capture for posenet
  video = createCapture(VIDEO);
  video.size(VIDEOW, VIDEOH);
  // Hide the webcam element, and just show the canvas
  video.hide();

  // Posenet option to make posenet mirror user
  const options = {
    flipHorizontal: true,
  };

  // Create poseNet to run on webcam and call 'modelReady' when model loaded
  poseNet = ml5.poseNet(video, options, modelReady);

  // Everytime we get a pose from posenet, call "getPose"
  // and pass in the results
  poseNet.on("pose", (results) => getPose(results));
}

function draw() {
  // one value from Arduino controls the background's red color
  //background(0, 255, 255);
 
  /////////////////CAR///////
  background(0);

  strokeWeight(2);
  stroke(100, 100, 0);
  line(0.2 * HANDTRACKW, 0, 0.2 * HANDTRACKW, height);
  line(0.4 * HANDTRACKW, 0, 0.4 * HANDTRACKW, height);
  line(0.6 * HANDTRACKW, 0, 0.6 * HANDTRACKW, height);
  line(0.8 * HANDTRACKW, 0, 0.8 * HANDTRACKW, height);
  line(HANDTRACKW, 0, HANDTRACKW, height);
  line(1.2 * HANDTRACKW, 0, 1.2 * HANDTRACKW, height);

  if (myPose) {
    try {
      // Get right hand from pose
      myRHand = getHand(myPose, false);
      myRHand = mapHand(myRHand);

      const rangeLeft2 = [0, 0.2 * HANDTRACKW];
      const rangeLeft1 = [0.2 * HANDTRACKW, 0.4 * HANDTRACKW];
      const rangeCenter = [0.4 * HANDTRACKW, 0.6 * HANDTRACKW];
      const rangeRight1 = [0.6 * HANDTRACKW, 0.8 * HANDTRACKW];
      const rangeRight2 = [0.8 * HANDTRACKW, HANDTRACKW];

      // Check which range the hand is in and print out the corresponding data
      if (myRHand.x >= rangeLeft2[0] && myRHand.x < rangeLeft2[1]) {
        print("LEFT2");
        movement = -1;
      } else if (myRHand.x >= rangeLeft1[0] && myRHand.x < rangeLeft1[1]) {
        print("LEFT1");
        movement = -0.5;
      } else if (myRHand.x >= rangeCenter[0] && myRHand.x < rangeCenter[1]) {
        print("CENTER");
        movement = 0;
      } else if (myRHand.x >= rangeRight1[0] && myRHand.x < rangeRight1[1]) {
        print("RIGHT1");
        movement = 0.5;
      } else if (myRHand.x >= rangeRight2[0] && myRHand.x <= rangeRight2[1]) {
        print("RIGHT2");
        movement = 1;
      }
      // Draw hand
      push();
      const offsetX = (width - HANDTRACKW) / 2;
      const offsetY = (height - HANDTRACKH) / 2;
      translate(offsetX, offsetY);
      noStroke();
      fill(CLR);
      ellipse(myRHand.x, HANDTRACKH / 2, 50);
      pop();
    } catch (err) {
      print("Right Hand not Detected");
    }
    print(keyVal)


    //print(movement);
   // print("here")
    //print(writers);
  }
  //////////////////////////

  if (!serialActive1 && !serialActive2) {
    text("Press Space Bar to select Serial Port", 20, 30);
  } else if (serialActive1 && serialActive2) {
    text("Connected", 20, 30);

    // Print the current values
    text("Acceleration = " + str(Acceleration), 20, 50);
    text("Brake = " + str(Brake), 20, 70);
    mover();
  }

}

function keyPressed() {
  if (key == " ") {
    // important to have in order to start the serial connection!!
    setUpSerial1();
  } else if (key == "x") {
    // important to have in order to start the serial connection!!
    setUpSerial2();
    s2_comp=true
  }
}

/////////////CAR/////////
function serialReady() {
  // Send initial command to stop the car
  serial.write("S",0);
  print("serialrdy");
}

function mover() {
    print("mover");

  // Send commands to the car based wwon keyboard input
  if (Acceleration==1) {
    writeSerial('S',0);
   
    //print(typeof msg1)
   
  }else if (Brake==1) {
    writeSerial('W',0);
  }else if ( movement < 0) {
    print("left")
    writeSerial('A',0);
  }else if ( movement > 0) {
        print("right")

    writeSerial('D',0);
  }else if (movement== 0) {
    print("stop");
    writeSerial('B',0);
  }
}

// When posenet model is ready, let us know!
function modelReady() {
  console.log("Model Loaded");
}

// Function to get and send pose from posenet
function getPose(poses) {
  // We're using single detection so we'll only have one pose
  // which will be at [0] in the array
  myPose = poses[0];
}

// Function to get hand out of the pose
function getHand(pose, mirror) {
  // Return the wrist
  return pose.pose.rightWrist;
}

// function mapHand(hand) {
//   let tempHand = {};
//   tempHand.x = map(hand.x, 0, VIDEOW, 0, HANDTRACKW);
//   tempHand.y = map(hand.y, 0, VIDEOH, 0, HANDTRACKH);

//   if (smooth) tempHand.x = averageX(tempHand.x);

//   return tempHand;
// }
function mapHand(hand) {
  let tempHand = {};
  // Only add hand.x to recentXs if the confidence score is greater than 0.5
  if (hand.confidence > 0.2) {
    tempHand.x = map(hand.x, 0, VIDEOW, 0, HANDTRACKW);

    if (smooth) tempHand.x = averageX(tempHand.x);
  }

  tempHand.y = map(hand.y, 0, VIDEOH, 0, HANDTRACKH);

  return tempHand;
}

function averageX(x) {
  // the first time this runs we add the current x to the array n number of times
  if (recentXs.length < 1) {
    console.log("this should only run once");
    for (let i = 0; i < numXs; i++) {
      recentXs.push(x);
    }
    // if the number of frames to average is increased, add more to the array
  } else if (recentXs.length < numXs) {
    console.log("adding more xs");
    const moreXs = numXs - recentXs.length;
    for (let i = 0; i < moreXs; i++) {
      recentXs.push(x);
    }
    // otherwise update only the most recent number
  } else {
    recentXs.shift(); // removes first item from array
    recentXs.push(x); // adds new x to end of array
  }

  let sum = 0;
  for (let i = 0; i < recentXs.length; i++) {
    sum += recentXs[i];
  }

  // return the average x value
  return sum / recentXs.length;
}

////////////////////////

// This function will be called by the web-serial library
// with each new *line* of data. The serial library reads
// the data until the newline and then gives it to us through
// this callback function
function readSerial(data) {
  ////////////////////////////////////
  //READ FROM ARDUINO HERE
  ////////////////////////////////////

  if (data != null) {
   // print(data.value);
    let fromArduino = data.value.split(",");
    if (fromArduino.length == 2) {
      //print(int(fromArduino[0]));
      //print(int(fromArduino[1]));
      Acceleration = int(fromArduino[0]);
      Brake  = int(fromArduino[1])
     
    }

    //////////////////////////////////
    //SEND TO ARDUINO HERE (handshake)
    //////////////////////////////////
    if(s2_comp){
    let sendToArduino = Acceleration + "," + Brake + "\n";
      // mover()
    //print("output:");
    //print(sendToArduino);
    //writeSerial(sendToArduino, 0);
    }
  }
}


The car moves forward/backward when a user engages the foot pedals, and steers left/right when the user moves his/her hand left/right. The components of the car system are able to communicate via serial communication in p5.js. To enable this, we created 2 serial ports(one for the car and the other for the foot pedal).


CHALLENGES

One challenge we may face during the implementation is accurately interpreting the user’s hand gestures. The camera tracking system required a lot of experimentation and programming adjustments to ensure that it interprets the user’s hand movements while also being light and responsive. Originally the camera was tracking the X and Y axis, but it caused p5 to be very slow and laggy because of the number of variables that it needs to keep track of. The solution was to simply remove one of the axes, this improved the responsiveness of the program drastically.


The initial plan was to operate the car wirelessly, however, this was not possible due to many factors, such as using the wrong type of Bluetooth board. With limited time, we resorted to working with two serial ports for communication between the car, the pedals, and the hand gesture control. This introduced a new problem- freely moving the car. However, we solved the issue by using an Arduino USB extension cable for the car to be able to move freely.


Another major roadblock was the serial ports in p5js. Since the project uses both a pedal and the car, there was the need to use 2 separate Arduino Uno boards to control both systems. This necessitated the use of 2 serial ports in p5js. The original starter code for connecting p5 to Arduino was only for 1 serial port. A lot of time was spent adjusting the existing code to function with 2 serial ports.


Lessons learned, especially with regard to robots, is be grouped into the following points:

Planning is key: The project can quickly become overwhelming without proper planning. It’s important to define the project goals, select appropriate devices and how to sync the code to those devices and create a detailed project plan.

Test as often as you can before the showcase date: Testing is crucial in robotics projects, especially when dealing with multiple hardware components and sensors. This one was no exception. It’s important to test each component and module separately before combining them into the final project.

Future steps needed to take our project to the next level.

  1. Expand functionality: While the current design allows for movement in various directions, there are other features that could be added to make the car more versatile. We plan on adding cameras and other sensors(LiDar) to detect obstacles to create a mapping of an environment while providing visual feedback to a user.
  2. Optimize hardware and software: We also plan on optimizing the hardware and software components used. This would involve changing the motors to more efficient or powerful motors, using more accurate sensors (not using the ultrasonic sensor), or exploring other microcontrollers that can better handle the project’s requirements. Additionally, optimizing the software code can improve the car’s responsiveness and performance. For example, our software code can detect obstacles but cannot detect the end of a path. Regardless, we believe we can engineer a reverse obstacle-sensing algorithm to create an algorithm that could detect cliffs and pot-holes, and dangerous empty spaces on roads to ultimately reduce road accidents.

User Testing

Week 9 – BuzzBoard

BuzzBoard By Majid and Hassan

Concept

For our project, we aimed to create a unique musical instrument using distance tracking sensors and buttons. After brainstorming various ideas, we were inspired to design a piano-like instrument that could be played by two hands, one is distance tracked and the other is pressing the buttons. There are 7 notes and 3 different octaves that can be played. The notes are determined by the distance and the octave is based on which button is pressed.

implementation

We decided to use ultrasonic sensor for detecting the hand distance and buttons for controlling different notes of the piano. The Arduino was also connected to a piezo sensor for producing the piano sounds. Once the circuit assembly was complete, we tested the circuit to ensure the sensors and buttons were working and registered properly. Then we programmed the buttons to play different octaves of the notes.

Deciding which note to be played is at the core of our code. We did so through making a list of if conditions. First we checked what was the last button pressed, to decide the octave we are playing the notes in. After that, based on the distance from the ultrasonic sensor, in increments of 3cm, we chose a note to be played. For example, here is how the notes are played if the last button pressed was 2:

  if(lastButton == 2){
  if (distance < 3) {
    tone(8,NOTE_A4,noteDuration);
  } else if (distance >= 3 && distance < 6) {
    tone(8,NOTE_B4,noteDuration);
  } else if (distance >= 6 && distance < 9) {
    tone(8,NOTE_C4,noteDuration);
  } else if (distance >= 9 && distance < 12) {
    tone(8,NOTE_D4,noteDuration);
  }
  else if (distance >= 12 && distance < 15) {
    tone(8,NOTE_E4,noteDuration);
  }
      else if (distance >= 15 && distance < 18) {
    tone(8,NOTE_F4,noteDuration);
  }
      else if (distance >= 18 && distance < 21) {
    tone(8,NOTE_G4,noteDuration);
  }
}

Challenges

One of the main challenges we encountered during the project was calibrating the distance sensors to play different notes. We had to experiment with different threshold values and distances for the different notes and octaves.

The Demo

Week 9 – Variable Threshold Lightsensor


Concepts

In this week’s HW, the concept is a  variable threshold light sensor where the blue led lights up depending on if the ambient light is higher than the threshold which is controlled by the switch.

I built a simple Arduino circuit that used an analog sensor and a digital sensor to control two LEDs. To begin, I connected an LDR (Light-Dependent Resistor) and a switch to the Arduino board. The LDR measured the ambient light level, and the switch was used to control the threshold at which the LDR LED turns on.

The Demo


Code

For the coding part, I programmed the Arduino to turn on the LDR LED when the ambient light level fell below the threshold set by the switch. Conversely, when the ambient light level was lower than the threshold, the LDR LED turned off. To make the circuit more interactive, I added a feature that allowed me to adjust the threshold of the LDR LED by pressing the switch. Each time I pressed the switch, the threshold decreased by 200, making the LDR LED turn on at a lower ambient light level. Once the threshold reached 0, it looped back to the maximum value of 1023, allowing me to adjust the threshold again.

digitalSensorState = digitalRead(digitalSensorPin);
if (digitalSensorState == HIGH) {
  switchPressCount++;
  ldrThreshold -= 200;
  if (ldrThreshold < 0) {
    ldrThreshold = 1023;
  }

In addition to controlling the digital LED with the switch and LDR, I also programmed the analog LED to change its brightness depending on the threshold set by the switch. The analog LED became brighter as the threshold decreased. This was done using the map function.

int brightness = map(ldrThreshold, 0, 1023, 255, 0);
analogWrite(analogLEDPin, brightness);

Challenges and Future changes

During the development of this project, one of the challenges I faced was accurately calibrating the LDR threshold with the switch. Ensuring that the threshold value was accurate and consistent required some trial and error. Additionally, mapping the threshold value to the analog LED brightness required some experimentation to ensure that the changes in brightness were noticeable and distinct. In terms of possible future changes and improvements, one idea would be to add additional sensors, such as a motion sensor, to further expand the functionality of the circuit.

Week 8 – Bicep Switch

This week’s assignment required us to design a straightforward circuit switch without the use of our hands. When thinking about how to remove the hands from creating a switch I thought of the area further up the arm which was the bicep and forearm. The switch turns on by flexing my bicep muscle and completing the circuit.

I began by building a basic circuit that would turn on the LED whenever the circuit was closed. Then I unplugged the ground from the main + and – bus on the breadboard and removed the power to the LED row. I decided to use aluminum foil, which functions as an electrical conductor, to complete the circuit and turn on the switch. The connection was then redirected onto a piece of aluminum foil using wires and a jumper to attach. I was able to close the circuit by securing the piece of aluminum foil to the top of my bicep and bottom of my forearm. This allowed me to complete the circuit by flexing my bicep which brought the 2 pieces of aluminum together and completed the circuit and turn on the LED.

Week 7 – SURVIVE Midterm Project Completed

  • Describe the overall concept of your project (1-2 paragraphs)

For the midterm project, I’m continuing to develop the “SURVIVE” game I created in week 3. The game concept is based on many retro games such as space invaders. The goal of this interactive video game is to avoid oncoming RGB-colored missiles while the user controls a triangle at the cursor. The objective of the game’s endless mode is to live for as long as you can and obtain high scores. To go with the retro theme, I made the main menu also styled like an arcade game. The sound effects I chose were also intended to give off a retro vibe.  The soundtrack is energetic and upbeat which matches the type of feel I wanted the gameplay to have.  


  • Describe how your project works and what parts you’re proud of (e.g. good technical decisions, good game design) 2-3 paragraphs

The projectiles are all separate objects that have collision detection with the player. The timer counts up and the bullets’ speed increases the more time passes. To make the game easier to browse, I also incorporated a variety of menus. There is a main menu and a game-over menu included. I also added a Highscores menu that keeps track of the player’s scores locally (in the browser) and sorts them from highest to lowest. The gameplay has been enhanced by adding 3 new mechanics. Shield and Slowdown which are powerups and Clear which is an active ability. Picking up Shield allows the player to be able to take collide with an incoming projectile without losing any HP. Slowdown, when picked up makes the projectiles move in slow-motion for a short duration. Clear can be activated by pressing space or mouseclick, and it emits a blue circle around the player which neutralizes all incoming projectiles that collide within the circle.

Finding the right balance with regard to the power-up spawn frequency and clear cooldown is something that I found to be very interesting. For the game to have the right amount of challenge while not making it too easy is surprisingly a hard balance to find. This naturally took a lot of trial and error to find a frequency that forced the player to actually play the game and avoid the obstacles while also keeping them frequent enough to where the player gets to use the power-ups multiple times a playthrough. With Clear being an active ability the player can trigger it was vital to not make the cooldown time too short as it would make the game too easy, I settled on around 20 seconds. This amount of time makes the player heavily consider the opportunity cost of using the ability which makes the game more engaging.

I am also proud of how I structured the program to handle multiple menus. How organized or disorganized the code depends on the structure used. Each menu will be in its own if statement that tests the current “level,” as I chose to do. Currently, there are 4 different levels. These are the main menu, game over screen, high scores, and the actual game. The application can only retrieve information that is made available to the current level variable using this structure. As a result, developing game features is considerably simpler and easier. It also makes it so that the program does not have to go through every line of code as it is restricted to levels, this reduces the amount of processing power required.

  • Describe any problems you ran into (1-2 paragraphs)

I ran into problems with the Highscores function of the game. Initially I thought that it would be possible to write directly to an uploaded txt file in p5js. When I was researching online I saw that most people were using savestring() to do this. However, when I tried it, the file would just download onto my browser but not change the already uploaded txt file which I was reading from. I had tried a few more functions but to no success. So I opted for a local storage solution that used storeitem() and getitem(). These functions would store all the data locally on your browser and would stay after multiple sketch resets. The main drawback with this approach is that it is locally stored, meaning that players on other computers would not see the same high scores.

I also ran into a weird bug that I couldn’t figure out for a good while. When I was clicking on the return to main menu button it would take me to the high scores menu. This weird behavior did not make any sense when I looked at the code itself. But upon further investigation, I realized the problem stemmed from the mouseIsClicked variable I was using to interact with the buttons. The issue was that it would stay returning true as long as I held the mouse button down and I was within the range of the button. In addition to this, my return to the main menu button was in the exact same position as the high scores button in the main menu. So in reality the program was actually switching to the main menu, but in the split second in which I was holding down the mouse button, it would also activate the high score menu. I solved this problem but introducing a clicked boolean value and using the mouseClicked() function. This made it so that only one instance of true would be returned when I clicked on the mouse button.


Majid Week 6 – SURVIVE Continuation

Concept:

My concept this week is to continue building on the “SURVIVE” game I made in week 3. It is an interactive video game in which the player is a triangle located at the cursor and the objective is to avoid incoming projectiles RGB colored projectiles.I have removed the “MISSION ACCOMPLISHED” page as I have opted to make the game Tetris style. That means the game is an endless mode in which the goal is to survive for as long as possible and get a highscore. Instead of counting down the timer counts up and speed of  the projectiles get faster based off of the time elapsed. I have also added different menus to help navigate the game. This includes a main menu and game over menu.

Embedded:

Code:

function resetGame() {
  rain = [];
  range = 400;
  size = 30;
  health = 3;
  ctr = 0;
  count = 0;
  lost = 0;
  win = 0;
  speedinc = 0;
  starttime = 2;
  timer = 0;
  for (let i = 0; i < 120; i++) {
    rain.push(new raindrop());
  }
}


The main change between this new iteration is the ability to reset the game back to its original state without rerunning theb sketch. This is made possible using the resetGame() function. The purpose of this function is to reinitialize all the games attributes back to its baseline.

if (level == 0) {
    noCursor();
    background(0);
    print("lvl 0");

    fill(200, 200, 100);
    triangle(
      mouseX - 10,
      mouseY + 5,
      mouseX + 10,
      mouseY + 5,
      mouseX,
      mouseY - 10
    );
    if (frameCount % (5 * 60) == 0) {
      print("fdnsjgds");
      speedinc = speedinc + 1.25;
    }
    if (frameCount % 60 == 0) {
      timer++;
    }

    if (timer <= starttime) {
      fill(255);
      textSize(24);
      textAlign(CENTER, CENTER);
      text("OBJECTIVE: SURVIVE", width / 2, height / 2);
    } else if (timer > starttime) {
      displayTimer();

      for (let i = 0; i < 120; i++) {
        noStroke();
        rain[i].draw();
        rain[i].move();
        rain[i].checkForCollisions();
        ctr++;
        if (ctr > 2) {
          ctr = 0;
        }
      }

      if (win == 1) {
        background(0);
        fill(255);
        textSize(24);
        textAlign(CENTER, CENTER);
        text("MISSION ACCOMPLISED", width / 2, height / 2);
        win = 1;
        resetGame();
      } else if (health <= 0) {
        resetGame();
        level = 2;
      }
    }
  }
  if (level == 1) {
    background(0);
    fill(255);
    textSize(24);
    textAlign(CENTER, CENTER);
    text("Main Menu", width / 2, height / 2 - 36);
    text("Play", width / 2, height / 2 + 36);
    text("Highscores", width / 2, height / 2 + 80);
    resetGame();
    // push();
    fill(0,0,0,1);
        rect(width / 2 - 75 ,
        height / 2 - 15 + 36 ,
        75*2 ,
        30)
    stroke(0);
    // pop();
    // stroke(255);
    print("lvl 1");
     // if (mouseIsPressed) {
      if (
        mouseX > width / 2 - 75 &&
        mouseX < width / 2 + 75 &&
        mouseY > height / 2 - 10 + 36 &&
        mouseY < height / 2 + 25 + 36
      ) {
        // push();
        stroke(255);
        // pop();
        if (mouseIsPressed){
          level = 0;
        }
      }

  }
  if (level == 2) {
    cursor(CROSS);
    background(0);
    fill(255);
    textSize(24);
    textAlign(CENTER, CENTER);
    text("GAME OVER", width / 2, height / 2 - 36);
    text("Retry", width / 2, height / 2 + 36);
    text("Return to main menu", width / 2, height / 2 + 80);
    print("lvl 2");

     if (mouseIsPressed) {
      if (
        mouseX > width / 2 - 75 &&
        mouseX < width / 2 + 75 &&
        mouseY > height / 2 - 25 + 36 &&
        mouseY < height / 2 + 25 + 36
      ) {
        level = 0;
      }
      if (
        mouseX > width / 2 - 75 &&
        mouseX < width / 2 + 75 &&
        mouseY > height / 2 - 25 + 80 &&
        mouseY < height / 2 + 25 + 80
      ) {
        resetGame();
        level = 1;
      }
    }
   } 
  
  if(level == 3){
     
   }
}


Another aspect is navigating between the different menus. The structure that this is done with determines how clean or messy the code would be. I opted to have each menu in a different if statement which checks the current “level”. There are 4 different levels currently. These consist of the game itself, main  menu, game over screen, and high scores. Using this structure, the program is only able to access which is made available to the current level variable. This makes developing features in the game much simpler and easier.

Challenges:

I had an issue where when I return to main menu after the Game over screen the buttons would not work, the issue was fixed by temporarily commenting out the level 3 line as it has not been implemented which caused the program to completely halt as it entered level 3 (highscores).

Future Improvements:

The project is halfway completed. The next features to be developed: Add a points system which increases based on the timer, Add a background image and sound effects, Add various power ups and interactable items, complete the Highscore page and make it so that you can enter your name and score into the leaderboard, and finally to add different fonts and sprites. My hope is that the game ends up being a fun and engaging game in which friends can compete in achieving highscores.


Week 4 Generative Text

The concept behind this project is to create a colorful, dynamic, and mesmerizing generative artwork that combines vibrant colors, fluid shapes, and intriguing phrases. To achieve this, we use a combination of randomization and user-defined variables to create unique color schemes, shapes, and phrases.


The program is structured around a group of arrays that describe the nouns, adjectives, and colors that make up the sentences. The random() method is then used to pick a color from the color array, an adjective from the adjective array, and a noun from the noun array, resulting in a sentence that vividly describes a scene using a wide variety of colors and adjectives.

My use of a gradient background is one of the code snippets I am most pleased with. To make a background that is both visually pleasing and easy on the eyes, I used the createLinearGradient() function to make a linear gradient.


Adding user controls to this project would be a great way to improve it and give people more interactivity in shaping the final product. Also, I would use other shapes and phrases, adding additional components to the artwork to increase its visual complexity and intrigue.


Majid Week 3 – SURVIVE

Concept:
My concept this week is “SURVIVE”. It is an interactive video game in which the player is a triangle located at the cursor and the objective is to avoid incoming projectiles RGB colored projectiles. The text at the top includes a timer and a health counter. The timer is 30 seconds long, if the user survives for the amount of time without losing all his/her health the game displays a “MISSION ACCOMPLISHED” page. If the player loses all his Health before the timer runs out then the game will display a “GAME OVER” screen.

Embedded:

Code:

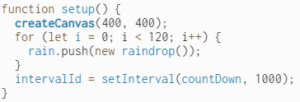
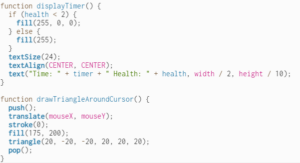
In this week’s assignment, I had  2 main issues, which were keeping track of time and managing the projectile collision.  The first snippet is the method I used to keep track of time. I discover a setinterval() function in js which allows the user to set a specific amount of time in order to increment, which I set to 1000 ms or 1s. I created another function that counts down the timer and displays a console message when the timer ran out for debugging purposes. I then used the timer variable to dictate what happens in the game.

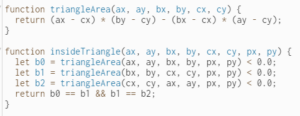
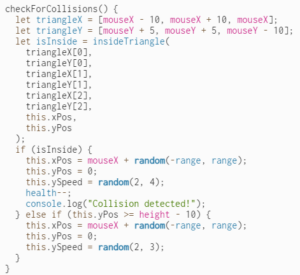
The collision aspect was interesting because it requires precision or else the player experience for the game would not be great.  I created 2 functions that calculated the triangle area and checked whether the inputted coordinates are within that triangle. In order to make this work for the cursor triangle, I inputted the coordinates of 3 points surrounding the cursor which combined make up a triangle. This allowed me to get precise collision detections for the triangle which is located on the cursor.

Future Improvements:
There are quite a lot of improvements that can be made to this assignment. For example, I can add different levels which scale in difficulty. The difficulty would be dictated by the speed of the incoming projectiles as well as the number of them. Another way is to have the speed of the projectiles scale with the timer, and there would be a points system based on the timer as well. This setup is similar to how the classic game Tetris works in which the longer the player lasts the higher their score. Adding sound effects would also enhance the player’s overall experience as well. This assignment has the potential to be a fully-fledged game in the future.


Majid Ibrahim – King Portrait

Your concept:
My idea is to make a portrait of a wise king. I went through a lot of experimenting to finally end up with this portrait, however, it was a very fun process overall, and am happy with how it turned out.

A highlight of some code that you’re particularly proud of:
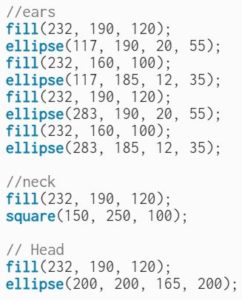
I used a lot of partial layering to achieve the look and shape that I wanted. An example of this is the inner ear:

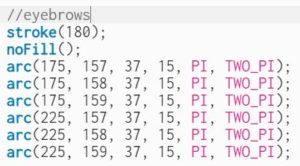
In addition, I didn’t know how to thicken the arc for the eyebrows so I came up with the idea to just add more arcs to increase the thickness:

Embedded sketch:

Reflection and ideas for future work or improvements:

I started this as a portrait of myself. I made the head shape but got stuck on the hair. After some experimenting, I came up with the idea of the crown. It was more stylish than my original idea. With that I naturally thought of making the portrait of a king instead. As I was working on the lower part of the portrait i.e. the shoulder and upper torso, I struggled with getting it all to fit together so I decided to give him a beard to circumvent this issue. The choice of red background color was a reference to the background color of the UAE leader’s portraits. For future improvements, I would add interactivity to the portrait by making the eyes follow the cursor and have the mouseclick change the background color and clothes.