week 11: exercises

1:

For this exercise, I just repurposed the code from class. I kept the Arduino IDE code the same. I used the alpha value (which was the reading from the photoresistor) and added these three lines of code to move the ellipse along the horizontal axis.

let x = map(alpha, 0, 1023, 0, width);
fill(0, 0, 0);
ellipse(x, height/2, 20, 20);

2:

For this, I modified the Arduino code slightly.


// Week 11.2 Example of bidirectional serial communication

// Inputs:
// - A0 - sensor connected as voltage divider (e.g. potentiometer or light sensor)
// - A1 - sensor connect
  pinMode(LED_BUILTIN, OUTPUT);

  // Outputs on these pins
  pinMode(leftLedPin, OUTPUT);
  pinMode(rightLedPin, OUTPUT);

  // Blink them so we can check the wiring
  digitalWrite(leftLedPin, HIGH);
  digitalWrite(rightLedPin, HIGH);
  delay(200);
  digitalWrite(leftLedPin, LOW);
  digitalWrite(rightLedPin, LOW);


  // start the handshake
  while (Serial.available() <= 0) {
    // digitalWrite(LED_BUILTIN, HIGH); // on/blink while waiting for serial data
    Serial.println("0,0"); // send a starting message
    delay(300);            // wait 1/3 second
    // digitalWrite(LED_BUILTIN, LOW);
    delay(50);
  }
}

void loop() {
  // wait for data from p5 before doing something
  while (Serial.available()) {
    digitalWrite(LED_BUILTIN, HIGH); // led on while receiving data

    int left = Serial.parseInt();
    int right = Serial.parseInt();
    if (Serial.read() == '\n') {
      brightness = map(left, 0, 1023, 255, 0);
      analogWrite(rightLedPin, brightness);
      int sensor = analogRead(A0);
      delay(5); // delay bc consecutive analog reads might make some noise 
      int sensor2 = analogRead(A1);
      delay(5);
      Serial.print(sensor);
      Serial.print(',');
      Serial.println(sensor2);
    }
  }
  digitalWrite(LED_BUILTIN, LOW);
}

And here is the p5.js code:

let rVal = 0;
let alpha = 255;
let left = 0; // True (1) if mouse is being clicked on left side of screen
let right = 0; // True (1) if mouse is being clicked on right side of screen
let slider;

function setup() {
  createCanvas(640, 480);
  textSize(18);
  slider = createSlider(0, 255, 0);
}

function draw() {
  // one value from Arduino controls the background's red color
  background(map(rVal, 0, 1023, 0, 255), 255, 255);

  // the other value controls the text's transparency value
  fill(255, 0, 255, map(alpha, 0, 1023, 0, 255));

  if (!serialActive) {
    text("Press Space Bar to select Serial Port", 20, 30);
  } else {
    text("Connected", 20, 30);
    

    // Print the current values
    text('rVal = ' + str(rVal), 20, 50);
    text('alpha = ' + str(alpha), 20, 70);
    text('brightness = ' + str(slider.value()), 20, 90)
   

  }

}

function keyPressed() {
  if (key == " ") {
    // important to have in order to start the serial connection!!
    setUpSerial();
  }
}

// This function will be called by the web-serial library
// with each new *line* of data. The serial library reads
// the data until the newline and then gives it to us through
// this callback function
function readSerial(data) {
  ////////////////////////////////////
  //READ FROM ARDUINO HERE
  ////////////////////////////////////

  if (data != null) {
    // make sure there is actually a message
    // split the message
    let fromArduino = split(trim(data), ",");
    // if the right length, then proceed
    if (fromArduino.length == 2) {
      // only store values here
      // do everything with those values in the main draw loop
      
      // We take the string we get from Arduino and explicitly
      // convert it to a number by using int()
      // e.g. "103" becomes 103
      rVal = int(fromArduino[0]);
      alpha = int(fromArduino[1]);
    }

    //////////////////////////////////
    //SEND TO ARDUINO HERE (handshake)
    //////////////////////////////////
    left = slider.value();
    right = slider.value();
    let sendToArduino = left + "," + right + "\n";
    writeSerial(sendToArduino);
  }
}

I created a slide that when the user moves back and forth, they can adjust the brightness of the blue LED (I used the blue LED because I used the exact same schematic, and the blue LED was connected to the digital PWM).

3:

The Arduino code I used for the third exercise was also very similar to the initial one provided:

// Week 11.2 Example of bidirectional serial communication

// Inputs:
// - A0 - sensor connected as voltage divider (e.g. potentiometer or light sensor)
// - A1 - sensor connected as voltage divider 
//
// Outputs:
// - 2 - LED
// - 5 - LED

int leftLedPin = 2;
int rightLedPin = 5;
int brightness = 0; 
void setup() {
  // Start serial communication so we can send data
  // over the USB connection to our p5js sketch
  Serial.begin(9600);

  // We'll use the builtin LED as a status output.
  // We can't use the serial monitor since the serial connection is
  // used to communicate to p5js and only one application on the computer
  // can use a serial port at once.
  pinMode(LED_BUILTIN, OUTPUT);

  // Outputs on these pins
  pinMode(leftLedPin, OUTPUT);
  pinMode(rightLedPin, OUTPUT);

  // Blink them so we can check the wiring
  digitalWrite(leftLedPin, HIGH);
  digitalWrite(rightLedPin, HIGH);
  delay(200);
  digitalWrite(leftLedPin, LOW);
  digitalWrite(rightLedPin, LOW);


  // start the handshake
  while (Serial.available() <= 0) {
    // digitalWrite(LED_BUILTIN, HIGH); // on/blink while waiting for serial data
    Serial.println("0,0"); // send a starting message
    delay(300);            // wait 1/3 second
    // digitalWrite(LED_BUILTIN, LOW);
    delay(50);
  }
}

void loop() {
  // wait for data from p5 before doing something
  while (Serial.available()) {
    digitalWrite(LED_BUILTIN, HIGH); // led on while receiving data

    int left = Serial.parseInt();
    int right = Serial.parseInt();
    if (Serial.read() == '\n') {
      // brightness = map(left, 0, 1023, 255, 0);
      digitalWrite(leftLedPin, left);
      digitalWrite(rightLedPin, right);
      // if (right == )
      int sensor = analogRead(A0);
      delay(5); // delay bc consecutive analog reads might make some noise 
      int sensor2 = analogRead(A1);
      delay(5);
      Serial.print(sensor);
      Serial.print(',');
      Serial.println(sensor2);
    }
  }
  digitalWrite(LED_BUILTIN, LOW);
}

and this is the p5.js code:

let velocity;
let gravity;
let position;
let acceleration;
let wind;
let drag = 0.99;
let mass = 50;
let ledVal = 0;

function setup() {
  createCanvas(640, 360);
  noFill();
  position = createVector(width / 2, 0);
  velocity = createVector(0, 0);
  acceleration = createVector(0, 0);
  gravity = createVector(0, 0.5 * mass);
  wind = createVector(0, 0);
}

function draw() {
  background(255);

  if (!serialActive) {
    print("click to select Serial Port");
    fill(0);
    text("click to select Serial Port", 20, 30);
  } else {
    applyForce(wind);
    applyForce(gravity);
    velocity.add(acceleration);
    velocity.mult(drag);
    position.add(velocity);
    acceleration.mult(0);
    ledVal = 0;
    ellipse(position.x, position.y, mass, mass);  
    if (position.y > height - mass / 2) {
      velocity.y *= -0.9; // A little dampening when hitting the bottom
      position.y = height - mass / 2;
      ledVal = 1;
    } 
  }
}

function applyForce(force) {
  // Newton's 2nd law: F = M * A
  // or A = F / M
  let f = p5.Vector.div(force, mass);
  acceleration.add(f);
}


function keyPressed() {
  if (key == " ") {
    mass = random(15, 80);
    position.y = -mass;
    velocity.mult(0);
  }
}


function mousePressed() {
  if (!serialActive) {
    // important to have in order to start the serial connection!!
    setUpSerial();
  }
}

function readSerial(data) {


  if (data != null) {
    let fromArduino = split(trim(data), ",");
    // if the right length, then proceed
    if (fromArduino.length == 2) {
      let val = int(fromArduino[1]);
      wind.x = map(val, 0, 1023, -1, 1);
      print("wind", wind.x);
    }

    //////////////////////////////////
    //SEND TO ARDUINO HERE (handshake)
    //////////////////////////////////
    // left = slider.value();
    // right = slider.value();
    // console.log(position.y);

    let sendToArduino = ledVal + "," + ledVal + "\n";
    writeSerial(sendToArduino);
  }
}

The modifications in the p5.js code make it so that the user clicks on the screen to set up the serial. Once the game is started, the reading from the potentiometer is used to adjust the wind, and everytime the ball hits the ground the LED lights up. One thing that I struggled with was how to stop the LED from being perpetually lit up while the ball was just on the ground.



Disability Meets Design (Week 11 Reading Response)

Pullin’s “Design Meets Disability” represents a good cross-section between, disability, fashion and design. In my opinion, he presents a story that goes beyond basic usability to embrace the core ideas of inclusion and empowerment, particularly when viewed through the lens of inclusivity and disability. In his book Pullin deftly demonstrates how assistive technology—like glasses, hear wear, and prosthetic limbs (leg wear)—has transformed into fashion statements. It’s amazing to see how design innovation has transformed these items from basic needs to unique expressions of identity and personal style to the point where today, spectacles are a fashion statement, unlike when they were only meant for individuals with disabilities like bad eyesight. Pullin discusses the significance of designs being both functional and aesthetically pleasing. He demonstrates how important it is to make things both visually appealing and accessible to those with disabilities. It’s similar to saying, “Hey, these things can look great AND they can help you!” Pullin emphasizes how a combination of good design and utility may change public perceptions of disability aids, increasing their social acceptance and appreciation.

Pullin discusses how keeping functionality without sacrificing simplicity can benefit those with disabilities. He illustrates how many people, regardless of ability, can profit from this type of design. He provides illustrations of universally usable, basic designs that improve the quality of life for those with impairments. It also emphasizes how crucial it is to pay attention to individuals with disabilities when creating these designs, as frequently we assume we know what is best for them based on presumptions and the stigmas society has attached to them. Therefore, I believe it is crucial to draw attention to these minute details that, not only benefit us but also those who are the primary beneficiaries of these designs.

This reading challenged me to consider creating not just an “interactive” design, but a GOOD interactive design that can improve everyone’s quality of life, particularly for those who are disabled. It’s not only about making things function; it’s also about making them user-friendly, simple and fashionable.  I learned that good design considers everyone’s needs and can change how we see and accept things like disability aids. It’s about making the world more inclusive and thoughtful for everyone.

Week 11 – Serial Communication

For this assignment, I collaborated with Shahd. We based our project on the example codes and made changes as we see appropriate. Shahd did the second exercise and I did the first exercise. We worked together to complete the third exercise.

Video:

Exercise 1:

p5 sketch:

int leftLedPin = 7;
int rightLedPin = 4;


void setup() {
 // Start serial communication so we can send data
 // over the USB connection to our p5js sketch
 Serial.begin(9600);


 // We'll use the builtin LED as a status output.
 // We can't use the serial monitor since the serial connection is
 // used to communicate to p5js and only one application on the computer
 // can use a serial port at once.
 pinMode(LED_BUILTIN, OUTPUT);


 // Outputs on these pins
 pinMode(leftLedPin, OUTPUT);
 pinMode(rightLedPin, OUTPUT);


 // Blink them so we can check the wiring
 digitalWrite(leftLedPin, HIGH);
 digitalWrite(rightLedPin, HIGH);
 delay(200);
 digitalWrite(leftLedPin, LOW);
 digitalWrite(rightLedPin, LOW);


 // start the handshake
  while (Serial.available() <= 0) {
    digitalWrite(LED_BUILTIN, HIGH);  // on/blink while waiting for serial data
    Serial.println("0,0");            // send a starting message
    delay(300);                       // wait 1/3 second
    digitalWrite(LED_BUILTIN, LOW);
    delay(50);
  }
}


void loop() {
 // wait for data from p5 before doing something
 while (Serial.available()) {
   digitalWrite(LED_BUILTIN, HIGH);  // led on while receiving data


   if (Serial.read() == '\n') {


     int sensor = analogRead(A1);  //potentiometer
     Serial.println(sensor);
   }
 }
 digitalWrite(LED_BUILTIN, LOW);
}

Exercise 2:

int leftLedPin = 6;


void setup() {
 // Start serial communication so we can send data
 // over the USB connection to our p5js sketch
 Serial.begin(9600);


 // We'll use the builtin LED as a status output.
 // We can't use the serial monitor since the serial connection is
 // used to communicate to p5js and only one application on the computer
 // can use a serial port at once.
 pinMode(LED_BUILTIN, OUTPUT);


 // Outputs on these pins
 pinMode(leftLedPin, OUTPUT);


 // start the handshake
 while (Serial.available() <= 0) {
   digitalWrite(LED_BUILTIN, HIGH);  // on/blink while waiting for serial data
   Serial.println("0,0");            // send a starting message
   delay(200);                       // wait 1/3 second
   digitalWrite(LED_BUILTIN, LOW);
   delay(200);
 }
}


void loop() {
 // wait for data from p5 before doing something
 while (Serial.available()) {
   digitalWrite(LED_BUILTIN, HIGH);  // led on while receiving data


   int brightness = Serial.parseInt();
   analogWrite(leftLedPin, brightness);
   if (Serial.read() == '\n') {
     Serial.println("0,0");
   }
 }
 digitalWrite(LED_BUILTIN, LOW);
}


Exercise 3:

int leftLedPin = 7;
int rightLedPin = 4;


void setup() {
 // Start serial communication so we can send data
 // over the USB connection to our p5js sketch
 Serial.begin(9600);


 // We'll use the builtin LED as a status output.
 // We can't use the serial monitor since the serial connection is
 // used to communicate to p5js and only one application on the computer
 // can use a serial port at once.
 pinMode(LED_BUILTIN, OUTPUT);


 // Outputs on these pins
 pinMode(leftLedPin, OUTPUT);
 pinMode(rightLedPin, OUTPUT);


 // Blink them so we can check the wiring
 digitalWrite(leftLedPin, HIGH);
 digitalWrite(rightLedPin, HIGH);
 delay(200);
 digitalWrite(leftLedPin, LOW);
 digitalWrite(rightLedPin, LOW);


 // start the handshake
  while (Serial.available() <= 0) {
    digitalWrite(LED_BUILTIN, HIGH);  // on/blink while waiting for serial data
    Serial.println("0,0");            // send a starting message
    delay(300);                       // wait 1/3 second
    digitalWrite(LED_BUILTIN, LOW);
    delay(50);
  }
}


void loop() {
 // wait for data from p5 before doing something
 while (Serial.available()) {
   digitalWrite(LED_BUILTIN, HIGH);  // led on while receiving data


   int LED_STATE = Serial.parseInt();
   //int right = Serial.parseInt();
   if (Serial.read() == '\n') {
     digitalWrite(rightLedPin, LED_STATE);
     int sensor2 = analogRead(A1);
     delay(5);
     Serial.print(sensor2);
     Serial.print(',');
     Serial.println('Y');
   }
 }
 digitalWrite(LED_BUILTIN, LOW);
}


Week 11 – Assignment (Rujul and Mariam Al Khoori)

Exercise 1: ARDUINO TO P5 COMMUNICATION

Using the potentiometer the ellipse is moved across the screen while also changing its opacity.

P5.js Sketch:

// variable to control x-coordinate
let x = 0;
function setup() {
  createCanvas(640, 480);
  textSize(18);
}
function draw() {
  // sets background
  background(255);
  stroke(0);
  // draws ellipse on canvas
  fill(0,255,0,map(x, 0, 1023, 0, 255))
  ellipse(map(x, 0, 1023, 0, width), height / 2, 100, 100);
  
  // checks if serial communication has been established
  fill(0)
  if (!serialActive) {
    text("Press Space Bar to select Serial Port", 20, 30);
  } else {
    text("Connected", 20, 30);
  }
  
}
// sets up serial connection
function keyPressed() {
  if (key == " ") {
    // important to have in order to start the serial connection!!
    setUpSerial();
  }
}
// This function will be called by the web-serial library
// with each new *line* of data. The serial library reads
// the data until the newline and then gives it to us through
// this callback function
function readSerial(data) {
  ////////////////////////////////////
  //READ FROM ARDUINO HERE
  ////////////////////////////////////
  if (data != null) {
    x = int(trim(data));
  }
  
}

Arduino Sketch:

void setup() {
  // Start serial communication so we can send data
  // over the USB connection to our p5js sketch
  Serial.begin(9600);
  // We'll use the builtin LED as a status output..
  pinMode(LED_BUILTIN, OUTPUT);
}
void loop() {
  // gets sensor reading
  int sensor = analogRead(A0);
  delay(5);
  // indicates data transfer
  digitalWrite(LED_BUILTIN, HIGH);
  // sends data to p5
  Serial.println(sensor);
  
  // indicates data transfer
  digitalWrite(LED_BUILTIN, LOW);
  
}

VIDEO – Exercise1


Assignment 2: P5 TO ARDUINO COMMUNICATION

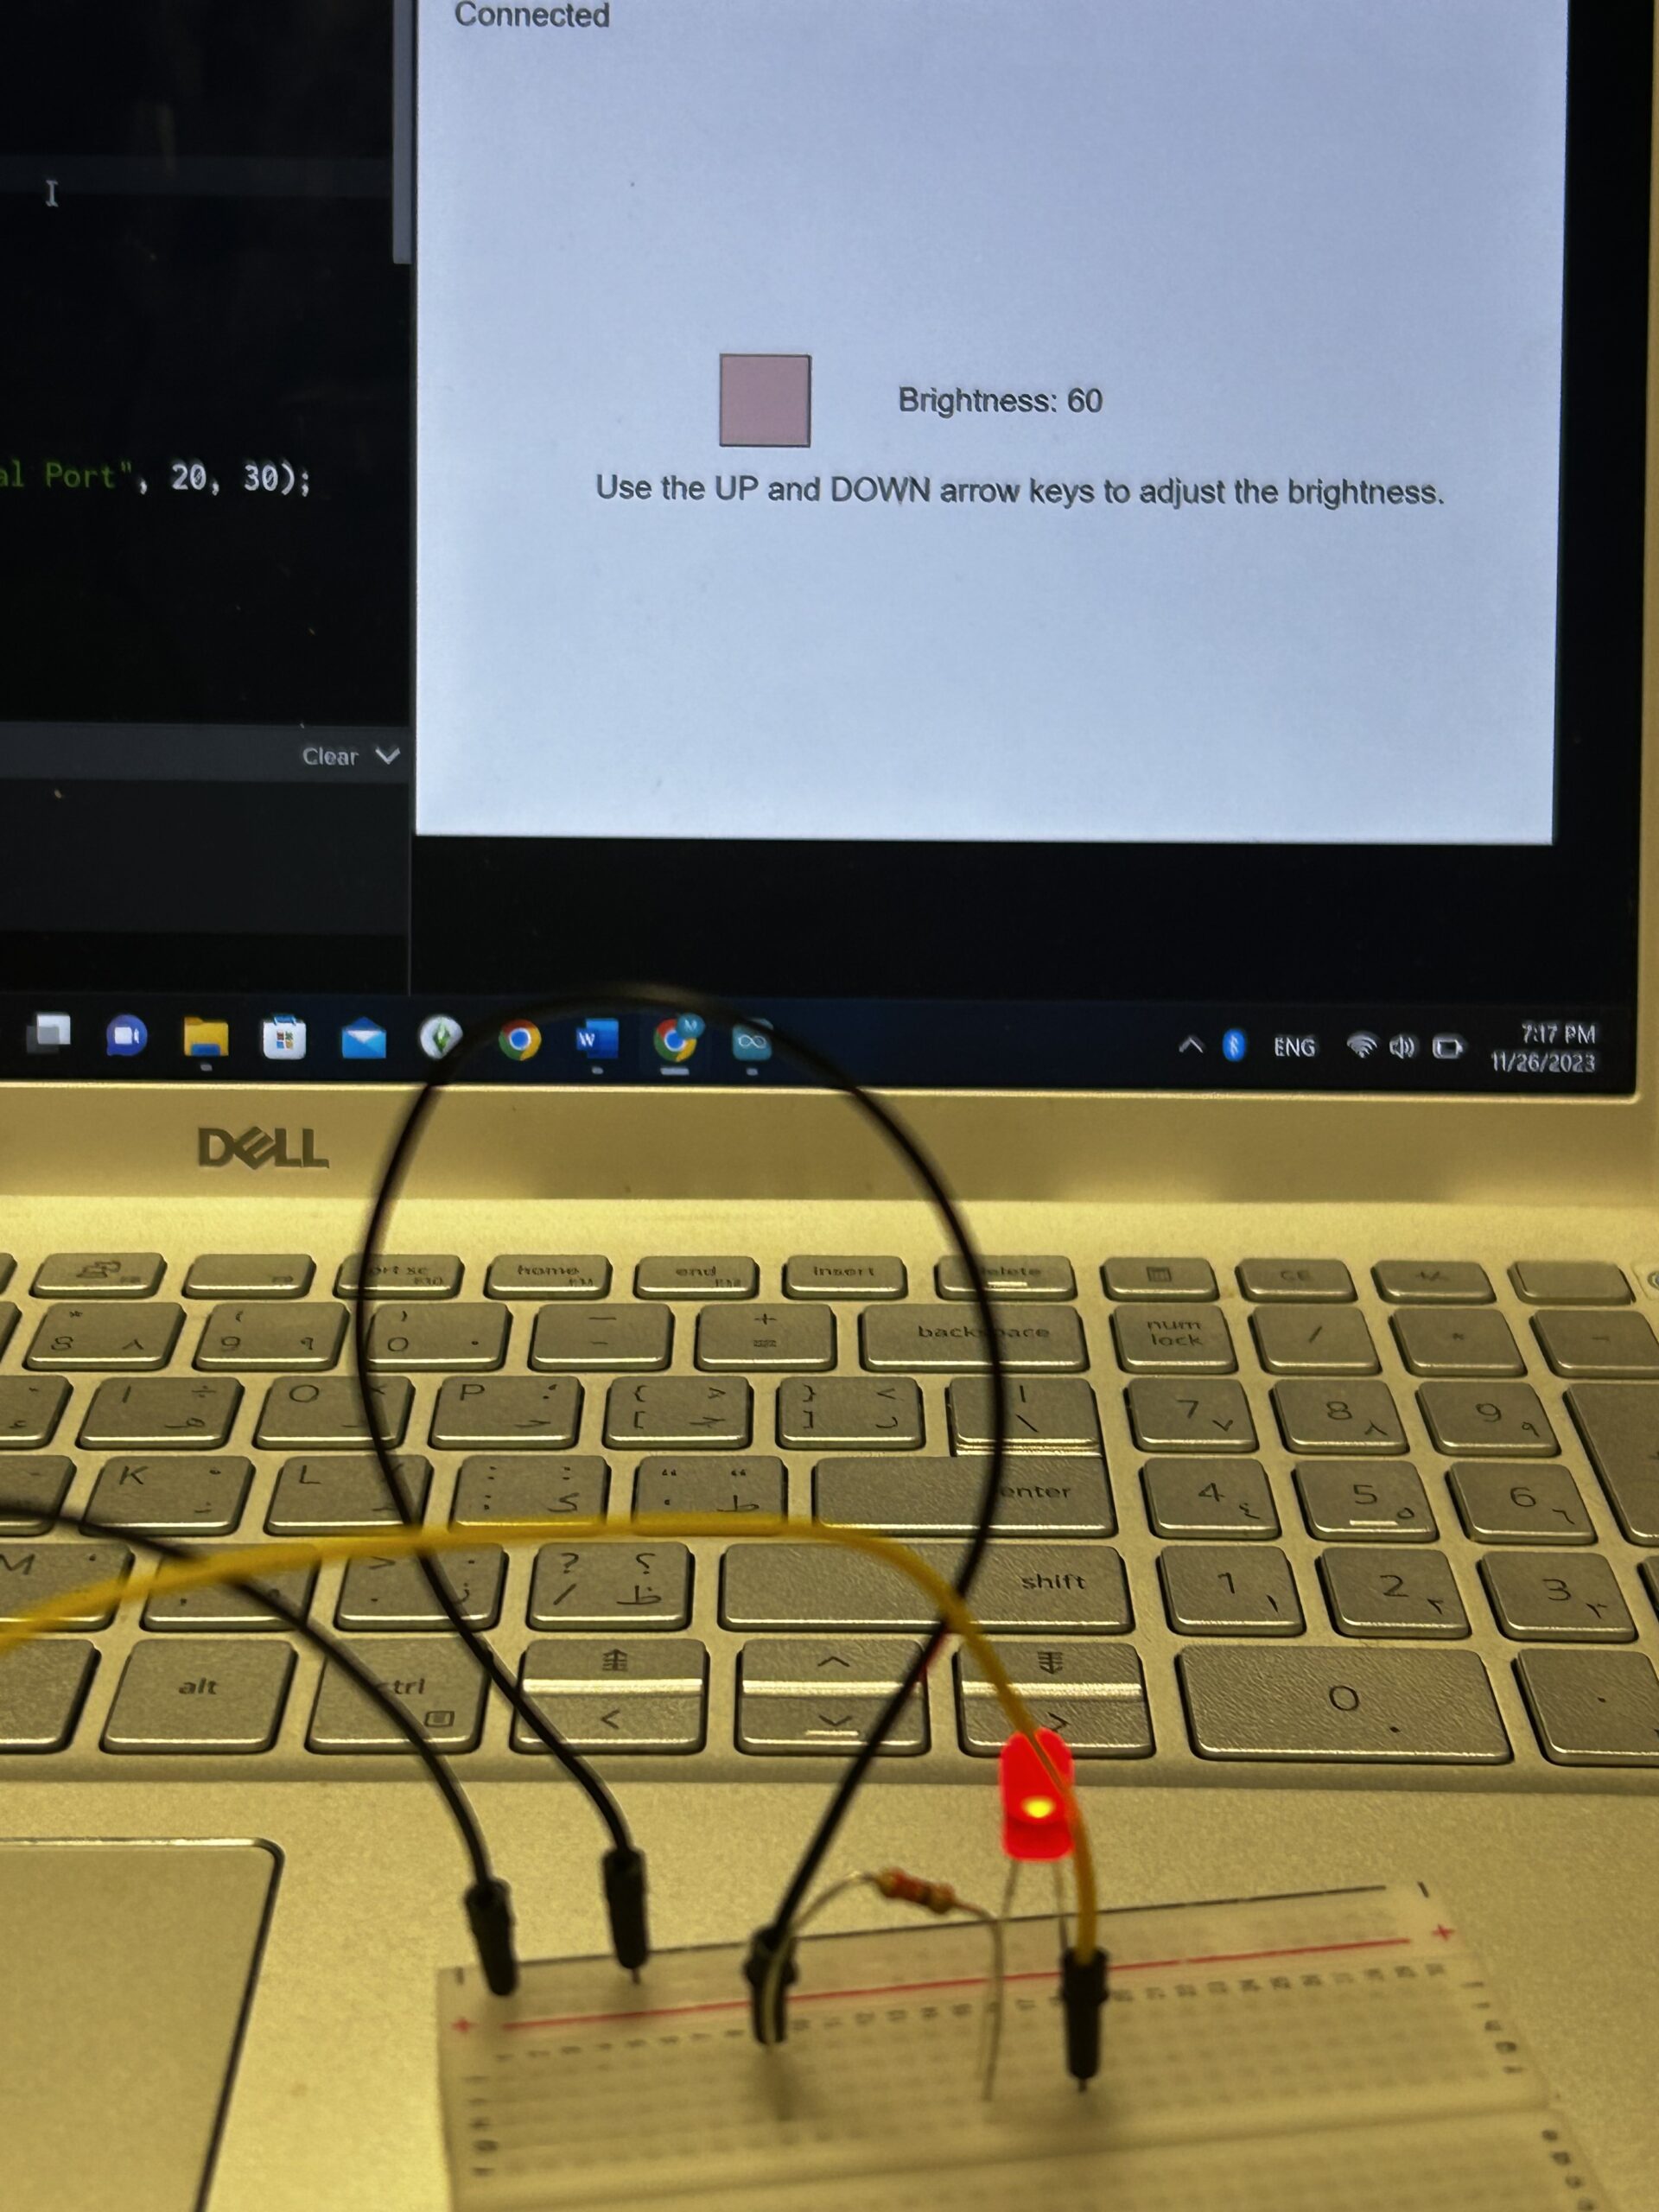
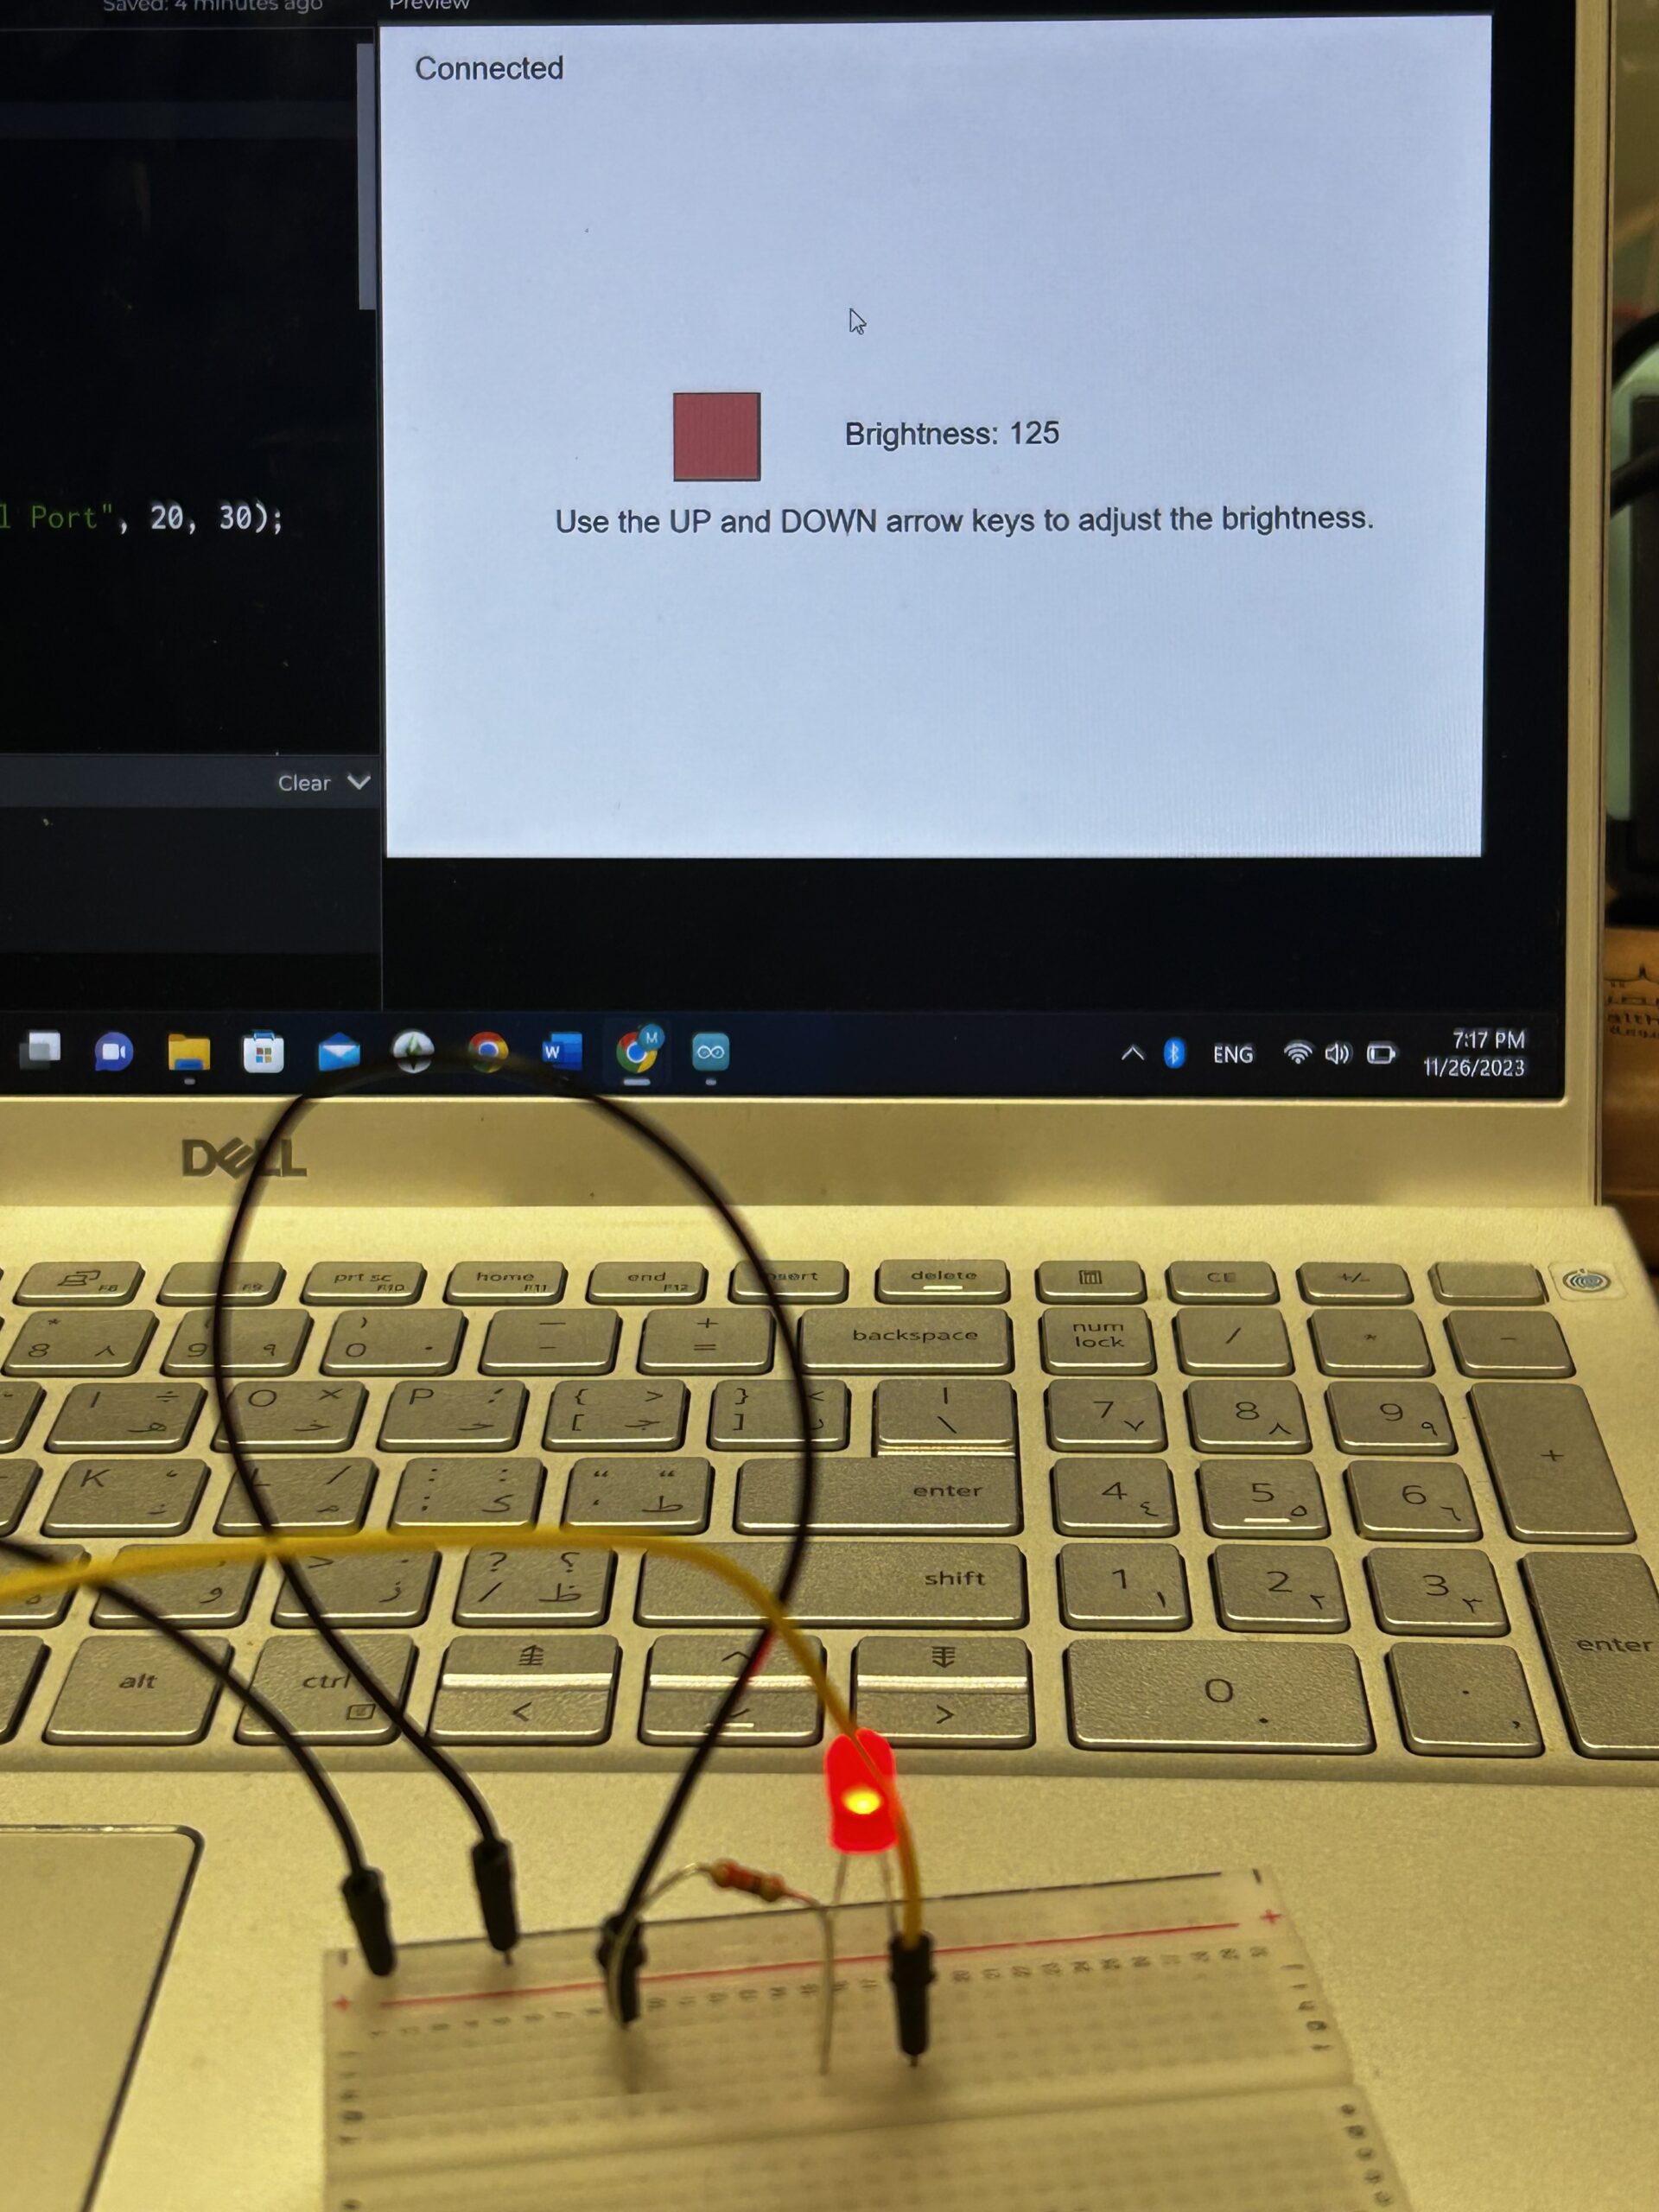
Brightness of the LED changes when pressing the UP and DOWN keys.

P5.js Sketch:

let brightness=0;

function setup() {
  createCanvas(640, 480);
  textSize(18);
}

function draw() {
  background(255);
  fill(0);

  if (!serialActive) {
    text("Press Space Bar to select Serial Port", 20, 30);
  } else {
    text("Connected", 20, 30);
  }
  fill(255,0,0,brightness)
  square(width/2-150,height/2-30,50)
  fill(0)
  text("Brightness: "+str(brightness),width/2-50,height/2)
  text("Use the UP and DOWN arrow keys to adjust the brightness. ",width/2-220,height/2+50)

  if (keyIsPressed) {
    if (keyCode==UP_ARROW) {
      if (brightness<255){
        brightness+=5;
      }  
    } else if (keyCode==DOWN_ARROW) {
      if (brightness>0){
        brightness-=5;
      }
    }
  } 
}

function keyPressed() {
  if (key == " ") {
    // important to have in order to start the serial connection!!
    setUpSerial();
  }
}

function readSerial(data) {
  if (data != null) {
    writeSerial(brightness+"\n");
  }
}

Arduino Sketch:

int LedPin = 5;

void setup() {
  // Start serial communication so we can send data
  // over the USB connection to our p5js sketch
  Serial.begin(9600);

  // We'll use the builtin LED as a status output..
  pinMode(LED_BUILTIN, OUTPUT);

  // Outputs on this pin
  pinMode(LedPin, OUTPUT);

  // Blink them so we can check the wiring
  digitalWrite(LedPin, HIGH);
  delay(200);
  digitalWrite(LedPin, LOW);

  // start the handshake
  while (Serial.available() <= 0) {
    digitalWrite(LED_BUILTIN, HIGH); // on/blink while waiting for serial data
    Serial.println("0"); // send a starting message
    delay(300);            // wait 1/3 second
    digitalWrite(LED_BUILTIN, LOW);
    delay(50);
  }
}

void loop() {
  // wait for data from p5 before doing something
  while (Serial.available()) {
    Serial.println("0");
    digitalWrite(LED_BUILTIN, HIGH); // led on while receiving data

    int brightness = Serial.parseInt();
    if (Serial.read() == '\n') {
      analogWrite(LedPin, brightness);
    }
  }
  digitalWrite(LED_BUILTIN, LOW);
}

VIDEO – Exercise2


Assignment 3: BI-DIRECTIONAL COMMUNICATION

The LED glows up when the ball touches the ground. The ultrasonic sensor is used to change the direction of the wind.

P5.js Sketch:

let velocity;
let gravity;
let posit5
let acceleration;
let wind;
let drag = 0.99;
let mass = 50;
let LED=0;
let wind_speed=0;

function setup() {
  createCanvas(640, 360);
  noFill();
  position = createVector(width/2, 0);
  velocity = createVector(0,0);
  acceleration = createVector(0,0);
  gravity = createVector(0, 0.5*mass);
  wind = createVector(0,0);
}

function draw() {
  background(255);
  fill(0)
  if (!serialActive) {
    text("Press RIGHT key to select Serial Port", 20, 30);
  } else {
    text("Connected", 20, 30);
  }
  applyForce(wind);
  applyForce(gravity);
  velocity.add(acceleration);
  velocity.mult(drag);
  position.add(velocity);
  acceleration.mult(0);
  fill(205,104,219); 
  ellipse(position.x,position.y,mass,mass);
  if (position.y > height-mass/2) {
      velocity.y *= -0.9;  // A little dampening when hitting the bottom
      position.y = height-mass/2;
    }
  
  if (position.y==height-mass/2){
    LED=1
  }else{
    LED=0
  }
  
  if (position.x>=width || position.x<=0){
    position.x=width/2
  }   
}

function applyForce(force){
  // Newton's 2nd law: F = M * A
  // or A = F / M
  let f = p5.Vector.div(force, mass);
  acceleration.add(f);
}

function keyPressed(){
  if (key==' '){
    
    mass=random(15,80);
    position.y=-mass;
    velocity.mult(0);
  }
  if (keyCode==RIGHT_ARROW){
    setUpSerial();
  }
}

function readSerial(data) {
  ////////////////////////////////////
  //READ FROM ARDUINO HERE
  ////////////////////////////////////

  if (data != null) {
    let fromArduino = trim(data);
    distance= int(fromArduino);
    if (distance>10){
      wind.x=2
    }
    else{
      wind.x=-2
    }
    
    let sendToArduino = LED+"\n";
    writeSerial(sendToArduino);
  }
}

Arduino Sketch:

int LedPin = 2;
int trigPin = 9;
int echoPin = 10;
long duration;
int distance;

void setup() {
  // Start serial communication so we can send data
  // over the USB connection to our p5js sketch
  pinMode(trigPin, OUTPUT); 
  pinMode(echoPin, INPUT);
  Serial.begin(9600);
  pinMode(LED_BUILTIN, OUTPUT);

  // Outputs on these pins
  pinMode(LedPin, OUTPUT);

  // Blink them so we can check the wiring
  digitalWrite(LedPin, HIGH);
  delay(200);
  digitalWrite(LedPin, LOW);


  // start the handshake
  while (Serial.available() <= 0) {
    digitalWrite(LED_BUILTIN, HIGH); // on/blink while waiting for serial data
    Serial.println("0,0"); // send a starting message
    delay(300);            // wait 1/3 second
    digitalWrite(LED_BUILTIN, LOW);
    delay(50);
  }
}

void loop() {
  // wait for data from p5 before doing something
  while (Serial.available()) {
    digitalWrite(LED_BUILTIN, HIGH); // led on while receiving data

    int LED = Serial.parseInt();
    if (Serial.read() == '\n') {
      digitalWrite(LedPin, LED);
      digitalWrite(trigPin, LOW);
      delayMicroseconds(2); 
      digitalWrite(trigPin, HIGH);
      delayMicroseconds(10);
      digitalWrite(trigPin, LOW);
      // Reads the echoPin, returns the sound wave travel time in microseconds
      duration = pulseIn(echoPin, HIGH);
      // Calculating the distance
      distance = duration * 0.034 / 2;
      Serial.println(distance);
    }
  }
  digitalWrite(LED_BUILTIN, LOW);
}

VIDEO – Exercise3 Wind

VIDEO – Exercise3 LED

Week 11- Serial Communication

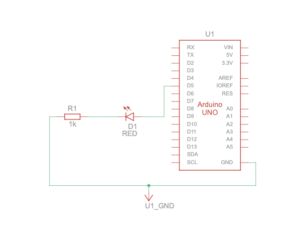
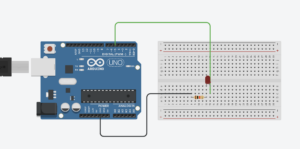
Exercise 1: ARDUINO TO P5 COMMUNICATION

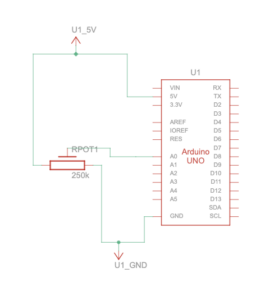
Schematic

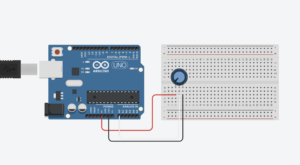
Circuit Diagram 

P5.js Code
We used the same example provided in class, however, we just added this part to the code:

function draw() {
  
  background('#6FA9B0')

  if (!serialActive) {
    fill("rgb(255,255,255)")
    text("Press Space Bar to select Serial Port", 20, 30);
  } else {

    noStroke()
    // draw a circle, alpha value controls the x-position of the circle
    circle(map(alpha, 0, 1023, 0, 640), 240, 50)

  }
}


Arduino

We used the same one provided in class.

Video


Exercise 2: P5 TO ARDUINO COMMUNICATION

Schematic

Circuit Diagram 

P5.js Code

let brightness = 0; 
let slider;
let img;

//preload images
function preload(){
  img = loadImage('sun.png');
  img2 = loadImage('moon.png');
}

function setup() {
  createCanvas(400, 400);
  //create slider
  slider = createSlider(0, 255, 100);
  slider.position(width/2-50,height/2+25);
  slider.style('width', '80px');
}

function draw() {
  background('#85CCEC');
  image(img,235,130,150,180); 
  image(img2,30,140,100,160);
  
  let val = slider.value();
  brightness = val;
  
  // instructions
  textAlign(CENTER,CENTER);
  textSize(16);
  textStyle(BOLD)
  text("Control the brightness using the slider below!",width/2,100);
  
  //connects serial port
  if (!serialActive) {
    textSize(10);
    text("Press Space Bar to select Serial Port", 100, 30);
  } else {
    textSize(10);
    text("Connected",100,30);
  }


}

function keyPressed() {
  if (key == " ") {
    // important to have in order to start the serial connection!!
    setUpSerial();
  }
}


function readSerial(data) {

  //READ FROM ARDUINO HERE
  
  if (data != null) {
    // if there is a message from Arduino, continue
    
    //SEND TO ARDUINO HERE (handshake)
    
    let sendToArduino = brightness + "\n";
    writeSerial(sendToArduino);
  }
}


Arduino Code

int LED = 5;
void setup() {
  Serial.begin(9600);
  pinMode(LED, OUTPUT);
  // start the handshake
  while (Serial.available() <= 0) {
    Serial.println("Wait");  // send a starting message
    delay(300);               // wait 1/3 second
  }
}
void loop() {
  // wait for data from p5 before doing something
  while (Serial.available()) {
    int brightness = Serial.parseInt(); 
    if (Serial.read() == '\n') {
      analogWrite(LED, brightness); // turn on LED and adjusts brightness
      Serial.println("LIT"); 
    }
  }
}


Video

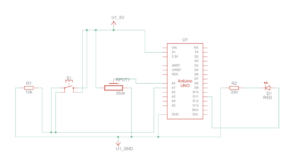
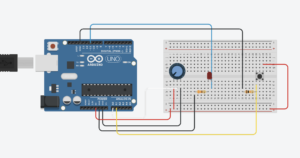
Exercise 3: BI-DIRECTIONAL COMMUNICATION

Schematic

Circuit Diagram 

P5.js Code

let hit = 0;  // whether the ball hit the ground
let reset = 0;  // whether Arduino sent a reset argument (a button press)

// Ball physics
let velocity;
let gravity;
let position;
let acceleration;
let wind; // wind direction is controlled by Arduino (potentiometer)
let drag = 0.99;
let mass = 50;

function setup() {
  createCanvas(600, 600);
  noFill();
  position = createVector(width / 2, 0);
  velocity = createVector(0, 0);
  acceleration = createVector(0, 0);
  gravity = createVector(0, 0.5 * mass);
  wind = createVector(0, 0);
}

function draw() {
  background('pink');
  applyForce(wind);
  applyForce(gravity);
  velocity.add(acceleration);
  velocity.mult(drag);
  position.add(velocity);
  acceleration.mult(0);
  fill(255)
  ellipse(position.x, position.y, mass, mass);
  if (position.y > height - mass / 2) {
    velocity.y *= -0.9; // A little dampening when hitting the bottom
    position.y = height - mass / 2;
    hit = 1;
  } else {
    hit = 0;
  }

  if (!serialActive) {
    console.log("Press Space Bar to select Serial Port");
  } else {
    // 
    // console.log("Connected");
    if (reset == 1) { // if reset signal is sent and flagged (button press)
      reset = 0; // clear the flag
      
      // reset ball with some random mass
      mass = random(15, 80);
      position.x = width / 2;
      position.y = -mass;
      velocity.mult(0);
    }
  }
}

function applyForce(force) {
  // Newton's 2nd law: F = M * A
  // or A = F / M
  let f = p5.Vector.div(force, mass);
  acceleration.add(f);
}

function keyPressed() {
  if (key == " ") {
    // important to start the serial connection!
    setUpSerial();
  }
}

function readSerial(data) {
  
  //READ FROM ARDUINO HERE
  

  if (data != null) {
    // split the message
    let fromArduino = split(trim(data), ",");
    // if the right length, then proceed
    if (fromArduino.length == 2) {
      reset = fromArduino[0];
      wind.x = fromArduino[1];
    }

    
    //SEND TO ARDUINO HERE (handshake)
    
    let sendToArduino = hit + "\n";
    writeSerial(sendToArduino);
  }
}


Arduino Code

int buttonSwitch = A2;
int potentiometer = A0;
int ledOut = 11;

void setup() {
  Serial.begin(9600);
  pinMode(12, OUTPUT);
  digitalWrite(ledOut, LOW);  // in the case of reconnection while p5 is running
  // start the handshake
  while (Serial.available() <= 0) {
    Serial.println("-1,-1");  // send a starting message
    delay(300);               // wait 1/3 second
  }
}

void loop() {
  // wait for data from p5 before doing something
  while (Serial.available()) {
    int hit = Serial.parseInt(); // receives 1 argument, whether the ball hit the ground
    if (Serial.read() == '\n') {
      digitalWrite(ledOut, hit); // turn on LED if the ball is in contact with the ground (1 -> HIGH) turn off LED if not (0, -> LOW)
      int sensor = digitalRead(buttonSwitch); // read button
      delay(1);
      int sensor2 = analogRead(potentiometer); // read potentiometer
      delay(1);
      Serial.print(sensor); // button
      Serial.print(',');
      if (sensor2 < 512) { // potentiometer; depending whether the value is over or below half, direction of the wind is set
        Serial.println(1);
      } else {
        Serial.println(-1);
      }
    }
  }
}


Video

Week 11 – Assignment

Video

P5.js code

let velocity;
let gravity;
let position;
let acceleration;
let wind;
let drag = 0.99;
let mass = 50;

let didTouch = 0;

function setup() {
  createCanvas(640, 360);
  noFill();
  position = createVector(width/2, 0);
  velocity = createVector(0,0);
  acceleration = createVector(0,0);
  gravity = createVector(0, 0.5*mass);
  wind = createVector(0,0);
}

function draw() {
  background(255);
  applyForce(wind);
  applyForce(gravity);
  velocity.add(acceleration);
  velocity.mult(drag);
  position.add(velocity);
  acceleration.mult(0);
  ellipse(position.x,position.y,mass,mass);
  if (position.y > height-mass/2) {
      didTouch = 1;
      velocity.y *= -0.9;  // A little dampening when hitting the bottom
      position.y = height-mass/2;
  } else {
    didTouch = 0
  }
}

function applyForce(force){
  // Newton's 2nd law: F = M * A
  // or A = F / M
  let f = p5.Vector.div(force, mass);
  acceleration.add(f);
}

function keyPressed(){
  if (keyCode==LEFT_ARROW){
    wind.x=-1;
  }
  if (keyCode==RIGHT_ARROW){
    wind.x=1;
  }
  if (key==' '){
    mass=random(15,80);
    position.y=-mass;
    position.x = width / 2
    velocity.mult(0);
  }
  
  if (key == 's') {
    setUpSerial();
  }
}

// This function will be called by the web-serial library
// with each new *line* of data. The serial library reads
// the data until the newline and then gives it to us through
// this callback function
function readSerial(data) {
  ////////////////////////////////////
  //READ FROM ARDUINO HERE
  ////////////////////////////////////

  if (data != null) {
    // make sure there is actually a message
    // split the message
    let fromArduino = split(trim(data), ",");
    // if the right length, then proceed
    if (fromArduino.length == 1) {
      // only store values here
      // do everything with those values in the main draw loop
      
      // We take the string we get from Arduino and explicitly
      // convert it to a number by using int()
      // e.g. "103" becomes 103
      windValue = int(fromArduino[0]);
      wind = createVector(map(windValue, 0, 1023, -2, 2), 0)
    }

    //////////////////////////////////
    //SEND TO ARDUINO HERE (handshake)
    //////////////////////////////////
    let sendToArduino = didTouch + "\n";
    print(sendToArduino)
    writeSerial(sendToArduino);
  }
}

Arduino code

// Week 11.2 Example of bidirectional serial communication

// Inputs:
// - A0 - sensor connected as voltage divider (e.g. potentiometer or light sensor)
// - A1 - sensor connected as voltage divider 
//
// Outputs:
// - 2 - LED
// - 5 - LED

int ledPin = 5;
int potPin = A2;

void setup() {
  // Start serial communication so we can send data
  // over the USB connection to our p5js sketch
  Serial.begin(9600);

  // We'll use the builtin LED as a status output.
  // We can't use the serial monitor since the serial connection is
  // used to communicate to p5js and only one application on the computer
  // can use a serial port at once.
  pinMode(LED_BUILTIN, OUTPUT);

  // Outputs on these pins
  pinMode(ledPin, OUTPUT);

  // Blink them so we can check the wiring
  digitalWrite(ledPin, HIGH);
  delay(200);
  digitalWrite(ledPin, LOW);


  // start the handshake
  while (Serial.available() <= 0) {
    digitalWrite(LED_BUILTIN, HIGH); // on/blink while waiting for serial data
    Serial.println("0"); // send a starting message
    delay(300);            // wait 1/3 second
    digitalWrite(LED_BUILTIN, LOW);
    delay(50);
  }
}

void loop() {
  // wait for data from p5 before doing something
  while (Serial.available()) {
    digitalWrite(LED_BUILTIN, HIGH); // led on while receiving data

    int ledLight = Serial.parseInt();
    if (Serial.read() == '\n') {
      digitalWrite(ledPin, ledLight);
      int sensor = analogRead(potPin);
      delay(5);
      Serial.println(sensor);
    }
  }
  digitalWrite(LED_BUILTIN, LOW);
}


In Class Exercises

Exercise 1: ARDUINO TO P5 COMMUNICATION

Schematic

Circuit Diagram 

P5.js Code
We used the same example provided in class, however, we just added this part to the code:

function draw() {
  
  background('#6FA9B0')

  if (!serialActive) {
    fill("rgb(255,255,255)")
    text("Press Space Bar to select Serial Port", 20, 30);
  } else {

    noStroke()
    // draw a circle, alpha value controls the x-position of the circle
    circle(map(alpha, 0, 1023, 0, 640), 240, 50)

  }
}

Arduino

We used the same one provided in class.

Video

Exercise 2: P5 TO ARDUINO COMMUNICATION

Schematic

Circuit Diagram 

P5.js Code

let brightness = 0; 
let slider;
let img;

//preload images
function preload(){
  img = loadImage('sun.png');
  img2 = loadImage('moon.png');
}

function setup() {
  createCanvas(400, 400);
  //create slider
  slider = createSlider(0, 255, 100);
  slider.position(width/2-50,height/2+25);
  slider.style('width', '80px');
}

function draw() {
  background('#85CCEC');
  image(img,235,130,150,180); 
  image(img2,30,140,100,160);
  
  let val = slider.value();
  brightness = val;
  
  // instructions
  textAlign(CENTER,CENTER);
  textSize(16);
  textStyle(BOLD)
  text("Control the brightness using the slider below!",width/2,100);
  
  //connects serial port
  if (!serialActive) {
    textSize(10);
    text("Press Space Bar to select Serial Port", 100, 30);
  } else {
    textSize(10);
    text("Connected",100,30);
  }


}

function keyPressed() {
  if (key == " ") {
    // important to have in order to start the serial connection!!
    setUpSerial();
  }
}


function readSerial(data) {

  //READ FROM ARDUINO HERE
  
  if (data != null) {
    // if there is a message from Arduino, continue
    
    //SEND TO ARDUINO HERE (handshake)
    
    let sendToArduino = brightness + "\n";
    writeSerial(sendToArduino);
  }
}

Arduino Code

int LED = 5;
void setup() {
  Serial.begin(9600);
  pinMode(LED, OUTPUT);
  // start the handshake
  while (Serial.available() <= 0) {
    Serial.println("Wait");  // send a starting message
    delay(300);               // wait 1/3 second
  }
}
void loop() {
  // wait for data from p5 before doing something
  while (Serial.available()) {
    int brightness = Serial.parseInt(); 
    if (Serial.read() == '\n') {
      analogWrite(LED, brightness); // turn on LED and adjusts brightness
      Serial.println("LIT"); 
    }
  }
}

Video

Exercise 3: BI-DIRECTIONAL COMMUNICATION

Schematic

Circuit Diagram 

P5.js Code

let hit = 0;  // whether the ball hit the ground
let reset = 0;  // whether Arduino sent a reset argument (a button press)

// Ball physics
let velocity;
let gravity;
let position;
let acceleration;
let wind; // wind direction is controlled by Arduino (potentiometer)
let drag = 0.99;
let mass = 50;

function setup() {
  createCanvas(600, 600);
  noFill();
  position = createVector(width / 2, 0);
  velocity = createVector(0, 0);
  acceleration = createVector(0, 0);
  gravity = createVector(0, 0.5 * mass);
  wind = createVector(0, 0);
}

function draw() {
  background('pink');
  applyForce(wind);
  applyForce(gravity);
  velocity.add(acceleration);
  velocity.mult(drag);
  position.add(velocity);
  acceleration.mult(0);
  fill(255)
  ellipse(position.x, position.y, mass, mass);
  if (position.y > height - mass / 2) {
    velocity.y *= -0.9; // A little dampening when hitting the bottom
    position.y = height - mass / 2;
    hit = 1;
  } else {
    hit = 0;
  }

  if (!serialActive) {
    console.log("Press Space Bar to select Serial Port");
  } else {
    // 
    // console.log("Connected");
    if (reset == 1) { // if reset signal is sent and flagged (button press)
      reset = 0; // clear the flag
      
      // reset ball with some random mass
      mass = random(15, 80);
      position.x = width / 2;
      position.y = -mass;
      velocity.mult(0);
    }
  }
}

function applyForce(force) {
  // Newton's 2nd law: F = M * A
  // or A = F / M
  let f = p5.Vector.div(force, mass);
  acceleration.add(f);
}

function keyPressed() {
  if (key == " ") {
    // important to start the serial connection!
    setUpSerial();
  }
}

function readSerial(data) {
  
  //READ FROM ARDUINO HERE
  

  if (data != null) {
    // split the message
    let fromArduino = split(trim(data), ",");
    // if the right length, then proceed
    if (fromArduino.length == 2) {
      reset = fromArduino[0];
      wind.x = fromArduino[1];
    }

    
    //SEND TO ARDUINO HERE (handshake)
    
    let sendToArduino = hit + "\n";
    writeSerial(sendToArduino);
  }
}

Arduino Code

int buttonSwitch = A2;
int potentiometer = A0;
int ledOut = 11;

void setup() {
  Serial.begin(9600);
  pinMode(12, OUTPUT);
  digitalWrite(ledOut, LOW);  // in the case of reconnection while p5 is running
  // start the handshake
  while (Serial.available() <= 0) {
    Serial.println("-1,-1");  // send a starting message
    delay(300);               // wait 1/3 second
  }
}

void loop() {
  // wait for data from p5 before doing something
  while (Serial.available()) {
    int hit = Serial.parseInt(); // receives 1 argument, whether the ball hit the ground
    if (Serial.read() == '\n') {
      digitalWrite(ledOut, hit); // turn on LED if the ball is in contact with the ground (1 -> HIGH) turn off LED if not (0, -> LOW)
      int sensor = digitalRead(buttonSwitch); // read button
      delay(1);
      int sensor2 = analogRead(potentiometer); // read potentiometer
      delay(1);
      Serial.print(sensor); // button
      Serial.print(',');
      if (sensor2 < 512) { // potentiometer; depending whether the value is over or below half, direction of the wind is set
        Serial.println(1);
      } else {
        Serial.println(-1);
      }
    }
  }
}

Video

Week 11 – Final project idea

I had two ideas for my final project but I’m still undecided on what I want to do

1. Pachinko machine 

Creating a pachinko machine that incorporates Arduino to add interaction, perhaps using servo motors to control some obstacles, or adding sound/lights whenever the ball hits a nail, or using Arduino to detect which hole the ball fell into. However, I can’t think of a good way of integrating P5.JS with this project without it being gimmicky like showing the score on P5.js, or shooting the balls from P5.js. I feel those interactions belong in the physical world and implementing them digitally takes away from it. Any interaction I can think of is better served physically, so I am not sure if I will proceed with this idea even though I personally like this idea more as it’s more fun.
Christmas Gift [Handmade DIY] Pinball Game Board Game Wooden Toy Handmade DIY - Shop jwoodgarden Wood, Bamboo & Paper - Pinkoi

2. Hello Kitty photobooth

A photobooth-type project, where the p5.js sketch is responsible for displaying the camera and taking the photos. The ‘twist’ is the usage of Arduino and the presence of a physical Hello Kitty that is sensed by the Arduino. By moving around the physical Hello Kitty it adjusts her location on the screen, so you can move her around and adjust her size, make her big so the viewer can stand next to her in the photo, or make her small and the viewer can hold her in the palm of their hands.

Assignment 11 (w/ Rujul)

Assignment 1: ARDUINO TO P5 COMMUNICATION

While controlling the potentiometer the ellipse would move across the screen while changing the opacity of it.

P5.js Sketch:

// variable to control x-coordinate
let x = 0;

function setup() {
  createCanvas(640, 480);
  textSize(18);
}

function draw() {
  // sets background
  background(255);
  stroke(0);

  // draws ellipse on canvas
  fill(0,255,0,map(x, 0, 1023, 0, 255))
  ellipse(map(x, 0, 1023, 0, width), height / 2, 100, 100);
  
  // checks if serial communication has been established
  fill(0)
  if (!serialActive) {
    text("Press Space Bar to select Serial Port", 20, 30);
  } else {
    text("Connected", 20, 30);
  }
  
}

// sets up serial connection
function keyPressed() {
  if (key == " ") {
    // important to have in order to start the serial connection!!
    setUpSerial();
  }
}

// This function will be called by the web-serial library
// with each new *line* of data. The serial library reads
// the data until the newline and then gives it to us through
// this callback function
function readSerial(data) {
  ////////////////////////////////////
  //READ FROM ARDUINO HERE
  ////////////////////////////////////
  if (data != null) {
    x = int(trim(data));
  }
  
}

Edit: https://editor.p5js.org/mariamalkhoori/sketches/f-MgfWbwx

Arduino Sketch:

void setup() {
  // Start serial communication so we can send data
  // over the USB connection to our p5js sketch
  Serial.begin(9600);

  // We'll use the builtin LED as a status output..
  pinMode(LED_BUILTIN, OUTPUT);

}

void loop() {

  // gets sensor reading
  int sensor = analogRead(A0);
  delay(5);

  // indicates data transfer
  digitalWrite(LED_BUILTIN, HIGH);

  // sends data to p5
  Serial.println(sensor);
  
  // indicates data transfer
  digitalWrite(LED_BUILTIN, LOW);
  

}

Results: 

assignment1

Assignment 2: P5 TO ARDUINO COMMUNICATION

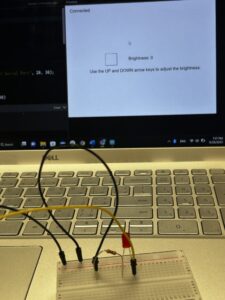
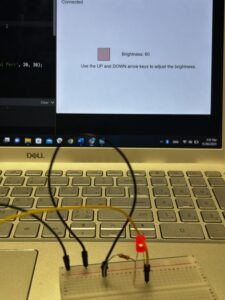
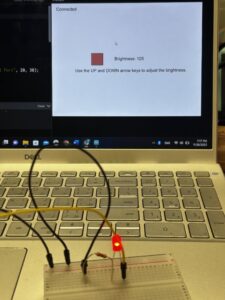
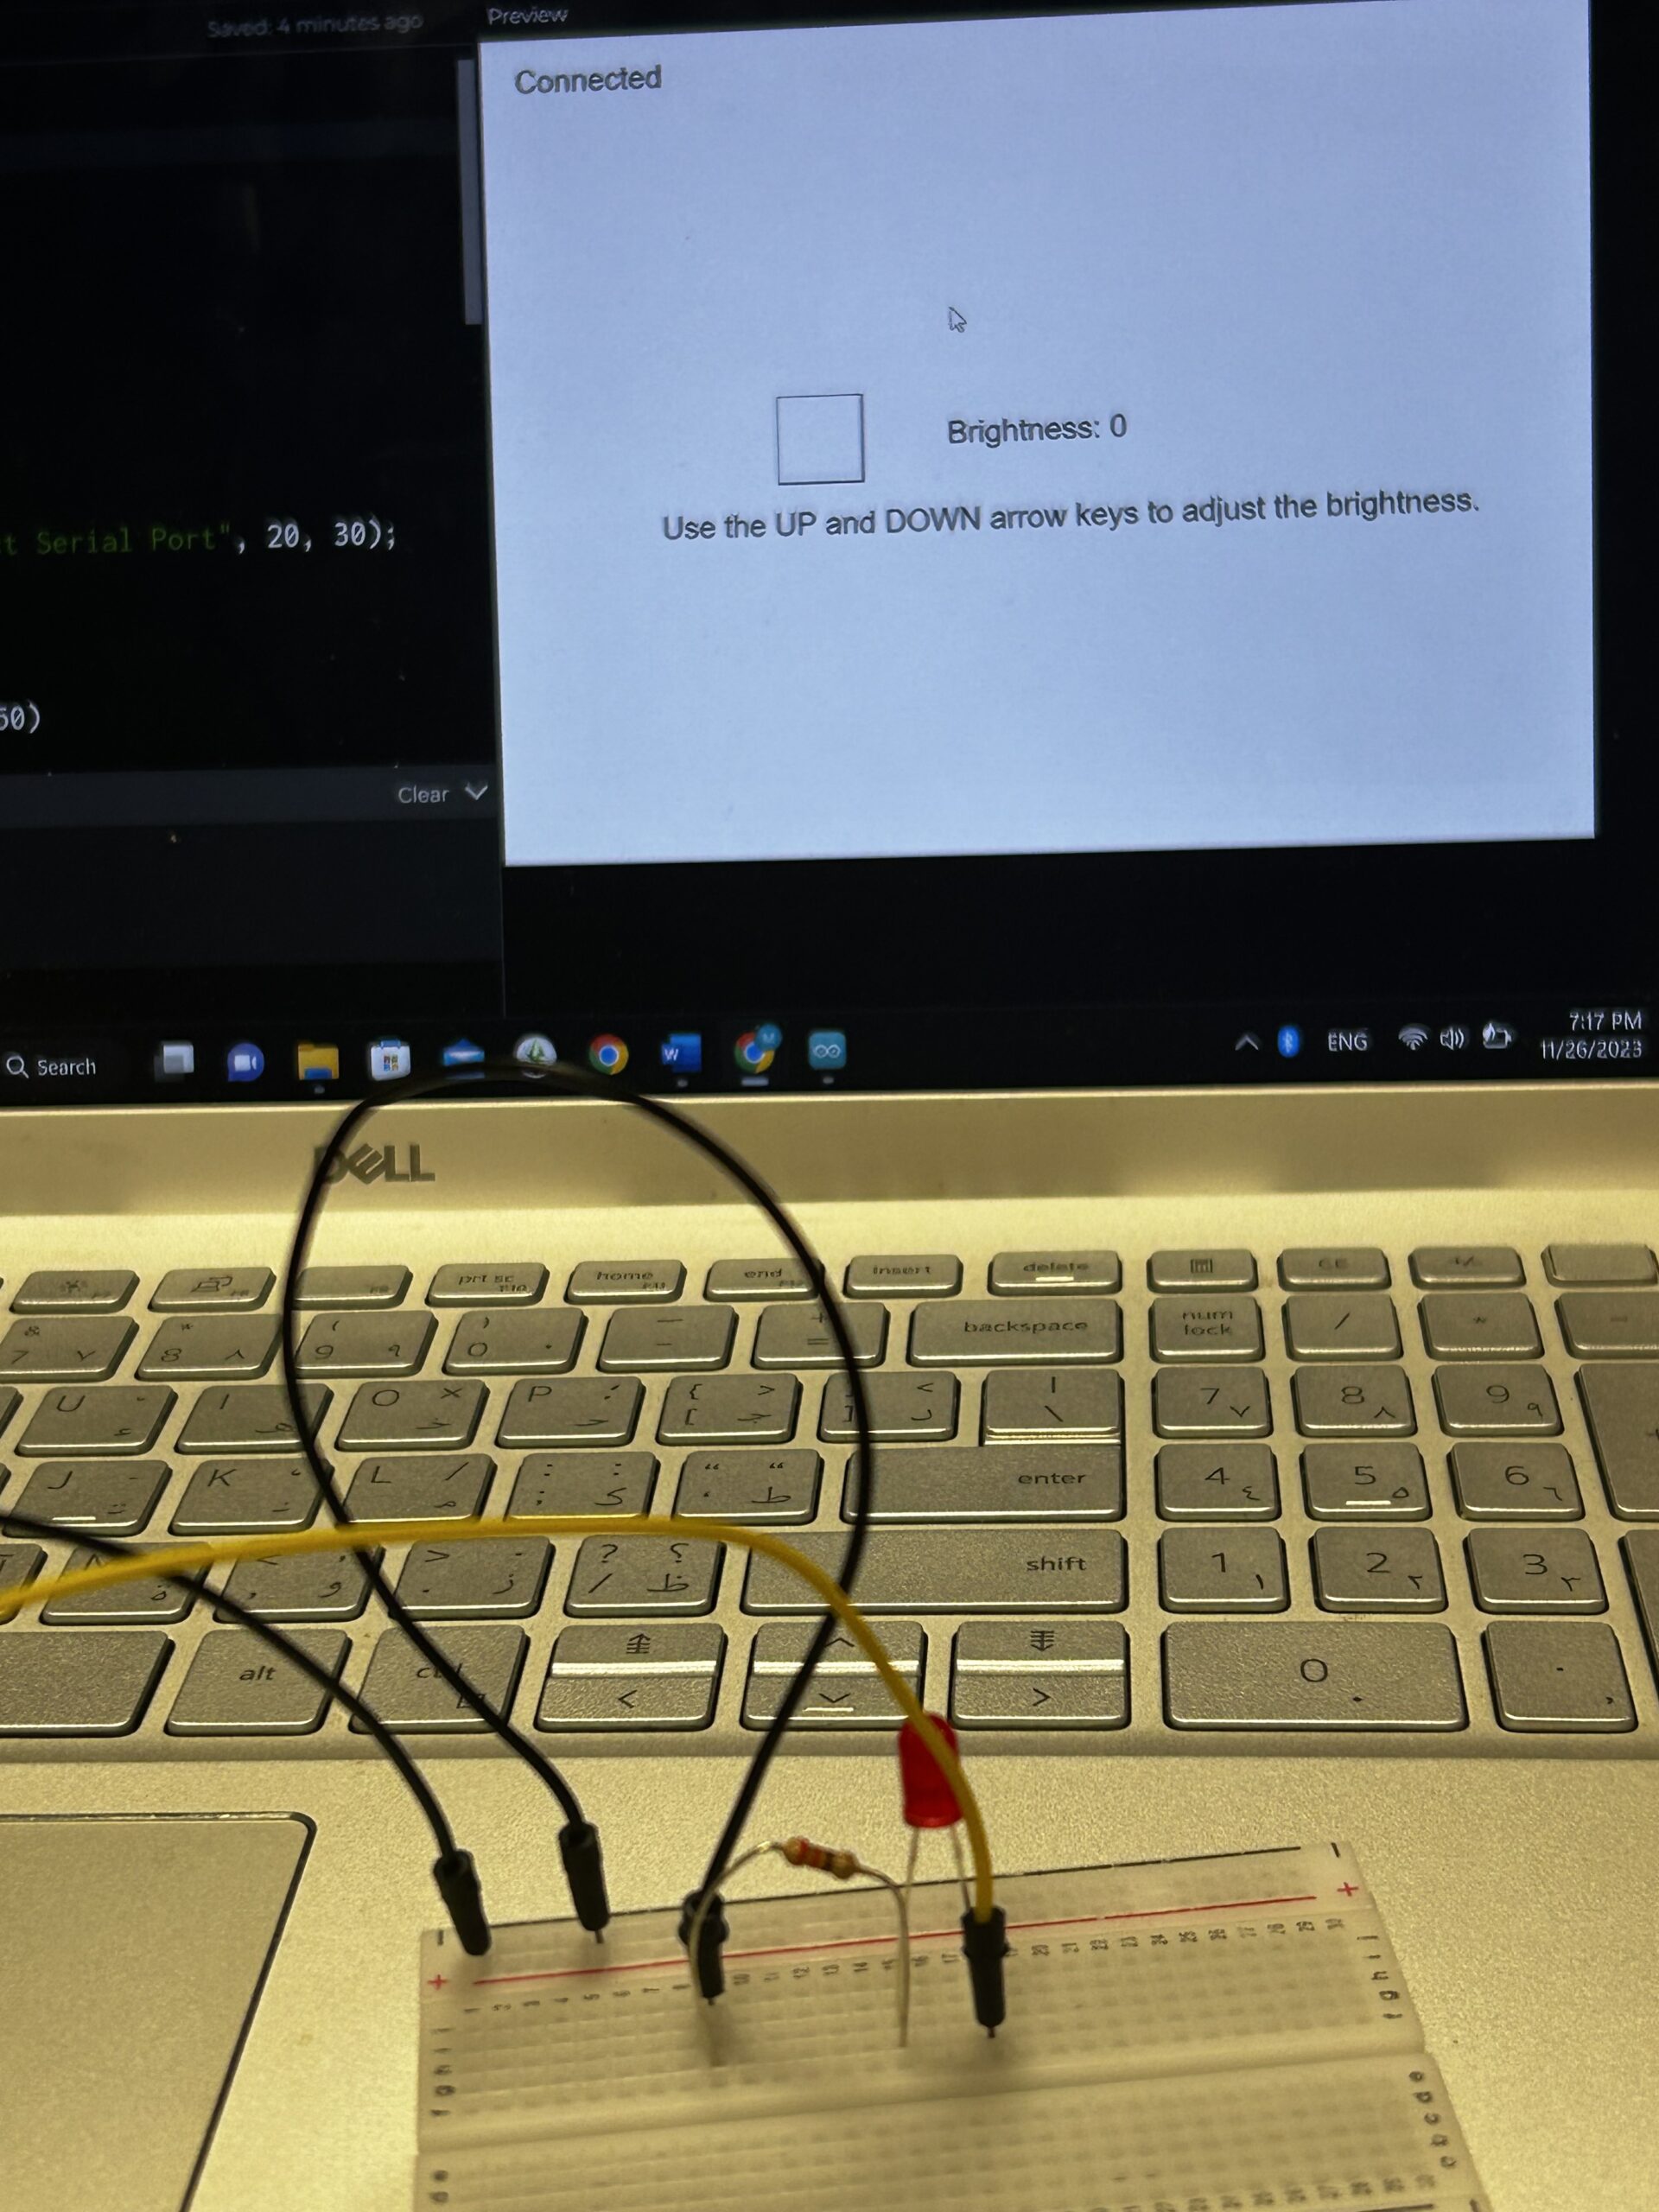
Brightness of the LED changes when pressing the UP and DOWN key buttons

P5.js Sketch:

let brightness=0;

function setup() {
  createCanvas(640, 480);
  textSize(18);
}

function draw() {
  background(255);
  fill(0);

  if (!serialActive) {
    text("Press Space Bar to select Serial Port", 20, 30);
  } else {
    text("Connected", 20, 30);
  }
  fill(255,0,0,brightness)
  square(width/2-150,height/2-30,50)
  fill(0)
  text("Brightness: "+str(brightness),width/2-50,height/2)
  text("Use the UP and DOWN arrow keys to adjust the brightness. ",width/2-220,height/2+50)

  if (keyIsPressed) {
    if (keyCode==UP_ARROW) {
      if (brightness<255){
        brightness+=5;
      }  
    } else if (keyCode==DOWN_ARROW) {
      if (brightness>0){
        brightness-=5;
      }
      
    }
  } 
}

function keyPressed() {
  if (key == " ") {
    // important to have in order to start the serial connection!!
    setUpSerial();
  }
}

function readSerial(data) {
  if (data != null) {
    writeSerial(brightness+"\n");
  }
}

Edit: https://editor.p5js.org/mariamalkhoori/sketches/f7vn6lagB

Arduino Sketch:

int LedPin = 5;

void setup() {
  // Start serial communication so we can send data
  // over the USB connection to our p5js sketch
  Serial.begin(9600);

  // We'll use the builtin LED as a status output..
  pinMode(LED_BUILTIN, OUTPUT);

  // Outputs on this pin
  pinMode(LedPin, OUTPUT);

  // Blink them so we can check the wiring
  digitalWrite(LedPin, HIGH);
  delay(200);
  digitalWrite(LedPin, LOW);

  // start the handshake
  while (Serial.available() <= 0) {
    digitalWrite(LED_BUILTIN, HIGH); // on/blink while waiting for serial data
    Serial.println("0"); // send a starting message
    delay(300);            // wait 1/3 second
    digitalWrite(LED_BUILTIN, LOW);
    delay(50);
  }
}

void loop() {
  // wait for data from p5 before doing something
  while (Serial.available()) {
    Serial.println("0");
    digitalWrite(LED_BUILTIN, HIGH); // led on while receiving data

    int brightness = Serial.parseInt();
    if (Serial.read() == '\n') {
      analogWrite(LedPin, brightness);
    }
  }
  digitalWrite(LED_BUILTIN, LOW);
}

Results:

assignment2

Assignment 3: BI-DIRECTIONAL COMMUNICATION

The LED glows up when the ball touches the ground. The ultrasonic sensor is used to change the direction of the wind.

P5.js Sketch

let velocity;
let gravity;
let posit5
let acceleration;
let wind;
let drag = 0.99;
let mass = 50;
let LED=0;
let wind_speed=0;

function setup() {
  createCanvas(640, 360);
  noFill();
  position = createVector(width/2, 0);
  velocity = createVector(0,0);
  acceleration = createVector(0,0);
  gravity = createVector(0, 0.5*mass);
  wind = createVector(0,0);
}

function draw() {
  background(255);
  fill(0)
  if (!serialActive) {
    text("Press RIGHT key to select Serial Port", 20, 30);
  } else {
    text("Connected", 20, 30);
  }
  applyForce(wind);
  applyForce(gravity);
  velocity.add(acceleration);
  velocity.mult(drag);
  position.add(velocity);
  acceleration.mult(0);
  fill(205,104,219); 
  ellipse(position.x,position.y,mass,mass);
  if (position.y > height-mass/2) {
      velocity.y *= -0.9;  // A little dampening when hitting the bottom
      position.y = height-mass/2;
    }
  
  if (position.y==height-mass/2){
    LED=1
  }
  else{
    LED=0
  }
  
  if (position.x>=width || position.x<=0){
    position.x=width/2
  }
  
    
}

function applyForce(force){
  // Newton's 2nd law: F = M * A
  // or A = F / M
  let f = p5.Vector.div(force, mass);
  acceleration.add(f);
}

function keyPressed(){
  if (key==' '){
    
    mass=random(15,80);
    position.y=-mass;
    velocity.mult(0);
  }
  if (keyCode==RIGHT_ARROW){
    setUpSerial();
  }
}

function readSerial(data) {
  ////////////////////////////////////
  //READ FROM ARDUINO HERE
  ////////////////////////////////////

  if (data != null) {
    let fromArduino = trim(data);
    distance= int(fromArduino);
    if (distance>10){
      wind.x=2
    }
    else{
      wind.x=-2
    }
    
    let sendToArduino = LED+"\n";
    writeSerial(sendToArduino);
  }
}

EDIT: https://editor.p5js.org/mariamalkhoori/sketches/MvolZDB7W

Arduino Sketch:

int LedPin = 2;
int trigPin = 9;
int echoPin = 10;
long duration;
int distance;

void setup() {
  // Start serial communication so we can send data
  // over the USB connection to our p5js sketch
  pinMode(trigPin, OUTPUT); 
  pinMode(echoPin, INPUT);
  Serial.begin(9600);
  pinMode(LED_BUILTIN, OUTPUT);

  // Outputs on these pins
  pinMode(LedPin, OUTPUT);

  // Blink them so we can check the wiring
  digitalWrite(LedPin, HIGH);
  delay(200);
  digitalWrite(LedPin, LOW);


  // start the handshake
  while (Serial.available() <= 0) {
    digitalWrite(LED_BUILTIN, HIGH); // on/blink while waiting for serial data
    Serial.println("0,0"); // send a starting message
    delay(300);            // wait 1/3 second
    digitalWrite(LED_BUILTIN, LOW);
    delay(50);
  }
}

void loop() {
  // wait for data from p5 before doing something
  while (Serial.available()) {
    digitalWrite(LED_BUILTIN, HIGH); // led on while receiving data

    int LED = Serial.parseInt();
    if (Serial.read() == '\n') {
      digitalWrite(LedPin, LED);
      digitalWrite(trigPin, LOW);
      delayMicroseconds(2); 
      digitalWrite(trigPin, HIGH);
      delayMicroseconds(10);
      digitalWrite(trigPin, LOW);
      // Reads the echoPin, returns the sound wave travel time in microseconds
      duration = pulseIn(echoPin, HIGH);
      // Calculating the distance
      distance = duration * 0.034 / 2;
      Serial.println(distance);
    }
  }
  digitalWrite(LED_BUILTIN, LOW);
}

Results:

assignment3LED

assignment3WIND

Week 11: reading response

The shift in approaching disability, as outlined in the text, from a medical model to a social model is indeed intriguing and resonates with a more inclusive and human-centric perspective. The idea that disabilities are not solely medical conditions but are shaped by societal factors opens up new avenues for design solutions. I particularly find the example of eyewear transformation from a medical necessity to a key fashion accessory compelling. The shift from perceiving glasses merely as vision correction tools to considering them as items of clothing aligns with the social model. The recognition of the cultural and fashion aspects of eyewear challenges the conventional view of assistive devices, emphasizing the importance of societal perceptions.

However, I am somewhat uncertain about the notion that design for disability should seamlessly integrate with mainstream design. While collaboration and shared perspectives are undoubtedly valuable, there may be unique challenges and considerations specific to designing for disabilities that require specialized attention. It’s crucial to strike a balance between inclusive design practices and recognizing the distinct needs of individuals with disabilities. The risk of blending the two seamlessly lies in potentially overlooking the specific requirements and experiences of those with disabilities. Designing for disabilities might benefit from a dedicated focus to ensure that the resulting solutions genuinely address the challenges faced by the community.