Assignment 1: Self Portrait

Overall Experience

For our first assignment, we were tasked with creating a self-portrait. As someone with little art skill, all I could think of was drawing a face that resembled me. I am not quite sure if I succeeded though ;D. Coding for me has always been tedious hours of writing code and handling data files but the artistry of this assignment was the complete opposite. Playing around with basic shapes and putting them together into a face, also accessorizing was really fun.  

Process and Progress

I started with an elliptical shape for my face and then added two more for the eyes. To portray my brows, I discovered that simple lines with a strokeWeight of 5 produced the appropriate thickness. It was the placement of eyelashes that I first realized that finding coordinates for drawing a simple line was not as easy as it seemed and I looked up for coordinates of p5.js. https://editor.p5js.org/prewiredonline/sketches/mA6XRFf-G. This is where I got what I was looking for and it eased my way through the rest of the portrait. I think the turning point of my sketch was this stage where the eyelashes were in the making and the coordinate plotting made it easier for me:

This is how my final portrait looks like: 

Reflection

I am pleased with my initial p5.js project, but I see room for improvement by incorporating animations into my self-portrait. I look forward to experimenting with these elements in my future assignments. This project was a great step for me in the Interactive Media world and I can’t wait to tackle more cool interactive projects in the future!


Homework 01 – Self-portrait

Concept

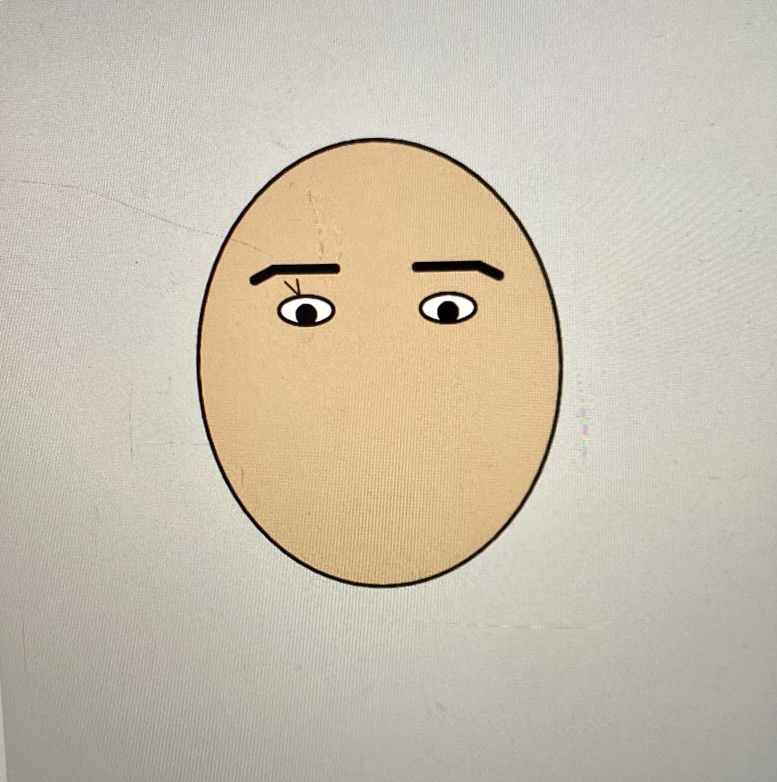
My self-portrait is a sort of digital avatar of myself. It is not overly realistic, but not overly abstract either. For example, my head is oval-shaped, and my eyes, eyebrows, nose, and mouth are in the approximately correct positions. However, going with a simplistic style, I opted to make the my torso triangular, and decided to not add ears. Moreover, I did not add my hair, but instead put on my favourite beanie-shaped hat. The colours black and grey are prominent, as they are some of my favourite.

As I was creating the self-portrait, I realised that there was an opportunity to make everything more interesting by making myself a kind of android, with laser eyes. Therefore I made my eyes a red colour which changes intensity over time, and I also added green lasers which follow the user’s mouse. Therefore my portrait can be said to represent the slightly grumpy and almost penetrating stare of someone who really needs their coffee in the morning, or a college student who is in their fourth class of the day.

Code highlight

I am particularly proud of the part of the code that creates the lasers, as well as their fading effect. At the start of each frame, instead of setting the background to a solid black colour, I set it to black with an alpha of 10 (out of total 255). This means that with every frame, the previously drawn lasers are not completely erased, but slowly fade out.

background(0, 0, 0, 10);

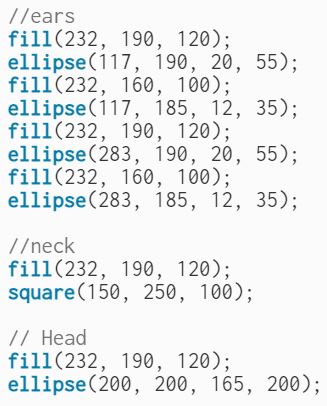
To make the code cleaner and more principled, I store the coordinates of my eyes in two arrays, where the first two numbers represent the (x, y) coordinates of the top left corner of the eye, and the next two represent the coordinates of the top right corner of the eye.

const eye1 = [0.38, 0.45, 0.45, 0.5];
const eye2 = [0.56, 0.45, 0.62, 0.5];

Note that, in my code, each coordinate is a number between 0 and 1, and is multiplied by the height or width of the canvas when drawing.

Then, I draw the eye, before finally drawing the lasers. The width of the lasers follows a sine curve that moves between 0 and 2.

strokeWeight(sin(frameCount * 0.01) + 2);

Again, to make the code cleaner and more principled, I define a function that, given the coordinates of an eye, returns its center, but slightly moved in the x and/or y direction, to create a ‘fuzz’ effect. I then use the function to get the center of each eye.

function getEyeCenter(eye) {
  const centerX = (eye[0] + eye[2]) / 2; 
  const centerY = (eye[1] + 2*eye[3]) / 3;
  return [(centerX + random(-LASER_FUZZ, LASER_FUZZ)) * X,
          (centerY + random(-LASER_FUZZ, LASER_FUZZ)) * Y];
}

const eyeCenter1 = getEyeCenter(eye1);
const eyeCenter2 = getEyeCenter(eye2);

Here, LASER_FUZZ is a small number, such as 0.01.

Finally, I draw the lasers. Each laser is a line from an eye to the mouse; however, the mouse coordinates are also slightly shifted in the x and/or y direction, to emphasize the ‘fuzz’ effect.

const laserTargetX = mouseX + X * random(-LASER_FUZZ, LASER_FUZZ);
const laserTargetY = mouseY + Y * random(-LASER_FUZZ, LASER_FUZZ);

line(laserTargetX, laserTargetY, eyeCenter1[0], eyeCenter1[1]);
line(laserTargetX, laserTargetY, eyeCenter2[0], eyeCenter2[1]);
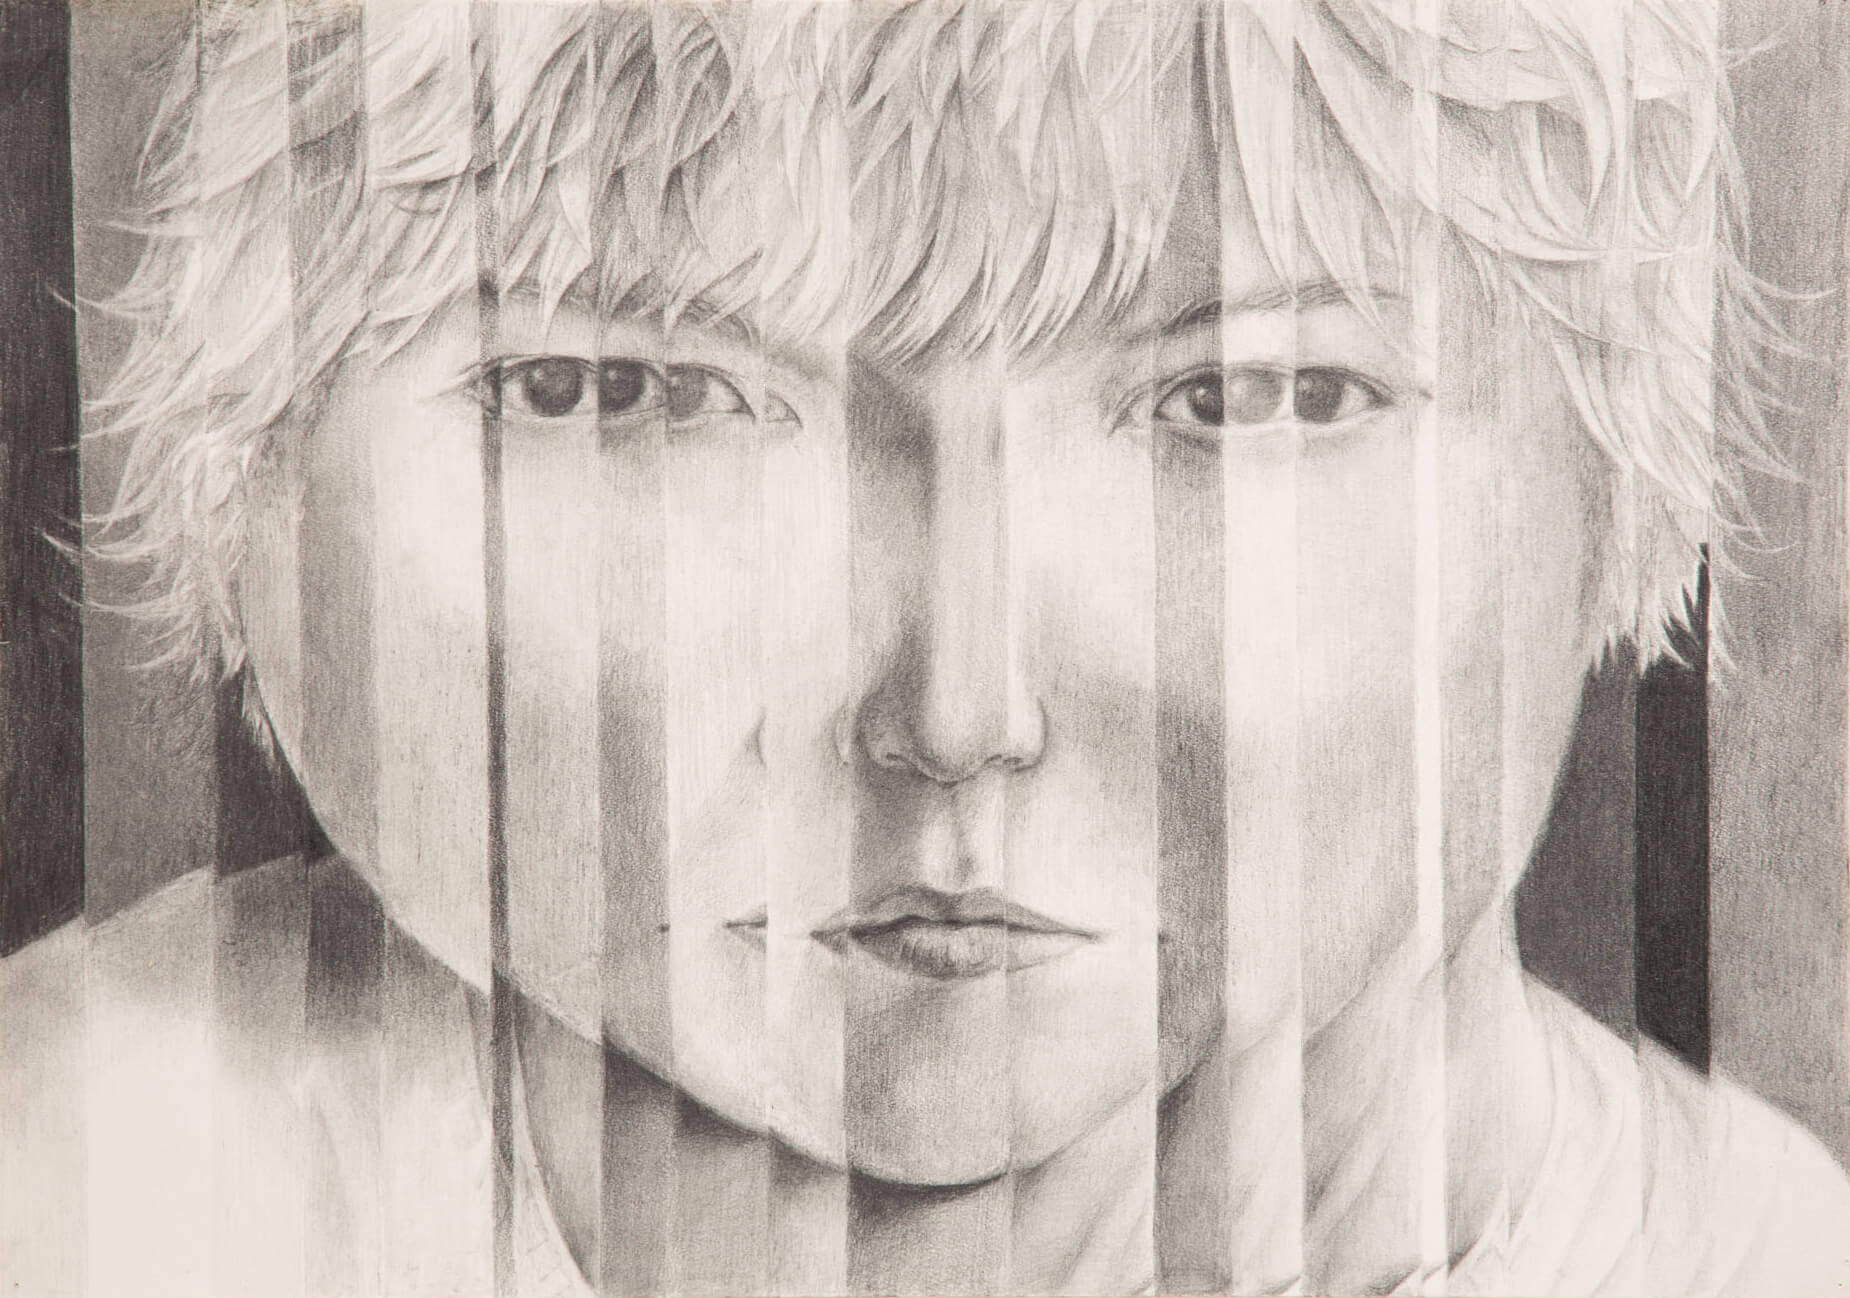
The sketch

Reflection

I am fairly happy with my final sketch. Many more visual details may be added to increase the realism and/or the digital-like effect. For example, if I decided to lean more into the android aesthetic, I could make my skin a metal-like texture instead of just grey, and add robotic details to my hat and/or clothes. In terms of interaction, to emphasize that the person in the sketch is ‘watching’ you, I can make them ‘lean’ towards the mouse as well, in addition to the lasers.

Majid Ibrahim – King Portrait

Your concept:
My idea is to make a portrait of a wise king. I went through a lot of experimenting to finally end up with this portrait, however, it was a very fun process overall, and am happy with how it turned out.

A highlight of some code that you’re particularly proud of:
I used a lot of partial layering to achieve the look and shape that I wanted. An example of this is the inner ear:

In addition, I didn’t know how to thicken the arc for the eyebrows so I came up with the idea to just add more arcs to increase the thickness:

Embedded sketch:

Reflection and ideas for future work or improvements:

I started this as a portrait of myself. I made the head shape but got stuck on the hair. After some experimenting, I came up with the idea of the crown. It was more stylish than my original idea. With that I naturally thought of making the portrait of a king instead. As I was working on the lower part of the portrait i.e. the shoulder and upper torso, I struggled with getting it all to fit together so I decided to give him a beard to circumvent this issue. The choice of red background color was a reference to the background color of the UAE leader’s portraits. For future improvements, I would add interactivity to the portrait by making the eyes follow the cursor and have the mouseclick change the background color and clothes.


Assignment 1: Self Portrait

Overview:

For this assignment, we were asked to draw a self portrait using the basic functions built into p5.JS. I started by drawing a rough sketch of what I wanted my self portrait to look like. For the self portrait, I tried to highlight the main features of my face. I think my spectacles are one of the very important feature of my face so I decided to add these to the portrait. Furthermore, while coding and looking at the examples that were provided to us, I decided to add some interactive features to the portrait. Overall, the assignment was really fun and helped me in understanding some of the key concepts of p5.JS.

Concept & Process:

The concept for my self portrait was fairly simple. I wanted to make sure that I add all the key features of my face and give it a animated look. I tried adding curly hair but it turned out to be really difficult and the results that I got after that weren’t really satisfying so I just went ahead with normal hair. I just used arc over my head to make it look like hair. As I mentioned earlier, spectacles were really important to me so I spent fair amount of time fixing them around the eyes. I used arc function and line to make it look more realistic. Moving on, for the nose and the lips, I used arc to make both of these. For the ears, I just rotated the arc and added those arcs on the both sides of my face. Furthermore, I added a neck and shirt using the rect function. I added the arms on the both sides by increasing the stroke weight and drawing lines next to the shirt. This turned out to be really realistic and allowed me to get the look that I wanted from this self-portrait.

Interactivity:

Inspired by the examples, I decided to add some interactive features to the portrait. For the background, whenever the mouse is moved around the canvas, ellipses are drawn of different colors. This required to run a for loop within the draw function and generate random values between 0 and 255 for r,g and b to later use them in the fill function. Furthermore, similar to the of “Koala portrait” example, I decided to make the eyes move in the same direction where the pointer goes on the canvas. This was fairly simple and all that required was to multiply the coordinates of the pointer  on the canvas with a very small constant  and add it to the coordinates of the ellipse that I had drawn for the pupils. This allowed me keep the pupil within the eyes and add this simple interactivity. Lastly, when the mouse key is pressed, the color of the shades is changed to random colors to create a cool effect. Again, I generated three random values for the r g and b using a for loop and the random function of p5.js to use these values in the fill function.

Future Improvements:

In future, I want to learn change this portrait from an animated one to a more realistic one. I hope to learn how to make curly hair and add it to this portrait. Furthermore, I’d like to add better and more artistic animations for the background. I would love to design better nose and ears using the points or any other function that allows me give them a more realistic touch. I hope to learn these skills and implement them on this portrait.Here’s how the final portrait look like:


Week 1 – Self Portrait

As a Computer Science major, I am entirely used to working in the console. The black an white screen with limited color has been my best friend since Freshman year. For that reason, seeing the shapes and colors on screen was magical. I have worked with Processing before, but on a very limited scale, with a few shapes and images in hopes of finishing a final project and going home. It took time to maneuver the page again, understand what to put in setup and what in the draw function, but in the end I created this dynamic portrait.

Challenge

Creating this portrait was anything but easy since humans eyes, or at least mine, are not made for estimating pixel position. It was trial and error until the very end, but I think it came out okay. I encountered another obstacle while working out the angle in which the sun can move. Since I did not know p5js uses clockwise rotation for angles, i.e., opposite of Math class, it was incredibly tedious to estimate the movement of the ellipse. Undoubtedly, the hardest part was the brazier curves that I used for my hair. Estimating the pixels coupled up with estimating angles is probably nobody’s cup of tea, but thankfully, once I figured out one side, it was just a matter of subtracting from width on the other.

It took some time to understand how map() and constrain() work, but once I did, the eye and sun movement was pretty easy to achieve. Symmetry was somewhat of a hassle, but since p5js contains the global variables of width and height, it was okay.

Night Phase (Cursor out of screen)

The night phase represents my home country, Bosnia. It is currently snowing heavily there and the day is extremely short. I used the code underneath to create the snowflakes and a few if statements to control the visuals of the page.

for (let i = 0; i < 50; i++) {
      ellipse(random(0, 400), random(0, 400), random(1, 4));
    }

Day Phase (Cursor on the screen)

The day phase is Abu Dhabi, hence the palms. The sun moves with the x coordinate of the cursor and the angle is mapped from PI to 2PI.

function sun() {
  fill("#FFE87C");
  // angle is mapped from PI to 2PI in accordance to mouseX
  var angle = map(mouseX, -400, 800, PI, 2 * PI);

  var sunX = width / 2 + cos(angle) * 550;
  var sunY = height + sin(angle) * 350;

  ellipse(sunX, sunY, 70);
}

Reflection

This assignment helped me understand the basic principles of shapes and colors in p5js. Although the angle and coordinate axis principles work differently than I was previously taught, working extensively with shapes helped me understand it a lot better. In the future, I would like to focus more on the animated part of coding and make my portrait more lifelike.

Assignment 1: Self Portrait

For my first assignment, we were tasked with creating a self portrait of ourselves using p5js. I’ll be honest, I’d say this was a pretty nice intro and learning experience to p5js and arguably one of the funniest moments i’ve had when it came to coding.

I’ve always done coding with a serious intent and I think that took the fun away from my projects, hence I wanted my portrait to reflect that. Thus, I decided to just wing it and make the funniest, interactive and outgoing portrait I could think of XD.

Portrait:

Idea and Process: 

My initial thought was that I want my portrait to have movement instead of just a static image because then it sort of brings it to life. I first drew myself using some basic shapes such as circles, ellipses, bezier curves etc. However, I had difficulty thinking of how I could incorporate this movement idea with myself.

After thinking and reviewing some of the examples, I figured I could try making my eyes follow the user’s cursor, that way it’s pretty fun and fits that movement aspect. For this idea, I decided to create the pupils at the center of the eye and it would sort of be constrained within the radius of the eye depending on the X and Y coordinate of the user’s mouse. I used some calculations for this as shown below:

circle(103+(0.03*mouseX), 187+(0.03*mouseY), 20);
circle(161+(0.03*mouseX), 187+(0.03*mouseY), 20);

I wanted to have a little bit of fun and add my own humour (pretty cursed) into the portrait so I added the impostor from the hit game Among Us into the portrait cause why not I thought it’d be funny. I used a variety of shapes such as ellipses and rectangles to construct it.

Later on, I decided, why not add a feature for if the user presses the mouse. I didn’t know exactly what to do but I figured I would piece it together as I went along coding.

As time passed I decided it would be funny if the impostor basically turned into some epileptic god, so I used the random() function to continuously change its colour. I also decided to edit my facial features and add golden hair (sort of resembling Goku going super saiyan) to add to the chaos and kinda act like I was ascending.

However, it still looked plain to me, hence, I decided to add some cool flickering stars in the background by using a for loop which would constantly add ellipse-like stars in the background at random points on the canvas as shown:

if(mouseIsPressed) {
   background("black"); 
   for (var i = 0; i < 10; i++) {
       var size = random(5, 15);
       ellipse(random(width), random(height), size, size);
   }
}

Overall Thoughts: 

Overall, I found it quite interesting with how many functions there were. One cool function I found was the translation function (used on the floating among us) which also added to the movement aspect of my portrait.

Dealing with shapes was tricky because I didn’t know which coordinates I had to put them at or where I would have to alter the control points for curves. Hence, I decided to add a sort of coordinate tracker for my cursor because I figured it would be really handy to when where I would like to place all of my shapes and curves, hence I added one on the top left.

One thing I would definitely improve is organizing my code. Most of the functions I used, the arguments were hard-coded and I feel like I could’ve used traits such as width and height to organize my code space. I could have also used functions such as drawFace() or drawClothes() to further organize my code.

Nonetheless, i’m no expert at art but this was a super awesome and fun assignment and I feel like I developed a strong foundation for some of the basic functions used in p5js.

Self-Portrait – Hana

The concept behind this self-portrait was to create a simplistic image which looks similar to me.

The most fun part of the design was creating the eyes, since there were so many components – eyebrows, eye line, eyelashes, iris and eye shine. I like the way I created depth in the irises by making a darker and thicker stroke, then putting pupils and eye shine which was white with lower opacity. Here is the code below:

//eyebrows
 stroke(105, 73, 31);
 strokeWeight(5);
 noFill();
 arc(200, 235, 45, 15, 180, 360, OPEN);
 arc(300, 235, 45, 15, 180, 360, OPEN);
 
 //eyes
 stroke(214, 164, 99, 130);
 strokeWeight(6);
 arc(200, 255, 45, 15, 180, 360, OPEN);
 arc(300, 255, 45, 15, 180, 360, OPEN);
 arc(200, 257, 40, 30, 90, 180);
 arc(300, 257, 40, 30, 0, 90);
 
 strokeWeight(3);
 stroke(64, 41, 11);
 fill(82, 54, 18);
 circle(200, 260, 22);
 circle(300, 260, 22);
 noStroke();
 fill(0);
 circle(200, 260, 10);
 circle(300, 260, 10);
 
 //eye shine
 noStroke();
 fill(255,255,255, 200);
 circle(205, 255, 7);
 circle(305, 255, 7);
 
 //eyelashes
 stroke(105, 73, 31, 130);
 strokeWeight(5);
 noFill();
 arc(180, 230, 15, 45, 90, 120, OPEN);
 arc(190, 225, 15, 45, 90, 120, OPEN);
 arc(320, 230, 15, 45, 60, 90, OPEN);
 arc(310, 225, 15, 45, 60, 90, OPEN);

In the future I would like to do something more special than just a simple portrait, maybe even include dynamic components. But since this was the first assignment and animation was not required, I decided to keep things simple 🙂

Week 1 Self Portrait

Concept

I, for one, am not much of an artist. I hate having to draw specific lines and shape because I am always bad at details. That is why for this assignment, I decided to get creative with what a “face” is. As the assignment directions describe, I decided to stay far away from a realistic face and focus more on practicing what I can do with p5js. The motive for this portrait is this picture:

a self portrait through a shattered glass. Unfortunately, I don’t have the artistic skills, nor coding skills to replicate this painting on p5js, so I decided to use simple shapes and arcs to recreate my own self portrait.

Making Process

I didn’t have a full picture of what I was going to make from the beginning so it was very much coming up with new ideas as I working. Initially, I split the canvas with rectangles using a for loop and then I thought I could use this different sections as a gradation of colors so I set the color fill variable with the iterator in order to achieve that. Since the canvas was split in 12 different rectangles, I created an array of size 12 and use the iterator to find the color value stored in the array to make gradually changing color scheme. Then I built the face structure using the arc element also using the for loop I set for creating the split in the canvas. One issue with this method however, is that each arc from the four sections (x < 250 & y < 250, x  > 250 & y < 250, x < 250 & y > 250, x > 250 & y > 250) are all identical. While it does look haphazard because of this, I decided to leave it like this because a) for this assignment I focused more on getting used to p5js so I wanted to keep the for loop iteration in my drawing, b) this had an unintended modern art sensation which I thought was cool. So since I got this modern art looking progress going on, I decided to stick with that theme and incorporate simple shapes to represent my facial features: circles for eyes, triangle for nose, and an arc for my mouth. When I was done with the facial features, I realized that the result looked a little too simple. So to spice things up, I decided to make the facial features move which leads to the next section of my documentation.

Challenge

Turns out, making shapes move in certain behavior on the canvas was much more difficult than I expected. My initial assumption on how to make this work was to make a variable for the x and y position parameters and increase or decrease them. However, when I quickly learned that the shapes didn’t move as I suspected, I had go through a lot of trial and error to try to fix the bugs and get what I wanted. After time, I managed to fix the nose and mouth motion using a speed variable that would be added to the x and y position parameters. If the shape position would reach the left/right or top/bottom end, the speed variable would be multiplied by -1 so the shape motion would go opposite direction and loop so that it would move consistently. The real challenge, however, was the eye motion going in circles. For this one, I couldn’t figure out how to have a shape move in circles, so I did some research. Thankfully, I found a source code online that managed to make this happen

(https://editor.p5js.org/kchung/sketches/SJkdHhWUQ)

so I referred to this code and learned the sin() function and cos() function with an increasing angle variable according to radian to make a shape move in circle.

let x1 = 225 + 25 * sin(angle);
let y1 = 200 + 25 * cos(angle);
let x2 = 325 + 40 * cos(angle);
let y2 = 150 + 40 * sin(angle);

circle(x1,y1, 50);  
circle(x2,y2, 50);

angle += 0.0314;


Wrapping Up

After the challenging parts, I decided to add some sprinkles on the product like changing up the stroke colors and the weight or make a warming up in color gimmick using the angle variable I set for the circle motion. For colors, I knew I wanted to use red, green, and blue because they are the RGB (I know its cheesy but still I thought it was cool). For the color in the background being blue was pure coincidence after playing with the gradation effect so I was left with red and green which each became the color for the nose and the mouth. For the eye color being yellow, I just thought it was a nice color match.

Reflection

Looking back on working on this assignment, I was able to use some of the the basic coding knowledge that I knew beforehand such as conditions, iteration, arrays, etc.. but I also learned a lot about p5js coding environment and its unique functions like how the draw() function behaves or the shape elements. Through this assignment I was reminded a lot about processing which I learned in my freshman year in Intro to CS. As for future possible improvements, I know for sure my code is a hot mess with no comments, very haphazardly organized, and not the most efficient so I hope to be able to code a little more cleanly and in a better way next time, and also learn & utilize more of what p5js can offer.

Assignment 1: Self Portrait

I learned the basic concepts of p5.js, such as circles, ellipses, and colors, through online tutorials, practice coding, and experimentation. I started out by learning how to create basic shapes using the ellipse and circle functions and then moved on to manipulating more complex shapes such as hair and eyes. I then experimented with different colors to create a more lifelike image. After mastering the basics, I began to understand how to use conditionals to create an animation. I then began to experiment with different speeds and directions to create a more dynamic animation. With each new concept I learned, I was able to create a more realistic selfportrait that accurately captures my personality.

This p5.js code is a moving selfportrait of me. It is a creative piece of code that uses mathematical concepts such as conditionals, variables, and geometry to create an animation. The code is comprised of a setup and draw function and uses variables for the coordinates, directions, and speed of the animation. The setup function creates a canvas of 400x400 pixels and sets the starting positions and speeds of the animation. The draw function uses the variables to draw the self-portrait, which consists of a head with eyes, hair, a nose, and a tongue. The head will move from side to side and bounce up and down when it hits the boundaries. This code captures my playful and creative spirit, as it animates me in a unique and amusing way.

The part of the code that I am most proud of is the part of moving and boundary detection. I was able to connect all pieces of the face into one variable so that all of them move simultaneously. Also, the ternary operator is my way of showing my CS skills(jk).

Reflecting on this project, I am proud of my progress and the creative outcome of the code. I am now confident in my ability to use the fundamental concepts of p5.js to create engaging visuals. However, I am also aware that there is still room for improvement and further exploration. I plan to add user interaction to the animation, for example, allowing users to move the portrait with their mouse. Additionally, I would like to incorporate video sensors to create a more lifelike animation. This could be achieved by tracking a users facial movements and incorporating them into the animation. As I continue to explore the limitless possibilities of p5.js, I look forward to creating increasingly complex animations and engaging interactive experiences.


Week 1: Self-Portrait

For this assignment, we were to use p5js online editor to create a self portrait. It did seem like a daunting task, given my incompetence in art and drawings. However, as I played around with the code and different shapes, I put together my face and some of its traits to the best of my ability.

Creating Me

Starting with a blank canvas, I divided the project into various parts to compartmentalise my work. This allowed me to focus on one aspect of the project at time. I created functions to draw different parts of my portrait, which would provide a modular structure to the code as well as help me slowly develop my portrait.

function draw() {
  background(color("#0977f6"));
  
  drawEars();
  drawBody();
  drawNeck();
  drawFace();
  drawStrawHat();
  drawBlush();
  drawSpecs();
}

Note: The drawFace() function draws every element in my face.

I started with the outline of my face. Since, my face is oval-shaped, I opted to using an ellipse to achieve this. The parameters I used to make the outline of my face (ellipse) would later be used in every other shapes and objects. In order to achieve this, I made the parameters for the ellipse global variables by declaring them at the top of the code outside any function. I initialised their values inside the setup() function since it would only be run once. I use this global variables as such:

let f_x, f_y;

function setup() {
  createCanvas(500, 500);
  f_x = width/2;
  f_y = height/2 - 40;
  
  textSize(30);
  textAlign(CENTER, CENTER);
}

f_x and f_y refer to face x-coordinate and face y-coordinate respectively. All the shapes in the portrait is drawn with respect to these variables. In other words, the shapes are drawn with positions corresponding to some manipulation of the aforementioned global variables. Here is an example:

// Eyes
  stroke(10);
  fill("#eeeeee");
  ellipse(f_x - 25, f_y + 10, 20, 7);
  ellipse(f_x + 25, f_y + 10, 20, 7);

The above code snippet creates the two eyes. Notice that the positions of the ellipses uses f_x and f_y. Basing all the shapes in my portrait, I created a digital image of myself.

Notable Traits:
  1. Straw Hat: The hat is inspired by one of my favourite fictional characters, Monkey D. Luffy.
  2. Rosy Cheeks: I have perpetually red cheeks. Although its shape is not exactly an ellipse, making it an ellipse was the only way it did not look off.
  3. Shadows: The shadow of my head on the neck was made by duplicating the head ellipse and translating it down. The width of the ellipse was then adjusted.

Future Improvements

While I was making my portrait, I noticed that making it dynamic was a challenge. The creation and implementation of global variables, f_x and f_y, did make it sort of dynamic as the portrait would still be intact even if we change the size of the canvas, it would be more dynamic if the shapes would also change size with respect to the canvas. This is something that I could work on to improve the customisability of the portrait.