Concept
For this assignment, we were inspired by the popular “Rick Rolling” meme. Essentially, this is a meme that tricks the viewer by surprisingly playing the song “Never Gonna Give You Up” by Rick Astley. Therefore, we decided to create a music box which plays this song when it’s opened.
How it works
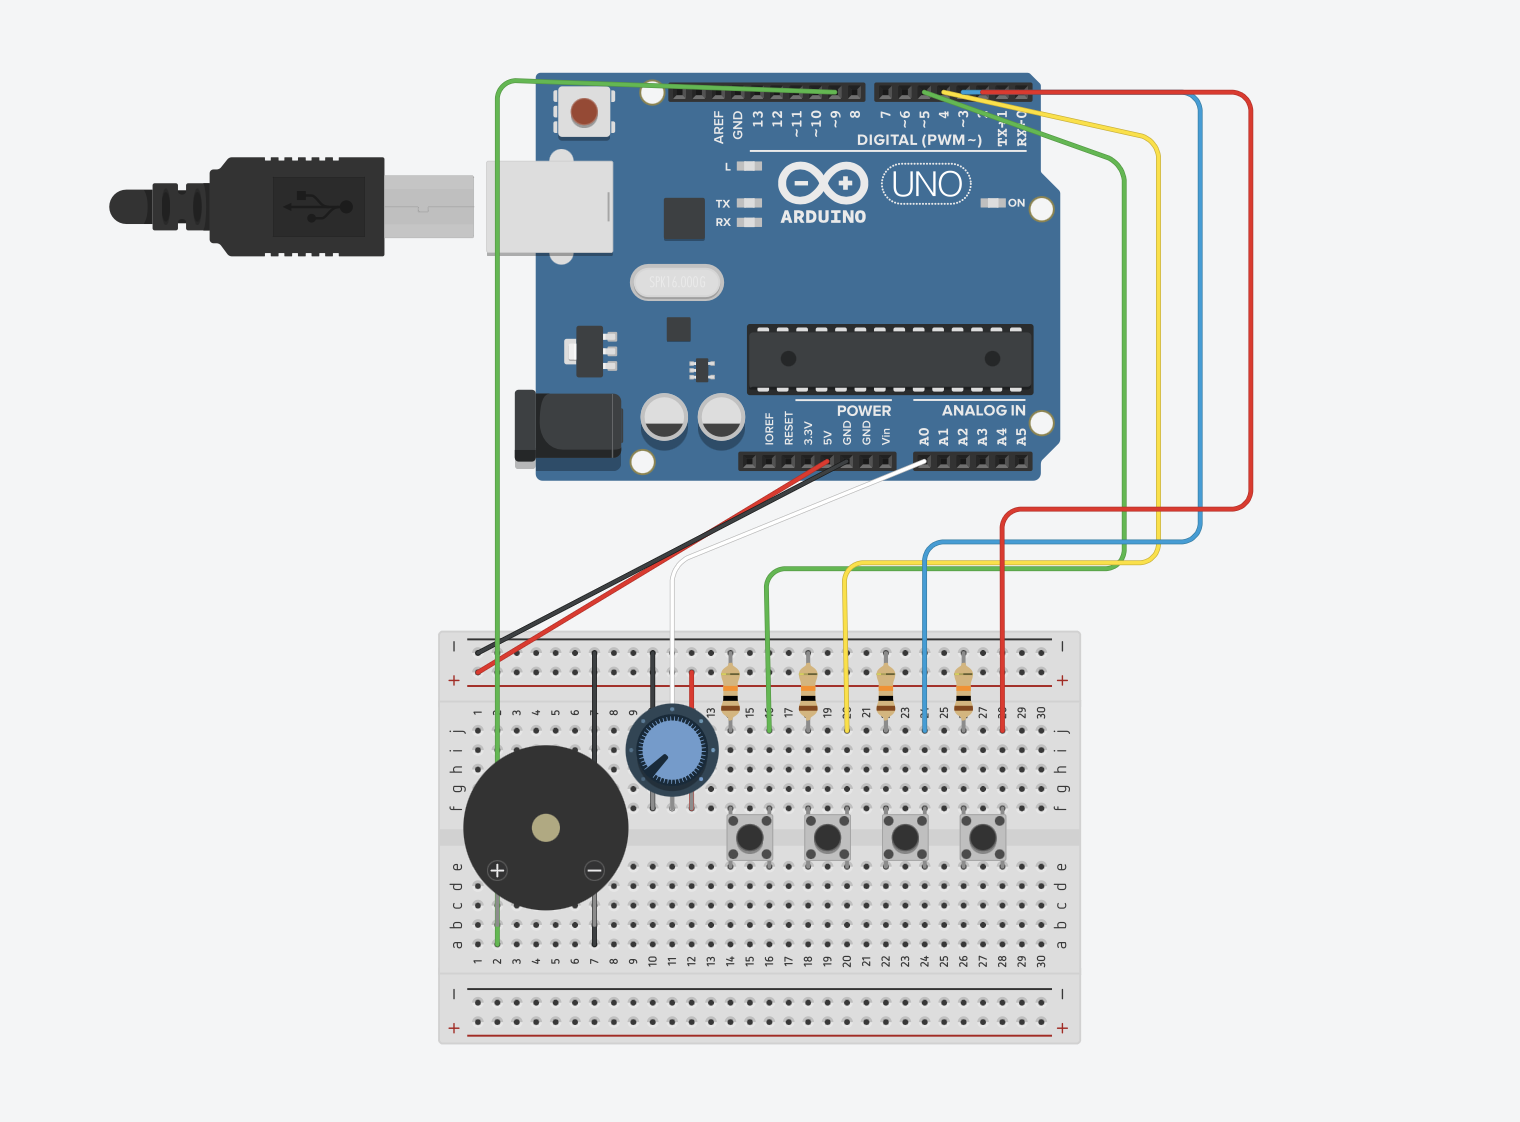
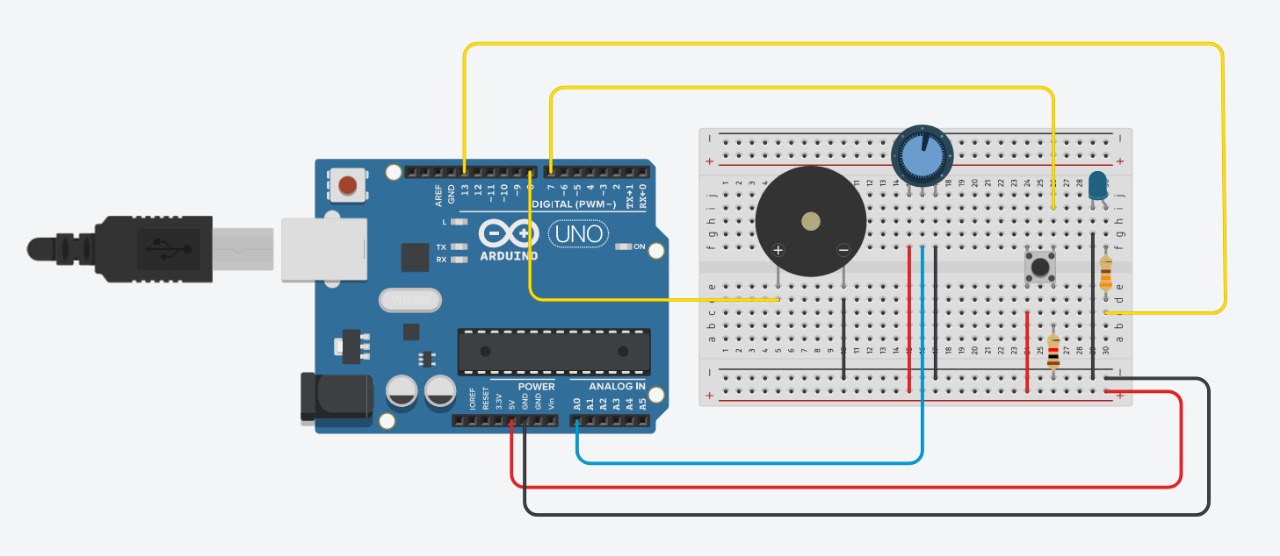
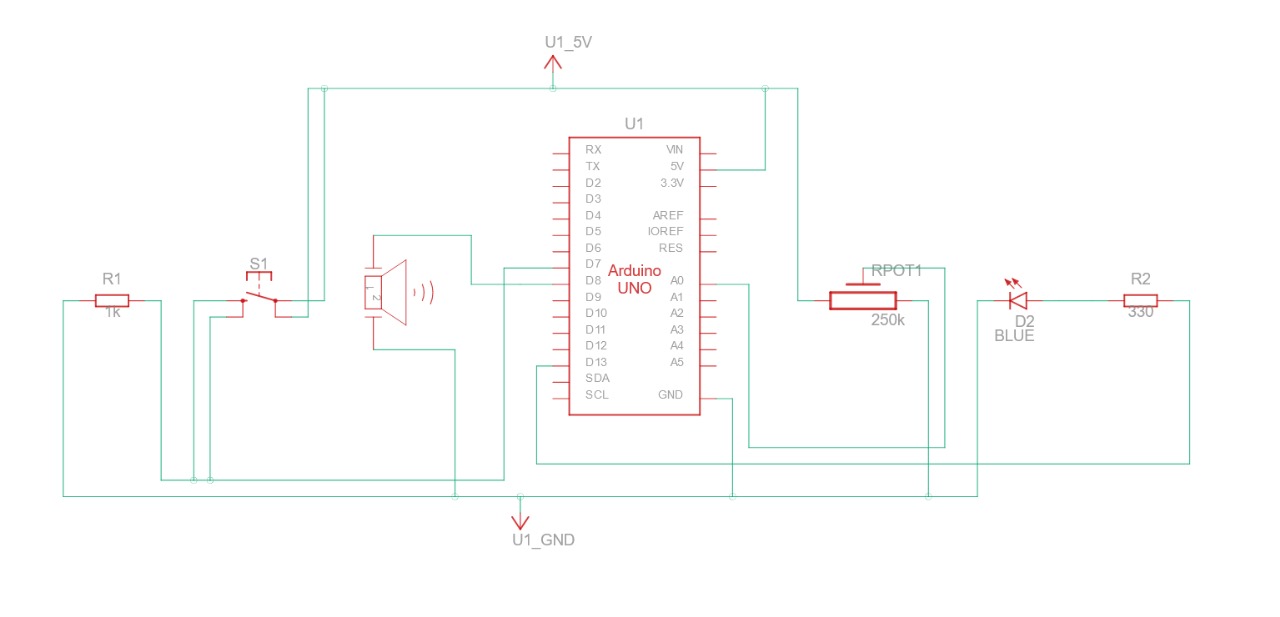
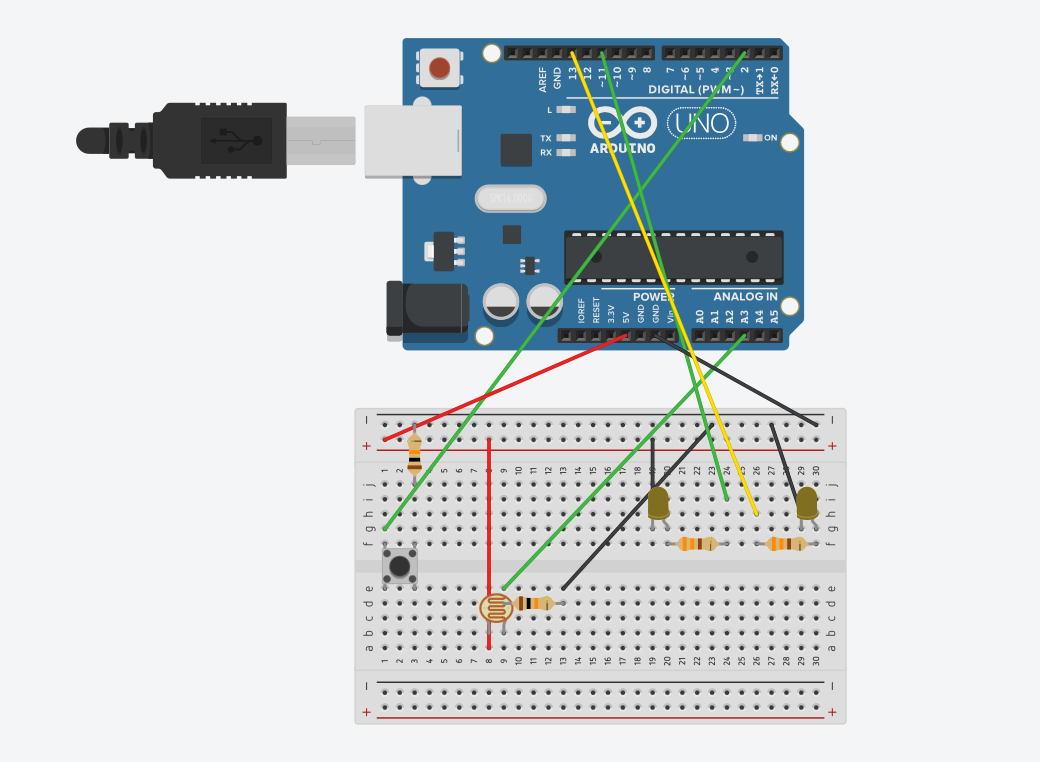
For the music box, we had multiple components. First, we used a photoresistor to detect brightness (open box) and darkness (closed box), which would determine whether to play the song or not. Then, we had a Piezo buzzer to actually play the notes of the song. Moreover, we added a LED light that blinks to the rhythm of the music. We also added a button which when pressed, would change the speed at which the music plays. Finally, we used a potentiometer to control the volume of the music. In the code, we divided the song into the intro, verse, and chorus.
Components
- 1 x Photoresistor
- 1 x Piezo buzzer
- 1 x LED Light
- 1 x Button
- 1 x Potentiometer
- 3 x 330 ohm resistors
- 1 x 10K ohm resistor
- Wires
- Arduino and Breadboard
Demo

Code Snippets
Our code is quite long, so here are some snippets:
This is an example of how we have created arrays for each part of the song. This is specifically for the chorus, but we also have them for the intro and the verse. We have one array for the melody, which is determined by the frequencies we have defined, and one for the rhythm, which determines the duration of each note when later multiplied with the beat length.
int song1_chorus_melody[] =
{ b4f, b4f, a4f, a4f,
   f5, f5, e5f, b4f, b4f, a4f, a4f, e5f, e5f, c5s, c5, b4f,
  c5s, c5s, c5s, c5s,
   c5s, e5f, c5, b4f, a4f, a4f, a4f, e5f, c5s,
  b4f, b4f, a4f, a4f,
  f5,   f5, e5f, b4f, b4f, a4f, a4f, a5f, c5, c5s, c5, b4f,
  c5s, c5s, c5s, c5s,
   c5s, e5f, c5, b4f, a4f, rest, a4f, e5f, c5s, rest
};

int song1_chorus_rhythmn[]   =
{ 1, 1, 1, 1,
  3, 3, 6, 1, 1, 1, 1, 3, 3, 3, 1, 2,
  1, 1, 1, 1,
   3, 3, 3, 1, 2, 2, 2, 4, 8,
  1, 1, 1, 1,
  3, 3, 6, 1, 1, 1, 1, 3, 3, 3,   1, 2,
  1, 1, 1, 1,
  3, 3, 3, 1, 2, 2, 2, 4, 8, 4
};
This is our setup function, which initializes the pins and the serial communication, and sets an interrupt on the button (which then trigger our getFaster function).
void   setup()
{
  pinMode(piezo, OUTPUT);
  pinMode(led, OUTPUT);
  pinMode(button,   INPUT_PULLUP); // high voltage when button is not pressed; low voltage when pressed
  pinMode(sensor, INPUT);
  attachInterrupt(digitalPinToInterrupt(button), getFaster, FALLING); // interrupt activates when pin is pressed
  digitalWrite(led, LOW);
  Serial.begin(9600);
  flag   = false;
  a = 4;
  b = 0;
  threshold = analogRead(sensor) + 200; // adding a value to the sensor reading to control how much darkness/brightness is necessary for the music to start playing
}
This is our loop function, which ensures that the sensor value is constantly being read and that the song plays when it is bright enough/pauses when it is dark.
void loop()
{
  int sensorreading = analogRead(sensor);
   if (sensorreading < threshold) { // play when there is brightness
    flag = true;
  }
   else if (sensorreading > threshold) { // pause when there is darkness
    flag = false;
   }

  // play next step in song when flag is true, meaning it is bright enough
  if (flag == true) {
    play();
   }
}
This is part of our play function, which determines which part of the song plays and the corresponding melody/rhythm.
void play() {
  int notelength;
  if (a == 1 || a == 2) {
     // intro
    notelength = beatlength * song1_intro_rhythmn[b];
    if   (song1_intro_melody[b] > 0) {
      digitalWrite(led, HIGH); // LED on
      tone(piezo,   song1_intro_melody[b], notelength);
    }
    b++;
    if (b >= sizeof(song1_intro_melody)   / sizeof(int)) {
      a++;
      b = 0;
      c = 0;
    }
And finally, our getFaster function to increase tempo by the decreasing the beat length when the button is pressed.
void getFaster()   { // decrease beat length in order to increase tempo
  beatlength = beatlength   / 2;
  if (beatlength < 20) { // loop back to original tempo
    beatlength   = 100;
  }
Circuit

Lastly, here is a link to the tutorial we followed:
https://projecthub.arduino.cc/slagestee/rickroll-box-d94733