Week 1: Vicka Through the Looking Class (Self-Portrait)

No, that is not a typo. Yes, I used a nickname so that my name would have the same number of syllables as ‘Alice’ and this is a pun on Through the Looking Glass, which really would have worked better if there had actually been any classes involved in this assignment but please, cut me (and my long sentences) some slack (Slack, hehe). It’s hard to think of any new puns after the first idea gets stuck in your head, as terrible as it might be.

This week’s assignment was to make a self-portrait using Processing’s basic shape tools and other functions. Being a little bit familiar with Processing, I had thought that this could be done fairly quickly– boy was I wrong. It took me two long sessions to get everything looking a way I was satisfied with. I had underestimated my ability to keep changing things infinitesimally to see what was better, and I had not realised the depth of Processing’s library, never really having worked much with it before.

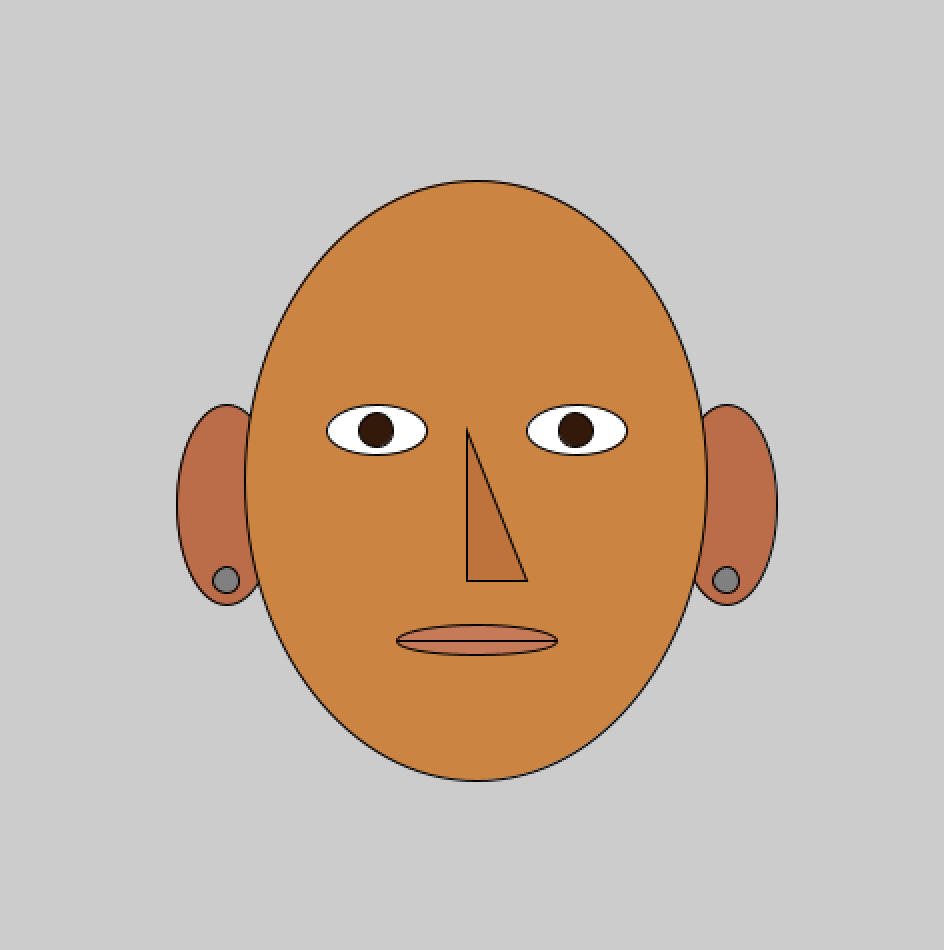
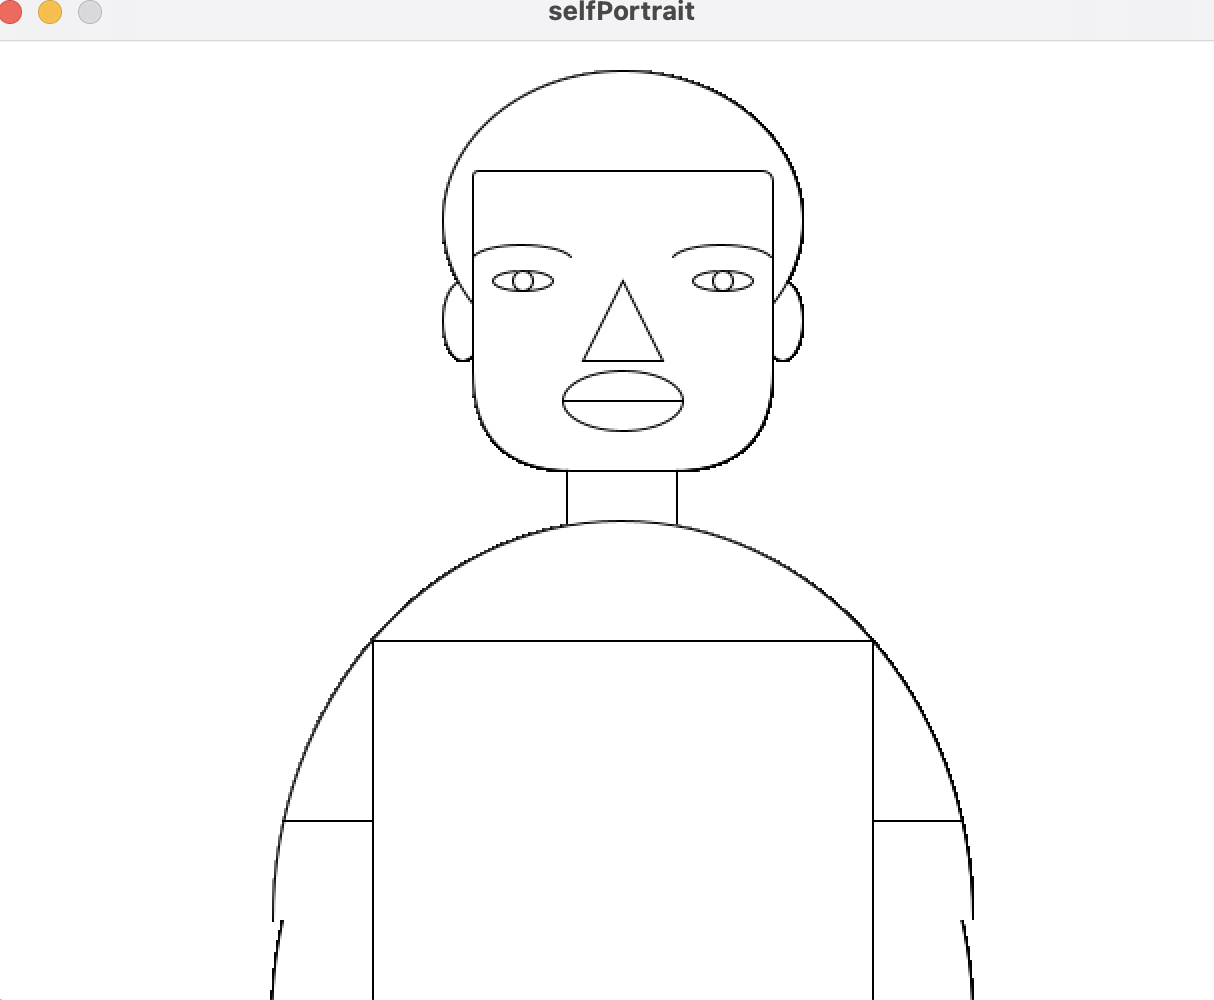
I was blessed with a lot of tools to make my work easier – for example, I discovered that the rect() function allows you to add angle parameters at the end if you want curved corners. So instead of making a normal rectangle and then an arc below it for the neck, I simply made it a rectangle with very rounded corners, and it helped give my hair shape too (but you can barely see it because it’s hidden behind the shirt). The point() function was perfect for drawing my birthmarks, and the alpha parameter for changing opacity which we discussed in class helped me make my glass lenses look like, well, glass.

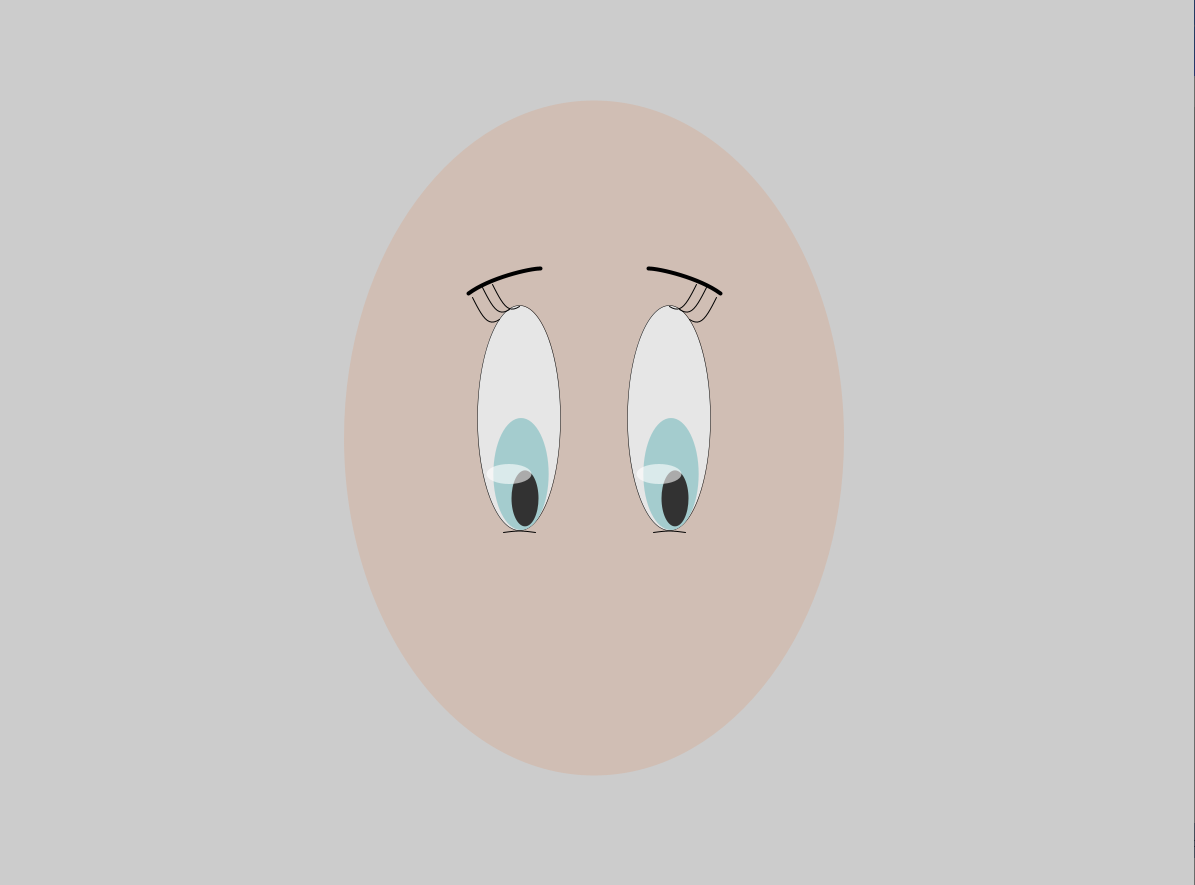
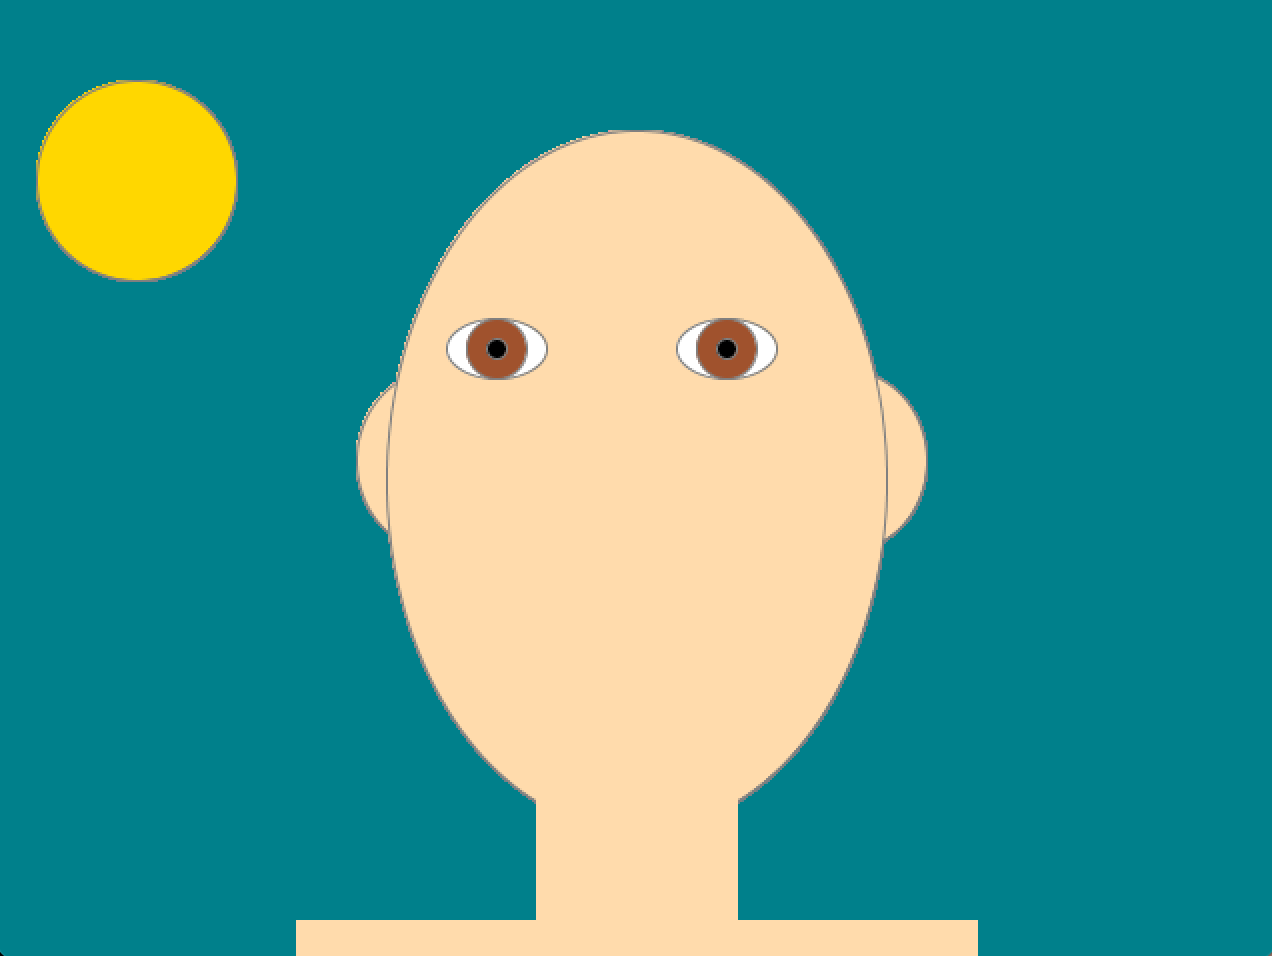
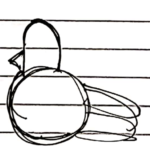
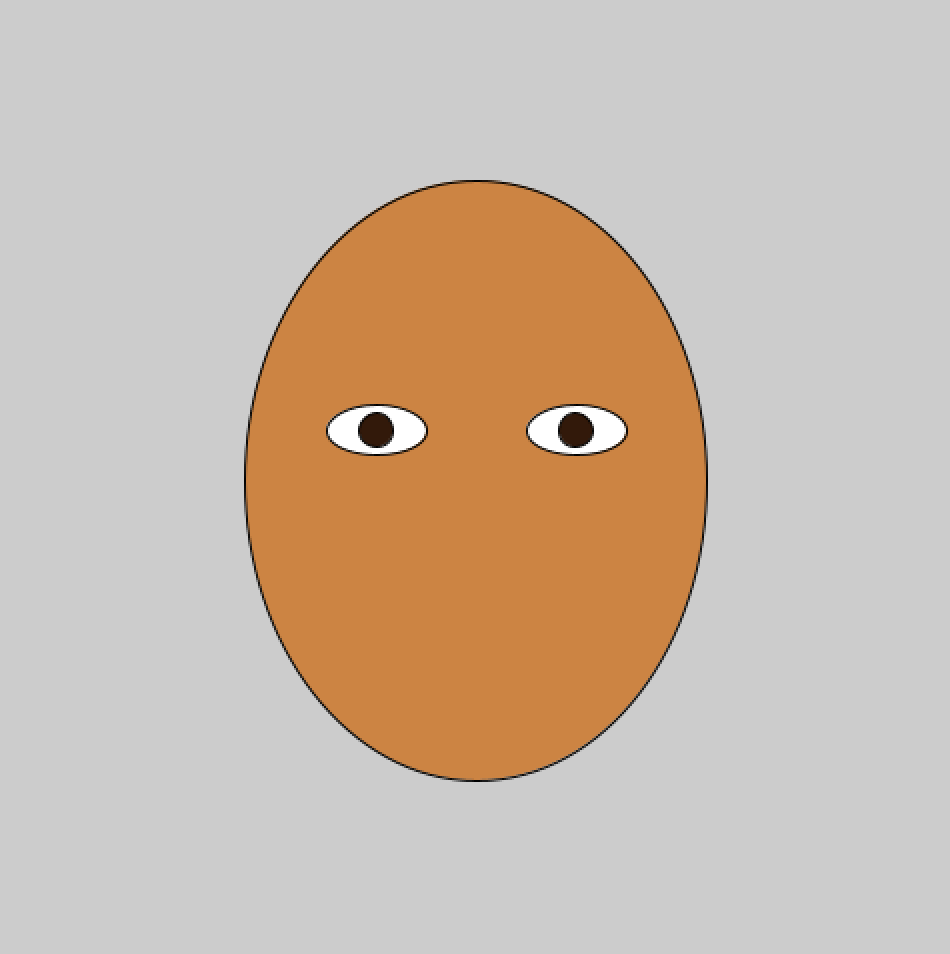
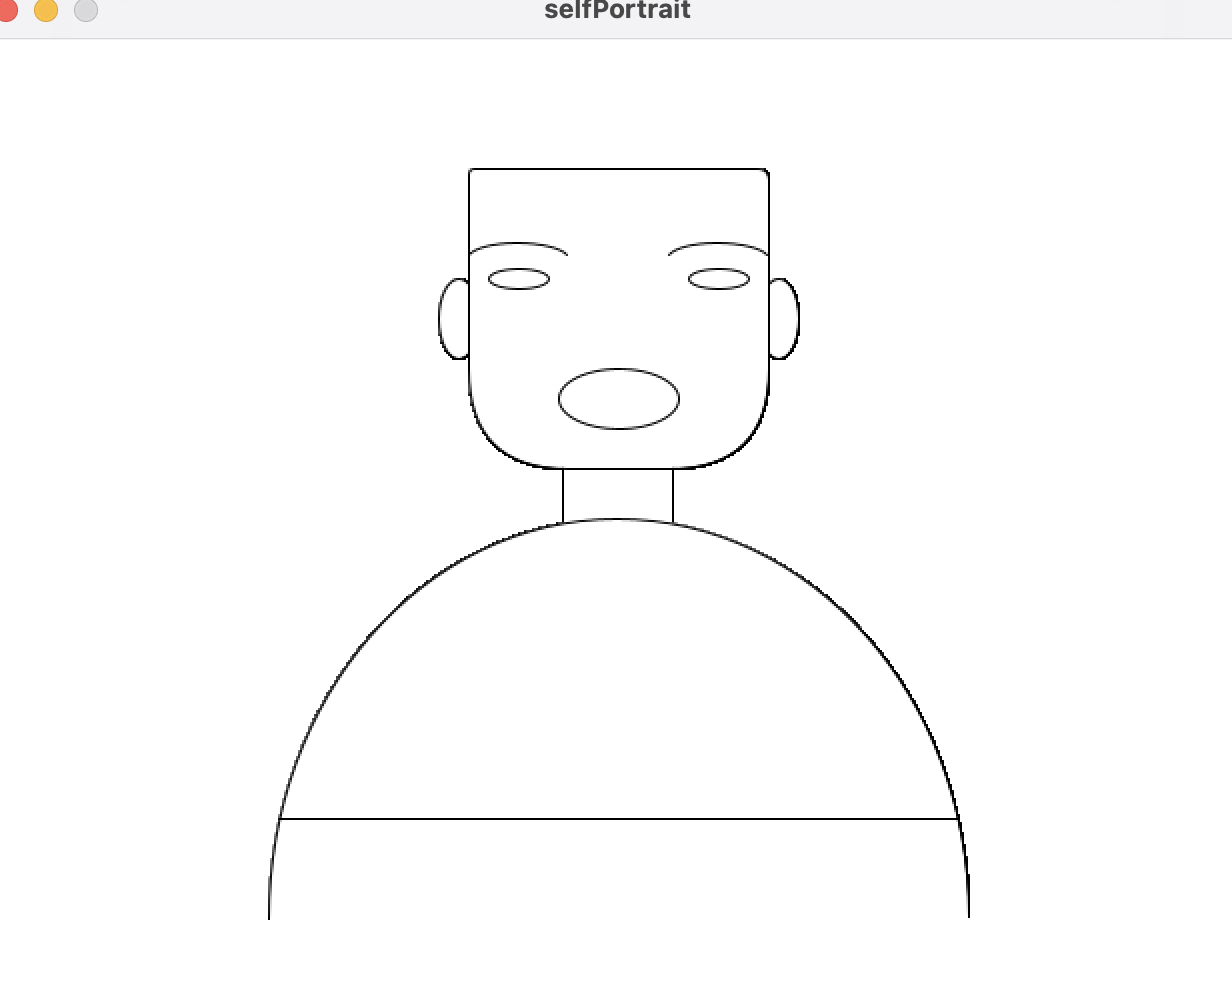
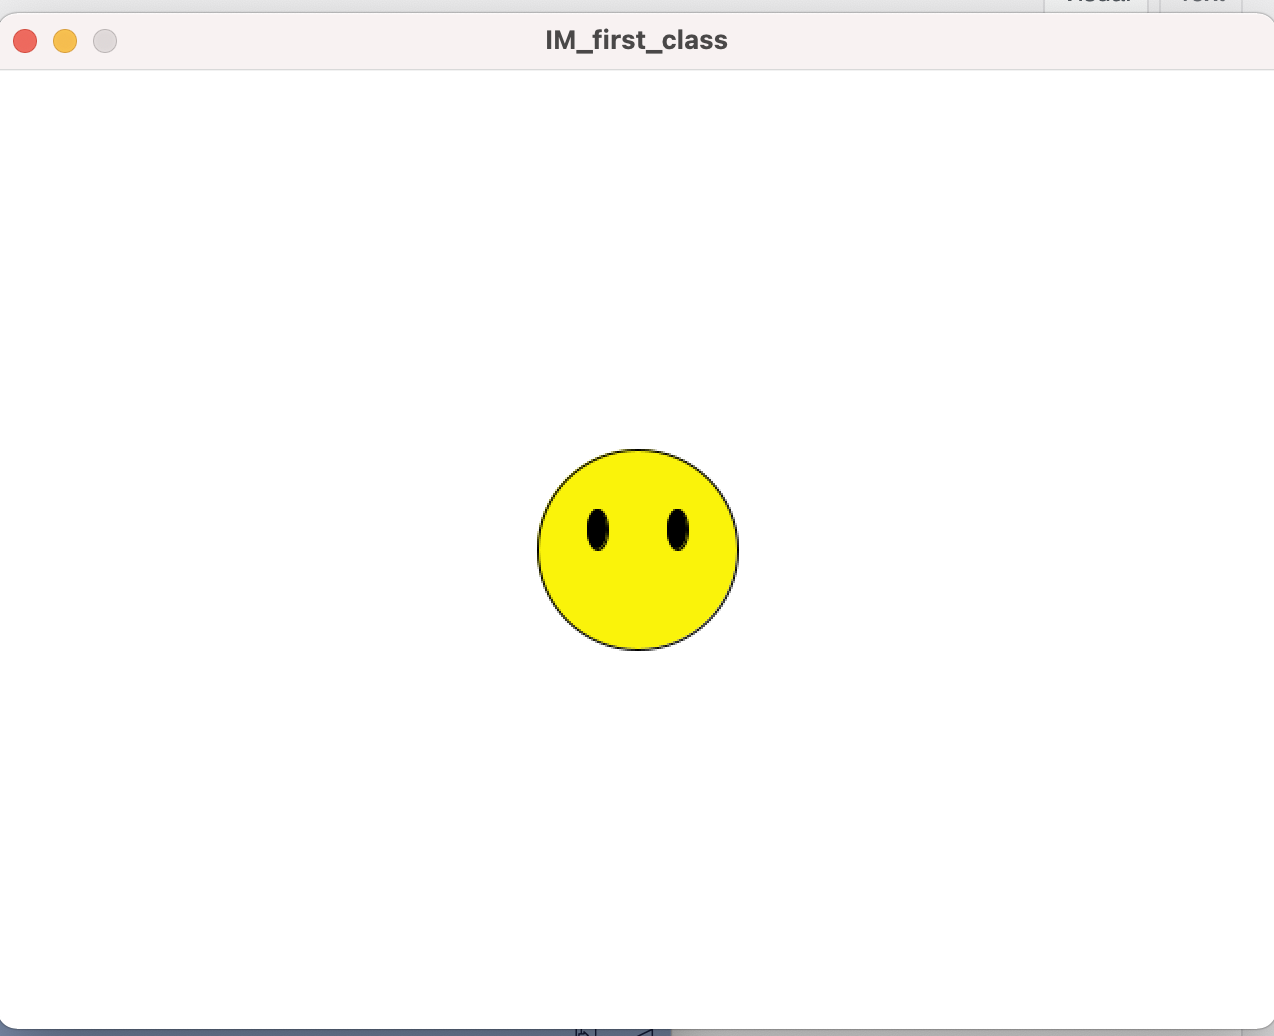
When we had been asked to attempt to draw a face in class, I had been making an emoji smiley but had been stumped when it came to the smile. That’s when Professor (I’m sorry, it’s hard to unlearn years of cultural traditions in a week) had talked about the arc() function, and it took me some time to wrap my head around it but I was finally able to figure out how to work it and start incorporating it in my code. This is also a good time to mention that I have copied a lot of variable names and some code verbatim from the face example we had discussed in class, it helped a lot.

Emoji guy without a smile

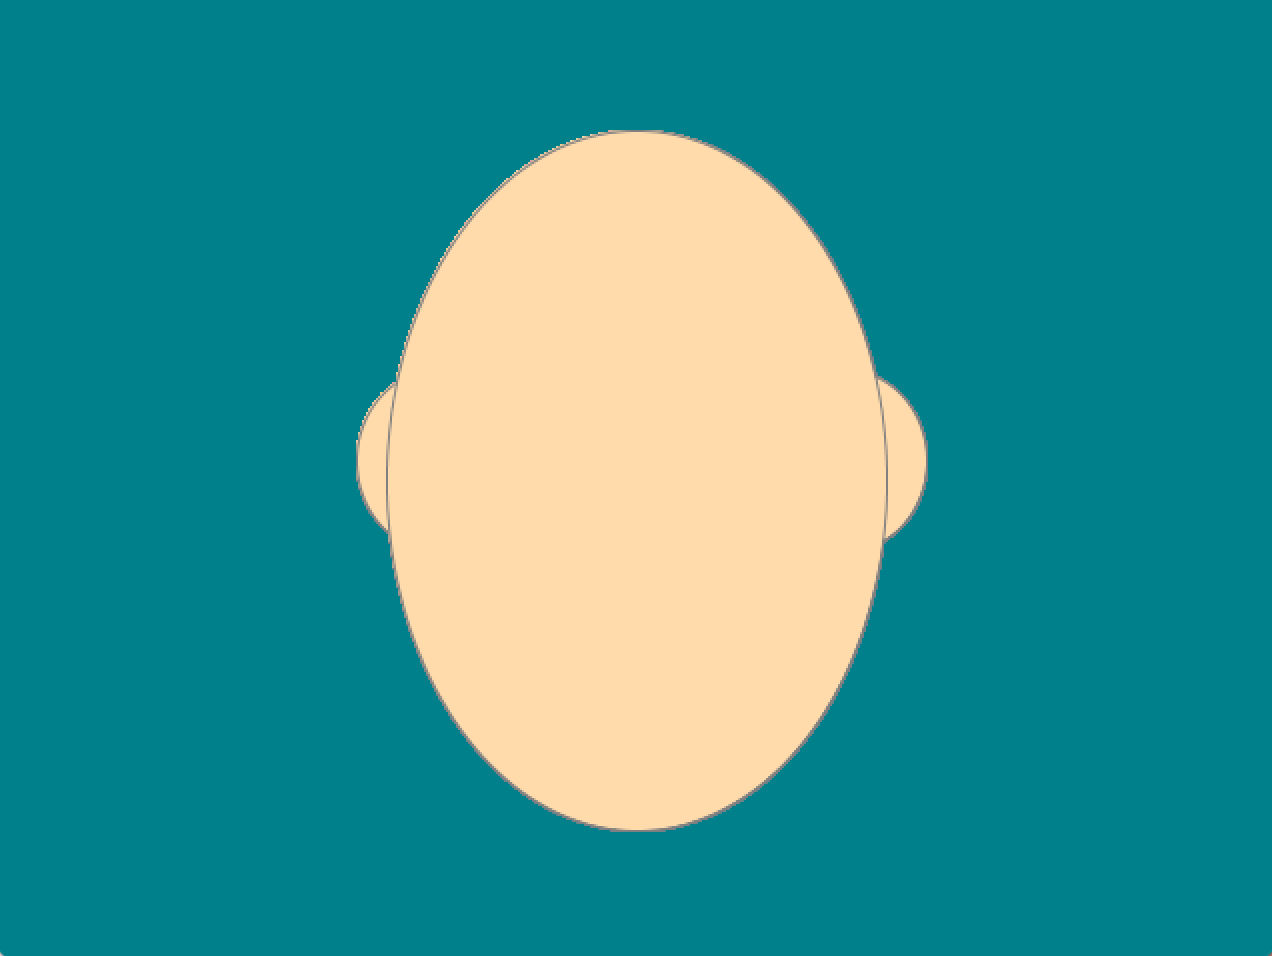
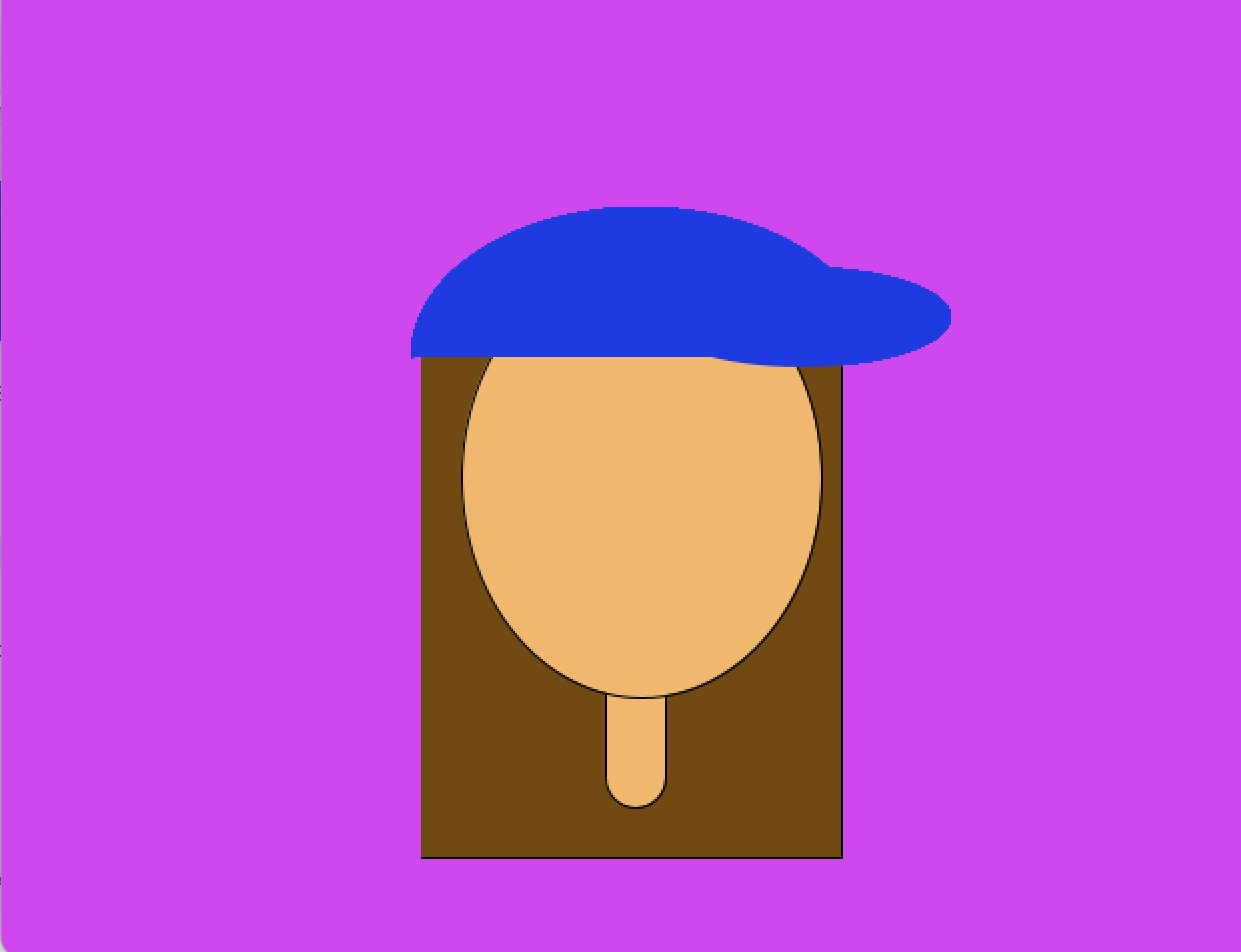
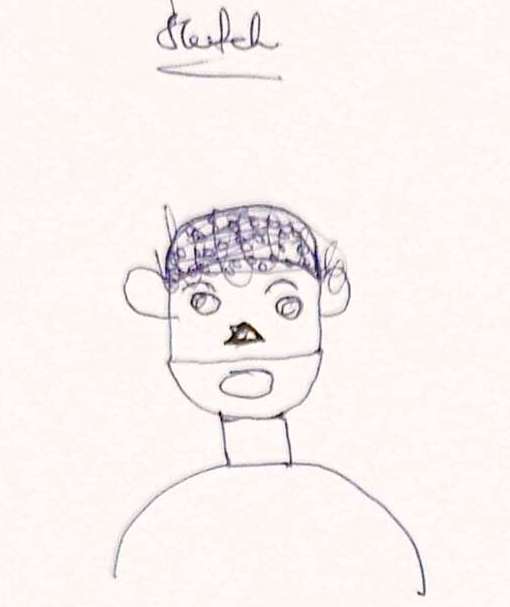
But, now that I had learnt how a lot of functions worked through trial and error, it was time to start making a resemblance of my face. I had been going through a lot of random past students’ blogs from the first day out of excitement for this course, so I had some sort of idea of which features I would like to draw which way: for example I knew I would like to use triangles for my eyebrows instead of arches and an ellipse for my face. But because of these mental images, I never really ended up drawing any physical sketch so the end result was sort of a surprise to me too.

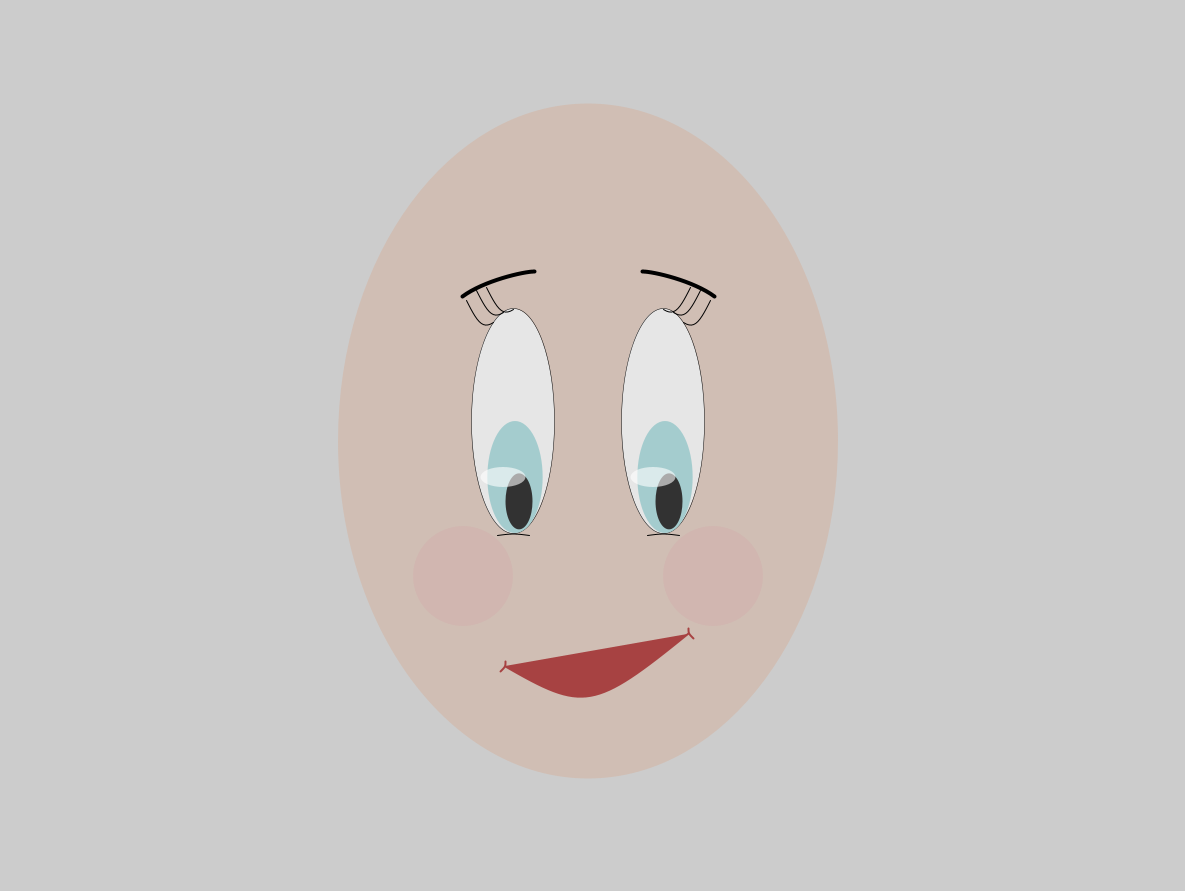
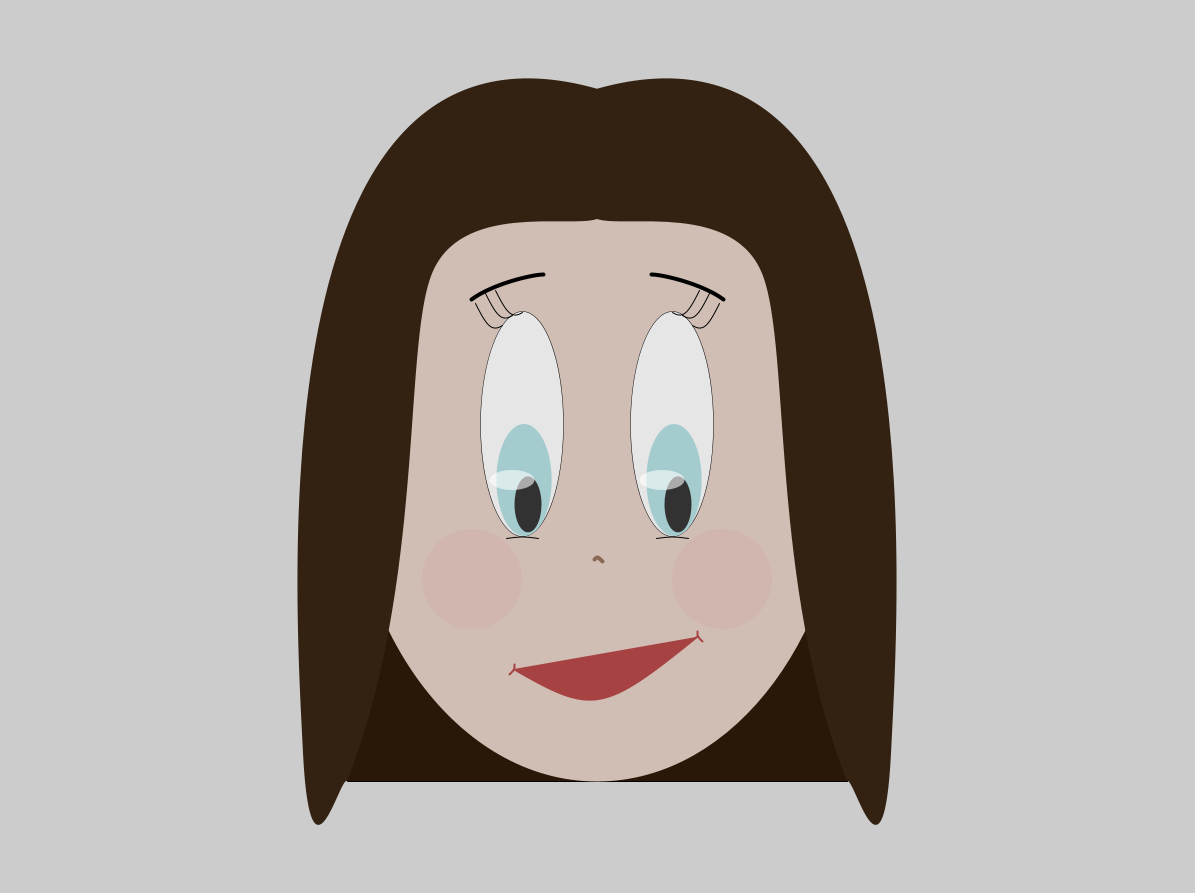
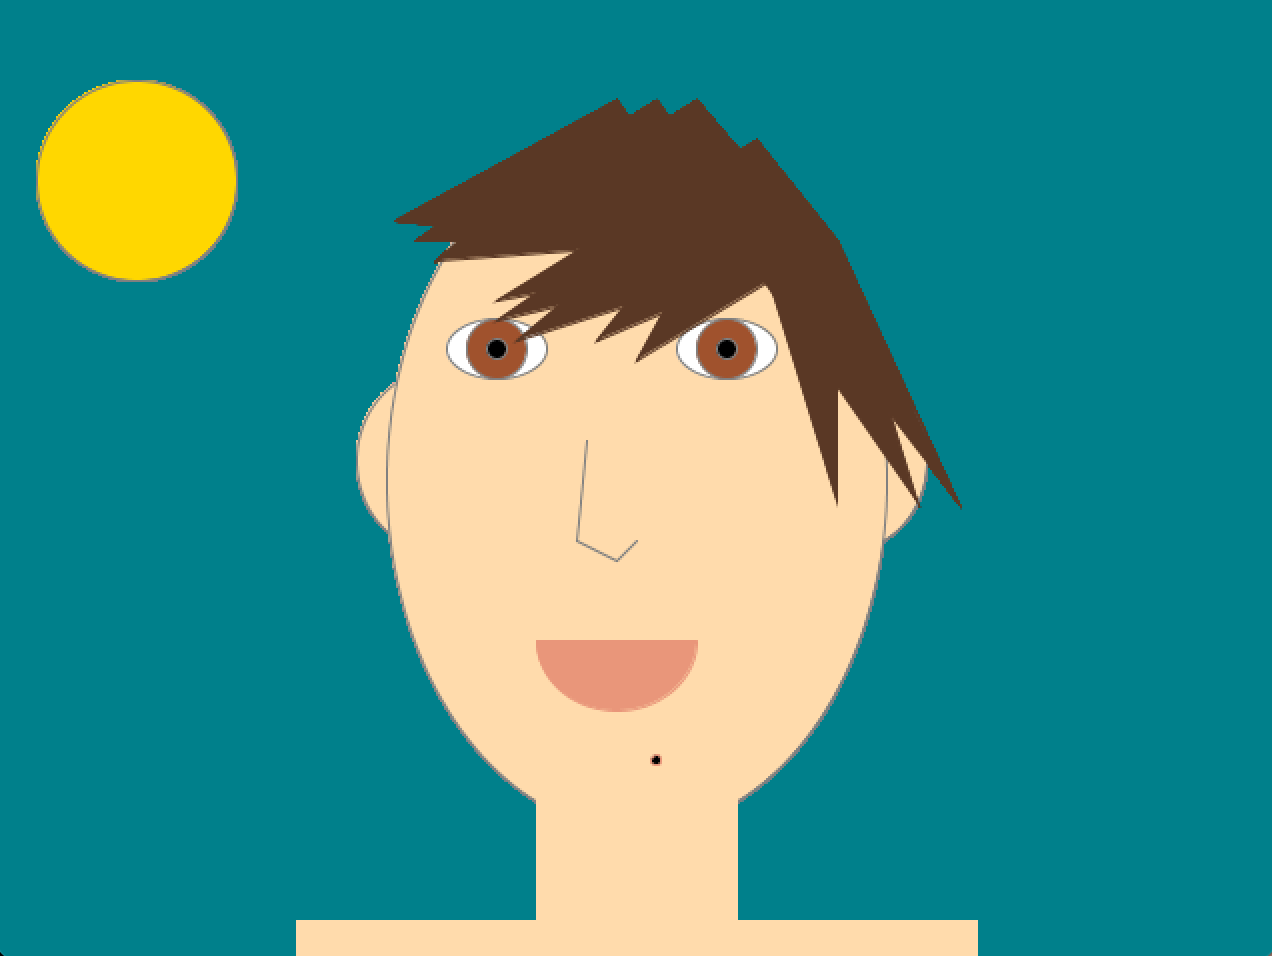
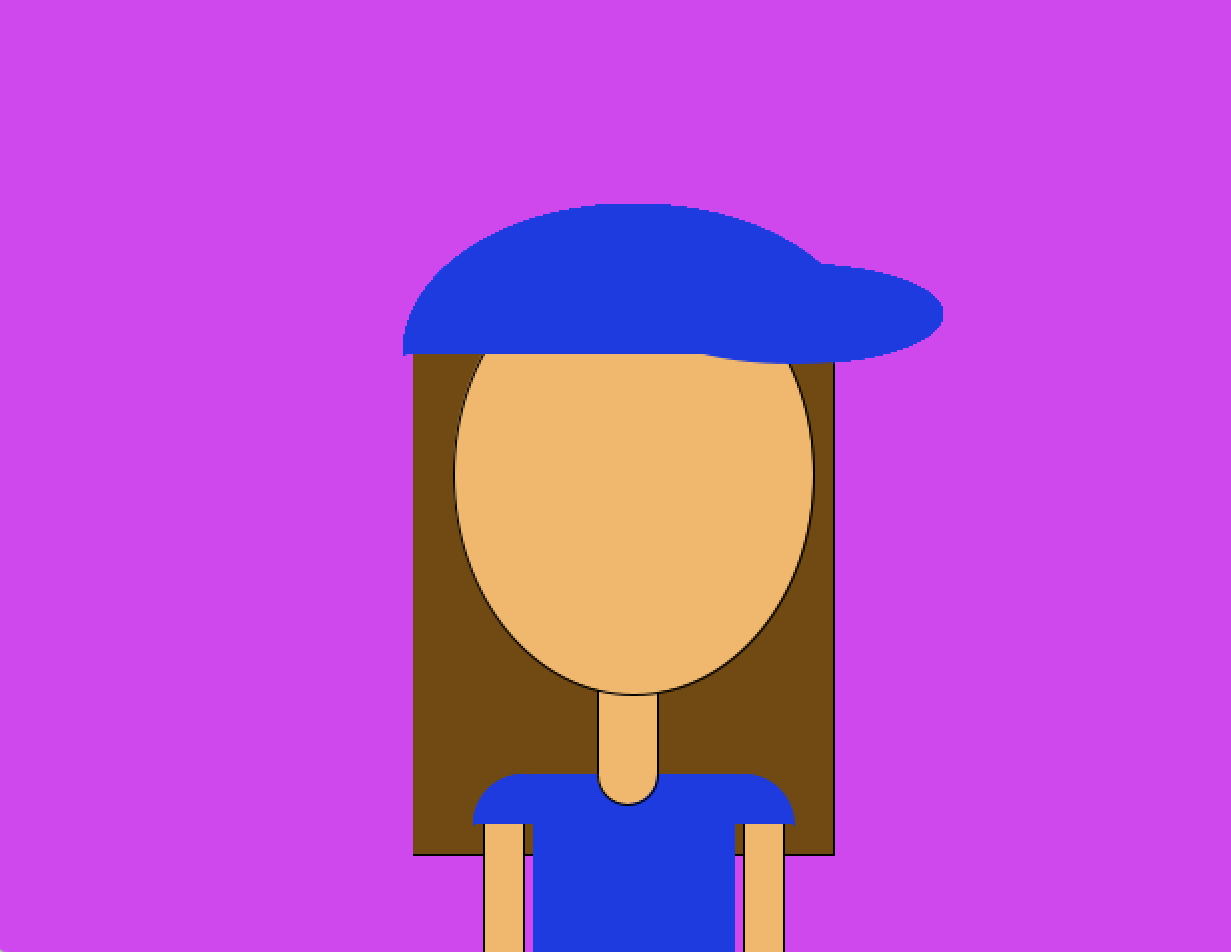
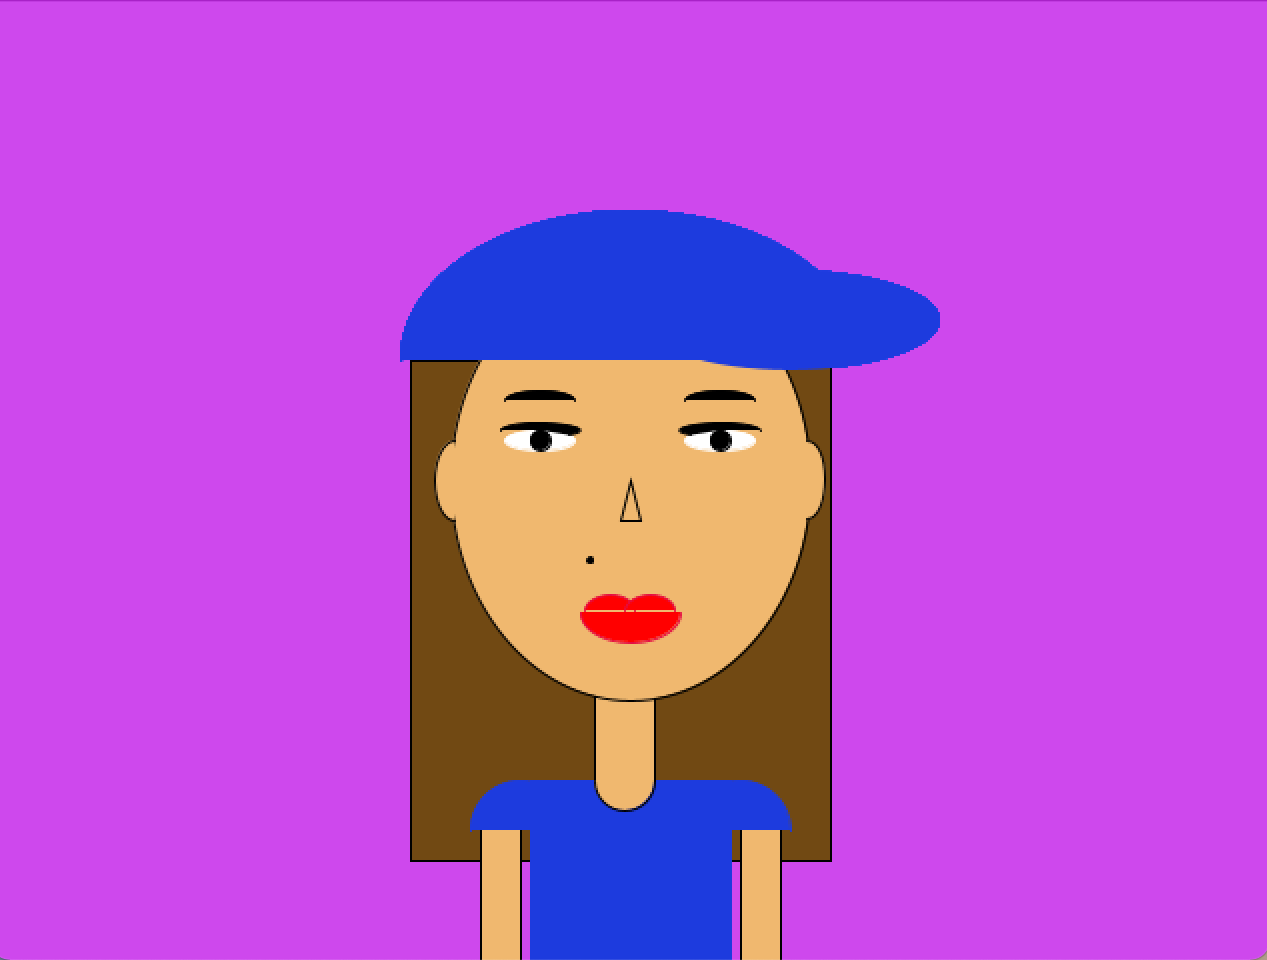
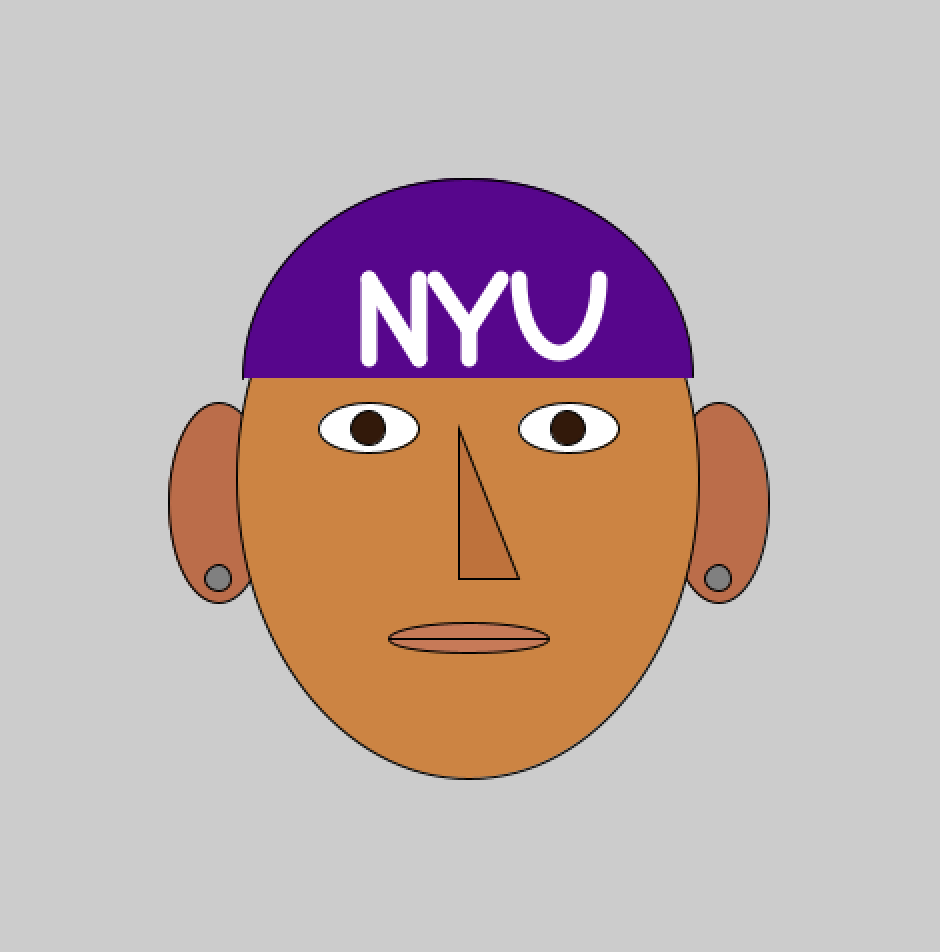
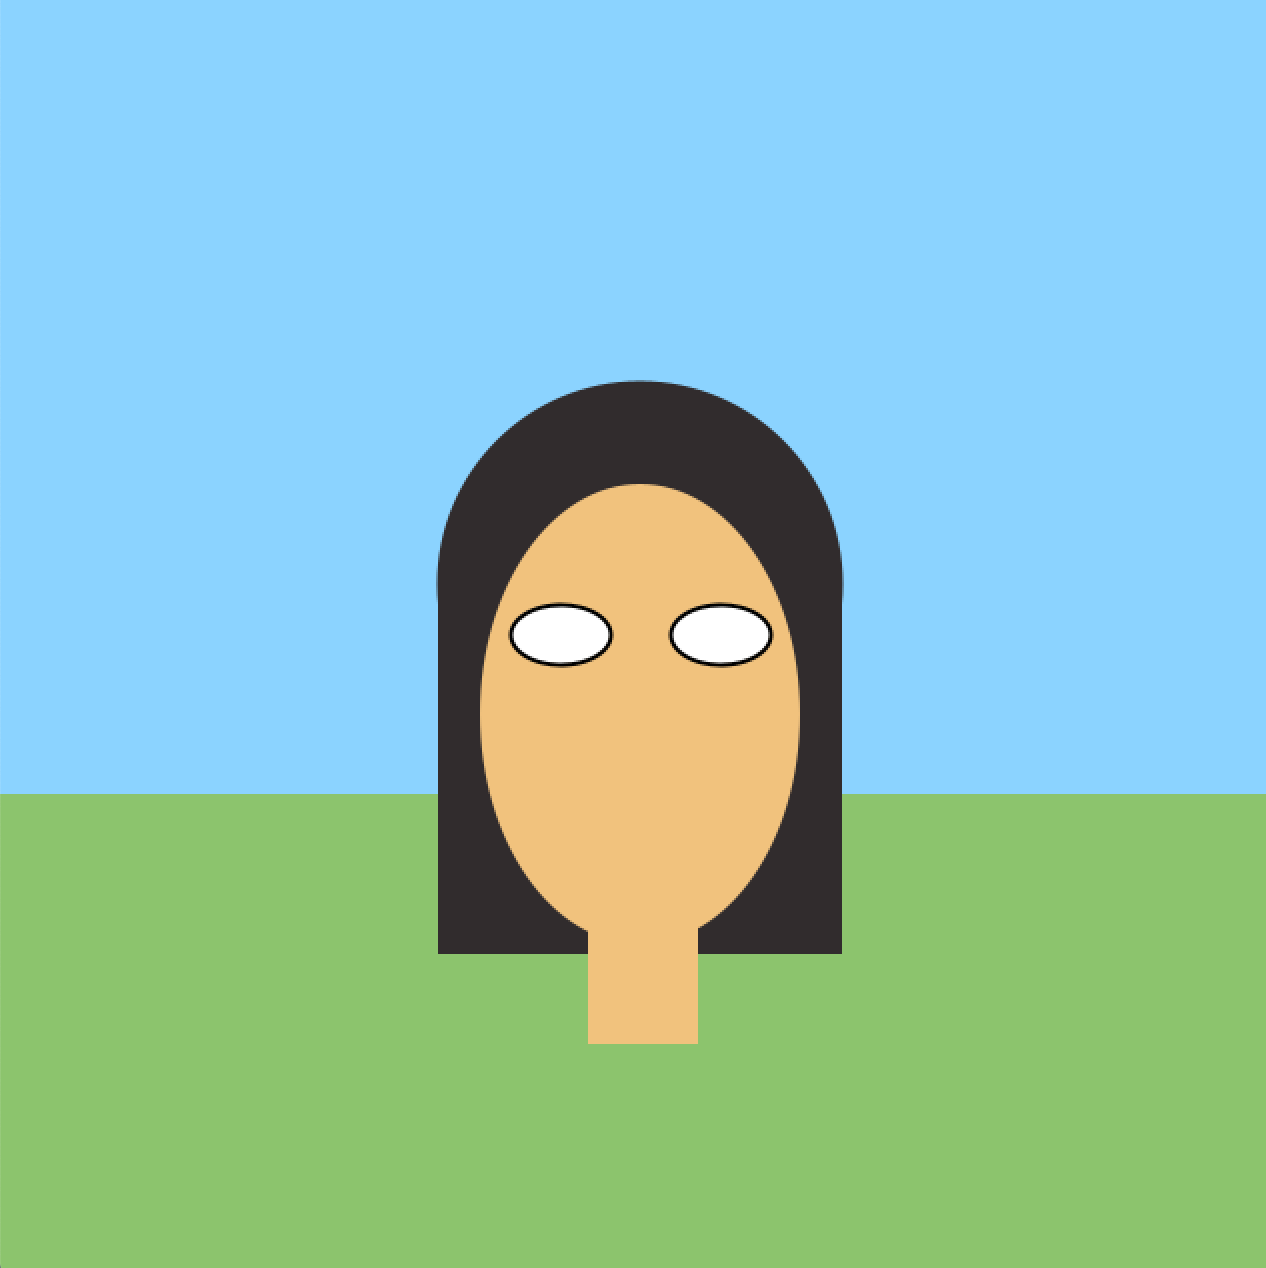
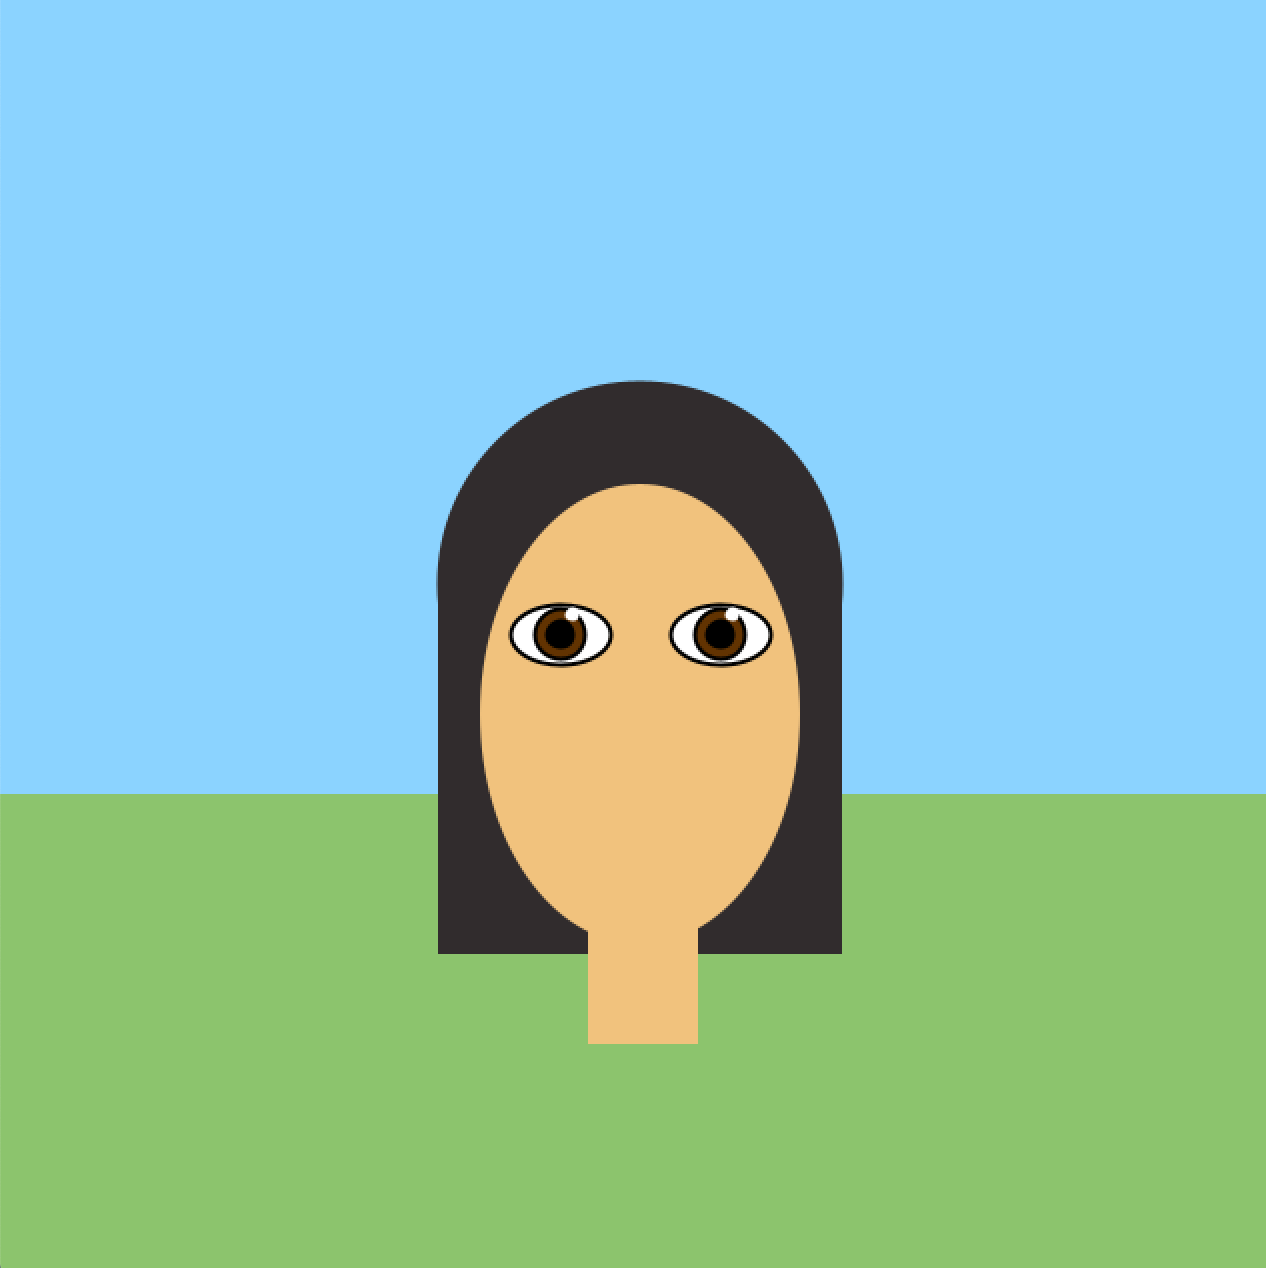
Something I hadn’t seen anyone draw was straight, long hair and I spent a lot of time trying to get it right. Since I usually end up wearing it in a middle-partition, the symmetry part was easy but it required a lot of adjustments and a combination of the rounded rectangle, two quadrilaterals and a circle which rather looks like a halo in the sketch. My face had been looking rather, to put it mildly, pensive, so I knew I had to make a smile somehow, but just drawing an arc didn’t fit in with the level of “realism” I had for the rest of my sketch. I was going to go through a long process of drawing arcs on the top and bottom, but then I realised that an ellipse with a line through it should do the trick too. I had almost given up on drawing my glasses because the eyes section was looking too crowded, but then I thought that I really can’t lie to myself and the world about this, I need those glasses. So I ended up adjusting the eye spacing and going through with them, and I’m glad I did.

My not-so-godly sketch

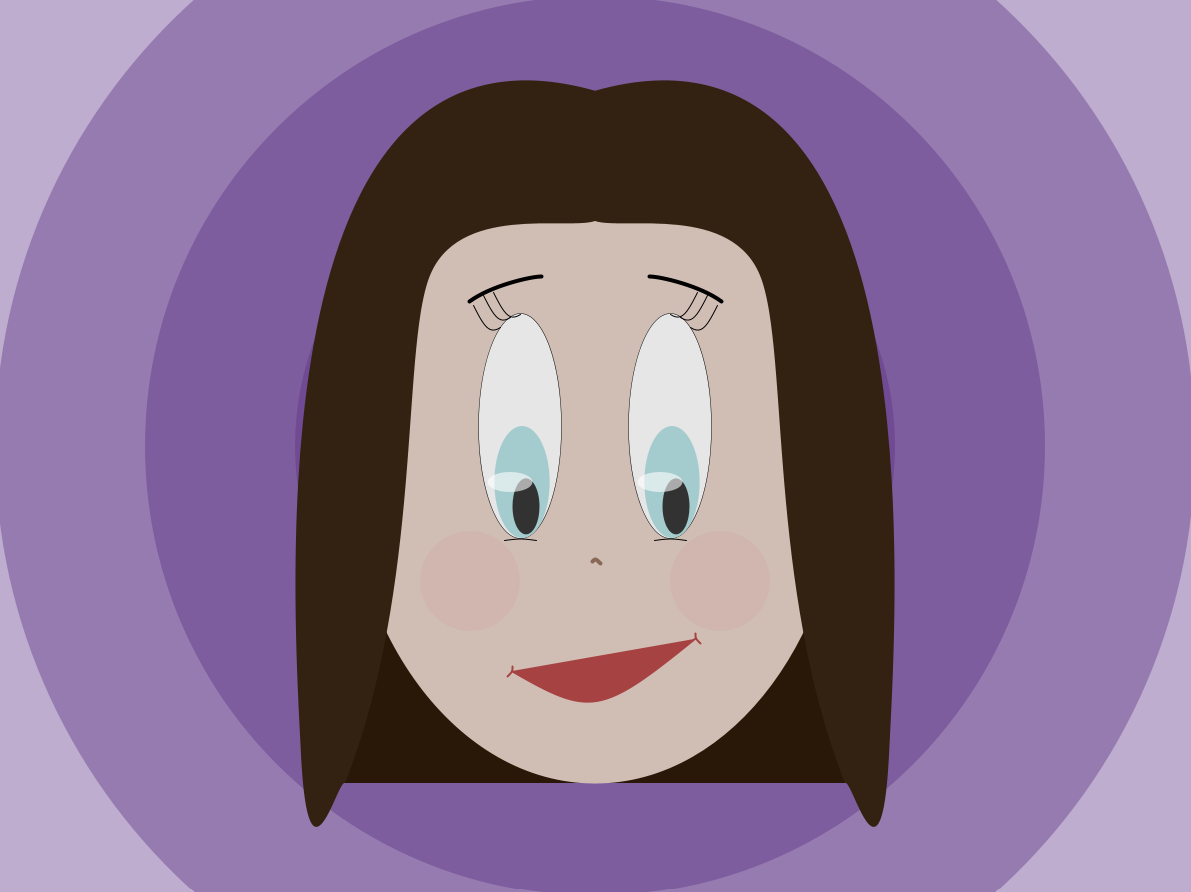
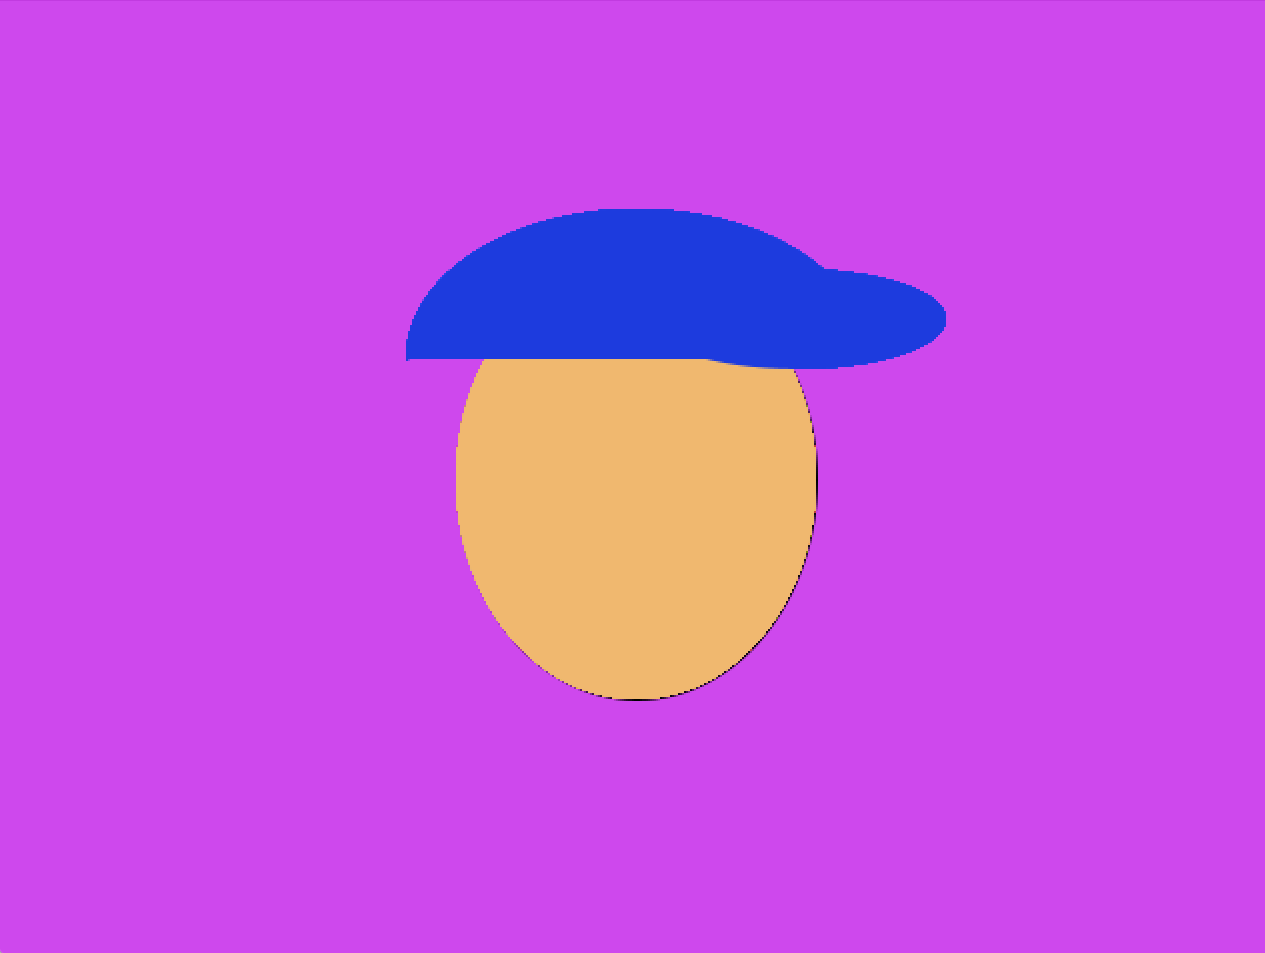
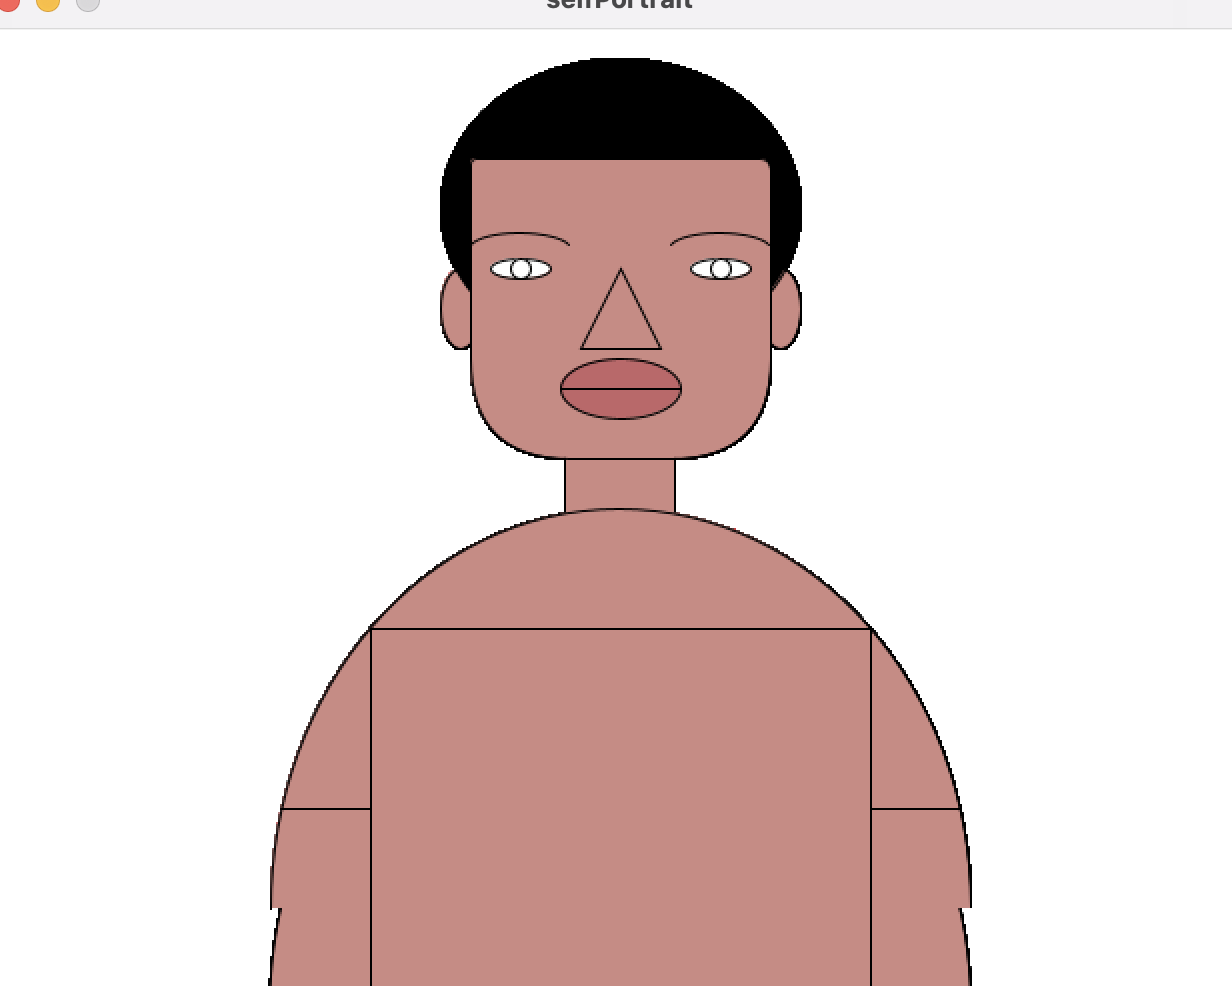
It was still a bit messy, but it had to do. Then I chose one of my favourite shades of aqua for the background and a shade of violet for the top because I’d like to think I’m wearing some NYU merch here, and after using varying strokeWeights for my “hipster” glasses I was done. This is the final code with some of the small details written in comments:

int faceHeight = 265;
int faceWidth = 175;
int eyeSpacing = 37;
int eyeWidth = 40;
int eyeHeight = 20;
int eyeOffset = 37;
int noseOffset = 30;
int noseHeight = 25;
int noseWidth = 20;
float earSpacing = 90.5;
int earHeight = 60;
int earWidth = 20;
int mouthOffset = 65;
int x, y;

void setup(){
  size(640, 480);
  x = width/2;
  y = height/2;
}

void draw(){
  background(148, 243, 252);
  
  //hair length
  fill(0);
  rectMode(CENTER);
  rect(x, y+noseHeight+40, 220, 350, 80);
  circle(x, y-eyeOffset, 220);
  
  //ears and earrings
  fill(245, 182, 133);
  ellipse(x-earSpacing, y-eyeOffset+25, earWidth, earHeight);
  ellipse(x+earSpacing, y-eyeOffset+25, earWidth, earHeight);
  fill(227, 238, 240);
  circle(x-earSpacing-2, y+5, 5);
  circle(x+earSpacing+2, y+5, 5);
  
  //t-shirt
  fill(71, 1, 147);
  ellipse(x, y*2+15, 300, 175);
  
  //neck
  fill(245, 182, 133);
  rectMode(CORNER);
  rect(x-noseWidth-15, y, noseWidth*2+30, 200, 0, 0, 70, 70);
  
  //head
  ellipse(x, y, faceWidth, faceHeight);
  strokeWeight(3); //for the moles to be visible
  point(x-noseWidth-5, y+15);
  point(x-50, y+40);
  strokeWeight(1);
 
  //hair parting
  fill(0);
  quad(x-1, y-faceHeight/2-16, x-1, y-faceHeight/2+25, x-faceWidth/2-10, y-eyeOffset, x-faceWidth/2-10, y-eyeOffset-35);
  quad(x+1, y-faceHeight/2-16, x+1, y-faceHeight/2+25, x+faceWidth/2+10, y-eyeOffset, x+faceWidth/2+10, y-eyeOffset-35);
  
  //eyebrows
  triangle(x-eyeSpacing+eyeWidth/2+4, y-(eyeOffset+3)-eyeHeight, x-eyeSpacing+eyeWidth/2+3, y-(eyeOffset+3)-eyeHeight/2-3, x-eyeSpacing-eyeWidth/2-3, y-(eyeOffset+3)-eyeHeight/2-8);
  triangle(x+eyeSpacing-eyeWidth/2-4, y-(eyeOffset+3)-eyeHeight, x+eyeSpacing-eyeWidth/2-3, y-(eyeOffset+3)-eyeHeight/2-3, x+eyeSpacing+eyeWidth/2+3, y-(eyeOffset+3)-eyeHeight/2-8);
  //discarded idea for the ends of the eyebrows
  //strokeWeight(2);
  //line(x-eyeSpacing-eyeWidth/2-3, y-eyeOffset-eyeHeight/2-8, x-eyeSpacing-eyeWidth/2-10, y-eyeOffset-2);
  //strokeWeight(1);
  triangle(x-eyeSpacing-eyeWidth/2-3, y-(eyeOffset+3)-eyeHeight/2-8, x-eyeSpacing-eyeWidth/2-10, y-(eyeOffset+3)-2, x-eyeSpacing-eyeWidth/2+2, y-(eyeOffset+3)-eyeHeight/2-8);
  triangle(x+eyeSpacing+eyeWidth/2+3, y-(eyeOffset+3)-eyeHeight/2-8, x+eyeSpacing+eyeWidth/2+10, y-(eyeOffset+3)-2, x+eyeSpacing+eyeWidth/2-2, y-(eyeOffset+3)-eyeHeight/2-8);
  
  //eyes
  fill(255);
  ellipse(x-eyeSpacing, y-eyeOffset, eyeWidth, eyeHeight);
  ellipse(x+eyeSpacing, y-eyeOffset, eyeWidth, eyeHeight);
  strokeWeight(3); //for the eyelashes
  arc(x-eyeSpacing, y-eyeOffset, eyeWidth, eyeHeight, PI, TWO_PI);
  arc(x+eyeSpacing, y-eyeOffset, eyeWidth, eyeHeight, PI, TWO_PI);
  strokeWeight(1);
  fill(49,0,7); //iris
  circle(x-eyeSpacing, y-eyeOffset, 20);
  circle(x+eyeSpacing, y-eyeOffset, 20);
  fill(0); //pupil
  circle(x-eyeSpacing, y-eyeOffset, 10);
  circle(x+eyeSpacing, y-eyeOffset, 10);
  fill(255); //highlights
  circle(x-eyeSpacing+3.5, y-eyeOffset-3, 5);
  circle(x+eyeSpacing+3.5, y-eyeOffset-3, 5);
 
  //nose
  //discarded original shape
  //triangle(x, y-noseOffset, x-(noseWidth/2), y+noseHeight, x+(noseWidth/2), y+noseHeight);
  line(x, y-noseOffset, x+(noseWidth/2), y+noseHeight);
  line(x-(noseWidth/2), y+noseHeight, x+(noseWidth/2), y+noseHeight);
  
  //glasses
  strokeWeight(3);
  stroke(103, 22, 22);
  //stroke(77, 224, 211); the colour of one of my old glasses
  line(x-noseWidth/2+1, y-eyeOffset-eyeHeight/2-2.5, x-noseWidth-eyeWidth-4, y-eyeOffset-eyeHeight/2-2.5);
  line(x+noseWidth/2-1, y-eyeOffset-eyeHeight/2-2.5, x+noseWidth+eyeWidth+4, y-eyeOffset-eyeHeight/2-2.5);
  line(x-noseWidth-eyeWidth-4, y-eyeOffset-eyeHeight/2-2.5, x-earSpacing+4, y-eyeOffset);
  line(x+noseWidth+eyeWidth+4, y-eyeOffset-eyeHeight/2-2.5, x+earSpacing-4, y-eyeOffset);
  fill(255, 60); //glass lenses, opacity adjusted
  arc(x-eyeSpacing, y-eyeOffset-10, eyeWidth+18, eyeWidth+35, 0, PI);
  arc(x+eyeSpacing, y-eyeOffset-10, eyeWidth+18, eyeWidth+35, 0, PI);
  noFill();
  arc(x, y-noseOffset-1, 17, 5, PI, TWO_PI);
  strokeWeight(1);
  stroke(0);
  
  //mouth
  fill(240, 90, 112);
  ellipse(x, y+mouthOffset+5, noseWidth*2+20, 15);
  noFill();
  arc(x, y+mouthOffset-5, noseWidth*2+40, 20, 0, PI);
}

I know a lot of stuff is hard-coded despite me using a lot of variables, but that’s just how it came down to in the end because of trial and error and I would like to change that in the future. This was plain drawing so I didn’t think of using methods for everything either, but maybe I should have.

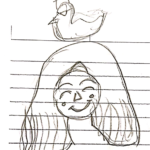
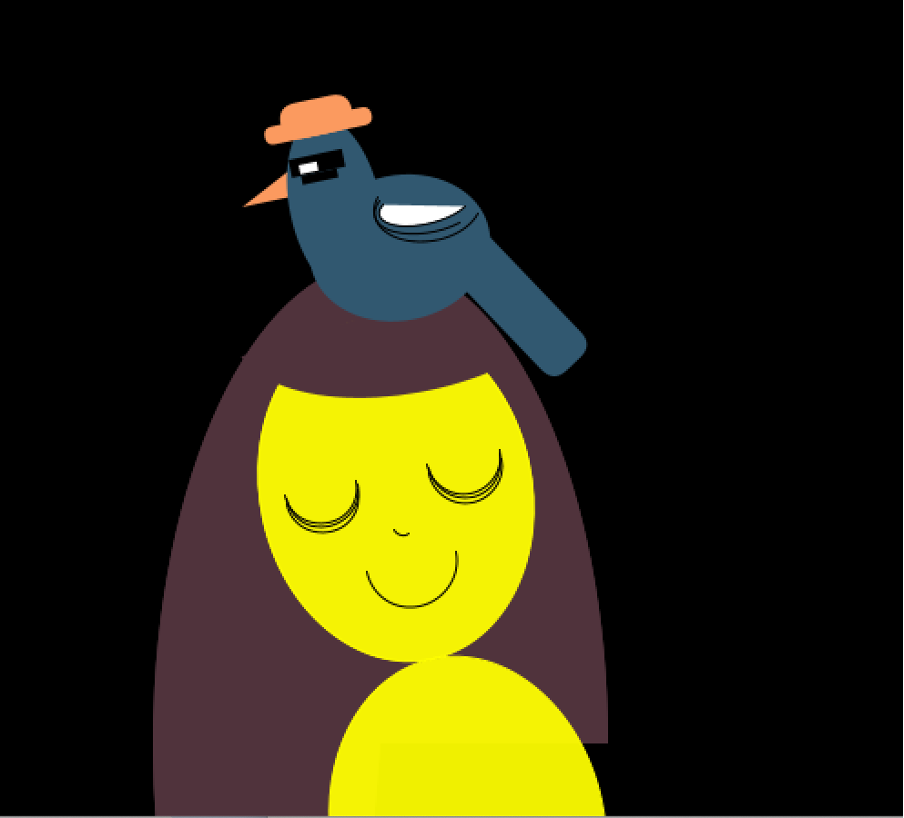
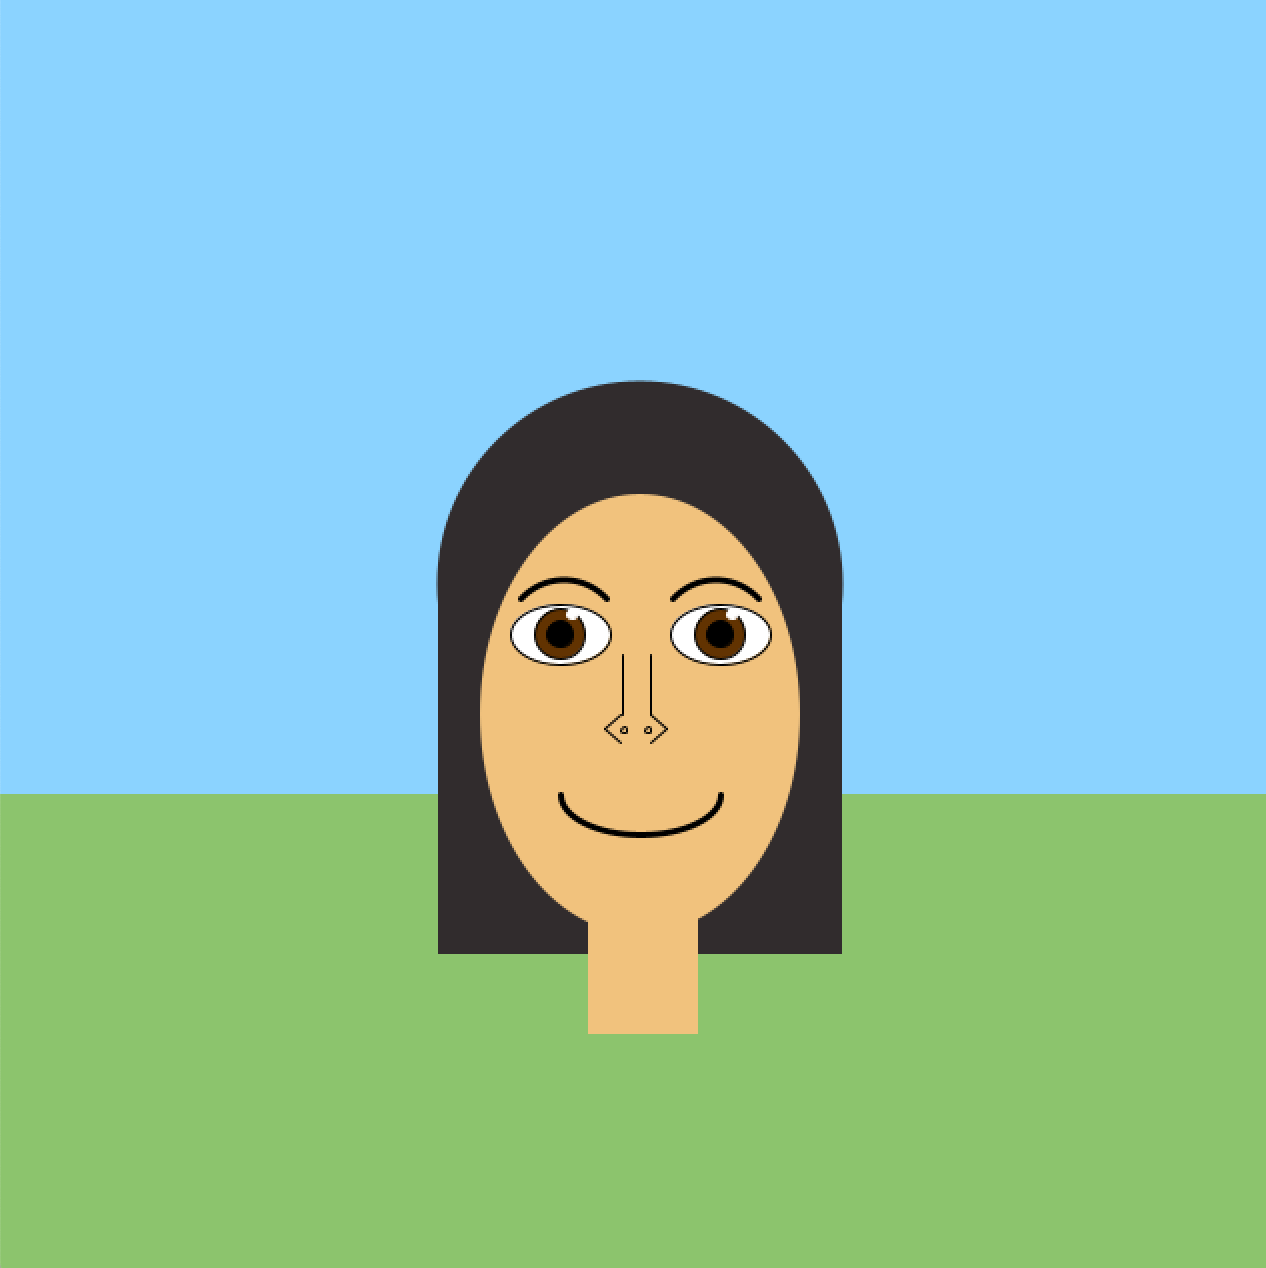
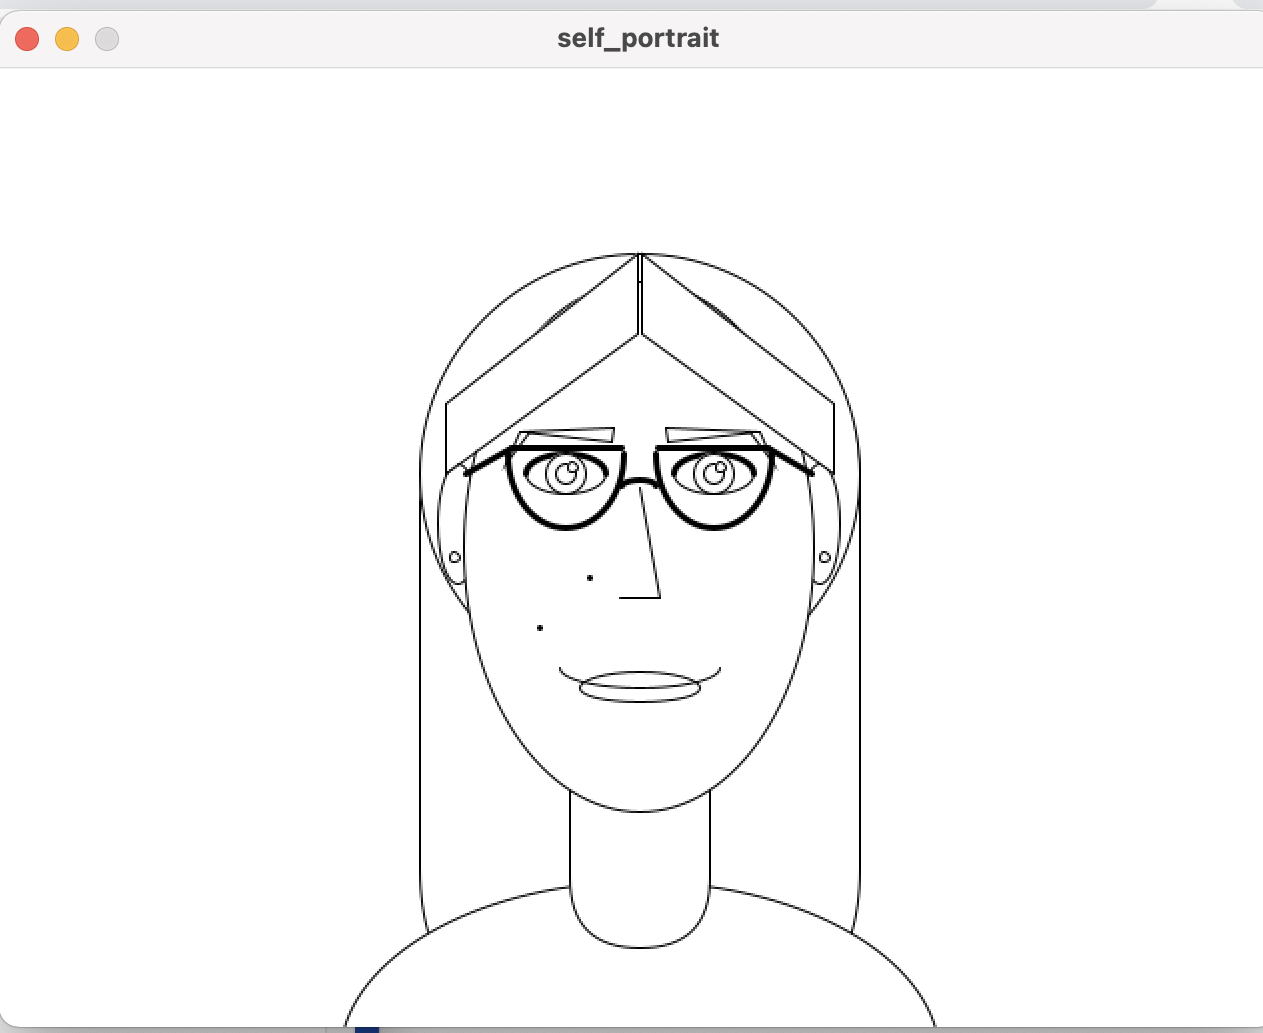
But voila! Here we have it, the results of this piece of code, a little bad in image quality:

It’s me! (sort of)

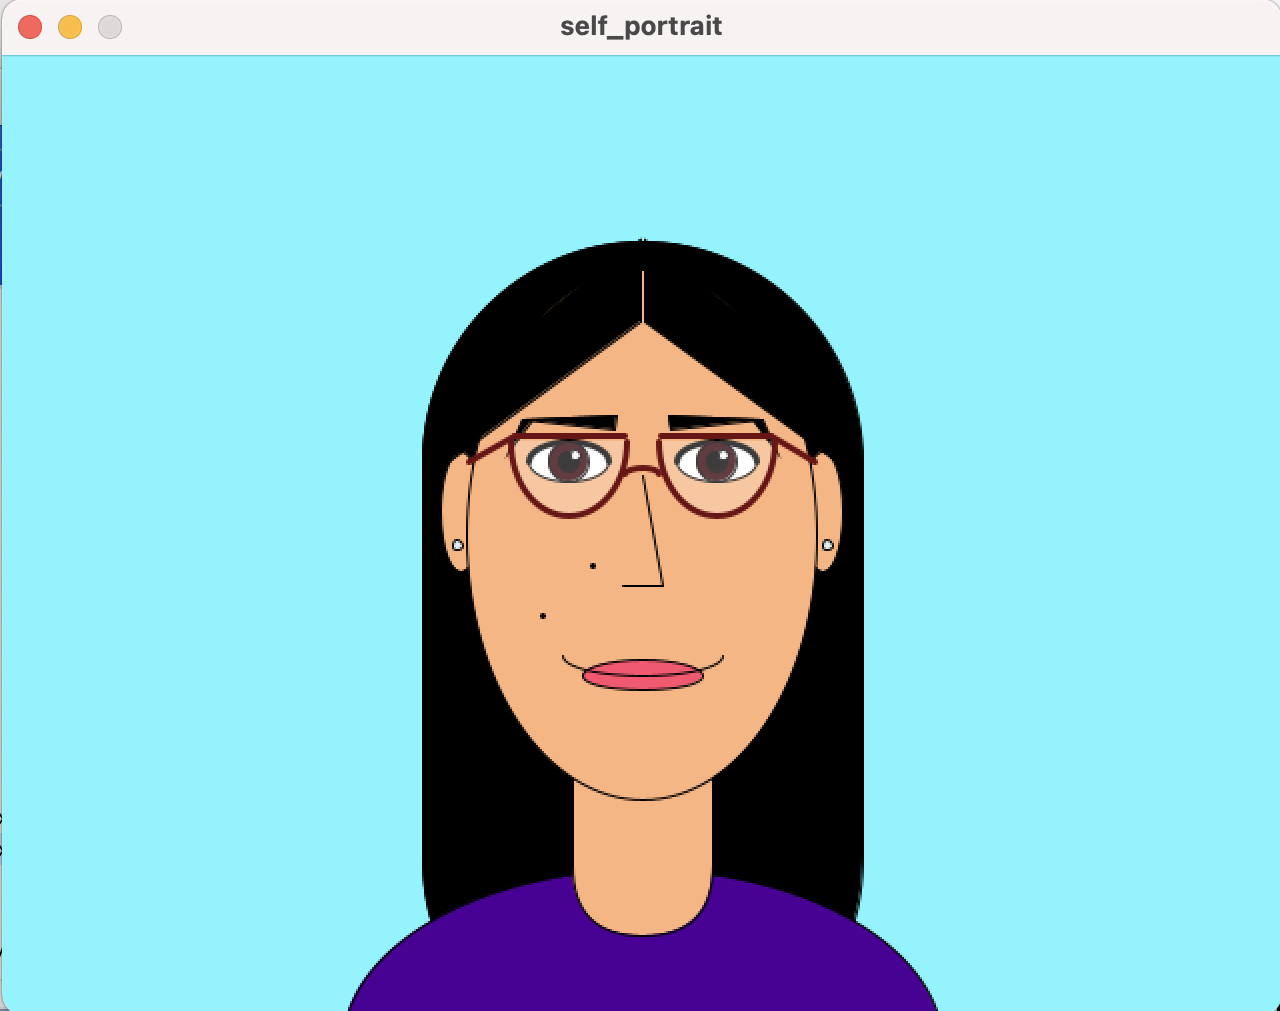
I know it ended up quite simplistic, but I’m content with the small details I worked on. It probably looks like a nicer version of me in real life. And hey, this is the most realistic photo you’re going to get from a photo averse person!

In conclusion, I am so so sorry for making this blog post the ramble it was, and will definitely try to keep it shorter and maybe more succinct in the future. I really don’t know what got into me when I started this. But, I’m looking forward to the future assignments, and hopefully I’ll have figured out how to make WordPress not reduce the quality of photos so much by next time.

For anyone who has made it till the end, I’ll now let y’all go from this post so that your brains can recover and start processing (ba dum tss, sorry I already had this planned when I was in the middle of writing the blog, I’ll actually go now, peace).

Week 1: Self Portrait – Fatema Nassar

Description:

I have used processing before, but the way I used it was very different. I found it really interesting to try to imagine processing as a canvas with dimensions. Sadly though, a canvas would be much easier to use, as u do not need to calculate the position of each small detail in a portrait, you kind of analyze it with your eye(a much quicker process).

Even though it was a boring process that took a long time, I do believe that in the end, I was able to figure out the pixel setup, and the speed of the process was multiplied.

process:

I started with the eyes, and it took me quite some time to figure out how to draw them. I did figure out in the end that drawing a normal eye, however, may not look as good. So, I decided to make it more like animation eyes to make it look more natural and less forced.

After I finished the eyes, I started working on the mouth. I think I felt like making a slanted mouth looked nicer than a classic mouth would’ve, so I went for it.


The hair was quite a struggle. I first tried using a random number generator to make circles that would imitate curly hair. However, sadly after hours of debugging, making the random circles not appear in a square frame took me much more time than I expected, so I decided to use a processing curve instead. The curve still took me some time to figure out, as I never used it on processing before, but when I finally finished the right hair side, I added the left, and the hair was perfect. I also added the back part of the hair separately, as when I decided not to make a neck, the darker part of the hair at the back made the hair look more realistic.

Finally, I put the background. I used purple translucent circles over one another to make the background. The circles, I believe, work well with the no-neck style of the portrait, and I decided to use the color purple for the NYUAD pride we all have :)).

code:

and here to my final code after all the comments and replaced little pieces were removed.

// Public variables
int dimWidth = 1200;
int dimHeight = 900;

int faceHeight = 675;
int faceWidth = 500;

void facee(){
  hairB();
  fill(#D0BEB4);
  noStroke();
  ellipse(dimWidth/2, dimHeight/2, faceWidth, faceHeight);//face
  fill(222,93,131, 20);
  noStroke();
  circle(dimWidth/2+faceWidth/4,dimHeight/2+faceHeight/5, 100);//blush
  circle(dimWidth/2-faceWidth/4,dimHeight/2+faceHeight/5, 100);//blush
  
  //eyes
  eye(dimHeight/2-20, dimWidth/2+75, true);
  strokeWeight(0.5)  ;
  eye(dimHeight/2-20, dimWidth/2-75, false);

  //nose
  stroke(#8A6856);
  bezier(dimWidth/2-3, dimHeight/2+faceHeight/6 +3,
          dimWidth/2, dimHeight/2+faceHeight/6,
          dimWidth/2, dimHeight/2+faceHeight/6,
          dimWidth/2+5, dimHeight/2+faceHeight/6 +5);
  
  noStroke();
  
  //hair
  hair();
  
  //mouth
  
  mouth(); 
}

void backGround(){
}

void eye(int centerY, int centerX, boolean flag){
  int eyeHeight = faceHeight/3;
  int eyeWidth = faceWidth/6;
  fill(230);
  stroke(0);
  strokeWeight(0.5);
  ellipse(centerX, centerY, eyeWidth,eyeHeight);
  
  noStroke();
  fill(164,204,206);
  ellipse(centerX+2, centerY+eyeHeight/4, eyeWidth/1.5, eyeHeight/2); //blue color
  fill(50  );
  ellipse(centerX+6, centerY+eyeHeight/2.8, eyeWidth/3, eyeHeight/4); //black color
  fill(255,150);
  ellipse(centerX-10, centerY+eyeHeight/4, eyeHeight/5, eyeWidth/4); //white color
  
  stroke(0);
  noFill();
  strokeWeight(1);
  bezier(centerX+eyeWidth/5,centerY+eyeHeight/2+2,
            centerX+1,centerY+eyeHeight/2,
            centerX-1,centerY+eyeHeight/2,
            centerX-eyeWidth/5,centerY+eyeHeight/2+2);
            
  if(flag){
    lashes(centerX, centerY-eyeHeight/2,
        centerX + eyeWidth/7, centerY- eyeHeight/2+ eyeHeight/30,
        centerX + eyeWidth/5, centerY- eyeHeight/2, 
        centerX + eyeWidth/3, centerY- eyeHeight/2- eyeHeight/10,
        1);
    brows(centerX+eyeWidth/2+10, centerY-eyeHeight/1.8,
          centerX+30, centerY-eyeHeight/1.6,
          centerX-10, centerY-eyeHeight/1.5,
          centerX-eyeWidth/2+20, centerY-eyeHeight/1.5);
  }
  else{
    lashes(centerX, centerY-eyeHeight/2,
        centerX - eyeWidth/7, centerY- eyeHeight/2+ eyeHeight/30,
        centerX - eyeWidth/5, centerY- eyeHeight/2, 
        centerX - eyeWidth/3, centerY- eyeHeight/2- eyeHeight/10,
        -1);
    brows(centerX-eyeWidth/2-10, centerY-eyeHeight/1.8,
          centerX-30, centerY-eyeHeight/1.6,
          centerX+10, centerY-eyeHeight/1.5,
          centerX+eyeWidth/2-20, centerY-eyeHeight/1.5);
  }
}

void hair(){
  fill(51,34,17); 
  beginShape();
  vertex(dimWidth/2, dimHeight/2-faceHeight/1.9);
  curveVertex(dimWidth/2, dimHeight/2-faceHeight/1.9);
  curveVertex(dimWidth/2+faceWidth/1.7, dimHeight/2-faceHeight/1.2);
  curveVertex(dimWidth/2+faceWidth/1.7, dimHeight/2+faceHeight/2.2);
  curveVertex(dimWidth/2+faceWidth/2, dimHeight/2+faceHeight/2);
  curveVertex(dimWidth/2+faceWidth/2, dimHeight/2+faceHeight/2);
  vertex(dimWidth/2+faceWidth/2, dimHeight/2+faceHeight/2);
  curveVertex(dimWidth/2+faceWidth/4, dimHeight/2+faceHeight/2);
  curveVertex(dimWidth/2+faceWidth/3, dimHeight/2+faceHeight/3);
  curveVertex(dimWidth/2+faceWidth/3, dimHeight/2-faceHeight/4);
  curveVertex(dimWidth/2, dimHeight/2-faceHeight/3);
  curveVertex(dimWidth/2, dimHeight/2-faceHeight/3);
  vertex(dimWidth/2, dimHeight/2-faceHeight/3);
  endShape();
  beginShape();
  vertex(dimWidth/2, dimHeight/2-faceHeight/1.9);
  curveVertex(dimWidth/2, dimHeight/2-faceHeight/1.9);
  curveVertex(dimWidth/2-faceWidth/1.7, dimHeight/2-faceHeight/1.2);
  curveVertex(dimWidth/2-faceWidth/1.7, dimHeight/2+faceHeight/2.2);
  curveVertex(dimWidth/2-faceWidth/2, dimHeight/2+faceHeight/2);
  curveVertex(dimWidth/2-faceWidth/2, dimHeight/2+faceHeight/2);
  vertex(dimWidth/2-faceWidth/2, dimHeight/2+faceHeight/2);
  curveVertex(dimWidth/2-faceWidth/4, dimHeight/2+faceHeight/2);
  curveVertex(dimWidth/2-faceWidth/3, dimHeight/2+faceHeight/3);
  curveVertex(dimWidth/2-faceWidth/3, dimHeight/2-faceHeight/4);
  curveVertex(dimWidth/2, dimHeight/2-faceHeight/3);
  curveVertex(dimWidth/2, dimHeight/2-faceHeight/3);
  vertex(dimWidth/2, dimHeight/2-faceHeight/3);
  endShape();
}

void hairB(){
  fill(41,24,7);
  beginShape();
  vertex(dimWidth/2-faceWidth/2,dimHeight/2);
  vertex(dimWidth/2+faceWidth/2,dimHeight/2);
  vertex(dimWidth/2+faceWidth/2,dimHeight/2+faceHeight/2);
  curveVertex(dimWidth/2+faceWidth/2,dimHeight/2+faceHeight/2);
  curveVertex(dimWidth/2-faceWidth/2,dimHeight/2+faceHeight/2);
  vertex(dimWidth/2-faceWidth/2,dimHeight/2+faceHeight/2);
  endShape();
}

void lashes(int x1, int y1, int x2, int y2, int x11, int y11, int x12, int y12, int flag){
  bezier(x1,y1, x2,y2, x11,y11, x12,y12);
  bezier(x1+10*flag,y1+3, x2+10*flag,y2+3, x11+10*flag,y11+3, x12+10*flag,y12+3);
  bezier(x1+20*flag,y1+13, x2+20*flag,y2+13, x11+20*flag,y11+13, x12+20*flag,y12+13);
}

void brows(float x1, float y1, float x2, float y2, float x11, float y11, float x12, float y12){
  strokeWeight(4);
  bezier(x1,y1, x2,y2, x11,y11, x12,y12);
}

void mouth(){
  stroke(#A74242);
  strokeWeight(2);  
  fill(#A74242);
  bezier(dimWidth/2-faceWidth/6,dimHeight/2+faceHeight/3,
          dimWidth/2-5,dimHeight/2+faceHeight/2.5,
          dimWidth/2+5,dimHeight/2+faceHeight/2.5,
          dimWidth/2+faceWidth/5,dimHeight/2+faceHeight/3.5);
  noFill();
  bezier(dimWidth/2-faceWidth/6,dimHeight/2+faceHeight/3 -5,
          dimWidth/2-faceWidth/6,dimHeight/2+faceHeight/3,
          dimWidth/2-faceWidth/6,dimHeight/2+faceHeight/3,
          dimWidth/2-faceWidth/6-5,dimHeight/2+faceHeight/3 +5);

  bezier(dimWidth/2+faceWidth/5,dimHeight/2+faceHeight/3.5-5,
          dimWidth/2+faceWidth/5,dimHeight/2+faceHeight/3.5,
          dimWidth/2+faceWidth/5,dimHeight/2+faceHeight/3.5,
          dimWidth/2+faceWidth/5+5,dimHeight/2+faceHeight/3.5+5);
}


void setup(){
  size(1200,900);
  background(255);
  noLoop();
}

void draw(){
  //background
  int dim = dimWidth/4;
  fill(89,46,131,100);
  noStroke();
  for(int i=0; i<5; i++){
    circle(dimWidth/2, dimHeight/2, dim);
    dim+= dimWidth/4;
  }

  facee();
}


Week 1 Self Portrait – Rhythm Kukreja

Description of the Assignment: 

We were asked to create a self-portrait using simple drawing functions taught in class. I used circle, ellipse, rectangle, arc, and triangle to do the same.

Process:

I started this assignment by designing a rough sketch in my notebook. Later on, I figured out the shapes I could use to replicate the notebook sketch virtually.

First, I started by setting the dimensions of the screen and the background color. I chose a mixture of Teal colors. After that, I added the face and ears. I used an ellipse for the face and arcs for the ears.

Then I added a neck, shoulders, and a sun. I used rectangles for both neck and shoulders and a circle for the sun.

After that, I added the eyes, iris, and pupils. I used ellipses for the eyes and circles for the irises and pupils.

Coming onto the challenging part, I had to design my porcupine hairstyle. I had to use multiple triangles at different coordinates which took a really long time. But, the result was pretty cool. I also had to design a nose for which I used three lines at different coordinates.

Finally, I added a smile using an arc and a mole using a circle.

This was the final result. Conclusively, the assignment was really fun.

CODE:

int centerX;
int centerY;

void setup () {
    //size of the viewer 
    size(640, 480);
    background(0, 128, 139);
    centerX = width/2;
    centerY = height/2;
};

void draw() {
 
    //ears
    fill(255, 219, 172);
    stroke(128,128,128);
    arc(220,230, 80, 90, HALF_PI, PI+ HALF_PI);
    arc(425,230, 80, 90,PI+HALF_PI, TWO_PI+HALF_PI );
    
    
    //face
    fill(255, 219, 172);
    stroke(128,128,128);
    ellipse(width/2, height/2, 250, 350);
    
    //sun
    fill(255,215,0);
    circle(70, 90, 100);
    
    //neck and body
    stroke(255, 219, 172);
    fill(255, 219, 172);
    rect((centerY)+30, (centerX)+40, 100, 100);
    rect((centerY)-90, 460, (centerX)+20, 20);
    
    //eyes
    fill(255, 255, 255);
    stroke(128,128,128);
    ellipse((centerY)+10, height/2.75, 50, 30);
    ellipse((centerX)+45, height/2.75, 50, 30);
    
    //iris
    fill(160,82,45);
    circle((centerX)+45, height/2.75, 30);
    circle((centerY)+10, height/2.75, 30);
    
    //pupil
    fill(0,0,0);
    circle((centerX)+45, height/2.75, 10);
    circle((centerY)+10, height/2.75, 10);
    
    //nose
    fill(255, 219, 172);
    line((centerY)+55, centerY-20, centerY+50, (centerY)+30);
    line((centerY)+50, (centerY)+30, centerX-10, centerY+40);
    line(centerX, (centerY)+30, centerX-10, centerY+40);
    
    
    //hair texture
    stroke(90, 56, 37);
    fill(90, 56, 37);
     
    triangle((centerY)+30, 100, (centerX)+30, 50, (centerX)+90,  (centerY)-120);
    triangle((centerY)+30, 100, (centerX)+30, 50, (centerX)+70,  (centerY)-120);
    triangle((centerY)+10, 100, (centerX)+10, 50, (centerX)+60,  (centerY)-120);
    triangle((centerY)-20, 100, (centerX)-10, 50, (centerX)+30,  (centerY)-120);
    triangle((centerY)-20, 130, (centerX)-10, 50, (centerX)+40,  (centerY)-120);
    triangle((centerY)-40, 110, (centerX)-10, 50, (centerX)+30,  (centerY)-115);
    
    triangle((centerY)-30, 120, 310, 50, 320, 120);
    triangle((centerY)-30, 110, 310, 60, 350, 120);
    
    triangle(centerX, 180, (centerX)+60, 70, (centerX)+100,  (centerY)-120);
    triangle((centerX)-20, 170, (centerX)+60, 70, (centerX)+100,  (centerY)-120);
    triangle((centerY)+20, 170, (centerX)+60, 70, (centerX)+100,  (centerY)-120);
    triangle((centerY)+10, 160, (centerX)+60, 70, (centerX)+100,  (centerY)-120);
    triangle((centerY)+10, 150, (centerX)+60, 70, (centerX)+100,  (centerY)-120);
    triangle((centerX)+140, 250, (centerX)+60, 135, (centerX)+100, (centerY)-120);
    triangle((centerX)+140, 250, (centerX)+60, 120, (centerX)+100, (centerY)-120);
    triangle((centerX)+100, 250, (centerX)+60, 120, (centerX)+100, (centerY)-120);
    triangle((centerX)+160, 250, (centerX)+60, 120, (centerX)+100, (centerY)-120); 
    

    //smile
    fill(233,150,122);
    stroke(233,150,122);
    arc((centerX)-10, centerX, 80, 70, 0, PI);
    
    //mole
    fill(0,0,0);
    circle(centerX+10, centerY+140, 5);
};


Week: 1 Self Portrait – Shanaia Paruthi

Description of the Assignment: 

We were asked to create a self-portrait using simple drawing functions taught in class. I used ellipse, circle, rectangle, arc and triangle to do the same.

Process:

I started this assignment with a rough sketch in my notebook where I determined which shapes to use and what to use them for. Furthermore, I also looked into the colour scheme, and what will bring out my sketch even more.

Please click the link to see  the  sketchStarting sketch

I started by painting the background with a violet shade, then went on to use the ellipse for the face. Since I love wearing caps, I made my sketch wear a cute cap using arc for the head and the ellipse as a visor/bill.

Then I continued to make the hair using the rectangle function. The rectangle function was also used to make the neck and the arc was used to give the shirt a neckline.

Then came the torso, which I again used the rectangle function for. Intially I thought of using the triangle function to give the shirt sleeves, but I believe the arc function fits it better so I went along with the arc function. Once again, I used the rectangle function to give the shape of hands/arms to the figure.

Now for the challenging part of the sketch, I had to draw the features of the sketch. I used the ellipse for the eyes and circle for its pupils. Comparing the dimensions set for the eyes, I used the arc function to make the eyebrows and eyelashes. I made the nose using triangle function.  For the lips, I used two arc functions for upper lips and one arc function for lower lip. I also used the arc function to create ears for my figure. Finally, for the finishing touch I gave the self-portrait a mole similar to mine.

Overall,  this was extremely fun and rewarding!

CODE:

int centerX;
int centerY;

//size of viewer
void setup(){
  size(640,480);
  background(206,72,237);
  centerX = width/2;
  centerY = height/2;
};

void draw(){ 
  //hair 
  fill(113, 73, 19);
  rect((centerX)-110, (centerY)-60, 210, 250); 

  //hands
  stroke(0);
  fill(240, 184, 111);
  rect((centerX)-75, (centerY)+170, 20, 90);
  rect((centerX)+55, (centerY)+170, 20, 90);
  
  
  //body
  stroke(29, 59, 222);
  fill(29, 59, 222);
  rect((centerX)-50, (centerY)+150, 100, 130); //torso
  arc((centerX)-55, (centerY)+175, 50, 50, radians(180), radians(360));// sleeves
  arc((centerX)+55, (centerY)+175, 50, 50, radians(180), radians(360));//sleeves
  
  //neck
  stroke(0);
  fill(240, 184, 111);
  rect((centerX)-18, (centerY)+100, 30, 50);
  arc((centerX)-3, (centerY)+150, 30, 30, radians(360), radians(540));
  
  
  //face
  ellipse(centerX, centerY, 180, 220);
  
  //nose
  triangle((centerX), centerY, (centerX)+5, (centerY)+20, (centerX)-5, (centerY)+20);
  
  //cap
  stroke(29, 59, 222);
  fill(29, 59, 222);
  arc((centerX), (centerY)-60, 230, 150, radians(180), radians(360));
  noStroke();
  ellipse((centerX)+80, (centerY)-80, 150, 50);
  
  //eyes
  stroke(255);
  fill(255);
  ellipse((centerX)+45, (centerY)-20, 35, 10); 
  ellipse((centerX)-45, (centerY)-20, 35, 10);
  stroke(0);
  fill(0);
  circle((centerX)+45, (centerY)-20, 10);//pupil
  circle((centerX)-45, (centerY)-20, 10);//pupil
  
  //eyebrows
  arc((centerX)+45, (centerY)-40, 35, 10, radians(180), radians(360));
  arc((centerX)-45, (centerY)-40, 35, 10, radians(180), radians(360));
  
  //eyelashes
  arc((centerX)+45, (centerY)-25, 40,7, radians(135), radians(360));
  arc((centerX)-45, (centerY)-25, 40,7, radians(180), radians(405));
  
  
  //lips
  fill(255, 0, 0);
  stroke(229, 12, 66);
  arc((centerX)-10, (centerY)+65, 25,15, radians(180),radians(360));
  arc((centerX)+10,(centerY)+65,25,15,radians(180),radians(360));
  arc((centerX), (centerY)+66, 50, 30, radians(0), radians(180));
  
  //mole
  stroke(0);
  fill(0);
  circle((centerX)-20, (centerY)+40, 3);
  
  //ears
  fill(240, 184, 111);
  arc((centerX)-88, (centerY), 20, 40, radians(90), radians(270));
  arc((centerX)+88, (centerY), 20, 40, radians(270), radians(450));
};


Self Portrait: I’m a Hat

For the first week of class, our assignment was to create a self-portrait with the aim of getting comfortable with coding on Processing. I was very excited about the assignment and had very elaborate ideas for my sketch. But as I started getting more familiar with the functions available on Processing, my initial sketch evolved a lot. Regardless of the changes, I had some core elements I wanted in my portrait which I was able to have in the final sketch! Here’s a quick screenshot of the final animation of my portrait:


Inspiration –  Core Elements I wanted:

I wanted a black background with neon-ish colors for my portrait and I wanted some movement on my face. After some thinking, I also decided on having a pigeon with sunglasses and a hat in my drawing because I’ve always loved pigeons and their behavior around humans and also, one of my favorite comic strips is from Jimmy Craig featuring a pigeon in a hat from the ‘they can talk comics’ and I’ve always had some strange love for it. Here’s the comic:

So, I decided to incorporate that into my portrait. In the end, these were the things I wanted to achieve:

      1. My smiling face (perhaps moving)
      2. Pigeon with a hat
      3. Black background with bright color settings

Process:

Here were the initial sketches, as you’ll notice, I was pretty ambitious with the hair waves but in the end, I decided to work on achieving the elements I wanted in the portrait than focussing on the nitty-gritty details, my aim was to achieve the essence of what I had pictured in my portrait:


I simplified the rough sketches into concrete shapes that can be achieved on Processing using functions like circle(), ellipse(),arc(),rect(),etc. The approach I took to achieve abstract shapes was layering. Out of all the functions, I found the arc() function very hard to understand but after experimenting with it, I became much more comfortable with it. I also wanted my body to be angled as if I’m leaning sideways and I was able to achieve that with the rotate() function. 

For the bird, I used a bunch of ellipses and a rectangle for the tail. For the beak, I used a triangle. The hat was made with two rectangles and I used the fifth parameter to have more rounded edges. For the wings, I used a mix of shapes using arc().  I was very particular about the sunglasses of the pigeon, I wanted the sunglasses that are usually featured in memes (the pixellated version). So, I took some time to look at them and made a tinier version for my pigeon using rectangles. 

This was how the portrait looked after I made the pigeon and me. I had a scare in between because I forgot to remove a fill() function with red for my eyes and mouth, and I had a scary version of me on screen chilling with a pigeon. 

Then, I added in some color on my body and I added in some hands using lines and ellipses. Finally, I decided to add in movement, to have the pigeon move its head and me moving in sync with it. I also wanted something trippy in the background, but soon realized that that would mean I’d have so many conflicting elements that are moving taking attention away from the pigeon and me. So, I decided to tone it down by just having circles in the background with changing colors which also changed in sync with the pigeon’s movement. I achieved the movement by using variables bird_shake and shake and bird_shake would have the values of either 0 or 1, they would alternate after each iteration using the following statement:

bird_shake = 1 - bird_shake;

shake was the variable I used as an offset to move my body in the portrait. 

Final Output:

Here’s the final output of my portrait:

Here’s the code:

void setup() {
  background(0);
  size(640, 480);
  frameRate(5);
}

int bird_shake = 0;


void draw() {
  int shake = bird_shake*5;
  bg();
  face(shake);
  features(shake);
  bird(shake);
  bird_shake = 1 - bird_shake;
}

void bg(){
  background(0);

  if (bird_shake==0){
    fill(255, 200, 95);
  }
  else{
    fill(251, 154, 95);
  }

//circle bg
  circle(120,320,100);
  circle(200,400,190);
  circle(0,20,170);
  circle(80,500,80);
  circle(300,30,30);
  circle(550,250,250);
  circle(340,370,20);
  circle(500,60,100);
  circle(500,400,100);
  circle(200,200,100);
  circle(80,180,100);
  
}

void face(int shake)
{
  int x = width/2;
  int y = height/2;
  
  fill(80, 51, 60);
  

  //hair
  arc(x-60+shake, y+200, 250, 530, radians(100), radians(360));
  stroke(255, 0, 0);
  fill(255, 255, 0, 240);
  
  
  //face
  stroke(255, 255, 0);
  rotate(-PI/15);
  ellipse(200+shake, 350, 150, 190);
  
  //body
  stroke(0);
  fill(24, 0, 255, 240);
  ellipse(200+shake, 540, 150, 190);
  rotate(0);
}


void features(int shake) {
  noFill();
  stroke(0);
  
  //eyes
  arc(160+shake, 340, 40, 40, radians(0), radians(180));
  arc(160+shake, 345, 40, 40, radians(0), radians(180));
  arc(160+shake, 342, 40, 40, radians(0), radians(180));
  arc(240+shake, 340, 40, 40, radians(0), radians(180));
  arc(240+shake, 342, 40, 40, radians(0), radians(180));
  arc(240+shake, 345, 40, 40, radians(0), radians(180));

  //mouth
  arc(200+shake, 390, 50, 50, radians(0), radians(180));
  //nose
  arc(200+shake, 370, 10, 10, radians(60), radians(170));
  noStroke();
  
  //bangs
  fill(80, 51, 60);
  arc(230+shake*1.2, 250, 200, 100, radians(70), radians(167));
    
  //dancing hands
  fill(255, 255, 0, 240);
  stroke(255, 255, 0, 240);
  line(270+shake, 530, 400, 400);
  ellipse(400+shake, 400, 40, 10);
  line(140+shake,530,60,400);
  ellipse(50+shake,400,40,10);
  
  noFill();
  noStroke();
}


void bird(int shake) {
 
  //beak
  fill(251, 154, 95);
  triangle(150+8*bird_shake, 180, 200+10*bird_shake, 160, 200, 180);
  
  //head
  fill(49, 88, 112);
  ellipse(200+shake, 190, 50, 100);
   
  //sunglasses
  fill(0);
  rect(180+shake, 160, 30, 10);
  rect(185+shake, 170, 20, 5);
  
  //reflections
  fill(255, 255, 255);
  rect(185+shake, 164, 10, 5);
  
  //hat
  fill(251, 154, 95);
  rect(180+shake, 130, 40, 20, 30);
  rect(190+shake, 140, 40, 10, 40);
  rect(170+shake, 140, 40, 10, 40);
  
  //body
  fill(49, 88, 112);
  ellipse(230+shake, 220, 100, 80);

  //tail
  rotate(45);
  rect(290+shake, -120, 130, 30, 10);
  rotate(-45);
  
  //wing
  noFill();
  stroke(0);
  arc(250+shake, 200, 60, 40, radians(30), radians(210));
  arc(250+shake, 200, 60, 30, radians(60), radians(210));
  fill(255, 255, 255);
  arc(248+shake, 200, 50, 20, radians(30), radians(210));
  noStroke();

}


Leo Shirky Self Portrait

Background

I spent a few minutes thinking about what the major features of my face were, and would therefore be important to preserve in the self-portrait. I ended up deciding to have my nose, my ears, my earrings, and my excuse for facial hair. I wanted to have my hair as well, although that ended up being difficult for me to figure out.

Process

I started with the face, going for a narrow-ish ellipse, as my face is quite narrow. I added the eyes next, with two more ellipses and circles. I made a float for eyeSpacing = 50, and used this as my standard unit that every other distance was based on.

The nose went next, and as I have quite a prominent nose, I tried to capture that in the self-portrait. Once I had the eyes and nose in a place I was happy with, I moved onto the rest of the face. The mouth, ears, and earrings were all ellipses, and not too difficult to add in.

I had no idea how to do hair, so I took the easy route and made me wear a hat instead. Below is the code for the hat, along with the NYU logo (violet pride!). I used an arc for the U in the NYU logo, and once I figured out how to use the arc in Processing, I moved onto the beard and mustache, both of which were arcs as well.

Challenges

As mentioned above, the hair was difficult and so I stuck with using a hat. Other than that, I felt that the creation and placement of each of the shapes was relatively easy once I had the process down.

Final

float circleSize = 300;
float eyeSize = 50;

int x, y;
x = width/2;
y = height/2;
float eyeSpacing = 50;
size(480, 480);

//ears
stroke(0);
fill(187, 109, 74);
ellipse(x - eyeSpacing * 2.5, y + eyeSize/4, eyeSize, eyeSize * 2);
ellipse(x + eyeSpacing * 2.5, y + eyeSize/4, eyeSize, eyeSize * 2);

//earrings
stroke(0);
fill(128, 128, 128);
circle(x - eyeSpacing *2.5, y + eyeSize, eyeSize/4);
circle(x + eyeSpacing *2.5, y + eyeSize, eyeSize/4);

//face
stroke(0);
fill(204, 132, 67);
ellipse(x, y, circleSize/1.3, circleSize);

//eyeballs
stroke(0);
fill(255);
ellipse(x - eyeSpacing, y - eyeSpacing/2, eyeSize, eyeSize/2);
ellipse(x + eyeSpacing, y - eyeSpacing/2, eyeSize, eyeSize/2);

//irises
stroke(0);
fill(50, 25, 10);
ellipse(x - eyeSpacing, y - eyeSpacing/2, eyeSize/3, eyeSize/3);
ellipse(x + eyeSpacing, y - eyeSpacing/2, eyeSize/3, eyeSize/3);

//nose
stroke(0);
fill(190, 114, 60);
triangle(x - eyeSpacing/10, y - 25, x - eyeSpacing/10, y + eyeSpacing, x + eyeSpacing/2, y + eyeSpacing);

//mouth
stroke(0);
fill(199, 122, 88);
arc(x, y + eyeSpacing * 1.6, 80, 15, 0, PI, CHORD);
arc(x, y + eyeSpacing * 1.6, 80, 15, PI, TWO_PI);

//beard
stroke(0, 0, 0, 185);
noFill();
strokeWeight(8);
arc(x, y + eyeSpacing/1.2, eyeSpacing * 4.25, eyeSpacing * 4.25, 0, PI, OPEN);

//moustache
stroke(0, 0, 0, 185);
noFill();
strokeWeight(6);
arc(x, y + eyeSpacing * 2.25, eyeSpacing * 3, eyeSpacing * 2, PI, TWO_PI);

//goatee
stroke(0, 0, 0, 185);
line(x, y + eyeSpacing * 1.9, x, y + eyeSpacing * 2.3);

//hat
stroke(0);
strokeWeight(1);
fill(87, 6, 140);
arc(x, y - eyeSpacing, 225, 200, PI, TWO_PI);

//hat logo
stroke(255);
strokeWeight(8);

//N
line(x - eyeSpacing, y - eyeSpacing * 1.2, x - eyeSpacing, y - eyeSpacing * 2);
line(x - eyeSpacing, y - eyeSpacing * 2, x - eyeSpacing/2, y - eyeSpacing * 1.2);
line(x - eyeSpacing/2, y - eyeSpacing * 1.2, x - eyeSpacing/2, y - eyeSpacing * 2);

//Y
line(x, y - eyeSpacing * 1.2, x, y - eyeSpacing * 1.5);
line(x - eyeSpacing/3, y - eyeSpacing * 2, x, y - eyeSpacing * 1.5);
line(x + eyeSpacing/3, y - eyeSpacing * 2, x, y - eyeSpacing * 1.5);

//U
noFill();
arc(x + eyeSpacing * 0.9, y - eyeSpacing * 2, eyeSpacing * 0.8, eyeSpacing * 1.5, 0, PI, OPEN);


Ingy El Sheikh- Self Portrait Assignment 1

Ingy’s Self Portrait

This being my first every coding experience, I am very happy with my results and had so much fun doing this assignment. After years of doing classes where I don’t get to see my learning progress visually and feel the reward of working, I am so glad I decided to take this step towards IM even though I was skeptical at first.

I started out this assignment not knowing where to start at all, but after a few hours of research and watching youtube videos and looking at examples I was able to see the vision I had in mind.

Background:

I started off wanting to do a dynamic background but I wasn’t very successful (my next goal for sure), so I decided to resort to an outdoors background using rectangles shapes and a circle for the sun. And I used the color selector to set the colors.

Hair, Neck and Face:

Drawing my hair took me some time, because I wanted to perfect the placement of the circle and rectangle that I used to create my hair. For the neck I used the rectangle and also took some time to perfect the placement of the neck in regards to the hair. For the face I used the ellipse and used the color selector to find the best matching skin tone.

Eyes:

They eyes for me were the most time consuming part. I wanted tot draw a very detailed eye with the sclera , iris , pupil and reflection spot. I used circles for all of them but had to take some time to figure out the placement.

This was the portrayed before incorporating the further details of the eye.

And after some work this is how it looked.

This is where I really started seeing the portrait coming to life.

Nose , Mouth and Eyebrows:

At the beginning I was just going to do two circles for the nose but I decided to challenge myself and I wanted to try something different and a little bit more realistic. So using a lot of lines I created the sides of the nose and used two small circles as well inside. And for the mouth and eyebrows I used the Arc.

Shirt:

For the shirt I simply used the rectangle and colored it purple for NYUAD!

Final Product:

// Ingy El Sheikh self portrait 


int x, y;

void setup(){
 size(640,640);
 x = width/2;
 y = height/2;

 background(140, 196, 109);
}//end of setup

//Lets draw an outdoors Background! Green grass and blue sky
void draw(){
   fill(139,211,255);
  noStroke();
  rect(0, 0, 640, 400);
  
  stroke(238,255,8);
  fill(238,255,8);
 ellipse(70, 70, 100, 100);
 
 // Drawing my hair 
 noStroke();
fill(49,44,45);
rect(x-101, y-20, 202, 180);
circle(x,y-25,203);

  //Lets draw my neck
noStroke(); 
fill(241, 194, 125);
rect(x-26, y+140, 55, 60);


//Drawing my face

fill(241, 194, 125);
noStroke();
ellipse (x, y+40, 160,220 );

//Lets Draw my eyes
//Sclera(white part)
 strokeWeight(1);
 stroke(0);
  fill(255);
  ellipse(x-40, y, 50, 30);
  ellipse(x+40, y, 50, 30);


//Iris(brown part)

stroke(0);
fill(98,51,1);
  circle(x-40, y, 25);
  circle(x+40, y, 25);
  
//Pupil
stroke(0);
fill(0);
  circle(x-40, y, 13);
  circle(x+40, y,13);
  
//white reflection spot

stroke(255);
fill(255);
  circle(x-34, y-10, 5);
  circle(x+46, y-10, 5);
  
//lets draw my nose!


  stroke(0);
  noFill();


line(x +5, y+10, x + 5, y+ 40);
line(x -9, y+10, x - 9, y+ 40);


line(x + 5, y + 40, x + 13, y + 47);
line(x + 13, y + 47, x + 5, y + 54);
line(x - 18, y + 47, x - 10, y + 54);
line(x - 10, y + 40, x - 18, y + 47);
 
strokeWeight(1);
 circle(x+4, y+48, 3);
 circle(x-8, y+48, 3);

//Eyebrows time!

strokeWeight(3);
arc(x - 38, y+5 , 60, 65, PI+QUARTER_PI, PI+HALF_PI+QUARTER_PI);

arc(x + 38, y+5 , 60, 65, PI+QUARTER_PI, PI+HALF_PI+QUARTER_PI);


//Mouth

noFill();

arc(x, y+80, 80, 40, 0, PI);

//Body and shirt
stroke(0);
fill(191,17,240);
rect(x-125,y+180,250, 200);

}


Week 1: Self-Portrait

This is my submission for the first week’s task. I decided to replicate a sketch since I wasn’t sure how to design a distinctive self-portrait.

Inspiration:

The character depicted in my submission is inspired by a sketch I drew a few months ago:The most significant change I made compared to this sketch is the hat I added mainly because hair design was difficult/ineffective. The character is named “Sketch Dude”, and he hates it when people invade his private Zoom box space.

Code:

I used a variety of shapes to design this character. I used lines, ellipses, arcs, bezier curves, and a rectangle. I hardcoded most of the design since my design is not symmetrical and keeping track of the variables would be difficult. However, I used global variables to design the interactive part of the program. I wrote three methods/functions to define the interactive parts of the program (Zoom box, eyes, mouth). Whenever the pointer goes into the Zoom box, the character becomes mad. As the pointer moves out of the Zoom box, the character becomes less mad and returns to his normal state. Following are sample pictures, a video, and the code of the project:

int zoomBoxWidth, zoomBoxHeight, nameTagW, nameTagH, eyeSize, eyeSizeMin, eyeSizeMax;

boolean isInBox() {
  if (mouseX >= width/2 - zoomBoxWidth/2 && mouseX <= width/2 + zoomBoxWidth/2 && mouseY >= height/2 - zoomBoxHeight/2 && mouseY <= height/2 + zoomBoxHeight/2) {
    return true;
  } else {
    return false;
  }
}

void eyes() {
  rotate(2*PI - 0.22);
  noStroke();
  if (isInBox() && eyeSize <= eyeSizeMax) {
    eyeSize++;
  } else if (!isInBox() && eyeSize >= eyeSizeMin) {
    eyeSize--;
  }
  if (eyeSize > eyeSizeMin) {
    fill(255, 0, 0);
  } else {
    fill(0);
  }
  circle(width/2 - 55, height/2 - 41, eyeSize);
  circle(width/2 - 2, height/2 - 42, eyeSize);
}

void mouth() {
  noFill();
  stroke(0);
  strokeWeight(5);
  if (isInBox()) {
    strokeJoin(MITER);
    beginShape();
    vertex(267, 264);
    vertex(282, 246);
    vertex(302, 260);
    endShape();
  } else {
    line(266, 257, 305, 253);
  }
}

void setup(){
  size(640, 480);
  zoomBoxWidth = 440;
  zoomBoxHeight = 330;
  nameTagW = 90;
  nameTagH = 20;
  eyeSizeMin = 13;
  eyeSizeMax = 33;
  eyeSize = eyeSizeMin;
}

void draw(){
  background(150);
  
  //zoom box
  noStroke();
  fill(0, 50);
  rect(width/2 - zoomBoxWidth/2, height/2 - zoomBoxHeight/2, zoomBoxWidth, zoomBoxHeight);
  fill(0, 150);
  rect(width/2 - zoomBoxWidth/2, height/2 + zoomBoxHeight/2 - nameTagH, nameTagW, nameTagH);
  fill(255);
  text("Sketch Dude", width/2 - zoomBoxWidth/2 + 5, height/2 + zoomBoxHeight/2 - 5);
  
  //face
  stroke(0);
  strokeWeight(3);
  noFill();
  arc(width/2 - 30, height/2 - 30, 100, 170, HALF_PI + QUARTER_PI, PI + QUARTER_PI);
  arc(width/2 - 49, height/2 + 48, 40, 50, HALF_PI  + QUARTER_PI, PI + QUARTER_PI);
  arc(width/2 - 49, height/2 + 64, 30, 30, PI, 2 * PI);
  line(286, 303, 303, 276);
  line(303, 276, 353, 255);
  line(254, 149, 256, 135);
  arc(width/2 - 30, height/2 - 30, 100, 170, HALF_PI + QUARTER_PI, PI + QUARTER_PI);
  
  //body
  noFill();
  strokeWeight(3);
  arc(width/2 - 10, height/2 + 70, 10, 70, PI + HALF_PI, 2*PI + QUARTER_PI);
  
  strokeWeight(5);
  bezier(314, 324, 226, 330, 225, 335, 210, 480);
  line(260, 480, 268, 400);
  arc(width/2 + 20, height/2 + 85, 90, 70, 0, PI);
  line(400, 480, 400, 400);
  bezier(386, 324, 442, 329, 445, 333, 465, 480);
  line(400, 400, 410, 480);
  
  strokeWeight(4);
  rect(width/2 + 25, height/2 + 165, 40, 40, 0, 0, 10, 10);
  
  //hair
  strokeWeight(6);
  arc(width/2 - 19, height/2 + 10, 130, 300, PI + QUARTER_PI, 2*PI + QUARTER_PI);
  arc(width/2 - 10, height/2 + 10, 130, 300, PI + QUARTER_PI, 2*PI + QUARTER_PI);
  arc(width/2 - 1, height/2 + 10, 130, 300, PI + QUARTER_PI, 2*PI + QUARTER_PI);
  arc(width/2 + 8, height/2 + 10, 130, 300, PI + QUARTER_PI, 2*PI + QUARTER_PI);
  arc(width/2 - 5, height/2 + 5, 80, 300, PI + HALF_PI, 2*PI + QUARTER_PI);
  arc(width/2 + 10, height/2 + 5, 80, 300, PI + HALF_PI, 2*PI + QUARTER_PI);
  arc(width/2 + 19, height/2 + 5, 80, 300, PI + HALF_PI, 2*PI + QUARTER_PI);
  arc(width/2 + 28, height/2 + 5, 80, 300, PI + HALF_PI, 2*PI + QUARTER_PI);
  arc(width/2 + 37, height/2 + 5, 80, 300, PI + HALF_PI, 2*PI + QUARTER_PI);
  
  //hat
  stroke(255);
  strokeWeight(2);
  fill(0);
  arc(width/2 + 5, height/2 -80, 150, 150, PI + 0.3, 2*PI + 0.2, CHORD);
  rotate(0.22);
  rect(width/2 - 50, height/2 -170, 165, 38, 5);
  
  //eyes
  eyes();
  
  //nose and mouth
  stroke(0);
  strokeWeight(5);
  line(275, 232, 290, 230);
  mouth();
    
}


SELF PORTRAIT: So Many Ellipses

For the first weekly production assignment, I worked in Processing to make a not-so-realistic self-portrait. The objective was to work with the basic functions and primitive shapes in Processing. This process, frustrating but fun, got me accustomed to the syntax implementation. Additionally, it was a great way to involve in process of researching and discovering different implementation techniques.

Production Process:

I started the assignment with high hopes, thinking to incorporate many artistic elements unaware of how difficult it would be. I sketched some designs digitally and to make it look more cool and trendy, I tried to sketch some Snapchat filters.

Having no experience with Processing beforehand, I had no idea where to start with and how to implement my sketch. After hours of watching different tutorials and trying different things, I decided to take each element one by one and try to implement the simplistic version. Later, I could work on it more to the best of my ability.

1- Size and Background

To start off, I set the size of the canvas to 350×450, resembling a photo ID dimensions standard. Then I used loops to create a grid and ellipses to create a ripple pattern. While I tried to work with different things to incorporate a gradient, I ended up resorting to a solid color background with white strokes.

//ripple effect looking background by creating not filled ellipses using loop
  while(x<= height){
    stroke(250);
    strokeWeight(0.75);
    noFill();
    ellipse(width/2,height/2,x,y);
    x = x + 30;
    y = y + 40;
  }
  
  //grid background
  for(int z = 10; z <= width; z+= 10){
    noFill();
    stroke(250);
    strokeWeight(0.01);
    line(z,0,z,height);
  }
  
  for(int z = 10; z <= height; z+= 10){
    noFill();
    stroke(250);
    strokeWeight(0.01);
    line(0,z,width,z);
  }

2- Face and Shoulders

I tried to do my best in finding the best color to match my skin tone. While the face doesn’t look realistic any bit, but I worked with different sizes of ellipses to form basic features. To make the shoulders, I used continuous curves and filling in any remaining places using rectangles. The eyes were also made using ellipses. The nose and smile were completed using curves.

3- Hair

The most time-consuming and frustrating part was making hair. As I wanted to sort of incorporate my somewhat wavy and color-treated hair, I spent so much time trying different things. Finally, I ended up making three rectangles with different transparency for the gradient. To make some waves and blend the colors in I made some ellipses and positioned them to give the effect of highlights. That is the part where so many ellipses come into effect.  Additionally, for the forehead hair, I used curves, and rather than filling, I just used a thicker stroke. While the code for this part is long, but here is a small snippet:

//hair made using small ellipses and gradient look using rectangles
  fill(52,30,25); //dark brown
  ellipse(width/2, height/2, 190, 220);
  fill(90,42,33,60);   //light brown
  rect(80,204, 188, 150);
  fill(124,30,11,190);  //red
  rect(82,245, 187, 110);
  
  //ellipses to curve hair
  fill(90,42,33,120);
  ellipse(85, 198, 15, 40);
  ellipse(101, 202, 15, 40);
  ellipse(248, 198, 15, 40);
  ellipse(264, 202, 15, 40);
  ellipse(84, 233, 15, 60);

//forehead hair by using continuous curves
  stroke(52,30,25);
  strokeWeight(35);
  beginShape();
  curveVertex(76, 202); // the first control point
  curveVertex(110, 188); // is also the start point of curve
  curveVertex(175, 133); //last point
  curveVertex(184, 115); //last control point
  endShape();

4- Dress

To make the portrait look sort of cute, I used rectangles to make a dress top. For the same reason, I chose a lighter shade of pink and polka dot effect. Nothing fancy, just some rectangles, circles, and cute colors.

5- Accessories

To jazz it up a little more, I wanted to include my everyday accessories at least. So, there you see my most emotionally valuable necklace and my classic nerdy glasses. For the necklace, it was two lines and a circle. The glasses were a couple of rectangles and lines.

//glasses
  stroke(20);
  strokeWeight(2.75);
  rect(126,227,40,20);
  rect(185,227,40,20);
  line(126,227,105,223);
  line(224,227,244, 222);
  line(167,232,184, 232);

//necklace
  strokeWeight(1.2);
  stroke(240,198,31);
  line(148,350,174,398);
  line(174,398, 203, 349);
  noStroke();
  fill(252,20,102);
  circle(175,396,8);

Also here is a short look at the production process:

And there you have the final self-portrait. Although I am kinda disappointed that I was unable to make it look like what I originally intended, I am proud that I got to learn something new and put that in effect. One of the weaknesses of the code is surely the hard-coded position coordinates, which I am in no way proud to do. My takeaway from this production is to practice more and try to be more creative in the implementation. Hopefully, with each production, I would learn more and find ways to enhance my code.

Cheers to a great semester ahead! 


Week1 : Self Portrait

Description

Make a self-portrait from basic shapes using simple drawing functions learned in class. The basic shapes includes but not limited to line, ellipse, rectangle, arc, and circle.

Process

The first step I took in drawing the self-portrait was to sketch the portrait. Having a visual of what I wanted to draw improve my pace overall.

In this project, I realized how useful rectangles can be. In drawing my face, I could have used an ellipse omitting my prominent jaws but I used a rectangle curving the bottom left and bottom right to properly show my jaws. Setting the rectangle mode to center, in the beginning, reduced significantly the time I would have spent experimenting with the right coordinates to use.

The top-to-down execution of Processing code helped a lot in coloring the portrait and in hiding unwanted parts of the shapes used. The execution made drawing and coloring my head, hands, and neck possible.

Using variables played an important role in centering the pupil for the eyes and the nose, eyes, mouth, and eyebrows for the face.

Challenges

The first challenge I faced was drawing my hair. The initial plan was to use an arc on top of my face and fill it with small black circles to depict afro hair. After hours of failing to fill the arc with small circles, I decided to used curly lines which also failed. Finally, I settled on using an ellipse and filling it with black color.

Another challenge I faced was centering my nose. Working with triangle function was hard, I had to read the reference and try out a lot of options before I finally got the nose in the center of the face

Last but not least, coloring my hands was a challenge because filling the torso which was a single arc with the shirt color filled the hand with the same color. I duplicated the arc for the torso and reduced its starting and stopping angles so that filling the color of the shirt won’t affect that of the hands.

Final Work

Code

int centerX;
int centerY;
float faceCenterX;
float faceCenterY;
float earWidth = 20;
float earHeight = 40;

void setup() {
  size(640, 480);
  background(180, 235, 52)
  centerX = width / 2;
  centerY = height / 2;
  faceCenterX = centerX;
  faceCenterY = centerY -100;
};

void draw() {
    stroke(0,0,0);
  rectMode(CENTER);
     fill(197, 140, 133); // skintone
   //neck
   rect(centerX,centerY, 55, 55);
   
   // ears
   ellipse(centerX-80 , centerY-100, earWidth, earHeight);
   ellipse(centerX +80, centerY-100, earWidth, earHeight);

  
   // hair 
    fill(0,0,0);
    ellipse(centerX,centerY-150,180,150);
   
  
   // face
   fill(197, 140, 133); // skintone
   rect(centerX,centerY-100, 150, 150, 3, 6, 50, 50);

   // eyebrows
   arc(faceCenterX-50,faceCenterY - 30, 50, 15, radians(193), radians(347));
   
   arc(faceCenterX+50,faceCenterY -30, 50, 15, radians(193), radians(347));
   
   // mouth
   
   fill(184, 105, 106);
   ellipse(faceCenterX,faceCenterY + 40, 60, 30);
   line(faceCenterX-30, faceCenterY + 40 , faceCenterX +30 , faceCenterY+40);
   
   
   // eyes
   fill(255,255,255); // eye color
   ellipse(faceCenterX -50, faceCenterY -20, 30, 10 );
            // pupil
           fill(0,0,0); // pupilcolor
           ellipse(faceCenterX - 50 , faceCenterY -20, 10, 10 );
           
   fill(255,255,255); //eye color 
   ellipse(faceCenterX + 50, faceCenterY -20, 30, 10 );
           // pupil
           fill(0,0,0); //pupil color
           ellipse(faceCenterX + 50 , faceCenterY -20, 10, 10 );
   
   
   fill(197, 140, 133); // skintone
   
   // nose
   triangle(faceCenterX-20,faceCenterY +20, faceCenterX, faceCenterY-20, 20+faceCenterX, faceCenterY+20);
   
   // torso

   //hands
   fill(197, 140, 133); // skintone
   arc(centerX,centerY+250,350,400,radians(160),radians(400));
   
   //shirt
   fill(43,58,222); //shirt color
   arc(centerX,centerY+200,350,400,radians(180),radians(360));
   line(centerX -170,centerY+150, centerX+170, centerY+150);
   stroke(43,58,222);
   rect(centerX,centerY+160, 250, 200);
 
   
}