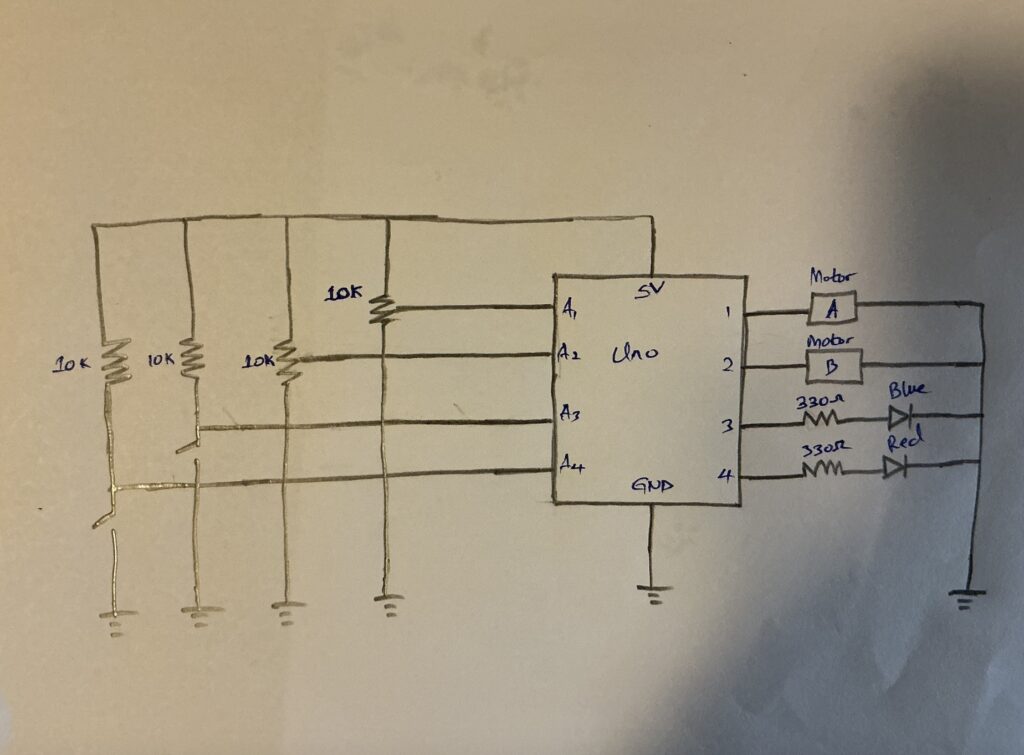
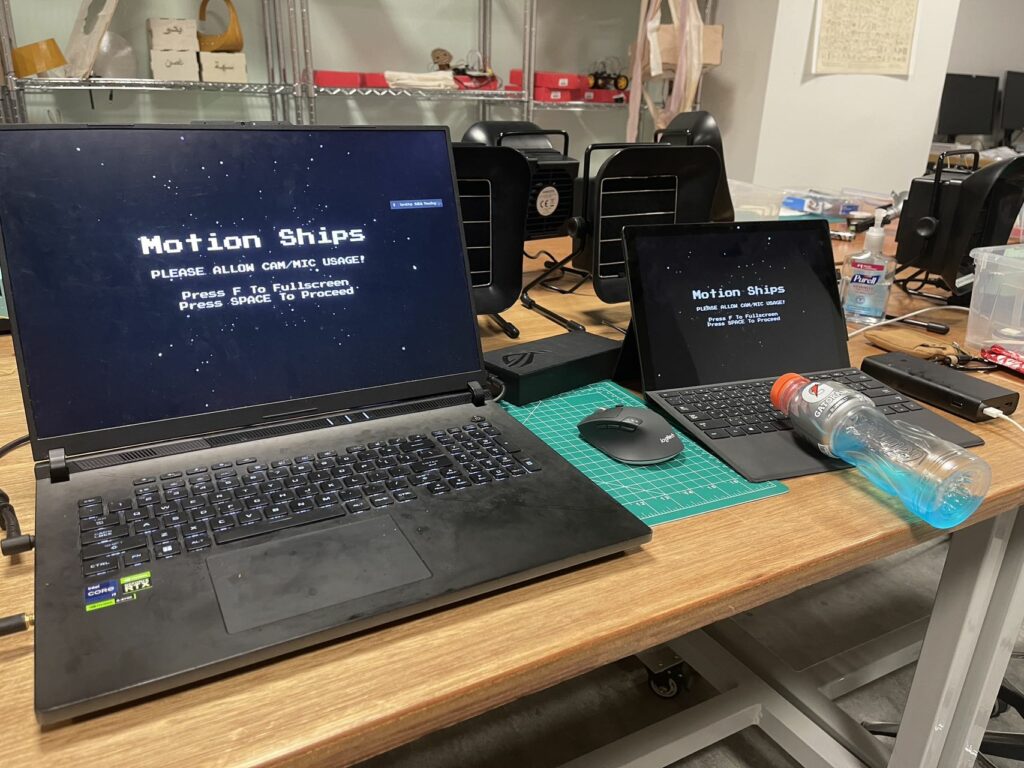
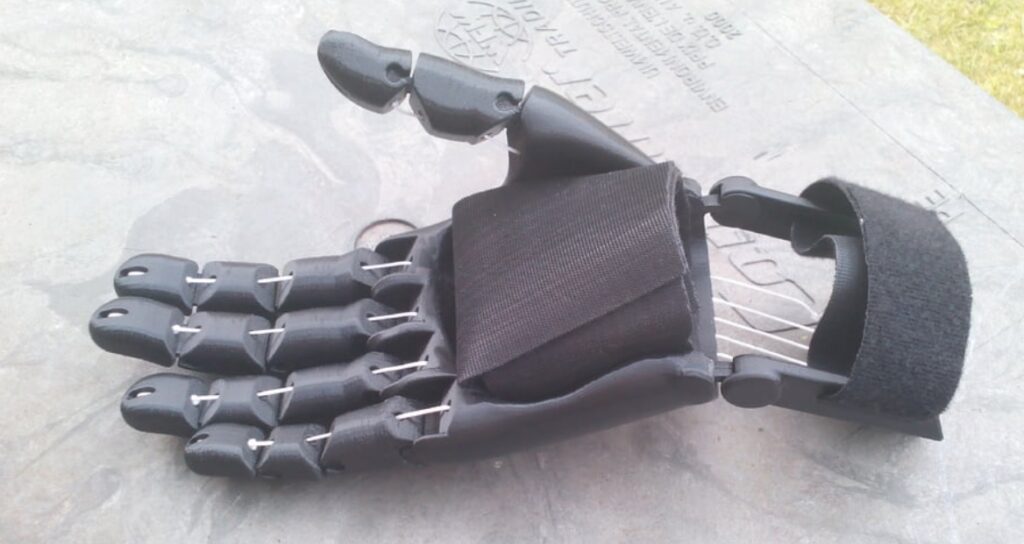
Week 11 – In-Class Practice

Following codes are built upon the bidi serial example

Practice 1: Shifting Ellipse

let rVal = 0;

function setup() {
  createCanvas(640, 480);
  textSize(18);
}

function draw() {
  background(10);

  fill(map(rVal, 0, 1023, 100, 255));

  if (!serialActive) {
    text("Press Space Bar to select Serial Port", 20, 30);
  } else {
    text("Connected", 20, 30);
    
    // Print the current values
    text('rVal = ' + str(rVal), 20, 50);

    ellipse(map(rVal, 150, 600, 0, width), height /2, map(rVal, 150, 600, 50, 200));
  }
}

function keyPressed() {
  if (key == " ") {
    // important to have in order to start the serial connection!!
    setUpSerial();
  }
}

// This function will be called by the web-serial library
// with each new *line* of data. The serial library reads
// the data until the newline and then gives it to us through
// this callback function
function readSerial(data) {
  ////////////////////////////////////
  //READ FROM ARDUINO HERE
  ////////////////////////////////////

  if (data != null) {
    // make sure there is actually a message
    // split the message
    let fromArduino = split(trim(data), ",");
    // if the right length, then proceed
    if (fromArduino.length == 1) {
      // only store values here
      // do everything with those values in the main draw loop
      
      // We take the string we get from Arduino and explicitly
      // convert it to a number by using int()
      // e.g. "103" becomes 103
      rVal = int(fromArduino[0]);
    }

    //////////////////////////////////
    //SEND TO ARDUINO HERE (handshake)
    //////////////////////////////////
    let sendToArduino = 0 + '\n';
    writeSerial(sendToArduino);
  }
}

/* Arduino Code

void setup() {
  // Start serial communication so we can send data
  // over the USB connection to our p5js sketch
  Serial.begin(9600);

  // We'll use the builtin LED as a status output.
  // We can't use the serial monitor since the serial connection is
  // used to communicate to p5js and only one application on the computer
  // can use a serial port at once.
  pinMode(LED_BUILTIN, OUTPUT);

  // start the handshake
  while (Serial.available() <= 0) {
    digitalWrite(LED_BUILTIN, HIGH); // on/blink while waiting for serial data
    Serial.println("0,0"); // send a starting message
    delay(300);            // wait 1/3 second
    digitalWrite(LED_BUILTIN, LOW);
    delay(50);
  }
}

void loop() {
  // wait for data from p5 before doing something
  while (Serial.available()) {
    digitalWrite(LED_BUILTIN, HIGH); // led on while receiving data

    if (Serial.read() == '\n') {
      int sensor = analogRead(A0);
      delay(5);
      Serial.println(sensor);
    }
  }
  digitalWrite(LED_BUILTIN, LOW);
}

*/

Practice 2: Brightness Control

let brightness = 0;
let rVal = 0;

function setup() {
  createCanvas(640, 480);
  textSize(18);
  background(0);
}

function draw() {
  background(map(brightness, 0, 255, 0, 255), 0, 0);

  fill(255);
  if (!serialActive) {
    text("Press 'Space' to connect to Serial Port", 20, 30);
  } else {
    text("Connected to Arduino", 20, 30);
    text('Brightness: ' + brightness, 20, 60);
    text('rVal: ' + rVal, 20, 90);

    // Map mouseX to brightness (0-255)
    brightness = map(mouseX, 0, width, 0, 255);
    brightness = int(constrain(brightness, 0, 255));

    // Display instructions
    text("Move mouse horizontally to change LED brightness", 20, height - 20);
  }
}

function keyPressed() {
  if (key === ' ') {
    setUpSerial();
  }
}

// This function will be called by the web-serial library
// with each new *line* of data. The serial library reads
// the data until the newline and then gives it to us through
// this callback function
function readSerial(data) {
  ////////////////////////////////////
  //READ FROM ARDUINO HERE
  ////////////////////////////////////
  if (data != null) {
    // make sure there is actually a message
    // split the message
    let fromArduino = split(trim(data), ",");
    // if the right length, then proceed
    if (fromArduino.length == 1) {
      // only store values here
      rVal = fromArduino[0];
    }

    //////////////////////////////////
    //SEND TO ARDUINO HERE (handshake)
    //////////////////////////////////
    let sendToArduino = brightness + '\n';
    writeSerial(sendToArduino);
  }
}

/*

// LED Brightness Control via Serial
const int ledPin = 9; 

void setup() {
  // Initialize serial communication at 9600 baud
  Serial.begin(9600);
  
  // Set LED pin as output
  pinMode(ledPin, OUTPUT);
  pinMode(LED_BUILTIN, OUTPUT);
  pinMode(2, OUTPUT);
  
  // Blink them so we can check the wiring
  analogWrite(ledPin, 255);
  delay(200);
  analogWrite(ledPin, 0);

  // start the handshake
  while (Serial.available() <= 0) {
    digitalWrite(LED_BUILTIN, HIGH); // on/blink while waiting for serial data
    Serial.println("0,0"); // send a starting message
    delay(300);            // wait 1/3 second
    digitalWrite(LED_BUILTIN, LOW);
    delay(50);
  }
}

void loop() {
  // Check if data is available on the serial port
  while (Serial.available()) {
    digitalWrite(LED_BUILTIN, HIGH);

    // Read the incoming byte:
    int brightness = Serial.parseInt();
    // Constrain the brightness to be between 0 and 255
    brightness = constrain(brightness, 0, 255);
    if (Serial.read() == '\n') {
      // Set the brightness of the LED
      analogWrite(ledPin, brightness);
      delay(5);
      // Send back the brightness value for confirmation
      Serial.println(brightness);
    } 
  }
  digitalWrite(LED_BUILTIN, LOW);
}

*/

Practice 3: Windy Balls Bouncing

let velocity;
let gravity;
let position;
let acceleration;
let wind;
let drag = 0.99;
let mass = 50;

// for uno connection
let rVal = 0;
let LED = 0; 

function setup() {
  createCanvas(640, 360);
  noFill();
  position = createVector(width/2, 0);
  velocity = createVector(0,0);
  acceleration = createVector(0,0);
  gravity = createVector(0, 0.5*mass);
  wind = createVector(0,0);
}

function draw() {
  background(255);

  fill(10);
  
  if (!serialActive) {
    text("Press S to select Serial Port", 20, 30);
  } else {
    text("Connected", 20, 30);
  
    // Print the current values
    text('rVal = ' + str(rVal), 20, 50);
  }
  
  if (rVal > 0) {
    wind.x += map(constrain(rVal, 200, 600), 200, 600, -0.5, 0.5);
    applyForce(wind);
  }
  
  applyForce(gravity);
  velocity.add(acceleration);
  velocity.mult(drag);
  position.add(velocity);
  acceleration.mult(0);
  ellipse(position.x,position.y,mass,mass);
  if (position.y > height-mass/2) {
      LED = 1;
      velocity.y *= -0.9;  // A little dampening when hitting the bottom
      position.y = height-mass/2;
  } else {
    LED = 0;
  }
}

function applyForce(force){
  // Newton's 2nd law: F = M * A
  // or A = F / M
  let f = p5.Vector.div(force, mass);
  acceleration.add(f);
}

function keyPressed(){
  if (key == "s") {
    // important to have in order to start the serial connection!!
    setUpSerial();
  }

  if (key==' '){
    mass=random(15,80);
    position.y=-mass;
    position.x=width/2;
    acceleration = createVector(0,0);
    velocity.mult(0);
    wind = createVector(0,0);
  }
}

function readSerial(data) {
  ////////////////////////////////////
  //READ FROM ARDUINO HERE
  ////////////////////////////////////

  if (data != null) {
    // make sure there is actually a message
    
    // split the message
    let fromArduino = split(trim(data), ","); 
    
    // if the right length, then proceed
    if (fromArduino.length == 1) {
      // convert it to a number by using int()
      rVal = int(fromArduino[0]);
    }

    //////////////////////////////////
    //SEND TO ARDUINO HERE (handshake)
    //////////////////////////////////
    let sendToArduino = LED+'\n';
    writeSerial(sendToArduino);
  }
}

/*

int ledPin = 9;

void setup() {
  // Start serial communication so we can send data
  // over the USB connection to our p5js sketch
  Serial.begin(9600);

  // We'll use the builtin LED as a status output.
  // We can't use the serial monitor since the serial connection is
  // used to communicate to p5js and only one application on the computer
  // can use a serial port at once.
  pinMode(LED_BUILTIN, OUTPUT);
  pinMode(ledPin, OUTPUT);

  // Blink them so we can check the wiring
  analogWrite(ledPin, 255);
  delay(200);
  analogWrite(ledPin, 0);

  // start the handshake
  while (Serial.available() <= 0) {
    digitalWrite(LED_BUILTIN, HIGH); // on/blink while waiting for serial data
    Serial.println("0,0"); // send a starting message
    delay(300);            // wait 1/3 second
    digitalWrite(LED_BUILTIN, LOW);
    delay(50);
  }
}

void loop() {
  // wait for data from p5 before doing something
  while (Serial.available()) {
    digitalWrite(LED_BUILTIN, HIGH); // led on while receiving data

    int ledState = Serial.parseInt();
    if (Serial.read() == '\n') {
      digitalWrite(ledPin, ledState);
      int sensor = analogRead(A0);
      delay(5);
      Serial.println(sensor);
    }
  }
  digitalWrite(LED_BUILTIN, LOW);
}


*/

Week 11: Final project concept

For my final projecting I am planning to expand on my midterm project to that it involves physical hands on components. Currently the project features two mini games and some helpful information regarding film photography in general. I plan to modify one of the pre-existing mini games (a mixing chemistry game) so that users have to hold a button in order to pour each chemical. I would also like to add 2-3 mini games. One of them would be assisting a customer calibrate the light meter in their camera (this would use a light sensor and potentiometer). Another idea is a further development of the dilm development station. This would feature the user loading their film in to a developing tank and would use dc motor to simulate the tanks spinning. Lastly, I am hoping to do some kind of lens assembly puzzle. I am the least sure about this idea because it would require 3D printing each piece of the lens and finding a way to simulate them locking together like they would on an actual camera. My biggest concern at the moment is being over ambitious in the conceptual phase and thus not having enough time to actually develop what I planned for. Please let me know if you have any suggestions!

Week 11: Reading Response

This week’s reading, Design Meets Disability, explores the ways in which assistive technologies and art are being used together to represent disabilities. The author highlights how this type of design works to extend these tools beyond the problem they solve and instead focuses on the user and their experience with them. Whether that be through prioritizing aesthetics or representing these resources as art themselves, this drives a new type of design process, one in which functionality is not the only factor. This proposition, of sorts, is something we have explored countless times with a special mention to Don Norman’s The Design of Everyday Things. The idea that the user experience is just as important as the design and purpose are common theme of these two articles and I am particularly interested in how it is presented in this article.

Not only is this design methodology more effective but in this context, it evidently makes individuals’ lives more accessible and inclusive. Whether it be through re-designing hearing aids to better match the needs and preferences of users or representing diverse bodies with different disabilities in media, this approach not only makes their lives easier but they open up space for conversation on a larger scale about why this type of inclusion is important. We can apply these practices in class when designing and implementing our projects through user-focused design and testing. Although on the design side it is oftentimes difficult to recognize these shortcomings, through field testing and design/usability-centric improvements it is more than possible.

Week 11: Design meets Disability

One of the main arguments I extracted from this week’s reading is the interplay between fashion and discretion in design, particularly in the context of disability. Whether a design should blend in or stand out is subjective and depends on the user. For instance, teeth implants and removable teeth were initially functional medical solutions meant to resemble natural teeth. Over time, however, these appliances have become fashion statements, with materials like gold being used to signify wealth or spirituality. This shift exemplifies how functional designs can appeal to broader audiences and evolve into tools of self-expression. Similarly, the example of the athlete in the reading, who embraced her prosthetic legs as a fashionable part of her identity, demonstrates how design choices can transcend functionality to reflect individuality. This underscores the idea that the line between utility and self-expression is fluid and often shaped by societal influences.

The reading also provokes thought about the ethics of design, particularly when it comes to medical appliances. While designers from unrelated fields might bring fresh perspectives, their lack of specialized knowledge can lead to unintended consequences. For example, the trend of hearing aids resembling earphones doesn’t address how excessive earphone use may itself lead to hearing loss, creating a harmful cycle. This highlights the risk of prioritizing aesthetics or profit over the users’ actual needs. These insights also apply to interactive design, reminding us that functionality and user experience must take precedence over superficial appeal. Thoughtful design must strike a balance, respecting the user’s needs and individuality while avoiding exploitation or unnecessary commercialization.

Week 11: In-class coding exercises

Below are the codes for each of our in class exercises including what was using in P5 and Arduino. After exercise 3’s code, you can find the video of the LED lighting up with the ball bouncing.

Exercise 1

P5 code

let distance = 0;

function setup() {
  createCanvas(640, 480);
  textSize(18);
}

function draw() {
  if (!serialActive) {
     //setting up the serial port information
    background(255);
    text("Press Space Bar to select Serial Port", 20, 30);
  } else {
    background(255);
    text("Connected", 20, 30);
    //reading the distance sent from arduino onto width of computer
    let mappedDistance = map(distance, 0, 50, 0, width); 
    //preventing ball from extending beyond the screen
    mappedDistance = constrain(mappedDistance, 0, width); 
    ellipse(mappedDistance, height / 2, 25, 25);
    //actually drawing the circle
  }
}

function keyPressed() {
  if (key == " ") {
    setUpSerial(); 
  }
}

function readSerial(data) {
  //reading the distance value given by arduino
  if (data != null) {
    distance = int(data); 
  }
}

Arduino Code

const int trigPin = 10;
const int echoPin = 9;
long timeTraveled; //variables for the distance monitor
int distance;

void setup() {
  Serial.begin(9600);
  pinMode(trigPin, OUTPUT); 
  pinMode(echoPin, INPUT); 
}

void loop() {
  // clear whatever the trig pin. has read
  digitalWrite(trigPin, LOW);
  delayMicroseconds(2);
  // 10 microsecond delay for each new reading
  digitalWrite(trigPin, HIGH);
  delayMicroseconds(10);
  digitalWrite(trigPin, LOW);
  //read the values sent in through echo pin
  timeTraveled = pulseIn(echoPin, HIGH, 38000);
  // use this conversion to calculate in centimeters
  distance = timeTraveled * 0.034 / 2;
 /* if (distance > 500){
    distance = pulseIn(echoPin, HIGH);
  }*/
  //display in serial monitor
  Serial.println(distance);
  delay(50);
}

Exercise 2

P5 code

let brightnessValue = 0; 

function setup() {
  createCanvas(640, 480);
  textSize(18);
}

function draw() {
  background(250);
  //setting up the serial port information
  if (!serialActive) {
    text("Press Space Bar to select Serial Port", 20, 30);
  } else {
    text("Connected", 20, 30);
  //depending on where the mouse is from left to right, sending that value as a brifghtness value to arduino
    brightnessValue = int(map(mouseX, 0, width, 0, 255));
    text('Brightness: ' + str(brightnessValue), 20, 50);
    let sendToArduino = brightnessValue + "\n";
    //printing that value in serial monitor arduino
    writeSerial(sendToArduino);
  }
}

function keyPressed() {
  if (key == " ") {
    setUpSerial();
  }
}

function readSerial(data) {
  //just to avoid no readSerial error saving data
  if (data != null) {
    let receivedData = data
  }
}

Arduino code

int ledPin = 9; 
int brightness = 0; 

void setup() {
  pinMode(ledPin, OUTPUT); 
  Serial.begin(9600); 
}

void loop() {
  if (Serial.available() > 0) {
    //making sure its not trying to run unless receiving from p5
    String brightnessString = Serial.readStringUntil('\n');
    //reading the converted value from the computer
    brightness = brightnessString.toInt(); //converting to an integer
    //illuminating the led to the newly converted brightness value
    analogWrite(ledPin, brightness);
    Serial.println(brightness); //adding to serial monitor
  }
}

Exercise 3

P5 code

let velocity;
let gravity;
let position;
let acceleration;
let wind;
let drag = 0.99;
let mass = 50;
let potValue = 512; //make it so that wind starts at 0 force
let running = true;

function setup() {
  createCanvas(640, 360);
  noFill();
  position = createVector(width / 2, 0);
  velocity = createVector(0, 0);
  acceleration = createVector(0, 0);
  gravity = createVector(0, 0.5 * mass);
  wind = createVector(0, 0);
}

function draw() {
  background(255);
  //created this flag variable to get the ball to drop again
  if (!running) {
    textSize(24);
    fill(0);
    text("Press 's' to run again", width / 2 - 100, height / 2);
    return;
  }
  //mapping the value of the potentiometer to which direction the ball falls 
  wind.x = map(potValue, 0, 1023, -2.5, 2.5);
  //mapping to speed -2.5 to 2.5 so the ball can gradually increase and decrease
  applyForce(wind);
  applyForce(gravity);
  velocity.add(acceleration);
  velocity.mult(drag);
  position.add(velocity);
  acceleration.mult(0);
  ellipse(position.x, position.y, mass, mass);
  if (position.y > height - mass / 2) {
    velocity.y *= -0.9;
    position.y = height - mass / 2;
  //standard s
    if (serialActive) {
      writeSerial("Ball bounced\n");
      //sending this to arduino each time ball hits ground
    }
  }
  if (position.x < -mass || position.x > width + mass) {
    //preventing the ball from being registered when it rolls off the screen
    running = false;
  }
}
function applyForce(force) {
  let f = p5.Vector.div(force, mass);
  acceleration.add(f);
}

function keyPressed() {
  if (key == ' ') {
    //opening setup pop up window
    setUpSerial();
  }

  if (key == 's') {
    //preparing a new ball to drop resetting the values 
    fill('white');
    position = createVector(width / 2, 0);
    velocity = createVector(0, 0);
    acceleration = createVector(0, 0);
    running = true;
  }
}
function readSerial(data) {
  //just to avoid no readSerial error saving data
  if (data != null) {
    potValue = int(data);
  }
}

Arduino code

const int pmPin = A0;  
const int ledPin = 9;   

void setup() {
  pinMode(ledPin, OUTPUT);   
  Serial.begin(9600);       
}

void loop() {
  int potValue = analogRead(pmPin); //read potentiometer value
  Serial.println(potValue); //printing in serial monitor for p5
  if (Serial.available() > 0) { //make sure data is coming in to p5
    String event = Serial.readStringUntil('\n');
    event.trim(); //reading each newline of data
    if (event == "Ball bounced") { //sent from p5
      // turning the led on when bounce message is received
      digitalWrite(ledPin, HIGH);
      delay(100);  
      digitalWrite(ledPin, LOW);
    }
  }
  delay(50); 
}

When this code runs, the first ball is dropped from the original code and then you are prompted to open the serial connection I just cut that out of the video.

Week 11: Reading Response

In this week’s reading, the idea for designers to prioritise aesthetics, cooperation, and diversity while developing assistive technologies struck a chord among the masses and have spread to a much wider scope. However, it has come with its own challenges of universality, fashion and so on.

A major core of the reading is focussed on designing for desire as long as utility is not comprimised. Hearing aids and prostheses have long been useful yet stigmatised owing to their utilitarian look. The author pushes for a more elegant design which devlops a sense of pride in its owner. Today, this wearable gadgets, for example, blur the barrier between function and fashion, with smartwatches serving as both style statements and health monitors. Similarly, minimalist gadgets like as folding keyboards and elegant standing workstations demonstrate how simplicity combined with beauty appeals to a wider audience.

Another good example is with prosthetic arms. One of the major reasons wearable prosthetic arms tend to be more expensive is because of the presence of quieter motors so that the wearer can not disturb the environment too much and draw attention to their impairment.

The theme of the reading, simply put, is that designers and users co-create products with the engineers (or people who figure out the science stuff). Once a radical idea, it is now standard in product development. His main argument that users should be active participants in shaping their tools finds echoes in today’s participatory design movements. Major brands regularly involve user feedback loops, whether through beta testing, user-generated content, surveys or iterative prototyping sessions.

That is why as engineers or Interactive Media students, we should think holistically about design – balancing aesthetics, accessibility, and functionality while keeping users at the center. This prevents long-term losses, maintains brand value, encourages innovation and open roads for other types of inventions.

Week 11 – Reading Response

Okay, let’s see what we got from this – passage from last century. Again, for me, it’s for sure an extension of our exploration and discussion on ‘balance,’ – but in an extended context.

For sure, whether the examples of eyeglasses, leg splints, iPods, and so on are within the context of disability or not, what intrigued me is how those supposedly pioneering principles suggested at that time are nowadays spread across a much broader scope: What’s particularly striking is how the central tensions – between fashion and discretion, simplicity and universality – have indeed become increasingly relevant beyond disability design. The Eames leg splint case study perfectly exemplifies this: what began as a disability-focused design solution ultimately influenced mainstream furniture design, challenging the traditional ‘trickle-down’ assumption that innovations flow from mainstream to specialized markets. The argument for moving beyond pure functionality or pure aesthetics to find ‘simplicity in concept and simplicity of form’ feels particularly prescient. Sometimes, it’s so easy to dwell in a term that seemingly fits all – yet we all know there is no such case. Therefore, whether we are dealing with balance or any of the included or parallel concepts, maybe the only fit-for-all is to find out what exactly the idea, ideology, or principle we claim to realize, follow, and develop stands for in the very specific case of our own designing.

Week 11: In-class Activities

Task 1: Sensor Controlled Ellipse

I used a potentiometer to control the horizontal movement of an ellipse in p5.js. Additionally, I displayed text showing the connection status and the current position of the ellipse in (x, y) format.

My Sketch (with the P5js Code) can be found here:

My Arduino Code is here:

// Pin for reading analog values from sensor
int Pin=A0;
void setup() 
{
 Serial.begin(9600);
}
void loop() 
{ 
//Reading values from sensor
   int sensor = analogRead(Pin);
   delay(5);
//Writting the sensor value through serial
   Serial.println(sensor);
}
Task 2: LED Brightness control from P5

I created a simple custom interface with On and Off Button to turn on the LED. While the LED is On there is a slider that can be adjusted to increase or decrease the brightness of the LED.

My Sketch (with the P5js Code) can be found here:

My Arduino Code is here:

 // Setting Global Variables
const int ledPin = 9; 
int brightness = 0;

void setup()
{
  pinMode(ledPin, OUTPUT);  
 // Start serial communication
  Serial.begin(9600);      
}

void loop()
{
// Check if data is available to read
  if (Serial.available())  
  {
// Read Data as Integer 
    int value = Serial.parseInt(); 
// Clear the serial data 
    Serial.flush();
    if (value > 0) 
    {
      brightness = value;
      Serial.println(brightness);
  // Analog write the brightness   
      analogWrite(ledPin, brightness);  
    }
  }else
  {
    analogWrite(ledPin, 0);  
  }
}
Task 3: Bouncing Ball and Winds

In this activity, I started with the given sketch. I added LED lighting that activates whenever the balls touch the ground. The LEDs are controlled digitally by the balls as they make contact with the ground. Additionally, I included two potentiometers that act as wind controls for the ball’s horizontal movement. When the right wind is stronger than the left, the balls move toward the right, and vice versa. I also added an arrow to indicate the direction of the wind.

My Schematics can be seen here:

Here is the Video Demonstration:

My Sketch (with the P5js Code) can be found here:

My Arduino Code is here:

 // Setting Global Variables
const int ledPin1 = 9; 
const int ledPin2 = 6; 
int WindLeftPin=A0;
int WindRightPin=A1;
int brightness = 0;

void setup()
{

  pinMode(ledPin1, OUTPUT);  
  pinMode(ledPin2, OUTPUT);  
 // Start serial communication
  Serial.begin(9600);     
}

void loop()

{if (Serial.available())  
{
  int WindLeft = analogRead(WindLeftPin);
  int WindRight = analogRead(WindRightPin);
  Serial.print(WindLeft);
  Serial.print(",");
  Serial.print(WindRight);
  Serial.println();
  int value = Serial.parseInt();
  if (value == 0) 
  {
    digitalWrite(ledPin1, LOW);
    digitalWrite(ledPin2, LOW);
  }
  else if (value == 1)
  {
    digitalWrite(ledPin1, HIGH);
    digitalWrite(ledPin2, HIGH);
  } 
}
}


Reading Reflection – Week 11

As technologies rapidly develop in our world, more and more disabilities can be treated to help each disabled person live a normal life without limitations. However, those technologies are often treated by disabled people as “embarrassing” because they explicitly state the disability and show it to society. Disabled people are often treated differently in society. They are treated as “sick” people and are often shown compassion and willingness to help, which is good and ethically right, but some of them do not wish to be treated that way. Some of them do not want to be pitied. This is exactly why I found “Design meets disability” a very interesting reading and enjoyed looking at the author’s perspective on this matter. I really liked the description of how glasses transformed into a stylish accessory from the plain medical device. It is a quite remarkable achievement – transformation into the essential object of fashion, and of course, for other devices created for people with disabilities it would be ideal to do the same. However, I think that it is still hard to achieve.

First of all, the glasses is a small object that can does not substitute the human body but rather complements it. This is why it can be called an accessory – it is something people add on as an extra element of their outfit. Sunglasses, for example, are worn even by people who have a perfect vision, simply because to looks good on them. The optimal goal for other devices should be exactly the same – to look more as a complementary object and less as an artificial substitute. The scientific progress pushes forward this idea, and the artificial arms and legs are now looking more and more “human”, which positively contributes to the perception by other people. Yes, the idea of embracing these artificial devices by plugging them into the fashion described by author (e.g. Aimee Mullins) contributes positively as well, but I believe that this is a temporary step to treat people with disabilities equally and decrease their level of feeling uncomfortable in the society rather than the ideal solution. The ideal solution would be to build the artificial arm to look the same as the normal arm. Giving an example, let’s refer to the Star Wars movies:

Why did Luke get an almost real replacement hand while Anakin got a robotics metal hand? : r/StarWars

The first prosthesis belongs to Luke Skywalker and reflects the technological advancements for the period between the prequel movies and the original trilogy. The second prosthesis belongs to Luke’s father, Anakin Skywalker. Obviously, the first looks much better than the second one. (By the way, Anakin wore the glove to cover his mechanical arm).

Overall, the technological inventions in the field of protheses are very important to make the people with disabilities all around the world feel included and equal to other members of society. As of now, while we are waiting for future advancements, it is a great idea to try to use them as elements of fashion just like the author suggested.

Week 10: The Arduino Piano (Takudzwa & Bismark)

The final product for you convenience is here: https://youtu.be/62UTvttGflo

Concept:

The motivation behind our project was to create a unique piano-like instrument using Arduino circuits. By utilizing two breadboards, we had a larger workspace, allowing for a more complex setup. We incorporated a potentiometer as a frequency controller—adjusting it changes the pitch of the sounds produced, making the instrument tunable. To enhance the experience, we added synchronized LED lights, creating a visual element that complements the sound. This combination of light and music adds a fun, interactive touch to the project. Here’s the project cover:

The tools used for this project were: The potentiometer, Piezo Speaker, LEDs, 10k & 330 ohm resistors, push buttons and jump wires.

Execution:

The following was the schematic for our project, which served as the foundation that allowed us to successfully execute this project:

The following Arduino code snippet brought our project to life, controlling both sound and light to create an interactive musical experience:

void setup() {
  // Set button and LED pins as inputs and outputs
  for (int i = 0; i < 4; i++) {
    pinMode(buttonPins[i], INPUT);       // Button pins as input
    pinMode(ledPins[i], OUTPUT);         // LED pins as output
  }
  pinMode(piezoPin, OUTPUT);             // Speaker pin as output
}

void loop() {
  int potValue = analogRead(potPin);                    // Read potentiometer value
  int pitchAdjust = map(potValue, 0, 1023, -100, 100);  // Map pot value to pitch adjustment range

  // Check each button for presses
  for (int i = 0; i < 4; i++) {
    if (digitalRead(buttonPins[i]) == HIGH) {         // If button is pressed
      int adjustedFreq = notes[i] + pitchAdjust;      // Adjust note frequency based on potentiometer
      tone(piezoPin, adjustedFreq);                   // Play the adjusted note
      digitalWrite(ledPins[i], HIGH);                 // Turn on the corresponding LED
      delay(200);                                     // Delay to avoid rapid flashing
      noTone(piezoPin);                               // Stop the sound
      digitalWrite(ledPins[i], LOW);                  // Turn off the LED
    }
  }
}

Finally, the final project can be found here: https://youtu.be/62UTvttGflo

Reflection:

Although our project may seem simple, we encountered several challenges during its development. Initially, we accidentally placed the digital pins incorrectly, preventing the project from functioning as expected. After hours of troubleshooting, we sought help to identify the issue. This experience turned into a valuable teamwork activity, helping us grow as students and problem-solvers. I view challenges like these as opportunities to build skills I can apply to future projects, including my final one. To enhance this project further, I would improve its visual design and sound quality to make it more appealing to a wider audience. That’s all for now!