CONCEPT:
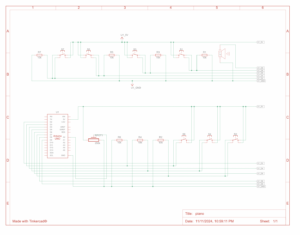
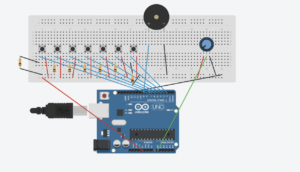
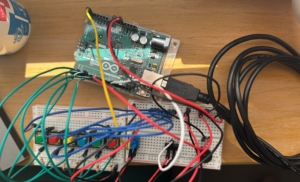
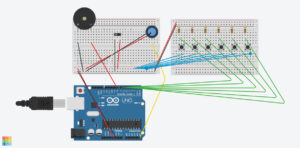
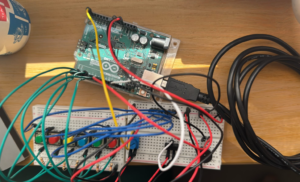
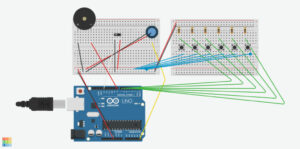
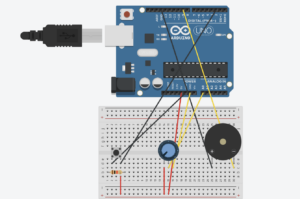
While brainstorming project ideas with Noura, we thought about how a radio works and decided it would be fun to make a simple version ourselves. Our goal was to create an Arduino “radio” that lets you switch between different songs, similar to tuning a real radio. We used a knob as the channel switch, allowing us to choose between three different songs that we got from Github and the exercises we did in class. Each channel has its own song, and turning the knob instantly switches to the next song, giving it a real radio-like feel. We also added a button that acts as a power switch to turn the radio on and off. This way, pressing the button starts the radio, and pressing it again turns it off. We even added a feature so that any song stops playing immediately when the channel changes, so you don’t have to wait for a song to finish before switching to a new one.
HOW IT WORKS:
SETUP:
HIGHIGHT:
The part Noura and I are most proud of is getting the button to work smoothly with the debounce feature. At first, the button would trigger multiple times with a single press, turning the radio on and off too quickly. By adding a debounce function, we made sure the button only registers one press at a time, making it much more reliable. A former student in IM (Shereena) helped us understand how debounce works and guided us in fixing this issue, explaining how it makes the button’s response stable and accurate.
Here’s a snippet of the debounce code we used:
// Variables for debounce
int buttonState;          // Current state of the button
int lastButtonState = LOW; // Previous state of the button
unsigned long lastDebounceTime = 0; // Last time the button state changed
unsigned long debounceDelay = 50;   // Debounce time in milliseconds

void loop() {
  int reading = digitalRead(buttonPin);

  // Check if the button state has changed
  if (reading != lastButtonState) {
    lastDebounceTime = millis();  // Reset debounce timer
  }

  // If enough time has passed, check if the button is pressed
  if ((millis() - lastDebounceTime) > debounceDelay) {
    if (reading != buttonState) {
      buttonState = reading;
      if (buttonState == HIGH) {
        radioState = !radioState;  // Toggle radio on/off
      }
    }
  }

  lastButtonState = reading;
}
This debounce function prevents accidental multiple triggers, making the button interaction smoother. We’re also proud of how the radio switches songs instantly when we turn the knob, making it feel real.
REFLECTION:
Working on this project with Noura was a nice experience, as we got to share our thoughts and class experience by working together. One of our main struggles was making the button work without triggering multiple times, which led us to use debounce for stability. While adding Debounce solved the problem, in the future, we’d like to explore other ways to troubleshoot and fix issues like this without relying on debugging alone.
For future improvements, we’d like to add more interactive features, such as volume control with an additional knob and possibly a small speaker for clearer sound. We could also include more “channels” with various songs or sound effects, giving users a richer experience. Another idea is to add an LED indicator that lights up when the radio is on and changes brightness with volume, making the design even more engaging. These changes would make our project more realistic for a radio and enhance.
CODE:
https://github.com/nouraalhosani/Intro-to-IM/blob/426c7d58639035c7822a4508f2e62dab34db0695/Radio.ino

