Week 10 Reading Reflection

A Brief Rant on the Future of Interaction Design

From a personal point of view, I think that the main point of this text might be misunderstood by a lot of people. More than anything, because the follow-up article is a key part that adds context, depth, and information to the author’s rant.

In any case, I agree with a big part of the ideas presented in the text. However, it is not clear to me whether the problems presented should be taken with the same heaviness the author mentions. The reason behind this is none other than the feasibility of a solution to the problems that the author mentions. I believe the critique makes total sense because it gives value to the other mobility functions of the human body. However, finding new methods of interaction that the common user would prefer over traditional ones is not an easy task. If it helps, we never imagined leaving the mouse and keyboard behind, and here we are, using touch screens in everything. Considering how old this article is, it makes sense for the author to say that we should leave touchscreens behind eventually. But, after 10 years, we clearly haven’t moved on.

A follow-up article

As I mentioned before, the idea of a “rant” was confusing indeed. Most readers expect to find a solution to the problems presented in the previous text, but none were found. This is simply because most people will not get the main point of this text. The text does not imply that a solution will be found any time soon, but the opposite: the main objective is to inspire and motivate people to start researching for an answer.

I personally think he makes a great point in his ideas for the future. This doesn’t mean either I can provide a clear answer to the problems that he proposed back in his rant, but I can definitely say that reading his post encouraged me to start thinking about them.

Assignment 10 – IM (Ivan & Muhammad) Techno

Concept

It took a while for us to come up with a properly functioning musical instrument with a decent sound. At first, we tried to incorporate an ultrasonic sensor for controlling the height of a sound, a servo motor to create a beat, and a flex sensor for controlling the duration of the notes. It turned out to be fine, but we weren’t satisfied with the quality of the sound or its instability. After a little experimenting, we finally decided to use transistors to amplify the sound, which gave the music a feel of the techno genre.

Technical structure

We decided to use a transistor to amplify the signal to the speaker. Moreover, we added an external 9V power supply to power the speaker, and these additions greatly enhanced the volume and clarity of the sound. The potentiometer controlling the volume is connected in series with the input signal to the speaker from the Arduino, and so the physical reduction of the voltage of the signal by adjusting the resistance of the potentiometer controls the volume. Therefore, we use the potentiometer as a variable resistor instead of an input here.

On the other hand, the potentiometer used for the delay is used to get analog input to the Arduino, which is then used to control the delay interval in code. This is just a way to showcase the different use cases of the same components.


Video demonstration:


Code

int mapDistanceToIndex(float distance) {
  // Map distances into array index (2 cm steps from 5 cm to 15 cm)
  // int index = constrain((distance - MIN_DIST) / 2, 0, ARRAY_LENGTH - 1);
  int dist = int(distance);
  int index = constrain(map(dist, MIN_DIST, MAX_DIST, 0, ARRAY_LENGTH - 1), 0, ARRAY_LENGTH - 1);
  return index;
}

void loop() {
  float dist = getDistance();

  noteDuration = map(analogRead(OFFSET_DIMMER), 0, 1023, 100, 500);

  if (millis() - noteStartTime >= noteDuration) {
    // noTone(SPEAKER_PIN);
    // delay(10);
    // Play a funky note continuously based on the distance range
    if (dist >= MIN_DIST && dist <= MAX_DIST) {
      int note = FUNKY_NOTES[mapDistanceToIndex(dist)];


      Serial.print(dist);
      Serial.print("cm ");
      Serial.print(note);
      Serial.print("HZ");
      Serial.print(" with duration = ");
      Serial.print(noteDuration);
      Serial.println();

      // Check if the note duration has elapsed, then check for a new note


      // If the note has changed, start a new note
      if (note != lastNote) {
        lastNote = note;
        tone(SPEAKER_PIN, note);
        noteStartTime = millis();  // Record the start time of the current note
      }
    } else {
      noTone(SPEAKER_PIN);
    }
  }

Reflection

We have succeeded in creating a new instrument that wouldn’t just become the replication of already existing ones. Furthermore, we had a chance to experiment with new sensors and get experience working with transistors and potentiometers, implementing them in one project. We believe there’s more potential for this project, especially if we could use the mp3 files. Nevertheless, we had fun working on this project, experimenting with Arduino.

Week 10 Assignment– IM (Ivan & Muhammad) Techno

Concept

It took a while for us to come up with a properly functioning musical instrument with a decent sound. At first, we tried to incorporate an ultrasonic sensor for controlling the height of a sound, a servo motor to create a beat, and a flex sensor for controlling the duration of the notes. It turned out to be fine, but we weren’t satisfied with the quality of the sound or its instability. After a little experimenting, we finally decided to use transistors to amplify the sound, which gave the music a feel of the techno genre.

Technical structure

We used the ultrasonic sensor to control the height of a sound. The B10K potentiometer controls the duration of the note, while the B100K potentiometer controls the volume of the sound. The potentiometer, as mentioned earlier, amplifies the sound.

We decided to use a transistor to amplify the signal to the speaker. Moreover, we added an external 9V power supply to power the speaker, and these additions greatly enhanced the volume and clarity of the sound. The potentiometer controlling the volume is connected in series with the input signal to the speaker from the Arduino, and so the physical reduction of the voltage of the signal by adjusting the resistance of the potentiometer controls the volume. Therefore, we use the potentiometer as a variable resistor instead of an input here.

On the other hand, the potentiometer used for the delay is used to get analog input to the Arduino, which is then used to control the delay interval in code. This is just a way to showcase the different use cases of the same components.

Video demonstration:

Code

int mapDistanceToIndex(float distance) {
// Map distances into array index (2 cm steps from 5 cm to 15 cm)
// int index = constrain((distance - MIN_DIST) / 2, 0, ARRAY_LENGTH - 1);
int dist = int(distance);
int index = constrain(map(dist, MIN_DIST, MAX_DIST, 0, ARRAY_LENGTH - 1), 0, ARRAY_LENGTH - 1);
return index;
}

void loop() {
float dist = getDistance();


noteDuration = map(analogRead(OFFSET_DIMMER), 0, 1023, 100, 500);

if (millis() - noteStartTime >= noteDuration) {
// noTone(SPEAKER_PIN);
// delay(10);
// Play a funky note continuously based on the distance range
if (dist >= MIN_DIST && dist <= MAX_DIST) {
int note = FUNKY_NOTES[mapDistanceToIndex(dist)];


Serial.print(dist);
Serial.print("cm ");
Serial.print(note);
Serial.print("HZ");
Serial.print(" with duration = ");
Serial.print(noteDuration);
Serial.println();

// Check if the note duration has elapsed, then check for a new note

// If the note has changed, start a new note
if (note != lastNote) {
lastNote = note;
tone(SPEAKER_PIN, note);
noteStartTime = millis(); // Record the start time of the current note
}
} else {
noTone(SPEAKER_PIN);
}
}

Reflection

We have succeeded in creating a new instrument that wouldn’t just become the replication of already existing ones. Furthermore, we had a chance to experiment with new sensors and get experience working with transistors and potentiometers, implementing them in one project. We believe there’s more potential for this project, especially if we could use mp3 files. Nevertheless, we had fun working on this project, experimenting with Arduino.

Week 10 Group Assignment

whimsical musical mixer box

Concept

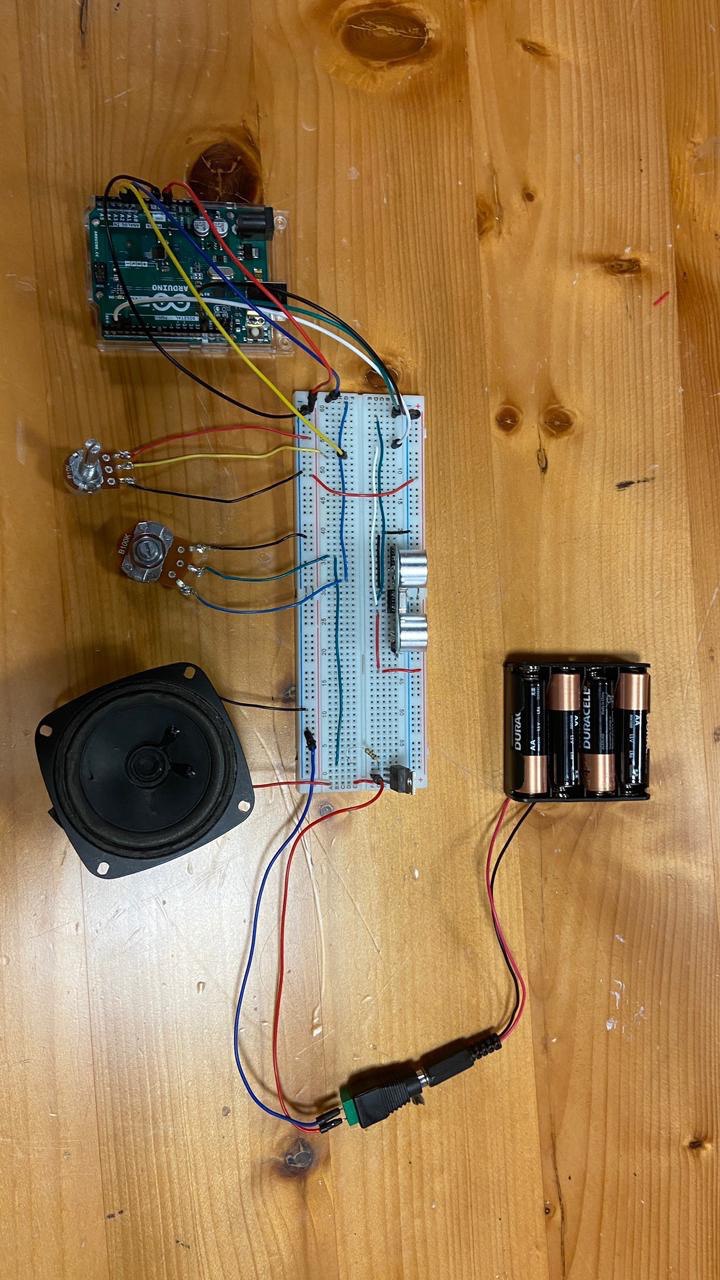
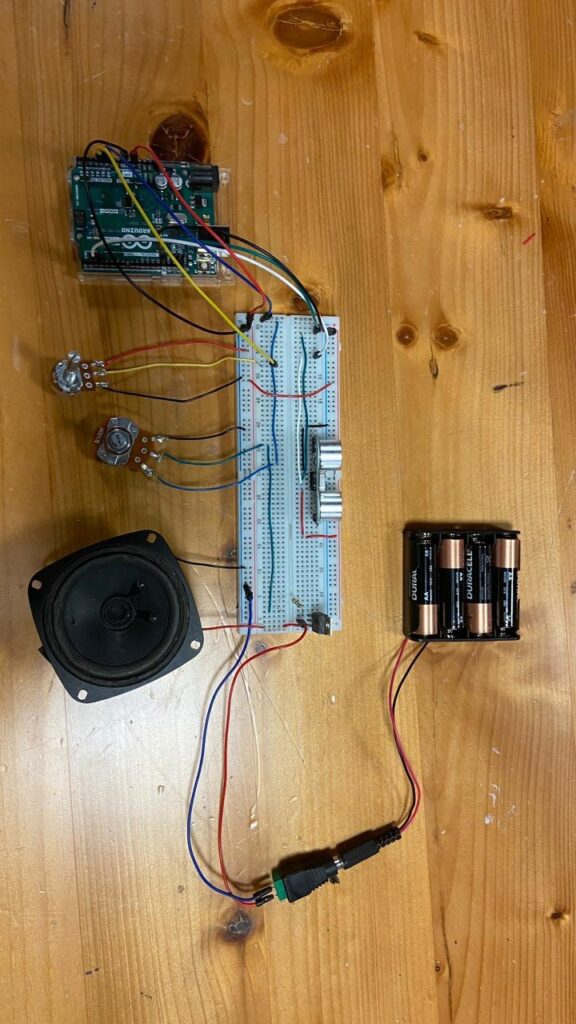
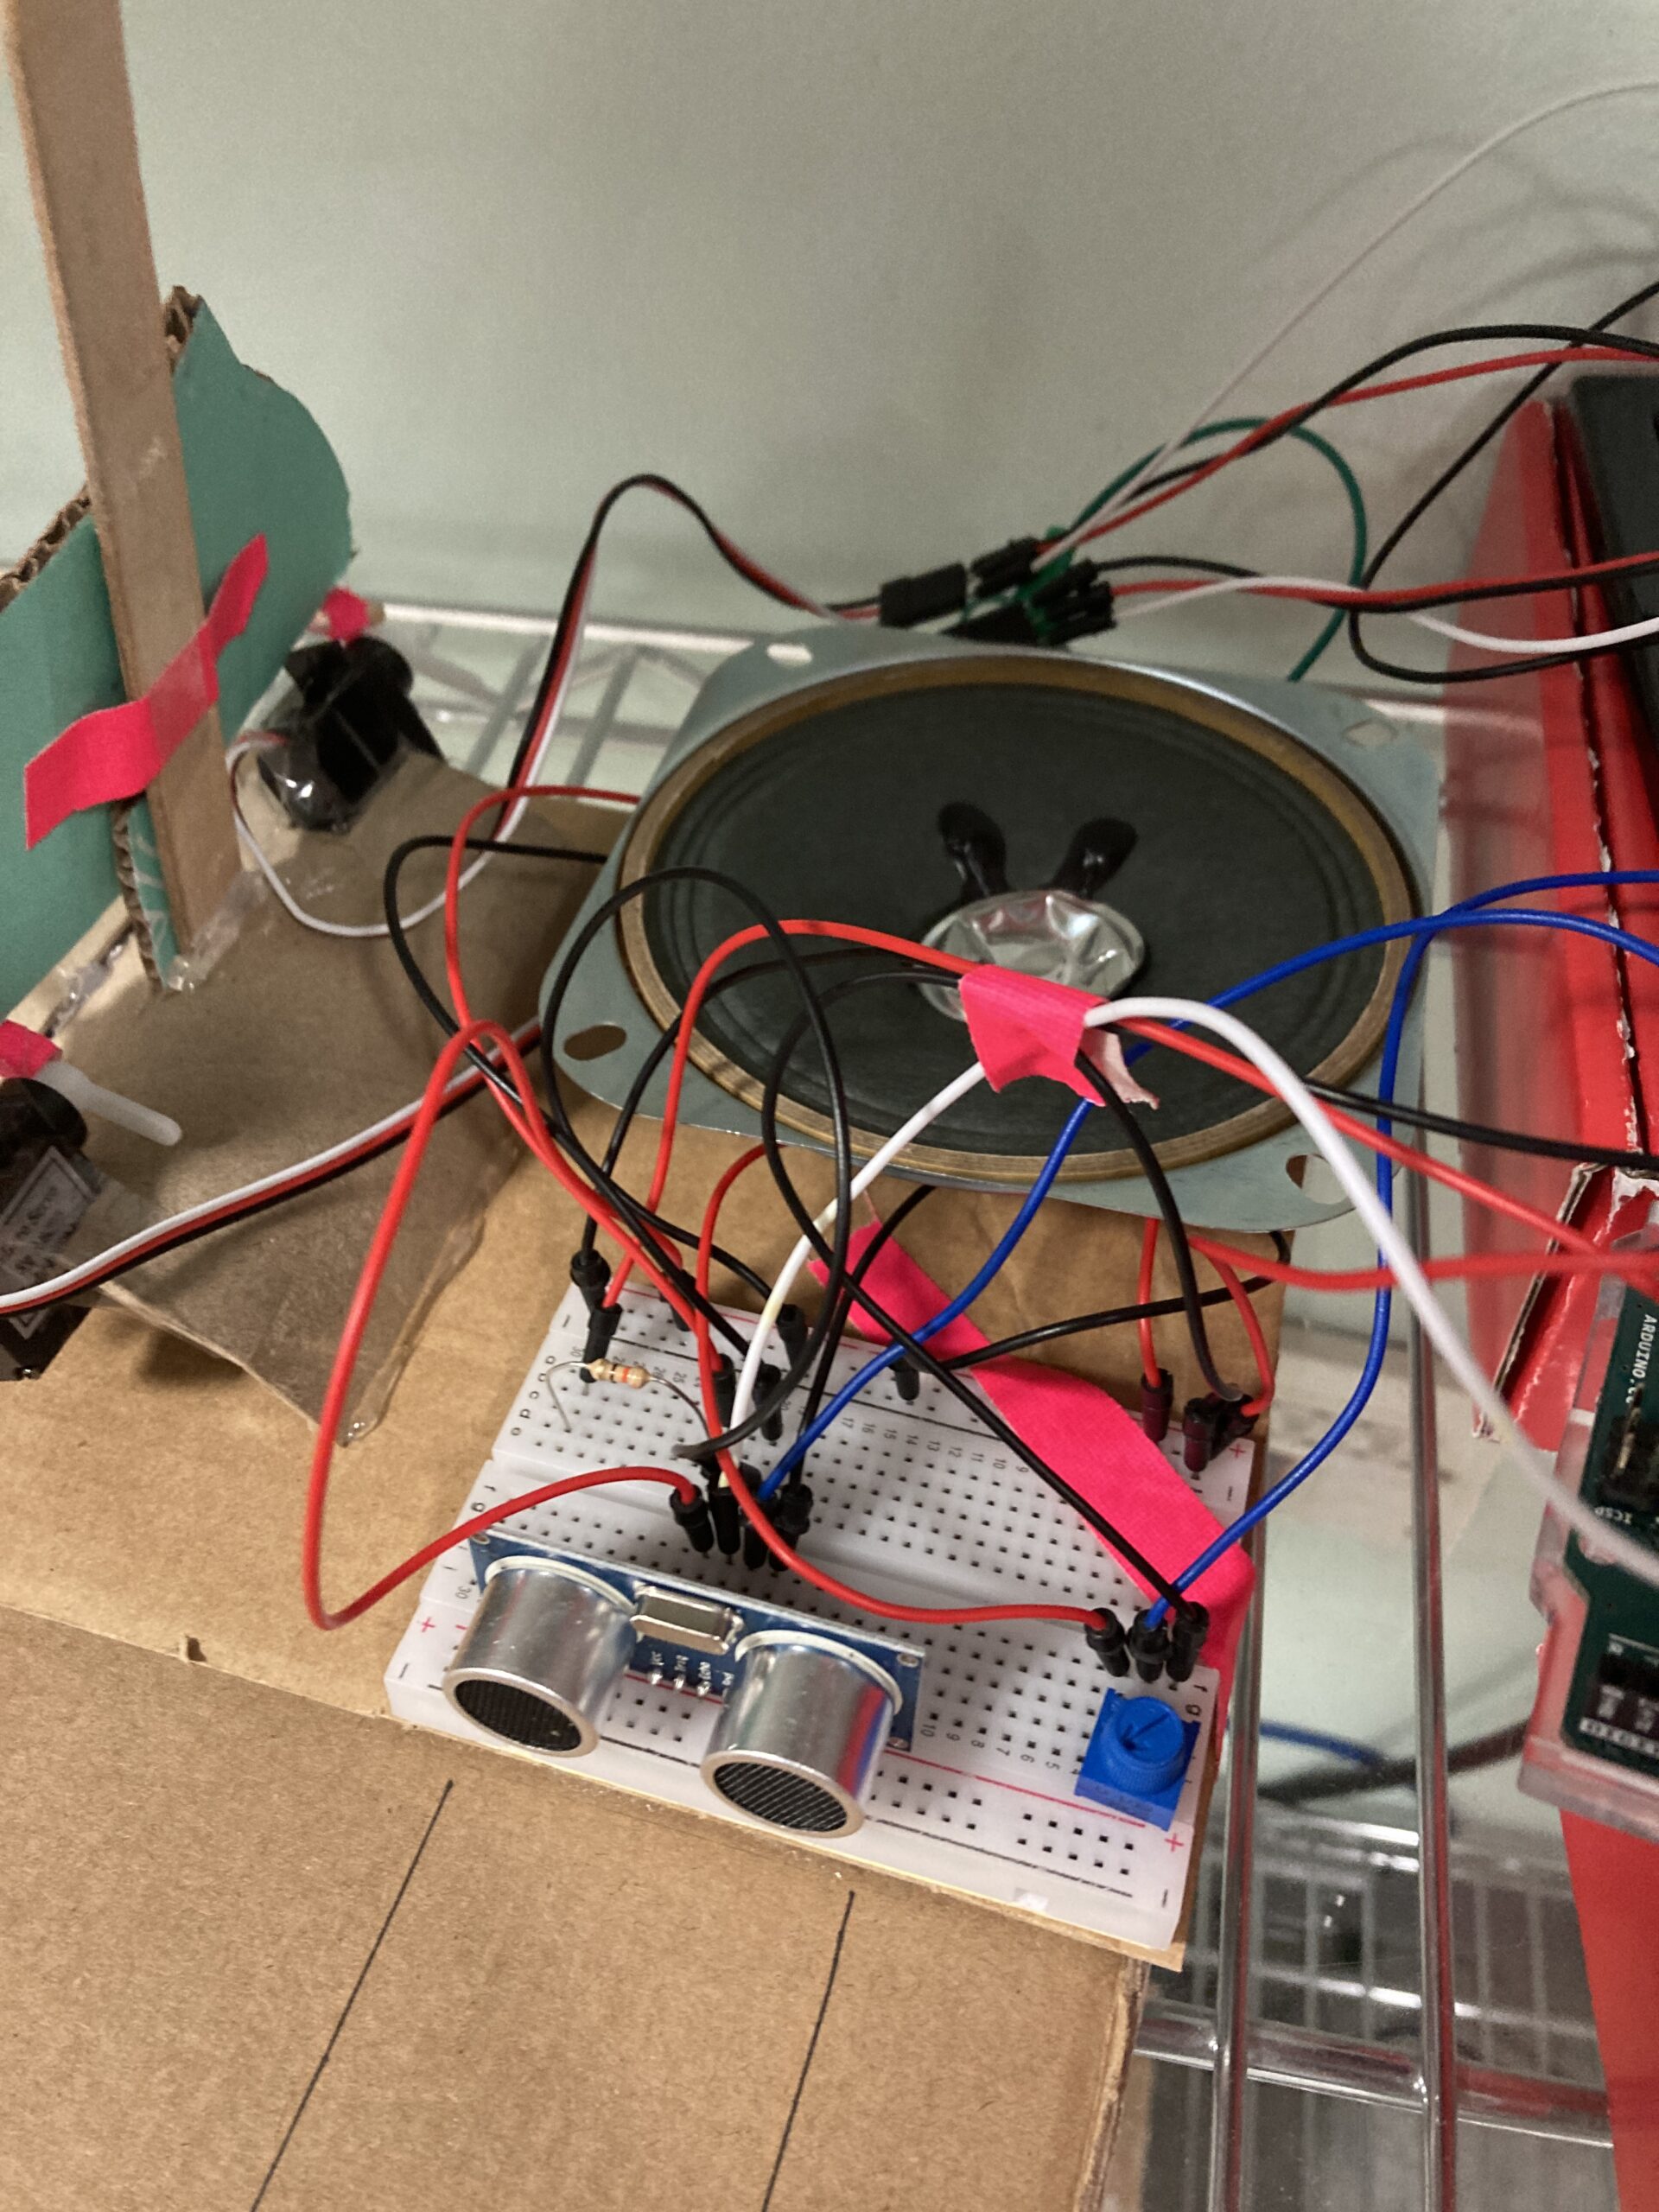
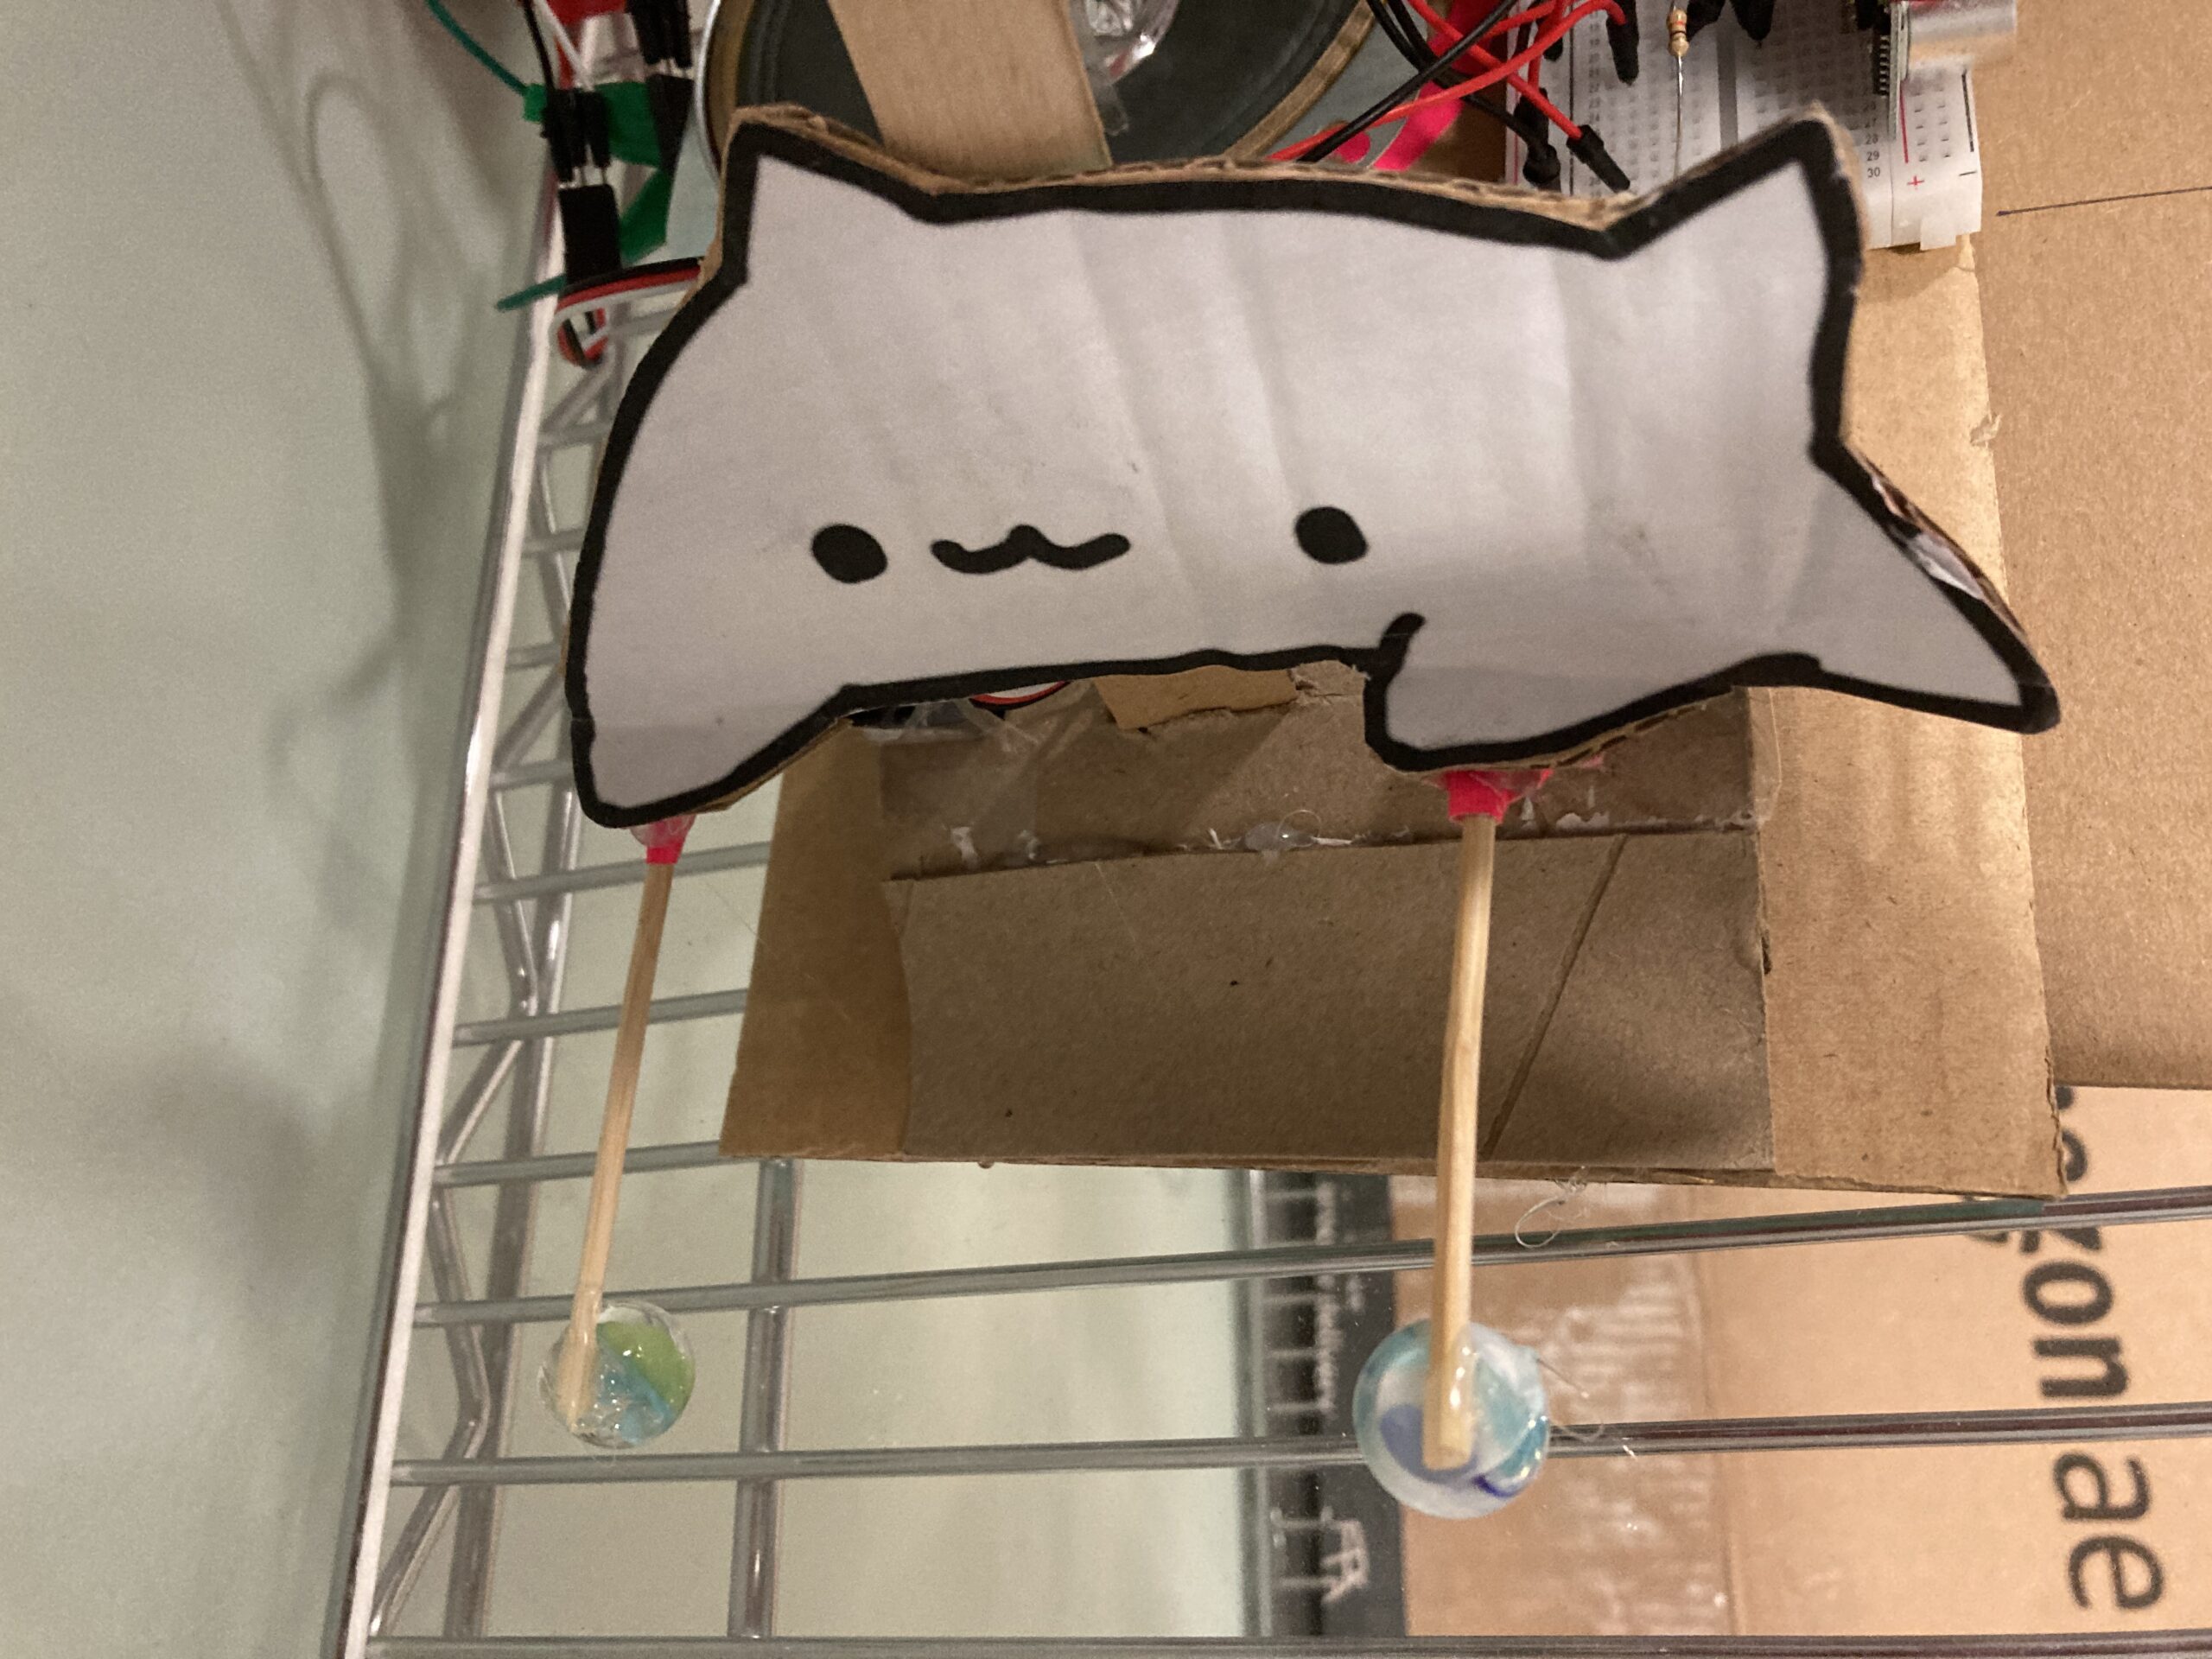
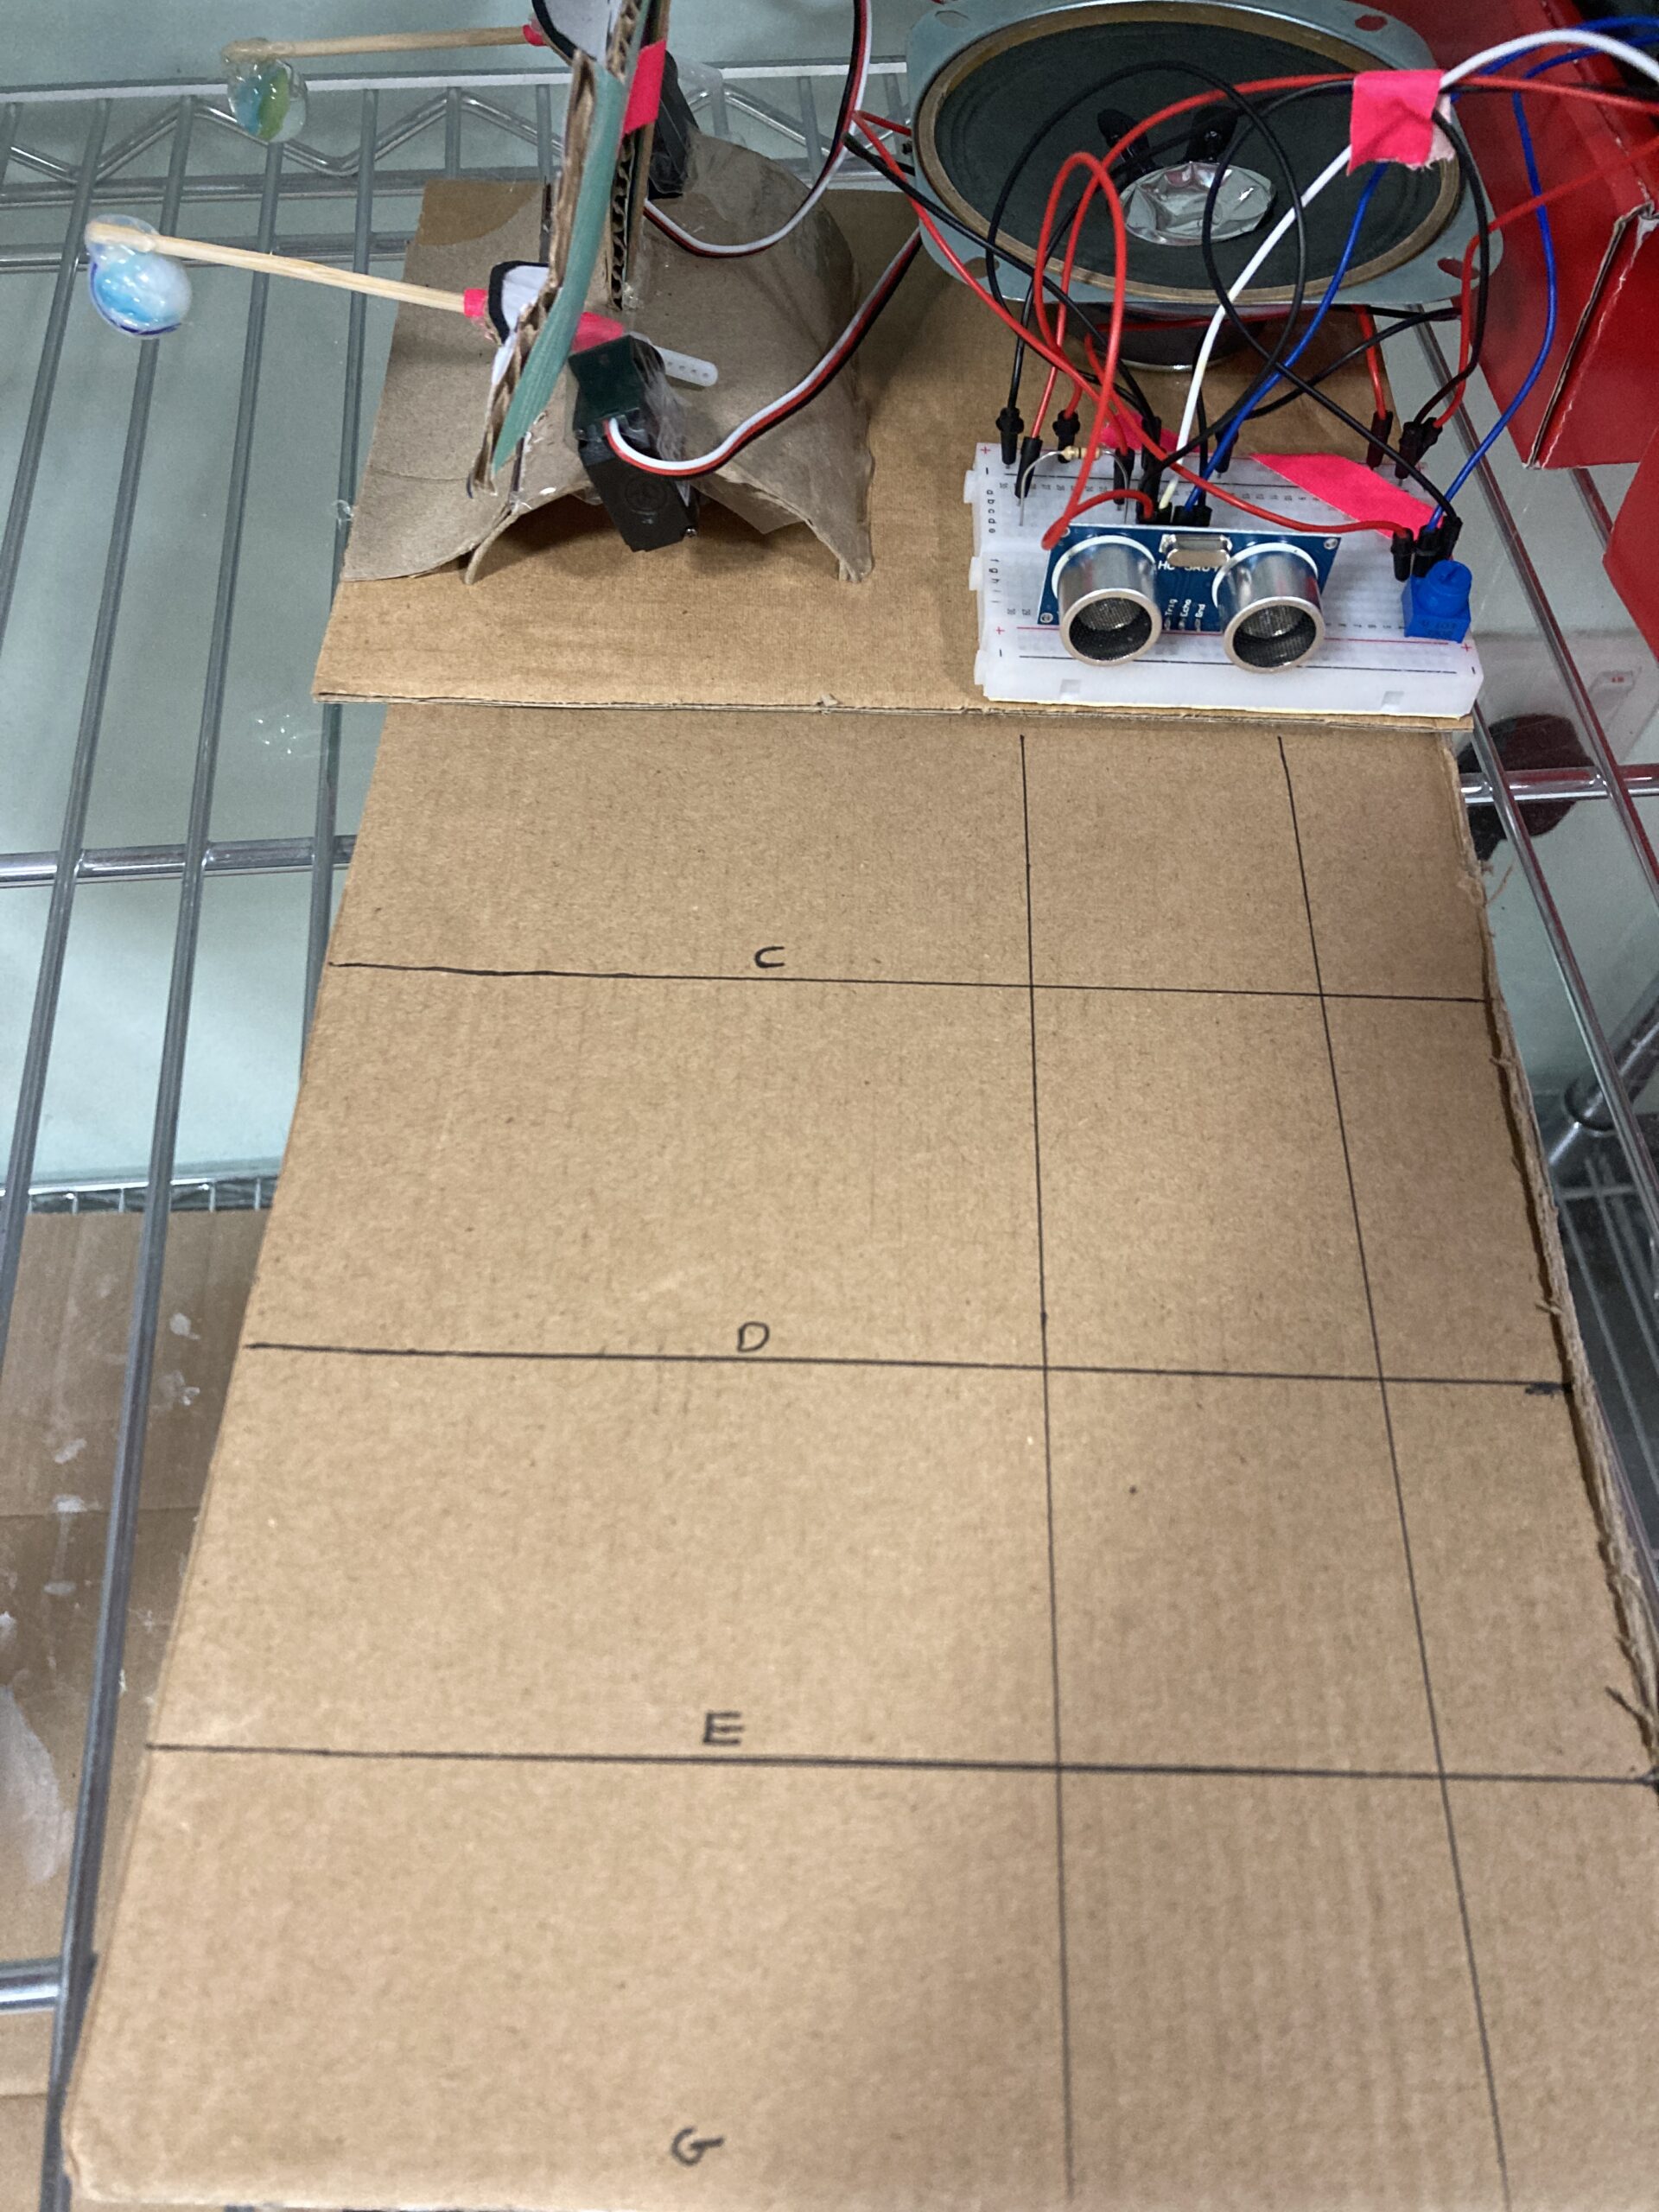
In this project, we designed a unique musical box with a playful twist. Rather than a conventional music box, our creation serves as a musical instrument. The distinctive feature lies in its utilization of an ultrasonic sensor to generate melodies. Additionally, the musical box incorporates a servo motor and an LED light for night use, both controllable digitally. It features an original melody, namely “Ode to Joy,” adding a personalized touch to the musical experience. Inspired by the spirited character Vanellope from the animated movie “Wreck-It Ralph,” we aimed for a funky and whimsical vibe. To enhance its visual appeal, we crafted the box using cardboard and adorned it with starry A4 paper, giving it a delightful and eye-catching appearance, and used a heart-shaped object to play the original song.

Video: 

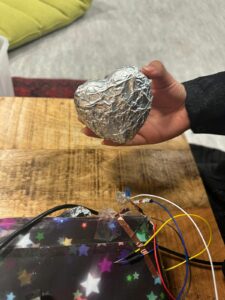
Musical instrument Project

Code & Highlights
#include "pitches.h"


// Defining the pins for the ultrasonic sensor and buzzer
const int trigPin = 9;
const int echoPin = 10;
const int buzzerPin = 11;


// Background melodies
int backgroundMelody1[] = {262, 294, 330, 349, 392, 440, 494, 523};
int backgroundMelody2[] = {330, 349, 392, 440, 523, 587, 659, 698};
int backgroundMelody3[] = {392, 440, 494, 523, 587, 659, 698, 784};
int backgroundBeat[] = {200, 200, 200, 200, 200, 200, 200, 200};


// Setup function runs once at the beginning
void setup() {
 // Setting the pin modes for the ultrasonic sensor and buzzer
 pinMode(trigPin, OUTPUT);
 pinMode(echoPin, INPUT);
 pinMode(buzzerPin, OUTPUT);
 //  serial communication for debugging
 Serial.begin(9600);
}


// Loop function runs repeatedly
void loop() {
 // This sends a short pulse to trigger the ultrasonic sensor
 digitalWrite(trigPin, LOW);
 delayMicroseconds(2);
 digitalWrite(trigPin, HIGH);
 delayMicroseconds(10);
 digitalWrite(trigPin, LOW);


 // Measure the duration of the echo
 long duration = pulseIn(echoPin, HIGH);
 int distance = duration * 0.034 / 2;


 // Print the distance to the serial monitor for checking
 Serial.print("Distance: ");
 Serial.println(distance);


 // Play different notes or melodies based on distance
 if (distance < 7) {
   playMelody();
 } else if (distance < 20) {
   playNote(330);
   playBackgroundMelody1();
 } else if (distance < 30) {
   playNote(392);
   playBackgroundMelody2();
 } else if (distance < 40) {
   playNote(440);
   playBackgroundMelody3();
 } else {
   noTone(buzzerPin);
 }


 delay(500); // Adjust the delay based on your preference
}


// Function to play a single note
void playNote(int frequency) {
 tone(buzzerPin, frequency);
 delay(500);  // Adjust the duration based on your preference
 noTone(buzzerPin);
}


// Functions to play background melodies
void playBackgroundMelody1() {
 for (int i = 0; i < 8; i++) {
   tone(buzzerPin, backgroundMelody1[i]);
   delay(backgroundBeat[i]);
   noTone(buzzerPin);
 }
}


Reflection  and Areas of improvement

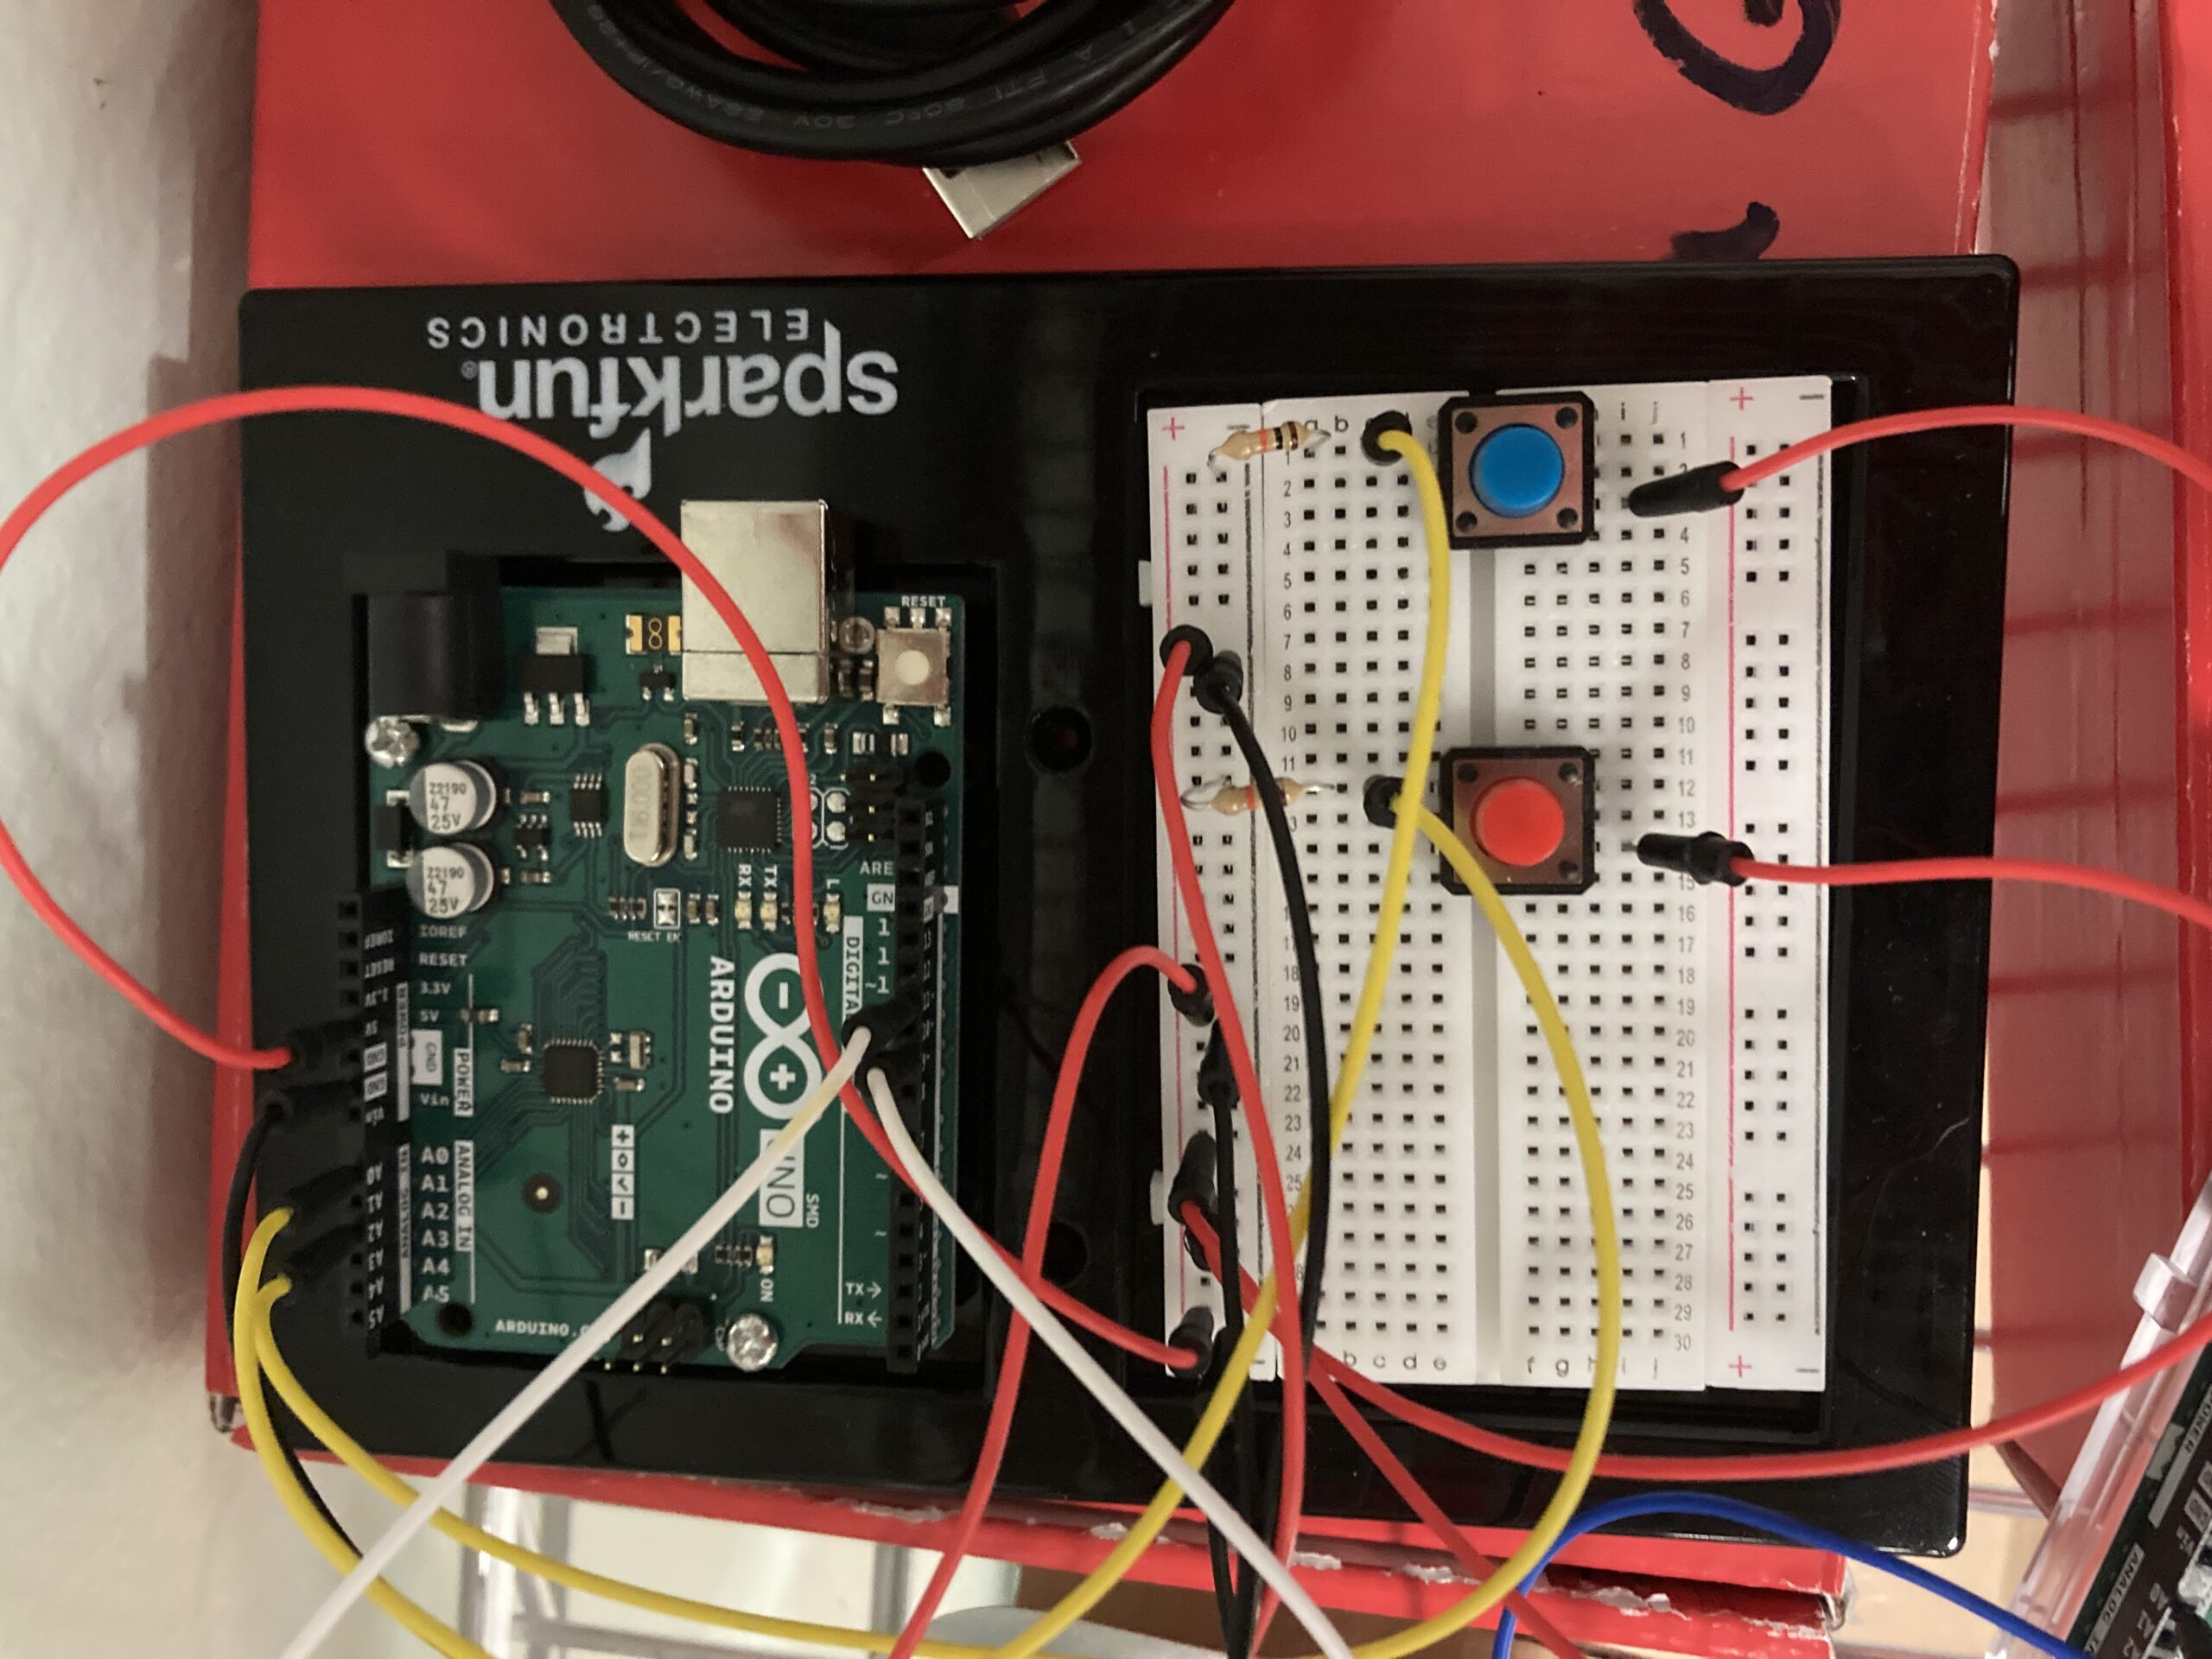
When we first implemented this project, we were aiming to have more than one song or melody that the user can switch to with a button, unfortunately, we faced a lot of difficulties and issues, when it came to the code and hardware, specifically the buttons connection to switching from one song to another, including how it was affected when other hardware devices were added. Another area we struggled with is the servo motor’s ability to move in a 360 loop. If we were to create this again, we would have added more songs instead of just one original song, and include a switch to control the volume.


References:

https://github.com/robsoncouto/arduino-songs/tree/master


Week 10 | Make a musical instrument: “A Whimsical Musical Mixer Box” Assignment

A Whimsical Musical Mixer Box:

In creating this project, our aim was to craft something that deviates from the regular and embraces the weird. I believe that Ghalia and I achieved perfection in capturing this unique and unconventional essence. Our project is inspired by a music box but is aiming to be more funky, weird, and whimsical. The goal is to create a musical box that stands out by having the twirly thingy on the outside instead of the inside. We had multiple ideas initially, but we ultimately settled on this one because we felt a strong desire to bring it to life. While the project was enjoyable, it also presented its challenges, making the process a bit of a struggle.

Structure

We made every effort to enhance our project by incorporating various elements. We integrated a digital light, a servo motor, and an analog sonic sensor. The aluminum on the side serves as a button to control the light and servo, while the sensor plays piano keys based on the distance of the hand. Despite our numerous ideas, implementing them became a challenge, and we faced struggles with the Arduino that led us to adapt our concepts as we encountered difficulties that proved difficult to overcome. An A foil based heart to controll the tone melody.

Initially, I was working with code to play two-tone melody songs controlled by a button. However, as we progressed, I encountered multiple challenges and had to make several changes. I eventually found a code similar to what we were aiming to achieve. Unfortunately, the Arduino posed some inconsistencies – it worked at certain points but failed at others, prompting us to modify and adapt the code.

void loop() {
  unsigned long currentMillisMelody = millis();

  // Play the melody
  if (currentMillisMelody - previousMillisMelody >= noteDuration) {
    previousMillisMelody = currentMillisMelody;

    // Check if there are still notes to play
    if (currentNote < notes) {
      // calculates the duration of each note
      divider = melody[currentNote * 2 + 1];
      if (divider > 0) {
        // regular note, just proceed
        noteDuration = (wholenote) / divider;
      } else if (divider < 0) {
        // dotted notes are represented with negative durations!!
        noteDuration = (wholenote) / abs(divider);
        noteDuration *= 1.5; // increases the duration in half for dotted notes
      }

      // Play the note
      tone(buzzer, melody[currentNote * 2], noteDuration * 0.9);

      // Increment to the next note
      currentNote++;
    } else {
      // All notes played, reset to the beginning
      currentNote = 0;
    }
  }

// Move the servo
// Move the servo from 0 to 360 degrees
  if (currentMillisMelody % 30 == 0) {  // Adjust the value based on your servo speed
    if (pos < 180) {
      pos++;
    } else if (pos < 360) {
      pos++;
    } else {
      pos = 0;
    }
    myservo.write(pos);
  }
}

Reflection

For improvements, I’d like to achieve what we had in mind but couldn’t accomplish in our project. I would also like to reintroduce the button somewhere in our project since we encountered difficulties in that aspect. Additionally, I’m open to suggestions on how to enhance and refine our project further. However, despite the numerous challenges and occasional breakdowns we faced during the process, we take pride in the final outcome. The journey was marked by struggles, but looking back, I can confidently say that the effort was entirely worth it. The end result exceeded our expectations even if our original plan hasnt been achieved, and I genuinely loved how our project turned out, even though it had its share of difficulties. Throughout it all, we managed to have a fun time working together. Now, I need to troubleshoot my Arduino, as it unexpectedly caused issues with my laptop and even caused some lag on my MacBook. It’s a reminder of the unpredictability that comes with the creative endeavors!

Week 10- Reading reflections

A Brief Rant on the Future of Interaction Design

From a psychological perspective, the author’s critique makes total sense because it values the sensual experience over the aesthetical and fancy way of an interactive system. For instance, in the book I once read, O’Keane (2022) suggests that “one makes sense of the world through one’s senses and this becomes the basis for one’s interpretation of the world and for one’s memory.” There is actually one type of memory which is called haptic memory which is the form of sensory memory specific to touch stimuli. So, I believe the author’s argument is very clear and in touch with the specific research in psychology.

However, the article did not offer clear and specific solutions to what can we do as an alternative. I think the author could have provided some options that are available today and that focus somehow on the haptic aspect. For example, Humane™ just launched its much-awaited #hardware device, which has been purpose-built for the new AI era from the ground up: here is the video. It is more human-centered design in technology and it gives an option for manipulating the technology with our hands.

A follow-up article

I think that most of my own critiques and questions from the previous article were answered in this follow-up. I think that authors should respond to critique to engage with readers, gain valuable insights, improve their work, and build a supportive community. Responding to the critique fosters a connection, and enhances the collaborative nature of the creative process.

I genuinely believe that his ideas about giving up on our bodies are so important to talk about. This reminded me of a conversation that I had with my friend about what art is. Today, we tend to think that art is AI-generated images, temporary installations, etc. However, I think art is deteriorating as we rely less on hands-on craftsmanship like it was before for building sculptures and architecture (e.g. Acropolis of Athens). By embracing technology, we risk losing the tactile connection that brings authenticity and soul to artistic creations.

Week 10 – Reading Reflection

When I was young, I used to watch fiction movies portraying the future. I’ve seen that the vision of it shifts significantly over time because, whereas filmmakers strive to develop pre-existing technologies, inventors revolutionize them by bringing in new ideas and perspectives on the world. For instance, I recall the old movie where the main characters could instantly get any book, which would appear in a special box if they said its title. Right now, with the invention of the Internet and smartphones, we can get the same result, but the way we do it is remarkably different. In that sense, I absolutely support the position of Bret Victor about stopping to visualize our future as an advanced version of the present, but rather thinking about how we might revolutionize it and create something entirely new.

Regarding the use of “Picture Under Glass”, I believe it will still be used for at least 3 decades, but personally, I would like to see the transition to the new form of control. Bret Victor promotes the idea that, similar to how we use physical objects and tools, we should use technology in a naturally human way. More or less, I support the idea of involving human actions as a way of controlling things, but I don’t think that it’s the only way to go, as it’s hard to see the world where every control will involve action or physical sensation. It may be implemented alongside other technologies, but not as the only path to technological development.

Reflections – Week 10

A Brief Rant About The Future of Interactive Design

It was fascinating to read an article about the future’s vision and direction – 12 years into the future.  Comparing Bret Victor’s ideas and complaints to what actually ended up transpiring, I am struck by both how correct he was and how much improvement is still possible.

In 2011, Victor dreamed of a future with interactivity design that involved more than just sliding and tapping on pictures behind a screen. Today, while we still continue to do  so (albeit with a few haptic gimmicks like he puts) – it is also true that we may directly be moving towards a future quite unlike this. Personally, my first experience with any kind of haptics or virtual movement simulation was the Nintendo Wii with motion detection. Today the technology has not just improved but we seem to be on the cusp of a virtual reality revolution. Virtual Reality systems have improved by leaps and bounds year upon year and soon we may reach a world where there is mainstream adoption of such technologies in everyday use.

I believe that while the future we have today would be immensely disappointing to the Bret Victor who wrote this post, the immediate future seems to be much more exciting. I am excited to see the digital future of mankind move towards a completely new direction!

Cat Composer – Week 10 Homework

Concept:

While working on this project, we went over several ideas on how we would make an instrument. One thing we discovered in our ideation process was that both of us had previously made projects that centrally involved cats. Thus, with some more tinkering around – we came up with “The Cat Composer”! The Cat Composer is an all in one musical instrument that can play a variety of simple tunes such as “Hot Cross Buns” and “Mary Had a Little Lamb”. It consists of 2 switches to control 2 beat-making servo motors, a distance sensor to control the notes (C, D, E, and G), and a turning potentiometer to toggle between octaves. Additionally, we incorporated a speaker from the IM Lab inventory to make a better sound than the provided buzzer. This instrument is best played with two people, one to play percussion/toggle between octaves, and one to play the notes.

However, with a bit of practice it is completely possible to play it by oneself! Note: In order for the distance sensor to receive a steady input and play the correct notes, it is best to play not with one’s hands, but with a larger piece of material.

Demonstration Video:

Code & Highlights:

The toughest part in the coding process was to ensure that the distance sensor worked exactly as we intended. For example, an issue that we ran into early was the abrupt changing of tune at the border values. Since the sensor isn’t accurate to the exact cm. It would then fluctuate between two tunes. We corrected this by instead using a 5-value moving average. This makes transitions significantly smoother (and the experience much more enjoyable!!)

unsigned int measureDistance() {
  const int numReadings = 5;  // Number of readings to average
  const int maxChange = 150;   // Maximum acceptable change in cm between readings
  static unsigned int lastAverage = 0;  // Store the last valid average distance
  unsigned long totalDuration = 0;


  for (int i = 0; i < numReadings; i++) {
    digitalWrite(trigPin, LOW);
    delayMicroseconds(2);
    digitalWrite(trigPin, HIGH);
    delayMicroseconds(10);
    digitalWrite(trigPin, LOW);


    totalDuration += pulseIn(echoPin, HIGH);
    delay(10); // Short delay between readings
  }


  unsigned int currentAverage = (totalDuration / numReadings) * 0.034 / 2;


  // Check if the change from the last average is within the expected range
  if (abs((int)currentAverage - (int)lastAverage) <= maxChange || lastAverage == 0) {
    lastAverage = currentAverage;  // Update the last valid average
    return currentAverage;
  } else {
    return lastAverage;  // Return the last valid average if the current reading is an outlier
  }
}

Reflections and Improvements:

We can improve our project significantly given more time!

Firstly, we would love the diversify the sounds our project can generate. In our research we discovered that instead of simply using tone() we could perhaps use some other sound generating function. We would love to try this!

Regarding the hardware implementation, the provided potentiometer is too hard to turn and often messes with the wiring. Instead we would love to use a better/larger potentiometer that allows us better access.

Similarly, another change we would like to do is to use a single Arduino Board and breadboard rather than our current 2 board solution. This will make the project more cohesive. Even though this seems easy enough to implement, we let our current design be as of now to simplify our approach.

Lastly, the ultrasonic distance sensor often gives outlier readings. As discussed in the highlight section, we tried our best to resolve this issue, however it still persists. We have some more ideas to remedy this. But we believe that given the scope of this project this was unnecessary. However, we would love to do this in the future.

week10.assignment – Creative Musical Instrument

Concept

For this group assignment, Shahd and I thought deeply about all the possibilities, and frankly, it was difficult to decide what to create. Nevertheless, after having a general idea of what sensors and switches we would like to implement into the project, we decided to create a “digital nature” musical instrument. Specifically, we decided to use photoresistors to measure the amount of light that was reaching our artificial flowers. If a flower is covered with a shadow, the instrument emits a lower-tone note. Adversely, if the flower were lit up with a flashlight or an LED, it would play a higher-pitched note through the piezo buzzer. We decided that the instrument would be controlled by a bee made out of cardboard on a stick that would land on the flowers and emit the “buzz.” However, during the creation of the instrument, another idea struck us, and we decided to add another way to control the instrument. For this, we decided to use the ultrasonic distance measuring sensor and make it play an octave of notes, depending on how close you place your hand, in intervals of three centimeters.

Implementation/Code

We began by constructing a basic circuit using just one photoresistor and the Piezo buzzer to see if our idea was going to work well or not. After numerous attempts to debug the code, we realized that the buzzer was not connected properly to the pin that was supposed to output the sound, so our main issue was solved. We proceeded to add an additional three photoresistors, four total, and I decided to extend their heights by soldering solid core wires to the “legs” of the sensor, varying their heights. Soon, we decided to add a toggle switch, which would transition into the second phase of the instrument, the distance sensor. Ultimately, the code was quite simple and used a variety of if conditions to control each sensor and the respective outputs sent to the Piezo. The code and video of the working instrument are below.

#include "pitches.h"

const int BUZZER = 8;
const int ECHO_PIN = 9;
const int TRIG_PIN = 10;
const int FLOWER1 = A0;
const int FLOWER2 = A1;
const int FLOWER3 = A2;
const int FLOWER4 = A3;
const int SWITCH = A5;
int flowerSound = 0;
int LED=2;
long duration = 100;

int DARK_THR = 600;

void setup() {
  // initialize serial communication at 9600 bits per second:
  Serial.begin(9600);
  pinMode(FLOWER1, INPUT);
  pinMode(FLOWER2, INPUT);
  pinMode(FLOWER3, INPUT);
  pinMode(FLOWER4, INPUT);
  pinMode(BUZZER, OUTPUT);  
  pinMode(ECHO_PIN, INPUT);    // echo pin measure the duration of pulses coming back from the distance sensor
  pinMode(TRIG_PIN, OUTPUT);   // trigger pin output pulses of electricity
  pinMode(LED,OUTPUT);
}

void loop() {
  digitalWrite(LED,HIGH);
  int flower1 = analogRead(FLOWER1);
  delay(1);  // delay in between reads for stability
  int flower2 = analogRead(FLOWER2);
  delay(1);  // delay in between reads for stability
  int flower3 = analogRead(FLOWER3);
  delay(1);  // delay in between reads for stability
  int flower4 = analogRead(FLOWER4);
  delay(1);  // delay in between reads for stability
  int switchOn = digitalRead(SWITCH);
  delay(1);  // delay in between reads for stability

  // Serial.println(switchOn);  ///debugging

  if (switchOn) {
    //dark sensor = lower notes
    if (flower1 <= DARK_THR) {
      tone(BUZZER, NOTE_C3, duration);
    } else if (flower2 <= DARK_THR) {
      tone(BUZZER, NOTE_D3, duration);
    } else if (flower3 <= DARK_THR) {
      tone(BUZZER, NOTE_E3, duration);
    } else if (flower4 <= DARK_THR) {
      tone(BUZZER, NOTE_F3, duration);

    //bright sensor = higher notes
    } else if (flower1 >= 850) {
      tone(BUZZER, NOTE_G3, duration);
    } else if (flower2 >= 850) {
      tone(BUZZER, NOTE_A3, duration);
    } else if (flower3 >= 850) {
      tone(BUZZER, NOTE_B3, duration);
    } else if (flower4 >= 850) {
      tone(BUZZER, NOTE_C4, duration);
    } else {         
      noTone(BUZZER);
    }
  } else { // if switch is changed to distance sensor
    int distance = getDistance();
    Serial.println(distance);
    if (1 < distance && distance < 3) {
      tone(BUZZER, NOTE_C4);
    } else if (3 < distance && distance < 6) {
      tone(BUZZER, NOTE_D4);
    } else if (6 < distance && distance < 9) {
      tone(BUZZER, NOTE_E4);
    } else if (9 < distance && distance < 12) {
      tone(BUZZER, NOTE_F4);
    } else if (12 < distance && distance < 15) {
      tone(BUZZER, NOTE_G4);
    } else if (15 < distance && distance < 18) {
      tone(BUZZER, NOTE_A4);
    } else if (18 < distance && distance < 21) {
      tone(BUZZER, NOTE_B4);
    } else {
      noTone(BUZZER);
    }
  }
}

float getDistance() {
  float echoTime;                   //variable to store the time it takes for a ping to bounce off an object
  float calculatedDistance;         //variable to store the distance calculated from the echo time

  //send out an ultrasonic pulse that's 10ms long
  digitalWrite(TRIG_PIN, HIGH);
  delayMicroseconds(10);
  digitalWrite(TRIG_PIN, LOW);

  echoTime = pulseIn(ECHO_PIN, HIGH);      //pulsein command to see how long it takes for pulse to bounce back to sensor
  calculatedDistance = echoTime / 55.2;    //calculate  distance of object that reflected the pulse in cm 
  return calculatedDistance;  
}
Reflection

Ultimately, I enjoyed working on this assignment and believe that our project / musical instrument was successful in accomplishing the tasks that we wanted it to do. Nevertheless, there is much room for improvement. From a visual standpoint, a variety of different improvements could be made. For instance, creating an enclosure for the wires, Arduino, and breadboard leaving only the flowers, switch, and distance sensor for view. This would allow for the instrument to be more visually appealing. Additionally, instead of the Piezo buzzer, we could use a speaker for generating the notes more clearly, and perhaps the switch could make different types of notes (piano and guitar, etc…). There could also be a different approach in which two people can play the instrument simultaneously, but that would require 2 speakers and more complexities.