Midterm Project

Fullscreen link: https://editor.p5js.org/fhgggtyf/full/_GaqN8_Sa

Overall Concepts

The concepts didn’t change much compared to what I thought of when planning. However, instead of staring with randomly generated maps, I chose to use the original map for the first few levels so that the difficulty won’t get too insane at the beginning. Then, after the user is familiar with the game, they will encounter randomly generated maps which are insanely difficult. The main gameplay is the same with the original Pac-Man version, but the success condition for finishing a level no longer is to eat all pellets but also reaching the portals to get to the next level. Each level has a theme which is rotated in a pool of three: fire, wood, and water. Each theme has its own sets of environment and music. This is because I do not want this game to only feel like a game to the user, but feel like a real adventure in various landscapes. The player also gets a record of their final score after their 3 health is depleted. The four ghosts each have a different logic system of pursuing the player, and the mode changes of the ghosts are coherent with the original game. As levels increase, scatter mode and chase mode ratios will change to make difficulties higher.

Implementation

The game is mostly separated into 3 modules: Game, Player, Ghosts. It could be divided to make the structure clearer but since its not such a big project I decided to keep it simple.

The game module is responsible for controlling how the game progresses. There are 3 game states, which are start, in game, and game over. In the in game state, it is responsible for the game interactions, level states, and sending signals to the ghosts making them go to different modes. There should be a game effect controller to do this but I integrated the elements into the game module instead. Basically, this module controls all in-game state changes and the program state changes.

the player module is responsible for taking in inputs and converting it into actions of the player object. it also contains stats of the player.

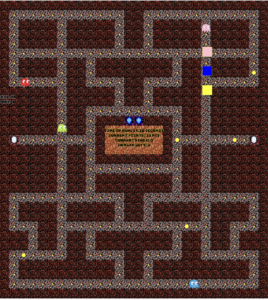
The ghosts module is used for calculating the actions of the ghosts. each ghost have its own rules in pursuit of the player. Also the ghosts have different states, which would effect their destination points. Overall, All ghosts have the same rules pursuing a certain destination point. However, different ghosts usually have different destination points due to their unique behaviors. Therefore I have subclasses inheriting the Ghosts class so they can determine their own destinations. These squares refers to their different destination points based on their behaviors. The squares in the following image stands for the destinations of each of the ghosts.

The code is shown below.

class Ghosts{
  constructor(){
    this.position=[1,1];
    this.img=blinkyImage;
    this.vulnerable=false;
    this.addPointFlag=false;
    this.absPos=[round(this.position[0]),round(this.position[1])];
    this.prevAbsPos=this.absPos;
    this.state=0;//prepare state
    this.dir=[1,0];//no direction
    this.speed=ghostSpeed[game.gameLevel];
    this.dest=[0,0];
    this.next=[0,0];
    this.sur=[[this.absPos[0],this.absPos[1]-1],
              [this.absPos[0]+1,this.absPos[1]],
              [this.absPos[0],this.absPos[1]+1],
              [this.absPos[0]-1,this.absPos[1]]];
    this.choices=[];
  }
  
  checkState(){ // Check ghost's state to determin action
    if(this.state==0&&this.absPos[1]>11){
      this.resetMode();
    }
    else if(this.state==9){
      if(this.absPos[0]==13&&this.absPos[1]==15){
        this.state=0;
        this.addPointFlag=false;
      }
    }
    else{
      if(game.frightened && game.frightenedTimer<=7){
        this.frightenedMode();
      }
      else{
        this.vulnerable=false;
        game.frightened=false;
        game.frightenedTimer=0;
        if(game.cycleTimer/(int(chaseTime[game.gameLevel])+int(scatterTime[game.gameLevel]))<=5 && game.cycleTimer%(int(chaseTime[game.gameLevel])+int(scatterTime[game.gameLevel]))<scatterTime[game.gameLevel]){
          this.scatterMode();
        }
        else{
          this.chaseMode();
        }
      }
    }

    
  }
   
  defeatedMode(){
    this.state=9;
    this.img=eyesImage;
    this.dest=[13,15];
  }
  
  resetMode(){
    this.dest=[13,11];
  }
  
  checkMoved(){ // check if the ghost moved a whole block, if moved calculate new destination
    this.absPos=[round(this.position[0]),round(this.position[1])];
    this.sur=[[this.absPos[0],this.absPos[1]-1],
              [this.absPos[0]+1,this.absPos[1]],
              [this.absPos[0],this.absPos[1]+1],
              [this.absPos[0]-1,this.absPos[1]]];
    if(this.absPos[0]!=this.prevAbsPos[0] || this.absPos[1]!=this.prevAbsPos[1]){
      this.calcMovement();
      this.prevAbsPos=this.absPos;
    }
  }
  
  calcMovement(){ // calculate new destination and how to get there
    this.choices=[];
    this.sur.forEach(element => {
      if((element[0]!=this.prevAbsPos[0] || element[1]!=this.prevAbsPos[1]) && mapData[game.mapNum][element[1]][element[0]]!=1){
        if((this.state != 0 && this.state != 9)&& mapData[game.mapNum][element[1]][element[0]]==3){
        }
        else{
          this.choices.push(element);
        }

      } 
    });
    
    if(this.choices.length==0){
      if(this.absPos[0]==1 && this.absPos[1]==14){
        this.position=[26,14];
        this.absPos=[round(this.position[0]),round(this.position[1])];
        this.choices.push([25,14]);
      }
      else if(this.absPos[0]==26 && this.absPos[1]==14){
        this.position=[1,14];
        this.absPos=[round(this.position[0]),round(this.position[1])];
        this.choices.push([2,14]);
      }
    }
    
    let closest = Infinity;
    
    this.choices.forEach(element => {
      
      let difference = sq(element[0]-this.dest[0])+sq(element[1]-this.dest[1]);

      // Check if the current element is closer than the previous closest element
      if (difference < closest) {
        closest = difference;
        this.next = element;
      }
    });
    
    this.dir=[this.next[0]-this.absPos[0],this.next[1]-this.absPos[1]];
  }
  
  moveToNext(){ // move
    if(this.dir[0]!=0){
      this.position[0]+=this.dir[0]*this.speed*deltaTime/1000;
      this.position[1]=this.absPos[1];
    }
    else{
      this.position[1]+=this.dir[1]*this.speed*deltaTime/1000;
      this.position[0]=this.absPos[0];
    }
  }
  
  frightenedMode(){
    this.vulnerable=true;
    this.img=vulImage;
    if(this.choices.length>1){
      this.dest=this.choices[floor(random(this.choices.length))];
    }

  }
  
}

class Blinky extends Ghosts{
  constructor(state,dest,position,img){
    super(state,dest,position,img);
    this.position=[13.5,11]
    this.img=blinkyImage;
  }
  
  scatterMode(){ // Scatter mode determine destination
    if(this.state!=2){
      this.dir[0]=-this.dir[0];
      this.dir[1]=-this.dir[1];
      this.state=2;
    }
    this.dest=[27,0];
  }
  
  chaseMode(){ // Chase mode determine destination
    if(this.state!=1){
      this.dir[0]=-this.dir[0];
      this.dir[1]=-this.dir[1];
      this.state=1;
    }
    this.dest=player.position;
  }
  
  display(){
    if(this.state!=9 && this.vulnerable==false){
      this.img=blinkyImage;
    }
    fill("red");
    // rect(this.dest[0]*40,this.dest[1]*40,40,40);
    image(this.img,this.position[0]*40,this.position[1]*40,40,40);
    fill(0); // Set the text fill color to black  
  }

}

In the code above I only shown one subclass so that it won’t be too long. The basic concept of the subclasses are similar. I am pretty proud of this part because the structure is clear and it made the development progress so much easier.

Areas for Improvement

Some areas of improvements could be the aesthetics of the different scenes. I planned to do a pixelated low-poly tile-map styled map design but it turned out to look very unnatural and dirty. If I have more knowledge in graphic design I might be able to do better. Another thing is that the program has a few minor rule bugs that may allow the user to gain points incredibly fast (with a great risk). Maybe I’ll fix them in the future. Also, the random maps may cause the ghosts to behave abnormally because of the limitations of a 43-year-old algorithm. It could also be refined. Also a user login system could be applied to store people’s personal bests online. Apart of random maps, I could also add one way areas or blockages that would slow the player down, etc. But that would require refines in the ghosts’ AI, which I didn’t have time to do in this project.

Midterm Presentation: The Designer Chair Plunge

Sketch:

Link to full screen: https://editor.p5js.org/llluka/full/EZEndFCFm

https://editor.p5js.org/llluka/sketches/EZEndFCFm

Concept:

The game, titled “Designer Chair Plunge,” is a fun and interactive experience that puts players’ reflexes and decision-making skills to the test while exploring the world of designer chairs. The goal is for the player to save a designer from a risky fall, guided by a humorous story in which the chairs are personified as fighters. As the player, you select your “fighter” from a range of well-known designer chairs including Barcelona, Eames, Panton and Wassily chairs, and the classic white plastic chair is added for the humorous effect. When the game begins, you must manipulate your chosen chair in order to capture a falling designer.  Your score rises with each successful rescue. However, be careful not to let a designer plunge to the ground, as this will result in an offensive game over. “Designer Chair Plunge” combines design appreciation and gaming components, creating a novel and enjoyable way to interact with the world of furniture design.

Technical Implementation:

The game is built on the p5.js framework utilizing object-oriented programming. There are various screens in the game for the introduction, chair selection, gaming, and ending. PNG images and sounds are used in the technological implementation to create an immersive experience. Chairs and designers are represented by images, and interactions are managed through mouse input, where the player selects their chair and attempts to catch designers falling from the top of the screen. The game keeps track of the player’s score and ends the game if a designer hits the ground. The “restart” function not only resets the game state but also ensures the music restarts from the beginning, creating a consistent and enjoyable audio experience for the players. Here is the code for the restart function:

function restart() {
  screen = 0; // switch to intro screen
  score = 0;
  designer.reset();
  designer.speed = 2; // reset the speed of the fall
  mozart.stop(); // stop currently playing sound
  mozart.play(); // start the sound from the beggining
}

Moreover, the falling designer figures are randomized from 3 distinct images. Here is a function inside my Designer class that handles that:

display() {
    if (this.r < 0.3) {
      image(subject_1, this.x, this.y, this.width, this.height);
    } else if (this.r < 0.6) {
      image(subject_2, this.x, this.y, this.width, this.height);
    } else {
      image(subject_3, this.x, this.y, this.width, this.height);
    }
  }

Nevertheless, an important part of the game’s look and feel is not in the code. At first, I experimented with different images of the chairs found online, however, nothing really seemed to match my vision for the game. Therefore, I decided to draw the chairs myself to give the experience a unified aesthetic. Here are my PNG images (I used Adobe Fresco on my iPad to produce them):


Reflection:

I am very happy about the final look and feel of the project. It turned out  exactly as I imagined it to be (refer back to the moodboard in Midterm Progress #1). I am especially satisfied with the concept and design of the game, and how I managed to create and maintain a unified feel of the mid-century modern aesthetic with the tiny details such as my own drawings, sounds, and the two graphic images. I also applaud myself for the humorous aspect of the game – there is no way to “win” the game, and thus the designer is never going to be satisfied, just like in the real life.

Mid-Term project

Link to the sketch: https://editor.p5js.org/nafiha/full/215NRUgea

Concept : From the beginning of my mid-term project, I was inspired to create a cooking game, a passion that has been with me since my childhood. Initially torn between the realms of cooking and baking, I eventually decided to choose baking, given my fondness for it. However, as I started on the journey to develop the game, I soon realized that simulating baking was a far more complex task than actually baking in the real world.

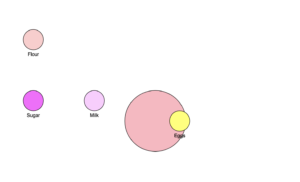
Over the past few weeks, I hunt through into the mechanics of enabling users to click on various ingredients and watch them smoothly move towards a designated destination, such as a mixing bowl or even autonomously. I began with simple shapes like circles to grasp the fundamentals of this interaction. I focused on the feature of clicking on ingredients rather than implementing a drag-and-drop functionality, mastering these concepts before delving into the coding aspects.

What particularly piqued my interest was a class where our professor taught us how to create a dynamic, moving background. I decided to incorporate this element into my game, kickstarting my coding journey. The concept is intentionally straightforward and minimalist to ensure a hassle-free user experience. Upon starting the game, the required ingredients will be presented. Users need to simply click on each ingredient to successfully complete the game. Once the game is won, a cupcake will appear and they have the option to restart and play again. A picture of the sketch which was initially done to practice the method has been attached.


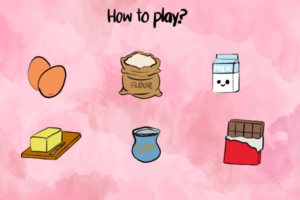
Part of the code that I am proud of  : This is the picture that I drew as a screen for instructions. The part of the code that I am especially proud of is when I learned to add the moving background as I mentioned earlier and to click on images from the computer to add on. And learning the function of lerp, was also exciting.

if (img.moving) {
// Move the image towards the center of the screen
let targetX = width / 2 - img.size / 2;
let targetY = height / 2 - img.size / 2;
let speed = 0.5; // Adjust the speed as needed
img.x = lerp(img.x, targetX, speed);
img.y = lerp(img.y, targetY, speed);
}
image(img.image, img.x, img.y, img.size, img.size);
}
}

Areas for improvement: Throughout the development process, I encountered numerous challenges, some of which I successfully resolved, while others remained elusive. Initially, I struggled with the issue of smoothly transitioning from one screen to the next, a task that seemed quite discouraging. After acquiring the necessary skills to address this, I then faced the problem of the background image overlapping with the added objects, which required a significant amount of time and effort to pinpoint and rectify.

In addition to these hurdles, I had originally intended to implement a time limit for the ingredient addition phase, which I, unfortunately, still couldn’t figure out. Nevertheless, apart from the time limit issue, I managed to overcome every other challenge that came my way.

midterm project: a life odyssey

link to sketch: https://editor.p5js.org/parchinkos/full/6Wh1hDMjG

link to p5.js web editor: https://editor.p5js.org/parchinkos/sketches/6Wh1hDMjG

(for some reason the initial start screen music doesn’t play on full-screen)

concept:

I knew from the beginning that I wanted to make a game. The aesthetics I had in mind for my project were always there, too – I’m a huge fan of 16-bit and 8-bit pixel art, and I knew I wanted to incorporate that art style into my work. I was also torn between the type of game I wanted to make; I could make it a complex story told through an RPG game format, or I could lean towards something more simple but with more gameplay. In the end, I ended up doing the latter, because it held one’s focus on the project for much longer. The gameplay for my project was inspired by simple platform games like Google’s T-Rex runner game or even Flappy Bird. Essentially, the player stays in one position throughout the game but has to avoid obstacles and/or hurdles throughout the way. My game has collectibles, which the player gathers for points, and obstacles which the user has to jump/avoid or else they lose points.

The main thing that I thought about was what I wanted the setting of the game to be. This semester, I’m taking a core class called Hindsight which focuses a lot on autobiographical story. So naturally, my mind went towards something similar: different life phases for different levels. Initially I was making it my own, but then I realized it would be infinitely more interesting if I loosely based the levels around my father’s life. He’s lived through much more different ‘settings’ (I’ve been in a city for my entire life). The game isn’t super focused on his life story, but the general inspiration for each level can be seen below.

chapter 1: the simple life

My dad grew up in a village, and on a farm, so the setting of this level is inspired by that! You also collect mangoes because that’s his favorite fruit.


chapter 2: the concrete jungle

In his late teens/early twenties, he moved from his village to Karachi, a large metropolitan city. It was his first time being in such an environment, so the level is based on the novelty of that. Cars, crows and rats are things one often finds in big cities like this which is why they’re the obstacles.

chapter 3: setting sail

After completing training at his cadet college (which was why he moved in the first place), my dad officially joined the Navy. He spent a lot of time at sea in his early years, which is why the last level he’s on a boat. At first I wanted there to be fish or something, but that seemed a bit difficult so I just settled on making the obstacles birds.

how it works

The functionality is relatively straightforward. There is a player object, which actually stays in place the entire game. The only movement from the user is that it can jump (and double-jump!) using the spacebar. The player object is given the illusion of moving because everything else – the obstacles, the collectibles, the background – move towards the player. The collectables and obstacles essentially have speeds at which they move towards the user, and if the player collides with a collectible points are added and deducted for obstacles. The placement of the obstacles and the collectables are random. Once the user has passed all obstacles in the game, the game advances to the next level.

My player class can be seen below.

class Player {
  constructor(spritesheet, spritesAcross, spritesDown, x, y, speed) {
    this.w = int(spritesheet.width / spritesAcross);
    this.h = int(spritesheet.height / spritesDown);
    this.across = spritesAcross;
    this.down = spritesDown;
    this.direction = 2;
    this.sprites = [];
    for (let y = 0; y < spritesDown; y++) {
      this.sprites[y] = [];
      for (let x = 0; x < spritesAcross; x++) {
        this.sprites[y][x] = spritesheet.get(
          x * this.w,
          y * this.h,
          this.w,
          this.h
        );
      }
    }
    this.x = this.w + 15;
    this.y = y;
    this.ground = y;
    this.speed = speed;
    this.step = 0;
    this.jump = 15;
    this.vy = 0;
    this.canDoubleJump = true;
    this.g = 1;
    this.isMoving = true;
    // this.score = 0;
  }

  setGround(newY) {
    this.ground = newY;
  }

  updatePosition() {
    this.y += this.vy;
    // gx -= obstacleSpeed;

    if (this.y < this.ground) {
      this.vy += g;
    } else {
      this.vy = 0;
      this.y = this.ground;
      this.canDoubleJump = true;
    }

    if (this.isMoving) {
      if (frameCount % this.speed == 0) {
        this.step = (this.step + 1) % this.across;
      }
    }
    // print(isMoving);

    image(this.sprites[this.direction][this.step], this.x, this.y);
  }

  doAJump() {
    if (this.y >= this.ground) {
      this.vy = -this.jump;
      this.canDoubleJump = true;
    } else if (this.canDoubleJump) {
      this.vy = -this.jump;
      this.canDoubleJump = false; // Consume double jump
    }
  }


things i’m proud of

One of my favorite things to do when I’m working on a technical creative project is figuring out the ambiance/aesthetics of the piece. Sometimes, I spend more time on that than the actual code. So needless to say, I’m the most proud of the aesthetics of this project. Not only does it it looks very in line with my initial vision of a retro game project, but I’m proud of how I was able to create the atmosphere for every setting. The background graphics, the obstacles, the collectibles, and the music. I think it all ties together very well and makes the game super immersive.

improvements

While I’m happy with how my project turned out, there is definitely room for improvements, or small changes that could completely elevate the level of my work.

  • Canvas size! I think because I was thinking of platform games on small screens, I kept the canvas size small. But I now wish it was bigger – unfortunately my code wasn’t typed in the most adaptable way, so it became a bit difficult to change the size towards the end.
  • Small features like being able to turn off the music would help a lot as well as I know the game is a bit heavy on the sound, which can be a bit disruptive.
  • Making the scoring system much more refined, i.e. adding points based on how elevated the collectable object is.

These changes seem relatively straightforward to implement, but I couldn’t mostly because of time restrictions.


Week 6 – Midterm Memory Box

Link to sketch: https://editor.p5js.org/ojmjunming/full/W-301y_lp 

Concept

I wanted to create an installation-type piece, something that you leave in a gallery or in some space and let users naturally interact with the piece. The idea behind my project is based off a thought I had a few weeks ago. I thought that despite all the new memories I make, I find myself forgetting things and people in my past who were once dear to me. This project is my take on trying to convey that feeling — the idea of losing memories for every new ones you gain.

How it Works

The screen prompts the user from a list of pre-determined questions and the viewer is encouraged to type a short response to it. When they press ‘Enter’, a photo will be taken of the viewer the viewer’s response and photograph will be inserted into the ‘Memory Box’, while an older memory is removed.

I also try to convey a feeling of fleetingness by making the title and question text look wobbly/jittery. The text doesn’t feel static and feels a little uncertain as they do not stay in one place, which I thought helps sell a feeling of dreamy-ness. The text input is also accentuated by the sounds of a typewriter, which I use to help create an atmosphere of retro-ness and nostalgia.

Technical Parts I’m Proud Of

class WobblyText {
  constructor(message, x, y, size = TEXT_SIZE) {
    this.letters = []
    this.size = size
    this.message = message
    this.x = x
    this.y = y
    
    let curString = '';
    for (let i = 0; i < message.length; i++) {
      let curLetter = message[i]
      this.letters.push(new Letter(curLetter, this.x + textWidth(curString) * 1.2, this.y, this.size))
      curString += curLetter
      
    }
  }
  
  render() {
    for (let letter of this.letters) {
      letter.render()
    }
  }
}
         
class Letter {
  constructor(letter, x, y, size = 16) {
    this.letter = letter
    this.size = size
    this.originX = x
    this.originY = y
    this.offsetX = 0
    this.offsetY = 0
    this.maxOffset = 2 + (size / 12)

    this.noiseX = random(10000)
    this.noiseY = random(10000)
  }
  
  render() {
    push()
    textSize(this.size)
    text(this.letter, this.originX + this.offsetX, this.originY + this.offsetY)
    pop()
    
    this.offsetX = (noise(this.noiseX) - 0.5) * 2 * this.maxOffset
    this.offsetY = (noise(this.noiseY) - 0.5) * 2 * this.maxOffset
    this.noiseX += 0.01;
    this.noiseY += 0.01;
  }
}

I’m really proud of the wobbly/jittery text as I feel that it helps add to the emotional feeling of the project. It was a little harder to achieve than I thought, as I had to manually create every letter of the text so I created two classes to help me achieve this effect without having to manually draw each of the letters. I maintain a separate state for each letter, so each letter moves independently of the other letters ( though within a certain bounds of it’s starting point ).

Things to improve

I left out the instructions for pressing ‘Enter’ as I assumed that it’s something that most viewers will know how to do, but I’m not sure if thats a good decision I’ve made and I wish I had more time to test my project with other people to see if there are any improvements I could’ve made on the UI/UX. I would’ve also liked to improve the animations for removing/creating a new memory, as right now there is only a simple fade out animation. A more dreamy animation for inserting the new memories would’ve been nice.

Midterm Project

Link to the Sketch: https://editor.p5js.org/be2143/full/wxUp4YLBf

Concept

“The Brain Game” is a game designed to challenge the user to complete 3 levels. Initially, my idea was to implement only “The 5 Hats to 3 Men Problem.” However, I later changed the concept to make it more engaging. One alternative idea I had was presenting the challenge in a storytelling format. Eventually, I drew inspiration from the “Brain Challenge” mobile game and developed the current game concept.

Key elements

Level 1: Reach the Exit


In level 1, the user’s task is to guide the character to the exit using arrow keys. To reach the exit, the player must first collect a key to clear the path. Once the player reaches the exit, the game proceeds to the next level.


Level 2: Odd One Out

The player is presented with an image and must identify what’s unusual. A cursor circle outlines the cursor, and the player must position it over the odd item and click. If the player makes two incorrect selections, a “hint” appears. Once the player correctly identifies the odd item, the game proceeds to the next level.

Level 3: Solve a Riddle

This level presents “The 5 Hats to 3 Men Problem,” challenging the player’s logical thinking skills. Three characters and five hats (three black and two white) are involved. The three hats are randomly assigned to each character. Given the ability to see the hats of the other two characters and the answer they have given, the player’s task is to guess the color of their own hat. An incorrect guess results in the level restarting, while a correct guess ends the game.


You can read more about the problem here: https://www.pumpfundamentals.com/The%205%20hats%20to%203%20men%20problem%20solution.pdf 


Design

I have intentionally provided instructions for each level before they begin to enhance player engagement and understanding.

Sound effects have been included throughout the game to enhance the user experience and provide feedback. For instance, an incorrect choice triggers a specific sound effect to signal that the player should try again.

A “home” button allows the player to restart the game without resetting the entire session.

I asked two of my friends to play my game to understand: what’s confusing for the user and to spot the areas to improve in the game. Based on their feedback, I added a hint feature for Level 2 to assist players in spotting the odd item. Additionally, in Level 3, I implemented a feature where the cursor touching a hat changes the background color around the image to clarify how to make a guess.

Problems I ran into

The most challenging part of this project was adapting “The 5 Hats to 3 Men Problem” into a playable game. To ensure solvability, I created specific hat combinations for the three characters, limiting the possibilities to wwb, wbb, and bwb (w = white; b = black). And it is not a random selection of combinations which limits the problem setting. I chose this combination based on the problem setting that the other two characters have already answered that they don’t know the color of their hat color. So that we should eliminate the combinations in which those two characters will be able to make the guess. 

let blackHatImg, whiteHatImg, greyHatImg;
let hats = [[1, 0, 1], [0, 1, 1], [0, 0, 1]]; // 1 for black, 0 for white
let randomHatSet;
let characters = 3;

// randomly choose hat set
  randomHatSet = floor(random(3));
function playPuzzle() {
  if (puzzleImgIndex < puzzleImg.length) {
    image(puzzleImg[puzzleImgIndex], 0, 0, width, height);
  }

  // Calculate the available width for the rectangles (canvas width minus margins)
  let availableWidth = width - 60; // 30 pixels from the left and 30 pixels from the right

  // Calculate the width of each section for three hats
  let sectionWidth = availableWidth / 3;

  // Draw the hats
  for (let i = 0; i < characters; i++) {
    // Calculate the x-coordinate for each hat based on the section
    let x = 30 + (i * sectionWidth) + sectionWidth / 2;
    let y = height / 4;

    // Draw the assigned hat images
    if (hats[randomHatSet][i] === 1) {
      image(blackHatImg, x - 45, y + 30, 90, 45);
    } else if (hats[randomHatSet][i] === 0) {
      image(whiteHatImg, x - 45, y + 30, 90, 45);
    }
  }
  // Draw a mystery hat on top of the hat of the user
  image(greyHatImg, (30 + (2 * sectionWidth) + sectionWidth / 2) - 45, (height / 4) + 30, 90, 45);
  
  // Choose from the black or white hat
  
  if (puzzleImgIndex === 1) {
    if (mouseX > blackHatGuess.x && mouseX < blackHatGuess.x + blackHatGuess.w && mouseY > blackHatGuess.y && mouseY < blackHatGuess.y + blackHatGuess.h) {
      // Change the color when the cursor is inside
      noStroke();
      fill('#FFB8CD');
      rect(blackHatGuess.x - 2, blackHatGuess.y - 2, blackHatGuess.w + 4, blackHatGuess.h + 4);
    } else if (mouseX > whiteHatGuess.x && mouseX < whiteHatGuess.x + whiteHatGuess.w && mouseY > whiteHatGuess.y && mouseY < whiteHatGuess.y + whiteHatGuess.h) {
      // Change the color when the cursor is inside
      noStroke();
      fill('#FFB8CD');
      rect(whiteHatGuess.x - 2, whiteHatGuess.y - 2, whiteHatGuess.w + 4, whiteHatGuess.h + 4);
    }
    // Draw a rect around the hat choices
    image(blackHatImg, blackHatGuess.x, blackHatGuess.y, blackHatGuess.w, blackHatGuess.h);
    image(whiteHatImg, whiteHatGuess.x, whiteHatGuess.y, whiteHatGuess.w, whiteHatGuess.h);
  }
}

function makeGuess(mouseX, mouseY) {
  if (mouseX > blackHatGuess.x && mouseX < blackHatGuess.x + blackHatGuess.w &&
      mouseY > blackHatGuess.y && mouseY < blackHatGuess.y + blackHatGuess.h) {
    pauseAndResumeDraw();
    levelCompleteSound.play();
    gameState = 'end';
  } else {
    pauseAndResumeDraw();
    // restart level 3
    wrongChoiceSound.play();
    restartPuzzle();
  }
}

Areas for improvement

If I had more time, I would implement additional features, such as allowing players to skip levels or revisit previous levels. I also observed that players tend to forget the challenge scenario in Level 3 thus it  would be better to enable players to revisit instructions for clarification.

Despite my overall satisfaction with the game, I could have enhanced the game’s visual appeal by investing in more attractive graphics, animations, and a user-friendly interface design. For my future projects, I will certainly prioritize the overall graphic design, its aesthetics, and user coherence.

Week 6 – Midterm Project

DiDesign – create your room design

Link to my sketchhttps://editor.p5js.org/Diannella/full/BCjYoXQdw

My Concept: “DiDesign” is a realization of my childhood dreams. As a child, I wanted to become an interior designer and was always interested in choosing and drawing the pieces of furniture and allocating them inside the room. Being inspired by the “coffee shop” game shown during the class, I also wanted to produce a calming experience with aesthetic images and pleasing sounds. The users have a chance to feel themselves as interior designers and even get imaginary payment for that. 

The explanation of how the project works: The rules of the game are simple. The game starts with the instructions section, where the character asks the user to design the room for the client and gives instructions on how to play the game. The users click on the “PLAY” button, which leads them to the room with the default most simple design. The users should click on each of the pieces of furniture and choose their favorite one from the array of six options. The users can change the sofa, the decors on the left and right sides of the sofa, and the lamp. In addition to that, the users can click on the character on the left side, who will give comments about the design process. When the users are done with the design, they can click on the button “SELL” to sell their designs to the client. This would lead to the last section, which shows the payment amount for the project. This amount is randomly chosen from the range of $2000 to $20000. If the users want to create another design, they can click on the button “RESTART” which would restart the game with the instructions section, followed by the default furniture.

The examples of the each image of sofa created by me on Canva

The areas I am proud of: Overall, I am proud of the project because the reality met my expectations of the project by around 90% and, most importantly, I have seen a huge development since the beginning of the semester. Firstly, I am very proud of the aesthetics of the game because I believe that the colors, shapes, allocation, the chosen pieces of furniture, and the sound effects are chosen great so that the users have an enjoyable experience of playing this game. Secondly, I am proud of the process of creating this game. Specifically, other than coding, the project includes the work on the design of each of the pieces of furniture. I selected each piece of an image and constructed the whole image of the room in the canvas to make sure that they looked great with each other resized every image to match the dimensions and downloaded every piece separately. Last but not least, I am most proud of the code with the mouseClicked function. It includes every conditional of the game, operating the change of each furniture and dialogue box, as well as the change over the stages with the resetting of the game and random payment. 

function mouseClicked() {
  clicking.play (); //every click is accompanied with clicking sound
// everything inside this conditional happens only in the playing state, which is the state inside the room
  if (gameState == 'playing') {
//if the mouse is clicked inside the area of piece of furniture, the next image is shown from the array of that piece of furniture
    if (mouseX >= width / 2 - sofas[0].width / 2 &&
        mouseX <= width / 2 - sofas[0].width / 2 + sofas[0].width &&
        mouseY >= height * 0.5 &&
        mouseY <= height * 0.5 + sofas[0].height) {
      currentSofa++;
      if (currentSofa >= sofas.length) {
        currentSofa = 0;
      }
}
//there are four more similar conditionals to manipulate the array of the left decor, right decor, lamp and the dialogue bubbles
  }
//one button is responsible for changing the game states. Every time the rectangle is clicked, the state of the game changes.
   if (mouseX >= width * 0.8 &&
      mouseX <= width * 0.9  &&
      mouseY >= height * 0.8 &&
      mouseY <= height * 0.9) {
    if (gameState == 'start') {
    gameState = 'playing';
    stopPayment() ; //random payment amount is generated every time the game starts
    } else if (gameState == 'playing') {
    gameState = 'end';
  } else if (gameState == 'end') {
//the design is returned back to default design of interior, which is the image in the first position of each array of images.
    currentSofa = 0;
    currentLeftDecor = 0;
    currentRightDecor = 0;
    currentLamp = 0;
    currentBubble = 0;
    restartGame();
  } 
}
    return false;
}

Areas for improvement: 

Initially, I also had an additional idea of adding the character from the sprite sheet, which could be controlled by the user. By pressing the arrow buttons, it would be possible to move that character inside the room. However, the issue was that I simply couldn’t find the sprite sheets of the character, which would match the vibe of the game. Most of the characters are made for arcade games with the jumping and falling images of little cartoon-looking characters. As there was no image that would match the style, I was thinking of drawing that character. Because of the time restrictions, the image of the girl was inserted, which talks when gets clicked by the user, but doesn’t move. As it doesn’t fully replace the initial idea, the drawing of own sprite sheet of the character would be a good improvement of the game for the future. 

Furthermore, the array of images I found might not be enough as well as the number of pieces that can be changed. In the future, room decor can be developed into house decor, so the users would have a chance to decorate every room in the house such as the bathroom, bedroom, kitchen, and living room. Each of the rooms would have at least ten changeable pieces of furniture with at least 10 options in each. This would expand the project and make it more interesting for older people because for now, only children would be engaged with the game. 

The resolved problem:

  1. I had an issue with the change of the pieces of furniture because the new image was added on top of the previous image, instead of replacing that. It was solved by adding the background image and the current image of the piece of furniture in every frame, so the old pieces of furniture would be covered by the background image and the new piece of furniture. I was not using this way initially because I thought that would lead to the freezing issues of p5.js, but everything works well with this strategy. 
  2. I had an issue that the game doesn’t go to the default design every time I restart the game, but stays in the last chosen images of the furniture. The solution was very obvious and was solved by explaining the steps of refreshing the game. I simply forgot to specify in the conditional that each element in the arrays should be in the first position, which is the default image. 

The unresolved problem: 

  1. I had a huge issue with the hover of the images, so when the mouse is on top of the image, that image would be colored white. This actually worked with single images, but couldn’t be applied to each of the images as a class. Just a hover for one image took almost 100 lines and just copy-pasting that code to each image wouldn’t be effective. The idea of using that in the class was not very successful. Because of this, I still should work on this and find a better solution. 

Reference List:

The website used for the images: canva

Sound used: 

Modern technology select. Source: https://mixkit.co/free-sound-effects/click/?page=2 

Simple Piano Melody by Daddy_s_Music. Source: https://pixabay.com/music/search/?order=ec&pagi=6 

Week 6 – Midterm Project!

Concept

As we approach the festive months of the year, all I can think about is winter break, my favorite holiday. The warmth, comfort, excitement, and simple joys that this season brings are what I eagerly anticipate for months. When considering ideas for this open-ended and creative project, I wondered if there were others like me who simply can’t wait for the Christmas season and New Year. Thus, I decided to create an Early Christmas Experience as an ode to one of my favorite festivals. The candy canes from school, the joy of exchanging gifts during Secret Santa, and the delight of decorating the Christmas tree are just a few things that make this season special, and I aimed to incorporate them into my project. From the reading ‘Making Art is like setting a trap’, my takeaways were to focus on and convey the simpler things and the feelings behind it

My project aimed to encapsulate the essence of Christmas, focusing on two central elements: decorating a Christmas tree and the excitement of hunting for hidden presents around a cozy house—both cherished traditions in my family. Having spent my entire life in a region where snowfalls are rare, I yearn for snowy vacations. For this project, I wanted to create a visually captivating experience, making it heavily reliant on graphics rather than physical and mechanical elements.

How It Works:

The experience begins with a screen featuring a play button. Upon clicking this button, users are transported to the experience screen—the screen of magic. Santa himself makes an appearance, offering brief instructions on how to navigate the experience. Users can click on the Christmas tree and decorate it by dragging and dropping ornaments. These decorations are saved for later viewing. Clicking on the house triggers a mini Christmas-themed hidden object game. The objective is to find a minimum of 5 presents to win. Throughout the experience, a snowy backdrop adds to the festive atmosphere, and users can navigate through the various parts of the experience using marked buttons in the form of presents with a carol playing in the background and end with a real – time countdown to Christmas.

 View directly in the editor for sound , re run and let Santa guide you further! https://editor.p5js.org/keyaa/full/lvw7KccaA 

Technical Parts I’m Proud Of

The Christmas tree was a major highlight of my project. While the drag-and-drop functionality for ornaments was easy with the reference shared in class, a significant challenge was saving the positions of these ornaments and placing them exactly on the experience screen tree as the user had arranged them on the tree screen. After multiple experiments with vectors in p5.js and other coordinate system functions, I chose to calculate the relative positions of X and Y coordinates of the ornaments and confirm if they were correctly placed on the tree. To add a more realistic touch, I included a layer of snow with gradually decreasing velocity, simulating the accumulation of snow on the tree. This was a personal favorite effect that enhanced the overall experience.

if (decorated == true) {
   for (let draggableObject of draggableObjects) {
     if (draggableObject.onTree) {
       draggableObject.x = draggableObject.relativeX + treeX;
       draggableObject.y = draggableObject.relativeY + treeY;
       draggableObject.show();
     }
   }
 }

 // Check if snowflakes2 touch the tree
 for (let snowflake of snowflakes2) {
   const distanceToTreeCenter = dist(snowflake.x, snowflake.y, treeX + christmasTree.width / 2, treeY + christmasTree.height / 2);
   if (distanceToTreeCenter < 70) {
     snowflake.speed = 0;
   }
   snowflake.update();
   snowflake.display();
 }

The typewriter effect for Santa’s words:

typewriterEffect() {
  if (this.index < this.message.length) {
    this.displayedMessage += this.message[this.index];
    this.index++;
  }
}

The usage of OOP and arrays is at the core of this project. It simplified tasks and made the project more organized. Creating Santa’s movement using sprites was a more significant challenge than anticipated. To enhance the visual appeal, I incorporated images from Shutterstock and designed some of my own using PicMonkey and Canva, opting for efficiency over drawing everything directly in p5.js.

Areas for Improvement

While I’m pleased with the project’s overall outcome, there are many other areas that I can improve and add to. Adding more challenging elements to the hidden objects game, such as a timer, or refining Santa’s movement for smoother animation, could make the project better.

In conclusion, creating this Christmas-themed interactive project for my midterm assignment was a delightful experience. I tried to work more on my creative skills instead of just coding like I would for other classes. I tried to incorporate most of the concepts learnt over the past few weeks and am already excited to see what the second half of the semester in this class holds for me to learn!

References

https://www.shutterstock.com/image-vector/bright-new-year-santa-claus-2d-1563199690, https://www.youtube.com/watch?v=bKEaK7WNLzM, https://www.youtube.com/watch?v=3noMeuufLZY, https://editor.p5js.org/codingtrain/sketches/U0R5B6Z88 

Week 6: Midterm Project

For my midterm project, I decided to change  my initial idea and created a unique card matching game “Paws and Puzzles”. The game revolves around Simba (named after my own dog<3), a lovable dog who has scattered his toys in the park and needs players’ assistance to match these toys through a card game. The objective is to pair up cards that represent Simba’s toys, including items like balls, a rubber duck, a squeaky chicken and more. The twist is that players must complete the matching within 30 attempts; otherwise, Simba becomes sad, leading to a game over scenario. Paws and Puzzles is not just about matching; it’s wrapped in a delightful storyline, making it engaging and fun.

Here are a few images of the cards I designed:

Card 1
Card 2
Card 3


How It Works:

In “Paws and Puzzles,” the game’s core mechanics involve flipping and matching cards. It starts with a visually appealing menu page, and players can choose between starting the game or viewing instructions. There’s also a win condition, and the restart functionality is in place, enhancing the overall user experience. Additionally, the integration of audio elements specific to each scene complements the game, making it more engaging for players.

What I’m particularly proud of is the game’s visual design, which includes amusing captions for the cards, adding an enjoyable element to the gameplay. I’m especially happy with the mousePressed function and the card-matching logic in my code. It did take some time, but I got them working just the way I wanted.

function mousePressed() {
   if (!gameStarted) {
    if (instructionMode) {
      // Clicked on "Start Game" button on instructions page
      const startGameButtonX = 31;  
      const startGameButtonY = 598; 
      const buttonWidth = 150;
      const buttonHeight = 50;
      
      if (mouseX > startGameButtonX && mouseX < startGameButtonX + buttonWidth && mouseY > startGameButtonY && mouseY < startGameButtonY + buttonHeight) {
        gameStarted = true;
        initializeCards();
      }
    }else {
      const startButtonX = 222;
      const startButtonY = 235;
      const buttonWidth = 150;
      const buttonHeight = 50;

      if (mouseX > startButtonX && mouseX < startButtonX + buttonWidth && mouseY > startButtonY && mouseY < startButtonY + buttonHeight) {
        //clicked on start game button
        gameStarted = true;
        initializeCards();
      } else if (mouseX > startButtonX && mouseX < startButtonX + buttonWidth && mouseY > startButtonY + buttonHeight + 20 && mouseY < startButtonY + buttonHeight + 20 + buttonHeight) {
        //clicked on instructions button
        instructionMode = !instructionMode;
      }
    }
  } else {
    for (let card of cards) {
      if (card.contains(mouseX, mouseY) && !card.isFlipped() && flippedCards.length < 2) {
        card.setFlipped(true);
        flippedCards.push(card);
        audioCard.play();

        if (flippedCards.length === 2) {
          tries++; //increment the tries
          if (millis() - startTime >= flipDelay) {
            checkMatch();
            startTime = millis(); //reset the timer
          }
        }
      }
    }

    //restart button click on game win
     if (gameWon && mouseX >= 210 && mouseX <= 420 && mouseY >= 297 && mouseY <= 347) {
      restartGame();
    }

    //restart button click on the loss
    if (tries > 30 && mouseX >= width / 2 - 75 && mouseX <= width / 2 + 75 && mouseY >= height - 100 && mouseY <= height - 50) {
      restartGame();
    }
  }
}


function checkMatch() {
  //check if flipped cards match
  if (flippedCards.length === 2) {
    if (flippedCards[0].getValue() === flippedCards[1].getValue()) {
      score++;
      flippedCards = [];
    } else {
      //not a match, unflip the cards after a delay
      setTimeout(function () {
        flippedCards[0].setFlipped(false);
        flippedCards[1].setFlipped(false);
        flippedCards = [];
      }, flipDelay);
    }

    //checking win condition
    if (score === cards.length / 2) {
      gameWon = true;
      audioGame.stop(); 
      audioWin.play();
     
      //lose game if more than 30 tries
    } else if (tries > 30) {
      
      gameWon = false;
      audioGame.stop();
      audioLose.loop();
     
    }
  }
}


Challenges Faced and Areas for Improvement:

I encountered some challenges, notably a performance issue on the Safari browser. Although I tried various online solutions, none seemed to work, and I eventually opted to playing the game on Chrome for better performance. An area for improvement is adding more levels to the game to increase the difficulty and provide players with a sense of progression. And, of course, there were a couple of bugs that I had to wrestle with – but that’s all part of the coding “fun”, right? Creating this game was a lot of fun, and I hope that people enjoy playing it just as much:)

Week 6: Midterm Project

Concept:

Anyone who knows me knows that I love baking and cooking. Being in the kitchen and creating something from scratch is such an amazing experience for me. Even though some people may argue that being in the kitchen is actually stressful, I don’t see it that way. It disconnects me from all the stress and anxiety of the outside world for a while and leaves me feeling relaxed. So for my midterm project, I wanted to create a kitchen simulation to let others feel a semblance of the calmness and joy I get when in the kitchen. 

My program is so easy to navigate. At first, the user is prompted to choose one of three recipes, Chocolate Cupcakes, Spaghetti and Meatballs or Avocado salad. After clicking on a recipe, the program takes the user through a few steps to prepare the recipe they chose. The user has to follow all the instructions to successfully deliver the recipe or else they fail and have to start over. After completing a recipe, the user is given two options, to follow a link with the actual recipe, if they want to try it in real life, or to go back to the homepage to start a new recipe. The program also allows users to return to the home page at any given time by pressing esc on the keyboard. I tried to make the program as fun and as engaging as possible. Additionally, I chose a calm music track for the background to add an extra level of tranquility as well as a soft palette of colors to maintain the overall theme of the program which is calming and relaxing.

*open in a new window to hear the music

How it works:

I created my program by creating a function for each screen and calling these functions at the necessary time. I created a list to store the ingredients that are being displayed on the screen and used OOP to define an ingredient class that handles the display and hide-when-clicked methods. I used clip art images for all the icons and pictures included in the program and sized them as necessary to fit the way I want them to. Additionally, I linked a font file to define the font I wanted to use. I chose this font because it looks cute and cartoon-ish even, which makes the program look more fun and gives it an element of style that my program would lack if I had used a standard font.

I included dynamic features where possible and tried to make the motion randomized instead of defined (the dressing drops, the home page animation and the smoke). I handled all the transitions using the mouseClicked() function to determine which screens are displayed when and after which conditions are met. I tried to make my code as modifiable as possible, that is making it easy to add more screens, more ingredients, more functionalities, even more recipes if needed, by using encapsulation and modularity. I found that compressing the functions in p5js made it easier and clearer for me to navigate through the code. 

For the smoke screens, I included an internal timer in my code that records the start time and the current time and compares them till the required time has elapsed and then if no action was taken then the smoke screen is displayed. I tried severaltimesto create it with a different logic but it did not work and I found this to be the most appropriate to use in my code.

if (screen === 3) { //screen is the cupcake oven screen
   CupcakeOven();
   currentTime = millis();
   if (currentTime - startTime > cupcakeinterval) { //count the seconds elapsed and //compare it to the allowed interval, if it is greater than the time allowed, //cupcakes burnt so go to smoke screen
      screen = 5; //go to the cupcake smoke screen
   }
}


Problems faced:

The main problem I faced in the beginning was the transitions. I had all the screens defined and working perfectly, but I could not get them to link together properly without facing so many bugs. I tried so many different ways to get them to call each other from within the functions itself, but I would get stuck on one single screen forever. I tried to link them using mouseButton, it worked partially but I faced so many problems with the ingredients when I implemented it. When I finally decided to use mouseClicked(), I tried to call the functions from within and use if functions to identify when and which screen is needed to be called, but I also faced errors 🙁  It was after a lot of trial and error that I realized having a screen variable that is controlled through the mouseClicked() and then having draw() call the screen functions is the way to go. 

Another major problem I faced was implementing the ingredients objects and how to make them disappear when clicked and how to link the screen transitions with the ingredients. At first it was mostly trial and error, but then I decided to take a step back and understand every little detail related to how I am implementing them and come up with a solution that works on paper and then implement it step by step. I am proud of the way I got it to work in the end because it just makes sense to me and makes the whole process smooth and straightforward as well as easy to add/remove/modify the ingredients as needed. It is also worth noting that I originally wanted to implement a drag and drop feature for the ingredients but it was too complicated to use within my program especially that I wanted to use resized images for the ingredients so I settled on mouse clicks instead.

Last but not least, I faced problems with implementing the smoke screens and how to make them appear automatically after the time elapses. It was a bit confusing for me at first to implement it, it never worked at all to the point where I decided to completely disregard the idea of smoke screens, but I managed to get it working in the end. I wanted to add a timer functionality where it displayed the timer on screen so that the user can visually see how much time they have left, but it created so many bugs and did not work effectively, even though it is a straight forward feature, it clashed with my other functionalities, so i decided that the users can count to 5 or 7 themselves.

Future improvements and reflection:

I would love to add more features to make the program more advanced like adding mixing and frosting stages for the cupcakes and adding a stirring stage for the spaghetti as well as some steam while it is cooking. I would also love to add more choices within the recipes so that users can choose what dressing they want for the salad for example. I am overall satisfied with what I have now and I am proud that I got my program to look like what I had initially planned for it.

References:

images:

https://www.clipartmax.com/

https://www.freepik.com/

https://www.vecteezy.com/vector-art/11234689-cocoa-sack-with-seeds

recipes:

https://sallysbakingaddiction.com/super-moist-chocolate-cupcakes/

https://www.onceuponachef.com/recipes/spaghetti-and-meatballs.html

https://www.onceuponachef.com/recipes/summer-avocado-salad.html

music:

https://www.ashamaluevmusic.com/cooking-music

Font:

https://textfonts.net/one-little-font.html#google_vignette