Reading 8A Week

Norman,“Emotion & Design: Attractive things work better”

Having read Norman’s thoughts on how emotions impact design, I’m struck by how feelings influence our thinking and actions. He suggests that feeling positive boosts creativity, while feeling negative sharpens our focus. I can relate to this from my own experiences: feeling happy often leads to creative ideas, while stress can make me intensely focused. Norman highlights the importance of designing products with people’s emotions in mind, which makes sense to me. It’s crucial to create things that not only work well but also make users feel good.

I understand Normal is majorly biased  towards attractiveness, he mentioned “…attractive things work better” (Pg 1). However, while Norman also argues that good design should balance aesthetics and functionality, I wonder if focusing too much on looks could sacrifice practicality. Sure, attractive designs can enhance the user experience, but can they make up for flaws in how something works? Norman’s ideas make me think about what really matters in design. Shouldn’t the main goal be to create products that are both visually appealing and easy to use? Norman also makes me wonder how designers can use emotions to make products more engaging. How can they tap into our feelings to make us enjoy using things more? Overall, Norman’s ideas have made me rethink how emotions, looks, and usability all play a part in making products that people love to use.

Her Code Got Humans on the Moon

Learning about Margaret Hamilton’s groundbreaking work in software engineering for the Apollo space program was incredibly inspiring. Her journey from being a young mother with a math degree to leading a team that created vital software for the Apollo missions shows her determination and talent. It’s amazing how she managed to balance being a mom and a pioneering programmer, challenging stereotypes and showing the importance of diversity in STEM fields.

One moment that really stood out to me was when Hamilton’s daughter accidentally caused an error in the MIT command module simulator. Even though Hamilton suggested adding code to prevent such mistakes, NASA dismissed her idea, thinking astronauts wouldn’t make errors. This shows the need to consider all possibilities and have safeguards, especially in important situations. It also makes me think about the consequences of ignoring suggestions based on assumptions about people never making mistakes.

Overall Hamilton’s story makes me reflect on the ongoing gender gaps in STEM fields and why it’s important to recognize women’s contributions to technology. It reminds me of the need to promote inclusivity and diversity, especially in fields where they’ve been overlooked. Moreover it also highlights the importance of rigorous testing and error prevention in complex systems, also reminding us to stay humble and prepared for anything.

Upon conclusion, as I witnessed Hamilton’s work, I’m left questioning: What more can be done to encourage women to pursue careers in STEM fields and break through gender barriers? How can we ensure that all voices are heard and respected in technological advancements and innovations?

Midterm Project – Musical Brick Breaker Game

Concept: Recreating one of my favorite childhood game – The Musical Brick Breaker Game

So I chose to have the concept for this project, is to create a musical soothing classical Brick Breaker game using the p5.js library. The game involves controlling a paddle to bounce a ball and break bricks at the top of the screen. The user interacts with the game by moving the paddle horizontally using the left and right arrow keys. The goal is to break all the bricks without letting the ball fall below the paddle. The game provides feedback through visual cues such as the ball bouncing off objects, disappearing bricks, and a scoring system. Moreover, sound effects further enhance the user experience.

Designing the Code: Elaborating important areas

1) Ball Behavior: Within the Ball class, I define the behavior of the ball. This includes its movement across the screen, detection of collisions with other objects (such as the paddle and bricks), and rendering on the canvas. This encapsulation allows for clear organization and modularization of ball-related functionality.

2) Paddle Control: The Paddle class covers the movement and display of the paddle. It handles user input from the keyboard to move the paddle horizontally across the screen, ensuring precise control for the player.

3) Brick Management: Each brick in the game is represented by the Brick class. This class manages the display of individual bricks on the canvas and provides methods for their creation, rendering, and removal during gameplay.

4) User Interaction: The mousePressed function responds to user input by triggering specific game actions, such as starting or resetting the game. This function enhances the interactivity of the game and provides a seamless user experience.

Additional functions, such as createBricks and resetGame, are responsible for initializing game elements (such as bricks) and resetting the game state, respectively. These functions streamline the codebase and improve readability by encapsulating repetitive tasks.

By breaking down the code into these specific components, I ensured a clear and organized structure, facilitating easier maintenance.

Minimizing Risk: Code I’m proud of,

display() {
    fill(255, 0, 0);
    ellipse(this.x, this.y, this.radius * 2);
  }
  
  checkCollision() {
    if (this.x > paddle.x && this.x < paddle.x + paddle.width && this.y + this.radius > paddle.y) {
      this.speedY *= -1;
      paddleHitSound.play();
    }
  }
  
  bounce() {
    this.speedY *= -1;
    ballHitSound.play();
  }
  
  hits(brick) {
    let closestX = constrain(this.x, brick.x, brick.x + brick.width);
    let closestY = constrain(this.y, brick.y, brick.y + brick.height);
    let distance = dist(this.x, this.y, closestX, closestY);
    return distance < this.radius;
  }
}

One major complex aspect of the project is implementing collision detection between the ball and other game objects (paddle, bricks, walls). Ensuring accurate collision detection is crucial for the game’s mechanics and overall user experience. To minimize the risk of errors in this area, I employed two  strategies:

1) Collision Detection Algorithm: Implementing this collision detection algorithms is essential because, for example in the Ball class, I used a method called hits(brick) to check if the ball collided with a brick. This method calculates the distance between the ball and the brick’s edges to determine if a collision occurred. Moreover, By using the dist() function in favor with appropriate ball coordinates, I ensured this accurate collision detection is perfectly executed.

2) Testing with Edge Cases: To validate the accuracy of this collision detection algorithm, I conducted repeated testing with various edge cases. This includes scenarios where the ball collides with the corners of bricks or with multiple objects simultaneously. By systematically testing these cases and analyzing the results, I came to conclusion that the collision detection behaves as expected under different conditions.

Prototypes (wire-frame notes) :
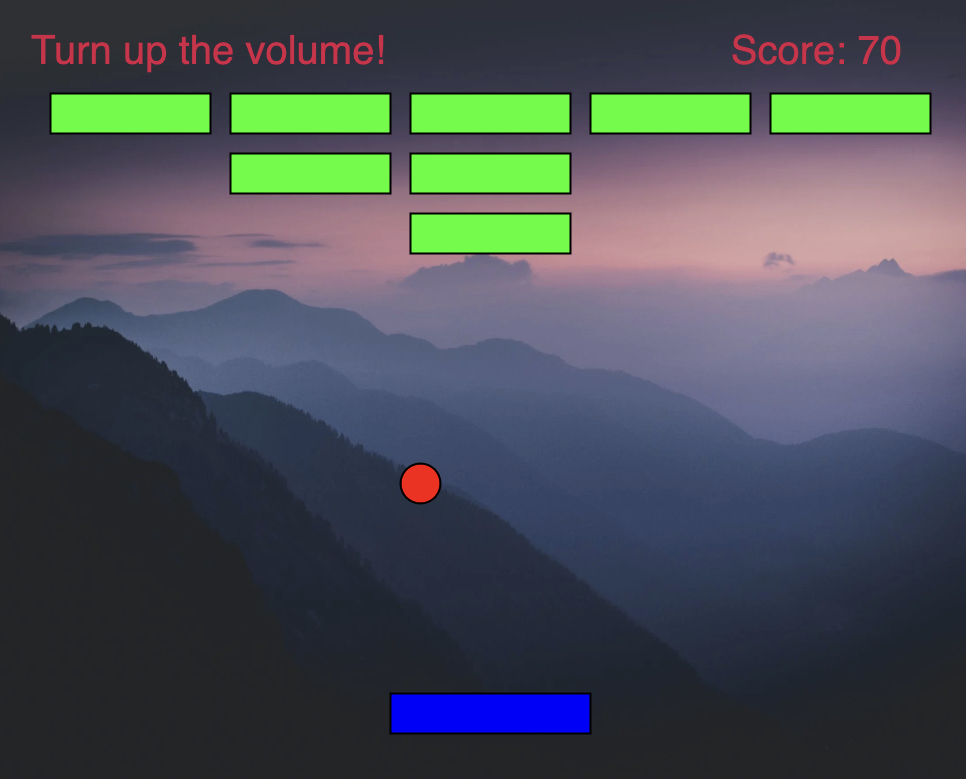
Here’s the Game:

Features & Game Mechanics:
– Game initializes with a start screen displaying “Musical Brick Breaker Game” and along with three themes to choose.
– The player controls the paddle using the left and right arrow keys.
– The ball bounces off the paddle, walls, and bricks.
– When the ball hits a brick, it disappears, and the player earns points.
– If the ball falls below the paddle, the game ends.
– Once game ends, it displays either “Game Over” or “Congrats” message along with the score and a feature for click to return Home.
– Clicking on the canvas after the game ends resets the game, allowing the player to replay.

Additional Features:
– Sound effects are played when the ball hits the paddle and when it hits a brick.
– The player earns points for each brick broken, and the score is displayed on the screen.
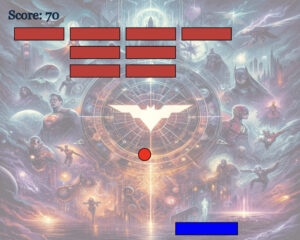
– Background music plays throughout the game to enhance the gaming experience, moreover different sound tracks were added to different themes selected.

Here’s a snapshot taken during the game-play of all the themes:


Complete Code Snippet (With Comments):

// Variables to hold background images for different themes
let backgroundImage;
let marvelBackgroundImage;
let dcBackgroundImage;

// Game objects
let ball;
let paddle;
let bricks = [];

// Brick layout parameters
let brickRowCount = 3;
let brickColumnCount = 5;
let brickWidth = 80;
let brickHeight = 20;
let brickPadding = 10;
let brickOffsetTop = 50;
let brickOffsetLeft = 30;

// Game score
let score = 0;

// Sound effects and background music variables
let ballHitSound;
let paddleHitSound;
let backgroundMusic;
let marvelSoundtrack;
let dcSoundtrack;

// Game state management variables
let gameState = 'home'; // Possible states: 'home', 'playing', 'gameOver'
let theme = 'default'; // Current theme: 'default', 'marvel', 'dc'
let gameStarted = false; // Flag to indicate if the game has started

// Preload function to load images and sounds before the game starts
function preload() {
  backgroundImage = loadImage('background_image.jpg');
  marvelBackgroundImage = loadImage('marvel_background.jpg');
  dcBackgroundImage = loadImage('dc_background.jpg');
  ballHitSound = loadSound('ball_hit.mp3');
  paddleHitSound = loadSound('paddle_hit.mp3');
  backgroundMusic = loadSound('background_music.mp3');
  marvelSoundtrack = loadSound('marvel_soundtrack.mp3');
  dcSoundtrack = loadSound('dc_soundtrack.mp3');
}

// Setup function to initialize game elements
function setup() {
  createCanvas(500, 400); // Set canvas size
  paddle = new Paddle(); // Initialize paddle
  ball = new Ball(); // Initialize ball
  createBricks(); // Create brick layout
}

// Main draw loop to render the game frame by frame
function draw() {
  background(255); // Clear the canvas with a white background
  // Apply background image based on the current theme with opacity
  if (theme === 'default') {
    tint(255, 127); // Half opacity
    image(backgroundImage, 0, 0, width, height);
  } else if (theme === 'marvel') {
    tint(255, 127); // Half opacity
    image(marvelBackgroundImage, 0, 0, width, height);
  } else if (theme === 'dc') {
    tint(255, 127); // Half opacity
    image(dcBackgroundImage, 0, 0, width, height);
  }
  noTint(); // Reset tint effect for drawing other elements without opacity

  // Display the appropriate screen based on the game state
  if (gameState === 'home') {
    displayHomeScreen(); // Display home screen with theme options
  } else if (gameState === 'playing') {
    playGame(); // Main game logic
  } else if (gameState === 'gameOver') {
    displayGameOver(); // Display game over screen
  }
}

// Handler for mouse press events to interact with the game
function mousePressed() {
  if (gameState === 'home') {
    checkButtonPressed(); // Check if any theme button was pressed
  } else if (gameState === 'gameOver') {
    resetGame(); // Reset game to initial state
    gameState = 'home'; // Return to home screen
  } else {
    if (!gameStarted) {
      gameStarted = true; // Start the game
    }
  }
}

// Function to check if a theme button was pressed and change the game state accordingly
function checkButtonPressed() {
  const buttonWidth = 200;
  const buttonHeight = 50;
  const startY = height / 2 - 75;
  const gap = 60;

  // Detect button press based on mouse coordinates
  if (mouseX >= width / 2 - buttonWidth / 2 && mouseX <= width / 2 + buttonWidth / 2) {
    stopAllMusic(); // Stop any currently playing music
    // Check which button was pressed and update the theme and game state
    if (mouseY >= startY && mouseY <= startY + buttonHeight) {
      theme = 'default';
      gameState = 'playing';
      backgroundMusic.loop(); // Start playing default background music
    } else if (mouseY >= startY + gap && mouseY <= startY + gap + buttonHeight) {
      theme = 'marvel';
      gameState = 'playing';
      marvelSoundtrack.loop(); // Start playing Marvel soundtrack
    } else if (mouseY >= startY + 2 * gap && mouseY <= startY + 2 * gap + buttonHeight) {
      theme = 'dc';
      gameState = 'playing';
      dcSoundtrack.loop(); // Start playing DC soundtrack
    }
  }
}

// Function to display the home screen with game title and theme selection buttons
function displayHomeScreen() {
  fill('black');
  textSize(32);
  textAlign(CENTER, CENTER);
  textFont('Georgia');
  text("Musical Brick Breaker Game", width / 2, 100); // Game title
  
  // Display theme selection buttons
  textSize(20);
  const buttonWidth = 200;
  const buttonHeight = 50;
  const startY = height / 2 - 75;
  const gap = 60;

  // Default theme button
  stroke(0);
  strokeWeight(2);
  fill(255, 0, 0, 200); // Semi-transparent red
  rect(width / 2 - buttonWidth / 2, startY, buttonWidth, buttonHeight, 20); // Rounded corners
  fill(0); // Black text
  noStroke();
  text("Default", width / 2, startY + 28);

  // Marvel theme button
  fill(0, 0, 255, 200); // Semi-transparent blue
  stroke(0);
  strokeWeight(2);
  rect(width / 2 - buttonWidth / 2, startY + gap, buttonWidth, buttonHeight, 20); // Rounded corners
  fill(255); // White text
  noStroke();
  text("Marvel Universe", width / 2, startY + gap + 25);

  // DC theme button
  fill(255, 255, 0, 200); // Semi-transparent yellow
  stroke(0);
  strokeWeight(2);
  rect(width / 2 - buttonWidth / 2, startY + 2 * gap, buttonWidth, buttonHeight, 20); // Rounded corners
  fill(0); // Black text
  noStroke();
  text("DC Universe", width / 2, startY + 2 * gap + 28);
}

// Function to handle gameplay logic
function playGame() {
  ball.update();
  ball.checkCollision();
  ball.display();
  
  paddle.display();
  paddle.update();
  
  // Loop through and display all bricks, check for collisions
  for (let i = bricks.length - 1; i >= 0; i--) {
    bricks[i].display();
    if (ball.hits(bricks[i])) {
      ball.bounce();
      bricks.splice(i, 1); // Remove hit brick from array
      score += 10; // Increase score
    }
  }
  
  // Check if game is over (no bricks left)
  if (bricks.length === 0) {
    gameState = 'gameOver';
  }
  
  // Display current score
  fill('rgb(2,46,82)');
  textSize(20);
  textAlign(LEFT);
  text("Score: " + score, 20, 30);
}

// Function to display game over screen
function displayGameOver() {
  fill('rgb(24,21,21)');
  textSize(32);
  textAlign(CENTER, CENTER);
  if (score >= 150) {
   text("Congratss! Score: " + score, width / 2, height / 2+50);
   textSize(18);
   text("You mastered this universe, click to win others", width / 2, height / 2 + 90);
  }
  else{
  text("Game Over!! Score: " + score, width / 2, height / 2+50);
  textSize(20);
  text("Click to return Home", width / 2, height / 2 + 90);
  }
}

// Function to reset the game to initial state
function resetGame() {
  gameStarted = false;
  score = 0;
  ball.reset();
  createBricks(); // Re-initialize bricks
}

// Function to stop all music tracks
function stopAllMusic() {
  backgroundMusic.stop();
  marvelSoundtrack.stop();
  dcSoundtrack.stop();
}

// Function to initialize bricks based on row and column counts
function createBricks() {
  bricks = [];
  for (let c = 0; c < brickColumnCount; c++) {
    for (let r = 0; r < brickRowCount; r++) {
      let brickX = c * (brickWidth + brickPadding) + brickOffsetLeft;
      let brickY = r * (brickHeight + brickPadding) + brickOffsetTop;
      bricks.push(new Brick(brickX, brickY));
    }
  }
}
// Class representing the ball object
class Ball {
  constructor() {
    this.radius = 10; // Radius of the ball
    this.reset(); // Reset ball position and speed
  }

  // Reset ball position and speed
  reset() {
    this.x = width / 2; // Initial x position at the center of the canvas
    this.y = paddle.y - 10; // Initial y position above the paddle
    this.speedX = 5; // Initial speed along the x-axis
    this.speedY = -5; // Initial speed along the y-axis
  }

  // Update ball position
  update() {
    this.x += this.speedX; // Update x position
    this.y += this.speedY; // Update y position
    // Bounce off the sides of the canvas
    if (this.x < this.radius || this.x > width - this.radius) {
      this.speedX *= -1; // Reverse speed along the x-axis
    }
    // Bounce off the top of the canvas
    if (this.y < this.radius) {
      this.speedY *= -1; // Reverse speed along the y-axis
    } 
    // Check if ball falls below the canvas
    else if (this.y > height - this.radius) {
      gameState = 'gameOver'; // Set game state to 'gameOver'
    }
  }

  // Check collision with the paddle
  checkCollision() {
    // Check if ball collides with paddle
    if (this.x > paddle.x && this.x < paddle.x + paddle.width && this.y + this.radius > paddle.y) {
      this.speedY *= -1; // Reverse speed along the y-axis
      paddleHitSound.play(); // Play paddle hit sound
    }
  }

  // Display the ball
  display() {
    fill(255, 0, 0); // Red fill color
    stroke(0); // Black thin outline
    strokeWeight(1); // Thin outline weight
    ellipse(this.x, this.y, this.radius * 2); // Draw ball as circle
  }

  // Bounce the ball (reverse speed along y-axis)
  bounce() {
    this.speedY *= -1; // Reverse speed along the y-axis
    ballHitSound.play(); // Play ball hit sound
  }

  // Check if ball hits a brick
  hits(brick) {
    // Calculate distance between ball center and brick center
    let distX = Math.abs(this.x - brick.x - brick.width / 2);
    let distY = Math.abs(this.y - brick.y - brick.height / 2);
    // Check if distance is less than combined radii of ball and brick
    if (distX > (brick.width / 2 + this.radius) || distY > (brick.height / 2 + this.radius)) {
      return false; // No collision
    }
    return true; // Collision detected
  }
}

// Class representing the paddle object
class Paddle {
  constructor() {
    this.width = 100; // Width of the paddle
    this.height = 20; // Height of the paddle
    this.x = (width - this.width) / 2; // Initial x position at the center of the canvas
    this.y = height - 35; // Initial y position near the bottom of the canvas
    this.speed = 10; // Speed of the paddle
  }

  // Display the paddle
  display() {
    fill(0, 0, 255); // Blue fill color
    stroke(0); // Black thin outline
    strokeWeight(1); // Thin outline weight
    rect(this.x, this.y, this.width, this.height); // Draw paddle as rectangle
  }

  // Update paddle position based on keyboard input
  update() {
    // Move paddle left
    if (keyIsDown(LEFT_ARROW) && this.x > 0) {
      this.x -= this.speed;
    } 
    // Move paddle right
    else if (keyIsDown(RIGHT_ARROW) && this.x < width - this.width) {
      this.x += this.speed;
    }
  }
}

// Class representing a brick object
class Brick {
  constructor(x, y) {
    this.x = x; // x position of the brick
    this.y = y; // y position of the brick
    this.width = brickWidth; // Width of the brick
    this.height = brickHeight; // Height of the brick
  }

  // Display the brick
  display() {
    fill(200, 50, 50); // Red fill color
    stroke(0); // Black thin outline
    strokeWeight(1); // Thin outline weight
    rect(this.x, this.y, this.width, this.height); // Draw brick as rectangle
  }
}


Reflection: Ideas added to this Final Midterm

1) User Experience: I’ve incorporated different themes so that the user won’t be limited to play in one environment. In addition, all the three themes have their separate backgrounds and soundtracks.

2) End Card Message:  I’ve implemented a conditional statement to display “Congrats” message if the user wins and “Game Over” message if the player losses along with the displaying scores on a side.

3) Immersive Audio Design: To ensure that the soundtrack and the paddle hit sound doesn’t overlap, I first reduced the volume (decibels) of the soundtrack using Audacity software before importing it into P5.js.

4) Areas I can Improve Further: Firstly, I aim to introduce difficulty levels to enhance the game’s complexity. Currently, players have three themes to choose from. By adding difficulty levels, players would face nine different variations (3 themes x 3 levels), offering a certain complex gaming experience.

Secondly, I plan to implement full-screen gameplay. However, attempting to switch to full-screen mode has caused disruptions in the game’s initial phase. It has affected the ball’s movement, needed adjustments in the number of bricks, required an increase in paddle size, and led to a decline in background quality. Additionally, P5.js has been slow in loading and executing the code, posing further challenges.

Conclusion: I’m very much satisfied with the output of my game, I never imagined I can implement complex algorithms and great features of P5.js programming: OOPS and Functions to recreate my favorite childhood game. For further learning experience, I’ll try to incorporate the changes I mentioned earlier.

Reference: Used Tools/ Software
1) Dall-E for background images : https://openai.com/dall-e-3
2) Audacity Software for sound editing. https://www.audacityteam.org
3) Coding Garder (Youtube Channel): https://www.youtube.com/watch?v=3GLirU3SkDM

Reading Response: Computer Vision for Artists and Designers, #Week5

Reflection: After reading the article on “Computer Vision for Artists and Designers,” I find myself intrigued by the democratization of computer vision technologies and their increasing integration into various artistic and interactive mediums. The examples provided, such as Myron Krueger’s Videoplace and Rafael Lozano-Hemmer’s Standards and Double Standards, showcase the diverse ways in which computer vision is being employed to create immersive and thought-provoking experiences. However, I couldn’t help but wonder: What are the potential ethical implications of surveillance-themed artworks like Suicide Box by the Bureau of Inverse Technology? While these projects aim to shed light on societal issues, do they also raise questions about privacy and consent?

Regarding the author’s bias, it’s evident that they have a deep appreciation for the potential of computer vision in the arts. The article primarily focuses on the positive impact of these technologies, emphasizing their accessibility to novice programmers and the creative possibilities they offer. However, I would have appreciated a more nuanced discussion: What are the potential drawbacks or limitations of using computer vision in art? How might artists address ethical concerns such as privacy and consent when incorporating surveillance-themed elements into their work? Additionally, I’m left wondering about the broader societal implications: What are the implications of widespread adoption of these technologies, particularly in terms of surveillance and data privacy? Overall, the reading has prompted me to critically examine the intersection of technology and art, and consider the ethical implications of incorporating advanced technologies like computer vision into creative practices.

Week 5 & 6: (Midterm Progress) Image Processing and Sounds

Concept: Recreating one of my favorite childhood game – The Brick Breaker

So I chose to have the concept for this project, is to create a musical soothing classical Brick Breaker game using the p5.js library. The game involves controlling a paddle to bounce a ball and break bricks at the top of the screen. The user interacts with the game by moving the paddle horizontally using the left and right arrow keys. The goal is to break all the bricks without letting the ball fall below the paddle. The game provides feedback through visual cues such as the ball bouncing off objects, disappearing bricks, and a scoring system. Moreover, sound effects further enhance the user experience.

Designing the Code: Elaborating important areas

1) Ball Behavior: Within the Ball class, I define the behavior of the ball. This includes its movement across the screen, detection of collisions with other objects (such as the paddle and bricks), and rendering on the canvas. This encapsulation allows for clear organization and modularization of ball-related functionality.

2) Paddle Control: The Paddle class covers the movement and display of the paddle. It handles user input from the keyboard to move the paddle horizontally across the screen, ensuring precise control for the player.

3) Brick Management: Each brick in the game is represented by the Brick class. This class manages the display of individual bricks on the canvas and provides methods for their creation, rendering, and removal during gameplay.

4) User Interaction: The mousePressed function responds to user input by triggering specific game actions, such as starting or resetting the game. This function enhances the interactivity of the game and provides a seamless user experience.

Additional functions, such as createBricks and resetGame, are responsible for initializing game elements (such as bricks) and resetting the game state, respectively. These functions streamline the codebase and improve readability by encapsulating repetitive tasks.

By breaking down the code into these specific components, I ensure a clear and organized structure, facilitating easier maintenance and future development of the game for the midterm project.

Minimizing Risk: Code I’m proud of,

display() {
    fill(255, 0, 0);
    ellipse(this.x, this.y, this.radius * 2);
  }
  
  checkCollision() {
    if (this.x > paddle.x && this.x < paddle.x + paddle.width && this.y + this.radius > paddle.y) {
      this.speedY *= -1;
      paddleHitSound.play();
    }
  }
  
  bounce() {
    this.speedY *= -1;
    ballHitSound.play();
  }
  
  hits(brick) {
    let closestX = constrain(this.x, brick.x, brick.x + brick.width);
    let closestY = constrain(this.y, brick.y, brick.y + brick.height);
    let distance = dist(this.x, this.y, closestX, closestY);
    return distance < this.radius;
  }
}

One major complex aspect of the project is implementing collision detection between the ball and other game objects (paddle, bricks, walls). Ensuring accurate collision detection is crucial for the game’s mechanics and overall user experience. To minimize the risk of errors in this area, I employed two  strategies:

1) Collision Detection Algorithm: Implementing this collision detection algorithms is essential because, for example in the Ball class, I used a method called hits(brick) to check if the ball collided with a brick. This method calculates the distance between the ball and the brick’s edges to determine if a collision occurred. Moreover, By using the dist() function in favor with appropriate ball coordinates, I ensured this accurate collision detection is perfectly executed.

2) Testing with Edge Cases: To validate the accuracy of this collision detection algorithm, I conducted repeated testing with various edge cases. This includes scenarios where the ball collides with the corners of bricks or with multiple objects simultaneously. By systematically testing these cases and analyzing the results, I came to conclusion that the collision detection behaves as expected under different conditions.

Here’s the Game:

Features & Game Mechanics:
– Game initializes with a start screen displaying “Brick Breaker” and “Click to start” message.
– The player controls the paddle using the left and right arrow keys.
– The ball bounces off the paddle, walls, and bricks.
– When the ball hits a brick, it disappears, and the player earns points.
– If the ball falls below the paddle, the game ends.
– Once game ends, it displays the “Game Over” message along with the score and “Click to replay” option.
– Clicking on the canvas after the game ends resets the game, allowing the player to replay.

Additional Features:
– Sound effects are played when the ball hits the paddle and when it hits a brick.
– The player earns points for each brick broken, and the score is displayed on the screen.
– Background music plays throughout the game to enhance the gaming experience.

Here’s a snapshot taken during the game-play:

Complete Code Snippet (With Comments):

// Define global variables
let backgroundImage;
let ball;
let paddle;
let bricks = [];
let brickRowCount = 3;
let brickColumnCount = 5;
let brickWidth = 80;
let brickHeight = 20;
let brickPadding = 10;
let brickOffsetTop = 50; // Adjusted value
let brickOffsetLeft = 30;
let score = 0;

let ballHitSound;
let paddleHitSound;
let backgroundMusic;

let gameStarted = false;
let gameOver = false;

// Preload function to load external assets
function preload() {
  backgroundImage = loadImage('background_image.jpg'); // Replace 'background_image.jpg' with the path to your image file
  ballHitSound = loadSound('ball_hit.mp3');
  paddleHitSound = loadSound('paddle_hit.mp3');
  backgroundMusic = loadSound('background_music.mp3');
}

// Setup function to initialize canvas and objects
function setup() {
  createCanvas(500, 400); // Set the canvas size to match the background image size
  paddle = new Paddle();
  ball = new Ball();
  createBricks();
  backgroundMusic.loop();
  // resetGame(); // Commented out, not needed here
}

// Draw function to render graphics
function draw() {
  background(backgroundImage); // Draw the background image
  
  // Display "Click to start" only when game hasn't started and isn't over
  if (!gameStarted && !gameOver) {
    textSize(32);
    textAlign(CENTER, CENTER);
    text("Brick Breaker", width / 2, height / 2 - 40);
    textSize(20);
    text("Click to start", width / 2, height / 2);
  } else { // Game running
    if (gameStarted && !gameOver) { // Run game logic only when game is started and not over
      ball.update();
      ball.checkCollision();
      ball.display();
      
      paddle.display();
      paddle.update();
      
      // Display and handle collisions with bricks
      for (let i = bricks.length - 1; i >= 0; i--) {
        bricks[i].display();
        if (ball.hits(bricks[i])) {
          ball.bounce();
          bricks.splice(i, 1);
          score += 10;
        }
      }
      
      // Check if all bricks are destroyed
      if (bricks.length === 0) {
        gameOver = true;
      }
      
      // Display score
      fill('rgb(216,32,71)')
      textSize(20);
      textAlign(LEFT);
      text("Turn up the volume!                               Score: " + score, 20, 30);
    }
    
    // Display game over message
    if (gameOver) {
      fill('rgb(32,213,32)')
      textSize(32);
      textAlign(CENTER, CENTER);
      text("Game Over! Score: " + score, width / 2, height / 2);
      text("Click to replay", width / 2, height / 2 + 40);
    }
  }
}

// Mouse pressed function to start/restart the game
function mousePressed() {
  if (!gameStarted || gameOver) {
    resetGame();
  }
}

// Reset game state and objects
function resetGame() {
  gameStarted = true;
  gameOver = false;
  score = 0;
  ball.reset();
  createBricks();
}

// Function to create bricks
function createBricks() {
  bricks = [];
  for (let c = 0; c < brickColumnCount; c++) {
    for (let r = 0; r < brickRowCount; r++) {
      let x = c * (brickWidth + brickPadding) + brickOffsetLeft;
      let y = r * (brickHeight + brickPadding) + brickOffsetTop;
      bricks.push(new Brick(x, y));
    }
  }
}

// Ball class
class Ball {
  constructor() {
    this.reset();
  }
  
  // Reset ball position and speed
  reset() {
    this.x = paddle.x + paddle.width / 2;
    this.y = paddle.y - this.radius;
    this.speedX = 5;
    this.speedY = -5;
    this.radius = 10;
  }
  
  // Update ball position
  update() {
    this.x += this.speedX;
    this.y += this.speedY;
    
    // Reflect ball off walls
    if (this.x < this.radius || this.x > width - this.radius) {
      this.speedX *= -1;
    }
    if (this.y < this.radius) {
      this.speedY *= -1;
    } else if (this.y > height - this.radius) {
      gameOver = true; // Game over if ball reaches bottom
    }
  }
  
  // Display ball
  display() {
    fill(255, 0, 0);
    ellipse(this.x, this.y, this.radius * 2);
  }
  
  // Check collision with paddle
  checkCollision() {
    if (this.x > paddle.x && this.x < paddle.x + paddle.width && this.y + this.radius > paddle.y) {
      this.speedY *= -1;
      paddleHitSound.play(); // Play paddle hit sound
    }
  }
  
  // Bounce ball off objects
  bounce() {
    this.speedY *= -1;
    ballHitSound.play(); // Play ball hit sound
  }
  
  // Check collision with a brick
  hits(brick) {
    let closestX = constrain(this.x, brick.x, brick.x + brick.width);
    let closestY = constrain(this.y, brick.y, brick.y + brick.height);
    let distance = dist(this.x, this.y, closestX, closestY);
    return distance < this.radius;
  }
}

// Paddle class
class Paddle {
  constructor() {
    this.width = 100;
    this.height = 20;
    this.x = width / 2 - this.width / 2;
    this.y = height - 50;
    this.speed = 10;
  }
  
  // Display paddle
  display() {
    fill(0, 0, 255);
    rect(this.x, this.y, this.width, this.height);
  }
  
  // Update paddle position based on user input
  update() {
    if (keyIsDown(LEFT_ARROW)) {
      this.x -= this.speed;
    }
    if (keyIsDown(RIGHT_ARROW)) {
      this.x += this.speed;
    }
    this.x = constrain(this.x, 0, width - this.width);
  }
}

// Brick class
class Brick {
  constructor(x, y) {
    this.x = x;
    this.y = y;
    this.width = brickWidth;
    this.height = brickHeight;
  }
  
  // Display brick
  display() {
    fill(0, 255, 0);
    rect(this.x, this.y, this.width, this.height);
  }
}

Ideas to improve this project for the midterm:

1) User Experience: I’m thinking to enhance the user experience by adding features such as visual effects, animations, difficulty levels, and more interactive elements (themes) can make the game more engaging and enjoyable for players.

2) Saving High Scores  Implement functionality to allow players to save the player’s progress (high scores) and comparing them with their present and previous scores.

3) Immersive Audio Design: Enhancing more immersion by adding immersive audio effects or soundscapes to game play events and interactions. This features could adds more engaging and immersive audiovisual experience for the user.

Reading Response: The Psychopathology of Everyday Things, #Week4

Reflecting on Norman’s insights from “The Psychopathology of Everyday Things, Chapter:1” I find myself deeply considering the complexity hidden within simple everyday objects like doors, refrigerators, and watches. Norman points out that the designs meant to simplify our lives can sometimes make them more complicated instead. This resonates with me because I’ve often found myself frustrated by appliances and gadgets (like smart watches, bluetooth coffee maker) that have too many features. These features, instead of making the device better, can make it harder to use. Norman’s argument makes me rethink the belief that having more features means better functionality. My own experiences support this idea, as I’ve struggled with devices that seem to prioritize complexity over ease of use.

Furthermore, Norman’s critique makes me wonder about the true purpose of design. Is it more important for a product to look good and have lots of features than to be easy to use? This challenges the current trend in design, where form and complexity often take precedence over simplicity and functionality. Norman seems to favor designs that are straightforward and user-friendly, which makes me question my own ideas about what makes a design “good.” Previously, I might have thought that the more technologically advanced a product is, the better it is. However, Norman’s perspective has made me see the value in designs that balance functionality, simplicity, and elegance. This shift in thinking opens up new questions about how designers can create products that are both advanced and accessible. As technology evolves, finding the right balance will be crucial for creating products that enhance our lives without adding unnecessary complexity.

Yaakulya’s Assignment 4: Loading Data & Displaying text

Concept: I always wanted to understand the graphs and math revolve behind Real Estates, so for my Data Visualization assignment, I created a data visualization using the Boston Housing dataset. (Dataset URL: https://raw.githubusercontent.com/jbrownlee/Datasets/master/housing.csv)
This Dataset is available to public.

The resultant visualization displays the relationship between the average number of rooms per dwelling (RM) and the median home value ($1000s) for various suburbs in Boston. Each data point on the graph represents a suburb, with the x-axis indicating the average number of rooms and the y-axis indicating the median home value. Additionally, I implemented an interactive tooltip that provides detailed information about each data point when the user hovers over it, including the suburb name, crime rate, and median home value.

To make my concept work, I found inspiration from these sources and moreover I learnt a lot about attributes and functions used for loading the required data from the datasets precisely:

Highlight of Code: One part of the code that I’m particularly proud of is the implementation of the interactive tooltip, initially I found it very difficult. This feature enhances the user experience by providing additional information about the data points in a user-friendly manner. Here’s the code snippet responsible for displaying the tooltip:

function draw() {
  // Check if mouse is over a data point
  let overPoint = false;
  for (let i = 0; i < data.getRowCount(); i++) {
    let rm = map(data.getNum(i, 5), 3, 9, 100, width - 100);
    let medv = map(data.getNum(i, 13), 5, 50, height - 100, 100);
    let d = dist(mouseX, mouseY, rm, medv);
    if (d < 5) {
      overPoint = true;
      let suburb = data.getString(i, 0);
      let crimeRate = data.getNum(i, 1);
      let medianValue = data.getNum(i, 13);
      tooltip.html(`Suburb: ${suburb}<br>Crime Rate: ${crimeRate.toFixed(2)}<br>Median Home Value: $${medianValue.toFixed(2)}k`);
      tooltip.position(rm + 20, medv - 20);
      tooltip.show();
      break;
    }
  }
  if (!overPoint) {
    tooltip.hide();
  }
}

Explanation – How this Interactive feature works?: In the draw() function, which updates the canvas continuously, the code iterates through each data point in the dataset. It calculates the distance between the mouse cursor position and the position of each data point using the dist() function. If this distance is within a threshold of 5 pixels, indicating that the mouse is hovering over a data point, the code retrieves information such as suburb name, crime rate, and median home value using functions like getString() and getNum(). These functions extract specific values from the dataset based on row and column indices. The tooltip’s content is then updated to display this information, and its position is adjusted slightly from the data point using the position() function. Finally, the tooltip is shown to the user with show(). If the mouse is not over any data point, the tooltip is hidden using hide(). This process allows for interactive display of detailed information when the user hovers over data points on the visualization.

Complete Embedded Sketch:

let data;
let tooltip;

function preload() {
  // Load the Boston Housing dataset
  data = loadTable('https://raw.githubusercontent.com/jbrownlee/Datasets/master/housing.csv', 'csv', 'header');
}

function setup() {
  createCanvas(800, 600);
  background(240);

  // Plot the data points with black color
  for (let i = 0; i < data.getRowCount(); i++) {
    let rm = map(data.getNum(i, 5), 3, 9, 100, width - 100);
    let medv = map(data.getNum(i, 13), 5, 50, height - 100, 100);

    fill('rgb(197,134,88)'); // Change color to black
    noStroke();
    ellipse(rm, medv, 10, 10);
  }

  // Add x and y axes
  drawAxes();

  // Add interactive tooltip
  tooltip = createDiv('');
  tooltip.style('position', 'absolute');
  tooltip.style('background-color', 'rgba(255, 255, 255, 0.8)');
  tooltip.style('padding', '8px');
  tooltip.style('border-radius', '4px');
  tooltip.hide();


}

function drawAxes() {
  // Draw x-axis
  stroke(0);
  line(100, height - 100, width - 100, height - 100);
  for (let i = 4; i <= 9; i++) {
    let x = map(i, 3, 9, 100, width - 100);
    textAlign(CENTER, CENTER);
    textSize(12);
    fill(0);
    text(i, x, height - 80);
  }
  textAlign(CENTER, CENTER);
  textSize(16);
  fill(0);
  text('Average Number of Rooms per Dwelling (RM)', width / 2, height - 40);

  // Draw y-axis
  stroke(0);
  line(100, 100, 100, height - 100);
  for (let i = 5; i <= 50; i += 5) {
    let y = map(i, 5, 50, height - 100, 100);
    textAlign(RIGHT, CENTER);
    textSize(12);
    fill(0);
    text(i, 90, y);
  }
  textAlign(CENTER, CENTER);
  textSize(19);
  fill(0)
  text('Boston Housing Dataset Visualization (Year:1970-2006)', 400, 40);
  rotate(-HALF_PI);
  textSize(16);
  text('Median Home Value ($1000s)', -height / 2, 50);
}

function draw() {
  // Check if mouse is over a data point
  let overPoint = false;
  for (let i = 0; i < data.getRowCount(); i++) {
    let rm = map(data.getNum(i, 5), 3, 9, 100, width - 100);
    let medv = map(data.getNum(i, 13), 5, 50, height - 100, 100);
    let d = dist(mouseX, mouseY, rm, medv);
    if (d < 5) {
      overPoint = true;
      let suburb = data.getString(i, 0);
      let crimeRate = data.getNum(i, 1);
      let medianValue = data.getNum(i, 13);
      tooltip.html(`Suburb: ${suburb}<br>Crime Rate: ${crimeRate.toFixed(2)}<br>Median Home Value: $${medianValue.toFixed(2)}k`);
      tooltip.position(rm + 20, medv - 20);
      tooltip.show();
      break;
    }
  }
  if (!overPoint) {
    tooltip.hide();
  }
}

Generated Output:

Reflection and Ideas for Future Work: Overall, I’m satisfied with how the assignment turned out. The visualization effectively communicates the relationship between the number of rooms in a dwelling and the median home value in different suburbs of Boston. The interactive tooltip adds an extra layer of interactivity and information, enhancing the user experience.

For future work or improvements, I could consider adding more features to the visualization, such as:

1. Implementing color encoding for an additional variable, such as crime rate or pupil-teacher ratio, to provide more insights into the data.

2. Enhancing the design of the visualization by adding axis labels, a title, and a legend to improve clarity and understanding.

3. Exploring different types of visualizations, such as scatter plots or line charts, to represent the data in alternative ways and uncover additional patterns or trends in addition working with latest datasets.

Overall, this assignment has been a valuable learning experience, and I look forward to applying these skills to future assignments ad projects.

Related P5 References:
1. https://p5js.org/reference/#/p5/map
2. https://p5js.org/reference/#/p5.Element/style
3. https://p5js.org/reference/#/p5.Table/getNum
4. https://p5js.org/reference/#/p5.Element/hide
5. https://p5js.org/reference/#/p5.Element/position
6. https://p5js.org/reference/#/p5.Table/getString

Reading Reflection – Week#3

Reflection on “The Art of Interactive Design” by Chris Crawford:

After reading Crawford’s work, I found myself thinking about how interactivity is often misunderstood. Crawford compares interactivity to a conversation, where both parties listen, think, and speak. This analogy helped me understand that for interaction to be meaningful, both parties need to actively participate. Crawford also talks about how interactivity is often misused and misunderstood. (Pg 5, 6)

However, I had some questions about Crawford’s perspective. He criticizes traditional media like books and movies for not being interactive enough. But I believe these media still have value because they make us feel and think, even though they don’t interact with us directly. Crawford also seems biased towards interactive design over human factors engineering, which focuses on making tools more efficient for workers.

Another question that came up for me was about the limits of interactivity. Are there times when traditional media offer experiences that can’t be replaced by interactive designs? Overall, reading Crawford’s work made me rethink what interactivity means and how it affects design. It made me consider the importance of both form and function in design processes.

Assignment 3: Generative Art using OOPS, Functions & Arrray’s

Concept: My generative art created using P5.js presents a captivating display of colorful circles arranged in a dynamic pattern using OOPS, Arrays and Functions. I have integrated few interactive functions to make it more interesting. Inspired by the interplay of randomness and user interaction as discussed in class, this artwork embodies the concept of controlled chaos.

Main Inspiration:

At initial phase: At first, I had the idea to create artwork like the one in the video, but instead of using curves, I wanted to use circles. Each circle in my artwork has its own size, color gradient, and movement, which all come together to make the overall picture interesting. I added an interactive feature so people can join in and make the artwork themselves by clicking the mouse to add new circles. This makes the artwork more dynamic and engaging. The colors of the circles change gradually based on their position on the screen, which gives the artwork depth and liveliness. Additionally, each circle rotates at its own speed, adding a sense of flow and motion. Overall, my artwork demonstrates how randomness can be controlled to create harmony, inviting viewers to appreciate the beauty of unpredictability.

[Initial Output] This is how it looks! Try tapping anywhere in canvas to create more fun circles.. 

Initial Art Code:

let circles = [];

function setup() {
  createCanvas(600, 600);
  
  // Create an initial set of circles
  for (let i = 0; i < 50; i++) {
    let circle = new Circle(random(width), random(height), random(10, 50));
    circles.push(circle);
  }
}

function draw() {
  background(255);

  // Update and display each circle
  for (let circle of circles) {
    circle.update();
    circle.display();
  }
}

function mousePressed() {
  // Add a new circle at the mouse position when clicked
  let newCircle = new Circle(mouseX, mouseY, random(10, 50));
  circles.push(newCircle);
}

// Circle class definition
class Circle {
  constructor(x, y, diameter) {
    this.x = x;
    this.y = y;
    this.diameter = diameter;
    this.color1 = color(random(255), random(255), random(255));
    this.color2 = color(random(255), random(255), random(255));
    this.speedX = random(-2, 2);
    this.speedY = random(-2, 2);
    this.rotation = random(TWO_PI); // Random initial rotation
    this.rotationSpeed = random(-0.05, 0.05); // Random rotation speed
  }

  update() {
    // Move the circle
    this.x += this.speedX;
    this.y += this.speedY;

    // Bounce off the walls
    if (this.x > width || this.x < 0) {
      this.speedX *= -1;
    }
    if (this.y > height || this.y < 0) {
      this.speedY *= -1;
    }

    // Update rotation
    this.rotation += this.rotationSpeed;
  }

  display() {
    // Draw the circle with color gradient and rotation
    let gradientColor = lerpColor(this.color1, this.color2, map(this.y, 0, height, 0, 1));
    fill(gradientColor);
    noStroke();
    push();
    translate(this.x, this.y);
    rotate(this.rotation);
    ellipse(0, 0, this.diameter, this.diameter);
    pop();
  }
}

I felt that my artwork needed some additional features to make it more engaging, so I decided to incorporate three new elements:

1. Interactive Drawing: Now, users can click and drag their mouse to draw colorful circles directly onto the canvas. This adds an interactive dimension to the artwork, allowing people to actively participate in its creation.

2.Dynamic Color Palette: To enhance visual appeal, I introduced a dynamic color palette. Each circle is filled with colors randomly selected from a predefined palette, adding variety and vibrancy to the overall composition.

3.Transparency Effect: To create a sense of depth and visual interest, I implemented a transparency effect. The transparency of each circle varies based on its diameter, resulting in a captivating depth effect as circles overlap on the canvas.

Final Output (Tap and drag the mouse anywhere in the canvas)

This is how it looks if the user added more circles:

Final Code:

let circles = [];
let colorPalette = ['#FFC857', '#F4A35F', '#EE6C4D', '#F95738', '#FF5733', '#FF355E', '#D40C6B', '#7A00FF', '#0045FF', '#0088FF']; //Creating an array filled with color palettes. 

function setup() {
  createCanvas(800, 600);
  
  // Creating an initial set of circles
  for (let i = 0; i < 100; i++) {
    let x = random(width);
    let y = random(height);
    let diameter = random(10, 50);
    let colorIndex = floor(random(colorPalette.length));
    let circle = new Circle(x, y, diameter, colorPalette[colorIndex]);
    circles.push(circle);
  }
  
  // Adding interactive features (just need to tap and drag)
  background(0);
  textAlign(CENTER, CENTER);
  textSize(36);
  fill(255);
  text("Click and drag to draw!", width / 2, height / 2);
}

function draw() {
  // Updating and displaying each circle
  for (let circle of circles) {
    circle.update();
    circle.display();
  }
}

function mouseDragged() {
  // Add a new circle at the mouse position when dragged
  let diameter = random(10, 50);
  let colorIndex = floor(random(colorPalette.length));
  let circle = new Circle(mouseX, mouseY, diameter, colorPalette[colorIndex]);
  circles.push(circle);
}

// Defining Circle class 
class Circle {
  constructor(x, y, diameter, color) {
    this.x = x;
    this.y = y;
    this.diameter = diameter;
    this.color = color;
    this.speedX = random(-2, 2);
    this.speedY = random(-2, 2);
    this.rotation = random(TWO_PI); // Random initial rotation
    this.rotationSpeed = random(-0.05, 0.05); // Random rotation speed
  }

  update() {
    // Moving the circle
    this.x += this.speedX;
    this.y += this.speedY;

    // Bouncing off the walls
    if (this.x > width || this.x < 0) {
      this.speedX *= -1;
    }
    if (this.y > height || this.y < 0) {
      this.speedY *= -1;
    }

    // Updating rotaion
    this.rotation += this.rotationSpeed;
  }

  display() {
    // Drawing the circle with rotation and transparency effect
    push();
    translate(this.x, this.y);
    rotate(this.rotation);
    fill(this.color);
    noStroke();
    let alpha = map(this.diameter, 10, 50, 50, 200); 
    // Varrying transparency based on diameter
    fill(red(this.color), green(this.color), blue(this.color), alpha);
    ellipse(0, 0, this.diameter, this.diameter);
    pop();
  }
}

Code I’m proud of: Initially, I found implementing the transparency effect challenging in my artwork. Understanding how to vary the transparency based on the diameter of each circle was tricky. However, I managed to overcome this difficulty by experimenting with the map() function in the display() method of the Circle class. By mapping the diameter of each circle to a range of transparency values, I was able to achieve the desired effect. This involved adjusting the parameters of the map() function until I achieved the desired transparency levels, ultimately resulting in a visually appealing depth effect as circles overlapped on the canvas. Overall, successfully implementing this feature added an extra dimension to my artwork that I’m proud of.

Additional Art Work: With Valentine’s Day approaching, I decided to enhance my artwork by making some adjustments to the code. Here’s the updated look!

Here’s the code for the Valentine’s Day themed artwork:

let hearts = [];
let colorPalette = ['#FF4D6D', '#FF6381', '#FF7992', '#FF8BA3', '#FFA3B5', '#FFBFC7', '#FFD1D9', '#FFEDF2'];

function setup() {
  createCanvas(800, 600);
  
  // Addinng a sweet message
  background(255);
  textAlign(CENTER, CENTER);
  textSize(36);
  fill(150);
  text("Happy Valentine's Day!", width / 2, height / 2 - 50);
  text("Click and drag to create love!", width / 2, height / 2 + 50);
}

function draw() {
  // Updating and displaying each heart
  for (let heart of hearts) {
    heart.update();
    heart.display();
  }
}

function mouseDragged() {
  // Adding a new heart at the mouse position when dragged
  let size = random(30, 100);
  let colorIndex = floor(random(colorPalette.length));
  let heart = new Heart(mouseX, mouseY, size, colorPalette[colorIndex]);
  hearts.push(heart);
}

// Heart class definition
class Heart {
  constructor(x, y, size, color) {
    this.x = x;
    this.y = y;
    this.size = size;
    this.color = color;
    this.speedX = random(-2, 2);
    this.speedY = random(-2, 2);
    this.rotation = random(TWO_PI); // Random initial rotation
    this.rotationSpeed = random(-0.05, 0.05); // Random rotation speed
  }

  update() {
    // Moving the heart
    this.x += this.speedX;
    this.y += this.speedY;

    // Bounce off the walls
    if (this.x > width || this.x < 0) {
      this.speedX *= -1;
    }
    if (this.y > height || this.y < 0) {
      this.speedY *= -1;
    }

    // Update rotation
    this.rotation += this.rotationSpeed;
  }

  display() {
    // Drawing the heart with rotation and transparency effect
    push();
    translate(this.x, this.y);
    rotate(this.rotation);
    fill(this.color);
    noStroke();
    let alpha = map(this.size, 30, 100, 50, 200); // Vary transparency based on size
    fill(red(this.color), green(this.color), blue(this.color), alpha);
    beginShape();
    vertex(0, -this.size / 2);
    bezierVertex(this.size / 2, -this.size / 2, this.size, 0, 0, this.size);
    bezierVertex(-this.size, 0, -this.size / 2, -this.size / 2, 0, -this.size / 2);
    endShape(CLOSE);
    pop();
  }
}

Conclusion:  In conclusion, my inspired Bouncing Circles Art and Valentine’s Day-artwork successfully integrates the principles of generative art, interactive elements, and dynamic features using circles. The addition of an interactive drawing feature, a dynamic color palette, and a transparency effect enhances the overall aesthetic appeal, allowing users to engage with the artwork in a meaningful way. To speak more about the Valentines artwork,  the fusion of vibrant colors and interactive drawing adds a festive touch, making it suitable for the Valentine’s Day theme.

While I am pleased with the outcome, there are areas for potential improvement. One aspect to consider is enhancing user interaction further by introducing additional interactive features or refining existing ones to make the artwork even more engaging. Additionally, exploring different color palettes and experimenting with more complex patterns could elevate the visual impact of the artwork. Overall, this project has provided valuable insights and opportunities for growth, and I look forward to continuing to refine my skills and expand my creative horizons in future projects.

Yaakulya’s Assignment 2: Animation, Conditionals, Loops

Concept: The concept of this code is to create an interactive animation of concentric polygons using P5.js. The animation features a series of concentric polygons that rotate around a central point, creating a visually engaging effect. Additionally, the animation can be paused and resumed by clicking anywhere on the canvas, providing interactivity for the user.

Inspiration: My primary motivation for this project stems from my deep passion for cars. As a child, I spent countless hours playing with remote control cars, and one aspect that always fascinated me was the motion of the wheels. I found it incredibly satisfying to watch the wheel rims rotate in a clockwise direction as the speed increased. This experience inspired me to recreate a mesmerizing wheel animation using for and while loops. Additionally, I added an interactive element to the animation, allowing users to pause the concentric polygons by tapping anywhere on the canvas and vice versa to resume the effect. Here’s a simple video on rotatory motion of the toy car’s wheels.

Areas of Code I’m proud: Apart from creating a realistic rotatory motion, I aimed to add an interactive feature similar to the simple buttons used to control the pausing and driving of car wheels. Initially, I encountered difficulty in adding but  later I successfully achieved this feature through the implementation of one particular function: mouseClicked(). So I can say one noteworthy section of my code:is the implementation of the mouseClicked() function. This function toggles the isPaused variable, which controls the pause state of the animation. By toggling this variable based on mouse clicks, the code effectively enables the user to interact with the animation, pausing and resuming it at will. If this feature or option wouldn’t exist, the process of making the art interactive would be so difficult.

P5.js code:

// Define global variables
let angle = 0; // Initialize rotation angle
let rotationSpeed = 0.01; // Rotation speed for the spinning illusion
let isPaused = false; // Variable to track animation pause state

function setup() {
  // Create canvas
  createCanvas(600, 600);
  // Set background color
  background(255);
  // Set drawing properties
  noFill();
  strokeWeight(2);
  stroke(0);
  
  // Define parameters for concentric polygons using a for loop
  let numCircles = 20;
  let radius = width / 2;
  
  // Loop to draw concentric polygons using a for loop
  for (let i = 0; i < numCircles; i++) {
    // Calculate radius for current circle
    let currentRadius = map(i, 0, numCircles, 0, radius);
    // Generate random number of points for current polygon
    let numPoints = int(random(5, 15));
    let angleIncrement = TWO_PI / numPoints;
    beginShape();
    // Loop to draw vertices for current polygon using a while loop
    let j = 0;
    while (j < numPoints) {
      // Calculate vertex coordinates with rotation applied
      let x = width / 2 + currentRadius * cos(j * angleIncrement + angle);
      let y = height / 2 + currentRadius * sin(j * angleIncrement + angle);
      vertex(x, y);
      j++; // Increment counter
    }
    endShape(CLOSE);
  }
  
  // Add a central circle to create illusion of a spinning wheel
  fill(255);
  ellipse(width / 2, height / 2, 50, 50); // Draw central circle
}

function draw() {
  // Check if animation is not paused
  if (!isPaused) {
    // Set background color
    background(255);
    // Update rotation angle
    angle += rotationSpeed;
    // Redraw the artwork with updated rotation using the setup function
    setup();
  }
}

function mouseClicked() {
  // Toggle animation pause state when mouse is clicked
  isPaused = !isPaused;
}


Final Output:
Here’s how it looks, click anywhere on the canvas to pause/ resume the wheel.

Reflection and Ideas for Future Work or Improvements: I believe this code successfully achieves the goal of creating an interactive animation of concentric polygons. However, I feel there are few areas for potential improvement and future work:

1) Optimization: The code could be optimized to improve performance, especially when handling a large number of polygons. So instead of 20, I tried of giving number of circles as 50 and the webpage stopped working.

2) User Interface: I feel like there should be more interactive part with many features. Like it would be better if I leave the user few options for adding controls or adding adjusting rotation speed.

3) Additional Features: Incorporating additional features such as color transitions, different polygon shapes, or customizable patterns could add depth and complexity to the animation.

Overall, this assignment was a great opportunity to experiment with loops and conditional statements. Moving forward, I’m willing to learn more and plan to incorporate and fix the above discussed areas to enhance this coding animation in future.

Yaakulya’s Reading Reflection – Week2

Casey Reas’s video about computer-generated art blew me away. I never knew algorithms could create such detailed portraits and buildings. It got me thinking about how these algorithms could be used in lots of real-world stuff like computer games, designing buildings, and making interactive charts. Reas talked about how everything in his art is super precise and carefully calculated using geometry.

The part that really got me was when he showed how a string moved across a surface (Element 5) and how elements orient themselves based on what they’re touching (B6). It reminded me of what we talked about in wednesday’s class (loops: using for and while & making a bouncing ball animation), moreover the illustration resembles just like how atoms behave in sub atomic matter. Also, when he showed the artwork that looked like bacteria under a microscope (Process 18th), I was amazed by how creative algorithms can be. Before this, I only thought of algorithms as powerful tools, but now I see they can also be really creative. Reas used a framework called Processing for his art, and now I really want to learn more about it.

Watching Reas’s video made me realize that algorithms aren’t just for solving problems—they can also make beautiful art. It changed the way I see algorithms. Now, I’m curious about how we can use algorithms to create not just useful things, but also things that are interesting and fun to look at. I’m starting to think about how computer science and art can come together in cool and diverse ways. In conclusion, Reas’s video opened my eyes to a whole new world of possibilities, and now I’m eager to explore more about algorithmic art and how it all works.