HW3: Generative Art Using OOPs and Perlin Noise

Inspiration

This code is inspired by a video from “The Coding Train” channel on YouTube. The video shows how to create a flow field simulation using particles that follow the flow of a vector field.  It uses Object-Oriented Programming, arrays, and Perlin noise to create flow field particles that look very aesthetically pleasing.

Concept

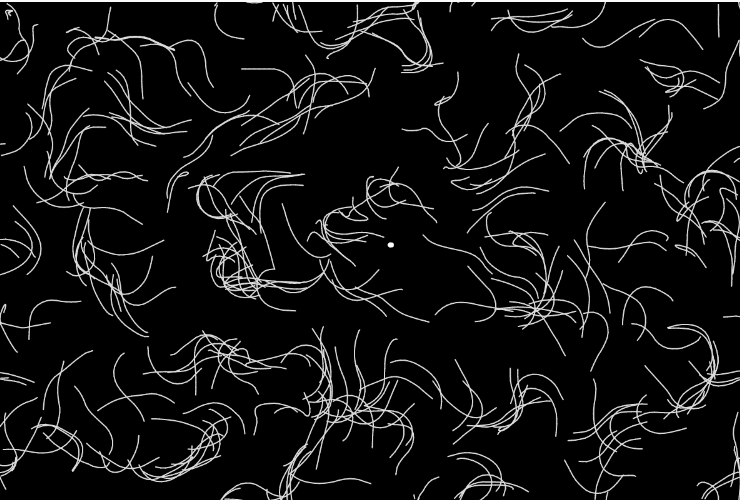
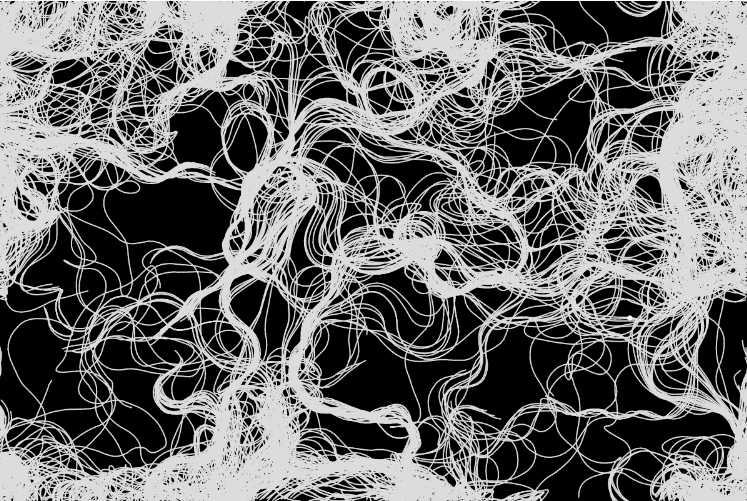
The concept behind the flow field simulation is that particles move according to a vector field, which defines the direction and magnitude of the flow. The vector field is generated using noise, so that the flow is not predictable and creates a natural, organic look. The particles follow the flow field by calculating the angle of the vector at their current position, and adjusting their velocity and position accordingly.

Implementation

The implementation of the code involves creating a Particle class to represent each particle in the system. This class contains a number of methods to control the particle’s motion. The update() method updates the velocity and position of the particle based on its acceleration. The follow() method uses the particle’s current position to find the corresponding vector in the flow field and apply it as a force to the particle. The display() method draws a line from the particle’s current position to its previous position, and the updatePrev() method updates the previous position to be the current position. The resetParticles() method checks if the particle has gone out of bounds and wraps it back to the other side of the canvas if it has.

The main setup function generates the flow field and creates the particles. The flow field is generated by dividing the canvas into a grid of cells, and then generating a random vector for each cell. The number of columns and rows in the grid is calculated based on the size of the canvas and the scale factor, s. The setup() function also creates the particles by creating new instances of the Particle class and adding them to the particles array.

The draw() function updates the flow field and the particles. First, it updates the noise offset to create a smoothly changing flow field. Then, it loops through the grid and calculates a new angle for each cell based on the noise function. This angle is converted into a vector, which is stored in the flowfield array. Next, the function loops through the particles, and for each particle, it calls the follow() method to apply the corresponding flow field vector to the particle. Then, the update() method is called to update the particle’s velocity and position based on its acceleration. Finally, the display() method is called to draw the particle and the resetParticles() method is called to wrap the particle back to the other side of the canvas if it has gone out of bounds.

// Class for a particle that moves based on a perlin noise flow field
class Particle {
  constructor() {
    // Initial position of the particle at a random point on the canvas
    this.pos = createVector(random(width), random(height));
    // Initial velocity set to (0, 0)
    this.vel = createVector(0, 0);
    // Initial acceleration set to (0, 0)
    this.accel = createVector(0, 0);
    // Maximum speed that the particle can move
    this.maxV = 4;
    // Store the previous position of the particle
    this.prevPos = this.pos.copy();
  }

  // Follow the flow field vectors
  follow(vectors) {
    // Calculate the grid position of the particle
    let x = floor(this.pos.x / s);
    let y = floor(this.pos.y / s);
    let index = x + y * cols;
    // Get the force vector at that grid position
    let force = vectors[index];
    // Apply a force to the particle's acceleration
    this.accel.add(force);
  }
  
  // Update the position of the particle based on its velocity and acceleration
  update() {
    // Add the acceleration to the velocity
    this.vel.add(this.accel);
    // Limit the velocity to the maxV
    this.vel.limit(this.maxV);
    // Add the velocity to the position
    this.pos.add(this.vel);
    // Reset the acceleration to (0, 0)
    this.accel.mult(0);
  }

  // Display the particle as a line connecting its current and previous position
  display() {
    stroke(220);
    strokeWeight(1);
    line(this.pos.x, this.pos.y, this.prevPos.x, this.prevPos.y);
    this.updatePrev();
  }

  // Update the previous position of the particle
  updatePrev() {
    this.prevPos.x = this.pos.x;
    this.prevPos.y = this.pos.y;
  }

  // Check if the particle has gone outside the canvas and wrap it around if necessary
  particleReset() {
    if (this.pos.x > width) {
      this.pos.x = 0;
      this.updatePrev();
    }
    if (this.pos.x < 0) {
      this.pos.x = width;
      this.updatePrev();
    }
    if (this.pos.y > height) {
      this.pos.y = 0;
      this.updatePrev();
    }
    if (this.pos.y < 0) {
      this.pos.y = height;
      this.updatePrev();
    }
  }
}

Challenges

One of the challenges in this project was figuring out how to create a smooth flow field that changes over time. This was achieved by using the noise function to generate random values for each cell in the grid. By updating the noise offset in the draw() function, the flow field smoothly changes over time, creating a dynamic and interesting visual.

Another challenge was figuring out how to apply the flow field vectors to the particles in a way that creates a believable and visually appealing motion. This was achieved by dividing the canvas into a grid of cells and using the particle’s position to find the corresponding flow field vector. The particle’s velocity is then updated based on this vector, creating a believable motion that follows the flow of the flow field.

Reflection

This project was a fun and interesting exploration of particle systems and flow fields. By creating a simple system of particles that follow a flow field, it is possible to create a wide variety of dynamic and visually appealing patterns. The use of the noise function to generate the flow field allows for a high degree of control over the motion of the particles and the overall visual appearance of the system. This project was a valuable learning experience, and it has given me a deeper appreciation for the potential of particle systems and flow fields for creating dynamic, organic and engaging visuals using object-oriented programming, arrays, and Perlin noise.

Reference

Sketch Link: https://editor.p5js.org/swostikpati/full/-KXM2Ag3s

HW2: Generative Loop Art

Motivation

The motivation behind this project was to create a simple generative artwork using the p5.js library. The goal was to combine elements of randomization, user interaction, and geometric shapes to create a unique and visually interesting piece.

Concept

The concept behind the artwork is a grid pattern of randomly colored rectangles and ellipses. The user can interact with the artwork by moving the mouse, causing the size of the shapes and the stroke weight of the outlines to change dynamically. This adds a layer of unpredictability to the artwork, making each viewing experience unique. Moving the mouse across the x axis changes the size of the shapes, while moving the mouse across the y axis, changes the strokewidth.

Process of Implementation

The process of implementing the generative art can be broken down into two primary steps:

Generating the grid pattern of shapes in the draw() function:

function draw() {
  // nested for loops to create a grid pattern
  for (let i = 0; i < width; i += s) { 
    for (let j = 0; j < height; j += s) {
      // randomize the color and shape of each square
      fill(random(255), random(255), random(255)); // randomly generate a color for each shape
      if (random(1) > 0.5) { // randomly choose between a rectangle or an ellipse
        rect(i, j, s, s); // draw a rectangle
      } else {
        ellipse(i + s / 2, j + s / 2, s, s); // draw an ellipse
      }
    }
  }
}

Implement the mouseMoved() function to add user interaction:

// function to change the size and stroke weight of the squares on mouse movement
function mouseMoved() {
  s = map(mouseX, 0, width, 10, 50); // map the size of the shapes to the x position of the mouse
  strokeW = map(mouseY, 0, height, 1, 10); // map the stroke weight to the y position of the mouse
  strokeWeight(strokeW); // update the stroke weight with the new mapped value
}

Challenges

One challenge in this project was understanding the map() function and how it works to map one range of values to another. It was important to understand the arguments passed to the map() function and how it affected the output.

Another challenge was getting the grid pattern of shapes to line up correctly, as the size of each shape needed to be adjusted to create a seamless grid.

Reflections

This project was a great opportunity to learn about generative art and how p5.js can be used to create unique and visually interesting pieces by using loops. By implementing randomization, user interaction, and geometric shapes, I was able to create a simple but impactful generative art piece.

Link to p5 sketch: https://editor.p5js.org/swostikpati/full/3W7yvJ3yo

HW1: Self Portrait

Inspiration

The assignment required us to play with basic shapes in p5.js and explore around to design a self-portrait. I wanted to add some creativity to the self-portrait so I began with the process of ideation to determine what could be a story behind my self-portrait. I wanted to do something funny.

I stumbled across a number of ideas throughout – including creating a type of animation or using text to create a portrait (but I realized it would go against the spirit of the assignment). But the one that stuck out the most was inspired from an episode of the show Phineas and Ferb – the one where the two brothers carve the face of Candace (their sister) on Mount Rushmore beside the others.

I instantly knew I had to do this. This became the story and purpose behind my self-portrait – To put my face up there on Mount Rushmore!

Project Implementation 

I started by importing the picture of Mount Rushmore from Unsplash. To avoid any lag in displaying the image, I preloaded the image in p5 before the setup function.

let bgImg;

function preload() {
  //preloading background image
  bgImg = loadImage(
    "https://images.unsplash.com/photo-1664048322440-7df65ca19151?ixlib=rb-4.0.3&ixid=MnwxMjA3fDB8MHxwaG90by1wYWdlfHx8fGVufDB8fHx8&auto=format&fit=crop&w=1170&q=80"
  );
}

The next steps involved slowly creating different parts of the face. I started out with an overall arc that would act as the outline of the face, went forward to create eyes, made a nose using a triangle, and used more arcs for the smile and the head, ellipses for ears, and circles for the eyeballs. I made sure to follow a definite order in which I added the different features in order to put them layer by layer. A specific piece that I wanted to add to the portrait was hair falling on the forehead, which sort of makes it more similar to me. I placed a triangle near the head to depict this. Then, I went about adding color to the different parts of the portrait. I copied color codes of natural skin tones from schemecolor.com.

Finally, I wanted to give a left tilt to the portrait to match the original design of the mountain and went about rotating all the components by a few radians and then translating their position to bring the portrait to the right place.

function setup() {
  createCanvas(500, 500);
  background(bgImg);
  
  //to give a tilted feeling
  rotate(radians(3))
  translate(18, -20)
  
  //ears
  fill("#F1C27D")
  ellipse(405, 276, 20, 30);
  ellipse(315, 276, 20, 30);

  //face
  fill("#FFDBAC")
  arc(360, 250, 100, 240, 0, PI, OPEN);

  //eyes
  fill(color(255))
  ellipse(337, 275, 30, 20);
  ellipse(382, 275, 30, 20);
  
  //eyeballs
  fill(color(0))
  circle(338, 278, 13);
  circle(381, 278, 13);

  //mouth
  fill("#FFDBAC")
  arc(360, 315, 60, 60, 0 +radians(25), PI - radians(25));

  //nose
  fill("#F1C27D")
  triangle(360, 290, 370, 317, 351, 317);

  //head
  fill(color(0))
  arc(355, 250, 110, 80, PI, 0, OPEN);

  //dropping hair
  
  noStroke();
  triangle(300, 250, 365, 247, 301, 280);
}

Throughout the process, knowing very specific coordinates was very necessary. For this reason, I used to continuously log the x and y coordinates of my cursor on the console using the draw function and then use those values in creating the different shapes.

function draw() {
  //   useful for finding coordinated on the canvas
  print(mouseX, mouseY)
}

Challenges

Personally, I didn’t face many challenges. There was just one that I would like to highlight. While trying to give the portrait a slight tilt, I used a number of functions before stumbling upon the right one. The ones I used before required the created canvas to be in WebGL format.  I wasn’t aware of WebGL and decided against making the portrait more complicated before stumbling across the right function.

Learnings and Reflections

One of the key takeaways I had from an Interactive Media course I took last semester was to question every creative decision and understand its requirement. My thinking while creating this assignment was the same. Why make a self-portrait? What could be the story behind this?

I believe I feel happy with the result I achieved. I didn’t look at this assignment as to just create a self-portrait, but rather to build a story about it and I feel I was successful in creating the outcome I had hoped for. Through the process, I got to explore the basics of p5 and get comfortable working with shapes and images. It was a great learning experience overall.