Final (final) Project

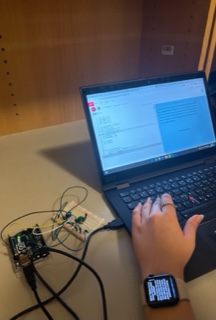
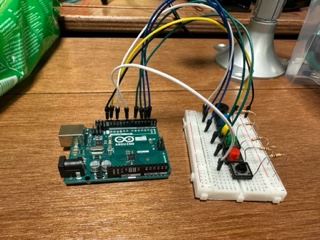
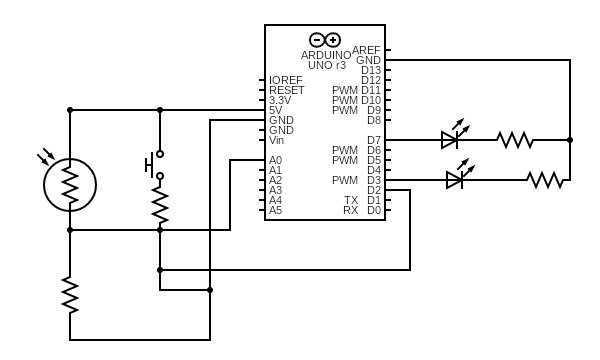
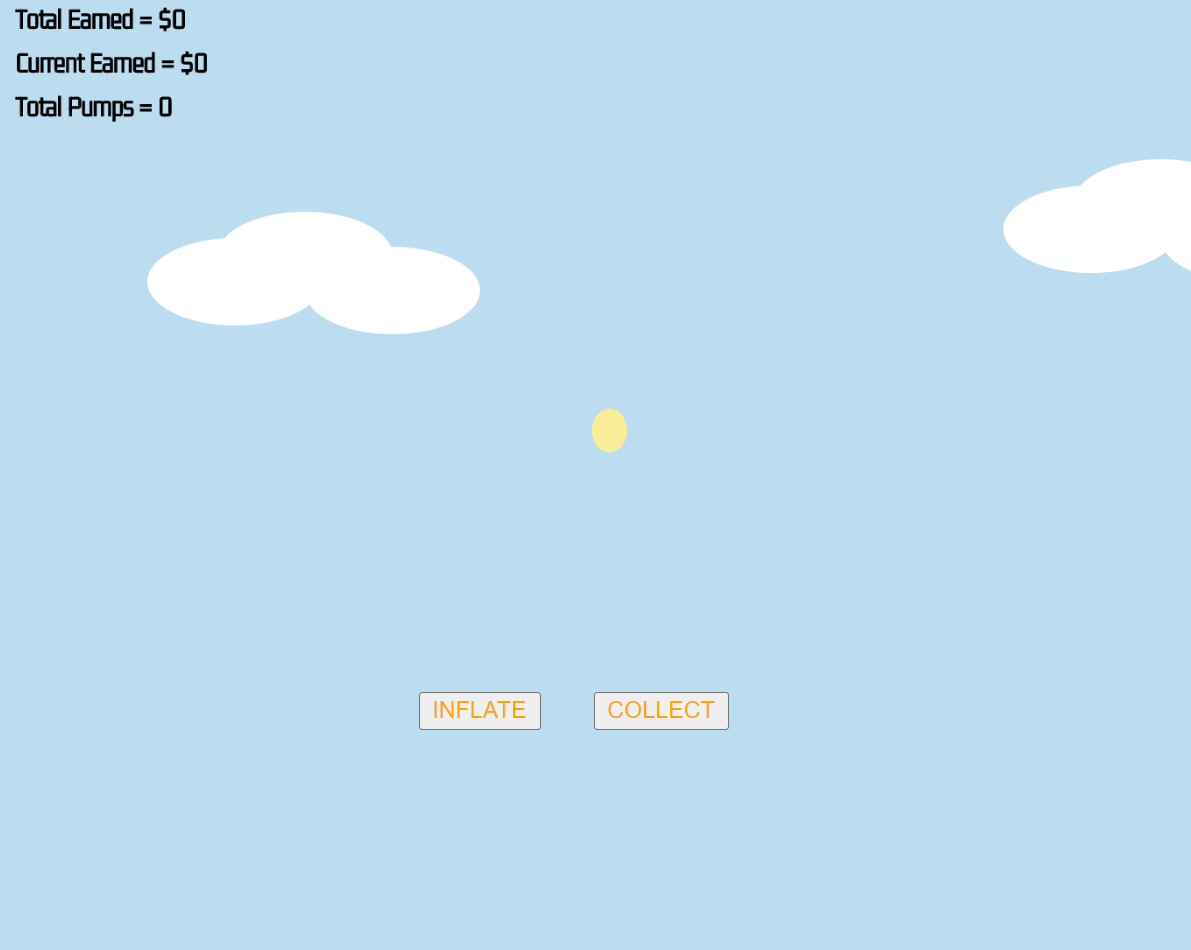
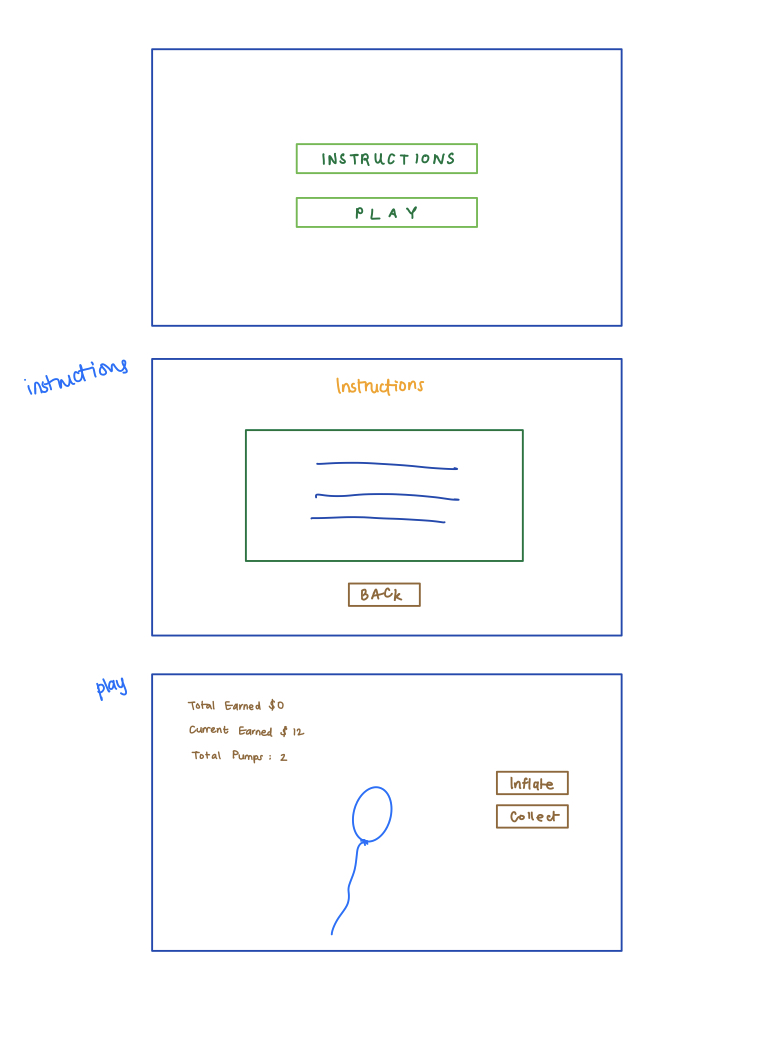
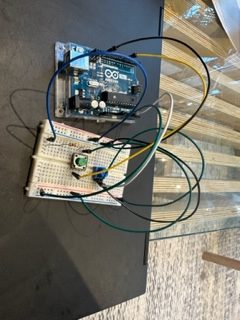
Concept: A physically interactive balloon inflation game. On the screen (p5.js), the user is first presented with an instructions page that guides them through the game. The first step is to select a  port to make a serial connection. Then the user could use a knob (potentiometer) to inflate the balloon and collect money using a button.

if (alpha == 1) {
    collectSound.play();
    totalDollars = rVal/100 + totalDollars;
    currentDollars = 0;
    countButtonClicks++;
  }

The bigger the balloon, the more money collected. However, every balloon has a random chance of bursting at any stage.

if (currentDollars > random(4, 9)) {
    popSound.play();
    circleWidth = 0;
    circleHeight = 0;
    currentDollars = 0;
    totalDollars=0;
    clicks = 0;
    rVal=0;
  }

Arduino Code is commented below.

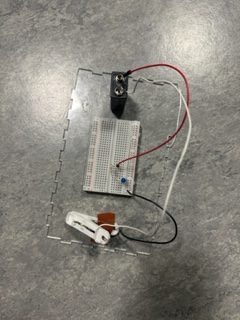
Future Improvements: I would have loved to build a pretty platform where only the interactive elements show (potentiometer and button with labels, no wires). I would print out the instructions page and have it displayed on the platform for the user. If I had more time, I would also make the game more challenging by displaying different balloon colors that burst at different rates.

Final Project Testing

User testing helped me improve any bugs and make unclear elements of the project clearer. I did not have an instructions page so adding that for the final helped guide the user with what to do. I struggled with having consistent, continuous serial connection with p5js and Arduino. I was worried about this but  I solved the problem by having same number of inputs and outputs (even if I’m not really using one of them, which is the case).

Video Attachment:

Final Progress

I have my circuit ready with 2 buttons: one for start/restart & another for “collect”, and a potentiometer to inflate the balloon. I wanted to use a pressure sensor for blowing but the readings weren’t too sensitive to human blowing and it wasn’t too accurate. So, I decided to keep it simple and make it like an arcade game with hand interaction only. I edited my code to read the potentiometer values directly from Arduino.

while (Serial.available()) {
    int left = Serial.parseInt();
    int right = Serial.parseInt();
    if (Serial.read() == '\n') {
      digitalWrite(2, left);
      digitalWrite(5, right);
      int sensor = analogRead(A0); //potentiometer 
      delay(1);
      int sensor2 = digitalRead(7); //start button

The challenging part was having a steady serial connection from Arduino. I realized that it would go faster if there are equal number of data coming in and out of Arduino (even though I am not sending anything back to Arduino). I consider my project 80% done and hope to have more progress until the showcase.

Final Project (Preliminary Concept)

For my final project, I decided to upgrade the balloon game I developed for the midterm project. For the game itself, I want to have different colors that pop at different rates so this could be used as an analysis test for risk-taking abilities. To make it physically interactive, I will be adding sensors that detect blowing from the user in real life. One way I would do this is by making something spin as the user is blowing and then a motion sensor to detect the spinning (something like a fan). I can imagine this to be challenging, so plan B would be using a potentiometer or a button to inflate the balloon.

After inflating it, the user could “collect” the balloon of that round by pressing a button or a brake pedal and another round is displayed until the game ends. The piezo buzzer will be used for the popping sound of the balloon. The score will be displayed in a screen (LCD or neopixel).

I will also be developing the result to make it more specific than just a score; it would calculate the number of pumps based on the color and give specific personalized result on their learning abilities.

Serial Communication

Schematic: It includes all 3 exercises using 1 Arduino.

Exercise 1

Arduino Code:

void setup() {
  Serial.begin(9600); // initialize serial communications
}
 
void loop() {
  // read the input pin:
  int potentiometer = analogRead(A0);                  
  // remap the pot value to fit in 1 byte:
  int mappedPot = map(potentiometer, 0, 1023, 0, 255);
  // print it out the serial port:
  Serial.write(mappedPot);
  //Serial.println(mappedPot);
  // slight delay to stabilize the ADC:
  delay(1);                                            
}

Exercise 2 (cred to Aisha)

Arduino Code:

int LED = 11;

void setup() {
  Serial.begin(9600);
  pinMode(LED, OUTPUT);
  // start the handshake
  while (Serial.available() <= 0) {
    Serial.println("Wait");  // send a starting message
    delay(300);               // wait 1/3 second
  }
}

void loop() {
  // wait for data from p5 before doing something
  while (Serial.available()) {
    int brightness = Serial.parseInt(); 
    if (Serial.read() == '\n') {
      analogWrite(LED, brightness); // turn on LED and adjusts brightness
      Serial.println("LIT"); 
    }
  }
}

Exercise 3 (cred to Joonha)

Arduino Code included in the p5.js sketch.

Working Video:

Musical Instrument

For this week’s assignment, we wanted to design a mini piano using switch buttons.  Our goal was to make each button have a different note so that when users play the piano they can recreate the sound from the “Happy Birthday” song.  The potentiometer in the circuit regulates the volume of the notes.
To build the circuit we added switch buttons and resistors and connected the wires to the pins. We downloaded pitches from examples→toneKeyboard, each switch button had its own musical note (C5, B4, A4, G4, D5).
int analogValue = analogRead(POTENTIOMETER_PIN);
  if(analogValue > 500){
   while(digitalRead(BUTTON_C) == ACTIVATED)
  {
    digitalWrite(PIEZO, HIGH);
    tone(PIEZO,NOTE_C5);
  }
We struggled a bit with adding potentiometer and piezo buzzer to our circuit with piano buttons, however we managed to solve the problems and understand the process.
At the beginning we initialized the piano buttons, buzzer and potentiometer. Next, we went on to add the code for the buzzer and potentiometer. We wrote code to read the input on the analog pin and turn the piezo buzzer on and off. Also, we set a tone for each button and activated it.
Full Code: https://github.com/hessaala/introToIM/tree/main/week10_musicalinstrument

Final result:


Analog & Digital Sensors

For this assignment, I used a digital sensor (switch) that acts as an ON/OFF button for an LED and an analog sensor (photoresistor/light sensor) to control the brightness of another LED. I built 2 simple LED circuits, each connected to their sensors using code.

Recorded Video: 2 LEDs working

To choose the values for the thresholds of the analog sensor, I first printed the values of the analog output to see what values the photosensor ranges from and to (depending on the room light I was in). Then, I divided them into 4 ranges.

if (brightness < 25) {
  Serial.println(" - Dark");
  analogWrite(blueLEDPin, 0);
} else if (brightness < 50) {
  Serial.println(" - Dim");
  analogWrite(blueLEDPin, 10);
} else if (brightness < 100) {
  Serial.println(" - Light");
  analogWrite(blueLEDPin, 80);
} else if (brightness < 255) {
  Serial.println(" - Bright");
  analogWrite(blueLEDPin, 255);
} else {
  Serial.println(" - Very bright");
}

Reflection: I found digital sensors easier to work with, but analog sensors so much more interesting because there is so much more to do with it.

Codeless LED Switch

Concept: This switch is turned on when the brake pedals are pressed. The simple LED circuit is connected to a clothes pin (the brake pedal), a resistor, and a 9V battery.  I used a breadboard and different materials I found in the lab like wires.
recordedVid

Reflection: I loved working on a hands on project that involved no coding and seeing how we could be creative in so many ways.

Midterm

Concept

A balloon inflation game that assesses risk-taking abilities through a series of 8 rounds. The one-player game starts with a small balloon to be pumped as many times as they wish. The more you inflate, the more money you earn. At each point, you may bank the sum earned and move to the next balloon. However, if the balloon is pumped too much and the balloon pops, all that round’s money is lost. This is inspired by the famous Pymetrics balloon game. A player who manages to collect all the balloons but earns very low sums is classified as cautious, whereas a player who tends to pop a lot of balloons but gain higher sums is considered a risk-taker and adventurous.

Implementation

https://editor.p5js.org/hessaala/sketches/wcdYbG-aD

The game starts with an instructions page, explaining the different buttons and game idea to the player. As soon as the player is ready to proceed, a click on the screen takes them to the main game page. The game page has an inflatable balloon and 2 buttons, “inflate” which increases the balloon size, and “collect” which banks the money at any stage. It also presents information on the number of pumps and current earned in every round, and updates the total earned. After 8 rounds, the game ends and the score is displayed.

Challenges

It was a bit confusing working with different pages for the game. For regular shapes and text, it was relatively simple to figure out. The thing I struggled with the most is working with buttons in the separate pages. I figured that they don’t work like the shapes, rather they’re a separate element that are not actually on a ‘canvas’. The solution was to use the show() and hide() features.

Design Choices

Since it’s a balloon game, I immediately thought of making it a kid’s game. So, the theme I went for is light and plain but also child friendly. I used object-oriented programming for the main game page (moving clouds), and a garden image in the end page.

Future Direction

I would love to make the balloons pop at different planned rates and not random based on their colors. This game could be used for investment banking tests to analyze candidates risk-taking and learning abilities.

Midterm progress

For the midterm, I’ll be working on a balloon inflation game. The idea is to inflate the balloon using a button and the more you inflate it the more money earned, but the more you inflate it, there’s a higher risk for it to burst and the money earned is 0. For 1 game, there will be a total of 7-10 balloons that burst randomly at different sizes. The landing page will have two buttons, instructions and play button. The game page will have to buttons: inflate and collect. Inflate makes it bigger by *1.2 and increases the “current earned”. Collect resets the balloon size and “current earned” and increases “total earned”.

Idea

Progress