Progress post and 26th of April post, because өмірдін саған не әкелетінің ешқашан білмейсін

I knew that I can never write a code from a scratch with my pathetic skills, so the first thing I did is search for anything related to using an analog sensor to trigger an audio file from processing. I found one very useful link:

Link to a useful project <– press

However, an analog sensor used there was quite different from ultrasonic thing that we used, so I ended up just looking over the project and trying to figure out how to do that with our type of sensor. Because there was a lot, I broke down all the steps into several categories.

  • Make distance sensor measure distance and show it on the screen;

I succeeded in this part, here is the video:

And of course, it was done using this: press me

Confusion

So, here you can see my confusion with how the values were transferred to processing, and it was a success, however, I was not so sure about this so there are lots of awkward hand movements. Yeah…

Also, did you know that the suggestions you get for videos are actually the suggestion of the uploader? You now are seeing stuff I watch, lol

Anger

Here, you can see a mistake that repeated itself from the project about the wind and ball and stuff. First, the sound is not playing. In the first “confusion” part I did only background part whereas here I added the sound file to my code, so I was very angry at “outofbound” error I saw, but I later fixed it with a correct number for my port [0]. After that though, there was an error of null number and exception which was very confusing, as it did not highlight any line with a mistake in it inside the processing code. So, I sat there and questioned my entire existence for a couple of hours. Then, I remembered famous quote of Aaron Sherwood:

break down your code and test if every part is working
Aaron Sherwood, 2021

NB! – words might not be very accurate

In any case, I decided to test whether the sound is even working in processing. So, I inserted this code with changing audio file name to mine.

import ddf.minim.*;
 
Minim minim;
AudioPlayer song;
 
void setup()
{
  size(100, 100);
 
  minim = new Minim(this);
 
  // this loads mysong.wav from the data folder
  song = minim.loadFile("you_suffer.mp3");
  song.play();
}
 
void draw()
{
  background(0);
}

It worked, so I again looked at my code. Then, I realized, HAH, turns out I forgot to put “.mp3” part in the audio name… After doing that it worked and I kind of laughed till I cried for a little while. This was my mood for a while.

Mood, when the error of you code is 3 symbolsArduino code:
int trigPin = 11;    // Trigger
int echoPin = 12;    // Echo
long duration, cm, inches;
 
void setup() {
  //Serial Port begin
  Serial.begin (9600);
  //Define inputs and outputs
  pinMode(trigPin, OUTPUT);
  pinMode(echoPin, INPUT);
}
 
void loop() {
  // The sensor is triggered by a HIGH pulse of 10 or more microseconds.
  // Give a short LOW pulse beforehand to ensure a clean HIGH pulse:
  digitalWrite(trigPin, LOW);
  delayMicroseconds(5);
  digitalWrite(trigPin, HIGH);
  delayMicroseconds(10);
  digitalWrite(trigPin, LOW);
 
  // Read the signal from the sensor: a HIGH pulse whose
  // duration is the time (in microseconds) from the sending
  // of the ping to the reception of its echo off of an object.
  pinMode(echoPin, INPUT);
  duration = pulseIn(echoPin, HIGH);
 
  // Convert the time into a distance
  cm = (duration/2) / 29.1;     // Divide by 29.1 or multiply by 0.0343
 // inches = (duration/2) / 74;   // Divide by 74 or multiply by 0.0135
  
 // Serial.print(inches);
 // Serial.print("in, ");
 Serial.print(cm);
 //Serial.print("cm");
  Serial.println();

if(duration < 500) {
    Serial.println("T"); // send the letter T (for Trigger) once the sensor value is less than 500  
}
  
  delay(250);
}
Processing code:
import processing.serial.*;
import ddf.minim.*;

Minim minim;
AudioPlayer player;

int lf = 10;  
String myString = null;
Serial myPort; 
int duration = 0;

void setup() {
  printArray(Serial.list());
  myPort = new Serial(this, Serial.list()[0], 9600);
  myPort.clear();
  myString = myPort.readStringUntil(lf);
  myString = null;
  minim = new Minim(this);
  player = minim.loadFile("audio_for_final.mp3"); 
}

void draw() {
  // check if there is something new on the serial port
  while (myPort.available() > 0) {
    // store the data in myString 
    myString = myPort.readStringUntil(lf);
    // check if we really have something
    if (myString != null) {
      myString = myString.trim(); // let's remove whitespace characters
      // if we have at least one character...
      if(myString.length() > 0) {
        println(myString); // print out the data we just received
        // if number (e.g. 123) received, it will store it in duration, then use this to change the background color. 
        try {
          duration = Integer.parseInt(myString);
          // As the range of an analog sensor is between 0 and 1023, we need to 
          // convert it in order to use it for the background color brightness
          int brightness = (int)map(duration, 0, 1023, 0, 255);
          background(brightness);
        } catch(Exception e){}
        if(myString.equals("T")){
          if(player.isPlaying() == false){
            player.play();
          }
        
      }
    }
  }
}
}
Btw, the whole idea is that as Distance is small, there is a letter T printed and when processing receives that, it turns on the audio. Yep.
Plans further:
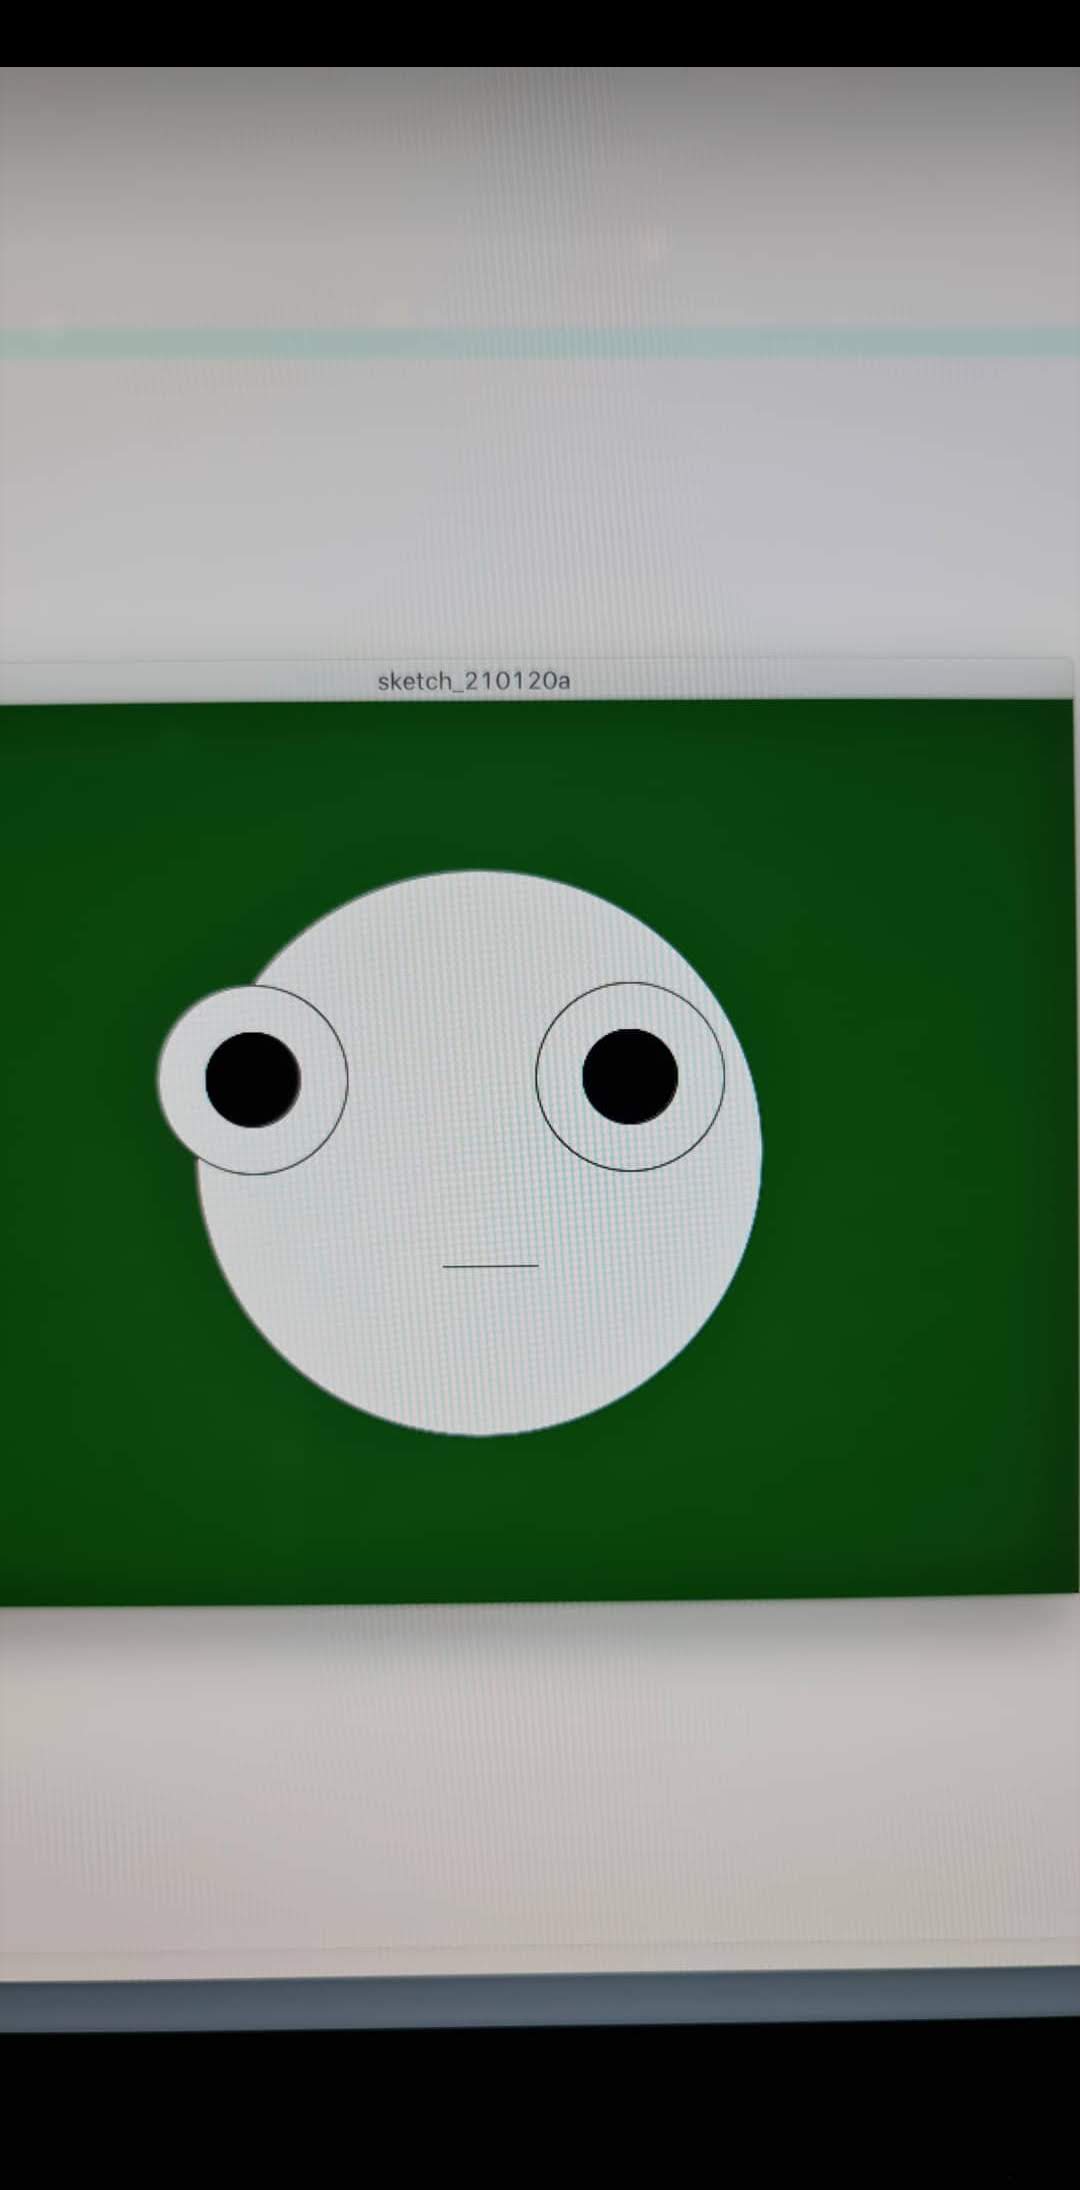
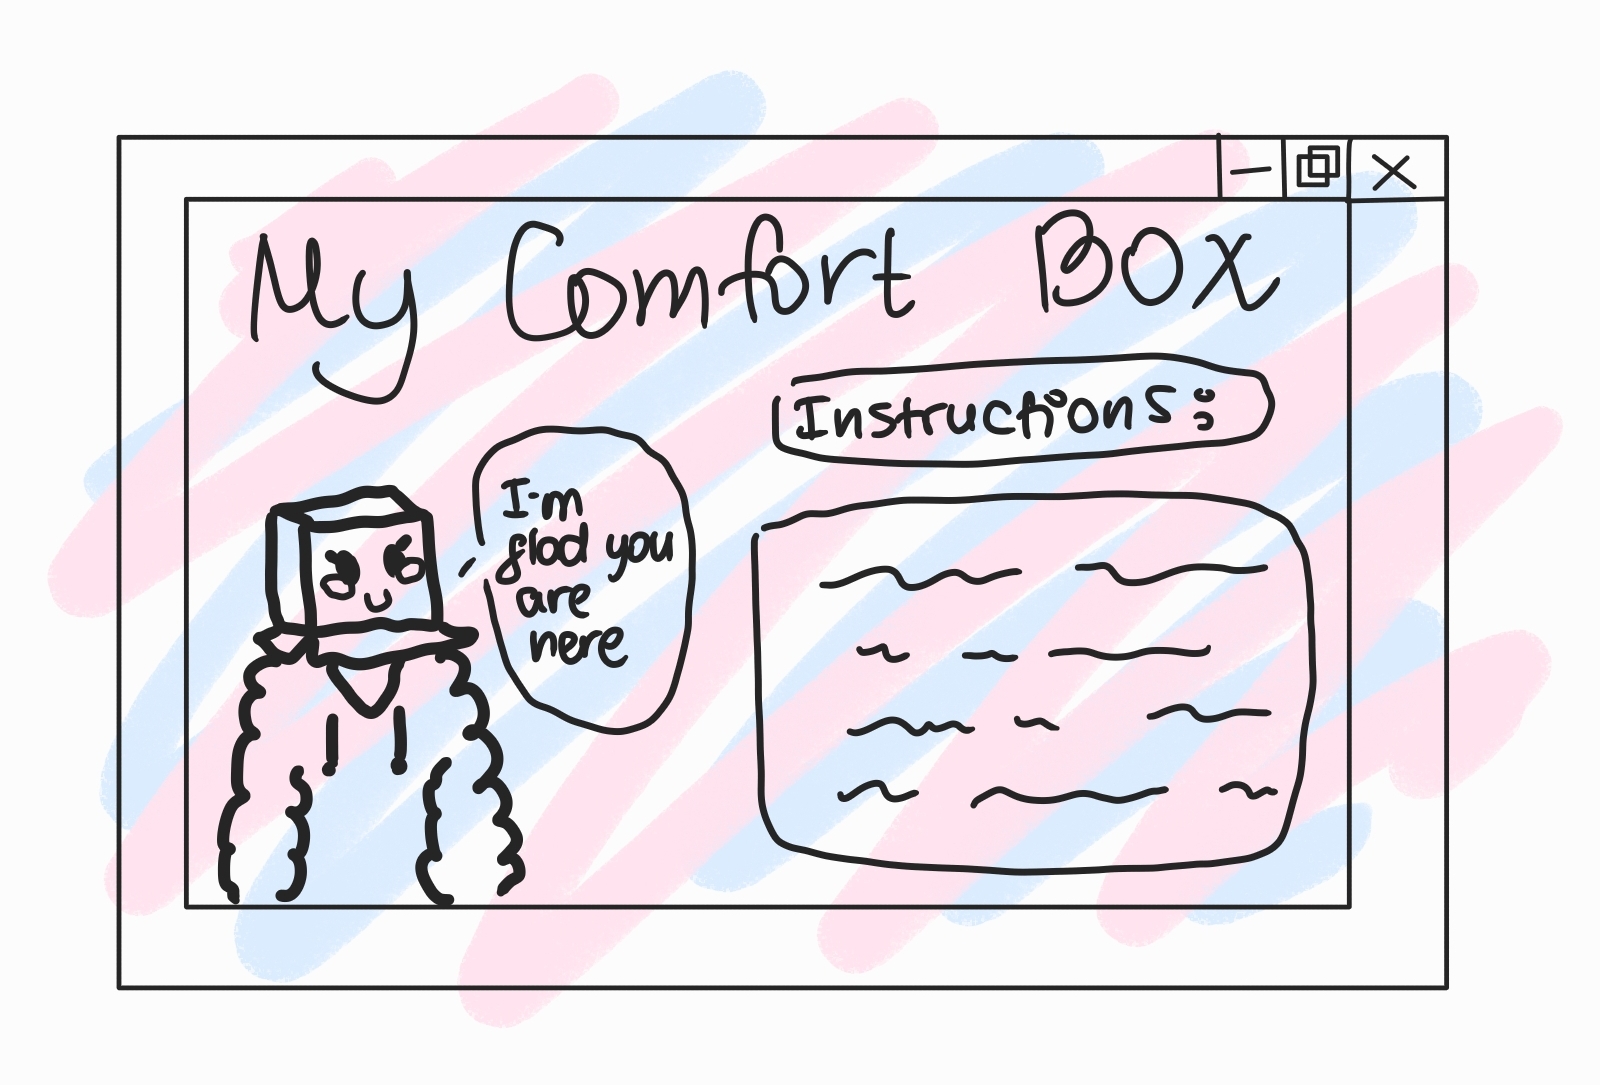
  • create a sketch I did below, so instructions are more clear;
  • find a box and somehow make Arduino board fit in it;
  • decorate the box;
  • If I manage, I would like to figure out how to stop the sound once box is removed.

Welcome page for a box

Links:
  1. https://www.hackerscapes.com/playing-an-audio-file-with-processing/
  2. https://gist.github.com/timpulver/5ba4a29cddd543b4a900
  3. https://randomnerdtutorials.com/complete-guide-for-ultrasonic-sensor-hc-sr04/

Small Brain, sadly not Big brain

So, after the weird phase of having two separate codes that did two separate things (for those weird ones reading this post of mine for some unknown reason, that post is private because I am so ashamed of my level that you shall never see it or else I am going to die from embarrassment) I moved on more risky stuff (at least in my opinion) (and if this is Professor Aaron reading this code and seeing that it’s private, it means that halfway though I got very self-conscious about my code and decided to privatize it).

So, what I did was “merging” them in a way. I needed to substitute ellipses for the images of the books and Instagram. On the way there I changed the pictures because I didn’t like the way the designs of the ones I had looked next to each other, especially now that the background changes from black to white.

In order to change the images, I went to the Drop class and changed the ellipse shape to (image) and there I added all the required global variables and yay, it worked 😀

class Drop {
  float x;
  float y;
  float r;
  float speedY;
  float c;
  PImage dropbrain;
  boolean isCaught;

  Drop() {
    r = 8;
    x = random(width);
    y = -r*4;
    speedY = random(1, 50);
    isCaught = false;
  }

  void update() {
    //position

    y += speedY;

    //check bounds

    if (y>height + r) {
      y = -r;
    }
  }

  void display() {
    if (isCaught != true) {
      imageMode(CENTER);
      dropbrain = loadImage("dropbrain.png");
      image(dropbrain, x, y, r*4, r*4);
    }
  }

  void caught() {
    isCaught = true;
  }

  void reset() {
  }
}

//If (drops[I].alive==true){drops[I].show; drops[I].move}

Then, a few interesting things happened, because I needed to add another drop class for the “bad” things that were going to serve as a distraction (aka instagram). I figured that I needed to create another class, and it would be exactly similar to the drop class I already have. So, I create badDrop class and copied the information from the class above with few alterations of changing the image and adding changes in names of for() loops in the main CatcherGame tab.

The tricky part gets when the images did not disappear when intersecting with the little brain image of a catcher. I asked Mister Jack about this, and he showed a pretty handy solution.

My main issue is that despite having drops[i].caught in the main sketch, I didn’t put the code in there, so it wasn’t running any functions. I needed a boolean that would indicate whether the drop is caught or not. So, after adding it, it worked, yay!

So, now that I had a game that was running with everything except without a score that went down when you caught badDrops. I needed to solve that. So, I just added the score-- in the for() loop for badDrop in the main sketch.

      if (intersect(catcher, badDrops[i]) == true) {
        badDrops[i].caught(); 
        score--;
      }

That worked, however, now the score went to a negative number and I needed the player to lose when the score was less than a zero. Finally… Time for an if function has come. You may not believe it, but I actually never used it because for some unknown reason I was very scared of the power it had. It is partially the reason why I choose switch screen function instead of multiple if functions. I have been avoiding it for as long as I could. So, when I used it today it was a pretty big deal. And of course, I failed :,)

The function worked, however, the reset part of the score did not work, so the game did not switch back to screen 0 (or instructions page) since the score did not reset back to zero. So it basically prevented me from changing the screen by pressing the key. I sat there watching the screen and changing the placement for a good 3 hours and after almost giving up and thinking about dropping Interactive media I decided to ask help from, you guessed it, Mister Jack. Mister Jack enlightened me in the simple truth that my screen was reset, but my small brain should’ve focused on void keyPressed() instead of changing the placement of the if function. So, after changing the placement of score = o to void keyPressed(), my game worked, and now I am here  :3

My final game*:

CatcherGame – PRESS ON ME IT WOULD BE FUNNY!!!

  • – I love seeing the suggestions of videos everyone has since mine are always Minecraft related, and it’s accurate, so we actually get a sneak peek of what every one of us watches haha

Conclusions:

  • Mister Jack is great! If Mister Jack ever reads this, the biggest, huge, enormous thanks to you. You literally saved many (and I don’t have many of them) nerves of mine 😀

P.s. Mister Aaron is great as a given 😀 😀

  • Private button her is just as great in helping me not die from embarrassment in front of many people. Instead, I just need to feel ashamed in from of Mister Aaron, and I am getting quite used to it. Triple 😀 😀 😀

References:

  • The YouTube tutorial for the catcher explanation: https://www.youtube.com/watch?v=dti_mVscdxY and https://www.youtube.com/watch?v=gXPf_R_hDP0
  • The YouTube tutorial for changing the game states that never actually became useful: https://www.youtube.com/watch?v=vgKQHocitd4

Week 4 – What is the meaning of life?

Inspiration

“What is the meaning of life?” I always wonder about the answer to this question, whenever I get a bad mark/eat sweets that ruin my face/pet cats that I am allergic to, and more. It’s a very difficult question, so why not generate text that will showcase the chaos of answers we might get, even with my limited abilities.

Understanding Arrays

So, the main thing that I got from the video was that the array was that of a list that starts from 0 and goes upwards. So, it can pull out any number from that list that would be identified with, in our case, a word, and thus, we can get that word out on the screen. Like, I tried to do that with keyPressed function, and there, each time that I pressed the “space”, words will change. Like, I had a question “what is the meaning of life” and another text with variants using the array (live, laugh, love). So, each time I pressed space the meaning of life would change! :D, how cool is that?

So, for the final product, I just repeated the scary thingy we did in class since it took a lot of time for me to understand how everything interacts together. Then, I added the twist with the live, laugh, and love. The meaning does indeed change very fast since life is fleeting with each second that you might be reading this is to capture this temporal event.

Project Version number 1

String [] meaningofLife = {"Live", "Love", "Laugh"} ;
String meaningHolder = ""; //store whatever name we randomly pull out of the array
String question = "What is the meaning of life?";
PFont myFont;
int xPos;


void setup() {
  size (2500, 1500);
  myFont = createFont("Courier New", 72);
  textFont(myFont);
  textAlign(CENTER);
  textSize(100);
  xPos = width;
  //println(meaningofLife.length); discover how many characters there are
  
}

void draw() {
  background (255);
  fill(0);
  textSize(90);
  //text (question, width/2, 300);
  xPos -=4;
  
  if  (xPos<= - textWidth(question)) {
   xPos = width; 
  }
 
  for (int i=0; i<question.length(); i++) {
   char c =  question.charAt(i);
   float x = width/4 + i*textWidth(c);
   float y = height/4 + random(-5, 5);
   text(c, x, y);
  }
}

void mouseMoved() {
  textSize(random(40, 72));
  meaningHolder = meaningofLife[int(random(meaningofLife.length))];
  text(meaningHolder, mouseX, mouseY);
}

However, after a meeting with the Professor, a question of the design was brought up, so I tried to make the design more intentional. Here, I added a more chaotic atmosphere, eased my job with for() function. I especially like how at some point the random function just goes out of hand and all meaning disappears leaving jiggling “what is the meaning of life?” text. As if showing the scariness of the question, feeling of being lost as to what is exactly the meaning of life.

String [] meaningofLife = {"Live", "Love", "Laugh", "Nothing", "Family", "Knowledge"} ;
String meaningHolder = ""; //store whatever name we randomly pull out of the array
String question = "What is the meaning of life?";
PFont myFont;
PFont myFont2;
int xPos;


void setup() {
  size (2500, 1500);
  myFont = createFont("Courier New Bold", 72);
  myFont2 = createFont("Courier New Italic", 72);
  textAlign(CENTER);
  textSize(100);

  //println(meaningofLife.length); discover how many characters there are
}

void draw() {
  textFont(myFont);
  background (50);
  fill(0);
  xPos -=4;

  if  (xPos<= - textWidth(question)) {
    xPos = width;
  }

  for (int i=0; i<question.length(); i++) {
    char c =  question.charAt(i);
    float x = width/4 + i*textWidth(c);
    float y = height/4 + random(-5, 5);
    text(c, x, y);
  }
}
void mouseMoved() {
   textFont(myFont2);
   fill(255);
  for (int i=0; i<5; i++) {
    textSize(random(66, 72));
    float w;
    float h;
    meaningHolder = meaningofLife[int(random(meaningofLife.length))];
    w = random(i*100, i*900);
    h = random (i, i*500);
    text(meaningHolder, w, h);
  }
}


Credit

This guy is awesome, love this guy for the way he explains stuff, and he shall be my savior for this assignment!

Week 2 sufferings

Inspiration that is way out of my league

I am fascinated by the fact that these organic snake is actually a code and not a hand drawn artwork. Overall, the idea of making or attempting to make organic shapes from loops sounds very appealing to me!

I was doing my ellipse loop with the help of “for” function from Processing.org site. I was trying to figure out what each thingy in a bracket meant and manipulated them accordingly. I managed to get a very beautiful loop of circles all the way down to the screen and wanted to make them turn so its similar to a snake. So, I decided to try rotate function. I added it to the code and the image below happened.

I lowkey considered leaving it like this, because it looked pretty :D, but then reality hit me and I had to do some other stuff.

And after these painful screenshots of doing everything and at the same time nothing:

Aruzhan Temirgaliyeva Week 2 Intro to IM  –  press here to see the painful three screenshots I managed to make while suffering on this awful abomination that I cant even call a code. No, this is on the same level as omg why do I have such a poor time management

I came to this final product:

  1. I decided to create a clock since I couldn’t figure out how to make an angular transition of a loop to resemble that  snakes movement and bending;
  2. I created 4 lines of ellipse loops using “for” and “noise” function;
  3. I played around with coordinates to make them align properly;
  4. I found Youtube video on how rotation and angles were made and decided to try it, since there still was a lot of hope I had for making a snaky bending thingy (foolish me);
  5. I tried the code, however couldn’t incorporate it with ellipses and make two separate loops connect.
  6. So I just lost hours understanding that the coordination system is like a paper. How, when you translate you change the coordinates not of the shape but of the grid and the paper itself. How popMatrix saves the coordinates and push returns them to their original state and so on.
  7. Then I just added as far as I could understand the lines and another ellipse to the center of the clock in order to finish of the whole image.
  8. And using lerpColour added gradient between 2 colours so it looked pretty!
//the coordination system is like a piece of paper
//VELOCITY = change in position over time
// ACCELERATION = change in velocity over time
// angle is an angular position, not a vector, single number
float b = 0;
float s = 0;
float a = 0.0; // a is some angle
float aVelocity = 0.0; // angular velocity's some amount
float aAcceleration = 1;
int fromC;
int toC;
int interA;
int interB;

void setup() {
  size(1100, 700);
} 

void draw() {
  background(255);
  stroke(1);
  fromC = color(255,200,200);
  toC = color(230, 0, 0);
  interA = lerpColor(fromC, toC, 0.33);
  interB = lerpColor(fromC, toC, 0.66);

  //ellipse width down
  for (int i=0; i<width; i+=1) {
    s = s + 1;
    float x = noise(s);
    x = map(x, 0, 1, 0, 1100);
    fill(fromC);
    ellipse (x, 600, 50, 50);
  }
  //ellipse height right
  for (int i=0; i<width; i+=1) {
    b = b + 1;
    float x = noise(b);
    x = map(x, 0, 1, 0, -685);
    rotate(PI/2);
    fill(fromC);
    ellipse (x, 1000, 50, 50);
  }
  //ellipse height left
  for (int i=0; i<width; i+=1) {
    b = b + 1;
    float x = noise(b);
    x = map(x, 0, 1, 0, -685);
    rotate(PI/2);
    fill(interA);
    ellipse (x, 50, 50, 50);
  }

  //ellipse width up
  for (int i=0; i<width; i+=1) {
    s = s + 1;
    float x = noise(s);
    x = map(x, 0, 1, 0, 1100);
    fill(interB);
    ellipse (x, 50, 50, 50);
  }
  //god bless the coding train guys
  aAcceleration = map(mouseX, -0, width, -0.001, 0.001);
  a+= aVelocity; //velocity changes its position
  aVelocity += aAcceleration; // velocity changes acceleration
  translate(500, 350);
  rotate (a);
  line(0, 0, 100, 200);
  translate(100, 100);
  fill(toC);
  ellipse(-100, -100, 100, 100);
}
Conclusions and lessons to be drawn:
  • If you think you can do it, you cant;
  • If you have a couple hours to do a week’s work, shame on you and no chocolate for you, life is bitter when you have poor time management;
  • Computer rooms are cold;
  • God bless guys from YouTube channel “The Coding Train” and professing.org;
  • My work fits the meme about”Expectations VS. Reality” :’)
Reference list:
  • https://py.processing.org/reference/lerpColor.html
  • https://www.youtube.com/watch?v=8ZEMLCnn8v0&list=PLRqwX-V7Uu6bgPNQAdxQZpJuJCjeOr7VD&index=8
  • https://www.youtube.com/watch?v=YcdldZ1E9gU&list=PLRqwX-V7Uu6bgPNQAdxQZpJuJCjeOr7VD&index=2
  • https://www.youtube.com/watch?v=qMq-zd6hguc

Green

void setup() {
  size(640, 480);
};

void draw () {

  background(60, 100, 55);

int MainFaceX = width/2;
int MainFaceY = height/2;
int FaceSize = 300;

  //mainhead
  fill(255);
  ellipse(MainFaceX, MainFaceY, FaceSize, FaceSize);

  //lefteyeball
  fill(255);
  ellipse(FaceSize-50, MainFaceY-40, FaceSize-200, FaceSize-200);

  //right eyeball
  fill(255);
  ellipse(MainFaceX+80, MainFaceY-40, FaceSize-200, FaceSize-200);

  //mouth
  noFill();
  arc(350, 300, 50, 50, 0, HALF_PI);

  //pupil right
  fill(0);
  ellipse(MainFaceX-70, MainFaceY-40, FaceSize-250, FaceSize-250);

  //pupil left
  fill(0);
  ellipse(MainFaceX+80, MainFaceY-40, FaceSize-250, FaceSize-250);
};

Spend a lot of time to remember which part is what variable, what it affects and how to do properly the line and coordination of everything.

the version I liked the best


#when you have to look discreetly at someone

confusing code:

  • deletes the line, eyeballs and mouth

smooth();
noStroke();
fill(255,0,0);
beginShape();
vertex(50, 15);
bezierVertex(50, -5, 90, 5, 50, 40);
vertex(50, 15);
bezierVertex(50, -5, 10, 5, 50, 40);
endShape();

https://www.processing.org/discourse/beta/num_1246205739.html - credit