Response – Week 5, Golan Levin’s Computer Vision for Artists and Designers

Golan Levin’s Computer Vision for Artists and Designers,  explains the concept computer vision for beginner programmers like myself, placing a emphasizing on utilizing vision-based detection and tracking techniques within interactive media. The initial section introduces the artistic applications of computer vision beyond industrial and military realms.

It was a very interesting read that almost shows history in interactive media through computer vision, at least in some way or the other. It is through computer vision the first computer interactive art performance was developed.

For example, ‘Standards and Double Standards’ by Rafael Lozano-Hemmer is something that intrigued me. Belts spinning around based on who’s passing by – visually cool, but there’s this metaphorical layer that adds depth. It’s the kind of stuff that makes you ponder. Which is what I would like to implement in my work.


Midterm: Feline Frenzy

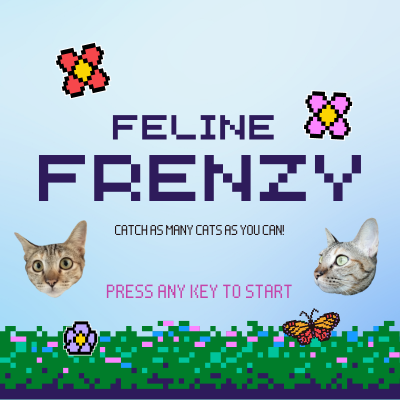
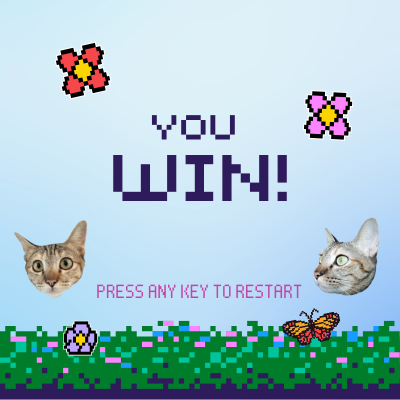
For my midterm, I had to create a game primarily focused on cats, driven by my love for them. The game’s objective is to reach a score of 20 by catching as many cats as possible within thirty seconds. Additionally, there is a power-up cat that boosts your score. I encountered two unsuccessful attempts in executing my ideas, leading me to start over, which I believe turned out quite well.

INITIAL IDEAS:

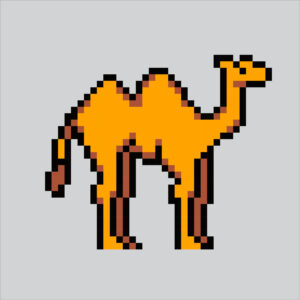
My initial idea was to create a game inspired by “My Talking Tom,” a game I enjoyed playing while growing up. I aimed to introduce a twist by replacing the cat with a camel. However, when it came time to execute the idea, I was unsure of how to begin and could not find any examples to follow.


My second idea involved creating an interactive game using PoseNet, modeled after the classic “I’ve got your nose” game. The core code functioned well; however, implementing the menu and other deliverables proved difficult, as they interfered with the rest of the code’s functionality. If you’re interested in trying it out, I recommend visiting the actual sketch, as you’ll need your webcam.

Moving on to the actual game, I aimed to create something simple and easy to play. However, I do wish it offered more of a challenge to players. Perhaps increasing the speed or adding another character that reduces the score instead of offering power-ups could enhance the difficulty. Additionally, feedback from one of my classmates highlighted the importance of clear instructions. Given the potential for confusion, providing explicit instructions regarding the timeframe, the scoring system, and the power-up cat would make it easier for users to understand and enjoy the game.

In terms of challenges, I faced issues similar to those of my classmates, particularly with the sketch not accepting images. I was advised to either work on the code locally or clear my cache to resolve this issue. However, my main challenges were related to the stylistic aspects of the game and deciphering the keyPressed(); function. Additionally, linking all parts of the game—from the menu to the game itself, and then to the win or lose screen—before looping it all back to the menu was probably the most time-consuming aspect of this entire project.

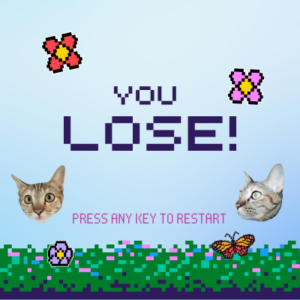
The most enjoyable aspect of this project for me was creating the graphics. I utilized Canva and Vecteezy to source all the elements needed to achieve the pixelated Mario aesthetic I desired.

Code + Notes:

// Midterm Project by Amal Almazrouei
// Credit:
// Sound: https://www.voicy.network/
// Font: Google Fonts
// Images: https://www.vecteezy.com/ ; pinterest.com
// Graphics: canva.com
// Example Code: https://editor.p5js.org/simontiger/sketches/Dj7GS2035


// Flags to control game state
let started = false;
let gameEnded = true; // Treat game as ended initially to present start menu
let showingEndScreen = false; // Indicates if end screen is currently displayed

// Game timing and positioning variables
let startTime;
let x = 200;
let y = 200;
let powerX = 100;
let powerY = 200;

// Score and game dynamics variables
let score = 0;
let r = 48; // Radius for interactive elements
let interval = 60; // Controls frequency of game events
let frames = interval; // Countdown to trigger game events
let powerIsThere = false; // Flag for power-up appearance
let increase = 1; // Score increment
let increased = 0;

// Assets and sound variables
let img, powerImg, startScreenBg; // Image variables for game elements
let myFont; // Custom font variable
let backgroundMusic, catSound, powerUpSound, winSound, loseSound; // Sound variables

function preload() {
  // Preload all necessary media assets
  img = loadImage('Media/cat1.png'); // Main character image
  powerImg = loadImage('Media/cat2.png'); // Power-up image
  startScreenBg = loadImage('Media/startScreenBg.png'); // Start screen background image
  myFont = loadFont('assets/MyFont.ttf'); // Custom font
  // Loading sound assets
  backgroundMusic = loadSound('sounds/backgroundMusic.mp3');
  catSound = loadSound('sounds/catSound.mp3');
  powerUpSound = loadSound('sounds/powerUpSound.mp3');
  winSound = loadSound('sounds/winSound.mp3');
  loseSound = loadSound('sounds/loseSound.mp3');
}

function setup() {
  createCanvas(400, 400);
  textFont(myFont); // Set the custom font
  backgroundMusic.loop(); // Play background music on loop
}

function keyPressed() {
  // Handles key presses for restarting or transitioning from end screen
  if (gameEnded && showingEndScreen) {
    showingEndScreen = false; // Exit end screen to show start menu
  } else if (!started && !showingEndScreen && gameEnded) {
    resetGame(); // Reset and start game from menu
  }
}

function resetGame() {
  // Reinitialize game variables for a new session
  started = true;
  gameEnded = false;
  showingEndScreen = false;
  startTime = millis(); // Reset game timing and positioning
  x = 200;
  y = 200;
  score = 0;
  r = 48;
  interval = 60;
  frames = interval;
  powerIsThere = false;
  increase = 1;
  increased = 0;
  clear(); // Clear the screen before starting
}

function mousePressed() {
  // Handle player interactions with game elements
  if (started && !gameEnded && !showingEndScreen) {
    if (dist(mouseX, mouseY, x, y) < r) {
      catSound.play();
      // Random chance for score increase
      const rand = random(1);
      if (rand < 0.02) {
        increase = 50;
      } else if (rand < 0.1) {
        increase = 10;
      } else {
        increase = 1;
      }
      score += increase;
      increased = 20;
      interval--;
      r--;
    }
    if (powerIsThere && dist(mouseX, mouseY, powerX, powerY) < r) {
      powerUpSound.play();
      score++;
      interval = 60;
      r = 48;
      powerIsThere = false; // Remove power-up after clicking
    }
  }
}

function draw() {
  // Main animation loop: Update game screen based on state
  if (!started && !showingEndScreen) {
    gameStartScreen(); // Show start screen if game hasn't started
  } else if (started && !gameEnded) {
    // Game play updates
    let currentMillis = millis();
    background(135, 206, 235); // Set background
    // Display power-up image if present
    if (powerIsThere) {
      image(powerImg, powerX - r, powerY - r, r * 2, r * 2);
    }
    // Display main character image
    image(img, x - r, y - r, r * 2, r * 2);
    // Display score and time left
    textAlign(LEFT, TOP);
    textSize(30);
    fill(255, 0, 255); // Set text color
    text(score, 15, 15);
    let timeLeft = 30 - Math.floor((currentMillis - startTime) / 1000);
    text("Time: " + timeLeft, 15, 50);
    // Update positions and check for game end conditions
    frames--;
    if (frames <= 0) {
      frames = interval;
      x = random(width);
      y = random(height);
      if (random(1) < 0.07) {
        powerIsThere = true;
        powerX = random(width);
        powerY = random(height);
      } else {
        powerIsThere = false;
      }
    }
    if (score >= 20) {
      endGame(true); // Player won
    } else if (currentMillis - startTime > 30000) {
      endGame(false); // Time's up, player lost
    }
  }
}

function endGame(win) {
  // Handle game end: Show win or lose screen
  started = false;
  gameEnded = true;
  showingEndScreen = true;
  background(135, 206, 235); // Optionally reset background
  textAlign(CENTER, CENTER);
  textSize(32);
  // Display win or lose message
  if (win) {
    winSound.play();
    fill(0, 0, 128); // Blue color for win
    text("You Win!", width / 2, height / 2);
  } else {
    loseSound.play();
    fill(0, 0, 128); // Blue color for lose
    text("You Lose!", width / 2, height / 2);
  }
  fill(255, 0, 255); // Magenta color for subtitle
  textSize(24); // Smaller font size for subtitle
  text("Press any key to continue", width / 2, height / 2 + 20);
}

function gameStartScreen() {
  // Display start screen at game launch
  image(startScreenBg, 0, 0, 400, 400);
}

Credit + Resources:

Sound: https://www.voicy.network/
Font: Google Fonts
Images: https://www.vecteezy.com/ ; pinterest.com
Graphics: canva.com
Example Code: https://editor.p5js.org/simontiger/sketches/Dj7GS2035


Week 4 — Reading Reflection: Don Norman’s Ch1

I personally found Don Norman’s view on the design world and its rules valid. The main goal of a designer is to find innovative creative ways to make designs easier to use and efficient, so when something as simple as how to open a door gets too complicated I too would write about it.

What makes a good design is the level of how fast users understand how it works. However, nowadays Norman argues that as technology is developing design must play a role in easing the interaction between technology and people. This idea hits close to home, in every family gathering I am the designated technology expert whenever my grandparents want to post something on instagram or update their facebook status, it would be nice if these platforms would measure user experience and user feedback — which was also a principle of design that Norman wrote about. This issues of technology not being inclusive to those of older generations must be addressed because it is a global issues.

Assignment Week – 4

I wanted to take the route of generative text, I wanted something that has a motion of swaying side to side having some sort of hypnotic effect. Additionally, I wanted the text to be in a pixelated font mainly for the aesthetic element, I used the font Silkscreen to achieve that look.

As a beginner in p5.js I had to use online resources such as the p5.js reference page, and YouTube: Patt Vira’s videos.

I am especially proud of being able to figure out the following formulas and that block of code, it might seem basic but it took me a while to wrap my head around them. The following block is what gives the element of swaying as there are two texts overlapping each other using, the top layer mimicking the motion of the layer under it. Updating the angle based on a sinusoidal function, creating a dynamic movement in the pattern which is what creates the swaying motion. And, I added the interaction element of being able to switch the colors of the text randomly – the colors are randomized and the letters are transparent.

function draw() {
  background(0);
  stroke(255);
  let x = r * cos(angle);
  let y = r * sin(angle);
  translate(20, 300);

  for(let i = 0; i < points.length; i++) {
    line(points[i].x, points[i].y, points[i].x + x, points[i].y + y);
  }

  fill(textColor);
  textSize(size);
  textFont(font); 
  text(msg, x, y);

  let increment = 2 * sin(t);
  t++;
  angle += increment;
}

function mousePressed() {
  // Change text color on mouse click
  textColor = color(random(255), random(255), random(255), 100);

  // Introduce noise to the points
  for (let i = 0; i < points.length; i++) {
    points[i].x = originalPoints[i].x + random(-10, 10);
    points[i].y = originalPoints[i].y + random(-10, 10);
  }
}

I initially wanted to add the Dubai landscape behind the text, however that was a complete failure, I couldn’t figure out what went wrong, but that is the only thing that I would change with my code.

Here is my entire code:

let font;
let points = [];
let originalPoints = [];
let msg = "dubai";
let size = 250; 
let r = 15; 
let angle = 0; 
let t = 0;
let textColor;

function preload() {
  font = loadFont("fonts/Silkscreen-Regular.ttf");
}

function setup() {
  createCanvas(850, 400);
  points = font.textToPoints(msg, 0,  0, size);
  originalPoints = points.map(point => createVector(point.x, point.y));
  angleMode(DEGREES);
  textColor = color(255, 100);
}

function draw() {
  background(0);
  stroke(255);
  let x = r * cos(angle);
  let y = r * sin(angle);
  translate(20, 300);

  for(let i = 0; i < points.length; i++) {
    line(points[i].x, points[i].y, points[i].x + x, points[i].y + y);
  }

  fill(textColor);
  textSize(size);
  textFont(font); 
  text(msg, x, y);

  let increment = 2 * sin(t);
  t++;
  angle += increment;
}

function mousePressed() {
  // Change text color on mouse click
  textColor = color(random(255), random(255), random(255), 100);

  // Introduce noise to the points
  for (let i = 0; i < points.length; i++) {
    points[i].x = originalPoints[i].x + random(-10, 10);
    points[i].y = originalPoints[i].y + random(-10, 10);
  }
}


Assignment Week – 3


For this assignment I tried my best to wrap my head around arrays and classes and how to go about them. I wanted to also add an interactive element where the circles respond to disturbance of the mouse – proud of that 🙂

There wasn’t really a specific idea, It was trial and error until I found what works for this assignment which is that. However, I wasn’t successful with randomizing the floating orange colors.

let oranges = [];

function setup() {
  createCanvas(600, 600);
  rectMode(CENTER);

  for (let i = 0; i < 10; i++) {
    let x = random(width);
    let y = random(height);
    let diameter = random(30, 50);
    let velocity = random(1, 5);
    let orangeColor = color(random(255), random(255), 0);
    let orange = new Orange(x, y, diameter, orangeColor, velocity);
    oranges.push(orange);
  }
}

function draw() {
  background(174, 198, 207);

  for (let orange of oranges) {
    orange.update();
    orange.display();
    if (orange.isMouseOver()) {
      orange.disturb();
    }
  }
}

class Orange {
  constructor(x, y, diameter, color, velocity) {
    this.x = x;
    this.y = y;
    this.diameter = diameter;
    this.color = color;
    this.velocity = velocity;
    this.originalX = x;
    this.originalY = y;
  }

  update() {
    this.x += this.velocity;

    if (this.x > width + this.diameter / 2) {
      this.x = -this.diameter / 2;
      this.y = random(height);
    }
  }

  display() {
    fill(this.color);
    ellipse(this.x, this.y, this.diameter);
  }

  isMouseOver() {
    let d = dist(this.x, this.y, mouseX, mouseY);
    return d < this.diameter / 2;
  }

  disturb() {
    this.x += random(-5, 5);
    this.y += random(-5, 5);
  }
}


Week 3 – Reading Reflection: Chris Crawford’s The Art Of Interactive Design

Chris Crawford’s The Art Of Interactive Design was such an informative yet highly entertaining read. Touching on the meaning of interactivity, Crawford gave his definition of interactivity in which it is measured, and not as he puts it “a Boolean property”.

The piece was mostly very understandable and very informative in terms of understanding interactivity and what makes something interactive, at least in Crawford’s eyes. However, it is important to keep in mind that human conversation and interaction with machines such as fridges are completely different. I strongly believe that interactivity with humans, and art forms can be measured on a scale but not interactivity with fridges as they are solely tools or means of entertainment. Moreover, I do agree that books, films, and dancing aren’t interactive with users in the slightest which is pretty obvious.

What was highly entertaining to me was the fact that as the example of books not being interactive, he dedicated an entire paragraph to show us an active example of how it doesn’t fit his criteria of interactivity. And, the questions at the end were hilarious.


Week 2 – Reading Reflection: Casey Reas

The implementation of algorithms showcased in the video intrigued me, particularly the simulations where algorithms breathe life into meaningful constructs. Witnessing the utilization of body and tissue geometries to craft clothing was especially striking, demonstrating the fusion of art and technology in multiple ways.

The portrayal of randomness in Reas’s presentation was particularly interesting to me. Each pattern, stemming from a singular algorithm, unfolded into multiple distinct artworks with subtle alterations in speed or character selection. This showed us the ways in which randomness has the capability in generating diverse artistic expressions, raising questions about the nature of creativity in algorithmic art.

However, in a previous course I  attended the debate of when does an algorithm is allowed to be credited for the work it creates popped a lot. Especially when AI can generate images using solely a prompt. Of course, in Reas’s case it is completely different due to the fact that code is being used as a tool, but, what does it mean for artists now when using a prompt?

Assignment 2 – Living in Chaos

Looking into Computer Graphics and Art, two artist’s style caught my eye. It is specifically Charles Fritchie and Robert Morriss  where their style consisted of free form lines and a sense of chaos, blending circles and lines – some straight and some aren’t. (Page, 32)

The concept of this code is to tell the tale of how we as humans have become entrapped in a fast-paced life of constantly having to work that sometimes it is hard to break free of that mindset. The circles, which eventually aren’t visible represent us, and the lines represent every aspect of our work lives – assignments, jobs, social life, etc.

As a person who is new to p5.js I found that it was easier for me to start coding without an initial concept but a loose inspiration, it took me quite a bit of time because I wanted to implement some of the ideas we learned in class, the code ended up being simple however very impactful.

function setup() {
  createCanvas(600, 600);
  background(255);
  noFill();
  stroke(0);
  frameRate(4);
}

function draw() {
  for (let i = 0; i < 10; i++) {
    let x1 = random(width);
    let y1 = random(height);
    let x2 = random(width);
    let y2 = random(height);
    line(x1, y1, x2, y2);
  }

  ellipse(mouseX, mouseY, 20, 20);
}

function keyPressed() {
  background(255);
}


Amal Almazrouei – Self Portrait

I tried my best to include the Abaya and Sheila in my Self Portrait, even though it took a lot of trial and error I think I did a good job.

I actually watched a couple of videos in order to reach this point, however there is a lot of room for improvement. I overlapped ellipses in order to create the hijab, and then I wanted to have an interactive element where the pupils followed the mouse. I wanted the background to be of the stars with elements loosely related to The Starry Night. 

I would probably add a nose next time, and would like to eventually add an additional interactive element probably in the background.