Unusual Switch

Concept

I was talking on my phone with my friend I remember finding myself thinking about this project and not concentrating on the conversation. This immediately reminded me of the idiom “to have a light bulb moment”, therefore I decided to make a switch that would lighten the bulb when the phone touches my ear.

Circuit Diagram and Highlights 

I taped some aluminum foil to my phone case and some to my ear. If the phone case touches the ear, then the LED light will switch on because the circuit is connected.

Here is a link to the video of my project: Light bulb moment

I faced one challenge sticking the wires to the aluminum foil. I needed to make sure that the wire was not moving and tightly touched the foil. I resolved this by using the double-sided tape. I thought about alternative conductive fabrics when making this project, however, I eliminated other options, such as conducting tape, as I am aware that the sticky side of the tape is not that conducting.

Future thoughts and reflection

If I decide to revisit this task, I would enhance its visual appeal. I believe I can use a metal phone case and make some kind of metal accessory that could be worn on the ear. Moreover, to avoid holding Arduino and solderless breadboards, I would need to use longer wires.

I believe this project might function as a start for developing a detection program, which would lighten the bulb any time someone is dissociated and not focused when talking on the phone. Such a program would be helpful for everyone who is trying to stay motivated and not distracted during long calls.

Neuroscience Is... Cool


Week #8 : Reading reflections

Donald A. Norman: “Emotion & Design: Attractive things work better”

I really enjoyed reading this article, as it emphasizes the significance of both usability and aesthetics. The author also recognizes that it is crucial to have human interaction with products and a comprehensive design approach. I feel that the article is especially true in today’s context as the visual attractiveness of a product has the potential to greatly improve the user’s overall experience.  For instance, I found myself mentioning in a family conversation that an application from my home country’s bank is very useful, simple to use, and attractive, compared to other applications I have used in the past, which makes my overall experience with the bank account very pleasant. Although I really enjoyed reading this article, I am still interested in how to find the correct balance ratio between aesthetics and usability.

In my opinion, there is no indication of the author’s bias in this article. However, it is essential to note that the author explicitly states that he is a secret admirer of attractive products, which may emphasize that he leans more toward aesthetics and design than the product’s usability, which may function as a potential bias. Moreover, this article talks a lot about cognition and its effects on the user experience of the product but there is no empirical evidence or extensive research to support the claims the author makes. His arguments rely more on personal anecdotes and observations. This is not a bad thing to do considering the format of the article, but I am sure it would be useful for such readers as myself to have research-based evidence indicated in the article.

Her Code Got Humans on the Moon—And Invented Software Itself

I liked this article because it provides a historical account of Margaret Hamilton’s contributions to software development and her role in the Apollo space program. I believe it is very important to learn about people who pioneered the field of software development because it helps to understand the historical context and evolution of software engineering. This article not only provides insights into the early stages of the field and how it has progressed over time, but it can also provide inspiration and motivation to aspiring software engineers, showing that people with quick thinking, determination, and problem-solving skills, like Hamilton, can make a significant impact in the field. This article made me think that learning about the work of pioneers actually makes us feel appreciation for what has been done before us and what became the basis of our daily lives.

Moreover, I liked this article because it emphasizes that Hamilton was an outlier, as she was one of the few women working in tech and engineering. The article mentions how Hamilton’s role as a working mother and a spaceship programmer was challenging because people questioned her ability to balance her career and motherhood. I believe that by showcasing Hamilton’s accomplishments and contributions, the article challenges traditional gender roles and stereotypes. It sheds light on the importance of recognizing and celebrating the achievements of women in the field of software development, as well as the need for greater diversity and inclusion in the industry.


Concept

Instead of developing a game for my midterm project I decided to create a space for an emotional experience. I believe that midterms often bring about stress, and it’s essential for individuals to be able to relax and prioritize their overall well-being. Consequently, I designed a meditation program that would help unwind people’s minds and partake in self-care activities.

Approach and Code highlight

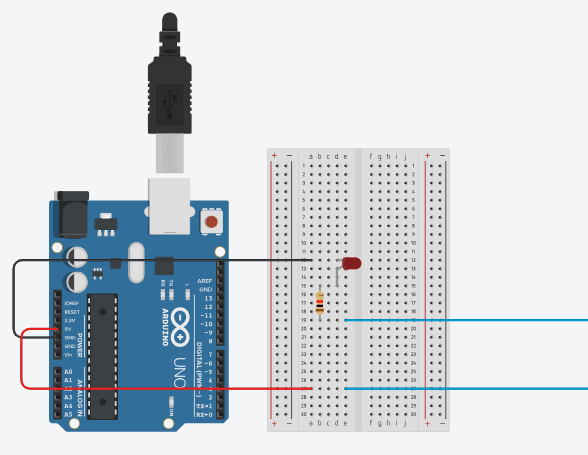
For the development of this project, I planned to have three different exercises breathing, mantras, and journaling. I have shown the code for the breathing exercises in my midterm progress blog post, where I designed a program of a bouncing ball that would be helpful for people to find a certain rhythm in their breathing. For the mantras, I was planning to show participants different affirmative quotes that would allow participants of the meditation program to focus on their selves. I planned to use the method of a .substring(). I found a sketch that would help to display a portion of the string, based on the mouse position, here. For the journaling exercise, I decided to give some space for the participant where they can think about some questions and have a space to write down their responses. I used a csv. file to store all of the prompts for the journaling exercises. I created an array of strings to hold the entire file and preloaded the text from the file into an array. because I only had one row for all of the prompts, I did not need to loop through each row in the file. I created an index of the random prompt in the prompt array, a variable for a random prompt, and the code that would choose 1 of the prompts from an array. I created an input window and a button that when pressed would erase the input and leave a thankful note to the participant. As the basis for building this little program, I found a code for creating an input on the reference page, here.

Here is the code and sketch for this program, which I am very proud of.

let input, submitButton, prompt;
let strings = [];

function preload() {
  strings = loadStrings("quotes.csv");
}

function setup() {
  if (strings == null) {
    print("failed to load the file, stopping here");
  }
  print("strings array contains this many lines: " + strings.length);

  // create canvas
  createCanvas(710, 400);

  input = createInput();
  input.position(20, 100);
  input.size(400);

  submitButton = createButton("submit");
  submitButton.position(input.x + input.width, 100);
  submitButton.mousePressed(prompting);

  // all the prompts in an array

  let allThePrompts = split(strings[1], ",");

  print(allThePrompts); //it has 5 prompts and they are all split. nice!!!

  // X is the index of the random prompt in the promt array
  let X = int(random(allThePrompts.length));
  print(X);

  // variable for a random prompt
  let randomPrompt = allThePrompts[int(random(5))];

  print(randomPrompt);
  //choosing 1 of the prompts from an array
  prompt = createElement("h2", foo);

  prompt.position(20, 5);

  textAlign(CENTER);
  textSize(50);
}

function prompting() {
  input.hide();
  // ? not working: how to hide the button: button.hide();
  prompt.html(
    "Thank you for your response ! Hopefully it made your day a little better ^^ "
  );
  input.value("");
}


Another part of the program, which I am very proud of and which ended up working perfectly is the three buttons in the choosing menu. I was able to program buttons myself using an image and not using built-in buttons. For this, I used object-orientated programming. I created a class, where I specified how buttons should be displayed and function when a mouse is over and the mouse is clicked on these buttons. Then, in setup, I created the three similar buttons that are in the array, which would use the commands specified in the class. Here is a code highlight of the class:

class ChoosingButtons {
  constructor(inX, inY, inImg, inScenery) {
    // what does this mean?
    this.x = inX;
    this.y = inY;
    this.img = inImg;
    this.scenery = inScenery; // where to go if this button is clicked
  }

  display() {
    stroke(0);

    print("in button display; scenery = " + this.scenery);

    // tint the image on mouse hover
    if (this.mouseOverImage()) {
      print("mouse over image");
      tint(254, 220, 220, 255);

      // furthermore, if the mouse is clicked,
      // set the scene
      if (this.mouseClickedOnImage()) {
        print("mouse is clicked" + this.scenery);
        scene = this.scenery;
      }
    } else {
      noTint();
    }

    image(this.img, this.x, this.y);

    noTint();

    print(this.img.width, this.img.height);
  }

  // over automatically matches the width & height of the image read from the file
  // see this.img.width and this.img.height below
  mouseOverImage() {
    if (
      mouseX > this.x &&
      mouseX < this.x + this.img.width &&
      mouseY > this.y &&
      mouseY < this.y + this.img.height
    ) {
      return true;
    } else {
      return false;
    }
  }

  // over automatically matches the width & height of the image read from the file
  // see this.img.width and this.img.height below
  mouseClickedOnImage() {
    if (
      mouseIsPressed &&
      mouseX > this.x &&
      mouseX < this.x + this.img.width &&
      mouseY > this.y &&
      mouseY < this.y + this.img.height
    ) {
      return true;
    } else {
      return false;
    }
  }
}

The code for the three buttons:

// make the three choosing buttons
  buttonsChoosing.push(new ChoosingButtons(20, 150, choosingImage, BREATHING));
  buttonsChoosing.push(new ChoosingButtons(235, 150, choosingImage, MANTRAS));
  buttonsChoosing.push(new ChoosingButtons(450, 150, choosingImage, JOURNALING));

Future Thoughts and Reflection

I haven’t finished this project in three parameters: the switching back and forth between the pages, and the implementation of the sound and shape. I would have added the sound and the shape (btw, I know how to do it) if I finished the switch code. However, because I am very new to coding and have never designed such a complex program of switching between multiple cases, I did not fully realize my project. I decided to take the risk of creating multiple cases in the switch statement, however, the back buttons did not work perfectly well and I spent a lot of time trying to debug it and make it work. Even though it works in the sense that it changes cases, it didn’t change the case to the one I intended. Moreover, as I designed the code for journaling exercises in another shorter program, I was having issues implementing it in my main code. I tried multiple ways of breaking it down, however, it still didn’t work.

Nevertheless, I learned a lot during this project. I now know how to program a switch statement and create my own buttons from images. I learned how to create an input box and display text correctly. I recapped how to use a csv. file to load the information and I learned how to randomly present information from this file. I also learned patience and that it is best to debug a long program by diving it into smaller programs even though it may not work when you are trying to paste it back into the main program. I also was able to practice object-oriented programming on a new level by creating buttons with it. So, even though I didn’t get all of my program to work as was planned, I am nevertheless very happy with the experience and knowledge I gained in the process of creating it.


Midterm progress

Concept

For my midterm project, I decided not to make a game, and rather focus on creating a program for an emotional experience. I think that midterms are always associated with stress and people need to find a way to balance these emotions and have time to focus on their well-being. Therefore, I decided to create a meditation program that will allow its users to calm themselves and enjoy self-care exercises.

Design

I started off by visualizing my project. Below you can see the developed design.


Here is a more detailed look at the three exercises I’m planning to create:

Frightening moments

The most frightening part for me is to understand how to create several pages that can be manipulated with buttons. I tried to look at the students’ codes, however, they were very complicated and I could not understand them. Therefore, with the help of the professor, I decided to use a switch statement to manipulate different cases (scenes) within the program.

Another complexity was regarding the buttons. For my program, I wanted to have a button as an image. So, a built-in function of creating a button was not appropriate. After doing some search, I eliminated this issue by finding a code that could help me to create and program my own buttons that are images. You can view the code here.

Also, I felt overwhelmed with doing everything within one code as it is very easy to find and analyze the bug when you run a long code. Therefore, I decided to test my exercises in a separate and much shorter code, which I can later implement in the main long code. Thus, I designed two separate codes for the breathing and journaling exercises.

Breathing exercise

For now, I’m still working on debugging the code that causes issues with the switch statement and buttons. Nevertheless, I am proud that the code functions more or less. As I am finished with debugging, I am going to add two last parameters that I need: shapes and sounds.

Reading Reflection – Week #5

The reading for this week was especially interesting. I have never seen the first works in interactive media that were using the concept of computer vision. I do not think that I came to like every work, however, one work was extremely fascinating – Suicide Box by the Bureau of Inverse Technology. It raises complex ethical concerns. While it offers a thought-provoking commentary on surveillance, privacy, and technology’s impact, its name and intent may be distressing. Ethical issues include potential harm to vulnerable individuals and the responsibility of artists to consider the emotional impact of their work. Even though this work triggered negative emotions in me, I believe it is one of those works that changed the world.

Although I liked how the author of this article was trying to present evolutionary artworks and thus provide a guide for new programmers about computer vision, I believe the lack of technological advances that use computer vision was obvious. Today, for instance, in healthcare, computer vision aids in medical image analysis, diagnosing diseases like cancer, and monitoring patient vital signs. In criminal investigation, it’s used for facial recognition, fingerprint matching, and analyzing surveillance footage to identify suspects and solve crimes swiftly, enhancing both medical diagnosis and law enforcement efficiency. These are just several examples of how people use computer vision not just for the sake of art, but also for something that is truly significant. I feel that the author could’ve mentioned these implications and shown how art can be incorporated into our everyday lives.

The World Deaths Rate in 2019

Concept

My initial idea was to see how COVID-19 had influenced the death rate of the whole world, however, I was not sure if this was an ethical thing to do. Therefore, I decided to visually represent what was the number of deaths in 2019 based on other illnesses. I found a great website that has public data and data visualizations available online. I thought it would be interesting to visualize the data available using circles. This way is more spontaneous and hence easier to understand. Each circle represented the cause of death. The bigger the circle the more deaths there were in 2019.

Approach and Code Highlights

To create this code, I was using a for loop in a setup function. I took a single row and split it into individual values that were separated by a comma.  I then assigned variables for each cause of death in a single row and I used ‘int’ to convert the value into an integer. I then calculated the sum of the deaths for every disease in a single row. And because all of this is in the for loop, this happened to every row in my data file, so I got the total number of deaths for every country in the world. After, I scaled the size of the circle according to the data. Specifically, in the data file the range of min and max values was from 0 to 500000, which would correspond to 1 to 10 size on the canvas, respectively. I placed the circle in the random x & y positions and I used the range of min and max for the radius.

After I was able to draw circles according to a country I needed to find a way to visually distinguish them. I am really proud that I was able to understand how to do it.

// Use unchar function to convert a
// single-character string to its corresponding
// integer representation
// We also use split because we have 3 letters in a
// country code and we need to extract only
// the first letter

let countryCode = unchar(split(singleRow[1], "")[0]);
print(countryCode);

// We know that the country code as represented by
// a number is going to be between 65 and 90 that
// corresponds to letters from A to Z
// We assign red values to the letters

let redValue = map(countryCode, 65, 90, 0, 255);

// Coloring the circle in a range for red value
// and fixed green,blue and alpha values

noStroke();
fill(redValue, 100, 100, 155);

I decided to use different colors to assign the colors according to some variables in the data file. In the data file, I had a country code represented as 3 letters. For instance, Kazakhstan is KAZ and Argentina is ARG. So, with the help of an unchar function, I used this country code and converted a single-character string to its corresponding integer representation. Specifically, for ease of things, I decided to split the 3 letter code into 3 values and use only the first one. To represent letters in a code I used the ASCII printable characters, where ‘A’ is 65 and ‘Z’ is 90. You can find the whole list of ASCII printable characters here. Then, I used a map function to re-map numbers from the ASCII range (65 to 90) to the color range (0 to 255). The last thing I did was to fill all the circles. I played with different Green, Blue, and Alpha values until I got visually appealing circles.

Future Thoughts and Reflections

I had several problems with the code, which did not allow me to see the circles. Firstly, I had some places where I forgot to put a curly brace or I put an extra one. This did not allow me to run the program and I understood how careful I should be in looking through a code. It is very helpful to write what is a curly brace for when closing it. Second, I had multiple times where I had to print the values and look if they were definer or undefined. This helped with debugging a lot. Moreover, the biggest problem was with assigning the const numbers for the radius of the circle. If the range is too big, for example from 1 to 100, what happens is that the program prints only 3 circles and the rest are not visible, probably because the smallest circles are just 1 pixel. Therefore, I had to change the range to be from 1 to 10, so that all the circles were visible. This assignment helped me to understand how to debug a problem step by step and it also taught me that the best way to do it sometimes is a trial and error method.


Reading reflection – Week #4

This chapter was really straightforward, and I liked how Norman explains that technology and psychology should act in interplay. I totally agree with the author, as he points out ‘big’ problems that are common for everybody. After reading this chapter, I came to the conclusion that many designers, engineers, and other people who create objects for our everyday use, sometimes forget about the importance of people. Specifically, they do not care that people are the key actors in the process of interaction with technology/objects. There are numerous examples of how I could not understand how something works, where to find information, etc. This proves a point that understanding human psychology is therefore essential to be able to produce the best products that are suitable for people.

Even though every example used in this chapter was clear, I feel that Norman looks at products that do not cause harm: a freezer, a sink, a door, etc. Only once, in the example of a wall that prevents people from falling down the stair shaft, he suggests something that is an example of a design used for humans’ well-being. I believe that HCD is a great way to ensure people’s safety. For instance, the instructions for emergency situations in case of a fire or in the cabin of the airplane. The instructions must be extremely understandable for people in general, and especially for those who cannot see well or are colorblind. But I have never seen those instructions made appropriate for this kind of audience.

Rain Forest

Concept

Initially, I had an idea to create rainfall and falling shaky leaves to show the windy and rainy weather, which I greatly enjoy and which we cannot encounter in Abu Dhabi. In an attempt to create the initial idea, I discovered some new, surprising outcomes, which changed my concept but made it even better than was planned. I was able to create an animated painting, which reminds me of famous Chinese ink paintings. Now my work is very pleasing and attractive!

Approach and Code Highlight

With this work, I had to experiment a lot. Using the trial-error method, I came to the outcome I enjoy. I created two classes and two arrays, set up a beautiful subtle color palette, and made some features, e.g. rainfall and drawing of the leaves.

I am happy with how leaves are drawn in this program. I used this video to understand how classes and arrays work and saw a nice method of how to create a shaky movement. I believe this is what makes my code interesting.

shake() {
  // movement of leaves
  this.leafX = this.leafX + random(-5, 5);
  this.leafY = this.leafY + random(-5, 5);
  this.leafX1 = this.leafX1 + random(-5, 5);
  this.leafY1 = this.leafY1 + random(-5, 5);
  this.leafX2 = this.leafX2 + random(-5, 5);
  this.leafY2 = this.leafY1 + random(-5, 5);
}

Another interesting action was experimentation with transparency alpha value in the background. I noticed that setting the value closer to zero would produce semi-transparent traces, which brings some charm to my work. Specifically, the movement of the leaves leaves traces in the form of a crown of a tree, and falling drops leaves traces that look like the trunk of a tree.

Reflection and Future Thoughts

I have an issue with this code, which doesn’t crash my program and it works fine, however, I would like to understand what I did wrong and to learn how to code variables accordingly.

Nevertheless, I am proud of the outcome because it was my first time doing object-oriented programming. I now understand all the benefits of coding in classes rather than hardcoding every single point and object in my program.

Reading Reflection – Week #3

In this chapter, I like how the author made his argument very clear to the lay audience who just started to think about interactive programming. Crawford showed in a very general, yet critical way what he considers and doesn’t consider being interactive. Nevertheless, I believe this chapter was biased toward the author’s subjective opinion about the definition of interactivity. This may be seen in most of his examples. Specifically, I want to point out the example of the books and how our reading cannot be interactive. I would oppose this argument by giving another example: interactive books. Recently, a new genre of books has been introduced, which is a gamebook.  These books share similarities with conventional books, but they demand the active involvement of the reader by prompting decisions that influence the story’s progression. There are also digital versions that require the reader to shake or blow on the phone so that something would happen on the screen of a phone. I believe, this is a great example of an interactive book, which doesn’t support the argument of the author. You can check an app for this type of book here.

One thing I really liked about this chapter is Crawford’s association of interactive programming with human conversation. As we think about coding, specifically the interactive things we do in class, it fully qualifies for interactive artwork.  However, I believe that no matter what computers do interactively, it is a human who stands as the main actor in the whole process. So, in this chapter, Crawford is limited to the concept of interaction within the computer and programs, but he does not mention who takes the initial control of the whole interactive process.


Viruses are everywhere

Concept

As I was looking through the ProgrammInformation21_PI21, I came across this piece by Felder mit Strichkonzentrationen, which instantly reminded me of the bacteria that surround us.

I decided that I want my piece to represent the issue of the abundance of viruses that has been relevant for us since 2019. I wanted to show the random movement of viruses in the air that we breathe and the water that we drink and use every day. I believe that it is very important to be aware of this and never forget about our safety and the safety of others.

Approach and Code Highlight

I wanted to make a relatively minimalist artwork using simple shapes. I decided on one particular shape which is a circle and used it to represent viruses, air, and water molecules. As air and water are molecular structures I decided to show them in a grid form, by using nested for loops that we learned in class. For water molecules, I used the same method but changed the color, opacity, and the arrangement of circles next to each other, so they would overlap, creating a grid pattern with no negative space. For the background to change as I pressed the mouse, I used if statement with a variable mouseIsPressed and an else statement, so that the grid of white circles would show anytime I did not press the mouse.

To create viruses, and specifically to show their movement, I decided to try a new method of creating random circles on the canvas. To know more about it, I watched this video by The Coding Train. As it was hard for me to understand how to create for loops, I think this part of the code is great. I used random function and manipulated variables of the circle to place them randomly on the canvas. I also decided to write the code fully in function draw(), so it was possible to show the movement of the virus circles.

// randomly arranged overlapping green circles

  frameRate(8);

  for (let circles = 0; circles < 75; circles++) {
    let xPosition = random(width);
    let yPosition = random(height);
    let radius = random(1, 50);

    fill(133, 182, 27, 200);
    noStroke();
    circle(xPosition, yPosition, radius);
  }

Reflection and Future Thoughts

I am proud that I was able to understand how conditionals work, specifically the else statement, which in combination with both would help me change the background of the piece. This was one of the problems I encountered in my work. It took me some time to figure out the order of where to put a conditional and a loop. I need to look at more examples of codes to understand better how to combine them.

Nevertheless, for this homework, I achieved the goal I had set for myself with success. I was able to effectively represent my idea using the combination of both simple shapes and loops/conditionals. As I was trying to represent particles of air, water, and viruses on the 2D surface, I now think it would be very interesting to see how to create the same artwork in 3D space.