Final Project | Some ideas

I’ve always wanted to create something related to gaze tracking—mapping the intangible act of looking into something tangible that showcases the power of staring. It’s about turning private intention into public expression.

Idea 1:
Develop a human body figure in p5.js and use p5 to detect and record gaze (eyeball) movements as the user observes the figure. Then, create a physical representation of the body figure and embed LED pins in different sections. p5.js would send gaze data to an Arduino, causing the LEDs to blink in the areas the user’s gaze travels to. Simultaneously, a speaker could play audio, creating an interactive experience that visualizes and vocalizes the gaze.

Idea 2:
This concept shifts from exploring the male gaze and fetishization to a more practical application: an eye-blink sensor for preventing drowsy driving. My cousin got us into a car accident last year because he fell asleep while driving, which inspired this idea. Although less creative, it’s highly practical. The system would include a speaker that plays a reminder whenever the user closes their eyes, encouraging them to stay alert. This device would be designed to be portable, so it can easily attach to any pair of glasses.

Reflective Response

Design Meets Disability

The reading helped me understand the intersection go aesthetics and utility. Its emphasis on glasses changing from medical necessity to fashion accessory made me realise how deep the idea of “hiding” disability is in our culture. We tend to prioritise discretion in disability design over self-expression. This showed how good designs should not just accommodate but enhance and adapt to human experiences without bringing attention to differences. I now see how disability is more of a limitation by environments which aren’t designed inclusively rather than a limitation of a person.
I was particularly struck by the contrast between traditional medical design and the bold, unapologetic aesthetics introduced by people like Aimee Mullins. Her idea that a prosthetic leg can be glamorous and even a fashion statement reforms disability not as a limitation but as an opportunity for individuality. Another interesting point was the way simple designs such as the Muji CD player were framed as essentially inclusive. It made me question the products I use daily ,such as elevators without braille and phones with complex interfaces, and how they often don’t accommodate diverse needs. Some designs exclude certain groups by default by catering only to “average” users. In my opinion many innovations could be made if designers embraced the tension between accessibility and aesthetic appeal.

This reading changed my perspective on inclusivity in design, it’s not just about solving problems but embracing differences.


Final Project Ideas

For my final project I had a couple of ideas of possible project. I am yet to narrow them down into one which I will work with as my project. I hope to do this as I progress to the next step of the assignment.

Idea 1

My first idea was to create a car with parking assistant simulator. My inspiration for this was trying to emulate the modern car parking assistance systems. My idea is to use distance sensors to detect how close the car is to surrounding objects. I would then use p5 to give a visual presentation of the parking scenario giving the user a visual feedback. I would also like to have alerts such as LED and buzzer warnings to give a better experience to the user

Idea 2

My second idea was to create a simple robot that can be controlled to move and possible wave and give data such as distance from objects around it. I plan to equip the robot with basic motion capabilities and a sensor to measure its distance from nearby objects. I intend to have the user interact with the robot through a controller or the keypad depending on what will be more convenient

Assignment 9: Final project Proposal

Title: Catch the Horse
Mechanical Horse.mp4 – Google Drive

Concept:

“Catch the Horse” is an interactive two-player game that blends physical and virtual gameplay to create an engaging experience. A physical mechanical horse and a digital cowboy chase are brought to life through Arduino and p5.js integration. The game revolves around strategy, reflexes, and decision-making, where one player controls a cowboy trying to catch a runaway horse, while the other player actively defends the horse using tools like mud, fences, and boosters. With immersive elements like crouching to dodge obstacles and precise timing challenges to throw a lasso, the game offers an interactive and entertaining experience.

Overview:

In “Catch the Horse,” a virtual horse escapes its stable and leaves the screen, triggering a motor that animates a physical mechanical horse placed beside the monitor. The cowboy avatar must chase after the horse, dodging obstacles and using a lasso to attempt capture. The horse player can make the chase challenging with mud, fences, and boosters, while the cowboy must rely on strategic decision-making and skill to win.

Gameplay Mechanics

The Cowboy’s Role (Player 1)

  • Chasing the Horse:
    • The cowboy avatar moves left and right using a joystick to dodge mud and other obstacles.
    • Physical crouching (detected by an ultrasonic sensor) is required to avoid fences thrown by the horse player.
    • At set intervals, the cowboy can attempt to throw a lasso to capture the horse or a bag of treats.
  • Lasso Mechanic:
    The cowboy has two options when throwing the lasso:

    1. Catch the Horse (Luck-Based):
      • A meter appears with an oscillating needle that moves slower, making it easier to time the throw.
      • If successful, the player rolls a virtual dice. A roll of 5 or 6 captures the horse; otherwise, the chase continues.
    2. Catch the Treats (Skill-Based):
      • The meter’s needle oscillates faster, requiring greater precision to time the throw.
      • Success guarantees the bag of treats, which stops the horse and ensures a win.
      • Failure results in no capture, and the chase continues. Speedometer meter with arrow for dashboard. - Vector. 30715312 Vector ...

The Horse’s Role (Player 2)

  • The horse player uses three buttons to evade capture:
    1. Mud Throw: Throws mud obstacles that the cowboy must dodge with the joystick.
    2. Fence Throw: Launches fences that the cowboy must crouch to avoid.
    3. Booster: Temporarily speeds up the horse, preventing the cowboy from throwing a lasso.
  • All buttons have cooldown periods to maintain fairness and balance. Robot Unicorn Attack 2 (Gameplay) Android / iOS - YouTube

Challenges and Solutions

  1. Mechanical Horse Durability:
    • The motor runs at a controlled speed to prevent stress on the fragile body.
  2. Button Cooldowns and Fairness:
    • Cooldown timers for the horse player’s buttons ensure balanced gameplay.
  3. Accurate Crouch Detection:
    • Calibrate the ultrasonic sensor to detect movement precisely while avoiding false triggers.

Winning Conditions

  • The cowboy wins if they:
    • Successfully throw the lasso and roll a 5 or 6.
    • Successfully capture the bag of treats.
  • The horse wins if:
    • The cowboy fails all lasso attempts, or the timer runs out.


WEEK 11 – EXCERSISE(WORKED WITH AMNA)

EXCERCISE 1: ARDUINO TO P5.JS COMMUNICATION

RESULT:

TASK 1 VIDEO

P5 CODE:

let sensorValue = 0; // Variable to store sensor data
function setup() {
  createCanvas(640, 480);
  textSize(18);
  if (!serialActive) {
    setUpSerial(); // Start serial communication with Arduino
  }
}
function draw() {
  // Set the background to dark blue and purple hues based on the sensor value
  background(map(sensorValue, 0, 1023, 50, 75), 0, map(sensorValue, 0, 1023, 100, 150));
  // Map the sensor value to control the ellipse's horizontal position
  let ellipseX = map(sensorValue, 0, 1023, 0, width);
  // Draw the ellipse in the middle of the screen
  fill(255); // White ellipse for contrast
  ellipse(ellipseX, height / 2, 50, 50);
  // Display connection status
  fill(255); // White text for readability
  if (!serialActive) {
    text("Press Space Bar to select Serial Port", 20, 30);
  } else {
    text("Connected", 20, 30);
    // Display the current sensor value
    text("Sensor Value = " + str(sensorValue), 20, 50);
  }
}
function keyPressed() {
  if (key === " ") {
    setUpSerial(); // Start the serial connection when the spacebar is pressed
  }
}
// This function is called by the web-serial library with each new line of data
function readSerial(data) {
  if (data != null) {
    // Parse the sensor value from the Arduino
    sensorValue = int(trim(data));
  }
}

ARDUIN CODE:

int sensorPin = A0; // Sensor connected to A0

void setup() {
  Serial.begin(9600); // Start serial communication
}

void loop() {
  int sensorValue = analogRead(sensorPin); // Read sensor value
  Serial.println(sensorValue); // Send the value to p5.js
  delay(10); // Small delay to avoid overwhelming the serial buffer
}

EXCERCISE 2: P5 TO ARDUINO COMMUNICATION

RESULT:

TASK 2 VIDEO

P5 CODE:

let brightness = 0; // Brightness value to send to Arduino

function setup() {
  createCanvas(640, 480);
  textSize(18);

  // Check if serial is active and set it up if not
  if (!serialActive) {
    setUpSerial(); // Initialize serial communication
  }
}

function draw() {
  background(30); // Dark background
  fill(255); // White text
  text("Use the UP and DOWN arrows to control LED brightness", 20, 30);

  // Display the current brightness value
  text("Brightness: " + brightness, 20, 60);
}

function keyPressed() {
  if (keyCode === UP_ARROW) {
    // Increase brightness
    brightness = min(brightness + 10, 255); // Max brightness is 255
    sendBrightness();
  } else if (keyCode === DOWN_ARROW) {
    // Decrease brightness
    brightness = max(brightness - 10, 0); // Min brightness is 0
    sendBrightness();
  } else if (key === " ") {
    // Start serial connection when spacebar is pressed
    setUpSerial();
  }
}

function sendBrightness() {
  if (writer) {
    // Send the brightness value to Arduino
    writer.write(brightness + "\n");
  } else {
    console.error("Writer is not available. Please connect to the serial port.");
  }
}

ARDUINO CODE:

int ledPin = 9; // LED connected to PWM pin 9
int brightness = 0; // Variable to store brightness value from p5.js

void setup() {
  Serial.begin(9600); // Start serial communication
  pinMode(ledPin, OUTPUT); // Set LED pin as an output
}

void loop() {
  // Check if data is available to read
  if (Serial.available() > 0) {
    // Read the brightness value sent from p5.js
    brightness = Serial.parseInt();

    // Constrain the brightness value to 0-255
    brightness = constrain(brightness, 0, 255);

    // Set the LED brightness
    analogWrite(ledPin, brightness);
  }
}

EXCERCISE 3: BI-DIRECTIONAL COMMUNICATION

RESULT:
TASK 3 VIDEO

P5 CODE:

let velocity;
let gravity;
let position;
let acceleration;
let wind;
let drag = 0.99;
let mass = 50;
let sensorValue = 0; // Variable to store wind value from Arduino
let windStrength = 0; // Wind force determined by the sensor

function setup() {
  createCanvas(640, 360);
  noFill();
  position = createVector(width / 2, 0);
  velocity = createVector(0, 0);
  acceleration = createVector(0, 0);
  gravity = createVector(0, 0.5 * mass);
  wind = createVector(0, 0);

  // Initialize serial communication
  if (!serialActive) {
    setUpSerial();
  }
}

function draw() {
  background(255);

  // Apply gravity
  applyForce(gravity);

  // Apply wind (continuously updated from sensor)
  wind.x = map(sensorValue, 0, 1023, -2, 2); // Map sensor value to a stronger wind range
  applyForce(wind);

  // Update position and velocity
  velocity.add(acceleration);
  velocity.mult(drag);
  position.add(velocity);
  acceleration.mult(0);

  // Draw the ball
  ellipse(position.x, position.y, mass, mass);

  // Check for bounce
  if (position.y > height - mass / 2) {
    velocity.y *= -0.9; // A little dampening when hitting the bottom
    position.y = height - mass / 2;

    // Notify Arduino about the bounce
    sendBounce();
  }
}

function applyForce(force) {
  // Newton's 2nd law: F = M * A
  let f = p5.Vector.div(force, mass);
  acceleration.add(f);
}

// Notify Arduino when the ball bounces
function sendBounce() {
  if (writer) {
    writer.write('1\n'); // Send the bounce signal
  }
}

// Read wind control value from Arduino
function readSerial(data) {
  if (data != null) {
    // Parse the sensor value directly into a variable for wind force
    sensorValue = int(trim(data));
  }
}

// Handle serial setup (using the serial.js file)
function keyPressed() {
  if (key === " ") {
    setUpSerial();
  }
}

ARDUINO CODE:

const int ledPin = 9;      // LED connected to pin 9
const int sensorPin = A0;  // Analog sensor for wind control
int sensorValue = 0;       // Variable to store sensor value from analog pin

void setup() {
  Serial.begin(9600);  // Start serial communication
  pinMode(ledPin, OUTPUT);  // Set LED pin as output
}

void loop() {
  // Read the sensor value and send it to p5.js
  sensorValue = analogRead(sensorPin);
  Serial.println(sensorValue);

  // Check if a bounce signal is received
  if (Serial.available() > 0) {
    char command = Serial.read();
    if (command == '1') {
      // Turn on the LED
      digitalWrite(ledPin, HIGH);
      delay(100);  // Keep the LED on briefly
      digitalWrite(ledPin, LOW);  // Turn off the LED
    }
  }
}


WEEK 11 READING

In my opinion, this reading challenges the idea that design for disability should only focus on solving problems. The prosthetic designs by Aimee Mullins show that disability can spark bold and exciting ideas, not just practical solutions. I think this mindset is what’s missing in most assistive designs today. Why settle for blending in when design can help people stand out and feel empowered? Similarly, the trend of customizing prosthetic eyes with unique designs—like intricate patterns or bold colors—proves that assistive devices can be about self-expression. These designs don’t try to look like a “normal” eye; instead, they let people proudly showcase their personalities. This is exactly the kind of creativity the design world needs.

The reading also points out a major flaw in how we think about inclusivity in design. Universal design sounds great in theory, but trying to make one product fit everyone often dilutes its purpose. For example, overly adjustable furniture for kids with disabilities can end up alienating them instead of including them. Instead of trying to be “one size fits all,” designers should focus on creating multiple, simple solutions that truly meet the needs of different individuals. This isn’t about making disability invisible—it’s about making design human and the diversity that comes with it.

WEEK 11 – EXCERSISE

EXCERCISE 1: ARDUINO TO P5.JS COMMUNICATION

RESULT:

IMG_1537

P5.JS:

CODE (P5.JS):

let sensorValue = 0; // Variable to store sensor data

function setup() {
  createCanvas(640, 480);
  textSize(18);
  if (!serialActive) {
    setUpSerial(); // Start serial communication with Arduino
  }
}

function draw() {
  // Set the background to dark blue and purple hues based on the sensor value
  background(map(sensorValue, 0, 1023, 50, 75), 0, map(sensorValue, 0, 1023, 100, 150));

  // Map the sensor value to control the ellipse's horizontal position
  let ellipseX = map(sensorValue, 0, 1023, 0, width);

  // Draw the ellipse in the middle of the screen
  fill(255); // White ellipse for contrast
  ellipse(ellipseX, height / 2, 50, 50);

  // Display connection status
  fill(255); // White text for readability
  if (!serialActive) {
    text("Press Space Bar to select Serial Port", 20, 30);
  } else {
    text("Connected", 20, 30);
    // Display the current sensor value
    text("Sensor Value = " + str(sensorValue), 20, 50);
  }
}

function keyPressed() {
  if (key === " ") {
    setUpSerial(); // Start the serial connection when the spacebar is pressed
  }
}

// This function is called by the web-serial library with each new line of data
function readSerial(data) {
  if (data != null) {
    // Parse the sensor value from the Arduino
    sensorValue = int(trim(data));
  }
}


CODE (ARDUINO): https://github.com/aaa10159/IntroToIM/blob/a6dc11112996470e161e0ef812409366ebd219d4/week%2011%20-%20exercise%201

EXCERCISE 2: P5 TO ARDUINO COMMUNICATION

RESULT:

IMG_1541

P5.JS:

CODE (P5.JS):

let brightness = 0; // Brightness value to send to Arduino

function setup() {
  createCanvas(640, 480);
  textSize(18);

  // Check if serial is active and set it up if not
  if (!serialActive) {
    setUpSerial(); // Initialize serial communication
  }
}

function draw() {
  background(30); // Dark background
  fill(255); // White text
  text("Use the UP and DOWN arrows to control LED brightness", 20, 30);

  // Display the current brightness value
  text("Brightness: " + brightness, 20, 60);
}

function keyPressed() {
  if (keyCode === UP_ARROW) {
    // Increase brightness
    brightness = min(brightness + 10, 255); // Max brightness is 255
    sendBrightness();
  } else if (keyCode === DOWN_ARROW) {
    // Decrease brightness
    brightness = max(brightness - 10, 0); // Min brightness is 0
    sendBrightness();
  } else if (key === " ") {
    // Start serial connection when spacebar is pressed
    setUpSerial();
  }
}

function sendBrightness() {
  if (writer) {
    // Send the brightness value to Arduino
    writer.write(brightness + "\n");
  } else {
    console.error("Writer is not available. Please connect to the serial port.");
  }
}

CODE (ARDUINO):

https://github.com/aaa10159/IntroToIM/blob/64b87caff1ef02ad4c3254acbd5fcd12b89e00f0/exercise%202

EXCERCISE 3: BI-DIRECTIONAL COMMUNICATION

RESULT:

EF08D8F3-8CC4-4F3D-939A-E8996AC8E21A

P5.JS:

CODE (P5.JS):

let velocity;
let gravity;
let position;
let acceleration;
let wind;
let drag = 0.99;
let mass = 50;
let sensorValue = 0; // Variable to store wind value from Arduino
let windStrength = 0; // Wind force determined by the sensor

function setup() {
  createCanvas(640, 360);
  noFill();
  position = createVector(width / 2, 0);
  velocity = createVector(0, 0);
  acceleration = createVector(0, 0);
  gravity = createVector(0, 0.5 * mass);
  wind = createVector(0, 0);

  // Initialize serial communication
  if (!serialActive) {
    setUpSerial();
  }
}

function draw() {
  background(255);

  // Apply gravity
  applyForce(gravity);

  // Apply wind (continuously updated from sensor)
  wind.x = map(sensorValue, 0, 1023, -2, 2); // Map sensor value to a stronger wind range
  applyForce(wind);

  // Update position and velocity
  velocity.add(acceleration);
  velocity.mult(drag);
  position.add(velocity);
  acceleration.mult(0);

  // Draw the ball
  ellipse(position.x, position.y, mass, mass);

  // Check for bounce
  if (position.y > height - mass / 2) {
    velocity.y *= -0.9; // A little dampening when hitting the bottom
    position.y = height - mass / 2;

    // Notify Arduino about the bounce
    sendBounce();
  }
}

function applyForce(force) {
  // Newton's 2nd law: F = M * A
  let f = p5.Vector.div(force, mass);
  acceleration.add(f);
}

// Notify Arduino when the ball bounces
function sendBounce() {
  if (writer) {
    writer.write('1\n'); // Send the bounce signal
  }
}

// Read wind control value from Arduino
function readSerial(data) {
  if (data != null) {
    // Parse the sensor value directly into a variable for wind force
    sensorValue = int(trim(data));
  }
}

// Handle serial setup (using the serial.js file)
function keyPressed() {
  if (key === " ") {
    setUpSerial();
  }
}


CODE (ARDUINO):

https://github.com/aaa10159/IntroToIM/blob/b181568724f29fd0d2bf9f290ca3b29949e18740/exercise%203

Assignment 8 | 3 exercises of Arduino & P5 (Jheel & Linda)

EXERCISE 01: ARDUINO TO P5 COMMUNICATION 

Make something that uses only one sensor on arduino and makes the ellipse in p5 move on the horizontal axis, in the middle of the screen, and nothing on arduino is controlled by p5.

The ball moves to the left when it’s dark; to the right when it’s bright.
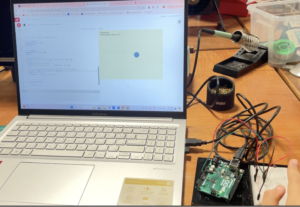
  • Please find the demonstration video here

Exercise 1

  • Please find the p5.js sketch here 
let port, reader, writer;
let serialActive = false;

async function getPort(baud = 9600) {
  let port = await navigator.serial.requestPort();
  await port.open({ baudRate: baud });

  // create read & write streams
  textDecoder = new TextDecoderStream();
  textEncoder = new TextEncoderStream();
  readableStreamClosed = port.readable.pipeTo(textDecoder.writable);
  writableStreamClosed = textEncoder.readable.pipeTo(port.writable);

  reader = textDecoder.readable
    .pipeThrough(new TransformStream(new LineBreakTransformer()))
    .getReader();
  writer = textEncoder.writable.getWriter();

  return { port, reader, writer };
}

class LineBreakTransformer {
  constructor() {
    this.chunks = "";
  }

  transform(chunk, controller) {
    this.chunks += chunk;
    const lines = this.chunks.split("\r\n");
    this.chunks = lines.pop();
    lines.forEach((line) => controller.enqueue(line));
  }

  flush(controller) {
    controller.enqueue(this.chunks);
  }
}

async function setUpSerial() {
  noLoop();
  ({ port, reader, writer } = await getPort());
  serialActive = true;
  runSerial();
  loop();
}

async function runSerial() {
  try {
    while (true) {
      const { value, done } = await reader.read();
      if (done) {
        reader.releaseLock();
        break;
      }
      readSerial(value);
    }
  } catch (e) {
    console.error(e);
  }
}

let rVal = 0; // Value from photoresistor

function setup() {
  createCanvas(640, 480);
  textSize(18);
}

function draw() {
  background(245, 245, 200);
  fill(0);

  if (!serialActive) {
    text("Press Space Bar to select Serial Port", 20, 30);
  } else {
    text("Connected", 20, 30);
    text('Photoresistor Value = ' + str(rVal), 20, 50);

    // Map the sensor value to the x-position of the ellipse
    let xPos = map(rVal, 0, 1023, 0, width);
    fill(100, 123, 158);
    ellipse(xPos, height / 2, 50, 50);
  }
}

function keyPressed() {
  if (key == " ") {
    setUpSerial();
  }
}

function readSerial(data) {
  if (data != null) {
    let fromArduino = trim(data); // Remove any whitespace
    rVal = int(fromArduino); // Convert the string to an integer
  }
}
void setup() {
  // put your setup code here, to run once:
  Serial.begin(9600);
}


void loop() {
  // put your main code here, to run repeatedly:
  int sensorValue = analogRead (A2);
  Serial.println (sensorValue);
  Serial.write(sensorValue);
  delay (1);
}


EXERCISE 02: P5 TO ARDUINO COMMUNICATION 

Make something that controls the LED brightness from p5.

  • LED brightness changes according to the slider.
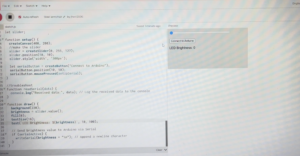
  • Please find the demonstration video here

Exercise 2

  • Please find the p5.js sketch here 
let brightness = 0; 
let slider;

function setup() {
  createCanvas(400, 200);
  //make the slider
  slider = createSlider(0, 255, 127); 
  slider.position(10, 10);
  slider.style('width', '300px');

  let serialButton = createButton("Connect to Arduino");
  serialButton.position(10, 50);
  serialButton.mousePressed(setUpSerial);
}

//troubleshoot
function readSerial(data) {
  console.log("Received data:", data); // Log the received data to the console
}

function draw() {
  background(220);
  brightness = slider.value(); 
  fill(0);
  textSize(16);
  text(`LED Brightness: ${brightness}`, 10, 100);

  // Send brightness value to Arduino via Serial
  if (serialActive) {
    writeSerial(brightness + "\n"); // Append a newline character
  }
}
int ledPin = 9; // PWM pin connected to LED

void setup() {
  Serial.begin(9600);
  pinMode(ledPin, OUTPUT);
}

void loop() {
  int bright;

  if (Serial.available() > 0) {
    bright = Serial.parseInt();
    analogWrite(ledPin, bright);
  }
}

EXERCISE 03: BI-DIRECTIONAL COMMUNICATION

Every time the ball bounces one led lights up and then turns off, and you can control the wind from one analog sensor

Please find the demonstration video here

Please find the p5

let port, reader, writer;
let serialActive = false;

async function getPort(baud = 9600) {
  let port = await navigator.serial.requestPort();
  await port.open({ baudRate: baud });

  // create read & write streams
  textDecoder = new TextDecoderStream();
  textEncoder = new TextEncoderStream();
  readableStreamClosed = port.readable.pipeTo(textDecoder.writable);
  writableStreamClosed = textEncoder.readable.pipeTo(port.writable);

  reader = textDecoder.readable
    .pipeThrough(new TransformStream(new LineBreakTransformer()))
    .getReader();
  writer = textEncoder.writable.getWriter();

  return { port, reader, writer };
}

class LineBreakTransformer {
  constructor() {
    this.chunks = "";
  }

  transform(chunk, controller) {
    this.chunks += chunk;
    const lines = this.chunks.split("\r\n");
    this.chunks = lines.pop();
    lines.forEach((line) => controller.enqueue(line));
  }

  flush(controller) {
    controller.enqueue(this.chunks);
  }
}

async function setupSerial() {
  noLoop();
  ({ port, reader, writer } = await getPort());
  serialActive = true;
  runSerial();
  loop();
}

async function runSerial() {
  try {
    while (true) {
      const { value, done } = await reader.read();
      if (done) {
        reader.releaseLock();
        break;
      }
      readSerial(value);
    }
  } catch (e) {
    console.error(e);
  }
}


////////////////////////////////////////////////////////////

let velocity;
let gravity;
let position;
let acceleration;
let wind;
let drag = 0.99;
let mass = 50;
let windSpeed;


function setup() {
  createCanvas(640, 360);
  noFill();
  position = createVector(width / 2, 0);
  velocity = createVector(0, 0);
  acceleration = createVector(0, 0);
  gravity = createVector(0, 0.5 * mass);
  wind = createVector(0, 0);
  textSize(16);
}

function draw() {
  background(0);
  
  if (serialActive){
    wind.x = map(windSpeed, 0, 1023, -1, 1);
  }
  applyForce(wind);
  applyForce(gravity);
  velocity.add(acceleration);
  velocity.mult(drag);
  position.add(velocity); 
  acceleration.mult(0);
  ellipse(position.x, position.y, mass, mass);
  console.log("Wind Speed: " + windSpeed); // For debugging

  if (position.y > height - mass / 2) {
    velocity.y *= -0.9; // A little dampening when hitting the bottom
    position.y = height - mass / 2;

    // Send signal to Arduino on bounce
    if (serialActive) {
      sendBounceSignal();
    }
  }

  if (!serialActive) {
    fill(255);
    text("Press SPACE to connect to Serial Port", 20, 30);
  } else {
    fill(0, 255, 0);
    text("Connected to Serial Port", 20, 30);
  }
}

function applyForce(force) {
  // Newton's 2nd law: F = M * A or A = F / M
  let f = p5.Vector.div(force, mass);
  acceleration.add(f);
}

function keyPressed() {
  if (keyCode == LEFT_ARROW) {
    wind.x = -1;
  }
  if (keyCode == RIGHT_ARROW) {
    wind.x = 1;
  }
  if (key == " ") {
    if (!serialActive) {
      setupSerial();
    } else {
      mass = 50;
      position.y = -mass;
      velocity.mult(0);
    }
  } 
}

async function setupSerial() {
  try {
    noLoop();
    // ({ port, reader, writer } = await getPort());
    
    port = await navigator.serial.requestPort();
    await port.open({ baudRate: 9600 });
    
    
    // Create a TextDecoderStream to decode incoming bytes to text
    const textDecoder = new TextDecoderStream();
    const readableStreamClosed = port.readable.pipeTo(textDecoder.writable);

    // Create the reader to read from the decoded text stream
    reader = textDecoder.readable
    .pipeThrough(new TransformStream(new LineBreakTransformer())) // Optional: split data by lines
    .getReader();
    
    writer = port.writable.getWriter();
    serialActive = true;
    // Start reading data after successfully opening the port
    runSerial();
    loop();
  } catch (err) {
    console.error("Serial connection failed:", err);
    serialActive = false;
  }
}

function readSerial(data) {
  if (data != null) {
    let fromArduino = trim(data); // Remove any whitespace
    console.log(data);
    if (fromArduino !== "") {
      fromArduino = parseInt(fromArduino, 10);
      windSpeed = int(fromArduino); // Convert the string to an integer
      
    }
  }
}


async function sendBounceSignal() {
  try {
    if (writer) {
      await writer.write(new TextEncoder().encode("bounce\n"));
    }
  } catch (err) {
    console.error("Failed to send bounce signal:", err);
  }
}

Please find the Arduino

let brightness = 0; 
let slider;

function setup() {
  createCanvas(400, 200);
  //make the slider
  slider = createSlider(0, 255, 127); 
  slider.position(10, 10);
  slider.style('width', '300px');

  let serialButton = createButton("Connect to Arduino");
  serialButton.position(10, 50);
  serialButton.mousePressed(setUpSerial);
}

//troubleshoot
function readSerial(data) {
  console.log("Received data:", data); // Log the received data to the console
}

function draw() {
  background(220);
  brightness = slider.value(); 
  fill(0);
  textSize(16);
  text(`LED Brightness: ${brightness}`, 10, 100);

  // Send brightness value to Arduino via Serial
  if (serialActive) {
    writeSerial(brightness + "\n"); // Append a newline character
  }
}


Assignment 8: In class Exercises (Serial Communication)

Exercise 1 – Moving Ellipse

Prompt: Make something that uses only one sensor on Arduino and makes the ellipse in p5 move on the horizontal axis, in the middle of the screen, and nothing on Arduino is controlled by p5.
Arduino Code
Demonstration:

Exercise 2 – LED Brightness

Prompt: Make something that controls the LED brightness from p5

Arduino Code

P5.js Sketch

Demonstration:

Exercise 3 – Bouncing Ball

Prompt: Take the gravity wind example (https://editor.p5js.org/aaronsherwood/sketches/I7iQrNCul) and make it so every time the ball bounces one led lights up and then turns off, and you can control the wind from one analog sensor

Arduino Code

P5.js Sketch

Demonstration:

Final Project Proposal

Inspiration

I’ve always tried making most of my projects personal/unique to me in some way,  and really I wanted to do the same for the final project! When I tried thinking about things I love, the first thing that came to mind was books and reading in general. Reading has always been one of my favorite activities and for this project, I tried to think of creating something that could make the experience of reading even more enjoyable and interactive.

I then remembered how a few years ago, I had stumbled upon a video of an automatic page turning mechanism and while it was cool, I couldn’t help but think: What if this was more interactive, more human-like? That’s when the concept of a reading buddy robot began to take shape in my mind. I envisioned a small, friendly robot sitting across from me, holding my book as I read. Not just flipping pages mechanically, but responding to my actions—like looking at the left or right page when I’m reading—and maybe even bringing some humor or companionship to the reading experience. The idea of combining robotics with interactivity felt like a perfect challenge that merges both technical and creative elements.

Concept

The reading buddy robot will be designed to face me while holding a book flat out on a  table, almost like a tiny librarian or companion. Its main features will include:

  1. Page Flipping: With a simple gesture or button press, the robot will flip the book’s pages one at a time. I want this mechanism to be smooth and reliable, even for thinner pages.
  2. Interactive Movements: The robot will “look” at the left page when I’m reading on the left side and the right page when I’m reading on the right. This can be achieved using a combination of servo motors and sensors or even a webcam paired with eye-tracking software. It could also give some sort of indication to about my distance from the book, so that I don’t strain my eyes too much.
  3. Personality Through Interaction: The robot won’t just be functional; it will have a personality! For example, if I take too long on one page, it could nod or tilt its “head” as if it’s waiting for me to move on. I’m thinking of adding some sound effects or p5.js animations to make it feel like the robot is alive.

To add a modern twist, I want to connect the robot to a digital interface using p5.js, allowing it to display fun visuals or stats about my reading progress. Maybe it could track how long I’ve been reading and cheer me on, or even throw a playful tantrum if I ignore it for too long!

Parts I’m Uncertain About

While I’m excited about this project, there are a few areas that I’m still figuring out:

  1. The Page Flipping Mechanism:
    I’ve seen examples of flat arm page-turners, but adapting this mechanism to hold the book upright and flip pages smoothly is going to be tricky.  Thin book pages might make this more challenging, so I’ll need to experiment with different designs and materials.
  2. Making It Human-Like:
    The goal is to make the robot feel interactive and expressive, but that’s easier said than done. I can imagine using servos to give it a moving “head,” but what if it feels too mechanical? Adding personality through sounds, lights, or p5.js animations could help, but I’m still brainstorming the best way to tie all of this together.

Final Thoughts

This project is still in its early stages, but I’m really excited about where it’s heading. The idea of combining robotics, interactivity, and reading feels like a perfect way to push myself creatively and technically. I know there will be challenge but I look forward to working on it and seeing how it turns out!