Week 11: (Pi / Darko) Overengineered Guitar – An Arduino Based Musical Instrument

Introduction

This is the “Overengineered Guitar” by Pi Ko and Darko Skulikj.

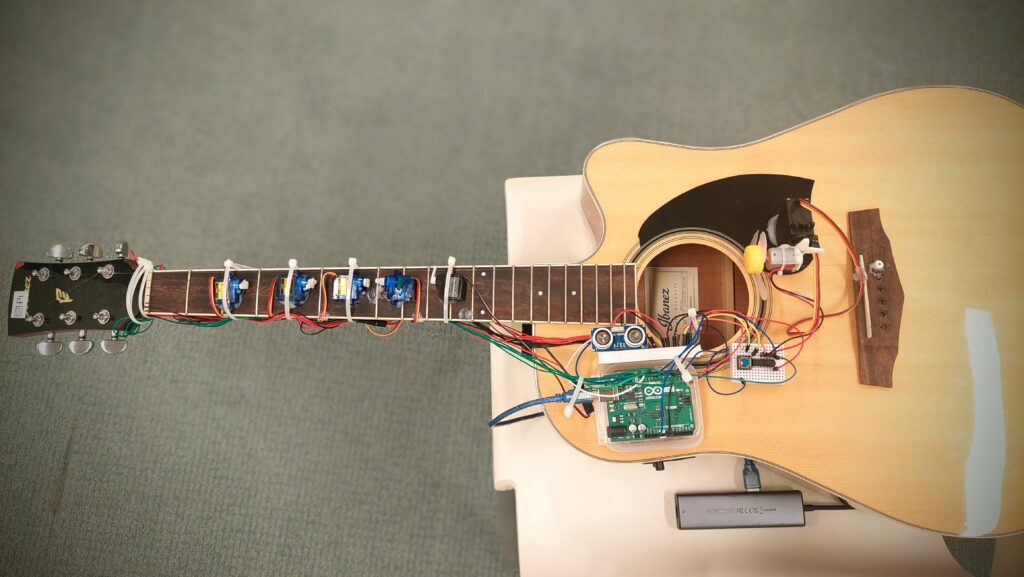
We massacred an acoustic guitar with a single string into an automated musical device that can be played akin to a theremin.

Concept – A Cringy Skit

Darko does not know how to play the Pirates of the Caribbean theme song on guitar, so he decided to turn to Arduino for help.

Demonstration and Media

The video demo of the instrument is shown below.

The sound sucks 😡. Moral of the story : Pi should play the guitar instead of the machine 🫵😠🎸.

Concept

In principle, the “Overengineered Guitar” is a one-stringed setup acoustic guitar for playing by using an array of sensors and servo motors. It has a push button digital sensor and an analog ultrasonic sensor. The main idea is to control the musical notes by hand over the ultrasonic sensor. Then a propeller does the mechanical plucking, controlled through a push button.

This provides the user the opportunity to play the predefined sequence from “He’s a Pirate” from Pirates of the Caribbean over and over again.

Components

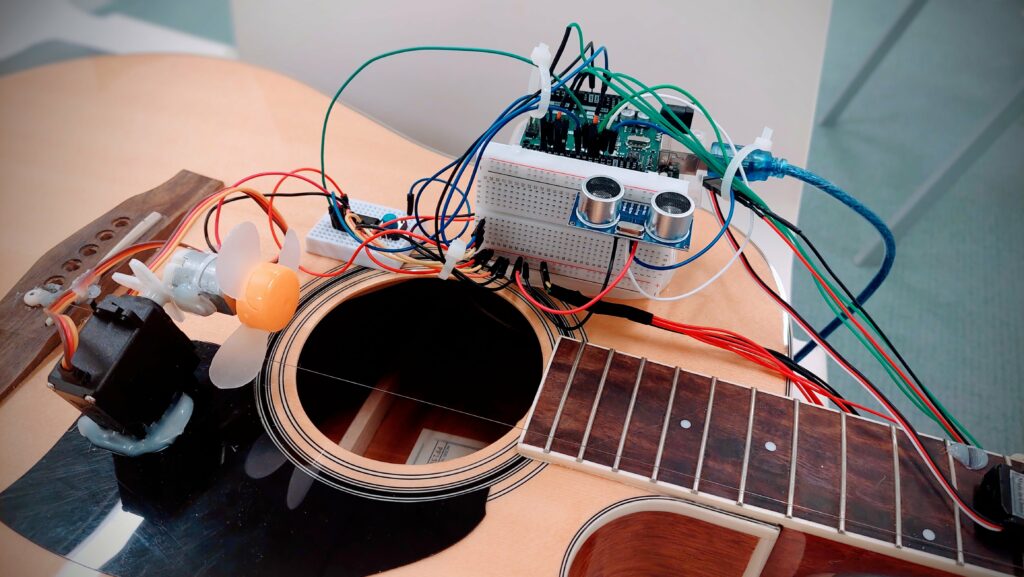
  • Arduino Uno: Serves as the main controlling box for all the sensors and actuators used.
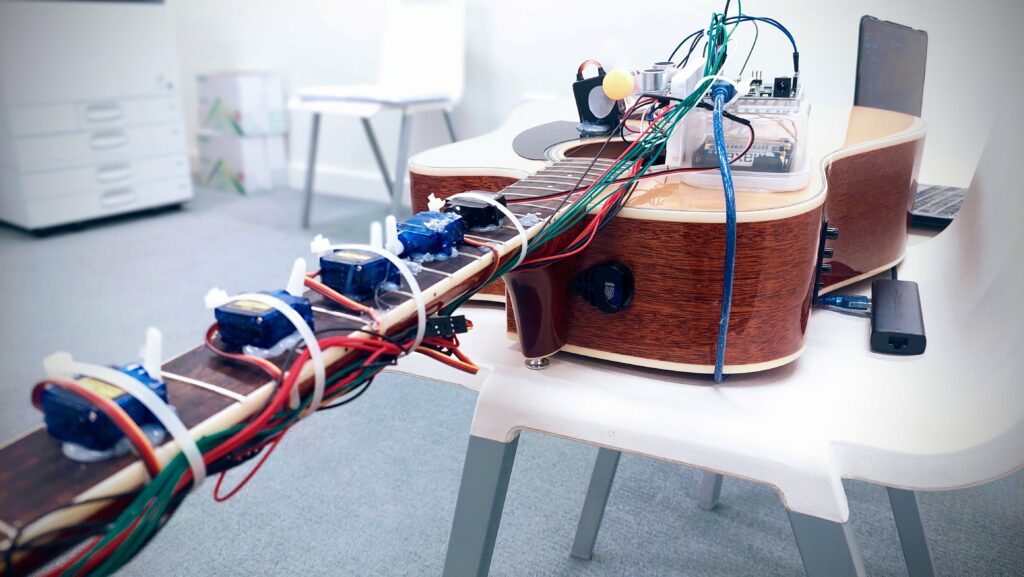
  • Servo Motors (5x): Five servo motors are being attached all across the fretboard, pressing their respective frets according to the desired note.
  • Ultrasonic Sensor: Used to toggle the press on the fretboard by the motors.
  • Digital pushbutton: It is pressed down to start up the propeller, which plucks the string.
  • Propeller motor and DC Motor: It gives the mechanical pluck on the guitar string.
  • L293D motor driver IC: Takes care of the high current requirement for the propeller.
  • External Power Supply: This ensures that the system power is being properly distributed among the various components without having to necessarily overpower the Arduino.
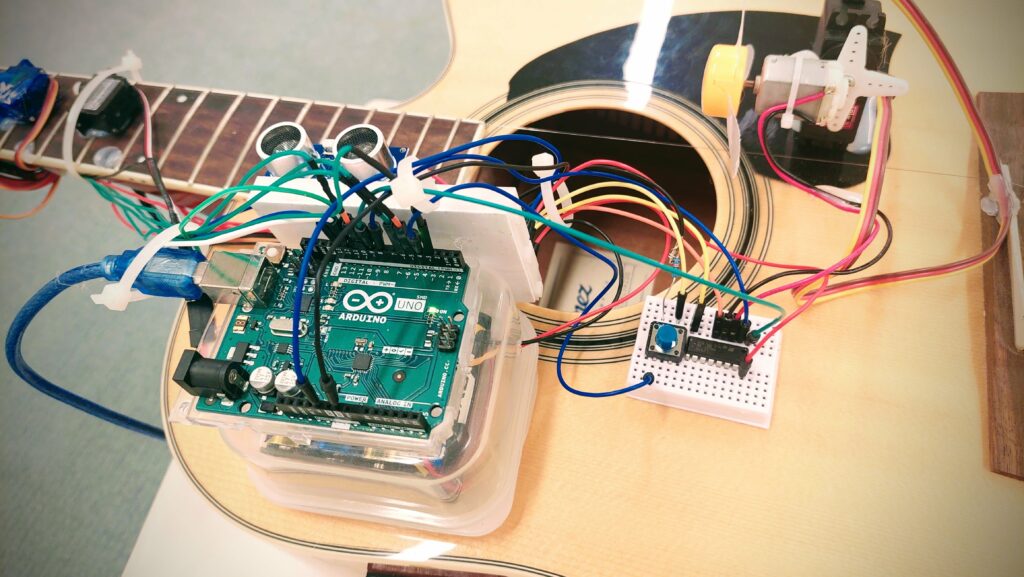
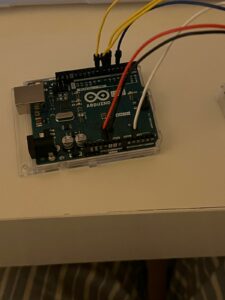
(Arduino, ultrasonic sensor, switch and L293D IC)

(Propellor on DC Motor)

The motors are attached to the arduino as below.

Arduino Pin Motor/Music Note ID Open Servo Angle Press Servo Angle
11 5 180 0
10 4 0 180
6 3 180 0
5 2 180 0
3 1 180 0
N/A 0 (open string) N/A (no servo) N/A (no servo)

Challenges

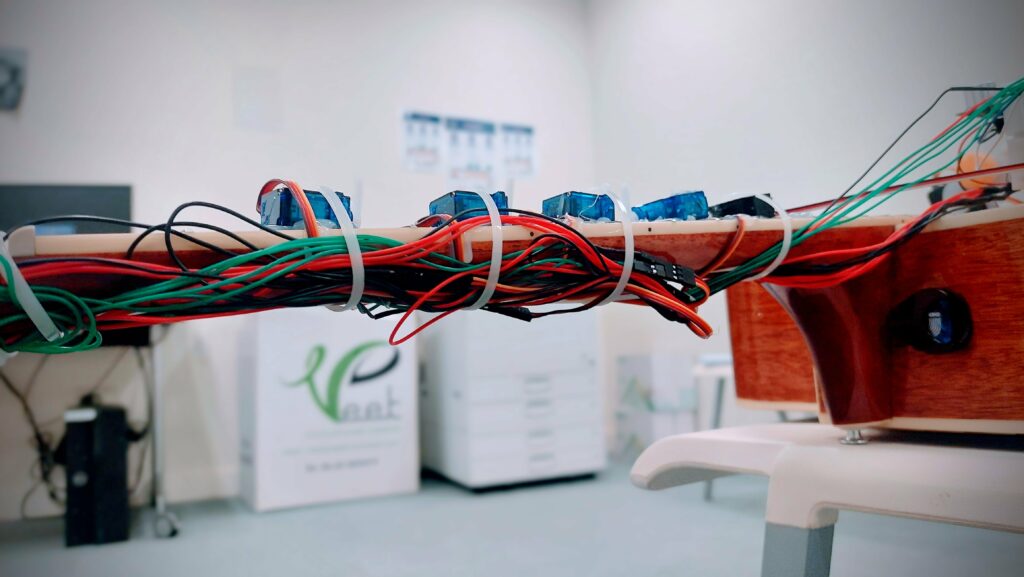
Our main challenge involved managing power to ensure that each component the required current. Also, the wiring was a challenge since there were a lot of wires.

(Wire management 😎)

Task Allocation

Darko took care of the wiring and code for the ultrasonic sensor and the switch using non-blocking code. The rest is filled by Pi.

Code

The code is below. It has debouncing to guarantee reliable operation of the switch.

#include <Servo.h>

// Define a struct to hold servo data
struct ServoData {
  int pin;
  int openAngle;
  int pressAngle;
  Servo servo;
};

// Create an array of servos for each note
ServoData servos[] = {
  {3, 180, 0}, // Note 1
  {5, 180, 0}, // Note 2
  {6, 180, 0}, // Note 3
  {10, 0, 180}, // Note 4
  {11, 180, 0} // Note 5
};
const int numServos = sizeof(servos) / sizeof(ServoData);

// Note durations in milliseconds
int noteDurations[] = {500, 500, 2000, 500, 2000, 500, 1000, 500, 500, 1000};
int noteSequence[] = {0, 1, 2, 3, 4, 5, 3, 2, 1, 2};
const int numNotes = sizeof(noteSequence) / sizeof(int);

unsigned long previousMillis = 0;  // Stores last update time
int currentNoteIndex = 0;          // Index of the current note being played

// Push Button and Propeller control
const int buttonPin = 4; // Pushbutton pin
const int ledPin = 13; // LED pin (for debugging)
int enA = 9; // Enable pin for motor
int in1 = 8; // Motor control pin
int buttonState = 0; // Current button state
// Define the pins for the ultrasonic sensor
const int trigPin = 13;
const int echoPin = 12;

// Define variables for the duration and the distance
long duration;
int distance;


void setup() {
  // Setup for servos
  for (int i = 0; i < numServos; i++) {
    servos[i].servo.attach(servos[i].pin);
    servos[i].servo.write(servos[i].openAngle);
  }

 // Define pin modes for ultrasonic
  pinMode(trigPin, OUTPUT); // Sets the trigPin as an Output
  pinMode(echoPin, INPUT); // Sets the echoPin as an Input
  // Setup for button and propeller
  pinMode(ledPin, OUTPUT);
  pinMode(buttonPin, INPUT);
  pinMode(enA, OUTPUT);
  pinMode(in1, OUTPUT);
  analogWrite(enA, 255); // Set propeller speed
  digitalWrite(in1, LOW); // Initially disable propeller
}

void loop() {
  unsigned long currentMillis = millis();
  // Darko - Switch
  // Improved button reading with debouncing
  int readButton = digitalRead(buttonPin);
  if (readButton != buttonState) {
    delay(50); // Debounce delay
    readButton = digitalRead(buttonPin);
    if (readButton == HIGH) {
      digitalWrite(ledPin, HIGH);
      digitalWrite(in1, HIGH); // Enable propeller
    } else {
      digitalWrite(ledPin, LOW);
      digitalWrite(in1, LOW); // Disable propeller
    }
    buttonState = readButton;
  }

  // Darko - Ultrasonic
  // Clear the trigPin condition
  digitalWrite(trigPin, LOW);
  delayMicroseconds(2);
  // Sets the trigPin HIGH (ACTIVE) for 10 microseconds
  digitalWrite(trigPin, HIGH);
  delayMicroseconds(10);
  digitalWrite(trigPin, LOW);
  
  // Reads the echoPin, returns the sound wave travel time in microseconds
  duration = pulseIn(echoPin, HIGH);
  
  // Calculating the distance
  distance = duration * 0.034 / 2; // Speed of sound wave divided by 2 (go and back)
  

  if(distance<=12){

  // Handling servo movements based on timing
  if (currentMillis - previousMillis >= noteDurations[currentNoteIndex]) {
    // Move to the next note
    if (noteSequence[currentNoteIndex] != 0) {
      // Release the previous servo, if any
      int prevNote = (currentNoteIndex == 0) ? -1 : noteSequence[currentNoteIndex - 1];
      if (prevNote != -1 && prevNote != 0) {
        servos[prevNote - 1].servo.write(servos[prevNote - 1].openAngle);
      }
      // Press the current servo
      int currentNote = noteSequence[currentNoteIndex];
      if (currentNote != 0) {
        servos[currentNote - 1].servo.write(servos[currentNote - 1].pressAngle);
      }
    } else {
      // Release all servos for open string
      for (int i = 0; i < numServos; i++) {
        servos[i].servo.write(servos[i].openAngle);
      }
    }

    previousMillis = currentMillis; // Update the last actuated time
    currentNoteIndex++;
    if (currentNoteIndex >= numNotes) {
      currentNoteIndex = 0; // Restart the sequence
    }
  }
  }
}


Luke Nguyen – Week 11 Reading

I understand that the author has a somewhat critical view towards that Pictures Under Glass paradigm because it decreases the flexibility of the humans’ hands. However, I do not how to feel towards his plea that humans should work their brains and put them into research to advance themselves. I think we seem to have reached a stagnant point in human timeline where things can only be extrapolated from their descendants. Everything innovative has been done before, and now researchers are working on how to enhance their performance and utility. Until some innovations highly unimaginable, a teletransportation device might be a stretch but I’ll assume a device along the same line, are conceived, we just have to rely on what we have created and achieved.

Reading the rant article gets me to notice how much those who responded to the author’s rant really take most advanced inventions for granted. To them, these inventions, such as the iPad as one of the main targets of the debate, seem to be so high-tech that it is now serving them in their life, not helping them to progress in terms of working and perceiving the world, much less incentivizing them to contribute to developing such inventions further. I do agree that iPad seem more like a toy to children these days than an invention that encourages their curiosity and thinking. I also do agree some adults become man-children in succumbing to the urge of merely using it for not very useful purposes. To attract buyers’ attention, manufacturers need to make products that are advanced enough but still have simple instructions for easy wield. Some people fuss when a product has a steep learning curve.

Reading Reflections- Week 11

A Brief Rant on the Future of Interaction Design

In this reading, the author criticizes current ways we interact with technology, saying they’re not very imaginative and don’t use our skills well. He argues that technology should help us do things better by using our hands and bodies. For example, he talks about the importance of our hands by pointing out that current touchscreens don’t let us feel things, which is important for doing our day to day activities like cleaning, cooking, playing video games etc. The author wants us to think bigger and create technology that works more like our hands and bodies do, giving us more natural and useful ways to interact with it.

Reading this made me think about times when I’ve been frustrated with technology that doesn’t feel intuitive. I remembered struggling with a graphic design program that felt disconnected from how I usually use my hands. It’s interesting to think about how much we rely on our sense of touch in everyday tasks. The author’s idea of creating technology that feels more natural and responsive is something I want to learn more about.

I’m curious about how we can make technology feel more like using our hands. It makes sense that if technology felt more like real life, it would be much easier to use. I wonder what kinds of new inventions might come out of thinking this way, and how they could change the way we do things every day.

A follow-up article

The author’s first article made me think about how I get frustrated with technology that doesn’t feel like how I do things in real life. He said that technology should help us use our hands and bodies better, which I totally agree with. Now, reading the follow up article, I like their ideas even more.

In this follow-up article, he talks more about how technology should work with our natural abilities. He gave examples of how our hands and fingers do things easily, like opening a jar. It made me think about how technology could be more like that. I’m excited about the idea of technology feeling more like real life. But I also wonder how we can make it happen. How can we make technology that really helps us do things better? And how might these advancements impact not just our daily tasks, but also our creativity and well-being?

Assignment #10 – Code – ☆Low Beam High Beam☆

For this assignment, I was inspired by the lighting system in my car. The headlights can be turned on automatically, but my car can detect darkness/brightness to turn them off or on automatically. This means, for example, that if I enter a dark tunnel during the day, the headlights will automatically turn on.

So, I thought I’d create some sort of system where in darkness, a LED turns on, while in brightness, the LED turns off. Simultaneously, there is another LED which can be toggled on and off with a button. That would be in the case that the analog LED is not displaying the result that the user wants, and therefore the user can turn it on or off manually, replicating the headlight system in my car.

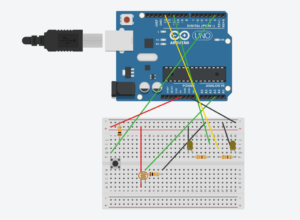
The components I used for this assignment were:

• 1 photoresistor

• 1 x button

• 2 x yellow LEDs

• 2 x 330 ohm resistors

• 2 x 10K ohm resistors

• Wires

• Arduino and Breadboard


My final setup looked like this:

IMG_3103

And this is my code!

int sensorLEDPin = 11;  // Photosensor LED
int buttonLEDPin = 13;  // Button LED
int buttonPin = 2;      // Pin connected to button
bool ledState = false;  // LED state; boolean variable
bool lastButtonState = HIGH;  // Last state of the button; boolean variable

void setup() {
  Serial.begin(9600);
  pinMode(sensorLEDPin, OUTPUT);  // Setting output pins
  pinMode(buttonLEDPin, OUTPUT);
  pinMode(buttonPin, INPUT_PULLUP);  // Setting the initial state of the button as HIGH
}

void loop() {
  int sensorValue = analogRead(A3);
    sensorValue = constrain(sensorValue, 390, 640);  // Constraining the sensor value
  int brightness = map(sensorValue, 390, 640, 255, 0);  // Mapping the sensor value to brightness so that when it is dark, LED is brighter
  analogWrite(sensorLEDPin, brightness);  // Uses the sensor to determine brightness

  int buttonState = digitalRead(buttonPin);  // Reading current state of the button (HIGh or LOW)
  if (buttonState == LOW && lastButtonState == HIGH) {
    ledState = !ledState;  // Toggling the state of Button LED
    delay(50); 
  }
  lastButtonState = buttonState;  // Updating the last state to be the current state

  digitalWrite(buttonLEDPin, ledState ? HIGH : LOW);  // Control LED based on button

  Serial.println(sensorValue);
  delay(100);
}


Finally, here is a schematic of my circuit:


Reading Reflection – Week 11

I have always imagined future technology, but the way the author describes the future was very eye-opening. I have always thought of a world with smart technology and screens but never considered that our hands could be essential tools for the future. I agree with the author that we perceive the world through touch. The hand is a tool used every day, helping us navigate our lives. However, today’s reading made me realize that the tactile experience is often overlooked when we use our everyday devices.

As children, we learned about different objects in this world through our tactile sense. This experience of learning through touching and using our hands and bodies has shaped who we are today. Thanks to these experiences, I know how to hold a cup, how to throw a ball, and I am familiar with the feelings of sand, rocks, and water. However, if the children of the future start learning things only through ‘pictures under glass,’ they will not be as well-rounded as we are now. They will miss out on knowing how wonderful the world is.

As the author emphasizes the importance of hands, I truly think that this overlooked issue should be addressed in the future with all possible technological advancements. I want to live in a world where my hands are useful. I want to live in a world where technology offers more than just ‘pictures under glass,’ and where I can truly feel the world.

Preliminary Final Project Planning

Game with Remote Controller

The game itself will be a basic platform game. I’ll program a character to move left, right, and perhaps jump on the screen using the control structure. The Arduino will be the bridge between the physical controller and the digital world.

Here’s how it works: on the Arduino side, I’ll connect tactile buttons (for actions like jumping, attacking) and a joystick (for movement) to the board’s input pins. The Arduino will then read the button presses and joystick movements, interpreting them as game commands. This information is then packaged into a simple data structure and transmitted to the computer via a serial connection.

On the p5.js side, running in the web browser, the program will be set up to receive this data stream from the Arduino. It will decode the data to understand which buttons are pressed and the joystick’s position. Based on these inputs, the p5.js code will control the movement and actions of the game character on the screen.

This project combines the familiar feel of physical buttons and a joystick with the creative potential of p5.js to create a unique interactive game experience. I am also thinking of expanding on this concept by adding more buttons, different control schemes using the joystick axes, and more intricate game mechanics, along the course.

Week 11: Alreem and Aysha’s Musical Instrument

For this week’s assignment, Aysha and I decided to create a simple musical instrument using buttons, potentiometer, and a piezo buzzer. Using these 3 items as our project’s main components allows us to showcase our concept of creative simplicity, in which we emphasize simple design but use our creativity to create some form of abstract output.  We wanted to utilize this concept as our main aim for this project which is to build an instrument that is not only easy to understand from both a schematic and user-design perspective, but also produce a diverse range of musical tones and rhythms. The musical instrument generates tunes when users press the designated buttons on the breadboard, allowing them to craft a unique tune of their own. The potentiometer offers users the ability to adjust the frequency of the tunes produced by the buttons, further enhancing their ability to personalize their musical experience. The hands-on and interactive approach to this project not only promotes personal creativity but also encourages users to experiment with different tone combinations, all within the framework of a simple and user-friendly design.

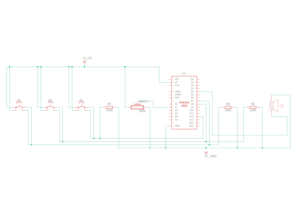
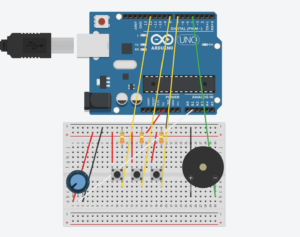
Below you can find the project’s schematic diagram:

PDF of Schematic here

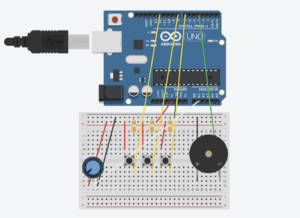
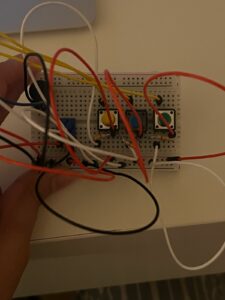
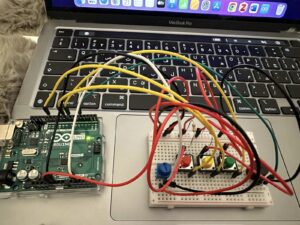
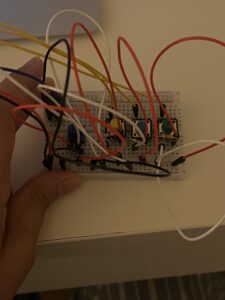
After finalizing our schematic diagram, we started to build the project using the arduino. The full list of the components used is as follows: 12 wires, 3 330 resistors, 3 buttons, potentiometer, and a piezo buzzer. These components are what helped ensure that the tunes are heard when the buttons are pressed and adjusted when the potentiometer is turned. 

You can see the fully complete project below

Some pictures:


When coding for this project, we struggled a bit with getting the certain tunes to be the way we wanted them. It was only when we tried and tested several different tunes for the different buttons did we get the rhythm/tunes we wanted for our project. Therefore, that is the part of the code that we are most proud of, which can be seen below:

#include "pitches.h"

// New melodies:
//For Button 1
int melodyPart1[] = {
  NOTE_C4, NOTE_E4, NOTE_G4
};

//For Button 2
int melodyPart2[] = {
  NOTE_A4, NOTE_C5, NOTE_E5
};

//For Button 3
int melodyPart3[] = {
  NOTE_G5, NOTE_E5
};

// Note durations: 4 = quarter note
int noteDurations[] = {
  4, 4, 4
};

//Function to play the tune on the buzzer, melody[] = array that containes the notes that need to be played, melodyLength = the number of notes in the melody array, tempoDelay = the delay (in milliseconds) between each note
void playMelody(int melody[], int melodyLength, int tempoDelay) {
// Initializes thisNote to 0, continues looping as long as thisNote is less than melodyLength, and increments thisNote after each loop
  for (int thisNote = 0; thisNote < melodyLength; thisNote++) {
//Calculates the duration of the current note
    int noteDuration = 1000 / noteDurations[thisNote];
//Plays the current note on the buzzer connected to buzzerPin
    tone(buzzerPin, melody[thisNote], noteDuration);

//Calculates the duration of the pause between the current note and the next note, adds 30% longer pause to the duration
    int pauseBetweenNotes = noteDuration * 1.30;
//Determine how long to wait before playing the next note
    delay(tempoDelay); // Use tempoDelay instead of fixed pauseBetweenNotes

//Stops the buzzer sound from playing the assigned tune by turning off
    noTone(buzzerPin);
  }
}

Overall, this project was an enlightening experience for both Aysha and me. It gave us the opportunity to combine our previous knowledge of working with circuits and programming to create something that is not only functional to users but also quite enjoyable to use. The project’s emphasis on simplicity resonated with us a lot as we wanted the project to speak for itself, which is why we are more than happy to see how by just using a few basic components, we could create a musical instrument of sorts that is capable of producing various tunes. That being said, we still feel like there are areas of improvement for our project. Next time, it would be interesting to explore adding additional features or potentially modes to our makeshift instruments, such as having more piezo buzzers in order for more than one tune to be played. Doing this might help enhance user-experience, creating a more well-rounded project. That being said, we are proud of how far we have come! Despite minor challenges we faced, we were able to collaborate together and successfully create a musical instrument that engages with the users in a personal way.

W11 Assignment- Alreem and Aysha’s Musical Instrument 🎶

For this week’s assignment, Alreem and I decided to create a simple musical instrument using buttons, potentiometer, and a piezo buzzer. Using these 3 items as our project’s main components allows us to showcase our concept of creative simplicity, in which we emphasize simple design but use our creativity to create some form of abstract output.  We wanted to utilize this concept as our main aim for this project which is to build an instrument that is not only easy to understand from both a schematic and user-design perspective, but also produce a diverse range of musical tones and rhythms. The musical instrument generates tunes when users press the designated buttons on the breadboard, allowing them to craft a unique tune of their own. The potentiometer offers users the ability to adjust the frequency of the tunes produced by the buttons, further enhancing their ability to personalize their musical experience. The hands-on and interactive approach to this project not only promotes personal creativity but also encourages users to experiment with different tone combinations, all within the framework of a simple and user-friendly design.

Below you can find the project’s diagrams:

Circuit Diagram

Schematic Diagram
After finalizing our schematic diagram, we started to build the project using the Arduino. The full list of the components used is as follows: 12 wires, 3 330 resistors, 3 buttons, potentiometer, and a piezo buzzer.  These components are what helped ensure that the tunes are heard when the buttons are pressed and adjusted when the potentiometer is turned. You can see the fully complete project below: 


When coding for this project, we struggled a bit with getting the certain tunes to be the way we wanted them. It was only when we tried and tested several different tunes for the different buttons did we get the rhythm/tunes we wanted for our final project. Therefore, that is the part of the code that we are most proud, which can be seen below:

#include "pitches.h"

// New melodies:
//For Button 1
int melodyPart1[] = {
  NOTE_C4, NOTE_E4, NOTE_G4
};

//For Button 2
int melodyPart2[] = {
  NOTE_A4, NOTE_C5, NOTE_E5
};

//For Button 3
int melodyPart3[] = {
  NOTE_G5, NOTE_E5
};

// Note durations: 4 = quarter note
int noteDurations[] = {
  4, 4, 4
};

//Function to play the tune on the buzzer, melody[] = array that containes the notes that need to be played, melodyLength = the number of notes in the melody array, tempoDelay = the delay (in milliseconds) between each note
void playMelody(int melody[], int melodyLength, int tempoDelay) {
// Initializes thisNote to 0, continues looping as long as thisNote is less than melodyLength, and increments thisNote after each loop
  for (int thisNote = 0; thisNote < melodyLength; thisNote++) {
//Calculates the duration of the current note
    int noteDuration = 1000 / noteDurations[thisNote];
//Plays the current note on the buzzer connected to buzzerPin
    tone(buzzerPin, melody[thisNote], noteDuration);

//Calculates the duration of the pause between the current note and the next note, adds 30% longer pause to the duration
    int pauseBetweenNotes = noteDuration * 1.30;
//Determine how long to wait before playing the next note
    delay(tempoDelay); // Use tempoDelay instead of fixed pauseBetweenNotes

//Stops the buzzer sound from playing the assigned tune by turning off 
    noTone(buzzerPin);
  }
}

Overall, this project was an enlightening experience for both Alreem and I. It gave us the opportunity to combine our previous knowledge of working with circuits and programming to create something that is not only functional to users but also quite enjoyable to use. The project’s emphasis on simplicity resonated with us a lot as we wanted the project to speak for itself, which is why we are more than happy to see how by just using a few basic components, we could create a musical instrument of sorts that is capable of producing various tunes. That being said, we still feel like there are areas of improvement for our project. Next time, it would be interesting to explore adding additional features or potentially modes to our makeshift instruments, such as having more piezo buzzers in order for more than one tune to be played. Doing this might help enhance user-experience, creating a more well-rounded project. That being said, we are proud of how far we have come! Despite minor challenges we faced, we were able to collaborate together and successfully create a musical instrument that engages with the users in a personal way. 

Week 11 reading: A brief rant on the future of interactive design

I always hear rants all about the future of technology, how it’s not the best for the coming generations. Nonetheless, this is the first time I come across an article that has such good arguments on this matter. The writer explicitly and very intricately shows us the objects that require the use of our hands. I found it impressive how he is so aware of the tactile sense, how our hands respond to each object with every movement. This would not be present when everything is within a tap or a swipe of a finger. While the writer makes valid points about this topic, I still don’t see how some of these objects will be replaced by technology in the future, such as opening a jar or drinking water.

While “Pictures under Glass” looks cool and all, I see why the writer is not happy with it. As shown in the video and the images below it, it seems too much, as if it is controlling people’s lives. It’s nice to have everything very easily accessible like that, but will become very disappointing once people forget how to do simplest things, like tying shoelaces.

Overall, I agree with almost everything that was mentioned in this article. We all use phones/laptops/other technologies in our daily lives and cannot imagine what today would look like without them. As the writer said, an iPad or an iPhone is not too bad for now, but will definitely be something to worry about in the future when they start to take over everything.

Week 11: Reading Response by Sihyun Kim

First of all, I found it very interesting that ‘A Brief Rant on the Future of Interaction Design’ and its follow-up article were written in 2011. In these readings, the author ‘rants’ about a ‘handheld device’ that ignores our hands, advocating instead for a dynamic medium that we can see, feel, and manipulate. It was intriguing how the author ranted about things that have now become a reality. When I first saw the article, I was surprised at how much the video entitled ‘Microsoft- Productivity Future Vision,’ which the author was quite skeptical about, resembles our present.

Both readings made me reflect on all my interactions with the ‘picture under the glasses.’ At the start of the article, I found myself disagreeing with the author’s argument, as I thought that all those simple interactions that the picture under the glasses offers are the ultimate form of interaction. As the author states, interactions with these devices do numb my fingers. However, I had never considered them numbing my tactile sense before reading this article.

Then, the sentence stating ‘My child can’t tie his shoelaces, but can use the iPad’ struck me. I perceived this sentence as a clear illustration of the consequences of tactile numbing while utilizing those ‘pictures under the glasses.’ While tying shoelaces isn’t a hard task, it does require tactile sensation. To young children, who are accustomed to iPads, they might not develop the tactile richness they should have. This could mean that these ‘pictures under the glasses’ might hinder people from developing the capabilities they ought to have.

As stated in one of the readings, I believe that a good tool should address human needs by amplifying human capabilities. However, in the case of those ‘pictures under the glasses,’ can we say that these are good tools in terms of interaction if they hinder us from realizing our full capabilities? Can they even be considered human-centric if they neglect the need for our hands to feel things?

These questions arose for me. Then, I came to realize that we tend to overlook the importance of considering holistic sensory engagement because of our pursuit of technological advancement and convenience. All those ‘pictures under the glasses’ technologies are indeed good tools in terms of their functionalities. They simplify and ease our lives and do amplify human capabilities. However, we have to sacrifice all the tactile richness of working with our hands, as the author said. Overall, reading this article made me realize that it is nearly impossible to have an ultimate tool which can be considered a ‘good’ tool in all aspects as there is always a drawback.