Week 11: Reading Responses + Final Proposal – Shereena AlNuaimi

Reading Response #1:

The article “A Brief Rant on the Future of Interaction Design” offers a convincing critique of the dominant touchscreen-centric methodology in interaction design, sometimes known as “Pictures Under Glass.” Using their knowledge of futuristic interface design, the author draws attention to the shortcomings of this paradigm, which underutilizes the tactile and manipulation capacities of human hands. The author challenges a reassessment of design goals by arguing in favor of interfaces that enhance rather than limit human capabilities. This emphasizes the significance of interfaces that physically connect with users.

The argument emphasizes how important physical and tactile contact is for human-computer interfaces and how modern designs frequently ignore these important details. Rather, the author sees a day when interfaces make use of the whole range of human skills to engage users in a more meaningful and multifaceted way. This forward-thinking perspective questions the present quo and exhorts technology and design stakeholders to give top priority to developing interfaces that are deeply in harmony with human experience, not just functional. This will enable hands-on technology to work together harmoniously, enabling us to reach our greatest potential.

Reading Response #2:

The author addresses criticisms and questions arising from their previous paper on interface design in this follow-up. The author makes it clear that their tirade was intended to draw attention to current issues rather than offer quick fixes, highlighting the necessity of continued investigation and learning in the field of interface design. The author makes the case for future innovation that goes beyond present technical constraints, supporting interfaces that more closely match human capabilities—all the while appreciating the usefulness of gadgets like iPhones and iPads.

The author dismisses styluses and physical keyboards as static instruments in response to criticisms of them, imagining future technologies that will be able to express and manipulate almost anything tangibly. Moreover, the author supports voice interfaces that encourage creativity and subtle involvement beyond basic voice commands, even while they acknowledge the usefulness of voice interfaces.  Furthermore, the author also addresses criticisms about brain and gestural interfaces, advising against designs that circumvent the body or interfere with proprioception. In the end, he rejects the idea that touchscreens are enough and advocates for interfaces that fully take into account the possibilities and difficulties of human interaction.

Final Proposal:

For my final project, I plan on incorporating something that’s been a huge part of my life, archery. I intend to create a game using P5JS and Arduino. With P5JS I plan to display a background of an archery target and make the arrow move left and right. With the Arduino, I plan to use pressure sensors and create a button so when the button is pressed the arrow stops and releases onto the target. I also plan on making it all a bit pixelated to make it look more like a game.

Week 11 Music – Saeed, Khalifa, Jihad

Concept:

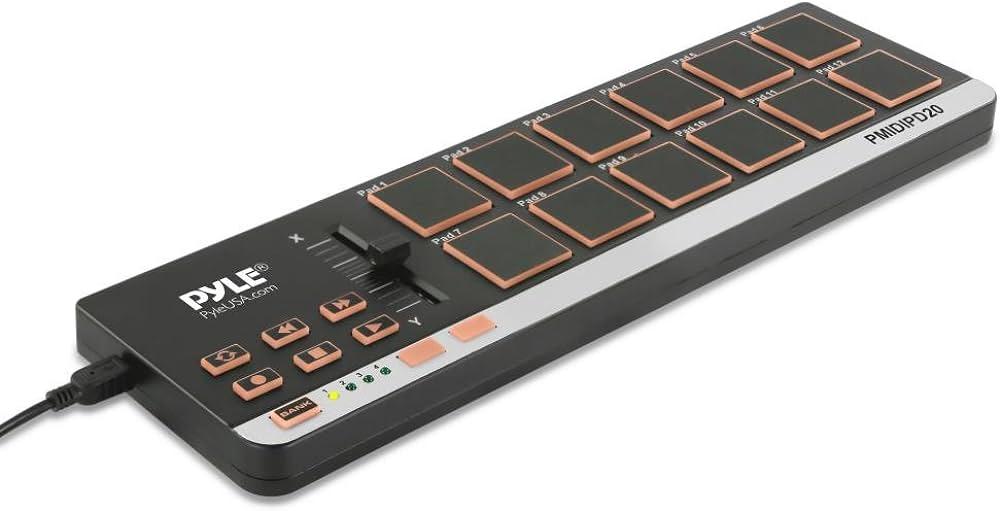
The concept of this project was to create a mini drum pad, or what is equivalent to one, with the hardware we have available. The device would use buttons to trigger different buzzer sounds, mimicking the functionality of a traditional drum pad. Each button on the device would correspond to a different sound, with the frequency of these sounds adjustable via a potentiometer. This allows the user to modify the pitch of the tones.
Code:

// Defining pins assignments for buttons and buzzers
const int buttonPin1 = 2;
const int buttonPin2 = 3;
const int buttonPin3 = 4;
// Coded with the Aid of ChatGPT
const int buttonPin4 = 5; // Monitoring and playbacks button
// Coded with the Aid of ChatGPT
const int buzzerPin1 = 8;
const int buzzerPin2 = 9;
const int buzzerPin3 = 10;
const int potPin = A0; // Potentiometer connected to A0 for frequency control

// Variables to manage button states and debounce timing
int buttonState1 = 0;
int lastButtonState1 = 0;
int buttonState2 = 0;
int lastButtonState2 = 0;
int buttonState3 = 0;
int lastButtonState3 = 0;
int buttonState4 = 0;
int lastButtonState4 = 0;

unsigned long lastDebounceTime1 = 0;
unsigned long lastDebounceTime2 = 0;
unsigned long lastDebounceTime3 = 0;
unsigned long lastDebounceTime4 = 0;
unsigned long debounceDelay = 50; // Debounce delay in milliseconds

// Struct to hold buzzer activation data including the pin and frequency
struct BuzzerAction {
  int buzzerPin;
  int frequency;
};

// Coded with the Aid of ChatGPT
BuzzerAction record[100]; // Array to store each buzzer activation
int recordIndex = 0; // Index for recording array
//Coded with the Aid of ChatGPT

void setup() {
  // Initialize all button and buzzer pins
  pinMode(buttonPin1, INPUT);
  pinMode(buttonPin2, INPUT);
  pinMode(buttonPin3, INPUT);
// Coded with the Aid of ChatGPT
  pinMode(buttonPin4, INPUT);
// Coded with the Aid of ChatGPT
  pinMode(buzzerPin1, OUTPUT);
  pinMode(buzzerPin2, OUTPUT);
  pinMode(buzzerPin3, OUTPUT);
  pinMode(potPin, INPUT); // Setups potentiometer pin as input
}

void loop() {
  // Reads current state of buttons
  int reading1 = digitalRead(buttonPin1);
  int reading2 = digitalRead(buttonPin2);
  int reading3 = digitalRead(buttonPin3);
// Coded with the Aid of ChatGPT
  int reading4 = digitalRead(buttonPin4);
// Coded with the Aid of ChatGPT
  int potValue = analogRead(potPin); // Reads potentiometer value
  int frequency = map(potValue, 0, 1023, 200, 2000); // Maps potentiometer value to frequency range

  // Handle button 1 press and recording
  debounceAndRecord(reading1, &lastButtonState1, &buttonState1, &lastDebounceTime1, buzzerPin1, frequency);

  // Handle button 2 press and recording
  debounceAndRecord(reading2, &lastButtonState2, &buttonState2, &lastDebounceTime2, buzzerPin2, frequency);

  // Handle button 3 press and recording
  debounceAndRecord(reading3, &lastButtonState3, &buttonState3, &lastDebounceTime3, buzzerPin3, frequency);

  // Handles button 4 for playback
  if (reading4 != lastButtonState4) {
    lastDebounceTime4 = millis();
  }
  if ((millis() - lastDebounceTime4) > debounceDelay) {
    if (reading4 != buttonState4) {
      buttonState4 = reading4;
      if (buttonState4 == HIGH) {
        for (int i = 0; i < recordIndex; i++) {
          // Play each recorded buzzer action with the specific frequency recorded
          tone(record[i].buzzerPin, record[i].frequency, 200);
          delay(250); // Short delay between each buzzer action for clarity
        }
        recordIndex = 0; // Resets record index after playback
      }
    }
  }

  // Update last button states for next loop iteration
  lastButtonState1 = reading1;
  lastButtonState2 = reading2;
  lastButtonState3 = reading3;
  lastButtonState4 = reading4;
}
// Coded with the Aid of ChatGPT
// Function to handle button debouncing and recording buzzer actions
void debounceAndRecord(int reading, int *lastButtonState, int *buttonState, unsigned long *lastDebounceTime, int buzzerPin, int frequency) {
  if (reading != *lastButtonState) {
    *lastDebounceTime = millis(); // Reset debounce timer
  }
  if ((millis() - *lastDebounceTime) > debounceDelay) {
    if (reading != *buttonState) {
      *buttonState = reading; // Updates button state
      if (*buttonState == HIGH && recordIndex < sizeof(record) / sizeof(record[0])) {
        record[recordIndex++] = {buzzerPin, frequency}; // Records the buzzer activation
        tone(buzzerPin, frequency, 200); // Plays buzzer at recorded frequency
      }
    }
  }
  *lastButtonState = reading; // Updates last button state for debouncing
// Coded with the Aid of ChatGPT
}


Hardware Configuration: The system is designed with four button inputs and three buzzer outputs. Additionally, a potentiometer is used to control the frequency of the buzzer sounds. Button Functionality: Buttons 1 to 3 are connected to buzzers and are responsible for triggering sounds with variable frequencies determined by the potentiometer. Button 4 is designated for playback. It plays back a sequence of sounds that have been recorded based on earlier interactions with buttons 1 to 3.

Frequency Control: The frequency of the sounds is dynamically adjusted using a potentiometer. The analog value from the potentiometer is mapped to a specified frequency range (200 Hz to 2000 Hz), which determines how the buzzers sound.

Debouncing: To ensure reliable button press detection without noise interference, the code implements debouncing logic. This involves measuring the time since the last button state change and updating the state only if this interval exceeds a predefined threshold (50 milliseconds).

Recording and Playback (Aided by ChatGPT)

Recording: When a button (1 to 3) is pressed, the action (which buzzer is activated and at what frequency) is recorded in an array. This includes storing both the pin of the buzzer and the frequency at which it was activated.

Playback: When button 4 is pressed, the system iterates over the recorded actions and plays them sequentially. Each action triggers the corresponding buzzer to sound at the recorded frequency for a short duration.

Loop and Functions: The main loop continuously checks the state of each button and the potentiometer, updating the frequency accordingly. A helper function, debounceAndRecord, is used to handle the logic

Video of Project:

Reflection and ideas for future work or improvements:

Integrating a small display screen would significantly improve its functionality, further enhancing the project. This screen would provide real-time visual feedback on button presses and frequency outputs, allow users to scroll through and select different sounds or presets, and serve as a simple interface for directly programming the device.

The potential for further development and refinement holds exciting prospects. The integration of a display screen and the addition of more customizable buttons are immediate steps that will enhance the device’s usability and versatility. Further innovations could include wireless connectivity for easy integration with other music production software or the addition of sensors to enable gesture-based controls, which would offer an even more dynamic and immersive user experience.

Several key insights stand out after reflecting on what this project has taught us. First, the practical challenges of hardware interfacing taught us the importance of robust design and a solid plan for creating it. There is also a need for effective wire management and physical housing to enhance device durability and aesthetics.

Looking Ahead:

Overall, this project resulted in a functional and entertaining product and served as a significant learning experience, underscoring the importance of patience, precision, and creativity in making it happen. These lessons will guide further improvements and innovations in our future projects.

Project Proposal – Stefania Petre

Hey there!

For this final, I have imagined stepping into a world where art and technology intertwine to create something truly special.

Envision an interactive space where art and technology fuse, transforming physical gestures into a cascade of colors on a digital canvas. My project is an invitation to express creativity through motion, as participants use a paintbrush to navigate a symphony of shapes and hues. This is not just an artwork but an experience that captures the essence of movement and translates it into a personalized digital masterpiece.

Arduino Part:

At the interaction’s core lies the Arduino Uno, paired with a ZX Distance and Gesture Sensor. The sensor is adept at tracking the proximity of the paintbrush and the subtle hand gestures of the artist.

  • Input: Proximity data and gesture commands from the ZX Sensor.
  • Output: Serial communication to relay the sensor data to the computer running the P5 sketch.
  • Data to P5: Real-time Z-axis data for proximity (distance of the hand or brush from the sensor) and X-axis data for lateral movement, along with gesture detections (swipes, taps).
  • From P5: Instructions may be sent back to calibrate gesture sensitivity or toggle the sensor’s active state.

P5JS Part:

On the digital front, P5 will act as the canvas and palette, responsive and mutable. It will process the incoming data from the Arduino, converting it into an array of colors and movements on the screen.

  • Receiving Data: Interpretation of proximity and gesture data from the Arduino.
  • Processing Movements: Real-time mapping of hand movements to strokes and splashes of color, varying in intensity and spread on the digital canvas.
  • Visual Feedback: Dynamic visual changes to represent the flow and dance of the user’s movements.
  • To Arduino: Signals for adjusting the ZX Sensor settings based on real-time performance and user experience feedback.

So far, this is how the painting should look like:


Development and User Testing:

The ZX Distance and Gesture Sensor is now integrated with Arduino. The creation of a smooth data flow to the P5 programme is the urgent objective. The system should react to hand motions by displaying appropriate visual changes on the screen by the time of user testing the following week. Assessing user interaction—specifically, how natural and fulfilling it is to paint in midair—will be largely dependent on this initial prototype. The documentation of user testing will involve multiple techniques such as gathering feedback from participants, recording interactions on video, and analysing the responsiveness of the system.


“Overengineered Guitar” by Pi Ko and Darko Skulikj

Introduction

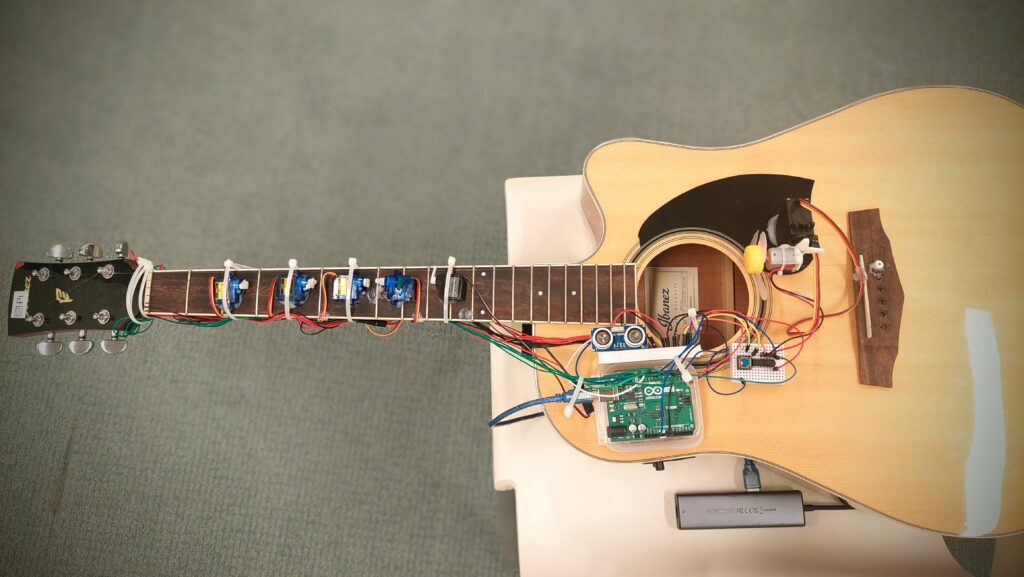
This is the “Overengineered Guitar” by Pi Ko and Darko Skulikj.

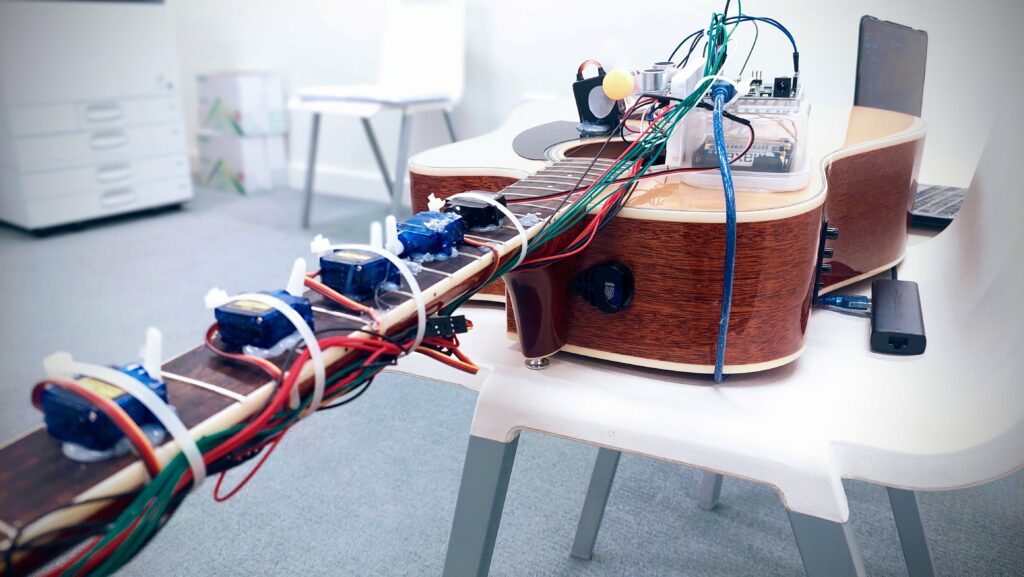
We massacred an acoustic guitar with a single string into an automated musical device that can be played akin to a theremin.

Concept – A Cringy Skit

Darko does not know how to play the Pirates of the Caribbean theme song on guitar, so he decided to turn to Arduino for help.

Demonstration and Media

The video demo of the instrument is shown below.

The sound sucks 😡. Moral of the story : Pi should play the guitar instead of the machine 🫵😠🎸.

Concept

In principle, the “Overengineered Guitar” is a one-stringed setup acoustic guitar for playing by using an array of sensors and servo motors. It has a push button digital sensor and an analog ultrasonic sensor. The main idea is to control the musical notes by hand over the ultrasonic sensor. Then a propeller does the mechanical plucking, controlled through a push button.

This provides the user the opportunity to play the predefined sequence from “He’s a Pirate” from Pirates of the Caribbean over and over again.

Components

  • Arduino Uno: Serves as the main controlling box for all the sensors and actuators used.
  • Servo Motors (5x): Five servo motors are being attached all across the fretboard, pressing their respective frets according to the desired note.
  • Ultrasonic Sensor: Used to toggle the press on the fretboard by the motors.
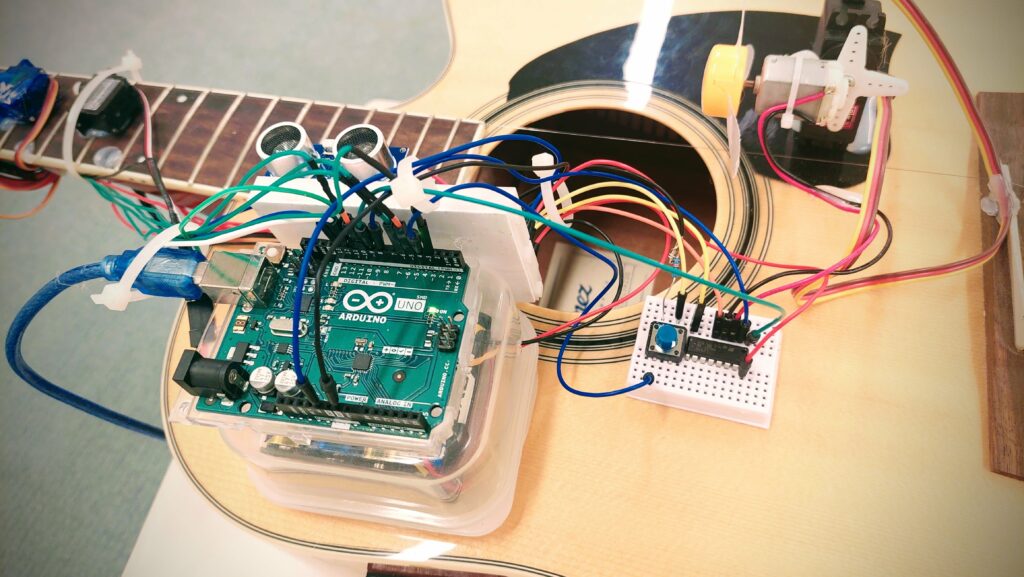
  • Digital pushbutton: It is pressed down to start up the propeller, which plucks the string.
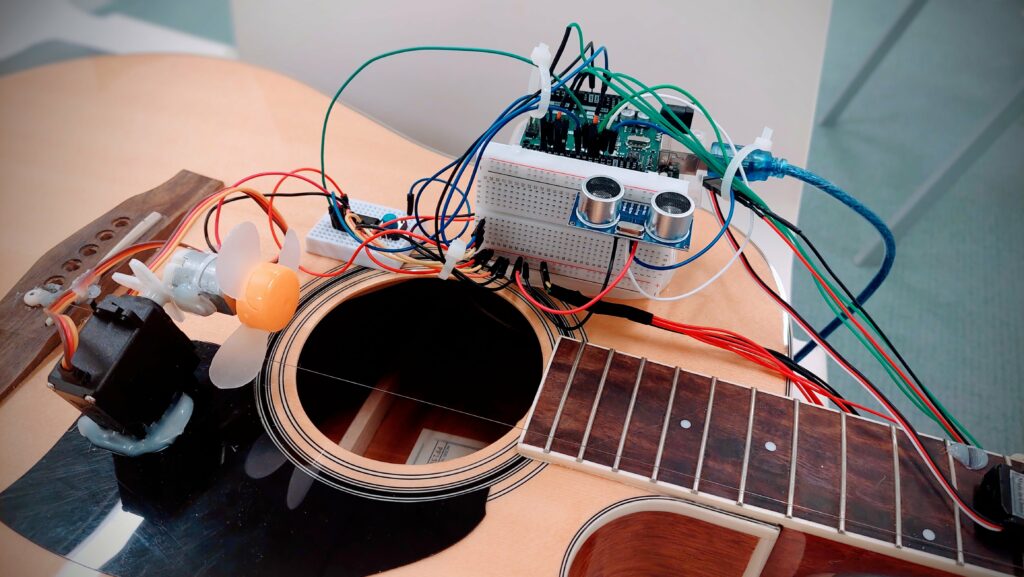
  • Propeller motor and DC Motor: It gives the mechanical pluck on the guitar string.
  • L293D motor driver IC: Takes care of the high current requirement for the propeller.
  • External Power Supply: This ensures that the system power is being properly distributed among the various components without having to necessarily overpower the Arduino.

(Arduino, ultrasonic sensor, switch and L293D IC)

(Propellor on DC Motor)

The motors are attached to the arduino as below.

Arduino Pin Motor/Music Note ID Open Servo Angle Press Servo Angle
11 5 180 0
10 4 0 180
6 3 180 0
5 2 180 0
3 1 180 0
N/A 0 (open string) N/A (no servo) N/A (no servo)

Challenges

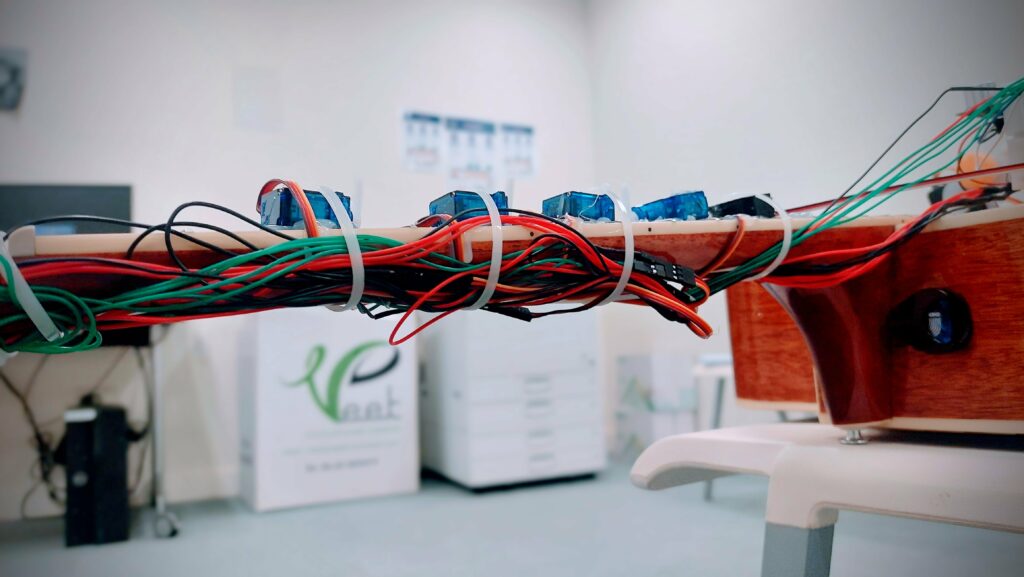
Our main challenge involved managing power to ensure that each component the required current. Also, the wiring was a challenge since there were a lot of wires.

(Wire management 😎)

Task Allocation

Darko took care of the wiring and code for the ultrasonic sensor and the switch using non-blocking code. The rest is filled by Pi.

Code

The code is below. It has debouncing to guarantee reliable operation of the switch.

#include <Servo.h>

// Define a struct to hold servo data
struct ServoData {
  int pin;
  int openAngle;
  int pressAngle;
  Servo servo;
};

// Create an array of servos for each note
ServoData servos[] = {
  {3, 180, 0}, // Note 1
  {5, 180, 0}, // Note 2
  {6, 180, 0}, // Note 3
  {10, 0, 180}, // Note 4
  {11, 180, 0} // Note 5
};
const int numServos = sizeof(servos) / sizeof(ServoData);

// Note durations in milliseconds
int noteDurations[] = {500, 500, 2000, 500, 2000, 500, 1000, 500, 500, 1000};
int noteSequence[] = {0, 1, 2, 3, 4, 5, 3, 2, 1, 2};
const int numNotes = sizeof(noteSequence) / sizeof(int);

unsigned long previousMillis = 0;  // Stores last update time
int currentNoteIndex = 0;          // Index of the current note being played

// Push Button and Propeller control
const int buttonPin = 4; // Pushbutton pin
const int ledPin = 13; // LED pin (for debugging)
int enA = 9; // Enable pin for motor
int in1 = 8; // Motor control pin
int buttonState = 0; // Current button state
// Define the pins for the ultrasonic sensor
const int trigPin = 13;
const int echoPin = 12;

// Define variables for the duration and the distance
long duration;
int distance;


void setup() {
  // Setup for servos
  for (int i = 0; i < numServos; i++) {
    servos[i].servo.attach(servos[i].pin);
    servos[i].servo.write(servos[i].openAngle);
  }

 // Define pin modes for ultrasonic
  pinMode(trigPin, OUTPUT); // Sets the trigPin as an Output
  pinMode(echoPin, INPUT); // Sets the echoPin as an Input
  // Setup for button and propeller
  pinMode(ledPin, OUTPUT);
  pinMode(buttonPin, INPUT);
  pinMode(enA, OUTPUT);
  pinMode(in1, OUTPUT);
  analogWrite(enA, 255); // Set propeller speed
  digitalWrite(in1, LOW); // Initially disable propeller
}

void loop() {
  unsigned long currentMillis = millis();
  // Darko - Switch
  // Improved button reading with debouncing
  int readButton = digitalRead(buttonPin);
  if (readButton != buttonState) {
    delay(50); // Debounce delay
    readButton = digitalRead(buttonPin);
    if (readButton == HIGH) {
      digitalWrite(ledPin, HIGH);
      digitalWrite(in1, HIGH); // Enable propeller
    } else {
      digitalWrite(ledPin, LOW);
      digitalWrite(in1, LOW); // Disable propeller
    }
    buttonState = readButton;
  }

  // Darko - Ultrasonic
  // Clear the trigPin condition
  digitalWrite(trigPin, LOW);
  delayMicroseconds(2);
  // Sets the trigPin HIGH (ACTIVE) for 10 microseconds
  digitalWrite(trigPin, HIGH);
  delayMicroseconds(10);
  digitalWrite(trigPin, LOW);
 
  // Reads the echoPin, returns the sound wave travel time in microseconds
  duration = pulseIn(echoPin, HIGH);
 
  // Calculating the distance
  distance = duration * 0.034 / 2; // Speed of sound wave divided by 2 (go and back)
 

  if(distance<=12){

  // Handling servo movements based on timing
  if (currentMillis - previousMillis >= noteDurations[currentNoteIndex]) {
    // Move to the next note
    if (noteSequence[currentNoteIndex] != 0) {
      // Release the previous servo, if any
      int prevNote = (currentNoteIndex == 0) ? -1 : noteSequence[currentNoteIndex - 1];
      if (prevNote != -1 && prevNote != 0) {
        servos[prevNote - 1].servo.write(servos[prevNote - 1].openAngle);
      }
      // Press the current servo
      int currentNote = noteSequence[currentNoteIndex];
      if (currentNote != 0) {
        servos[currentNote - 1].servo.write(servos[currentNote - 1].pressAngle);
      }
    } else {
      // Release all servos for open string
      for (int i = 0; i < numServos; i++) {
        servos[i].servo.write(servos[i].openAngle);
      }
    }

    previousMillis = currentMillis; // Update the last actuated time
    currentNoteIndex++;
    if (currentNoteIndex >= numNotes) {
      currentNoteIndex = 0; // Restart the sequence
    }
  }
  }
}


Raya Tabassum: Reading Response 6

Bret Victor’s “A Brief Rant on the Future of Interaction Design” raises some provocative questions about the trajectory of technology design. Why are we limiting ourselves to interactions with technology through mere touches on glass, when the human body has such a wide range of expressive capabilities? Victor challenges us to consider: What if we could design interactions that fully utilize the intricate ballet of our everyday physical movements? How might we transform our interactions with technology if we thought beyond the glass to harness the full potential of our tactile and kinesthetic intelligence? This essay pushes us to rethink how future technologies might enhance rather than restrict our natural interactions with the world. He champions a more expansive view that utilizes the full range of human capabilities, suggesting that true innovation in interaction design should engage more than just our fingertips — it should involve our entire bodies.
In his follow-up he addresses feedback from his initial “rant.” He clarifies that his critique was meant to highlight the limitations of current interface designs, like “Pictures Under Glass,” and to inspire research into more dynamic, tactile interfaces. He defends the potential of iPads while advocating for more dynamic, tactile mediums for interaction. Victor emphasizes that voice, gesture, and brain interfaces still miss crucial tactile feedback, and points out the dangers of technology that ignores the body’s natural abilities. He calls for technology to adapt to human capabilities, rather than bypass them.

Final Project Ideas

Idea 1: Concert

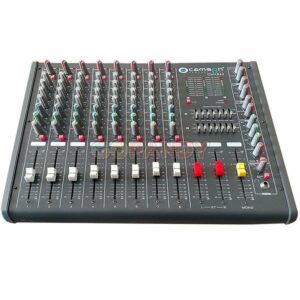
For this project, the user can design a concert environment. I am thinking of designing the Arduino and the breadboard as the mixer for controlling light and sound.

  • The photocell will be used to control the brightness of the room.
  • The potentiometer will be used to control the volume of the music.
  • A button will be used to switch songs.
  • A button will be used to change the color of the lights.
  • A speaker will be used to project the sound.
  • p5 will illustrate the concert setting.

This is what inspired me:

Idea 2: Musical Instruments

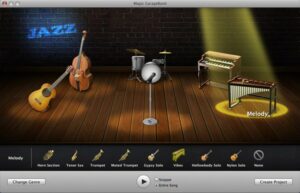
For this project, I am thinking of creating musical instruments. Like “Garageband” on Apple devices, I am thinking of providing a space for the users to play various instruments.

  • The potentiometer will be used to control the volume of the sound.
  • Buttons will be used as note keys.
  • A speaker will be used to project the sound.
  • p5 will illustrate the instruments on the screen and allow the users to select instruments.

This is “Garageband” that inspired me:


Raya Tabassum: Final Project Primary Concept

I’m thinking of building a “Gesture-Based Musical Interface” for final which will be an interactive system that allows users to create music through hand movements. Combining Arduino’s sensing capabilities with P5.js’s graphical and sound processing, this project will transform physical gestures into a live audio-visual performance. It aims to provide an intuitive way for users to interact with technology and art. I’ll use two ultrasonic sensors to detect the hand movements in X-axis and Y-axis, speakers to output the generated musical notes, and webcam to visualize the movements on p5.

Week 11: Final Project Concept

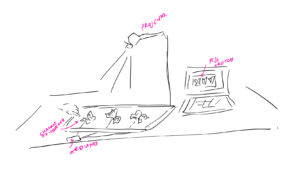
For my final project, I would like to revisit generative art – especially since I really enjoyed the immersive nature and the aesthetic satisfaction that comes with making such works. And to stay true to the original thread that ran through a lot of my work this semester, I am deciding to once again incorporate butterflies. Since my midterm project was essentially a game, I want to pivot toward making an artistic piece. Thanks to Professor Aaron, who helped me sift through a bunch of ideas and finalize an initial concept, I am currently set on building a miniature installation with butterflies whose movements or shapes are activated/manipulated through touch. Essentially, I would make (perhaps fabricate, if time allows) butterflies and disperse them on a physical canvas. Each butterfly on the physical canvas would be connected via conductive material to a touch capacitive sensor. Using p5.js, I would create and control the butterflies’ shapes, colors, and animations. The p5.js sketch would then be projected and mapped onto the physical canvas. Sensory touch signals relayed by the Arduino would trigger a change in the animation/shape/color of the touched butterfly on the p5.js sketch and, by extension, the physical canvas.

Here’s a very rough visualization of what I have in mind:

Week 11 – Reading Reflection

While Bret Victor’s critique offers valuable insights into the shortcomings of current interaction design, it overlooks some practical challenges in implementing his proposed solutions. While advocating for whole-hand interactions and universal design is commendable, transitioning from fingertip-centric interfaces to more complex tactile and gestural inputs may prove difficult in practice. In this case, designers would need to navigate usability concerns and ensure that new interfaces remain accessible to all users, including those with disabilities.

Moreover, when Victor emphasizes the importance of grounding interaction design in human biology, his vision may overlook the rapid evolution of technology and user expectations. While incorporating aspects of human behavior is essential, it’s also crucial to balance this with advancements in digital capabilities and user preferences. Striking this balance requires careful consideration and experimentation to ensure that technology remains both intuitive and innovative.

Raya Tabassum: Digital Piano with Percussion Effects

Concept:

The Digital Piano with Percussion Effects is an innovative musical instrument that blends traditional piano elements with modern sensor technology to create a unique and interactive musical experience. This project uses an array of digital push buttons connected to an Arduino board to simulate a piano keyboard, where 8 different buttons trigger 8 distinct musical notes (‘C D E F G A B C#’ or ‘Sa Re Ga Ma Pa Dha Ni Sa’). In addition to the keyboard, the instrument incorporates an ultrasonic distance sensor, which introduces a dynamic layer of percussion sounds. These sounds vary depending on the distance of the player’s hand. Furthermore, a potentiometer is integrated to alter the pitch of the notes dynamically, offering the ability to manipulate the sound palette expressively.

Components Used:

  • Arduino Uno
  • Breadboard (x2)
  • Jumper Wires
  • Piezo Buzzer (x2)
  • Push Buttons (x8)
  • Potentiometer
  • 10k ohm resistors (x8)
  • Ultrasonic Sensor

Video:

Code:

int buzzerPin = 12;
int buzzer2 = 13;
int potPin = A0;
int keys[] = {2, 3, 4, 5, 6, 7, 8, 9};
// Frequencies for notes (C4 to C5)
int notes[] = {262, 294, 330, 349, 392, 440, 494, 523}; 
int trigPin = 10;
int echoPin = 11;
int bassDrum = 200; 
int snare = 250; 
int hiHat = 300;


void setup() {
  pinMode(buzzerPin, OUTPUT);
  pinMode(buzzer2,OUTPUT);
  pinMode(2,INPUT);
  pinMode(3,INPUT);
  pinMode(4,INPUT);
  pinMode(5,INPUT);
  pinMode(6,INPUT);
  pinMode(7,INPUT);
  pinMode(8,INPUT);
  pinMode(9,INPUT);
  pinMode(trigPin, OUTPUT);
  pinMode(echoPin, INPUT);
  Serial.begin(9600);
}

void loop() {
  int potValue = analogRead(potPin);
  int volume = map(potValue, 0, 1023, 0, 255); // Map the potentiometer value to a volume range

  // Measure distance using the ultrasonic sensor
  digitalWrite(trigPin, LOW);
  delayMicroseconds(2);
  digitalWrite(trigPin, HIGH);
  delayMicroseconds(10);
  digitalWrite(trigPin, LOW);
  long duration = pulseIn(echoPin, HIGH);
  int distance = duration * 0.034 / 2; // Calculate the distance

  Serial.print(distance);
  Serial.println(" cm");


  bool isAnyButtonPressed = false;
  for (int i = 0; i < 8; i++) {
    int modifiedNote = map(potValue, 0, 1023, notes[i] / 2, notes[i] * 2);
      if (digitalRead(keys[i]) == HIGH) {
          tone(buzzerPin, modifiedNote, 100);
          isAnyButtonPressed = true;
          break; // Stop the loop once a button is found pressed
      }
  }

  if (!isAnyButtonPressed) {
    noTone(buzzerPin);
  }
  if (distance < 10) {
    tone(buzzer2, bassDrum, 100);
  } else if (distance >= 10 && distance < 20) {
    tone(buzzer2, snare, 100);
  } else if (distance >= 20 && distance < 30) {
    tone(buzzer2, hiHat, 100);
  } else {
    noTone(buzzer2);
  }
    delay(100);
}

In the loop, the program first reads the potentiometer value and uses it to modify the frequency of the piano notes. Depending on the button pressed, it plays a modified note frequency. If no buttons are pressed, it stops any ongoing tone. Depending on the distance detected, it chooses a percussion sound to play, simulating a drum kit with different sounds for different ranges.

Work Process and Challenges: 

For this assignment I was paired up with Snehil. We both worked together to brainstorm the primary idea. First we only had the concept to build the digital piano with push buttons and then we combined the ultrasonic sensor to measure distance and make the percussion sounds to level up the musical instrument. For further improvement Snehil made the potentiometer work to change the pitch of the notes. We were first having trouble to make the ‘for loop’ work for the push buttons to make sound. We were also at first using only one piezzo for the whole instrument and the piano wasn’t working then. So we had to troubleshoot many times to fix those problems.

Final instrument with the potentiometer working: