Week 11 Production Assignment – Sci-Fi Sound Effects

For this assignment, my point of departure was to experiment with creating a sense of range and tonality with the buzzer as opposed to producing singular notes. I feel that the easiest two options would have been to do so by linking the frequency (pitch) produced by the buzzer to either a light sensor or an ultrasonic sensor. As we’ve seen in class, light is very difficult to control, so I opted for the latter.

As the input taken from the ultrasonic sensor updates quickly and at small increments, the sound produced by the buzzer becomes interestingly distorted and non-standard. To me, it suited the aesthetic of a suspenseful scene in a Sci-Fi thriller film. This led me to consider adding a more mechanical sound to complement the buzzer and create an almost chaotic result. To do this, I incorporated the use of a servo motor which varies the BPM of its 180 degree movement based on the same input taken from the ultrasonic sensor.

Ultimately, I enjoyed this assignment as it acts as an example that ideas can come naturally through experimentation. One aspect I feel could be developed is the application of the servo itself as I could potentially vary the surfaces that it rotates on (as briefly shown in the video) to produce different results.

Below is the code, a video of the circuit with just the buzzer and a video of the complete circuit.

#include <Servo.h>

const int trigPin = 9;
const int echoPin = 10;
const int buzzerPin = 11;
const int servoPin = 6;

Servo servoMotor;
int servoAngle = 0;
unsigned long previousServoTime = 0;
unsigned long servoInterval = 0;

void setup() {
  pinMode(trigPin, OUTPUT);
  pinMode(echoPin, INPUT);
  pinMode(buzzerPin, OUTPUT);
  servoMotor.attach(servoPin);
  Serial.begin(9600);
}

void loop() {
  // Send ultrasonic pulse
  digitalWrite(trigPin, LOW);
  delayMicroseconds(2);
  digitalWrite(trigPin, HIGH);
  delayMicroseconds(10);
  digitalWrite(trigPin, LOW);

  // Measure the time it takes for the pulse to return
  long duration = pulseIn(echoPin, HIGH);

  // Calculate distance in centimeters
  float distance = duration * 0.034 / 2;

  // Map distance to BPM (Beats Per Minute)
  int bpm = map(distance, 0, 100, 100, 200);

  // Move the servo motor back and forth
  unsigned long currentMillis = millis();
  if (currentMillis - previousServoTime >= servoInterval) {
    servoMotor.write(servoAngle);
    previousServoTime = currentMillis;
    servoInterval = 60000 / bpm; // Convert BPM to interval in milliseconds

    // Increment or decrement the servo angle
    if (servoAngle == 0) {
      servoAngle = 180;
    } else {
      servoAngle = 0;
    }
  }

  // Output distance and BPM to the serial monitor
  Serial.print("Distance: ");
  Serial.print(distance);
  Serial.print(" cm, BPM: ");
  Serial.print(bpm);
  Serial.println(" beats per minute");

  // Generate buzzer tone based on frequency
  int frequency = map(distance, 0, 100, 100, 500);
  tone(buzzerPin, frequency);

}


Final Project Proposal – Selfies Only

As a photographer, I am inclined towards lens-based imaging. Because of this, the use of computer vision piqued my interest after being introduced to us earlier in the semester. In turn, I have decided to center my final project around the use of computer vision

Concept:

I will look to create a digital mirror which is, at first, heavily abstracted and almost visually illegible. The user is prompted to take a picture of themselves with their phone using the mirror. After raising their phone, the program will detect its presence and make the digital mirror clearer.

The work aims to highlight the common subconscious desire many of us have to take pictures of ourselves in reflective surfaces, in which case the affordance of any reflective surface becomes that of a mirror. Based on this, I present this work with the question – what if there was a mirror made only to take selfies with.

p5js and Arduino:

Naturally the computer vision, programming and ml5 implementation will all happen on p5js. I initially struggled to come up with how Arduino can be incorporated. However, considering the work’s purpose is to allow users to take selfies, I thought of wiring up a ring light (or any small, soft light source) to the Arduino in order to enhance the user’s experience. This light would be turned on only if a phone is detected by the program. In order to ensure functionality, I would need to connect the circuit to a stronger source of electricity than my computer. I also need to look into the different options that would allow me to connect the light to the Arduino physically.

Final Project Proposal: Become a sailor of one of the most fun small boats in the world!

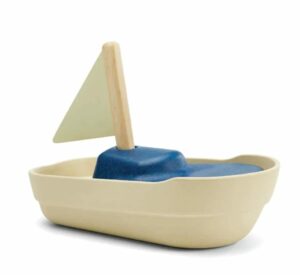
For my Final Project I have thought about the Idea of creating a small boat which we would be able to control with our hands.

Okay okay I agree that is very very plain but stay with me while I explain exactly what my plan is and how I will combine the Arduino with p5.js.

My idea is to 3d print a boat bed which would accommodate the Arduino and some batteries which would be used to power a DC Motor which would have a fan on it. I want to attach the DC Motor to a Servo motor just so I am able to change directions easier.

For controls I want to use a specific Ultra-Sonic sensor which we have available in the Connect2 booking system. This will determine if the boat will go to the left or right, faster or slower.

Finally, by connecting the Arduino to p5js. I’m planning to display the speed, and direction of the boat –  kind of like a dashboard in a car.

Final Project Idea | Moving Jigglypuff ?

Concept

This started off as a joke. A friend won a Jigglypuff at a fair and we joked how attaching wheels and a speaker to it would be amazing and how I should do it for my IM Final project.

So, I have decided I will do it for my IM Final Project.

I want to build A moving robot that has a Jigglypuff (which is a Pokemon) plushy at the top . It uses a gesture sensor to detect gestures and respond accordingly. The robot can be controlled through the laptop via P5. A speaker will be used to produce sounds depending on the ‘mood’ the JigglyPuff is currently in .


Some sensors that I plan on experimenting with and seeing what works :

  1. Infrared distance sensors (to check for collisions)
  2. Gesture sensors
  3. Speakers apart from the buzzer
  4. Some kind of camera module (or Go Pro that will stream video to P5)
  5. Maybe a makey makey that would allow sound response to certain touches. (such as if you pat the head of JigglyPuff)
  6. Maybe a mini-projector to project something’s on command

Initial Things to do

  1. Think of a container for the JigglyPuff. What kind of container will look good ? A large 3-D printed bowl? A decorated Wooden Cart ? The Whole module needs a reliable design and I would like to avoid sewing stuff into the plush.  Since it is a rounded plushy, placing components on top of it is not very practical.
  2. Code for the movement of the container.
  3. Check out gesture sensor and code if-else statements
  4. Attach a camera module to transfer input to P5.
  5. Get different sound clips from The Pokemon series for different emotions of JigglyPuff that are to be played for different gestures.
  6. Use Posenet to detect poses ?

Expected challenges

  1. Designing the container
  2. Connecting video feed to P5
  3. Coding for movement in P5
  4. May need multiple microcontrollers for the video feed if connecting to a goPro does not work
  5. Finding the sound clips and a speaker that can play them


Week 11 Reading Response: Of course I want JARVIS from Iron Man in my life, but I also love NATURE!

This weeks Reading response was very interesting for me. We always say that we can’t wait to see what the future holds and that we want flying cars and simplified life but what we don’t realize is that the future is NOW. The world is shifting in a tremendous pace, I mean look at AI, ChatGPT and other AI platforms have changed our views about Information on the Internet completely in the last 2-3 Years!

The real question is, how far do we need to go? How much is too much? We have all seen those Terminator movies, Judgement day and AI and Robots taking over, but I think that those technologies are very missenterpreted in the movies. As a firm Nature Lover and at the same time a religious person, I believe that those type of thoughts or the direction of which the world is heading to is a little bit too much. Why you would ask? There is always a limit of what we can do before it comes bad / or unhealthy. What makes us connected to earth is nature and our complete sense of it. From sandy beaches to incredible jungles, snowy mountains and wonderful lakes, Earth offers us whatever we would possibly want. That is what makes us human. Now why am I saying all this, well because as the years go we are moving further and further away from mother nature. Yes I understand (and I support) human centered design that will make our lives easier but what we keep forgetting is nature. So why don’t we center our research more on nature instead of us? Why does everything have to revolve around us?

On the flip side though, we can use AI and other Technologies to make the world a better place. Like imaging having Jarvis as an assistant in your everyday life.

This can help us make life easier and access to other people and information would be much much faster but I do not support this as a reason not to become closer to nature or people. Like why do we have to replace going to the Maldives with watching the Maldives on a VR screen. Or for example seeing your family in real life and having a talk over a coffee instead of just texting on Social Media.

Final Project Idea: Hear The World

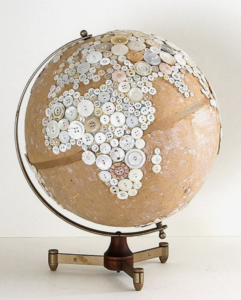
I am looking to create an interactive display using photosensors and P5.js animations. The main setup could be either a flatboard designed as a world map or a globe. This display will feature specific regions that, when touched, trigger music related to that region along with corresponding images or animations displayed using P5.js.

Project Concept:

  1. Interactive Display: Choose between a flat board or a globe. This will act as the base for your project.
  2. World Map/Globe with Regions Marked: The display will have different world regions marked. These could be continents, countries, or specific cities.
  3. Photosensors Embedded: There will be photosensors in these marked regions. These sensors will detect when they are touched.
  4. Music and Visuals: Touching a sensor will play music that is typical of that region. Simultaneously, P5.js will show relevant images or animations to enhance the experience.
  5. Technology Integration: I’ll use P5.js, a JavaScript library, to handle the visual and audio outputs based on sensor inputs.

Final Project Proposal – Bubble Buddy

Bubble Buddy:  Automated Bubble Maker 

I am planning to make an automated bubble maker that detects human presence and movement. The system will track the user’s location and adjust the bubble maker’s position to create bubbles and a bubble display on screen.  The experience will be interactive, as the bubble size and frequency will be based on human position.

System Overview:

The Automated Bubble Maker system consists of the following components:

  1. Human Detection Module:
    • Utilize Posenet, a machine learning model from ml5, to detect human presence and track their movement using a webcam.
    • The model will provide x, y coordinates of the human’s location, which will be used to control the bubble maker’s movement.
  2. Communication Module:
    • Send the x, y coordinates from p5.js to Arduino using serial communication.
    • Ensure seamless communication between the human detection module and the bubble maker’s control system.
  3. Platform Movement Module:
    • Employ 4 servo motors in 4 corners of the platform to move the bubble maker platform 180 degrees horizontally, aligning it with the detected human location.
  4. Bubble Generation Module:
    • Use two stands to support the bubble maker:
      • Stand 1: 5V DC motor fan to create air flow for bubble generation.
      • Stand 2: Servo motor with a threaded bubble maker rod to dip into the bubble solution and align with the fan.
  5. Control System:
    • Arduino board will control the servo motors, fan, and other components to ensure synchronized movement and bubble generation.

Key Features:

  • Real-time human detection and tracking using Posenet.
  • Automated platform movement using 4 servo motors.
  • Precise bubble maker rod alignment using a servo motor.
  • Adjustable bubble size and frequency.

Technical Requirements:

  • Webcam for human detection.
  • ml5 library for Posenet integration and serial communication.
  • Arduino board for servo motor control and fan activation.
  • 4 servo motors for platform movement.
  • 1 servo motor for bubble maker rod alignment.
  • 5V DC motor fan for bubble generation.
  • Bubble maker rod and solution.
  • Custom-designed platform and stands for bubble maker and fan.

Week 11 – Bret Victor’s Rant

In Bret Victor’s rant called A Brief Rant On The Future Of Interaction Design an important element that is commonly forgotten in the realm of designing future interfaces is hands! I have never read anything that focused on something as mundane as hands this passionately but it is true! 

Victor categorizes the function of hands into feeling and manipulation, something that I was never fully aware of until it was pointed out in the rant, our hands have programmed ways of holding several different items in so many ways it is choreographed in such a way where it is efficient and functional. 

So it makes sense that the future of interaction design focuses on our hands and their function, but that doesn’t limit other sensory aspects such as eye tracking or voice user interface, of course, our hands have been our main interaction facilitator however that doesn’t mean it would continue to be so.

Yaakulya Final Project Idea

Project Title: Interactive LineBot

Why a robot?
From childhood I’m always fascinated by robots. The inspiration for this project stems from a desire to create an engaging and interactive robotics experience just like Wall-E and DUM-E from Pixar and Marvel movies. I believe this project seeks to merge the worlds of hardware and software in a fun and accessible manner.

Objective: The objective of the Interactive LineBot project is to build a robot capable of autonomously following a black line on a white surface. By integrating an interactive p5.js interface, users can draw custom paths for the robot to navigate, providing a hands-on experience in robotics and programming. The project aims to foster curiosity, experimentation, and learning while exploring the principles of robotics, sensor integration, and graphical user interfaces.

Hardware Components:

1) Arduino board
2) Infrared (IR) sensors (typically two or more)
3) Motor driver
4) Motors and wheels for the robot chassis
5) Breadboard and jumper wires
6) Battery pack or power source

Steps I would like to proceed:

Building the Robot: Assemble the robot chassis and mount the motors, wheels, and IR sensors. Connect the IR sensors to the Arduino board and position them close to the ground in front of the robot. Connect the motors to the motor driver or shield, which will be controlled by the Arduino.

Programming: Write a program in the Arduino IDE to read data from the IR sensors and control the motors to follow the line. Implement logic or algorithms to interpret sensor readings and adjust motor speeds accordingly. Upload the Arduino code to the board and fine-tune parameters for optimal line following.

Creating the p5.js Interface: Develop a graphical user interface using p5.js where users can interactively draw custom lines representing the robot’s path. Implement functions to handle user input, such as mouse clicks or dragging, to draw lines on the canvas. Provide visual feedback to users as they draw lines and interact with the interface.

Integration: Establish communication between the Arduino board and the p5.js interface, typically via serial communication. Send commands from the p5.js interface to the Arduino to control the robot’s movements based on user-drawn trajectories.


(In a game it can be used to solve a maze)

Final Project Idea

This project aims to create an interactive art installation using a Flipdot display controlled by an Arduino UNO with a graphical interface powered by P5.js. The installation will allow users to create patterns or drawings on a web-based interface (using P5.js), which will then be replicated on a large Flipdot panel in real-time. This integration combines the digital and physical realms, making it a fascinating project for exhibitions, educational purposes, or interactive installations.