Assignment 1: Self-Portrait | “Hyein – NYUAD Class of 2027”

I vividly remember the moment I got into NYUAD. It was the happiest day of my life, and I felt immensely proud of myself. My identity is now closely intertwined with NYUAD, which inspired me to create a self-portrait in the style of a yearbook. I found the NYU colors in RGB on the internet, including NYU violet for the background and Ultra violet for the NYU merch sweatshirt. I chose to draw myself wearing NYU merch for the NYUAD yearbook photo.

What I’m particularly proud of is the code I wrote for displaying the text. On the left side, it reads “NEW YORK UNIVERSITY,” and on the right side, “CLASS OF 2027.” This coding task was special to me because it involved elements not covered in our classes. As someone with no prior experience in coding, I relied on the reference page and did some web surfing to figure out how to rotate the text and adjust its style, alignment, and size. In the process of learning how to rotate elements in p5.js, I discovered new functions such as push() and pop(), which allow settings and transformations to be applied to specific parts of the code. It was a rewarding experience to implement my vision into the code independently.

//New York University
  push()
  strokeWeight(3)
  noStroke()
  textAlign(CENTER)
  textSize(30)
  textStyle(BOLD)
  angleMode(DEGREES)
  translate(55, 200)
  rotate(270)
  fill('white')
  text('NEW YORK UNIVERSITY', 0, 0)
  pop()
  
  //CLASS OF 2027
  push()
  strokeWeight(5)
  stroke(color('white'))
  textAlign(CENTER)
  textSize(50)
  textStyle(BOLD)
  textStyle(ITALIC)
  angleMode(DEGREES)
  translate(340, 200)
  rotate(90)
  fill('white')
  text('CLASS OF 2027', 0, 0)
  pop()

For future improvements, I’m considering making this self-portrait more interactive. I plan to add code that will change the NYU merch in the portrait to different outfits when clicked, offering various clothing options.

Assignment 1: Self-Portrait – Jihad Jammal

Concept:

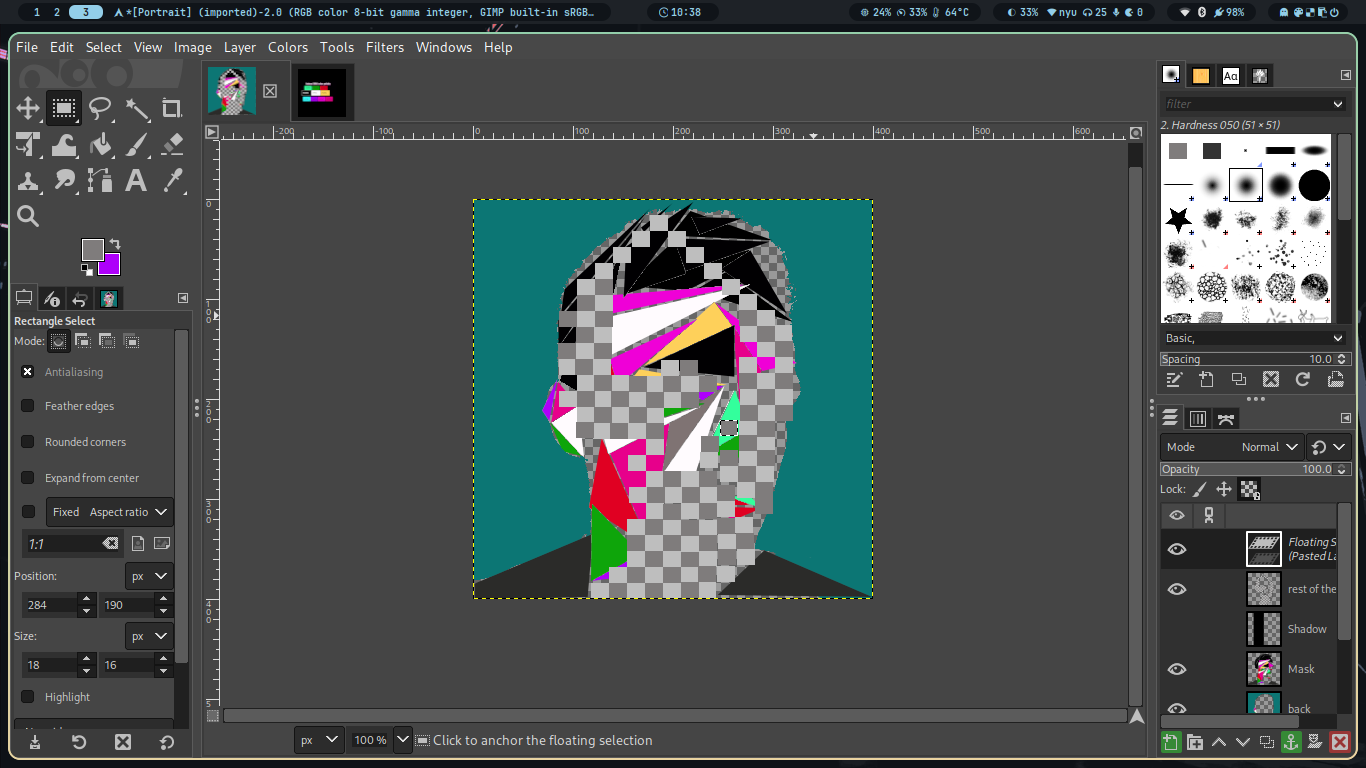
Considering my beginner coding skills and the project’s deadline, I focused on portraying recognizable features like my curly hair and glasses in my self-portrait. To achieve this, I used circles to mimic the curls of my hair and smooth squares to represent the frames of my glasses. This approach allowed me to create a clear and straightforward depiction of these key features within the technical and time constraints of the project.

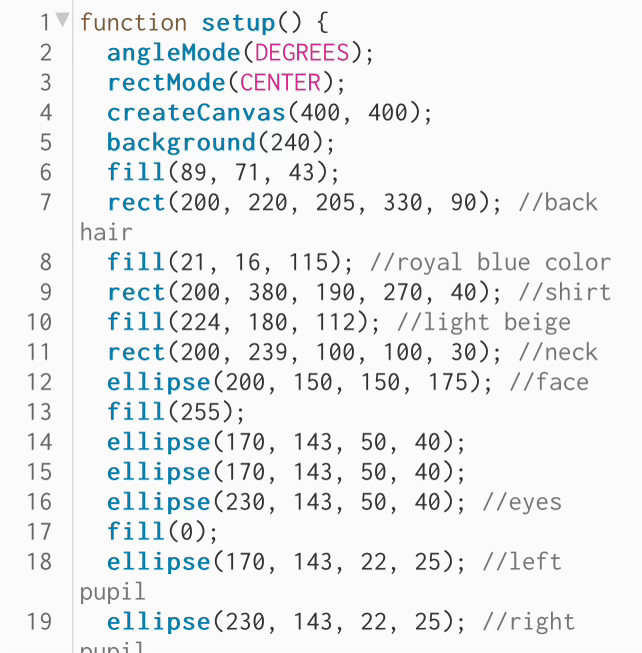
A highlight of some code that you’re particularly proud of:

//Hair
  noStroke()
  fill(0); 
  arc(200, 140, 120, 100, PI, 0); 

//Curls
fill("#181009")
  circle(150, 120, 50)
  circle(180, 120, 50)
  circle(210, 120, 50)
  circle(240, 120, 50)
  circle(245, 120, 50)
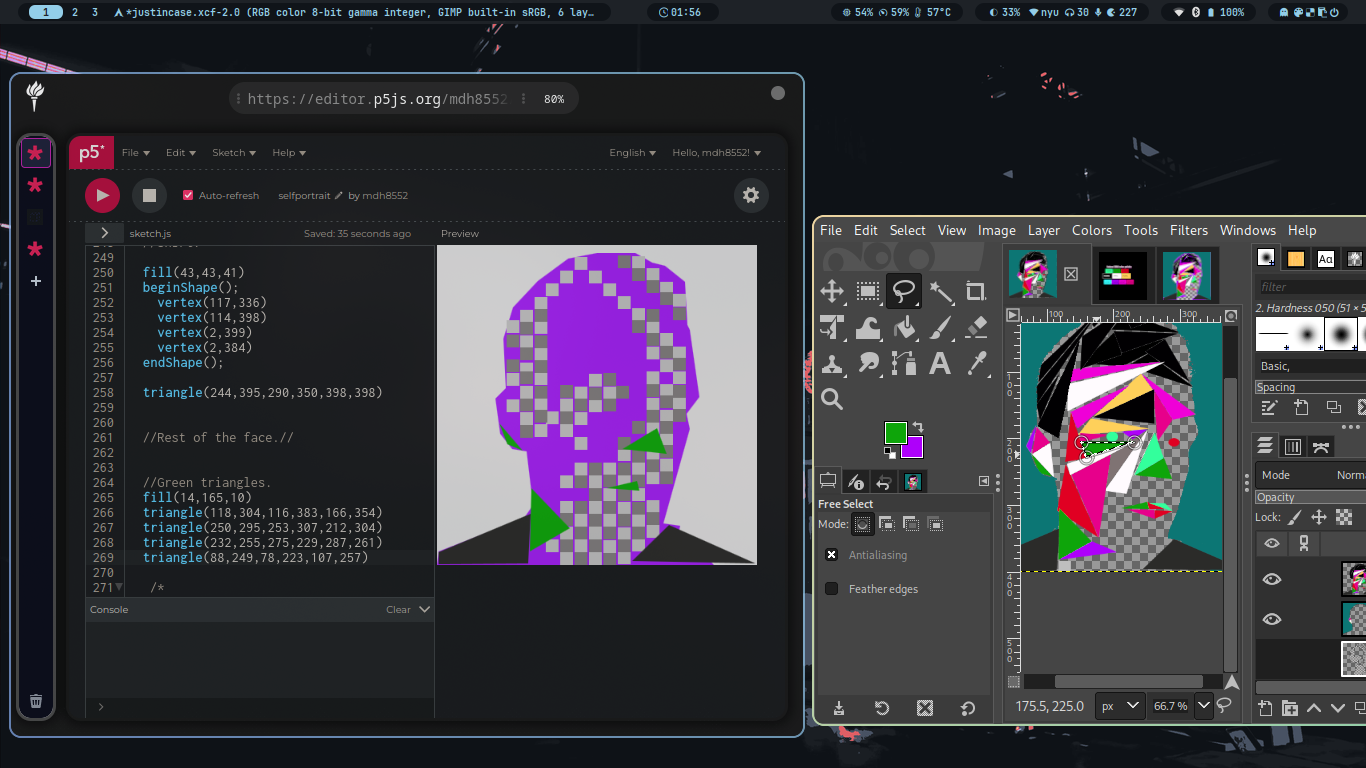
 

Embedded sketch:

Reflection and ideas for future work or improvements:

In my self-portrait, I generally feel content with the overall outcome, but there are elements I now recognize could have been improved. After looking at other examples, I realized a missed opportunity in the portrayal of my glasses. I wish I had learned to isolate a specific area for the eyes that would follow the cursor, adding an interactive and dynamic aspect to the artwork.

Another aspect I would revise is the portrayal of my facial features. Initially, I used simple shapes, but now I see the potential for more accurately representing features like my eyes, nose, and mouth. With more advanced coding skills, I could have added detail to these features, making the portrait not just an abstract representation but a more recognizable portrait of myself.

However I look forward to delving deeper into the possibilities of creative coding, pushing the boundaries of what I can create and express.

Assignment 1- Self-Portrait: Hazza

Concept

The assignment was to create a self-portrait using p5.js. I began experimenting with various shapes we’ve covered in class. Eventually, I drew inspiration from a self-portrait and opted to incorporate circles, ellipses, arcs, and quads into my portrait. I selected a canvas size of 450 by 450 and to showcase half of my body, thereby emphasizing the face as the primary focal point of the portrait. Alongside visual elements, I aimed to represent myself by including my name and the name of the university using text. My aim was to craft a portrait that is visually pleasing and easy on the eyes. To achieve this, I chose lighter colors that harmonize well with each other across the entire canvas.

A highlight of some code that you’re particularly proud of

// Eyebrows
noFill();
arc(177,220,30,10,PI,0); //left
arc(270,220,30,10,PI,0); //right

// Nose
line(224,260,236,270); //top
line(236,270,224,270); //down

// smile
fill(0);
arc(227,287,70,60,0,PI);

Embedded sketch

Reflection and ideas for future work or improvements

I think I can enhance this piece by incorporating interactive elements to make it more engaging for the viewer. Throughout the creation process, I encountered challenges with coding the hair and adding intricate details to the portrait. Moving forward, I aim to refine these aspects and imbue my future artworks with greater intricacy and depth.

Assignment 1 – Self portrait

For this self portrait assignment, I wanted to illustrate the 2d version of myself in a creative background. The code consists of a setup and draw functions and uses variables for the coordinates, directions, and speed of the animated background balls. The canvas is initially set to a size of 520×520, and the setup function populates an array named ‘balls’ with 20 instances of the Ball class, each representing a colored bouncing ball. The animated balls, governed by the Ball class, contribute a playful and dynamic element to the scene, bouncing randomly within the canvas boundaries.

As for my portrait, it is depicted with distinct features, including dark brown hair in an arc formation, a face represented by an ellipse, ears illustrated as arcs, and bangs with dark brown arcs above the forehead. Additional facial elements consist of black eyebrows, eyeshadow in dark semicircles, eyes depicted as dark brown ellipses with white eyeballs, and eyeglasses fashioned with black rectangular frames connected by a line. 

Further on, I would like to add more smoother and complex animations and user interactivity to it.

Highlighted code:

let balls = [];


function setup() {
  createCanvas(520, 520)
  // Create initial balls
  for (let i = 0; i < 20; i++) {
    balls.push(new Ball());
  }
}

function draw() {
  background(76, 160, 245);
  for (let ball of balls) {
    ball.move();
    ball.display();
  }
  //code for the portrait 
}

class Ball {
  constructor() {
    this.x = random(width);
    this.y = random(height);
    this.diameter = random(10, 30);
    this.color = color(random(255), random(255), random(255));
    this.xSpeed = random(-2, 4);
    this.ySpeed = random(-2, 4);
  }

  move() {
    this.x += this.xSpeed;
    this.y += this.ySpeed;

    // Bounce off the walls
    if (this.x < 0 || this.x > width) {
      this.xSpeed *= -1;
    }

    if (this.y < 0 || this.y > height) {
      this.ySpeed *= -1;
    }
  }

  display() {
    fill(this.color);
    noStroke();
    ellipse(this.x, this.y, this.diameter, this.diameter);
  }
}


Assignment 1: Self Portrait | Hasibur

For this assignment, we were asked to create a self-portrait using p5.js. I started by looking into the listed self-portraits and previous students work. I was heavily inspired by a few of them and later incorporated a few styles from their portraits. [1. https://editor.p5js.org/Sarthak-Malla/full/3NRqaQVKQ, 2. Koala portrait, 3. Assignment 1: Self-portrait]

I wanted to have a full-body portrait. However, I could not settle on one. Later, I came across this portrait online and decided to follow a similar structure. I initiated the process by sketching a rudimentary outline, focusing initially on the facial features. I used the bezier for the eye brows and the curveVertex for the hair. For the bezier shape, I used this tutorial. In the rest of the portrait, I just used the primitive shapes.

Each cell is a dynamic entity, its behavior governed by its position and the cursor’s proximity. The canvas isn’t just a static backdrop but a living part of the portrait, changing its hues and vibrancy in real-time. Each cell on the canvas pulsates with an oscillating brightness, creating a mesmerizing wave effect. This is not just a pre-programmed animation; the cells also react to the position of your mouse, creating an interactive dance of light and shadow.

function drawBackground() {
  for (let r = 0; r < rows; r++) {
    for (let c = 0; c < columns; c++) {
      let distance = dist(mouseX, mouseY, c * cellWidth, r * cellHeight);
      let offset = map(distance, 0, sqrt(sq(width) + sq(height)), 1, 0);

      let wave = (sin(time - c * r * 0.1) + 1) / 2;
      let brightness = map(wave, 0, 1, 100, 255) * offset;

      cells[r][c] = brightness;

      fill(brightness * 0.9, brightness * 0.7, brightness); 
      noStroke();
      rect(c * cellWidth, r * cellHeight, cellWidth, cellHeight);
    }
  }
}

The eyes follow your cursor, adding a layer of depth and engagement. The mouth opens and closes, reacting to the cursor’s vertical position, making the portrait not just seen but also felt.

function drawMouth() {
  noStroke();

  // calculate the openness of the mouth based on mouseY position
  let deltay = ((400 - mouseY) / 400) * 13 + 6;
 
  if(deltay <= 9.5) deltay=9.5;

  // outer mouth (lips)
  fill(255, 150, 122); // color for lips
  ellipse(200, 173, 27, deltay);

  // inner mouth (white part to represent teeth or inside of mouth)
  let innerMouthHeight = deltay - 2; 
  fill(255); // white color for the inner mouth
  if (innerMouthHeight > 8) {
    // show inner mouth only if it's significantly open
    ellipse(200, 173, 20, innerMouthHeight);

    // black line to split the white part (teeth or mouth separation)
    if (innerMouthHeight > 10) {
      fill(0); // black color for the separation
      let separationHeight = 4; // height of the separation line
      rect(200 - 10, 173 - separationHeight / 2, 20, separationHeight, 10); // centered black line
    }
    else {
      fill(0)
      let separationHeight = 1; // height of the separation line
      rect(200 - 10, 173 - separationHeight / 2, 20, separationHeight, 10); 
    }
  }
}

While working, I couldn’t figure out the nose style. Most portraits that I have seen use triangles or similar shapes. I found this portrait to have a very distinctive style, which I followed. Creating the hair shape took a lot of time for me. I am still not particularly happy with the hair. I wanted more realism for the hair shape.

In the future, I want to create a Lego character resembling my character and try to create a self-portrait based on the Lego character, which I believe would be easily achievable using the primitive shapes.

Assignment 1: Self-Portrait

My name in Arabic (الريم) means deer, so for this assignment, I decided to code a deer as a self-portrait.

It was particularly challenging to place the ears in the right position. For that, I had to use the translate and rotate functions. This is something that I am proud of as we have not covered this concept in class yet.

  push();
  translate(130, 355);
  rotate(HALF_PI + QUARTER_PI);
  arc(0, 0, 30, 25, 45, TWO_PI, PIE);
  pop();
  fill('rgb(161,92,92)');
  ellipse(180, 300, 30, 110);
  push();
  translate(180, 360);
  rotate(QUARTER_PI);
  fill('rgb(105,27,27)');
  arc(0, 0, 20, 20, 45, TWO_PI, PIE);
  pop();
  ellipse(220, 300, 30, 110);
  push();
  translate(220, 360);
  rotate(QUARTER_PI);
  fill('rgb(105,27,27)');
  arc(0, 0, 20, 20, 45, TWO_PI, PIE);
  pop();

For improvements, I could make the deer stand up if it is hovered on for interactivity. I could also try making it run sideways with additional sprites or make it move with the user’s mouse movement.

Assignment 1 – Self portrait | Saeed Lootah

Concept
I intended for this self-portrait to have a portrait which is fairly accurate but cartoonish, and I also wanted to experiment with many of the commands in the p5js and I chose to do this by making my portrait dynamic. My main focus was the eyes.


Highlight

  translate(x, y); //makes the center of the canvas the point from which everything rotates. otherwise it would have been rotating around (0,0)
  // -18 because that is

  // dont ask me to explain this, I got help from the reference of atan2()
  let mx = mouseX - x;
  let my = mouseY - y;

  let a = atan2(my, mx); // atan2 is weird, its atan2(y,x) rather than x,y :/

  let v = createVector(x, y);

  let d = dist(mouseX, mouseY, x, y);

  let d0 = d * constant;

  // the maximum of 18 has to be found manually, so i added the mouseIsPressed if statement below to help

  if (d0 > max) {
    d0 = max;
  }

  v.setMag(d0);
  v.setHeading(a);

  // for debugging magnitude of the vector
  //   if( mouseIsPressed == true) {

  //     print(d0);

  //   }

  translate(v);

First to explain what the code is doing it helps to also use the embedded sketch whilst reading this. The code above is the logic behind the movement of the eyes. The pupils follow the cursor of the user but move further out or further into the pupil based on how far the cursor is from the  center of the eye. I did this to make the eyes more realistic but also to make the overall sketch more interesting and more fun to interact with.  I did this by calculating the angle from the center of the pupil to the cursor (with a bit of help from the p5js reference), then I created a vector who’s origin point is the pupil and I set it’s angle to be the angle from the center of the pupil to the cursor and it’s magnitude to be based on how far the cursor is from the center of the eye but I limited the magnitude. Once the vector was made I had the eyes translate using the vector using the translate() method. To make things a little more neat I put all of it into a function. I did this because I worked on the eyes feature on a separate sketch but with only one eye and then just placed it into a function so that I could easily create two eyes for this sketch.


Sketch


Reflection

In hindsight there are a lot of things I would have done differently. Firstly, it was only towards the end that I started using functions more diligently and I hardcoded a lot of my values which meant that I no longer had the luxury of changing the canvas size without having to painstakingly go through every shape. Also, I felt I spent a lot of time trying to do the eyes mechanic all by myself, I feel I would have both enjoyed and benefited greatly by working on it with someone else since for a while I was stuck on what to do. In summary, I would make my code more neat in the future and soft-code more of my variables where I can, and lastly, I should try to get help/ideas from others rather than stick only to myself.

Assignment 1 – Self portrait | Luke

Concept:
It’s still during winter so I thought I’d make something that reflects the weather and personally, I love the cold. Designing the portrait is not too difficult. The character only needs a puffer jacket and a beanie hat. Winter is the season when colors are not vibrant, so I go for something that’s neutral such as orange/brown for the beanie hat and a little bit blue for the puffer jacket to make the outfit stand out. The character I created is a guy who’s feeling the holiday spirit. He enjoys other people’s company during the holiday season. You can see the glow in his eyes; he’s smiling back at you. He’s waiting for you to welcome him inside your house, because “Baby, it’s cold outside!”

A highlight of some code that I’m particularly proud of:

// nose_1
strokeWeight(2);
arc(185, 125, 25, 100, 0, -30);
noFill();
  
// nose_2
strokeWeight(2);
arc(205.5, 159, -30, -45, -30, -10, OPEN);
noFill();

// mouth_lips
noFill();
arc(190, 210, 70, 10, 0, 1/2*(HALF_PI) + 1/2*(HALF_PI));

// left_ear
fill("rgb(251,205,159)")
arc(124, 165, 25, 50, -30, -20.5);
noFill();
  
// right_ear
fill("rgb(251,205,159)")
arc(297, 160, 25, 50, -2, -3.9);
noFill();

Embedded sketch:

Reflection:
Overall, this is a simple enough sketch that incorporates many shapes I learned in class. I particularly practiced creating the arcs a lot, in figuring out the right arcs. Arcs are more difficult to create than other shapes so this part took me a lot of time.

Ideas for future work or improvements:
I want to add the gradient for the background. I also want to add more details in the background such as the leafless trees in the winter and the streetlights. These would require shapes more difficult to create than the ones we learned in class.

I particularly want to add interactivity for the snow; something like the snow spreads out or bounces off wherever the cursor moves. I also want to add randomness to the snow every time I generate the code as well. And I want to add movement to the snow, making it fall vertically in a natural way.

Assignment #1 – Self Portrait | Rashed Alshamsi

For this assignment, I did not want to recreate an image of myself, but I also wanted to add elements of my personality. One thing everyone knows about me is my ongoing passion for music; I collect vinyl records, CDs, and Cassettes. I cannot go anywhere without my headphones and I thought it would be a great idea to include that particular element as well as my ongoing love for music in my self-portrait.

I was particularly proud of the animated musical notes. Originally, I was not planning on animating them but I wanted to challenge myself to try and play around with creating variables and the “If()” function. I initially knew how to animate them but I did not know how to have them bouncing back and forth in the same location. I resorted to YouTube and watched a tutorial on how to animate in P5.js https://youtu.be/s2PZvaP4dSg?si=Q81GurZ6GAjqfVSs . Even after watching the video, I did not know how I could animate multiple variables at the same time that could move altogether. I then realized I could add the condition that if the variable “MusicNoteY1” would exceed a certain point, it would have the variable “ySpeed” equal negative “ySpeed” which would make it move in the opposite direction. Then I had all other music note variables move in their own value + ySpeed which had them all move together.

//Variables
let MusicNoteY1 = 130
let MusicNoteY2 = 70
let MusicNoteY3 = 120
let MusicNoteY4 = 60
let MusicNoteY5 = 81
let MusicNoteY6 = 69
let MusicNoteY7 = 55
let MusicNoteY8 = 70
let MusicNoteY9 = 395
let MusicNoteY10 = 335
let MusicNoteY11 = 330
let MusicNoteY12 = 350
let MusicNoteY13 = 360
let MusicNoteY14 = 341
let ySpeed = 2

function setup() {
  
  createCanvas(500, 500);
}
function draw() {
  background(104,191,255);
  
  //Grass
  noStroke();
  fill(157,231,121)
  arc(250, 500, 700, 250, PI,0,OPEN)
  
  print(mouseX + "," + mouseY);
  
  //Musical Note
  fill('black')
  ellipse(40,MusicNoteY1, 35,25);
  rect(48,MusicNoteY2, 10,60);
  ellipse(92,MusicNoteY3, 35,25);
  rect(100,MusicNoteY4, 10,60);
  quad(48,MusicNoteY5,48,MusicNoteY6,110, MusicNoteY7,110,MusicNoteY8)
  ellipse(442,MusicNoteY9, 35,25);
  rect(450,MusicNoteY10, 10,60);
  quad(450,MusicNoteY11, 450, MusicNoteY12, 474, MusicNoteY13,477,MusicNoteY14);
  MusicNoteY1 = MusicNoteY1 + ySpeed
  MusicNoteY2 = MusicNoteY2 + ySpeed
  MusicNoteY3 = MusicNoteY3 + ySpeed
  MusicNoteY4 = MusicNoteY4 + ySpeed
  MusicNoteY5 = MusicNoteY5 + ySpeed
  MusicNoteY6 = MusicNoteY6 + ySpeed
  MusicNoteY7 = MusicNoteY7 + ySpeed
  MusicNoteY8 = MusicNoteY8 + ySpeed
  MusicNoteY9 = MusicNoteY9 + ySpeed
  MusicNoteY10 = MusicNoteY10 + ySpeed
  MusicNoteY11 = MusicNoteY11 + ySpeed
  MusicNoteY12 = MusicNoteY12 + ySpeed
  MusicNoteY13 = MusicNoteY13 + ySpeed
  MusicNoteY14 = MusicNoteY14 + ySpeed
  
  if (MusicNoteY1 > 180) {
  ySpeed = -ySpeed;  
  }
  if (MusicNoteY1 < 100) {
    ySpeed = -ySpeed;
  }

I am looking forward to adding an interactive element to my work in the future.


Assignment #1 – Me, in a weird abstract way

For assignment #1, I found myself wanting to do something a bit unusual, as the emergent ideas that popped up in my brain told me to do something weird and abstract, like a self-portrait of myself but with weirdness added as a layer. So, thanks that I have a bit of knowledge using applications such as GIMP, I did a sketch of what I wanted to code, but taking into account that I did not want to make around 600+ lines of code.

The first step for this was to take a photo of myself, and then crop it to the 400×400 resolution to be allowed to use as a pixel reference. After cleaning the image and drawing what I would like to program, as shown in the screenshots below, it allowed me to proceed with the code implementation.

Figure 1. Preparing the image in GIMP (adding layers).
Figure 2. Using the image created in GIMP as a reference to code the image in p5.js

For the silhouette, I was a bit worried of not finding a particular function to allow drawing a free shape, but thanks to p5.js’ documentation, I found that the function beginShape(); can do what I wanted, so it was only a matter of drawing a lot of vertices with vertex(x,y);, according to the X and Y coordinates in GIMP, to fully draw my silhouette and proceed with the rest of the details.

The beginShape();code part is written like this for the sketch:

beginShape(); //I found this function helpful, as it allowed me to make the silhouette.
   vertex(2,383)
   vertex(0,400)
   vertex(346,400)
   vertex(325,375)
   vertex(315,382)
   vertex(300,369)
   vertex(304,351)
   vertex(283,348)
   vertex(316,230)
   vertex(312,211)
   vertex(328,190)
   vertex(316,106)
   vertex(313,100)
   vertex(310,46)
   vertex(285,26)
   vertex(269,22)
   vertex(248,10)
   vertex(200,10)
   vertex(164,17)
   vertex(126,45)
   vertex(95,78)
   vertex(83,117)
   vertex(86,179)
   vertex(73,192)
   vertex(79,236)
   vertex(94,255)
   vertex(112,258)
   vertex(120,325)
   vertex(105,347)
   vertex(80,357)
   vertex(64,359)
   vertex(2,383)
 endShape(); //Custom shape ends here.

This sketch took a lot of time as there were too many details, such as the many squares that act as the transparency placeholder for editing software and the triangles with abnormal X and Y positions. I have to admit it was fun and liberating to create something like this, but it took a lot of time, patience, and creativity to found a way to bring my idea into reality.

For future works, maybe I can implement other software to fully grasp the scope of what I want to create, as how I used GIMP to make the sketch and X and Y references. And regarding future improvements, maybe limit myself to only use p5.js (as an artist with only a stencil, its knowledge, and a white canvas) and integrate interactivity.