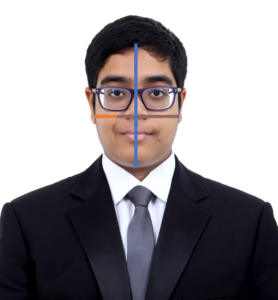
While I had some experience with Processing through Intro to CS, I was new to JavaScript and especially p5, so this assignment took longer than I expected. My goal was to make the portrait as detailed and true to life as possible with just basic shapes on p5.js, while at the same time not drowning in code. My final result is a compromise between these two parameters.
For my portrait, I first took a few pictures of myself as a reference. I began by basing the basic proportions of the shapes based on the proportions of different parts of my face.
I knew that a simple ellipse would not be enough to represent my face, so I decided to combine a rectangle with multiple arcs to get the “rounded square” shape of my face. A few more arcs (yes, this is a recurring theme throughout this assignment) were used to round out the jaw and the chin and then I was done with the first part.
I then decided to work on the neck and the shirt, as that would be easy to get out of the way. They just required a rectangle and a quadrilateral respectively, and I used more arcs to round out the shoulders and collar to avoid a blocky look.
Next, I worked on the eyes which, which was probably the most time-consuming step. Inspired by examples on the Intro to IM website, I decided to challenge myself by making some Bezier curves. This tutorial was very helpful in understanding how they work. Yet, it was time-consuming to make a decent shape out of them, especially as they are not as intuitive as they would be on graphics editing software such as Adobe Illustrator (and according to me, they’re not very intuitive even there). I settled for combining an arc for the upper portion of the eye, and a Bezier curve for the lower portion, which I feel gives the desired result. While learning to use Bezier curves took more time than I would have wanted, it was valuable for other steps in this assignment and in future ones.
function drawDayEyes(){
  //cornea
  strokeWeight(2);
  stroke(hairColor);
  fill(corneaColor);
  //right
  arc(4.13*width/10, 4.28*height/10, 0.8*width/10,
0.55*height/10, PI+0.1, -0.1, OPEN);
  bezier(3.73*width/10,4.23*height/10,4*width/10,
4.5*height/10, 4.25*width/10, 4.45*height/10,
4.5*width/10, 4.23*height/10);
  //left
  arc(5.87*width/10, 4.28*height/10, 0.8*width/10,
0.55*height/10, PI+0.1, -0.1, OPEN);
  bezier(5.47*width/10, 4.23*height/10, 5.77*width/10,
4.45*height/10, 6.07*width/10, 4.5*height/10,
6.27*width/10, 4.23*height/10);
  //irises
  noStroke();
  fill(irisColor);
  ellipse(4.13*width/10, 4.2*height/10, 0.34*width/10);
  ellipse(5.87*width/10, 4.2*height/10, 0.34*width/10);
  //pupils
  fill("black");
  ellipse(4.13*width/10, 4.2*height/10, 0.18*width/10);
  ellipse(5.87*width/10, 4.2*height/10, 0.18*width/10);
}
After the eyes came the obvious next step, my glasses. The basic frame was not too hard to make, but required a bit of trial and error to get a decent-looking shape. Within the glasses, I decided to include the optical lensing that occurs due to the high negative power of my lens, which makes it appear as if my face is shrunken inward when viewed face-to-face. This also helped me correct for making my eyes inadvertently small as I had forgotten that the reference also had the optical lensing effect.
Next were the lips and the nose. I was afraid of using Bezier curves for a shape as complex as lips but decided that I didn’t need them anyway. I simulated the shape of the lips using arcs and triangles, which seemed suitable enough. The nose too was similarly done, with the nostrils being made of simple ellipses, the apex being made of a moderately thick arc, and the dorsum (the front part of the nose) being made of thinner arcs. I still used Bezier curves to get the iconic shifted curved look of the nasal alae (the “wings” of the nose around each nostril).
This is when I decided to add hair to my portrait. The head hair was just a bunch of triangles, ellipses, and arcs overlapping to get the hair’s fringes. The eyebrows were also arcs drawn using a thick stroke weight. I wanted to include eyelashes, but they were annoying to implement, so I skipped them.
Next were the ears, which were also daunting. I knew that this required a complex Bezier curve shape. I experimented with the beginShape() and bezierVertex() functions to get the complex shape needed for the ears. This too required a lot of trial and error to get the shapes and sizes right.
  //right ear
  beginShape();
  vertex(2.85*width/10, 3.8*height/10);
  bezierVertex(2.5*width/10, 3.6*height/10, 2.4*width/10, 4.025*height/10, 2.55*width/10, 4.55*height/10);
  bezierVertex(2.625*width/10, 4.65*height/10, 2.4*width/10, 5.05*height/10, 2.8*width/10, 5*height/10)
  endShape();
  //left ear
  beginShape();
  vertex(7.15*width/10, 3.8*height/10);
  bezierVertex(7.5*width/10, 3.6*height/10, 7.6*width/10, 4.025*height/10, 7.45*width/10, 4.55*height/10);
  bezierVertex(7.375*width/10, 4.65*height/10, 7.6*width/10, 5.05*height/10, 7.2*width/10, 5*height/10)
  endShape();
At the very end, I decided to include some rudimentary interactivity by making a lamp that could be clicked on to cycle between “wake” and “sleep”. If-else statements dictate which elements to draw or not, and I quickly made a pair of “closed eyes” which are essentially just a pair of arcs.
Here is what my final self-portrait looked like:
Overall, I am really happy with the result. It did take a long while and quite a bit of effort, but I feel it was worth it to help set a strong foundation in p5.js while also making a decent self-portrait.

