Week 12- Final Project Draft 2

New Concept:

In the true spirit of being a bit indecisive, I’ve opted for a puzzle game. It all started with the certainty that I’d be dealing with a joystick in my physical computing adventures. So, brainstorming around this joystick, the idea of a picture puzzle game struck me. The concept is simple: solve the puzzle using the joystick. To add a personal touch, I thought it’d be cool to let players use their own pictures for the puzzle. I mean, puzzles can be dull, right? So, why not make it more fun by solving a puzzle of yourself?

P5.js Code:

I’ve made some progress in coding the game using P5.js. The groundwork includes screens for welcoming players, providing instructions, selecting difficulty levels, activating the camera, and of course, the puzzle screen itself. The code varies in complexity since it’s still a work in progress. Here’s a snippet that deals with turning a captured picture into a puzzle, which excites me the most.

function captureAndSetupPuzzle(video) {
  if (video) {
    source = video.get();
    source.loadPixels(); // Ensure pixels are loaded
 if (source.width > 0 && source.height > 0) {
    // Resize the source image to fit the canvas
    source.resize(width, height);
    video.hide();

    w = Math.floor(width / cols);
    h = Math.floor(height / rows);

    for (let i = 0; i < cols; i++) {
      for (let j = 0; j < rows; j++) {
        let x = i * w;
        let y = j * h;
        let img = source.get(x, y, w, h); // Get a portion of the image for each tile

        if (i === cols - 1 && j === rows - 1) {
          board.push(-1);
          puzzle.tiles.push(new Tile(-1, img));
        } else {
          let index = i + j * cols;
          board.push(index);
          puzzle.tiles.push(new Tile(index, img));
        }
      }
    }

    puzzle.board = board.slice();
    puzzle.simpleShuffle(puzzle.board);

    currentScreen = 'game';
    puzzle.startTimer();
  } else {
    console.error("Error loading the video source");
    }
  }
}

function setup() {
  createCanvas(600,400);
  //createCanvas(displayWidth, displayHeight);
  
  video = createCapture(VIDEO);
  video.size(400, 400);
  video.position(0, 0);
  video.hide();
  
  
  let timerDuration ;
  let level;

  puzzle = new Puzzle(cols, rows, timerDuration, level); // Example level: 3x3 grid, 600 seconds timer
}

Arduino Code:

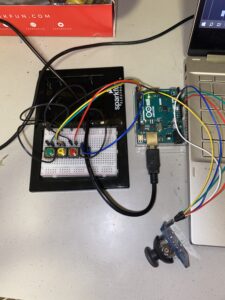
Additionally, I’ve been working on Arduino code. It seems mostly complete for now, though I might tweak it as my P5 code progresses. The aim of this code is to control the button movements and the movements of the puzzle tiles using the joystick.

const int XbuttonPin = 2;
const int SbuttonPin = 3;
const int TbuttonPin = 4;
const int CbuttonPin = 5;
const int joystickXPin = A0; // Analog pin for joystick X-axis
const int joystickYPin = A1; // Analog pin for joystick Y-axis
const int threshold = 50; // Threshold for joystick sensitivity
//bool isDifficulty = false;

void setup() {
  Serial.begin(9600);
  pinMode(XbuttonPin, INPUT_PULLUP);
  pinMode(SbuttonPin, INPUT_PULLUP);
  pinMode(TbuttonPin, INPUT_PULLUP);
  pinMode(CbuttonPin, INPUT_PULLUP);
}

void loop() {
  if (digitalRead(XbuttonPin) == LOW) {
    Serial.println("MOUSE_CLICK");
    delay(1000); // Debounce delay
  }
  
  if (digitalRead(SbuttonPin) == LOW) {
    Serial.println('2');
    delay(100); // Debounce delay
  }
  
  if (digitalRead(TbuttonPin) == LOW) {
    Serial.println('1');
    delay(10000); // Debounce delay
  }
  
  if (digitalRead(CbuttonPin) == LOW) {
    Serial.println('3');
    delay(100); // Debounce delay
  }

  if (digitalRead(TbuttonPin) == LOW) {
    Serial.println('C');
    delay(100); // Debounce delay
  }
  
  int xVal = analogRead(joystickXPin); // Read X-axis value
  int yVal = analogRead(joystickYPin); // Read Y-axis value

  if (xVal < 512 - threshold) {
    Serial.println("LEFT");
    delay(100); // Debounce delay
  } else if (xVal > 512 + threshold) {
    Serial.println("RIGHT");
    delay(100); // Debounce delay
  }

  if (yVal < 512 - threshold) {
    Serial.println("DOWN");
    delay(100); // Debounce delay
  } else if (yVal > 512 + threshold) {
    Serial.println("UP");
    delay(100); // Debounce delay
  }
}

Challenges popped up, especially when translating mouse movements to joystick actions. Initially, I aimed to use mouse clicks and key presses in my P5.js code, thinking I could easily convert them to buttons and switches. But handling joystick movements, considering up, down, left, and right, turned out more intricate than merely clicking a mouse to move a tile.

Prototype:

IMG_5120

Tasks on my to-do list seem endless because, well, I’m a bit of a perfectionist. At the moment, I’m focusing on crafting a case for my Arduino and breadboard. Simultaneously, I’m tirelessly refining my P5 sketch for a more appealing look. Adding background music and possibly turning the puzzle into more of an actual game are ideas I’m mulling over. But for now, this is where I stand in my project. I am also thinking of implementing the LED screen to the sketch that would display a message if the puzzle were solved because I think this would be a nice way to implement the p5 to Arduino communication.

Final Project Documentation- Dodge It!

Concept:

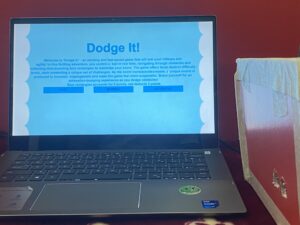
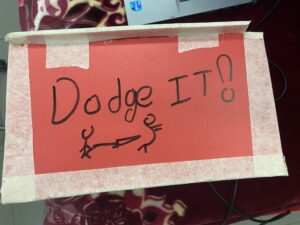
For my final project, I have created a game called “Dodge It!”. This game consists of moving rectangles- red and blue colored- on screen and there’s a ball that moves horizontally that the users control to navigate through these obstacles while dodging the red rectangles and picking up the blue ones to gain points.  There’s a slight twist to it, instead of using just buttons to control the ball, users use their physical hands to swipe left and right to control the ball’s movement in the game. To increase the interaction, I also implemented a system where every score will produce a unique tone and as the user loses scores, the tone keeps getting deeper and deeper as if they’re reaching the end, and as the score gets higher and higher, the tone gets higher showcasing an increased suspense element. The motivation behind this game is from online games that I used to play back in elementary school. These games were similar to “Dodge it!” but were mostly used by keyboard buttons to control the ball. Whereas, my game can make things much more interactive by using your own physical hands to control the ball’s movement, which adds a whole new spectrum of excitement and adrenaline rush as we navigate through the obstacles. My game also has different difficulty levels for users to choose from to make things more balanced between the enjoyers and the competitors.

Prototype:

Pictures:


Video:


Implementation:

Description of Interaction Design:

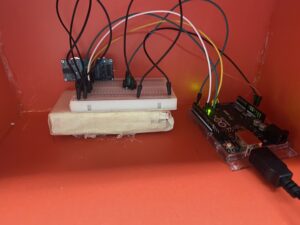
In order to balance out the lags that I was getting in between the code due to excessive elements being inputted by the Arduino and outputted to p5, I decided to make things much simpler and quite responsive by adding the necessary elements only. The prototype that I have created consists of an ultrasonic sensor incorporated within it and the users just need to put their hands in front of it and start playing straightforward. While I could have added more buttons to the prototype, this would have ruined the simplicity that I was aiming for. Also, more buttons would result in a bit more delay within the responsiveness of the ultrasonic sensor to the hand movement, and my goal was to make it as smooth as possible, so these changes were necessary.

Description of Arduino Code:

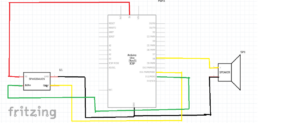
The Arduino part of the game is quite simple. I have added an ultrasonic sensor and a speaker. After connecting it to the digital pins, I utilized the send to p5 feature through serial print to send the outputted value of the ultrasonic sensor. The ultrasonic sensor outputs a value, which can be converted to distance through an equation, that distance is what I send to P5 which will later be reflected to the ball’s x coordinate. The Arduino receives the score value sent by p5; which will then be mapped and sent to the speaker to produce a tone. Additionally, I added an if condition to stop emitting a sound if the user is at the menu or endscreen.

//Define pins for speaker and ultrasonic sensor
const int trigPin = 11;
const int echoPin = 12;
const int speakerPin = 8;

void setup() {
  // Start serial communication so we can send data
  // over the USB connection to our p5js sketch
  Serial.begin(9600);
  pinMode(LED_BUILTIN, OUTPUT);

  // Outputs on these pins
  pinMode(trigPin, OUTPUT);
  pinMode(echoPin, INPUT);
  pinMode(speakerPin, OUTPUT);


}

void loop() {

  //GETS FROM P5
  int score = Serial.parseInt();

//if condition so that when score is 0 at menu and end screen, the sound doesnt emit and annoy us 
if(score==0)
{
  noTone(speakerPin);
}
else
{
  // Map the score to a frequency for the speaker
  int frequency = map(score, 0, 200, 100, 4000);
  // Play the tone
  tone(speakerPin, frequency);
}

  // sends a short pulse of ultrasonic sensor and waits a bit then receives it 
  digitalWrite(trigPin, LOW); 
  delayMicroseconds(2); 
  digitalWrite(trigPin, HIGH); 
  delayMicroseconds(10); 
  digitalWrite(trigPin, LOW); 

  // Time it takes for the pulse to travel back from the object long 
  int duration = pulseIn(echoPin, HIGH); 
  // Universal conversion of time into distance in cm 
  int distance = duration * 0.034 / 2;

  //SENDS TO P5
  Serial.println(distance);
  delay(50);

}


Description of P5.js code:

For my p5 side of the code, this took almost all of the time, designing an interactive interface that had aesthetic elements to it while also an interactive one. The p5 will receive values of distance from Arduino and input it towards the ball’s movements. One major factor that I had difficulty in would be smoothening the ultrasonic sensor’s reading. Initially, the ball was not as smooth, so I added a Lerp function to smoothen it out. Then the ball had abrupt changes in its distances, which is due to external issues from the ultrasonic sensor itself, so I fixed it by adding a maxPosChange variable to make sure that if the next reading is way greater than the previous one, the p5 will neglect that reading, ensuring a smoother path for the ball. As I set the foundation for my game in P5, I started working on the aesthetics, adding different difficulties and an end screen at the end. Each button also produces a hover sound and a click sound when clicked. I added texts explaining each difficulty. Finally, I also added a pause screen and exit to the main menu mid-game features to make things much faster and smoother to navigate.

While the code is long, I’ll only add the serial function where it sends and receives data to and from Arduino. You can navigate to the code by clicking on the P5 link above.

function readSerial(data) {
  ////////////////////////////////////
  // READ FROM ARDUINO HERE
  ////////////////////////////////////

  if (data != null) {
    // Parse the data received from Arduino
    let fromArduino = split(trim(data), ",");
    targetKnobValue = parseFloat(fromArduino[0]);
    print(targetKnobValue);
    
        // Check for abrupt changes in position and neglect them
    if (abs(targetKnobValue - knobValue) < maxPositionChange) {
      // Smooth the value we get from the Arduino using linear interpolation (lerp)
      knobValue = lerp(knobValue, targetKnobValue, easing);
    } 
  }

  //////////////////////////////////
  // SEND TO ARDUINO HERE
  //////////////////////////////////
  
  //if at menu or end screen dont send score to arduino
  if(option== MAINMENU || option== ENDSCREEN)
    {
    let notone=0;
    let sendToArduino= notone + "\n";
    writeSerial(sendToArduino);
    }
  else
    {
    let sendToArduino= score + "\n";
    writeSerial(sendToArduino); 
    }
}


  • Description of communication between Arduino and p5.js

As previously mentioned, both the P5 and Arduino complement and expand upon one another, where the Arduino receives the values of the changing score, and then maps that score to a a spectrum to produce a tone within the speaker. The Arduino will also send a distance value from the hand to the ultrasonic sensor to the P5 which is utilized in the ball class to control the ball’s movement. Of course, the distance is mapped to the Arduino’s dynamic canvas.

Some aspects of the project that I’m proud of

I’m mainly proud of the aesthetics and the beauty of the game. Adding a moving background for instance was not easy. I had to navigate through various websites to see how they did it. the implementation of various difficulties and how the screen changes everytime was also another aspect that I’m proud of. In addition to that, I’m also proud of how much I have decreased the errors in the ultrasonic sensor by adding proper lines of code to take care of the errors. Such as the abrupt changes in the ultrasonic sensor reading resulted in a big jump in the ball’s x coordinate, fixed by adding a tolerance which if the sensor exceeded from one reading to another, it disregards it. This made the game much more stable and I’m very proud of it.

Areas of Improvements

Some of the areas of improvement will most likely be towards the overall prototype and user interaction, due to issues with decreasing lag and delays I had to neglect certain buttons and elements that I could have added to the overall prototype while still achieving that simplistic look. For future improvements, more interactive elements can be added to the real-world prototype instead of just within the code. I could maybe also add a car that could be responsive to the scores, the higher the score results in the car moving at a higher speed and vice versa. I initially thought of doing that, but making a car was another big hassle, and adding it with the ultrasonic sensor would create multiple delays and issues within the execution of the ball’s movement.

IM SHOWCASE:

Final Project- User Testing

I conducted the user testing without giving them any prior notice and only reading from the interface, and they had some questions like when the game ends? So I added more text after that to make things more clear for the users. Other than that, once they got the hang of it, they were able to play the game easily and they figured out everything on how it works and how to stop. From the third iteration onwards, they become a master and play even better than I do(at least most of them). One area that could be improved is the addition of a text on the prototype saying Hover here or Put your hand here since they didn’t know where the sensor was in the beginning. That part of explaining where to hover the hand was the issue, which I will address by adding text on the prototype as mentioned.


Video:

Week 12 – Finalized Project Concept

Concept

For my final project, I have decided to change my idea. Now, I have settled on a rhythm music game, akin to Guitar Hero. Using force sensitive resistors (FSR), the user will have to quickly press the sensors to match the combinations that are being shown on the screen, almost like drums but using your hands. The design of the game on P5.js will be minimalistic, but it will also contain many colors and bright lights when the sensors are pressed. The more the user progresses, the more points will be accumulated, until the game eventually ends and restarts. To add more replayability, the rhythm of the sensors will be random.

Arduino

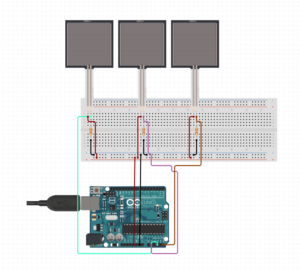
The Arduino will contain force sensitive resistors for inputs to capture the user’s input for the game. Each sensor will have an analog input assigned to it, which I will be able to manipulate with code. A cardboard box will also most likely be used around the breadboard to deliver a more aesthetically pleasing experience. Below is a schematic with the sensors for the board:

P5.js

The P5 program will be responsible for displaying the game, including the score and the notes that are necessary to be hit. The music could also be played by P5 instead of a buzzer on the breadboard, but that still needs to be decided. In terms of code, P5 will receive the information from the sensors and know when to activate a hit or miss in the notes. Below is a low-fidelity drawing of the game:


Final Project Proposal: Feed Flynn

I. Introduction

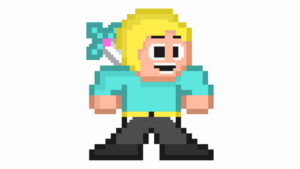
“Feed Flynn” is an immersive and engaging arcade-style game designed to entertain and challenge players. This game combines intuitive arcade button controls with a visually appealing graphic design ( which I designed YALL) to create an enjoyable gaming experience.

Some pictures:

Figure 1: My little Retro Style Flynn

Figure 2: My Game logo

II. Project Overview

A. Concept

The game revolves around Flynn, the main character, navigating through a world filled with edible objects and obstacles. The primary objective is to maneuver Flynn using arcade buttons, collecting burgers and donuts for points while avoiding collision with books, which results in point deductions. Flynn also has the ability to shoot bullets to eliminate books, adding an element of strategy and focus to the gameplay.

B. Features

  1. Arcade-Style Controls: Utilize physical or on-screen arcade buttons to move Flynn left and right within the game environment.
  2. Score System: Accumulate points by collecting burgers and donuts while avoiding collisions with books. Each successful collection adds points, while collisions deduct points.
  3. Shooting Mechanism: Implement Flynn’s ability to shoot bullets to eliminate books, allowing players to strategically clear obstacles.

Finalized Concept for the Project

What if Space had Sound?
  • Concept

For my final project, I decided to go with my first idea since I’m interested in gaining more experience in the scientific field and data visualization with a creative twist. My idea is to deliver to the audience some fun facts about space and its exploration through the method of sonification , which is transforming data from electromagnetic waves to sound and musical rhythms.

NASA translates Milky Way images into sound using sonification: Digital  Photography Review

  • Design and description of what your Arduino program will do.

For the Arduino program, I would use the infrared distance measuring sensor and the light sensor. The user would have control over the notes (sound) using both sensors together but each would have different note sound effects, however, they would have similar pitches depending on distance and light, representing electromagnetic waves from pulsar stars. For example, when there is a short distance, there will be high pitch representing stronger radiation, and more light would also mean a higher pitch, representing stronger radiation from a star.

Input – light and distance values /Output – sound and visual changes of wave patterns.How sonification brings sounds from faraway galaxies' black holes - ABC  Classic

  • Design and description of what P5 program will do.

The P5js would represent a starting page, where the user can click either for information about the project with sounds playing in the background from data in a csv file or click “Begin Experience” to head to the space themed page with wave patterns where they use controls from arduino to change the notes while an ambience background sound plays. It will be receiving values from distance measuring sensor and light sensor.


week12.assignment – Final Project Plan

Concept

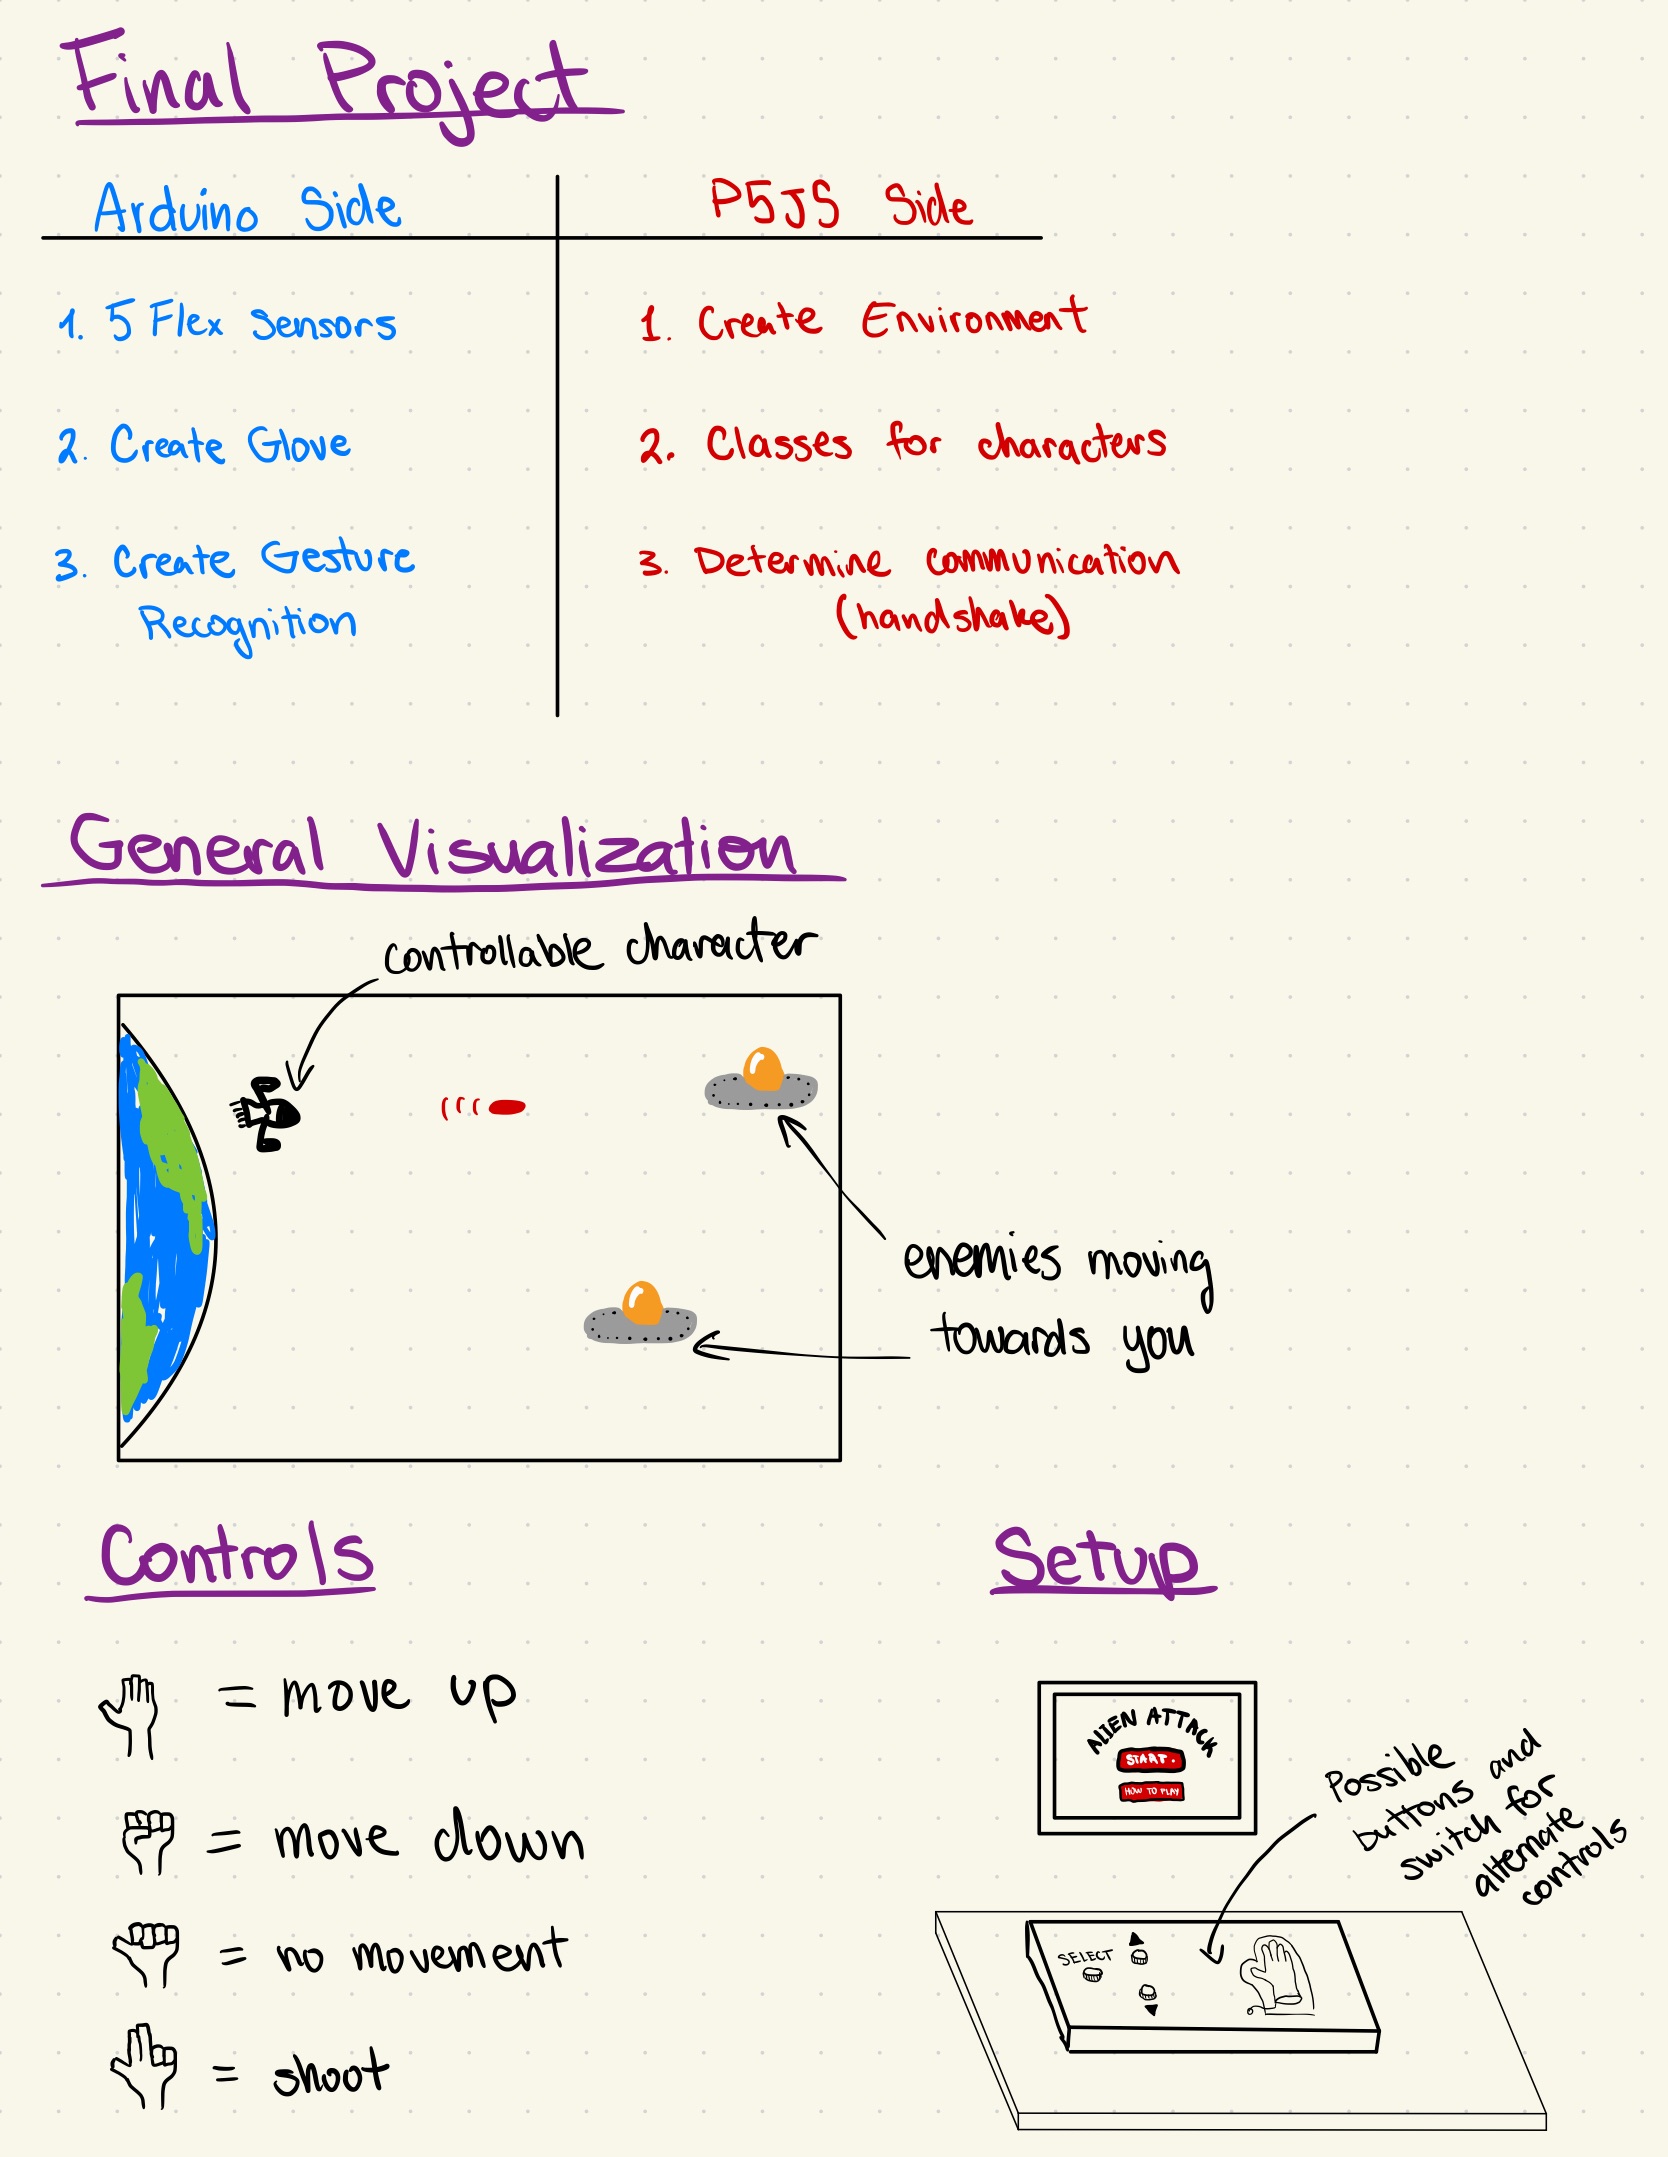
Considering the time limitations, upon deep contemplation of my two pervious ideas, I decided to focus on creating a single game with a unique controller in the form of a glove. Below a brief plan for how the game interface will look, the setups, and what the controls will be is shown.


As of now, there are a few more things that I will most likely decide on as I will be constructing the final project very shortly. First of all, I will need to create the game in 5p and make sure it works with no input from the Arduino. Simultaneously, I will work on developing the controlling glove with the Arduino. One issue that I have noticed is that the flex sensors are not extremely accurate, and thus, I will have to benchmark every sensor and determine the specific value ranges that will work well for it (0-1023). I am still unsure if I would want to use the amount of flex to control the speed since that would complicate the process significantly. Therefore, I will most likely create certain conditions in the Arduino code that would send numerical values through the serial communication, which would respond to the different actions in the p5 sketch. Additionally, I will add a few LEDs to the physical controller board to indicate the health points remaining of the player. Another feature I would like to try to implement is allowing users to save their high scores.

Arduino Inputs/Outputs

The Arduino will collect measurements from 5 flex sensors and at least 3 digital inputs (buttons). The data from the flex sensors will be processed within the Arduino code. Consequently, this will determine if certain conditions are met and will send these values to p5.

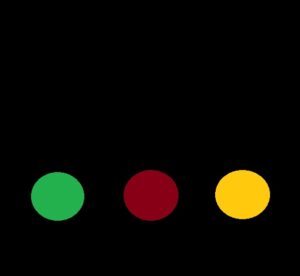
The Arduino will receive data from p5, which will correspondingly light up LEDs for the remaining health (3 LEDs).

P5.JS Inputs/Outputs

The P5 sketch will receive the data from the Arduino and process it to the corresponding actions to be performed in the game. The P5 sketch will keep sending data about the health points remaining to the Arduino.

week 12 : Final project update


“frenzy jump”

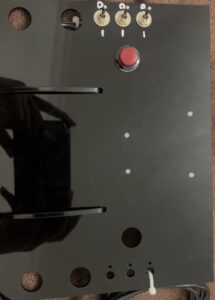
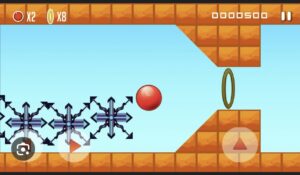
so previously i thought about making an instrument using the serial communication between arduino and p5, that turned out to be very difficult , i could have done it, but unfortunately with the time on hand i could not get it finished on time. therefore, i decided to create a very simple game on p5js that consists of a ball jumping over obstacles, and for the arduino part, i have created a remote switch/button panel that contains the arduino, and 4 different components, but i will use only two. The 4 components are 3 paddle switches, and one button, i will use one paddle switch, and one button to control the ball in the game.

My switch panel controller :

components:

Arduino protoshield

arduino board

3 paddle switches

one button

Initial code :

const player = {
  posX: 0,
  posY:  0,
  size: 50,
  forceY: 0,
  isJumping: false
}

const obstacles = [{
  posX: 600,
  height: 50,
  width: 70
},{
  posX: 1800,
  height: 50,
  width: 70
},{
  posX: 2500,
  height: 50,
  width: 70
}];

const gravity = 0.3;
const mapSpeed = 5;

const floorPosition = 100;

let gameover = false;

function setup() {
  createCanvas(window.innerWidth, window.innerHeight);
  
  player.posX = width / 3;
  player.posY = height - floorPosition - 100;
  
}

function draw() {
  background(0);
  
  if(!gameover) {
    
    // Check for serial connection
    if(!serialActive) {
      fill(255);
      text("Press space to select serial port.", 20, 30);  
    }
    else {
      fill(255);
      text("Connected", 20, 30);  

    }

    // Draw game
    drawFloor();
    drawObstacles();
    drawPlayer();


    // Move game
    movePlayer();
    moveObstacles();
  }
}

function drawFloor() {
  fill(255);
  
  rect(0, height - floorPosition, width, floorPosition);
}

function drawPlayer() {
  fill(255, 150, 0);
  
  ellipse(player.posX, player.posY, player.size, player.size);
}

function drawObstacles() {
  fill(255);
  for(o of obstacles) {
    rect(o.posX, height - floorPosition, o.width, -o.height);    
  }
}

function testCollisions(x, y) {
  // Test collide with floor
  if(player.forceY > 0 && y > height - floorPosition - player.size/2) {
    return true;
  }
  
  for(o of obstacles) {
    if(x + player.size / 2 > o.posX && x - player.size / 2 < o.posX + o.width && y > height - floorPosition - o.height - player.size / 2) {
      return true;  
    }
  }
  
  return false;
}

function movePlayer() {
  
  if(testCollisions(player.posX, player.posY)) {
    player.posX -= mapSpeed;
    player.isJumping = false;
    
    if(player.posX < 0 - player.size) {
      // gameover
      gameover = true;
    }

  }
  else if(player.posX < width / 3) {
    player.posX += 0.5;
  }
  
  const nextPos = player.posY + player.forceY;
  
  if(testCollisions(player.posX, nextPos)) {
    player.forceY = 0;
    player.isJumping = false;
  }
  else {
    player.posY += player.forceY;
    player.forceY += gravity;
  }
  
  
}

function moveObstacles() {
  for(o of obstacles) {
    o.posX -= mapSpeed;
    
    if(o.posX < -o.width) {
      o.posX = random(width, width*1.5);
      o.width = random(50, 200);
      o.height = random(20, 200);
    }
  }  
  
  
}

function readSerial(data) {
  const pin = data.split(':')[0]; 
  const action = data.split(':')[1];
  
  console.log(action);
  
  if(action == "pressed") {
    pressed = true;
  }
  else {
    pressed = false;
  }

}

function keyPressed() {
  if(key == " ") {
    setUpSerial();
  }
  
  if(key == 'z' && !player.isJumping) {
    player.isJumping = true;
    player.forceY = -8;
  }
}


idea of possibly how the game will look like:

Week 10 reading response- Nourhane Sekkat

In Bret Victor’s “A Brief Rant on the Future of Interaction Design,” he advocates for a more comprehensive approach to technology design, one that surpasses the conventional focus on visual stimuli. He highlights the necessity of integrating multiple sensory inputs, such as touch, sound, and perhaps even smell, to create a more immersive and human-centric experience. This perspective challenges the current trend in technology that heavily relies on visual elements, often neglecting other senses that could enrich the user’s interaction with digital environments.

Victor’s call for a balance in sensory engagement in technology design underlines the importance of harmony in user experience. By harmonizing different sensory inputs, designers can create more intuitive and natural interfaces that resonate with the user’s innate human capabilities. This balance would not only enhance usability but also foster a deeper connection between users and their technological tools, making technology more accessible and enjoyable.

Moreover, the pursuit of this balance in design philosophies raises several pertinent questions. How can designers effectively integrate different sensory modalities without overwhelming the user? What are the implications of such a balanced approach for users with sensory impairments? How will this shift impact the future trajectory of technology design, particularly in fields like virtual reality, gaming, and educational tools?

Victor’s ideas, although possibly viewed as idealistic, serve as a crucial reminder of the untapped potential in interaction design. They encourage designers and technologists to think beyond the current paradigms and explore innovative ways to make technology more human, not just in function but in experience. This reflection not only broadens our understanding of what interaction design could be but also inspires a more thoughtful and inclusive approach to technology development.